
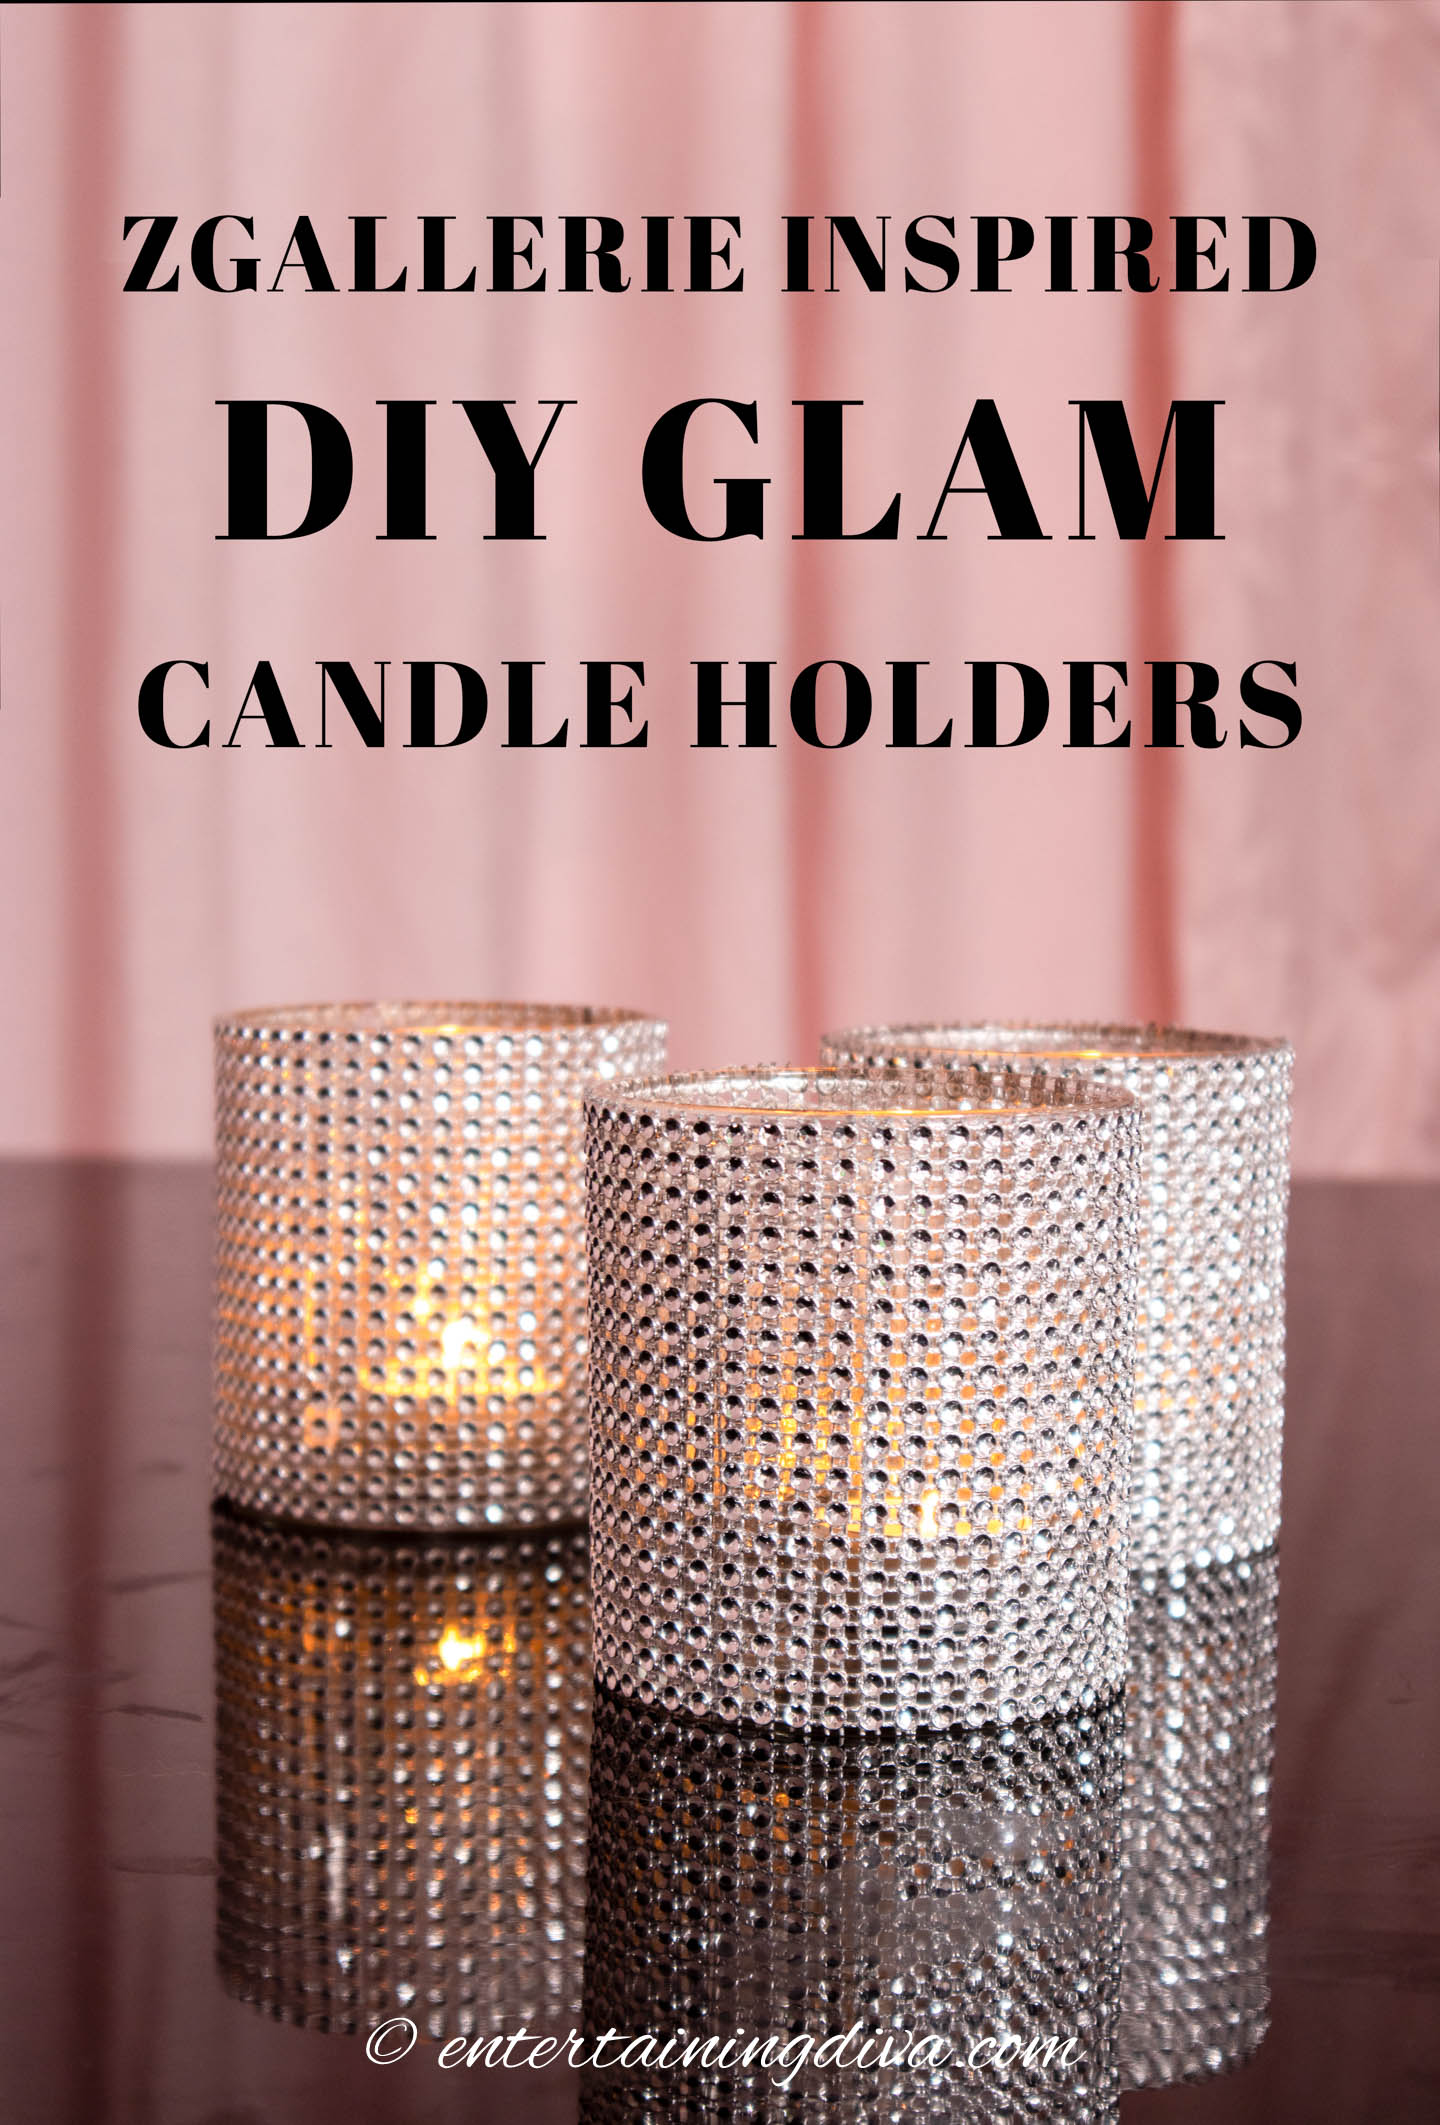
DIY Glam Rhinestone Candle Holders
In this DIY glam rhinestone candle holders tutorial, learn how to effortlessly transform ordinary candle holders into dazzling, sparkling centerpieces using rhinestone ribbon. Perfect for adding a touch of elegance to any room, these DIY glam candle holders are both easy to make and stunningly effective.
Whether you’re setting a holiday table, decorating for a party, or just want to add some warmth to your house, pretty candles are an easy way to create the ambiance you’re looking for.
Which is why I like to give candle holders as gifts. Everyone can use them!
They make great hostess gifts.
They’re perfect party favors for your guests to take home with them.
You can even give them as Christmas presents (for those people that you don’t know what to get).
Since ZGallerie is one of my favorite stores for accessories, I like to look at what they have for ideas.
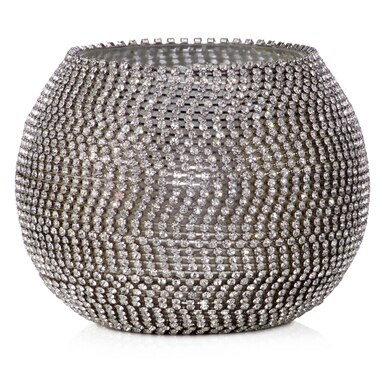
This year they have these pretty candles* on one of their gift lists.
So I thought I would use them as the inspiration for this DIY candle holder project.
I didn’t want to copy ZGallerie exactly (and decorating a curved surface takes a lot more work).
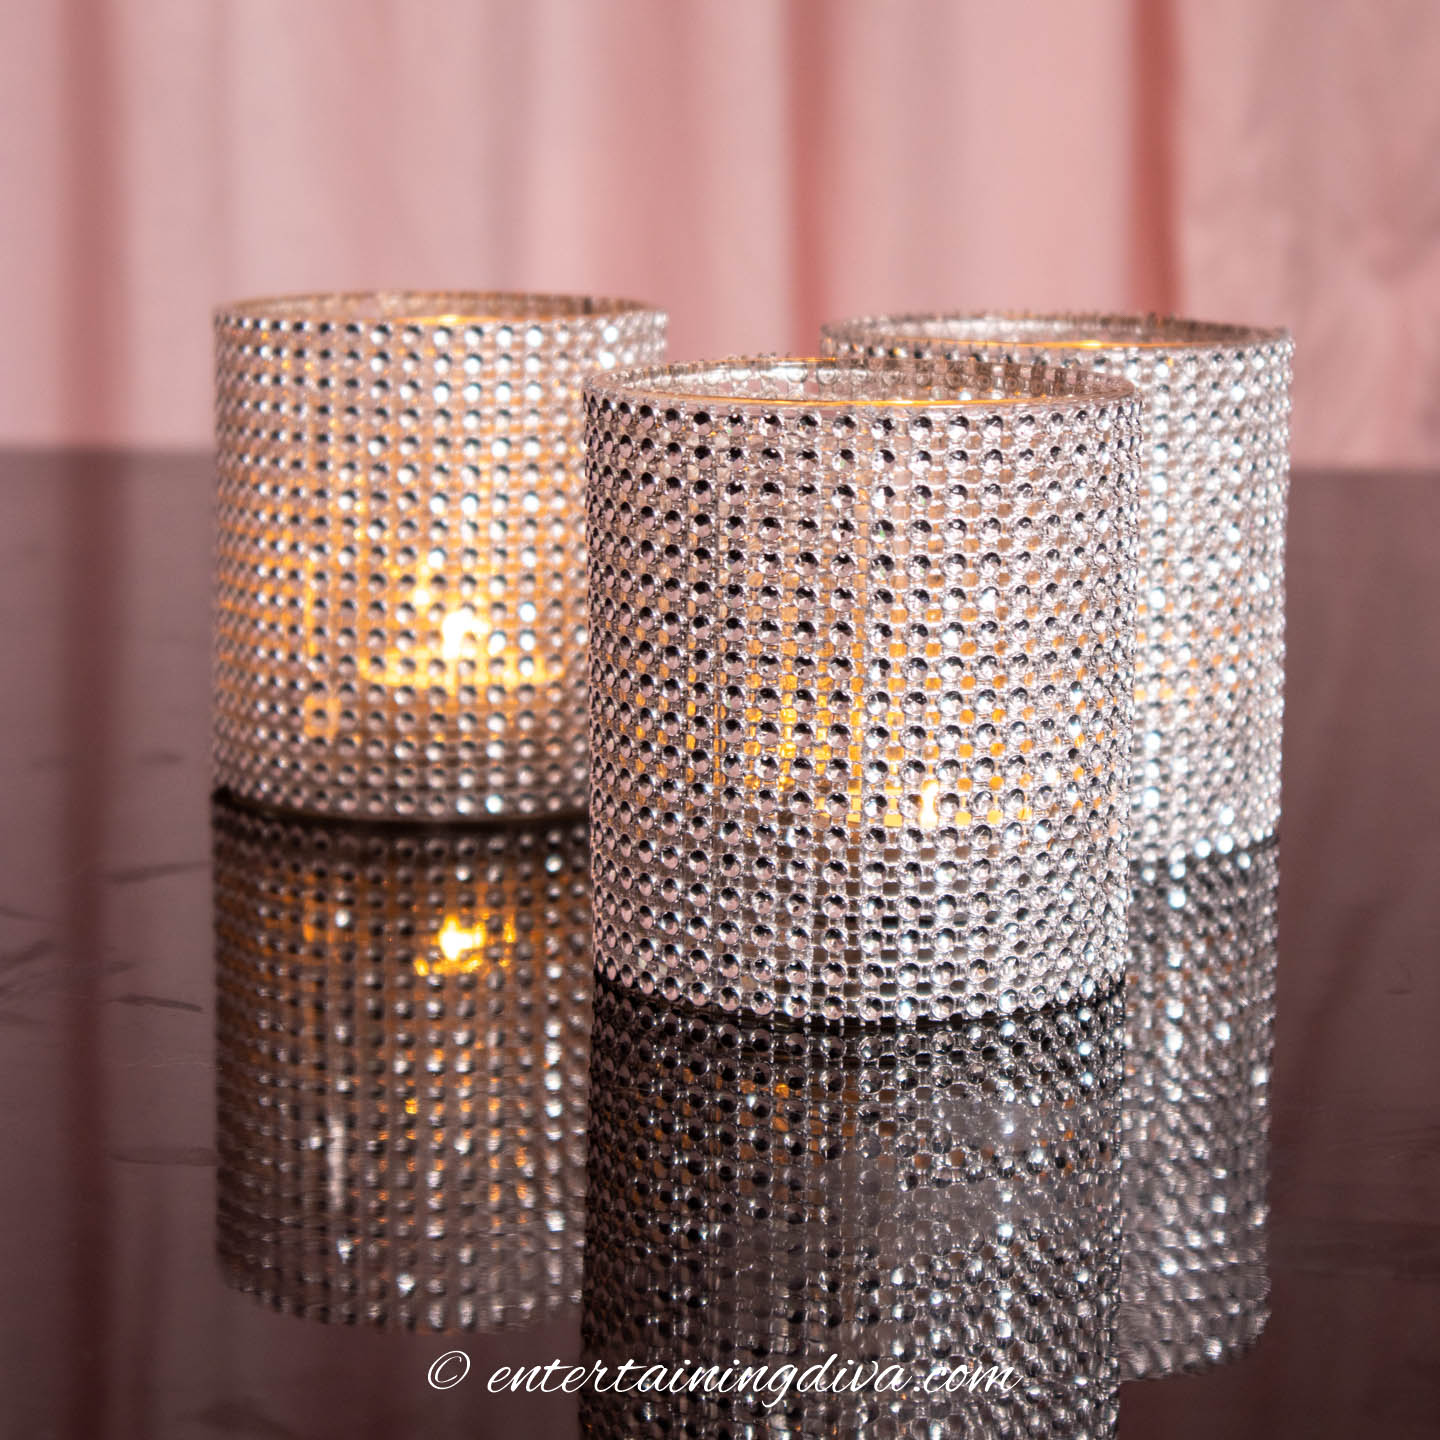
So I decided to go with small tumbler glasses with straight sides as the candle holder.
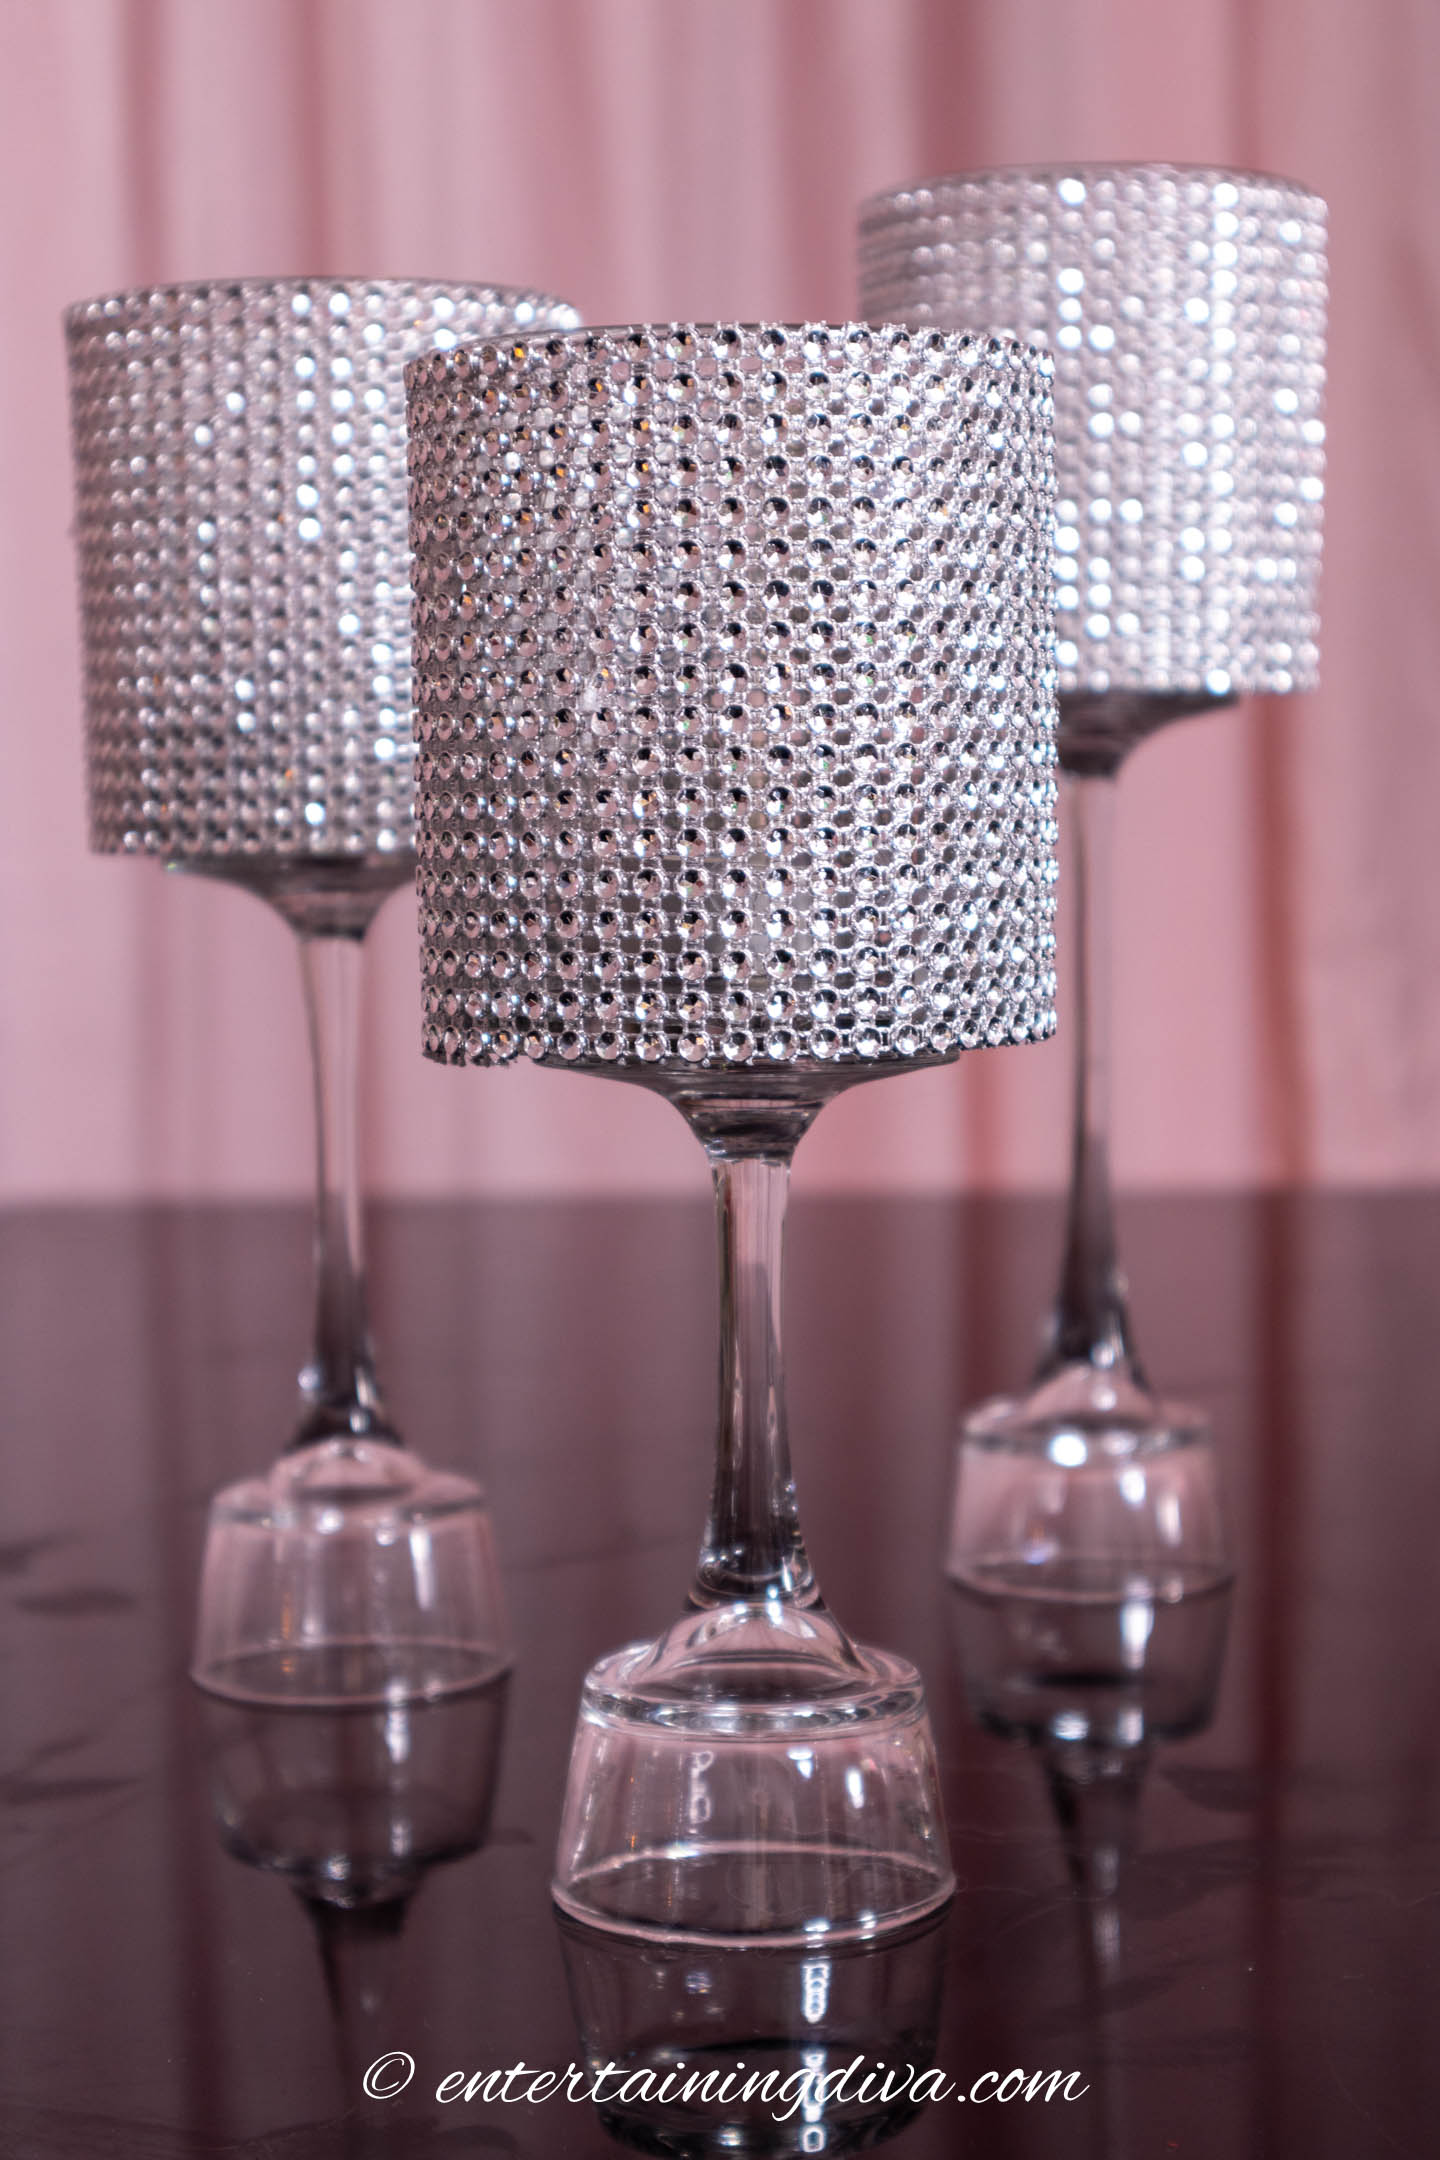
Then I added a base to raise the candles off the table. If you’re looking for low candleholders, you can skip this step. But I love the way they turned out.
Keep reading to find out how make my DIY glam candle holders.
But before we get started…
Supplies
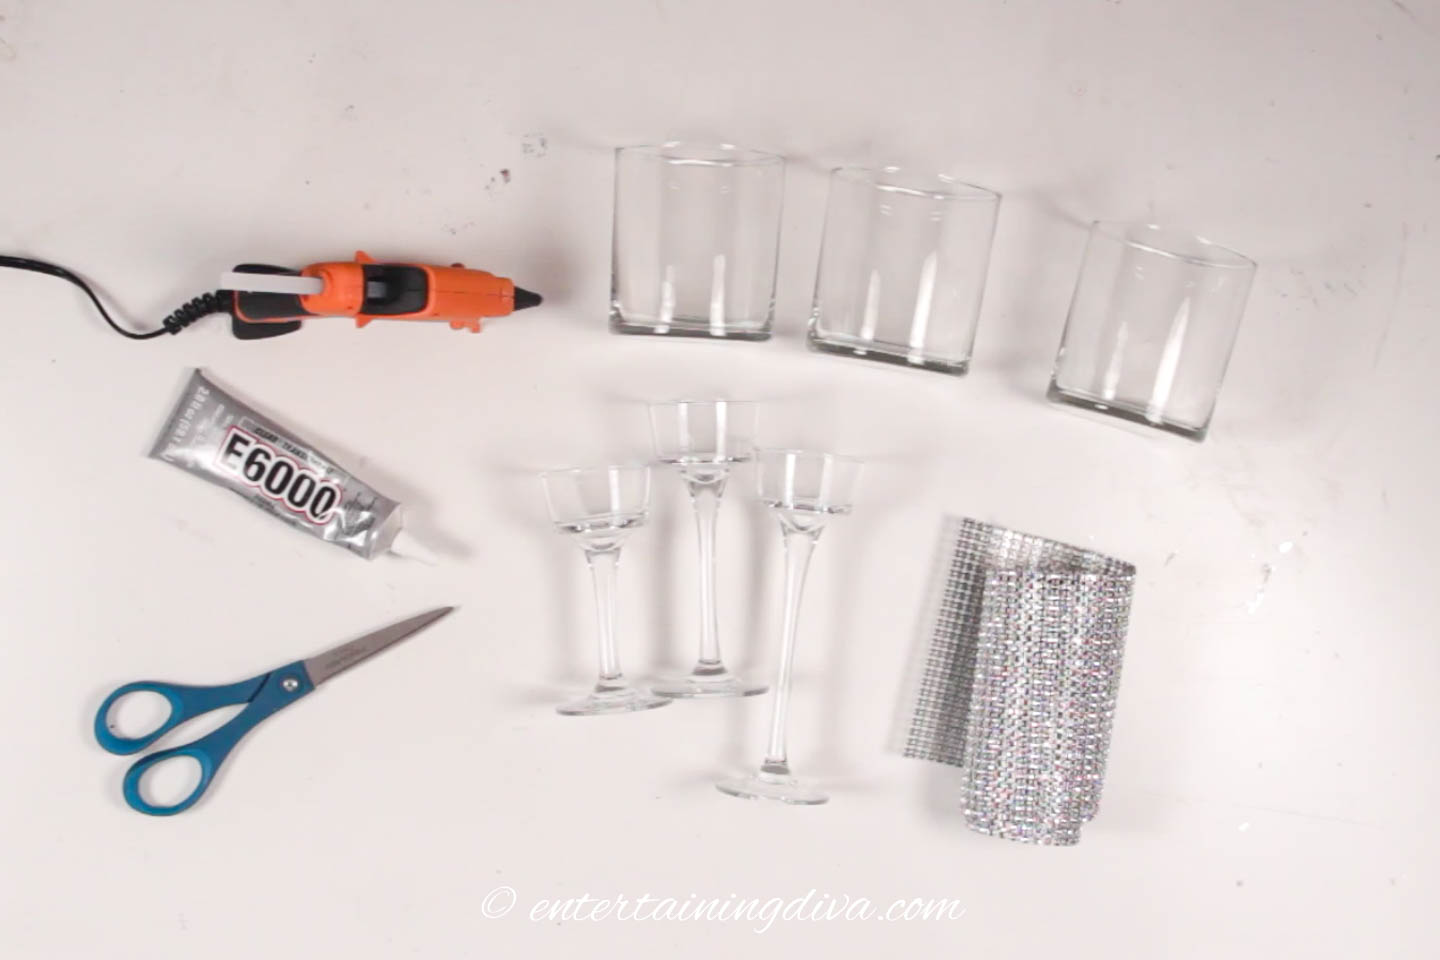
Materials
- small tumbler glasses with straight sides – I used these ones* from Target. Using glasses with straight sides makes it easy to put the ribbon on without puckering.
- 4.5″ wide diamond ribbon* – I used silver but you could use whatever color you want
- tall thin tealight candle holders* (optional) – only required if you want tall candle holders
- E6000 glue
Tools
- hot glue gun
- scissors
- disposable latex gloves (optional) – keeps the glue off your fingers
How To Make DIY Glam Candle Holders
1 . Cut The Ribbon
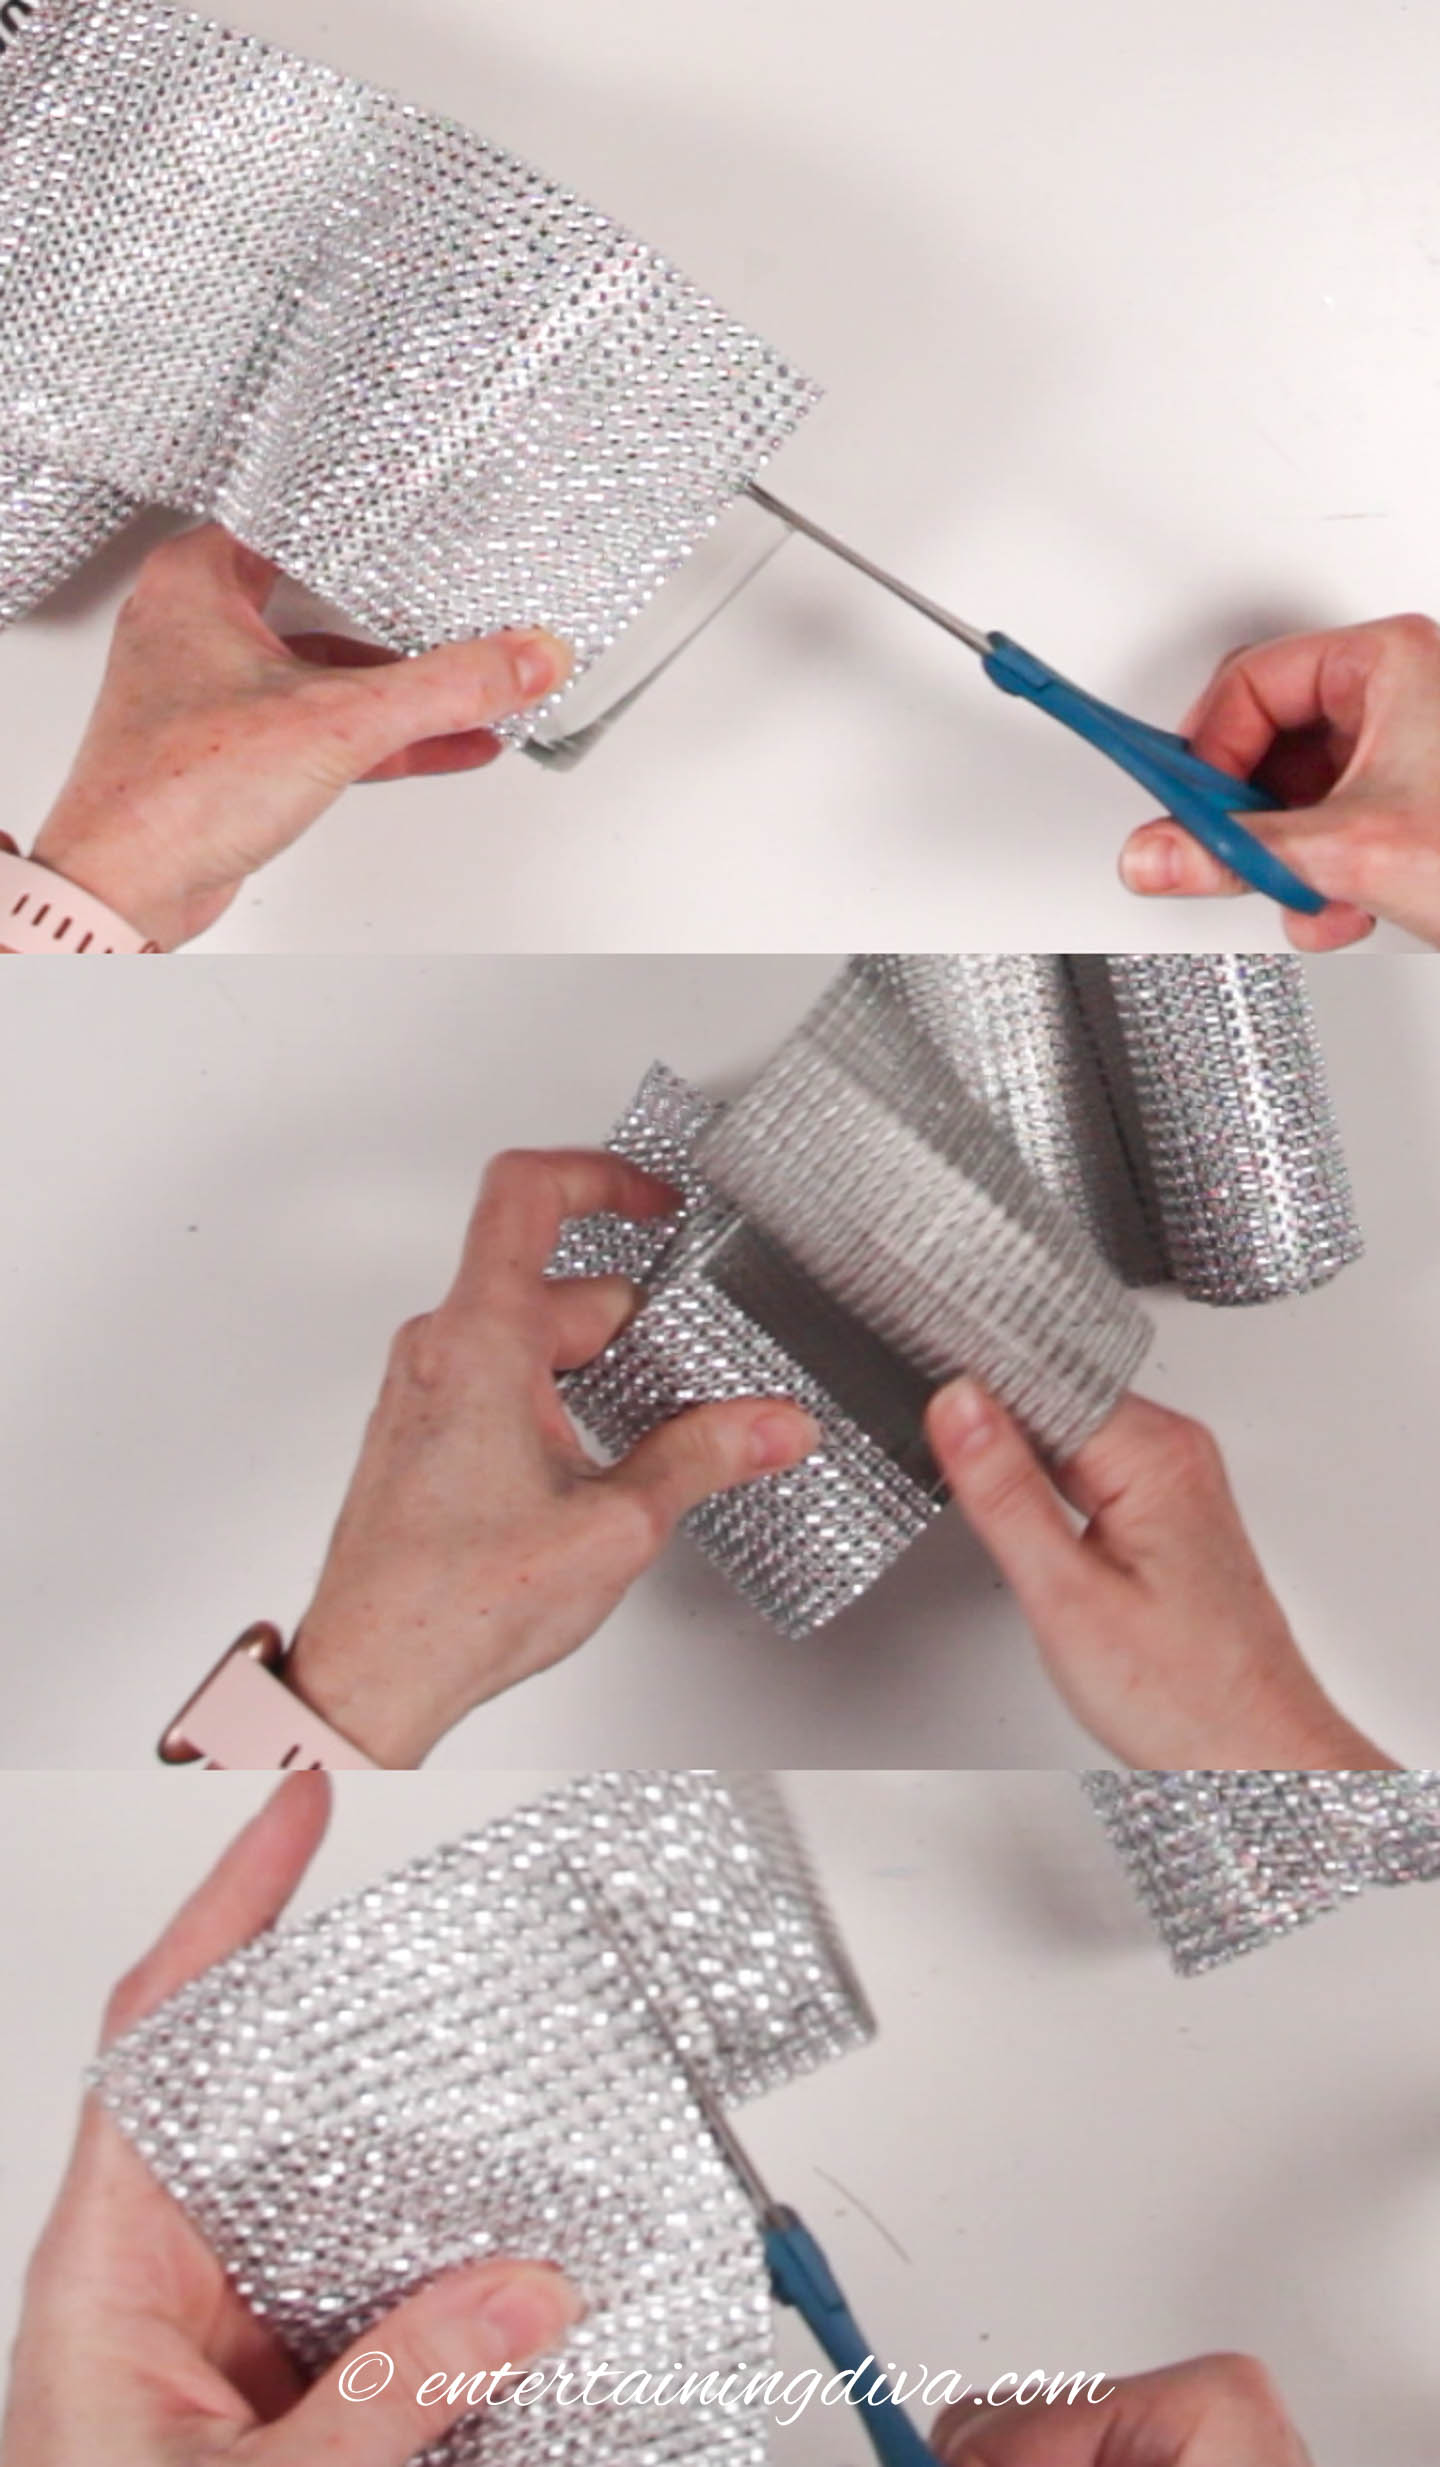
The first step to making our candle holders is to cut the diamond ribbon to the right size.
Line the bottom of the ribbon up with the bottom of the glass. Then cut it off at that height.
Next wrap the ribbon all the way around the glass. Cut the ribbon off where it meets the other end.
It’s always better for the ribbon to be a little too big than a little too small…you can always cut it down to the right size later.
2. Add Glue
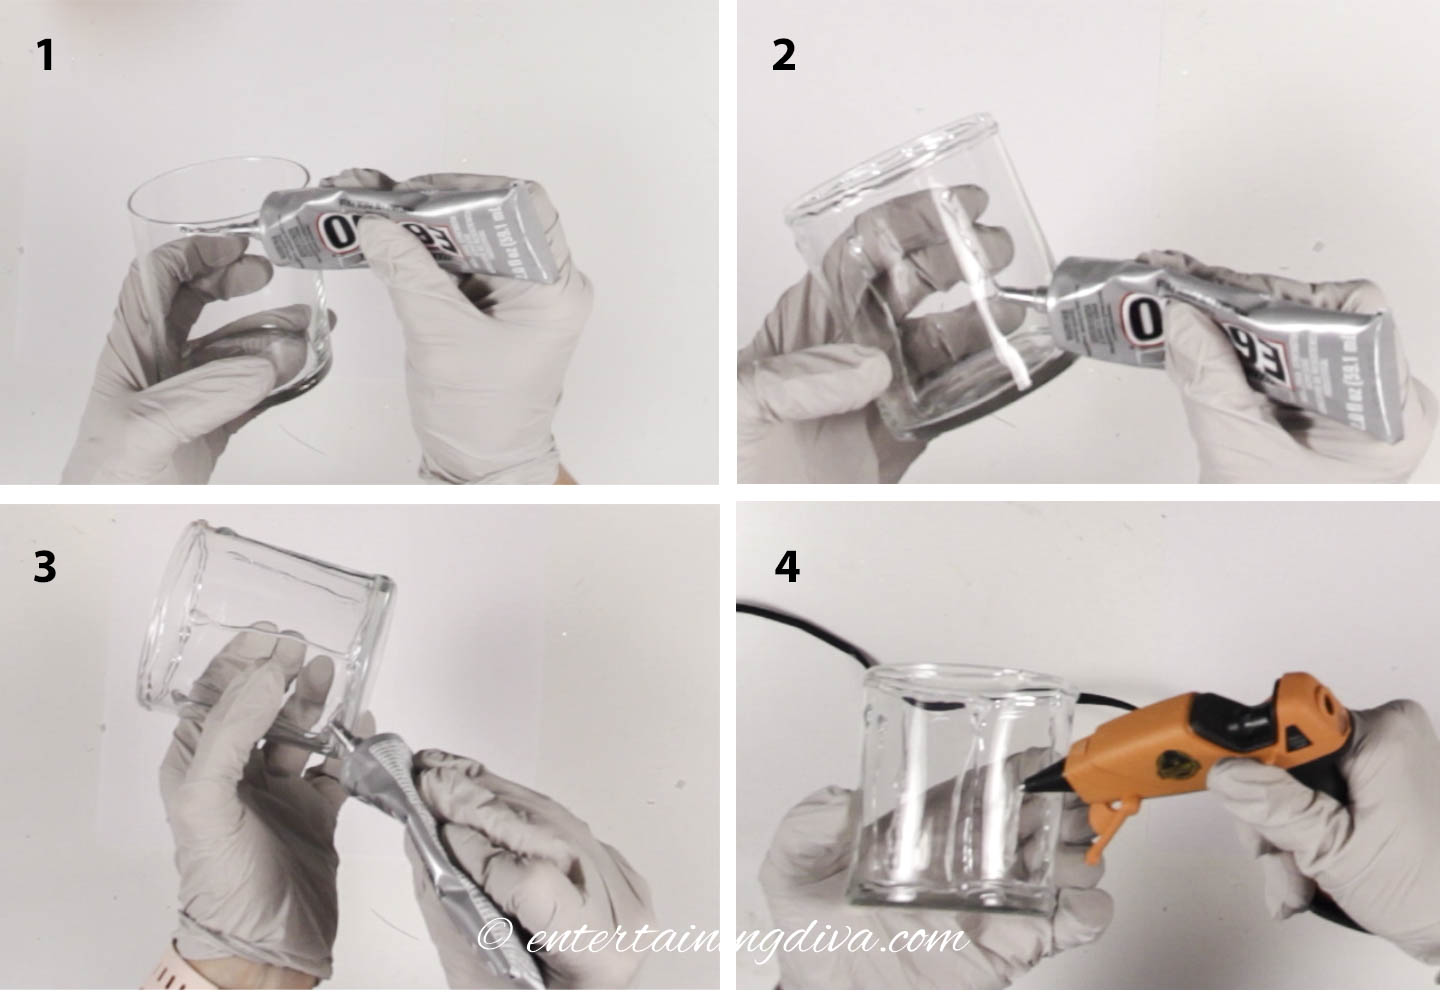
Next we need to glue on the diamond ribbon.
I like to use both E6000 glue and hot glue.
The E6000 creates a strong permanent bond and after it cures, it will stick even if it gets a little warm from the candles.
But it takes a while to set.
Which is where the hot glue comes into play. It dries really quickly and will hold the ribbon in place while the E6000 is drying.
Start by adding the E6000 glue around the top and bottom edges of the glass.
Then add a few lines of it in the middle of the glass.
Next add a few hot glue lines in between the E6000 lines.
3. Wrap The Ribbon Around The Glass
Wrap the ribbon around the glass.
You’ll need to do it quickly because the hot glue dries very fast.
Make sure that the top edge of the ribbon is even with the top of the glass. I like to turn the glass upside down on the table which keeps the ribbon in the right place.
Then smooth it out all the way around the glass to make sure it is tight.
Add some extra E6000 glue where the two ribbon ends meet.
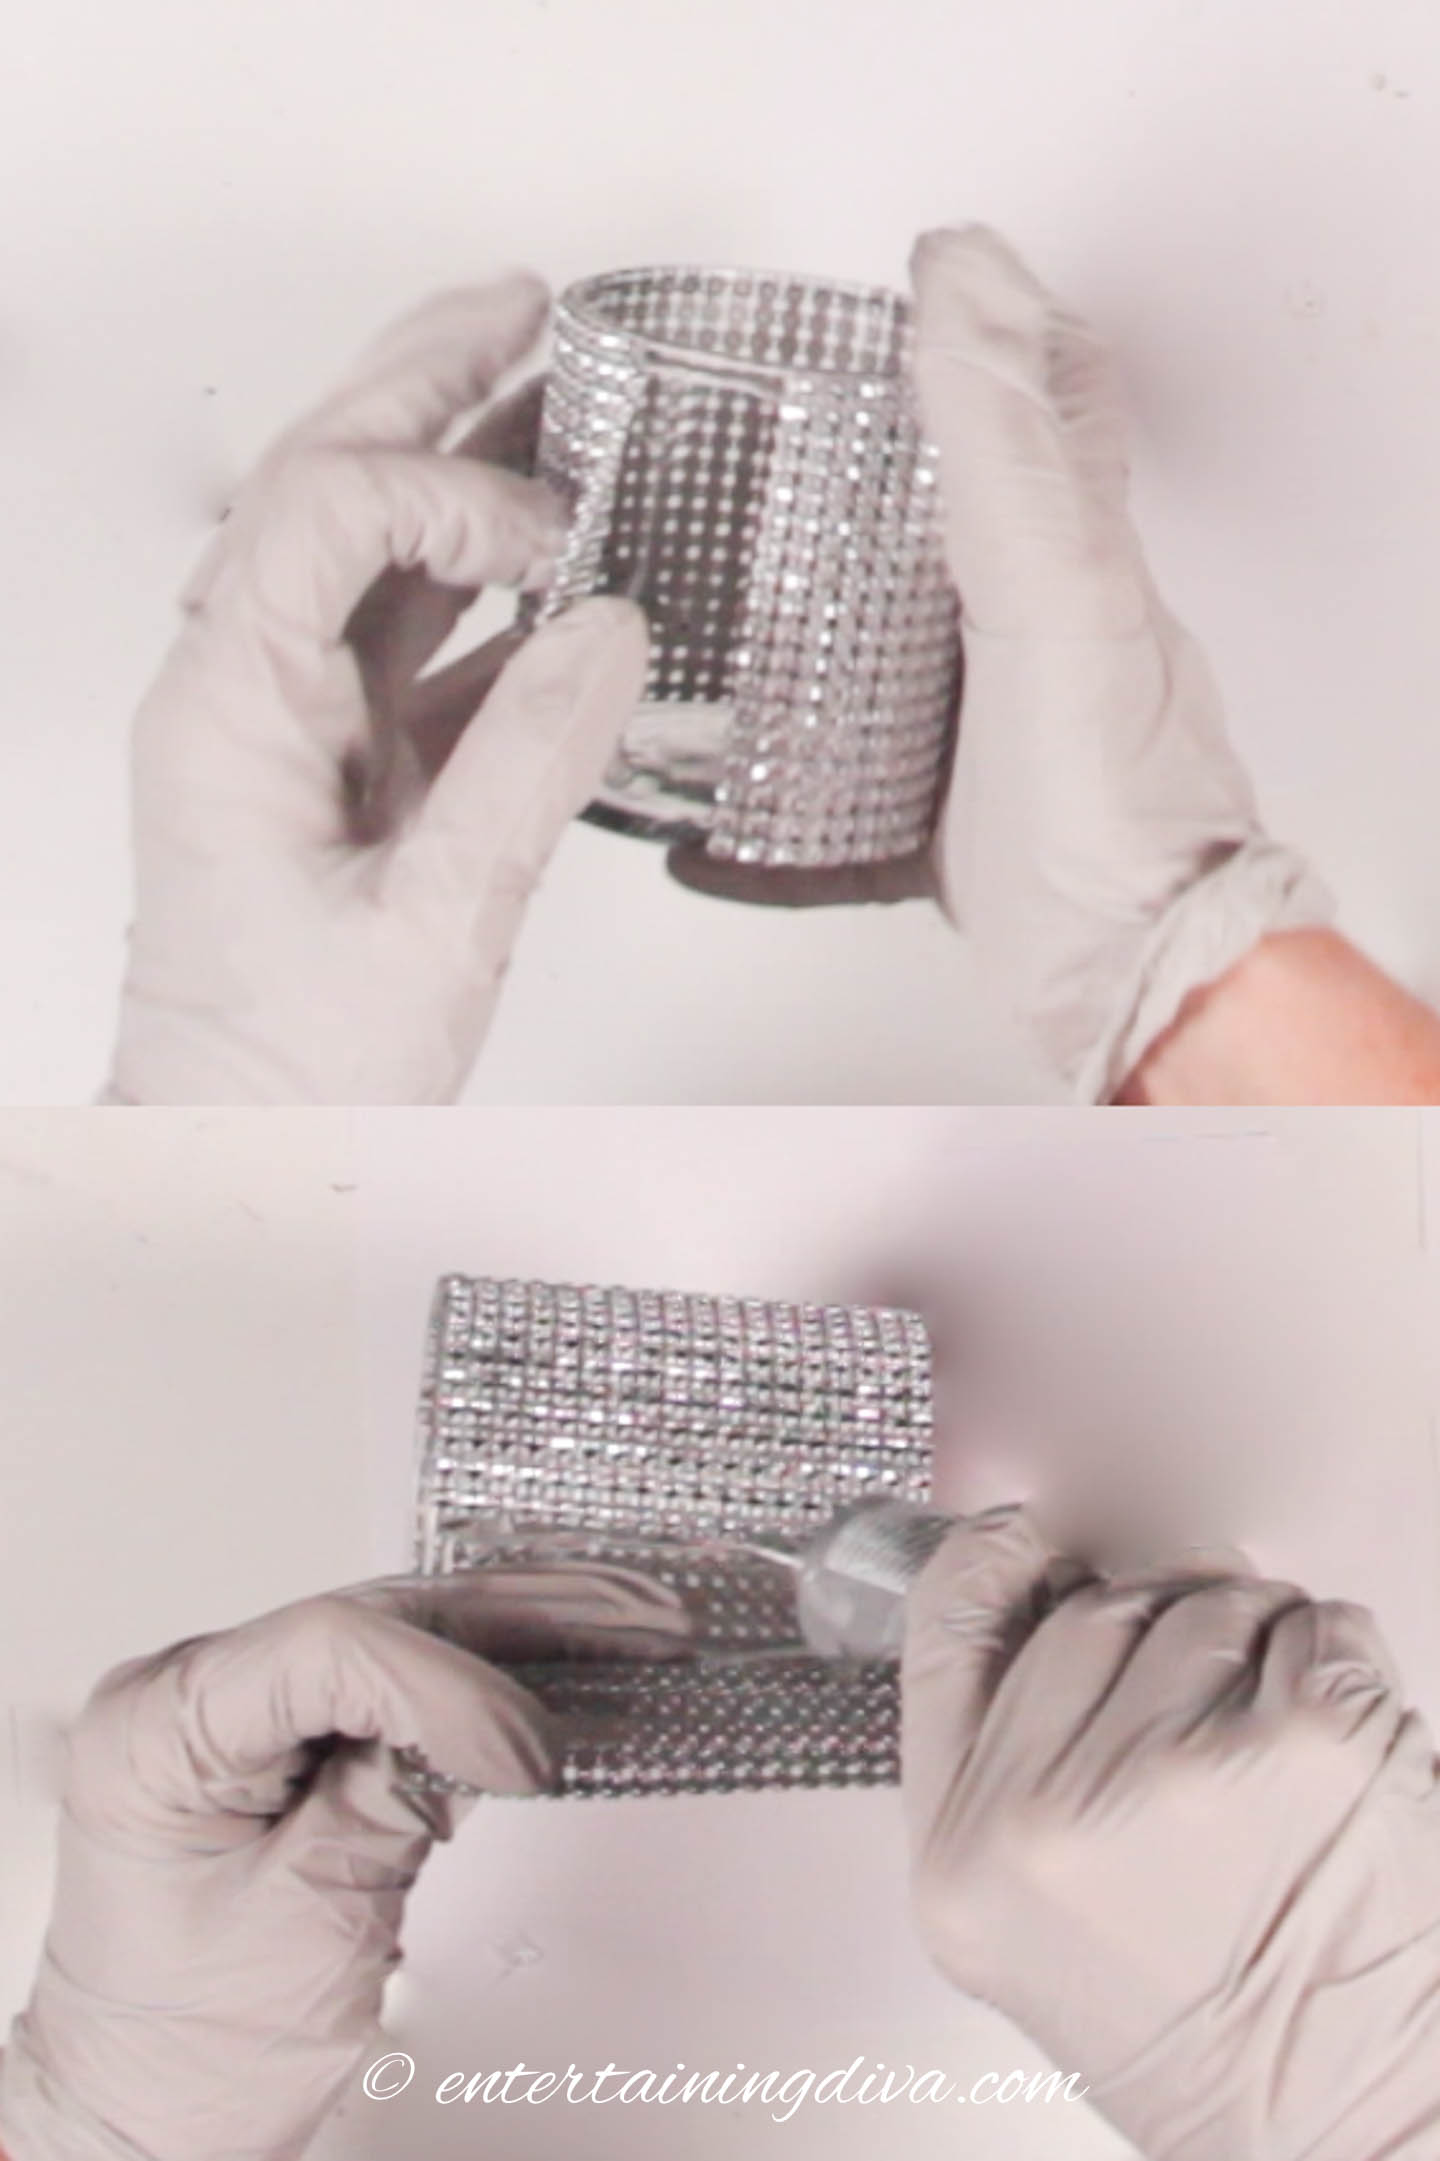
4. Glue On The Base (Optional)
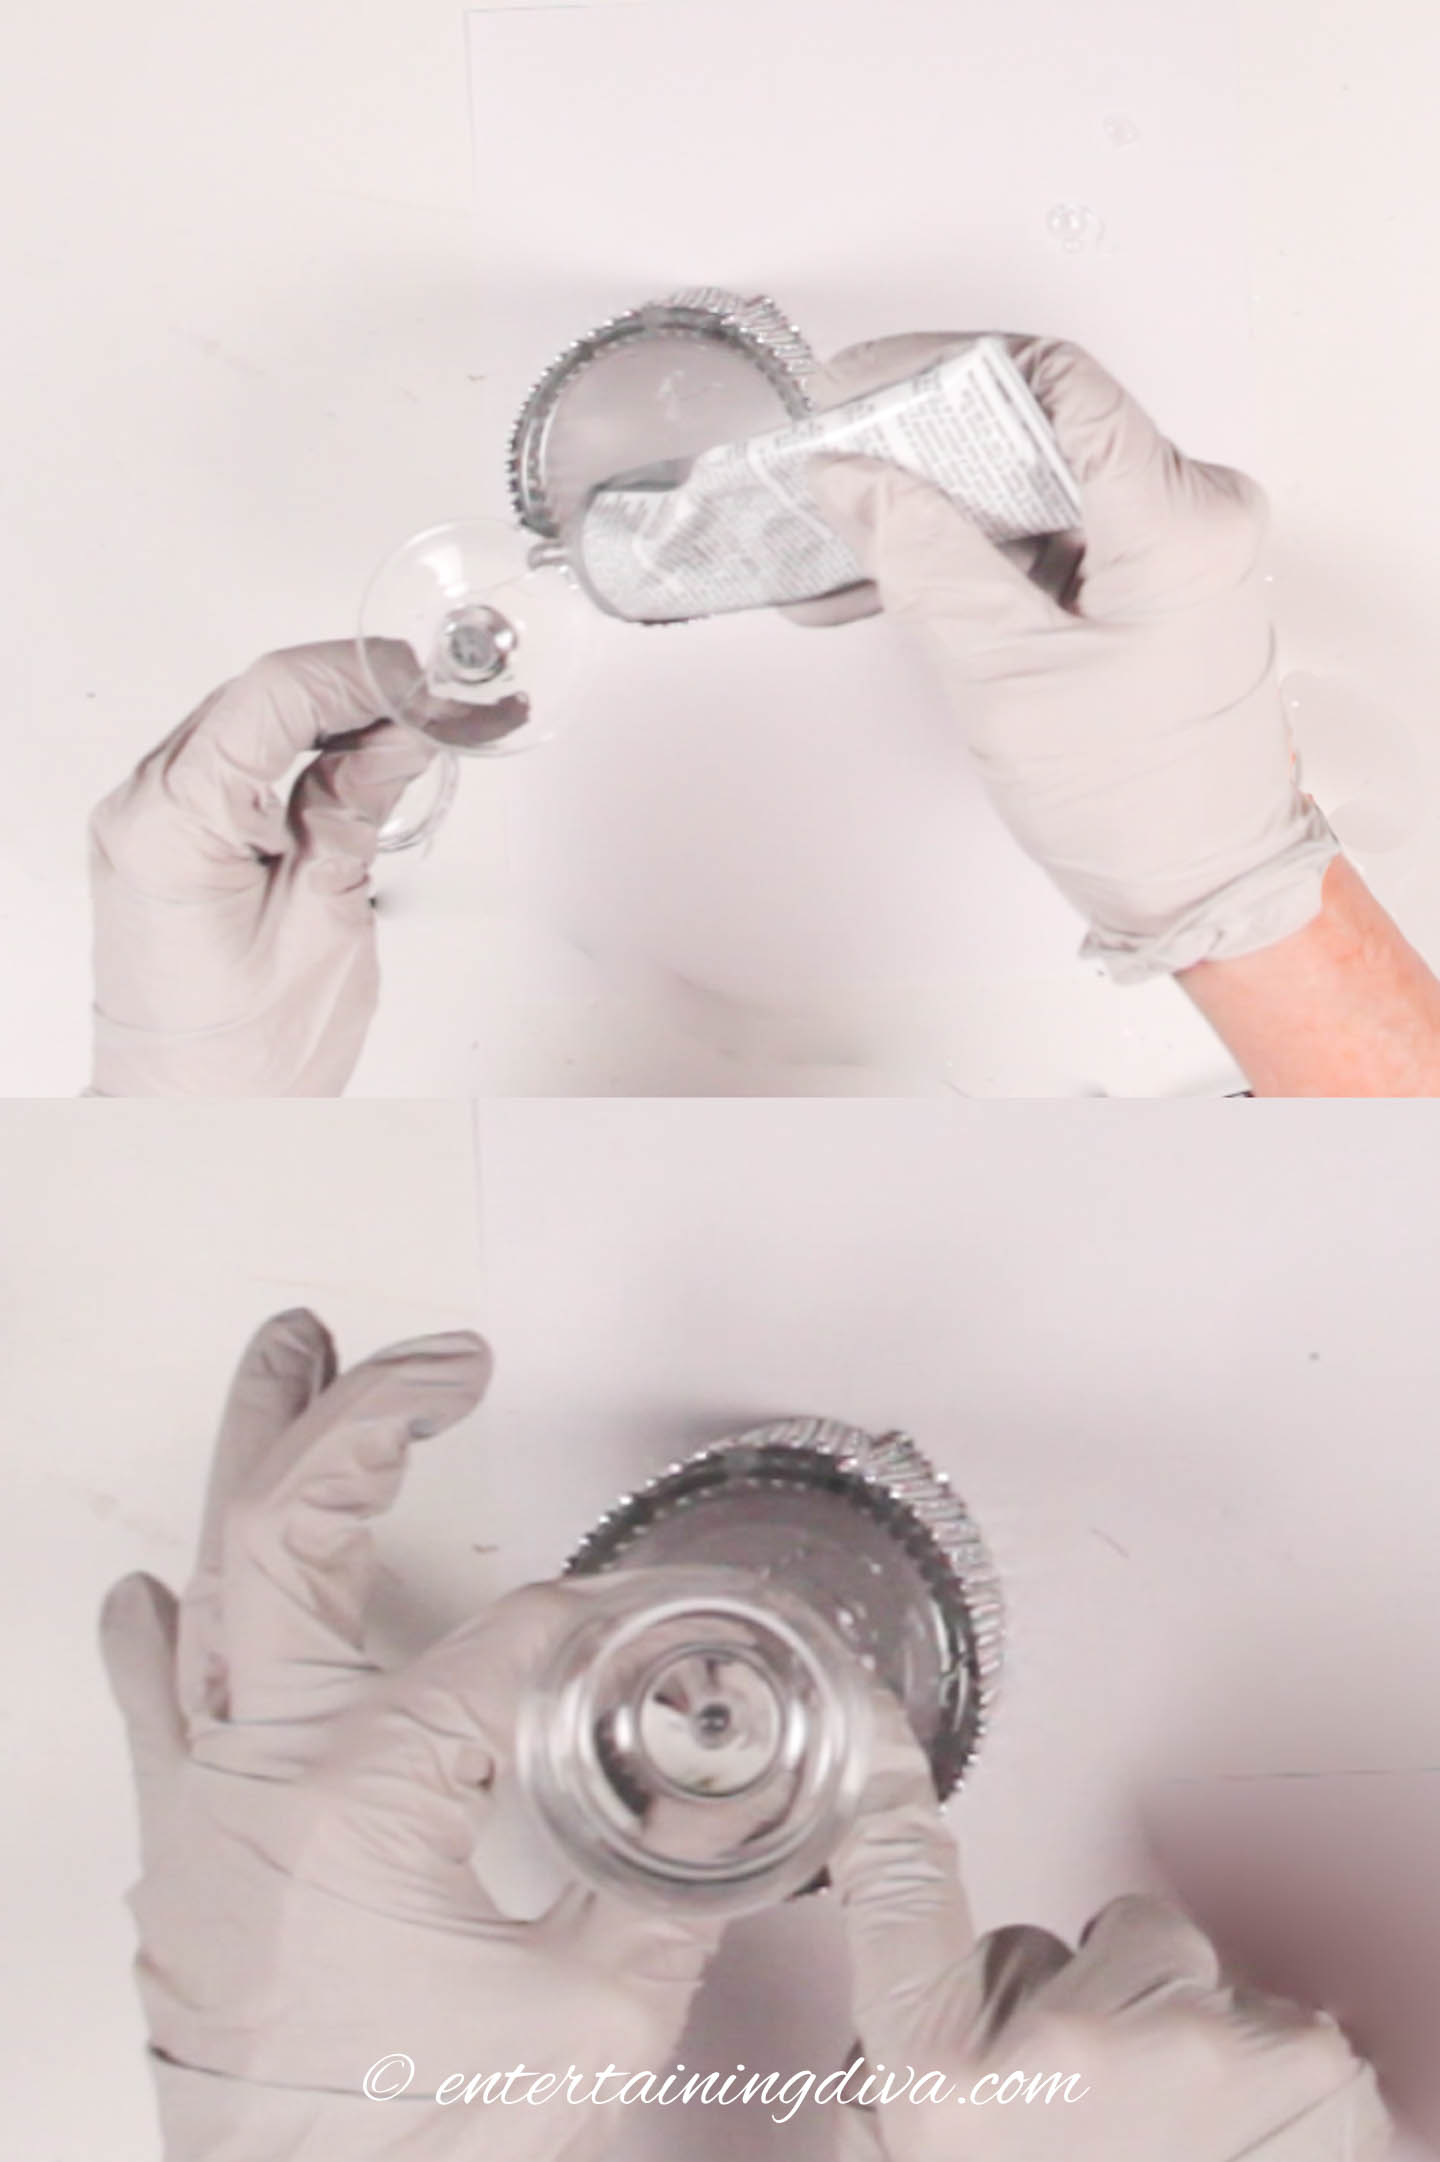
You can use the candle holders as is.
Or add a base to them to make them taller.
If you haven’t already, turn the glass (with the ribbon on it) upside down.
Turn the taller tealight candle holder upside down.
Add some E6000 around it’s bottom edge.
Stick the tall tealight candle holder onto the bottom of the glass, making sure that it is centered.
Repeat for all three sizes of tealight candles.
Let the glue dry for 24 hours before using the candles.
The Finished Candles
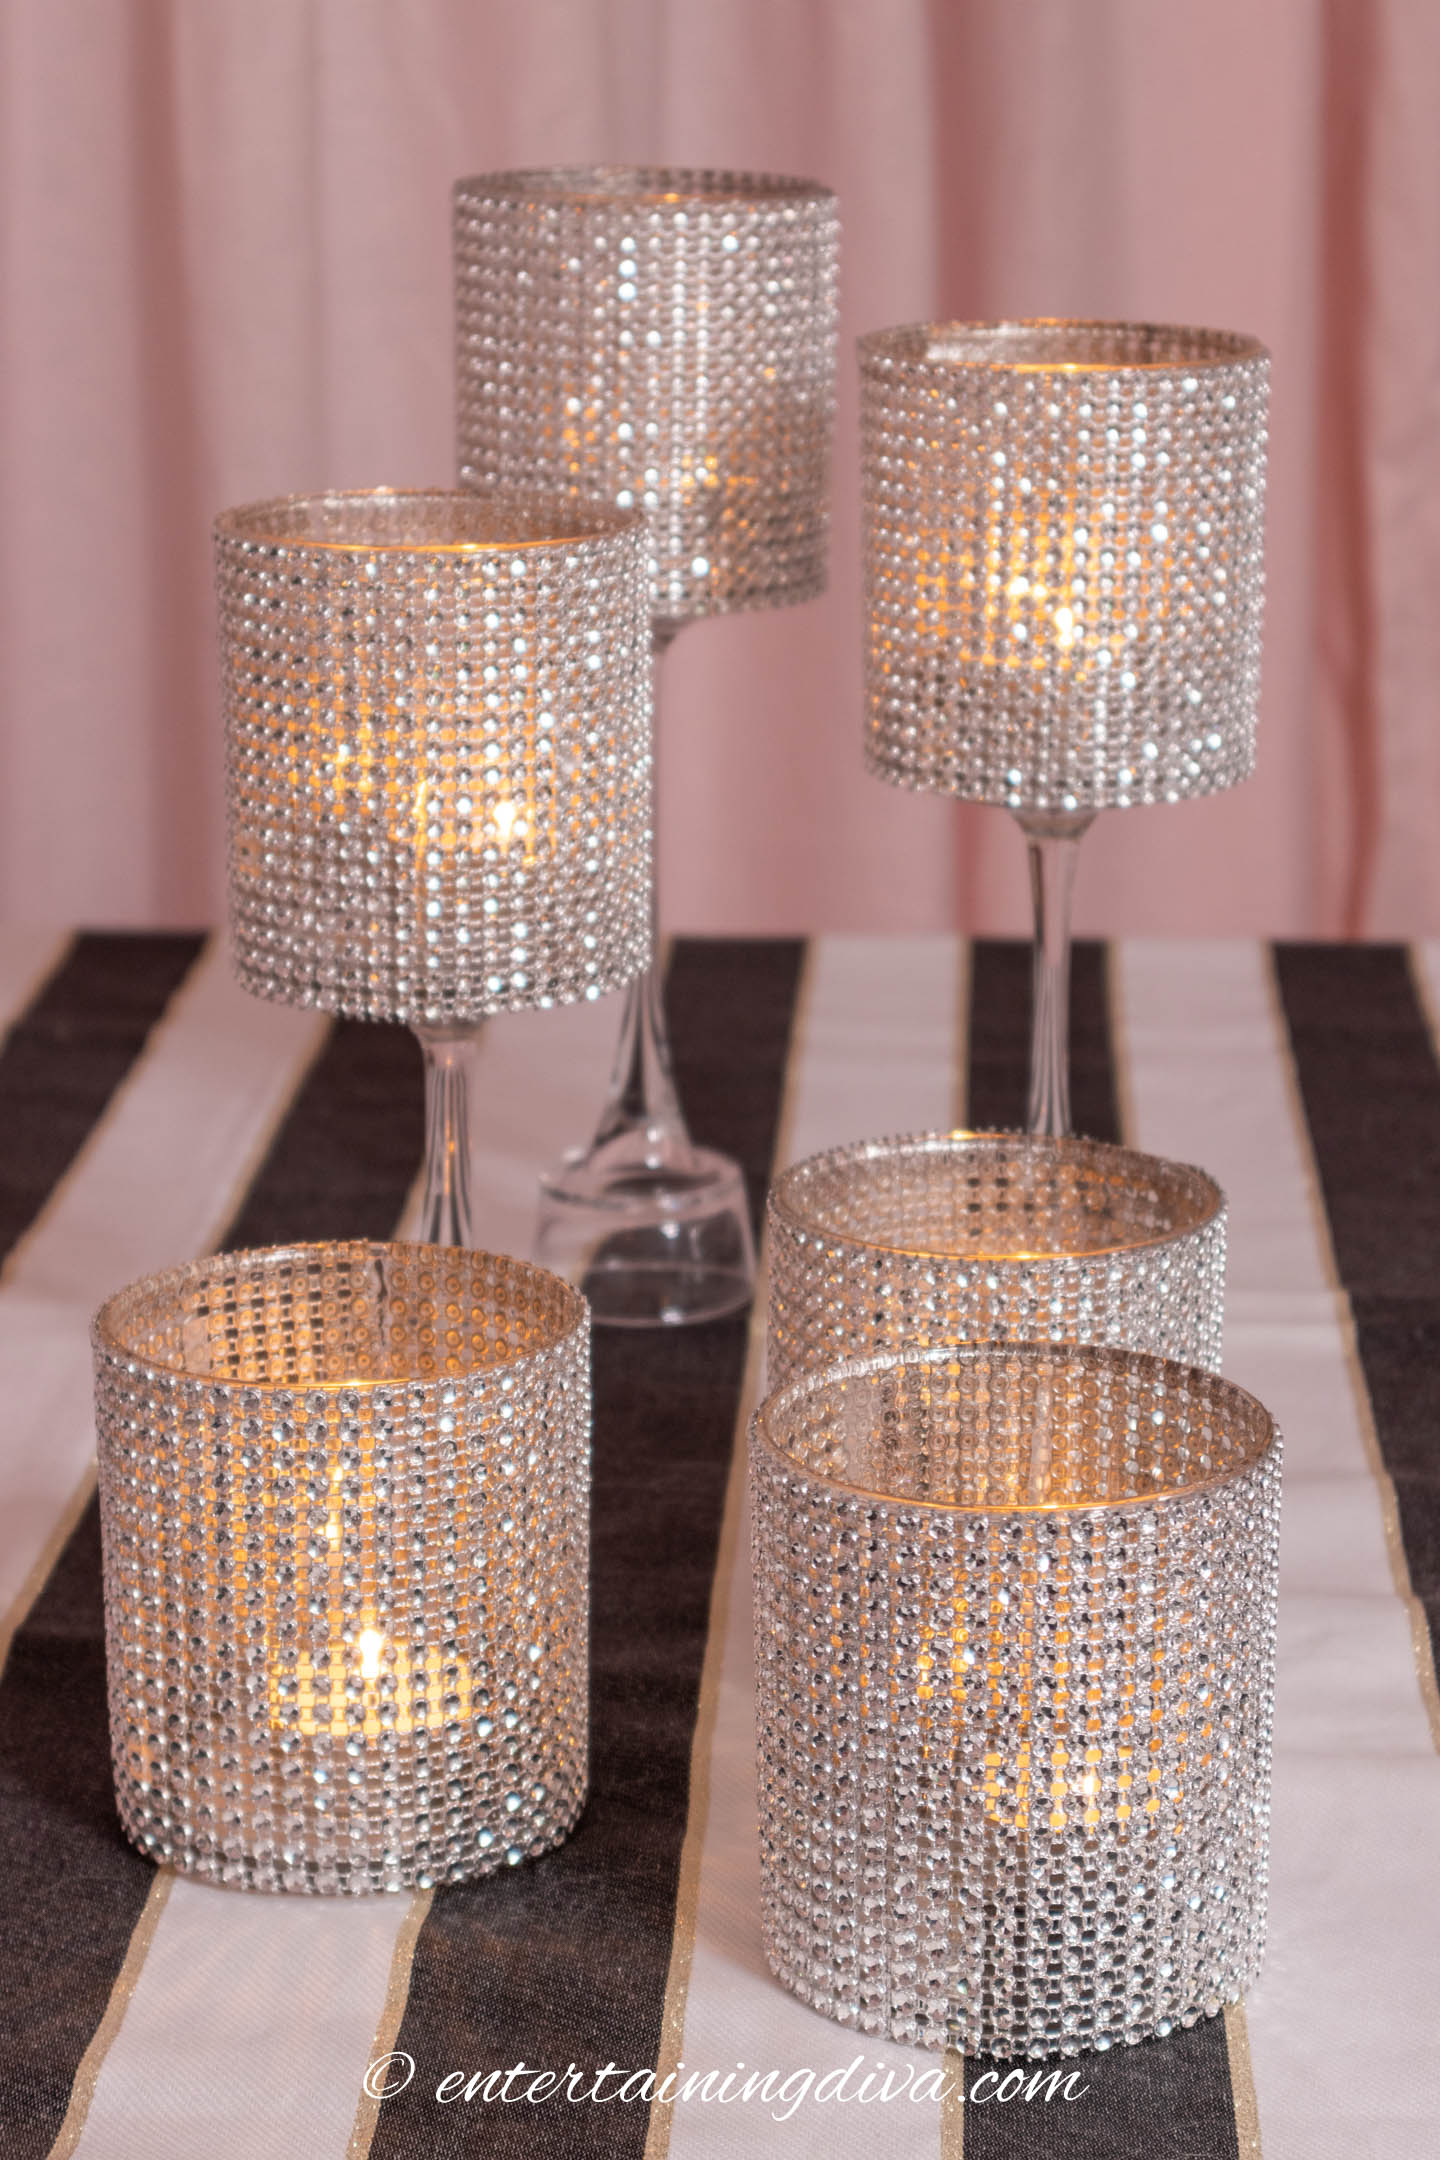
And that’s it!
Whether you go with the low version or the taller versions, the candle holders look really pretty.
You may like them so much you want to keep them for yourself 🙂
Other Handmade Gift Ideas
In case you’re looking for some other gift ideas, here are some other ideas you might like.

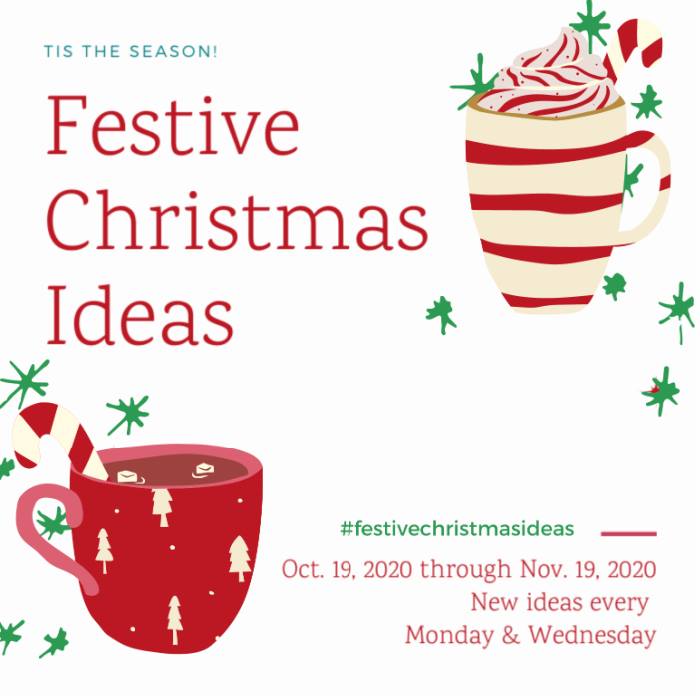
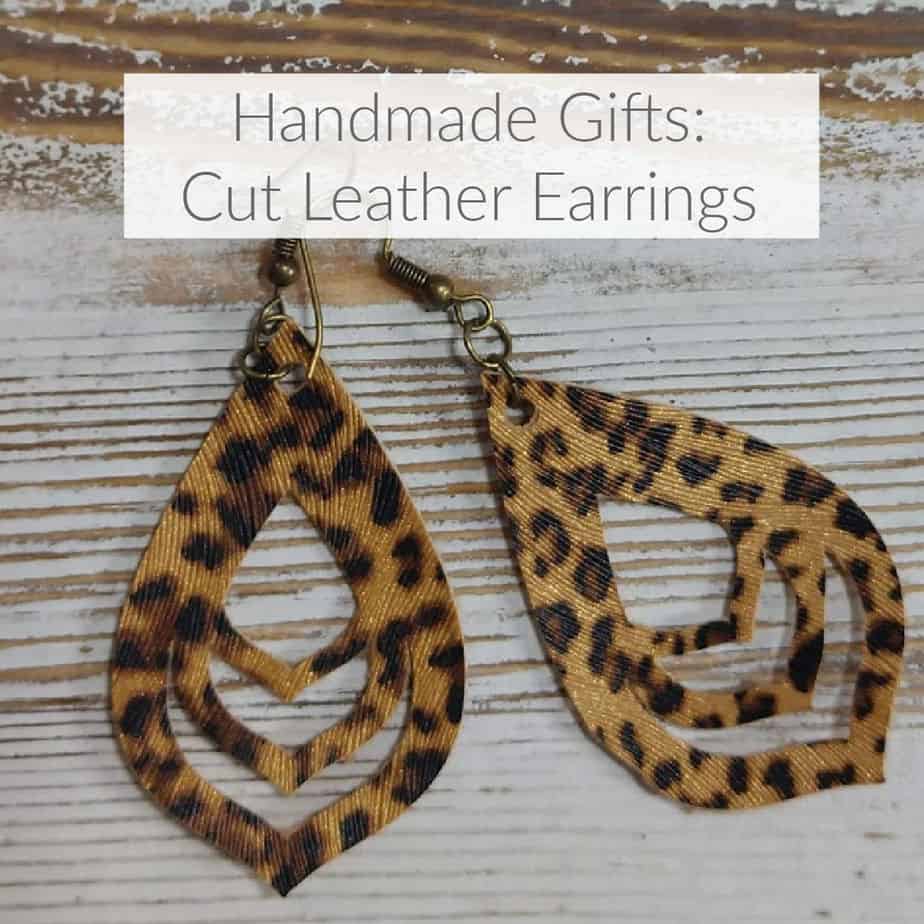
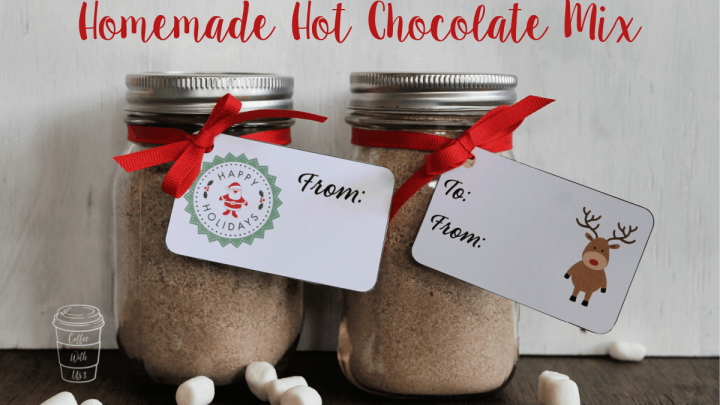
DIY Car Care Gift Bag For Her - Festive Holiday Ideas - Homemade Gifts!


Have comments or questions on my DIY glam rhinestone candle holders? Tell us in the comments below.
This post was originally published on October 26, 2020 but was updated with new content on January 20, 2024.
Very pretty! I love how your DIY candle holders turned out!
Thanks, Lauren! I’m pretty happy with them, too 🙂
Your glam candle holders are so pretty and they look so expensive too. I’d be thrilled to get these for a gift! Love how easy they are to make too.
Thanks, Marie! I like the way they turned out, too…I think they’re going to end up being a gift go myself 🙂
I love the bling! Your versions of the candle holders are beautiful.
Thanks, Beverly! Bling is kind of my thing so these candle holders are right up my alley 🙂
Those are really pretty!
Thanks, Tania!
I love the bling! What a great gift
Thanks, Emily! I’m a bit of bling lover myself 🙂
These turned out beautiful and will make a lovely gift!
Thanks, Cherryl! I liked them so much I kept them for myself 🙂
These are so very pretty! And perfect for gifting any time of year. They remind me of a cozy Winter. I would totally use them to decorate for a Winter Wonderland theme.
Thanks, Alexandra! I’m pretty happy with the way they turned out 🙂