
Winter Wonderland Decor: DIY Faux Ice Candle Holders
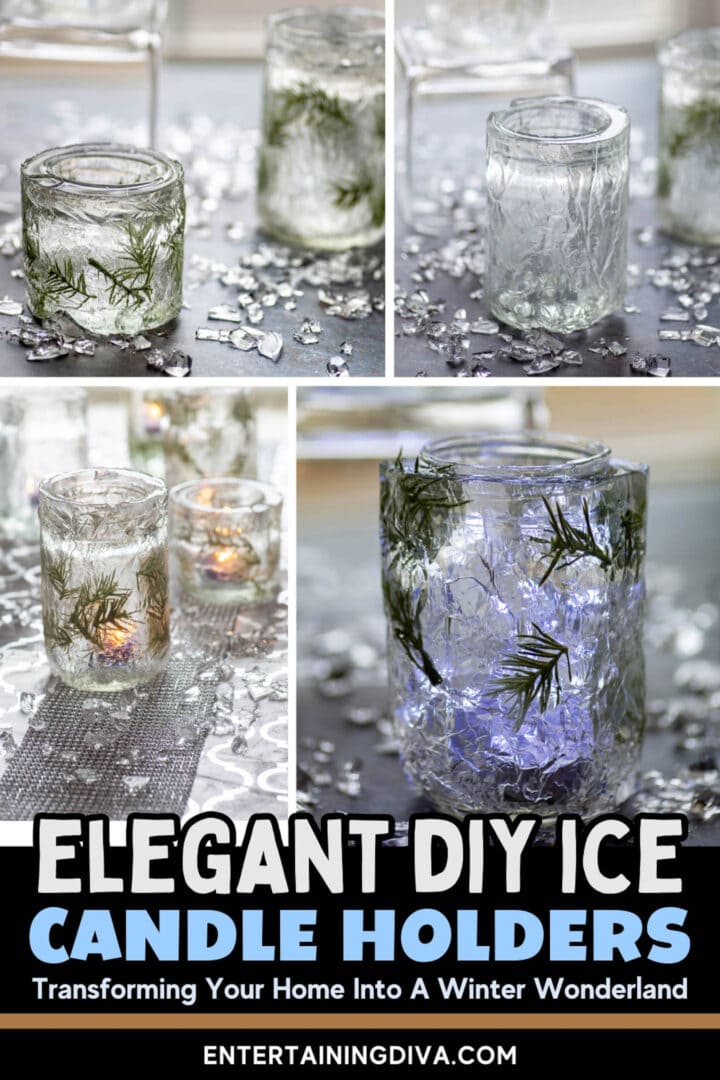
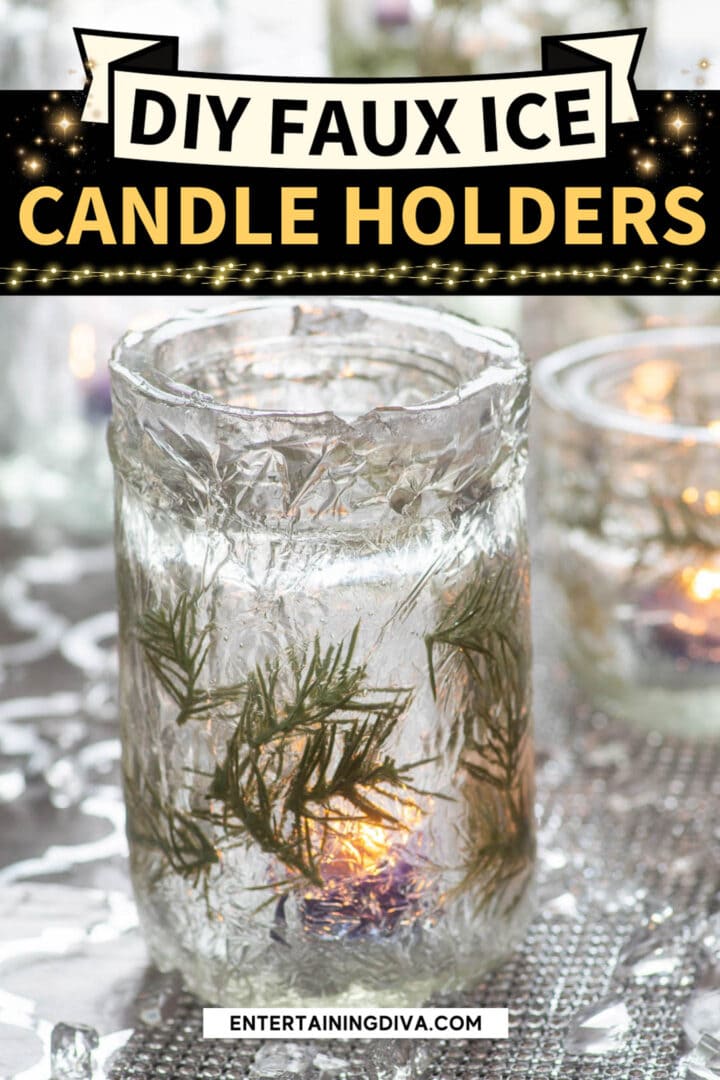

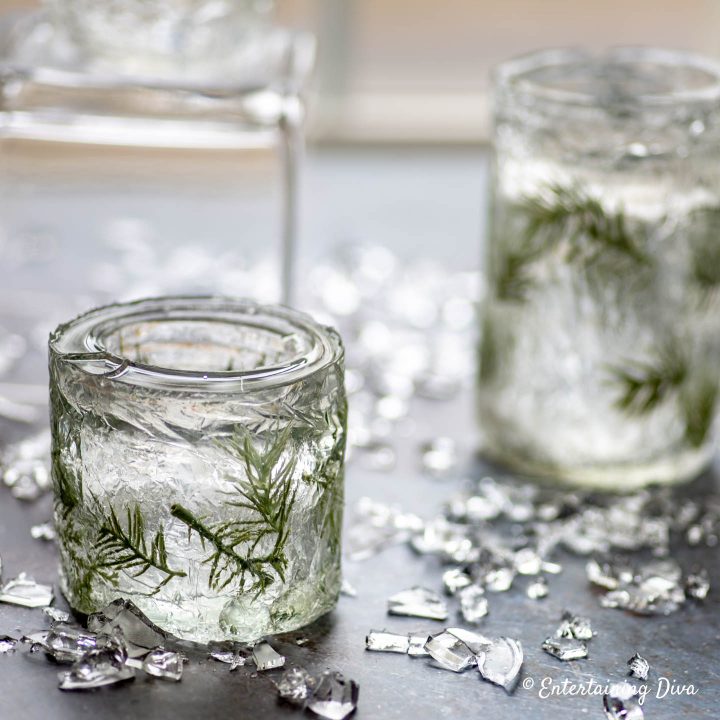
I have always loved the look of ice sculptures and wanted to add that wintry feeling to my winter wonderland table setting. But I’m not talented enough to actually carve an ice sculpture and didn’t really want to deal with the melting ice. These DIY faux ice candle holders were just the thing…the icy look without the mess. Perfect for my winter wonderland decor!
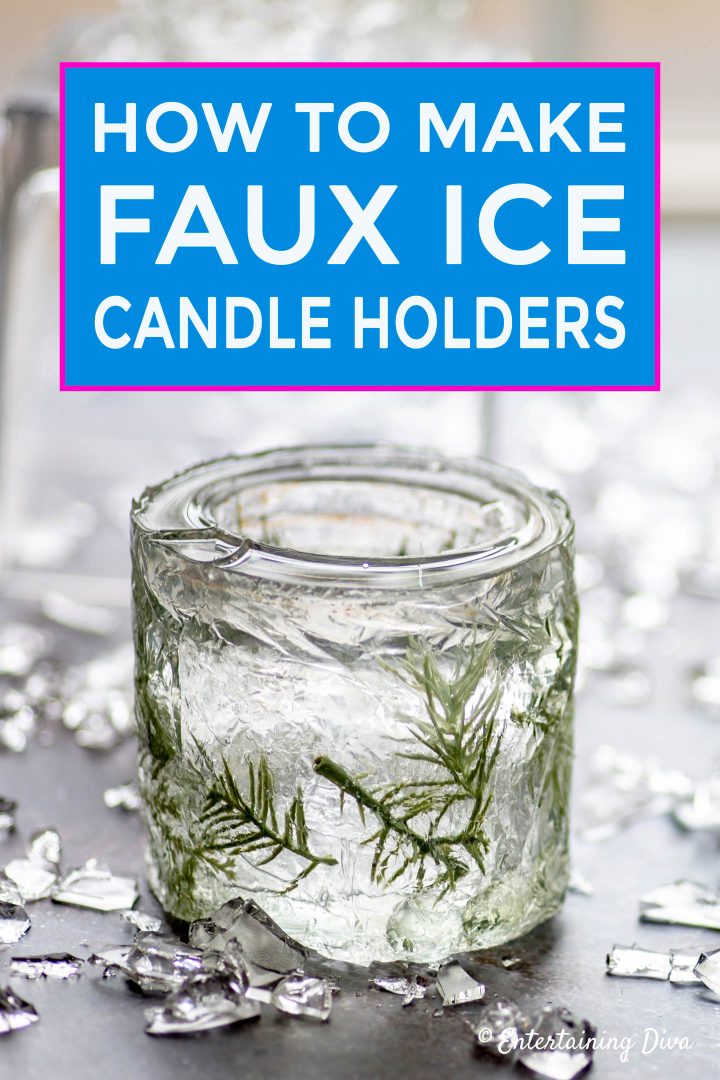
A few weeks ago, I put together a winter wonderland tablescape, featuring some DIY faux ice candle holders I made from mason jars.
When I was searching for ways to make candle holders that look like ice, I found a really cool product intended just for that purpose. (You can find the “faux water” link under the sources below).
It can be used anywhere that you need something to look like water or ice but don’t want to use the real thing.
Like the faux water at the bottom of faux floral vases.
Or those commercials that have beer bottles encased in ice. (Real ice wouldn’t survive very long on a film set with all those hot lights).
And it’s actually really easy to use.
So I decided to give it a try for my DIY winter wonderland candle holders.
As a side note, I’ve been working on a video for this…but my video editing skills leave something to be desired so it’s taking longer than I hoped. I thought I’d go ahead and post the instructions now. But if you want to watch it in video, stay tuned. It should be up shortly!
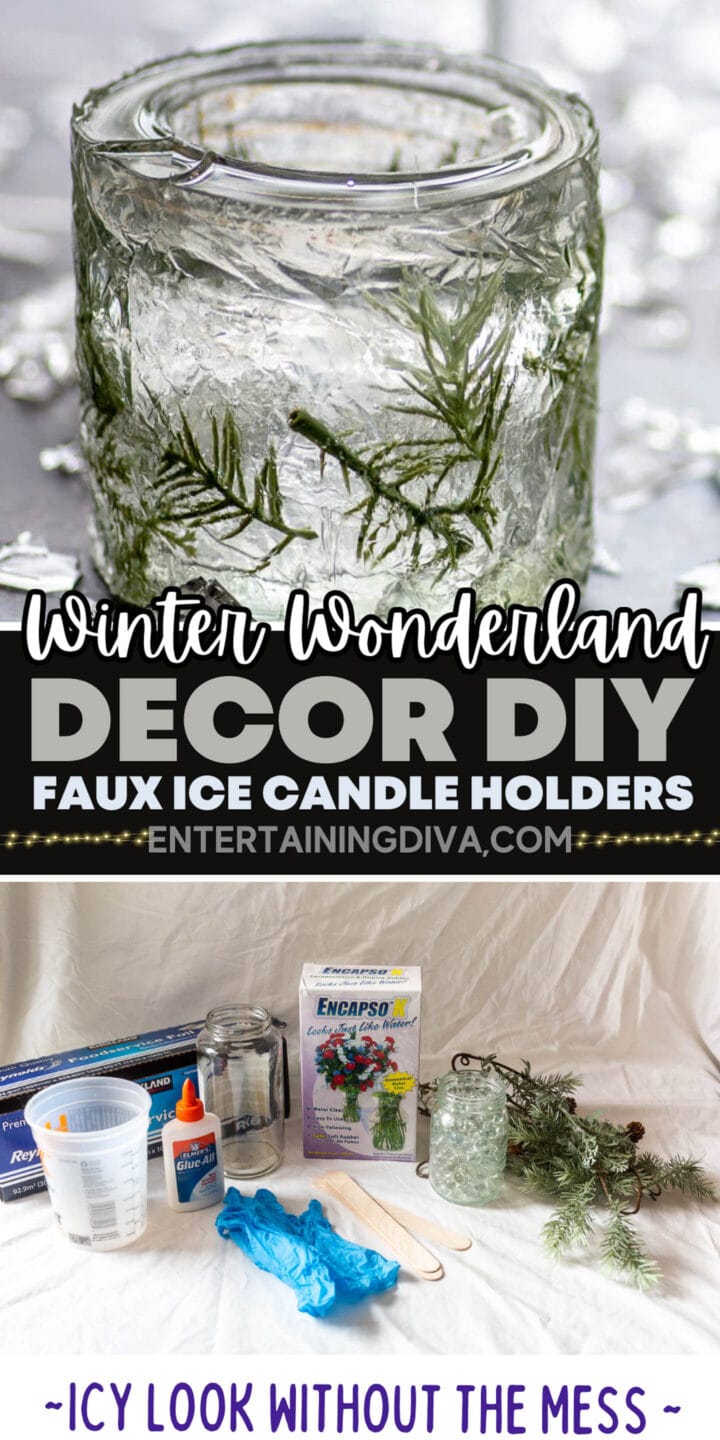
Supplies
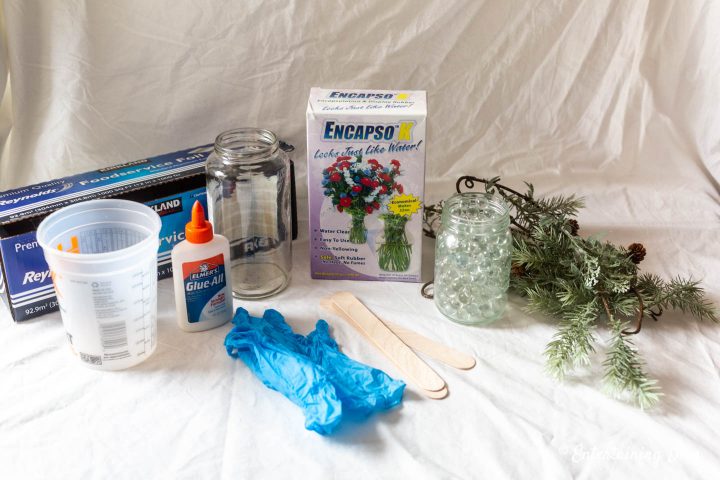
- Large jar or container
- Foil
- Glue
- Mason jar with a sealer for the top
- Marbles (or other heavy material that will fit inside of the mason jar)
- Disposable rubber gloves
- Faux water*
- Mixing container – it’s easiest if you can find ones that have measurements on the side.
- Stir sticks
- Faux evergreens (optional)
How to Make DIY Faux Ice Candle Holders
Step 1: Make A Mold
The first step of making my DIY winter wonderland candle holder is to make a mold for the “ice”.
This will go around the outside of the mason jar to hold the liquid against the outside of the mason jar until it has set.
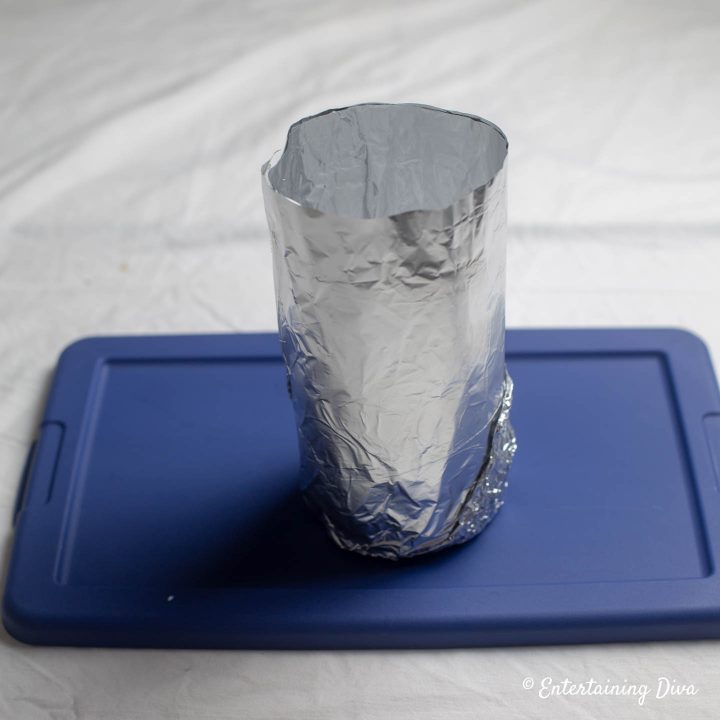
Since I wanted a mold that I could easily peel off when the “ice” was ready, I decided to make it out of foil. Easy to use and inexpensive!
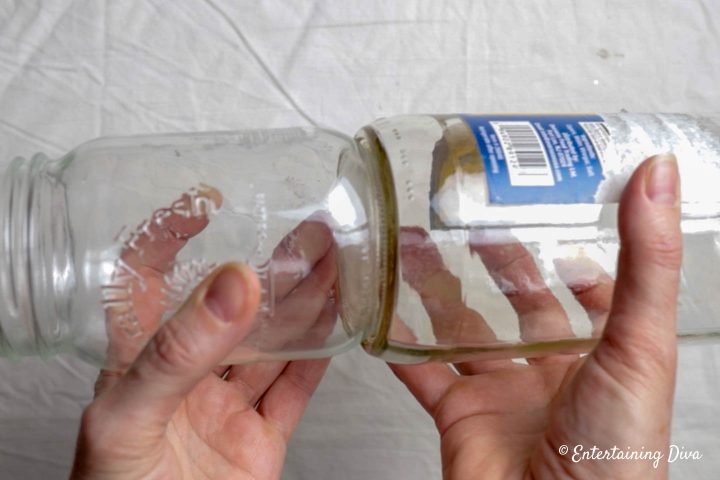
To make this happen, I found another jar that was slightly wider than my mason jar. I used this to make my foil mold.
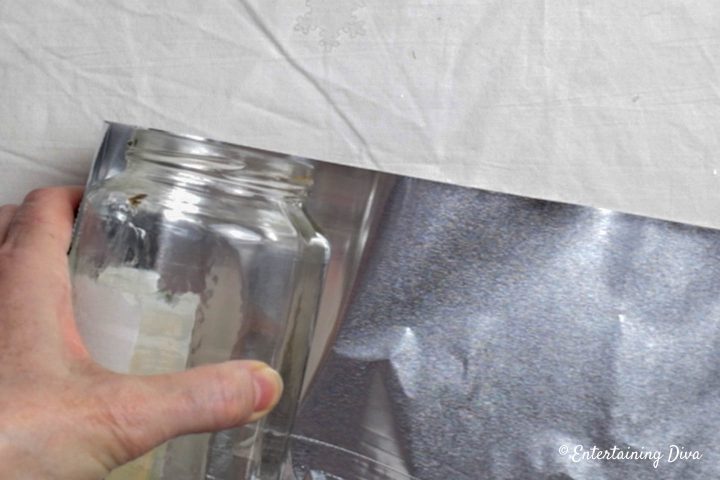
Line the edge of the foil up with the top of the jar.
Then roll the jar so that the foil wraps around it a few times.
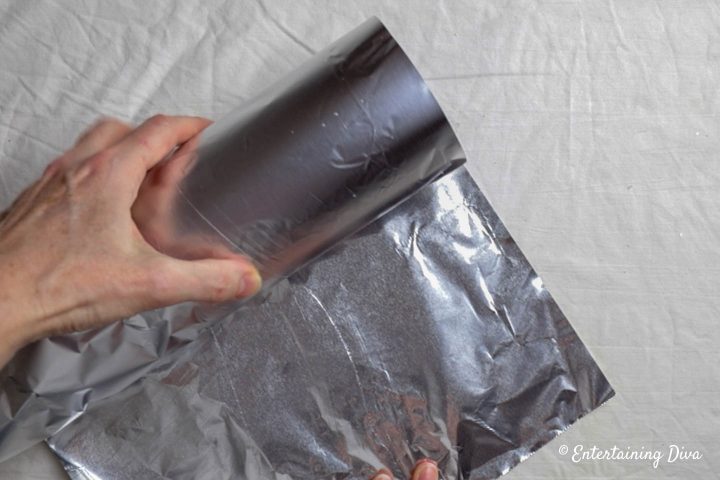
Fold the foil over the bottom of the jar so that there aren’t any seams on the bottom.
Then push the jar down to flatten the foil so that it will stand up evenly.
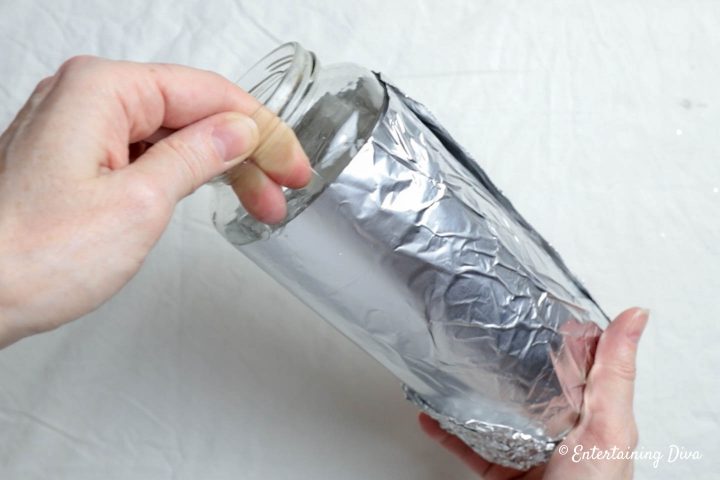
Carefully remove the jar from inside of the foil and you should have a mold.
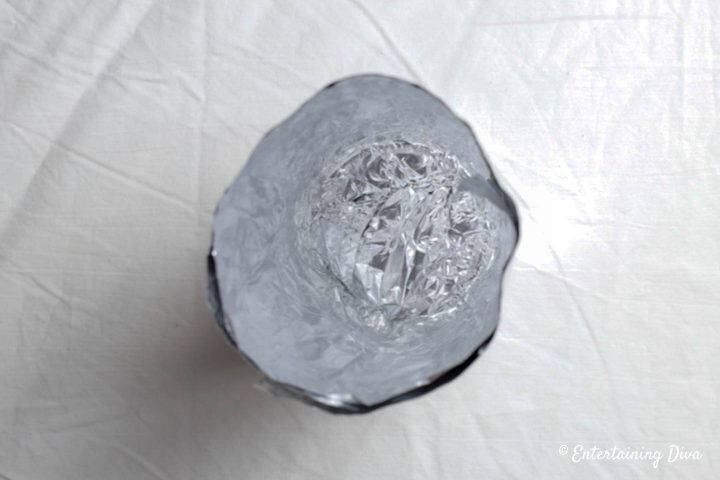
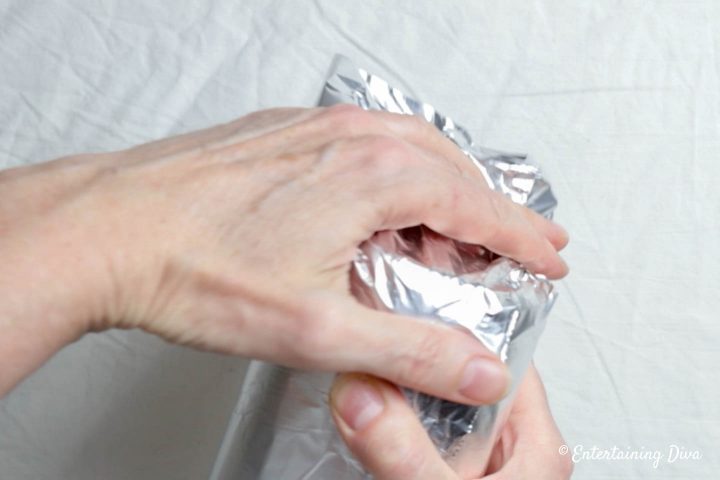
Flatten any foil bits that may be sticking out.
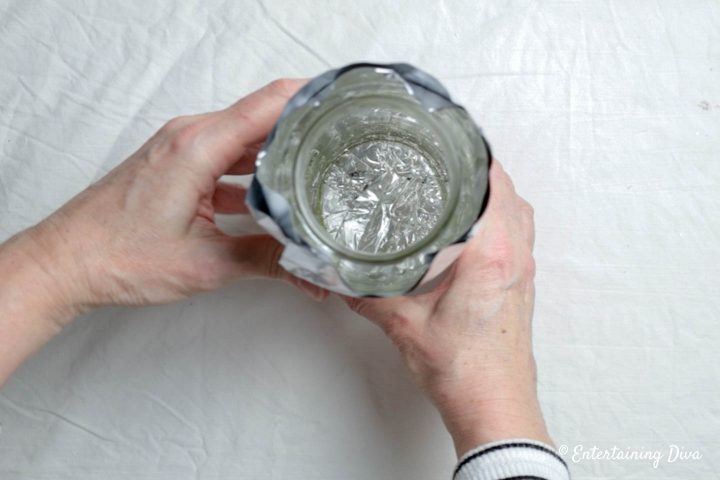
Before continuing, put your mason jar in the mold to make sure it fits.
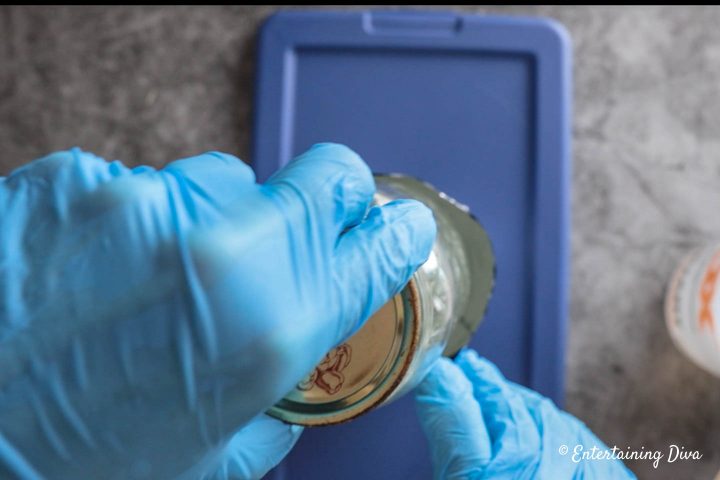
Step 2: Get The Mason Jars Ready
The next step is to get the mason jars ready for our DIY faux ice mason jar candle holders.
If they have any labels or other residue on them, you’ll want to clean all of that off before we begin.
Since the faux ice is liquid to start, you need to make sure that the mason jar does not start to float.
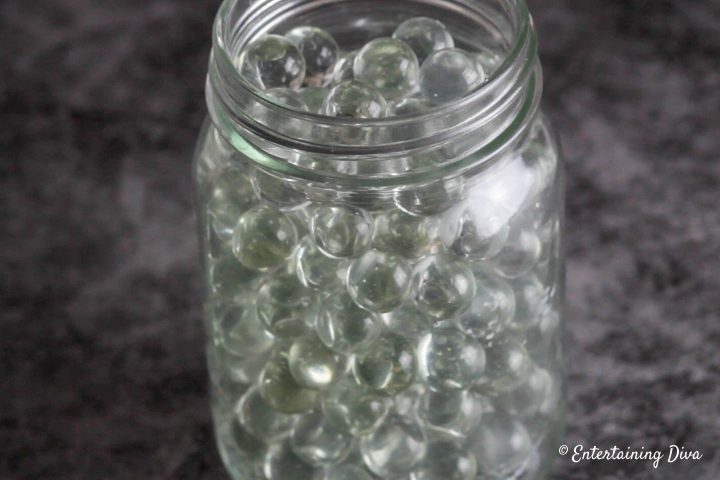
To do this, fill it up with something heavy. I used marbles.
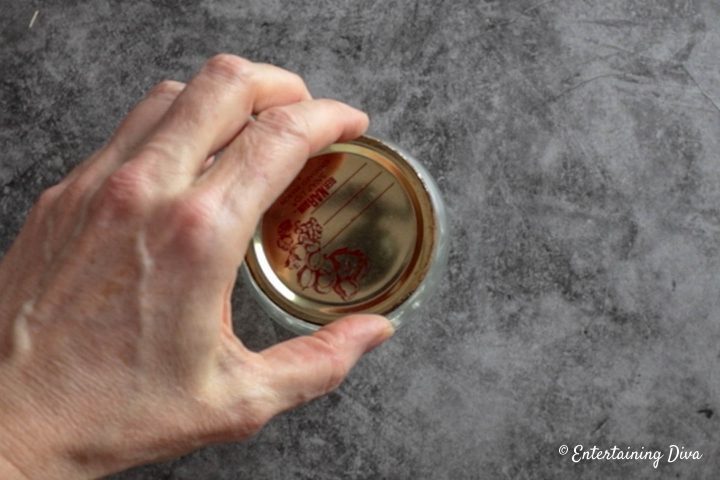
Put the lid sealer on the top of jar.
The foil mold does tend to a leak a little bit, so you’ll probably want to put it on something that will contain the liquid.
I used the top of a small storage container, but a small plate would work, too.
You may also want to line the inside of the foil with a plastic bag to make it more water-proof. I didn’t do this, but I would if I were making them again.
Then place your jar full of marbles in the middle of the mold.
You won’t want to move the mold after we have poured the liquid into it, so put it in a location where it can be left alone for a few hours.
Step 3: Prepare the Fake Ice
Now comes the fun part. Making the fake ice!
Before you get started, put on some disposable gloves to prevent getting the mixture on your skin.
The faux ice comes in two bottles. Like an epoxy, you need to mix the two liquids together in order for it to work.
Find the bottle marked A.
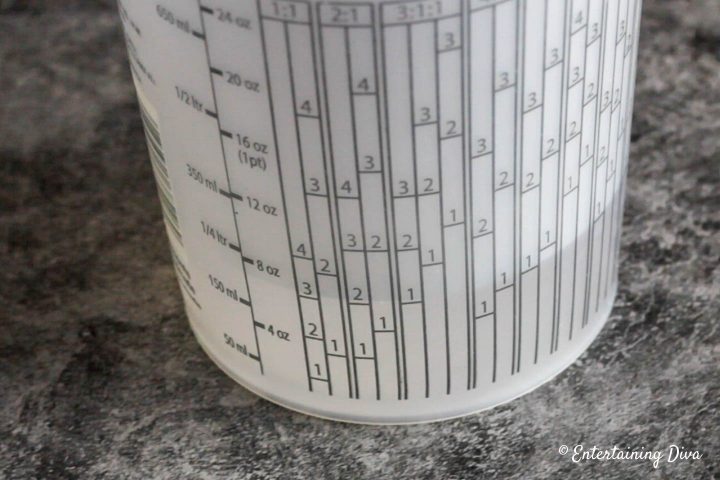
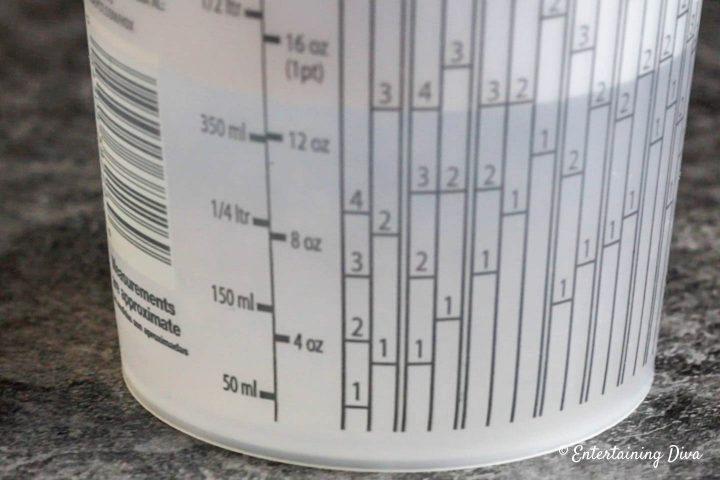
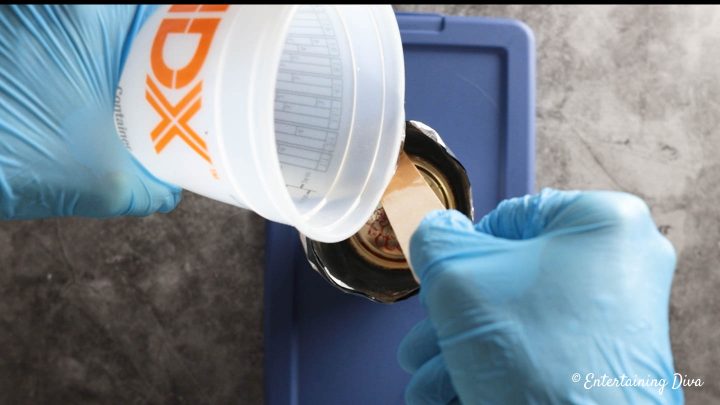
Shake it really well. Next we’ll be pouring it into the mixing container, but we need to make sure to use exactly the same amount of parts A and B. This is where having a mixing container with measurements on the side helps.
Each of the bottles is 16 ounces (2 cups). You’ll want to save about 4 oz of each to top off the candle holders at the end so don’t put in more than 12 oz at this stage.
Then add an equal amount of liquid from bottle B (no shaking required for this one).
Use a stir stick to mix the two together.
Stir continuously for 5 minutes making sure to scrape the bottom and the sides of the container occasionally.
Step 4: Fill In The Mold
Now we are ready to fill in the mold.
Hold the stir stick so that the end of it is pointing down between the edge of the mason jar and the foil (where you want the liquid to go).
Then pour the liquid onto the stir stick so it runs down into the mold.
Keep pouring until you have filled the mold up to the top of the mason jar.
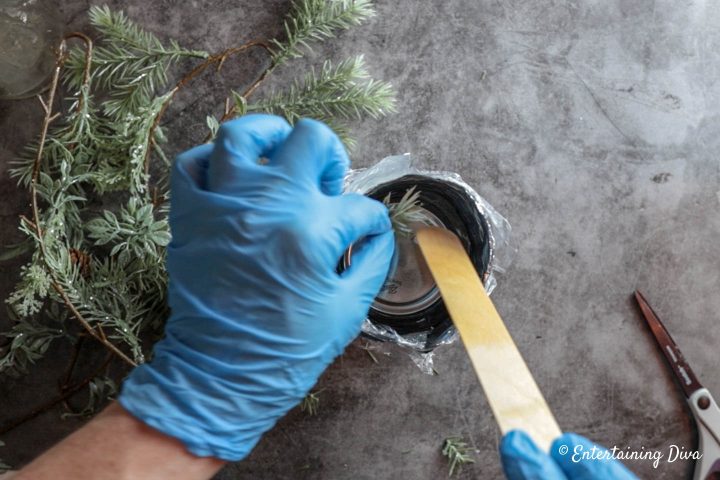
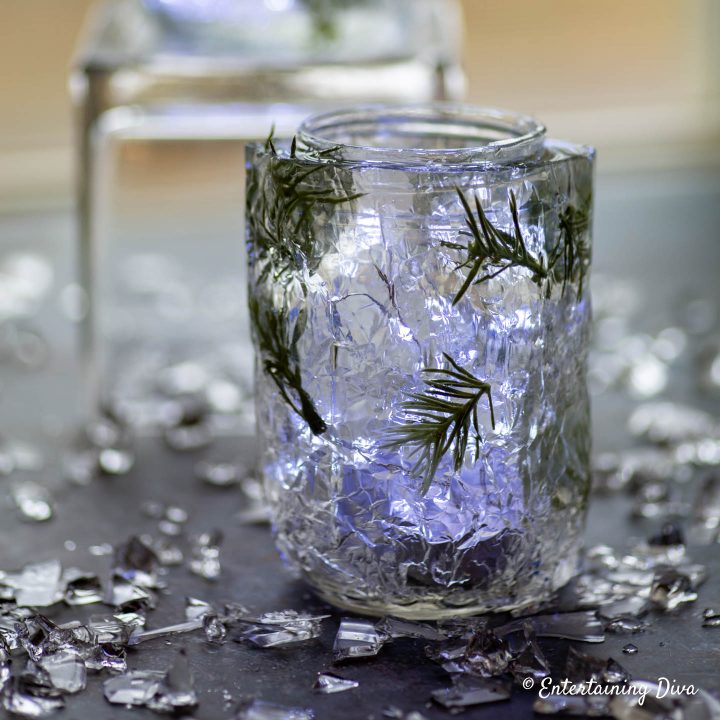
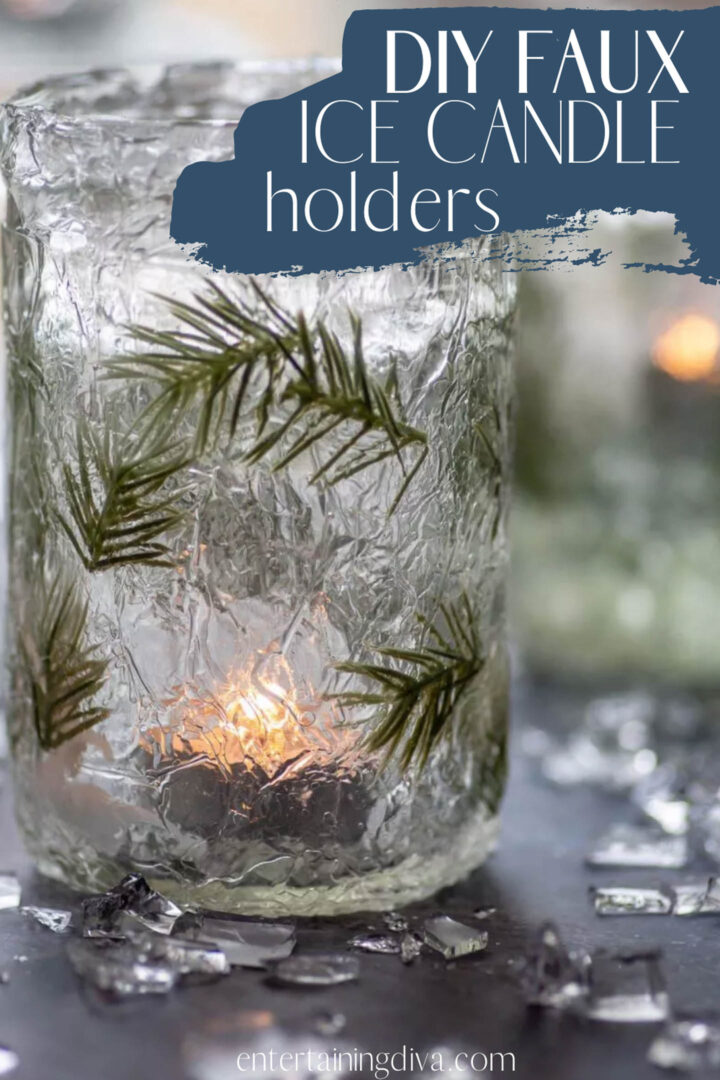
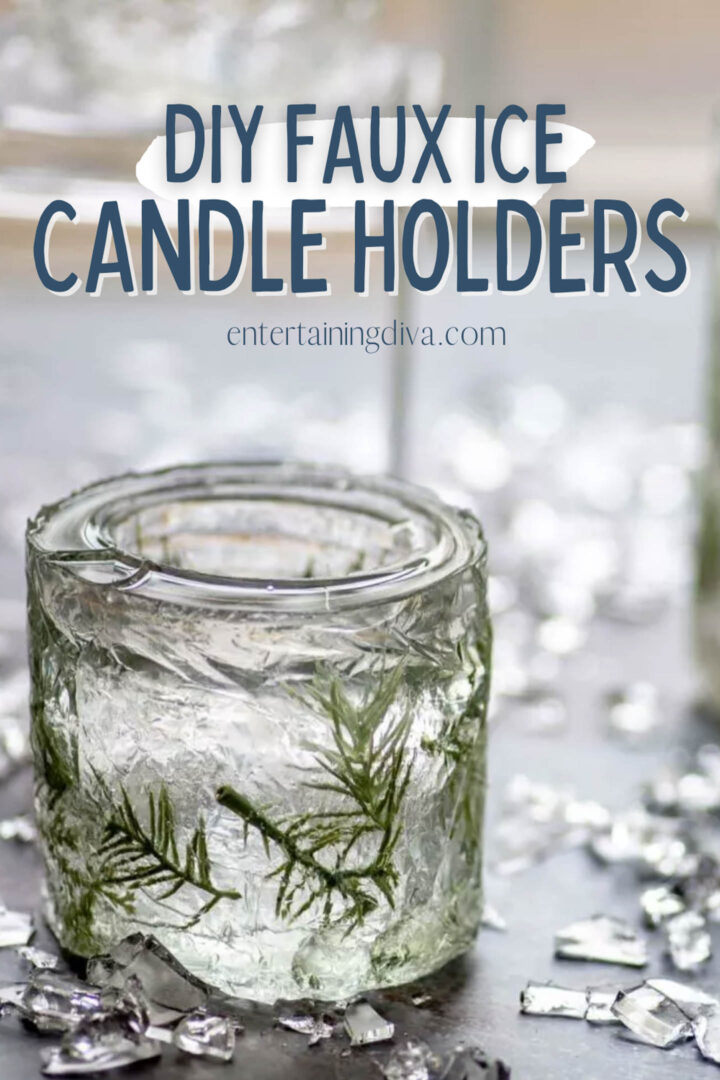
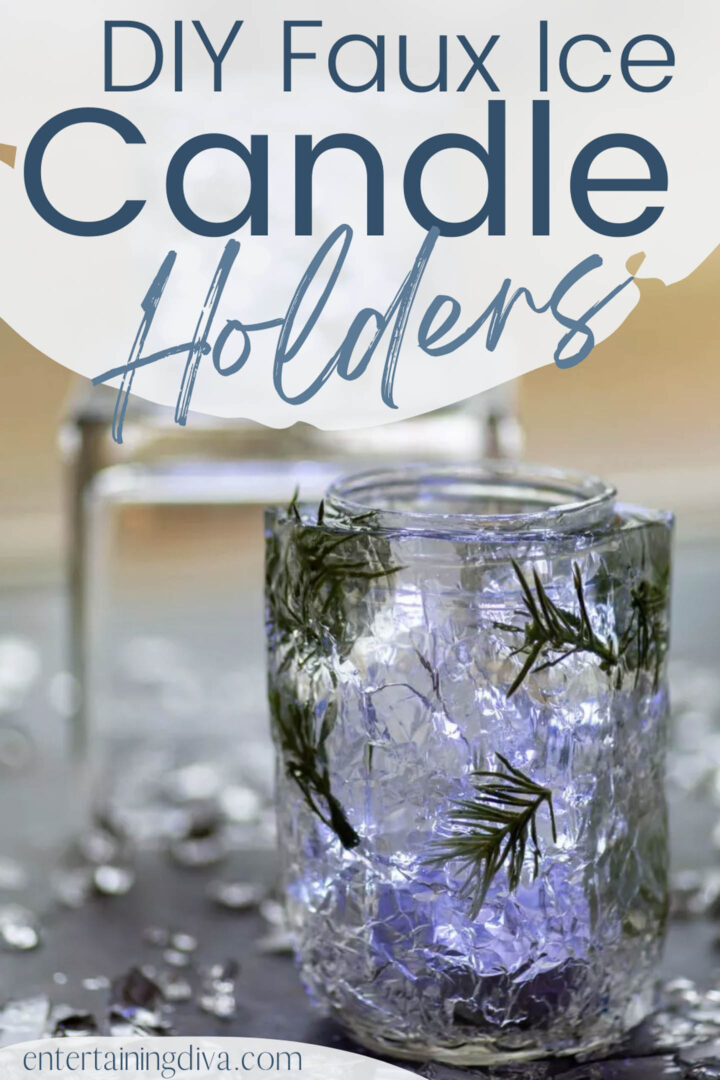
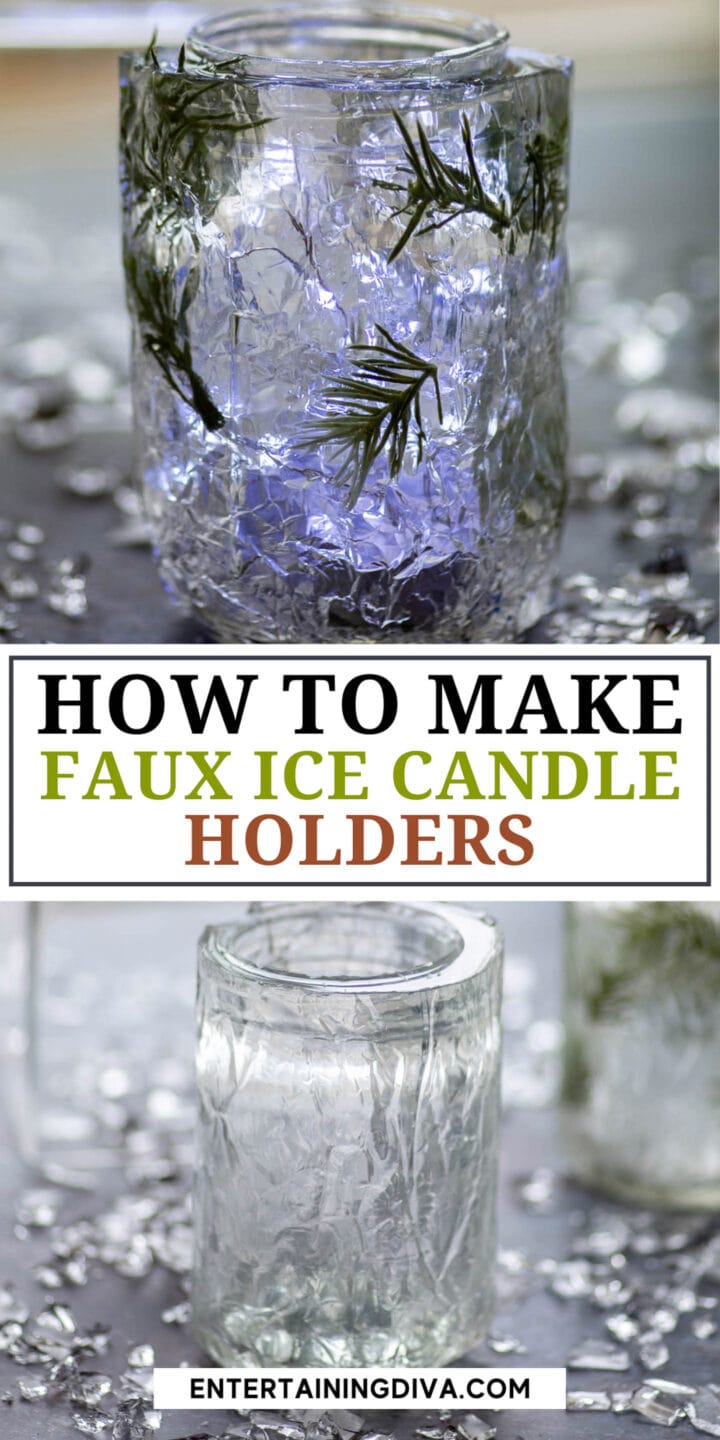
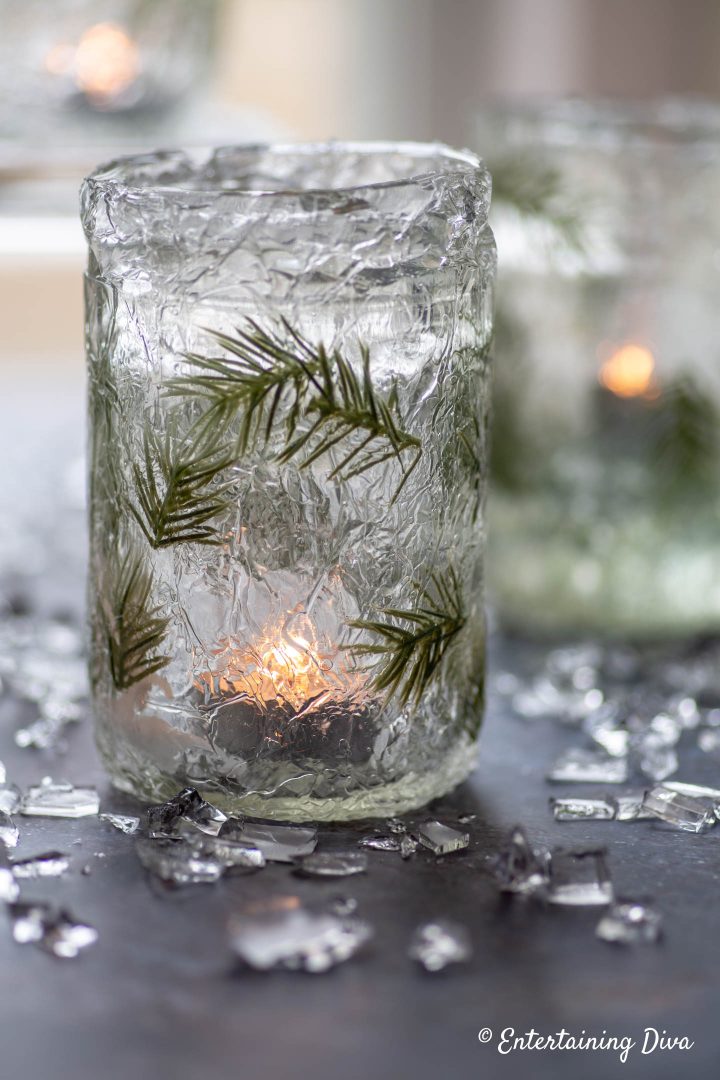
If you want to add some greenery to your ice, cut off little bits of faux evergreens. Then push them down inside the faux water liquid using the stir stick.
Let your mason jar sit for a few hours until the “ice” has set. The instructions say this will take 16 hours. But mine was done in about 8 hours.
The finished product is rubbery so don’t worry if it doesn’t feel like a hard surface when it’s finished…that’s how it is supposed to be.
You’ll likely find that the product has settled leaving about a half inch at the top of the jar that isn’t covered with the faux ice.
Repeat the mixing process with the liquid that we saved and top up the molds. Then let it for a few more hours until this new layer has gelled.
Step 5: Remove the Mold
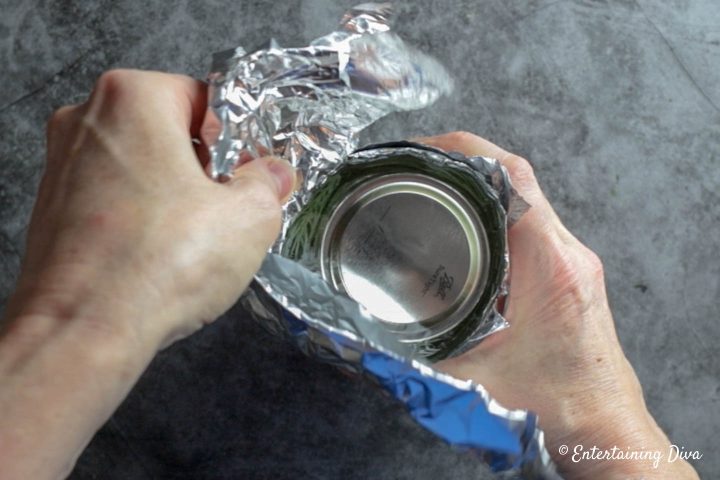
After your ice has set, carefully peel off the foil mold.
It is possible to peel off the faux ice with it, so don’t go too fast.
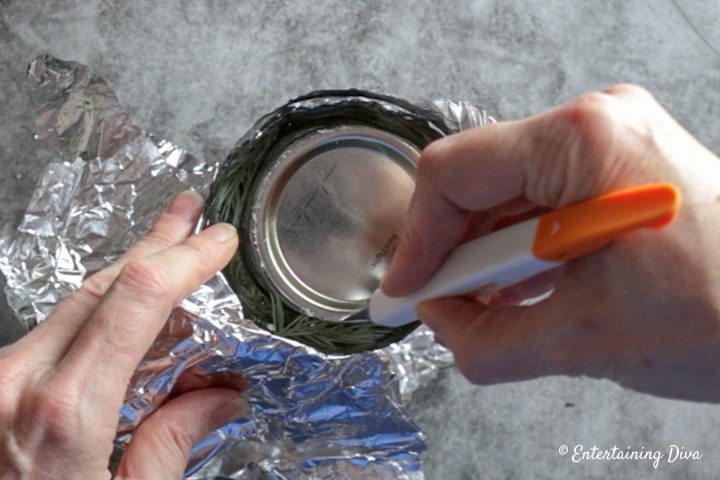
Then remove the sealer lid.
If there is too much “faux ice” on the top of your jar to remove the lid, cut around the edge of the lid with a utility knife and you should be able to pry it up.
Empty out the marbles and your candle holders are done!
If you want to give your DIY faux ice candle holders more of a chipped look, you can take off bits of fake ice with your nails.
The bits make great table scatter since they look like pieces of ice. I created a bunch of them with the little bit of faux ice that I had left over. Just let it sit in the container until it sets, then its pretty easy to break up into small bits.
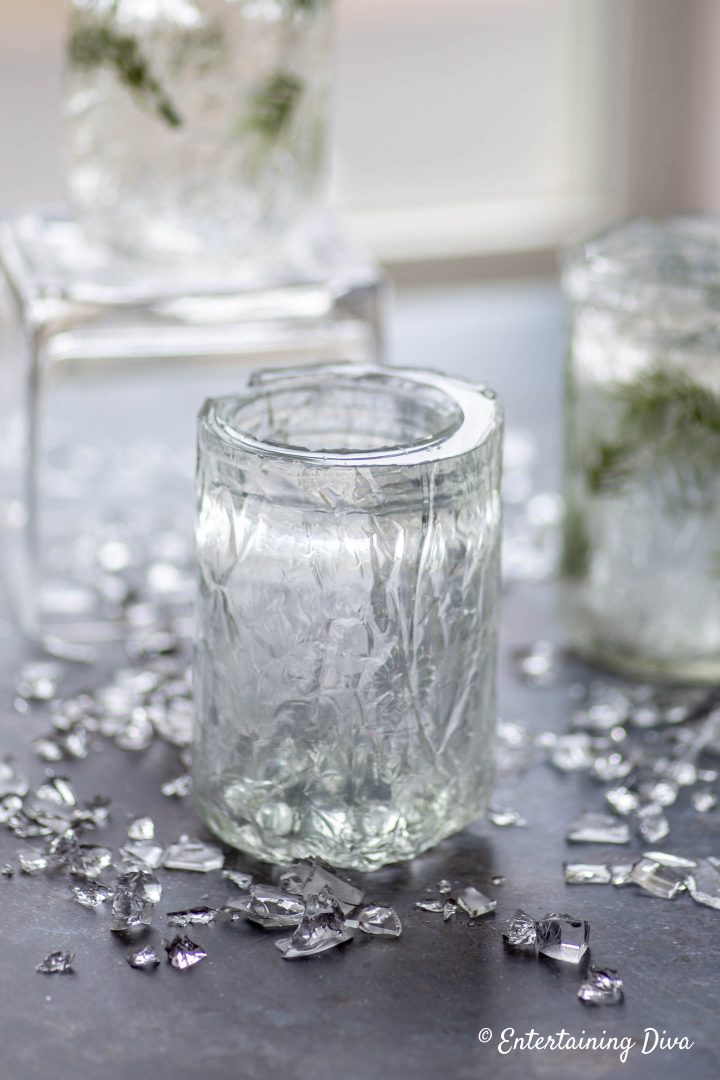
In case you want to make these DIY faux ice candle holders without the evergreens, here’s what they look like.
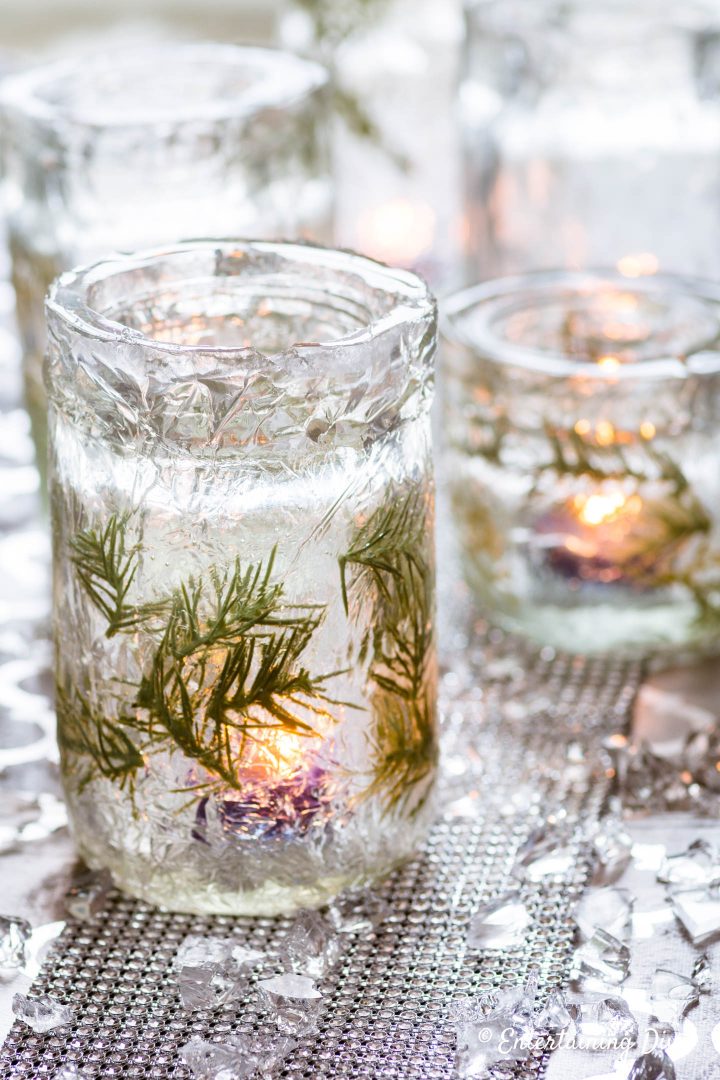
Adding some candles does make them shine a little more.
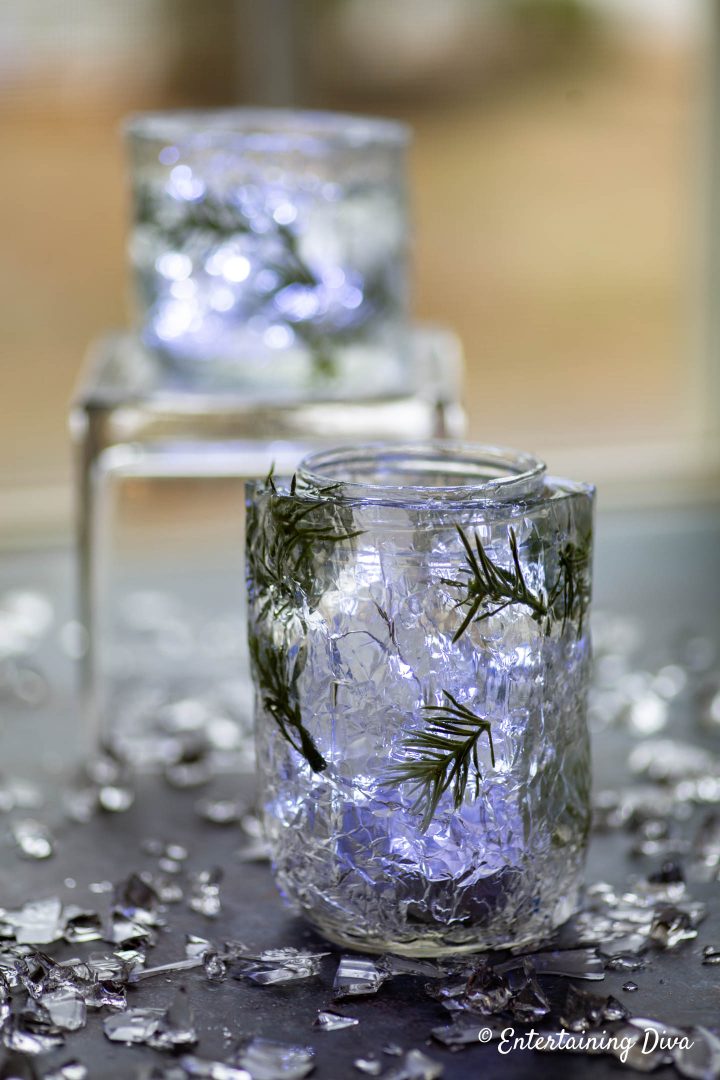
But I think they really get the icy feel when you put a string of battery-operated sparkle lights inside.
Other Winter Wonderland Decor Ideas You Might Like
- DIY frosted glass mason jar candle holders
- Winter Wonderland table setting
- Winter Wonderland party decor ideas
- DIY rhinestone candle holders
Have comments or questions on our DIY faux ice candle holders? Tell us in the section below.
This post was originally published on March 7, 2019 but was updated with new content on April 15, 2024.
About how many faux ice holders did you get per order of the epoxy
Hi Leigh…I got 3 16-oz mason jars and 1 smaller jar out of one epoxy mix. But it will depend on how thick you make the coating and how much of it leaks.
These are SO pretty and I want to do this for my wedding! How easy does the foil peel off of the “ice”? Do I need to spray it with cooking spray first? I don’t want it to stick and have bits of foil in my ice! Thanks!!
Hi Crystal…I didn’t have any trouble getting the foil off, but you could try cooking spray to see if it makes it easier (I would do one first just to make sure the spray doesn’t leave a film on the outside of the ice). Also, some people have said they have fewer problems with leaks if they line the inside of the foil with plastic wrap or a plastic bag. So you might want to try that, too 🙂
Wow, this is amazing. It fits perfectly as a decoration in my room. I read a lot of articles on this topic, but nowhere did I find such a detailed description of the procedure for making ice candle holders. I bought a few small candles so I could put them in these wonderful ice holders, I also bought everything I needed from the material at a nearby store, and I can’t wait to try to make these holders. My daughter will be thrilled.
Do you have your video yet? I want to make them for a winter wonderland themed festival of trees. Kind of confused if you used 2 different size jars & the foil?
Hi Sandy…sorry, I haven’t created the video yet (it’s still on my To Do list). I did use 2 different sized jars, but the larger one was just to use as a mold for the foil. The foil wrapping needs to be bigger than the actual jar that you’ll use in the candle holder. So I did that by wrapping it around another, larger jar and then sliding the foil off. So that larger container doesn’t necessarily have to be a jar. It could be a tin can or plastic container…it just needs to be round and bigger than your candle holder jar. I hope that helps.
How many pint size mason jars will the epoxy cover? I wanted to do 12 pint jars for a birthday party but the epoxy looks pretty expensive. Thanks.
Hi Tracy…It depends on how thick of a layer you put on them. I made 4 jars out of one box with about a 1/2-inch thick layer. It doesn’t need to be that thick, so if you could get it down to about 1/4″, 2 boxes would be enough. (It does look like the price went up since I made these).