Speakeasy Party DIY Chalkboard Entrance Sign (with free cut file)
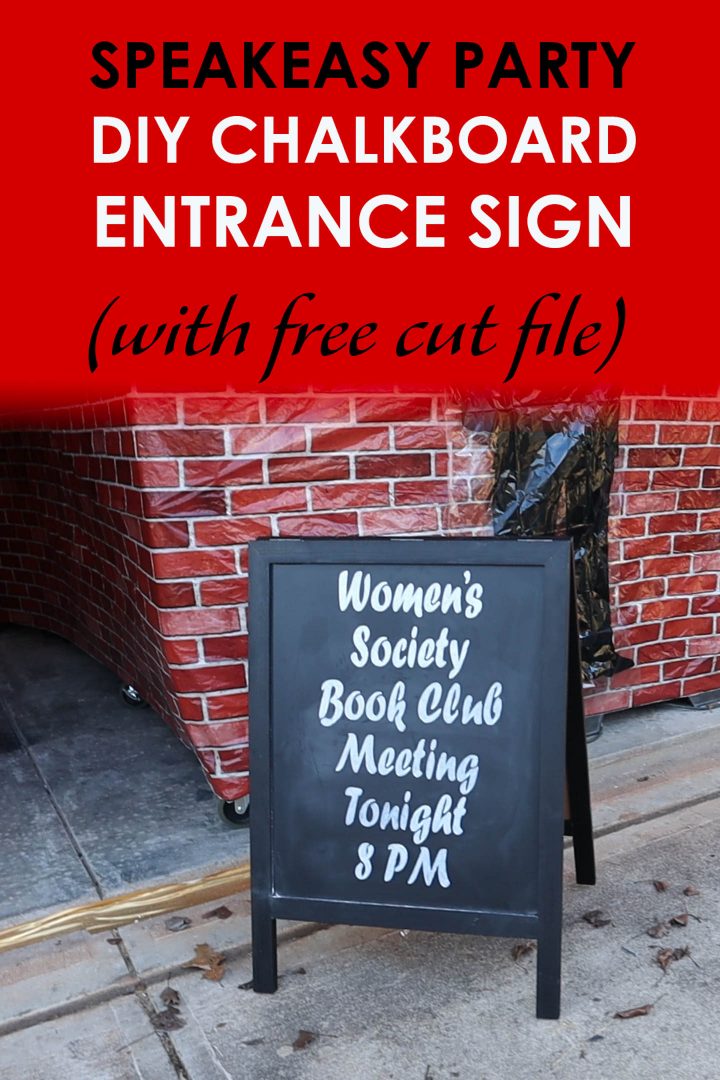
When I created the speakeasy entrance to my great Gatsby party, I used this chalkboard sign as a way to tell everyone where the entrance was…without actually saying it was the entrance. Just like they used to do in the 1920s.
But since I’m not very good at hand lettering, I had to use another way to get the printing on the sign to look good.
Which is where my Cricut definitely comes in handy!
By making a stencil out of adhesive vinyl and sticking it on to the chalkboard, it’s really easy to color in the letters and get perfect hand writing!
If you want to make the same sign that I did, you can get my cut file below.
However, the same process will work for any type of chalkboard sign. So if you don’t want to use this one, you could use your own text with your own choice of font and you’d have your own custom version.
Supplies
Files
To start this DIY speakeasy party chalkboard sign, you’re going to need to get the template file(s) from our resource library.
If you’re already a subscriber to our newsletter, you’ll find the password for the resource library at the bottom of every email. If you don’t have a password yet, you can request one by signing up below.
Materials
- chalkboard*
- re-positionable adhesive vinyl*
- transfer tape*
- white chalk or chalk marker*
Equipment
- 12″ x 12″ Standard grip mat*
- 12″ x 24″ Standard grip mat*
- Cricut scraper*
- Cricut weeding tool*
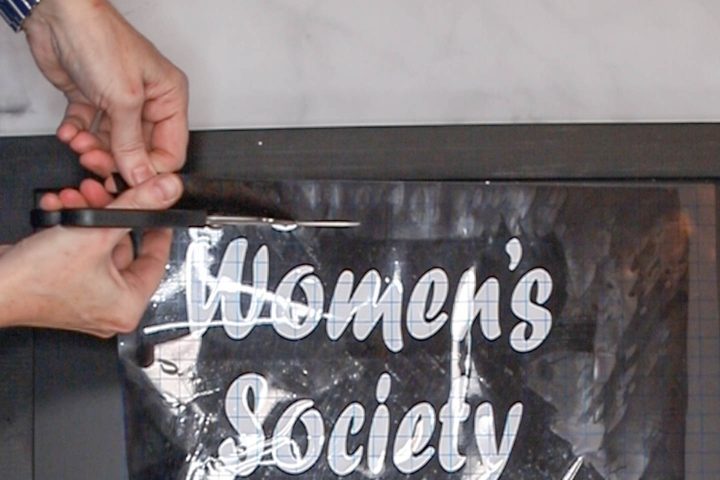
- Scissors
- Cricut fine-tip cutting blade – This is the standard one that comes with the machine
- Cricut machine* – Mine is a Cricut Explore Air 2, but you can use any type of Cricut (or other die-cutting machine) for this project
How To Make The DIY Speakeasy Party Chalkboard Sign
If you prefer, you can also watch our video:
1 | Cut The Vinyl
Get the DIY speakeasy party chalkboard sign .svg file from our Resource Library (it’s the one that displays the images of the cut layers).
Open a new project in Cricut Design Space.
Upload the file to your project (if you’re not sure how, click HERE to see our tutorial on how to upload files to Cricut Design Space).

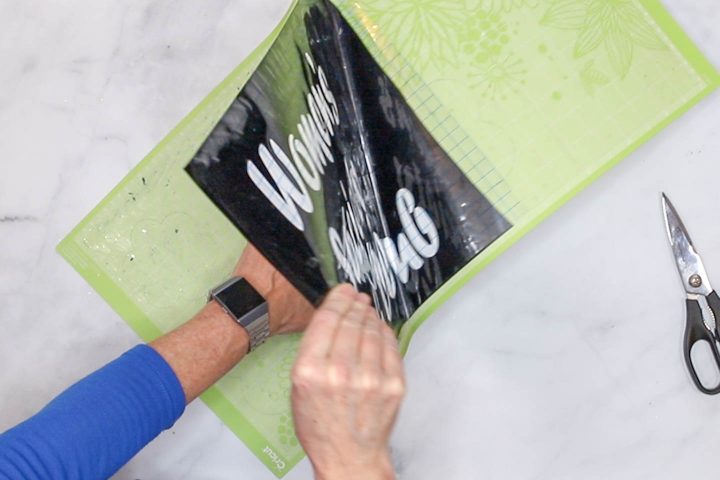
Cut one piece of vinyl that is 12″ x 12″ and load it onto a 12″ x 12″ Standard Grip Mat.
Then cut another piece of vinyl that is 12″ x 14″ and load it onto a 12″ x 24″ Standard Grip Mat.
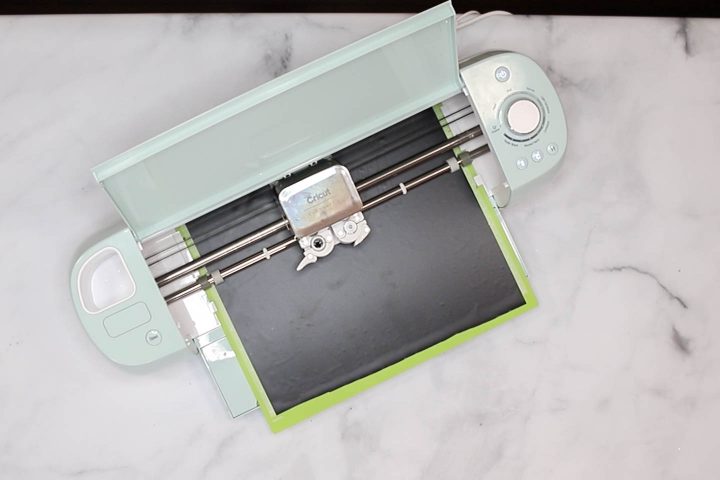
Have your Cricut cut the text on to the vinyl.
2 | Make The Stencil
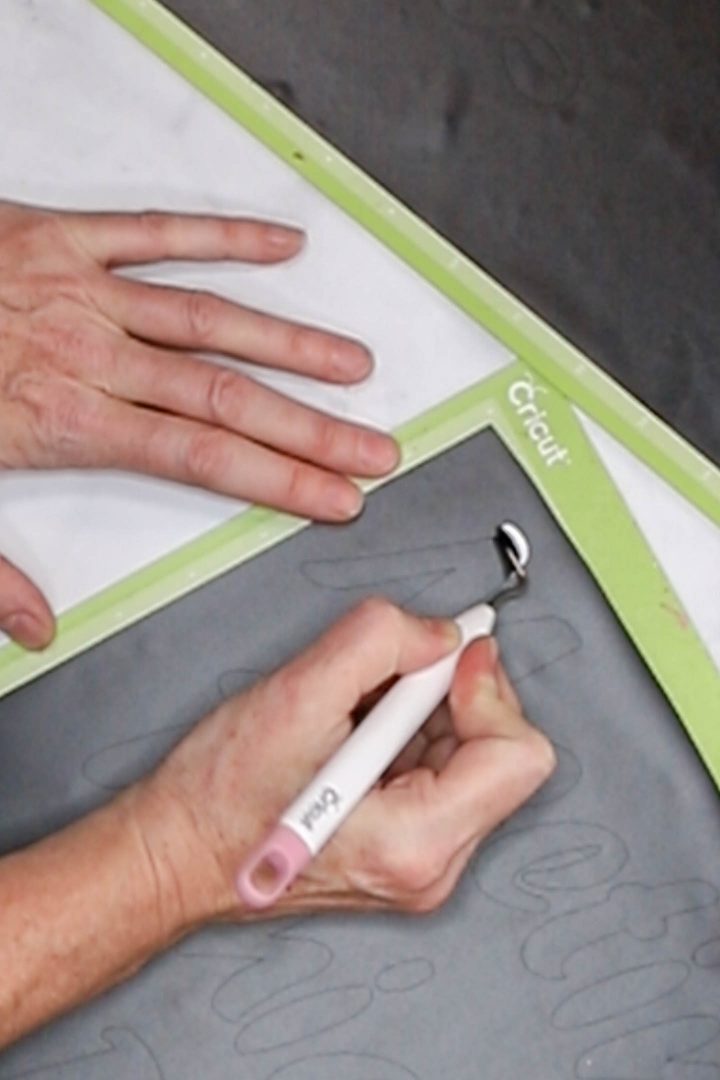
Stick the weeding tool into the top corner of the first vinyl letter. Then pull it back to remove the letter from the backing.
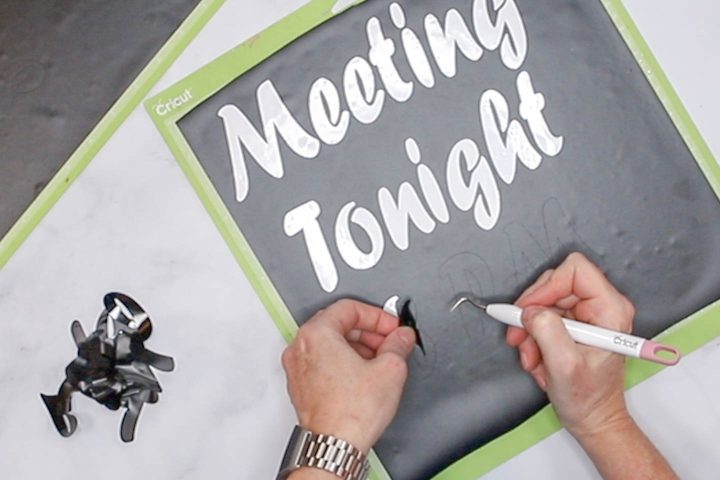
Repeat this process for all of the letters on both pieces of vinyl.
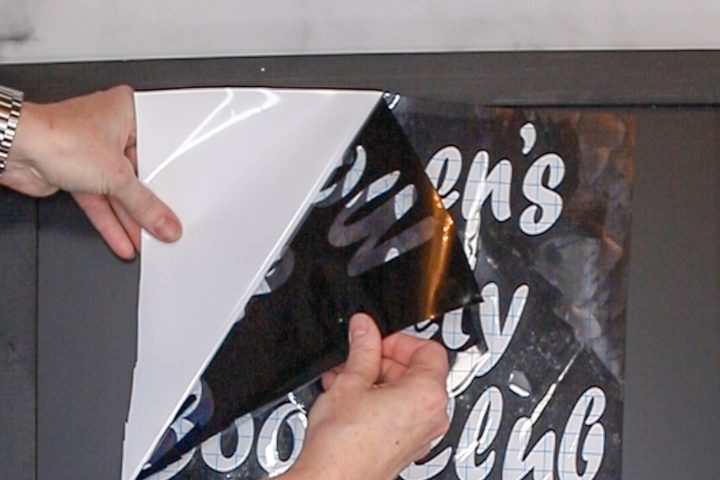
Cut the transfer tape to the same size as the adhesive vinyl.
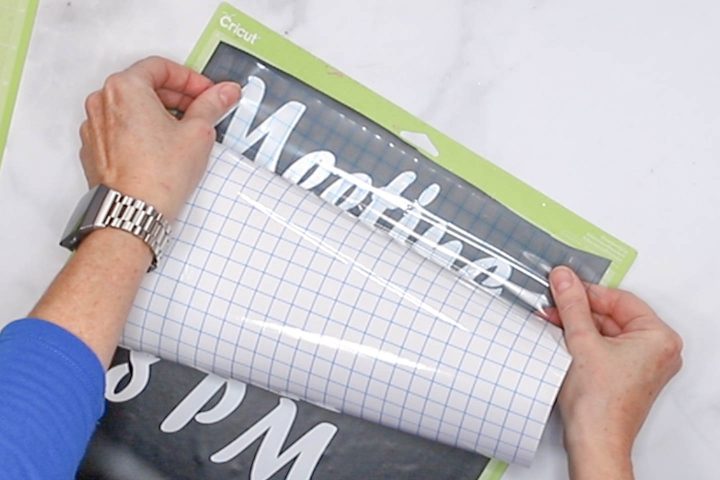
Stick the transfer tape over the top of the vinyl.
Tip: Since the transfer tape is really sticky, I only peel a little off the backing at a time to keep it from sticking where you don’t want it.
Then adhere the transfer tape to the vinyl by going over it with the Cricut scraper.
Peel the vinyl with the transfer tape off of the mat. The transfer tape helps to keep the vinyl from curling too much which makes it easier to put down straight on the chalkboard.
3 | Draw The Text On The Chalkboard
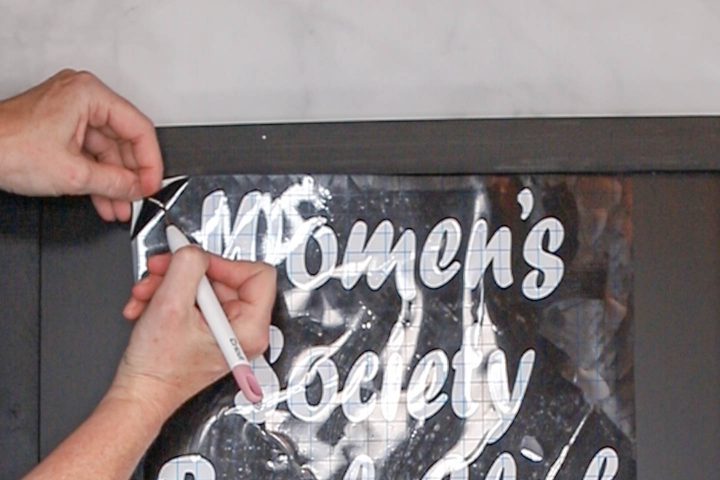
Layout the two halves of the stencil on your chalkboard, making sure they are centered.
Cut off any of the edges that overlap the sides of the chalkboard. This helps to keep the stencil laying flat on the board.
Peel the backing off the vinyl.
Tip: The easiest way to separate the vinyl from its backing is by using the weeding tool to lift a corner of the vinyl away (like you did with the letters above).
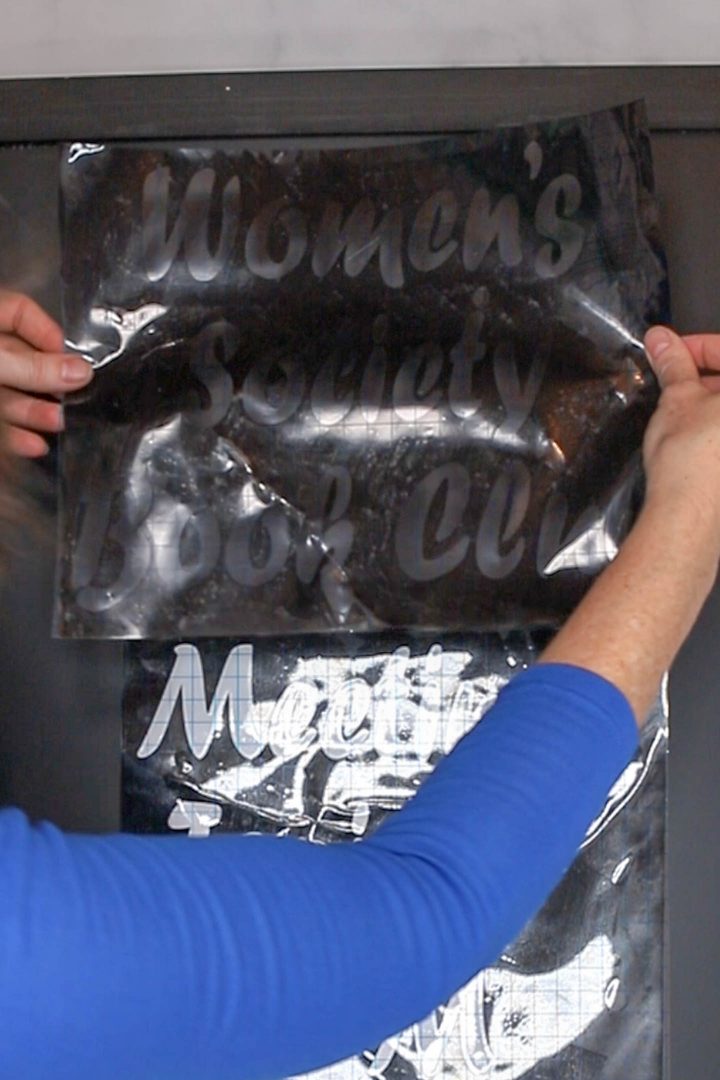
Stick the vinyl to the chalkboard making sure that it is centered, and that you have the words in the right order.
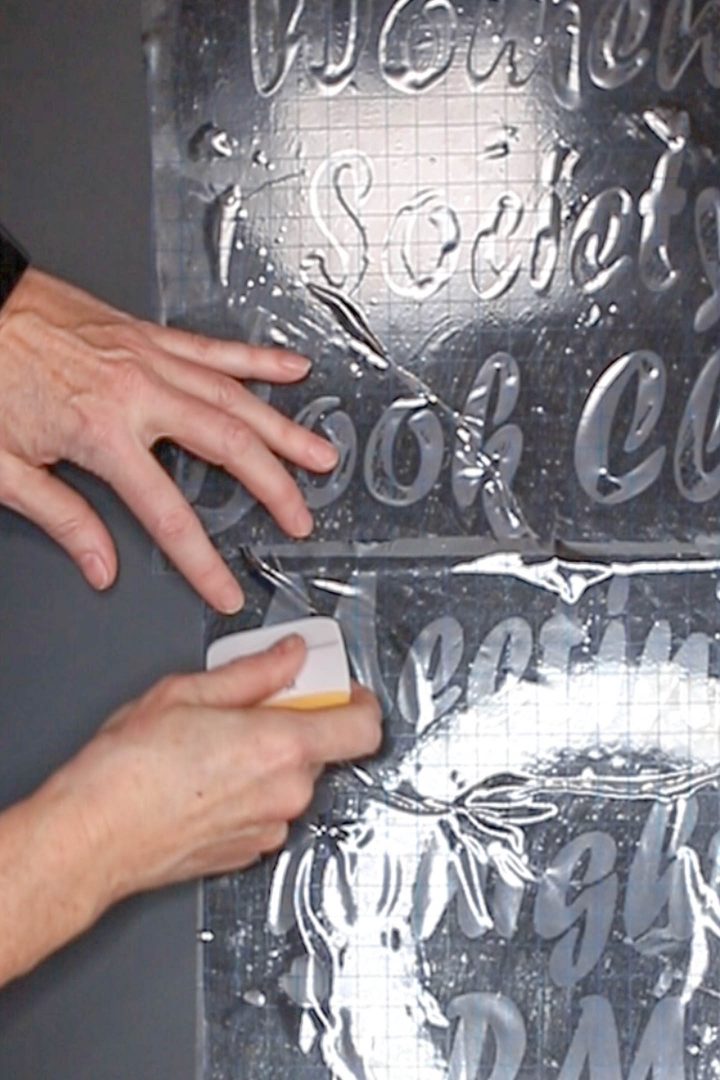
Use the Cricut scraper to make sure the vinyl has stuck securely to the surface (especially for the small pieces like the middle of letters).
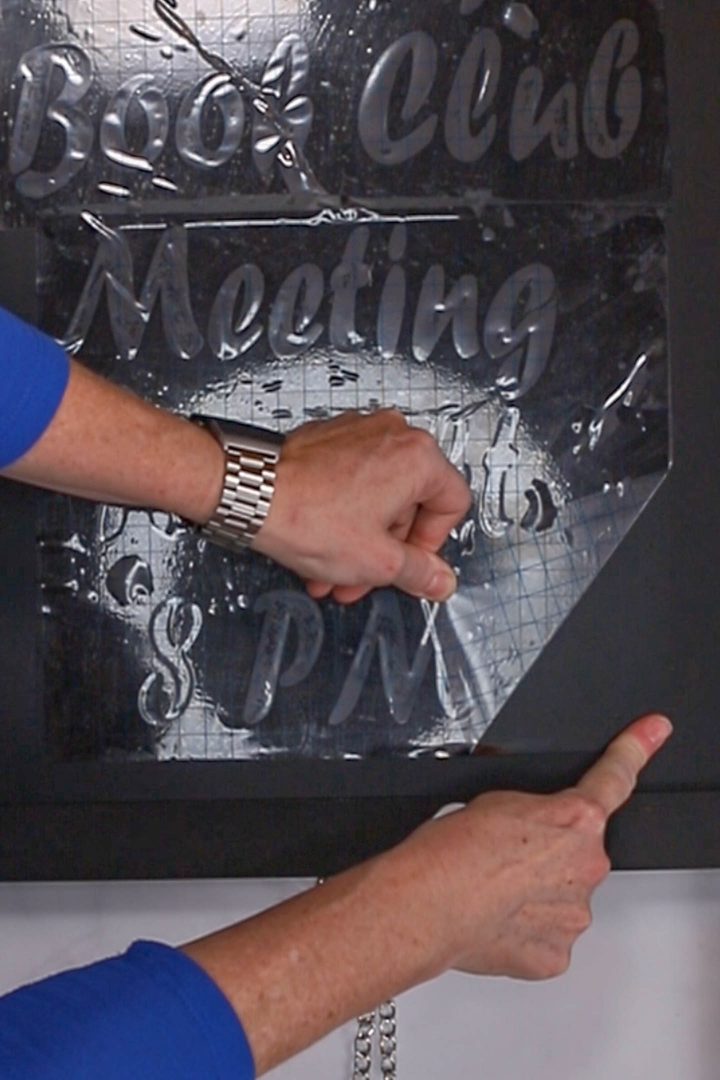
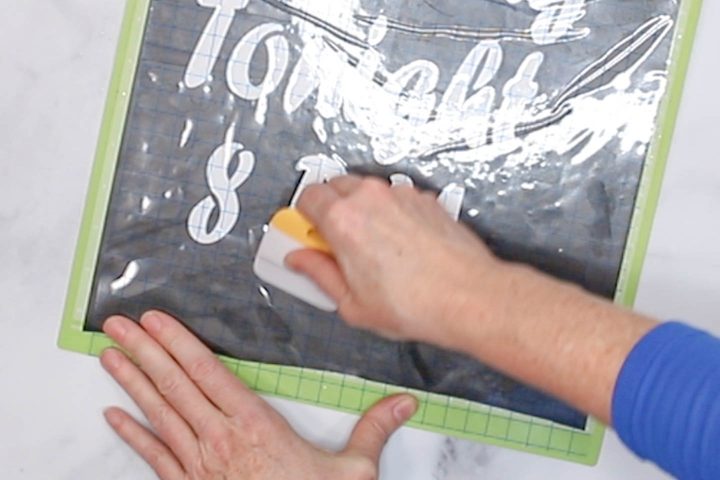
Carefully peel off the transfer tape by starting in a corner and slowly pulling it straight back.
If any pieces of the vinyl come up with the transfer tape, put the transfer tape back down and go over the area with the scraper. Then continue to remove the transfer tape.
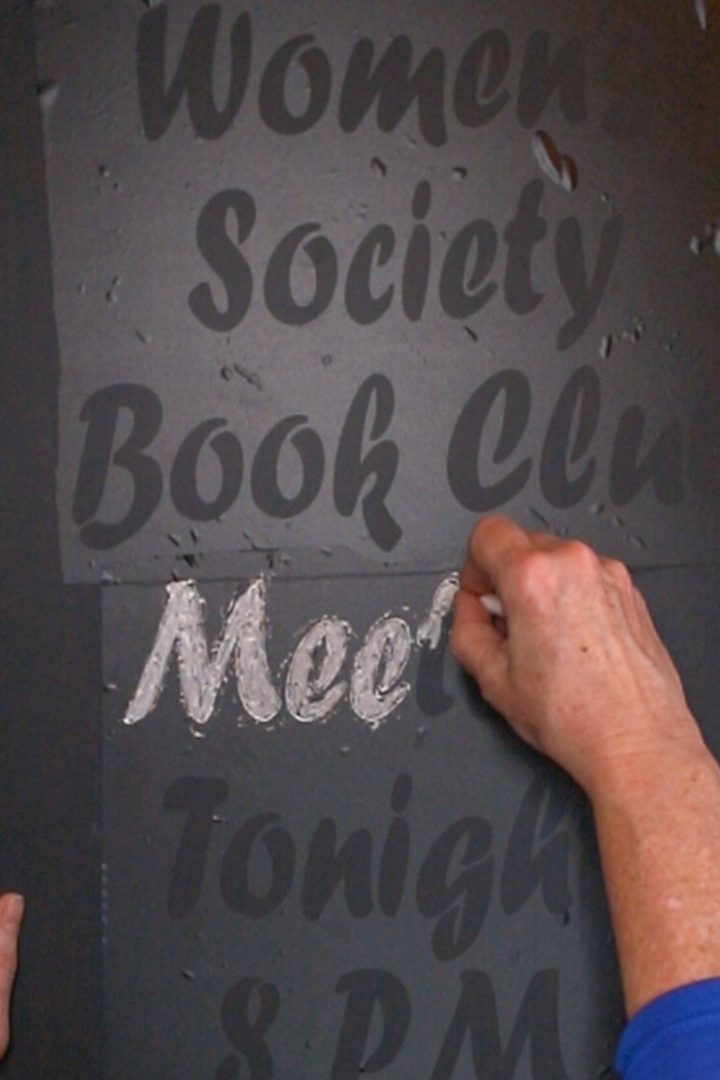
Use chalk or a chalk marker to fill in the letters.
(I used both on this board so you can see the difference…see the picture below…)
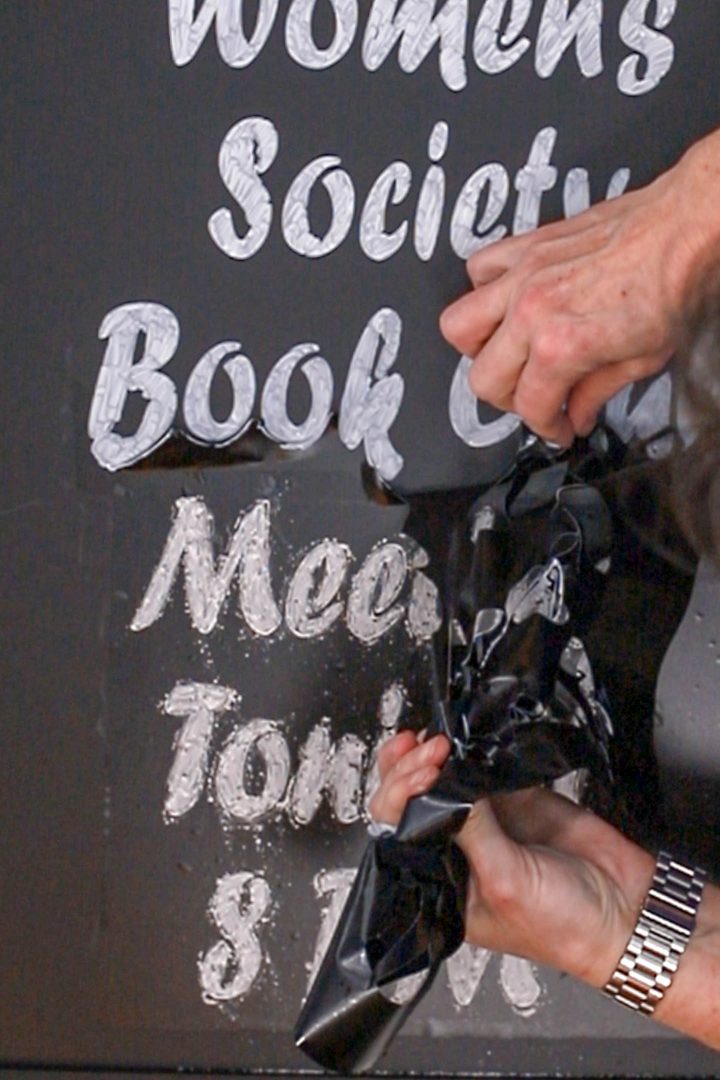
Peel off the vinyl, remembering to remove all of the small bits that may stay behind.
Should I Use Chalk Or Chalk Marker?
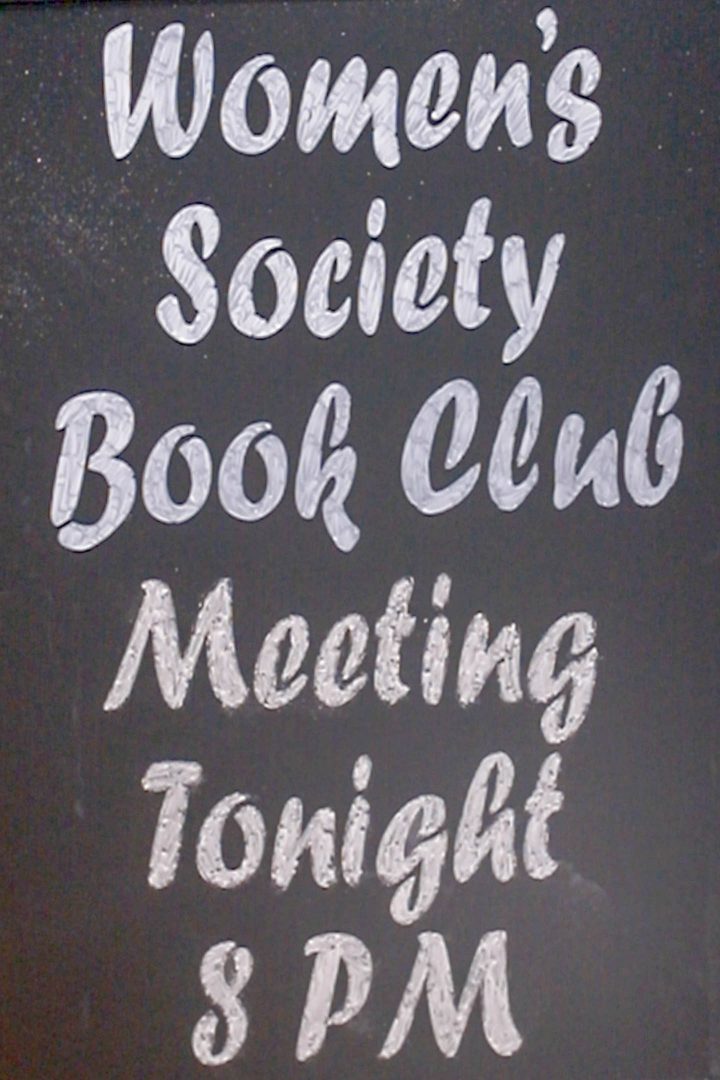
You can see the difference between the chalk marker and regular chalk in this picture.
The top 3 lines are the chalk marker and the bottom 3 lines are regular chalk.
Chalk Marker Pros and Cons
The chalk marker has cleaner lines and sticks better (it can take a little rain and not be washed off). However, if your chalkboard is porous, it also may not wash off cleanly.
If you’re starting with a brand new board, try writing on it with regular chalk first and then erasing it so that you spread the chalk dust all over the board. This can make it easier to remove the chalk marker later.
If it still won’t totally come off, wash the board with soap and water so that you remove any dirt and left over chalk dust. Then give it a coat of chalkboard paint and it will look brand new again.
Regular Chalk Pros and Cons
As I’m sure you know, regular chalk is very easy to wipe off using a cloth or chalkboard eraser.
Which is a pro and a con.
If you need to store the chalkboard before your party or display it outdoors, there’s a pretty good chance some of the chalk will get smudged or removed at some point.
So if you want a make-ahead project that lasts, regular chalk probably is not the right option for you.
However, if you’re really concerned about being able to erase your design. Or you need to change up the text regularly, then chalk is probably the way to go.
The Finished Chalkboard Sign
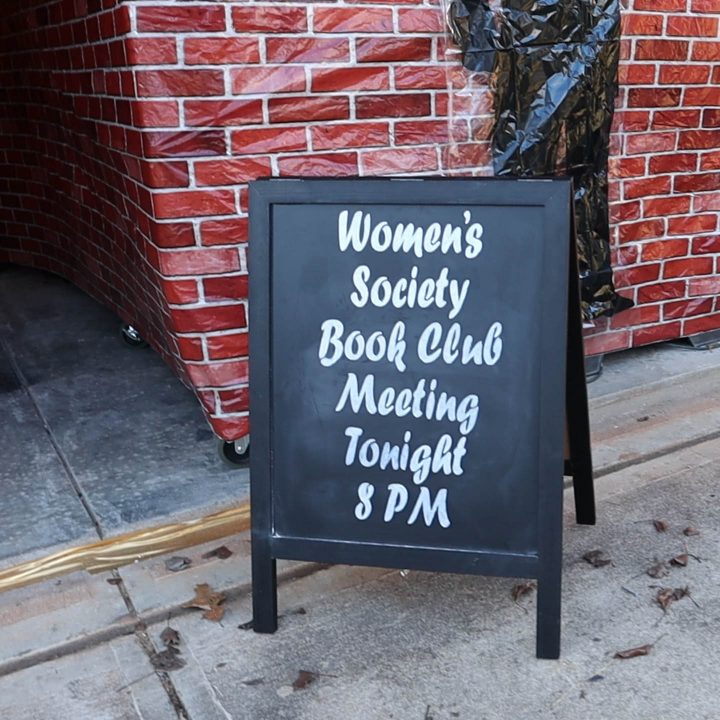
Since I wanted to make sure my sign was going to stand up to the weather (it did rain the night of my party), I went with the chalk marker approach.
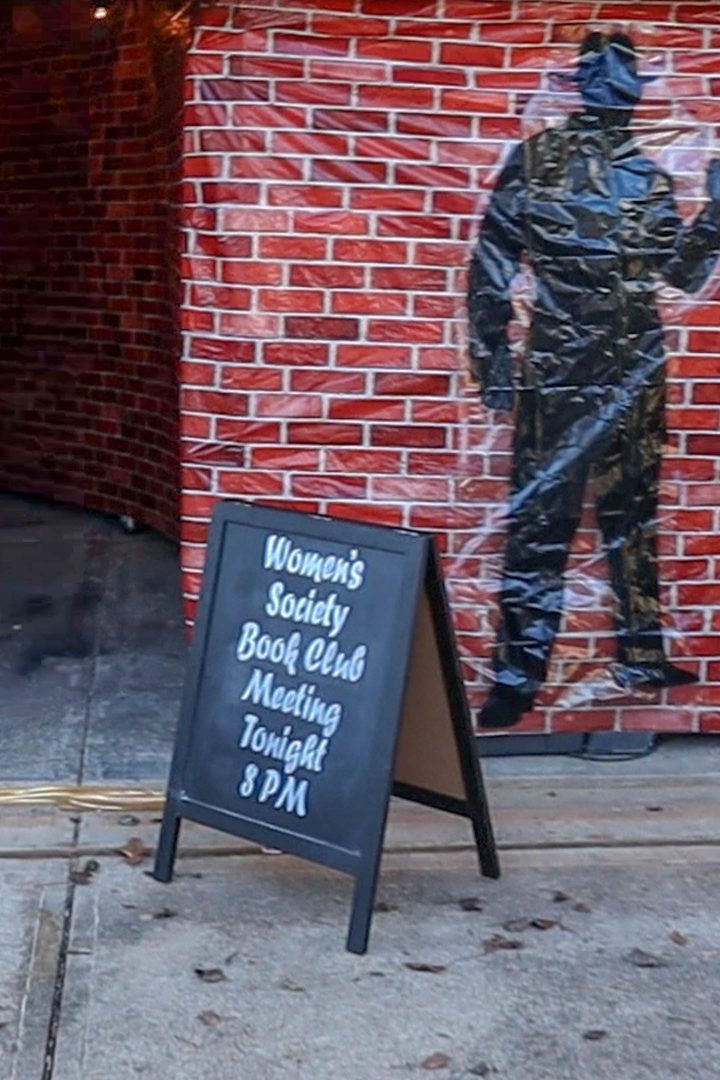
And the sign definitely added to my speakeasy “hidden entrance” vibe I was going for.
Other Roaring 20’s Party Ideas You Might Like
Have comments or questions on our DIY speakeasy party chalkboard sign? Tell us in the section below.
This post was originally published on December 15, 2019 but was updated with new content on April 15, 2024.