
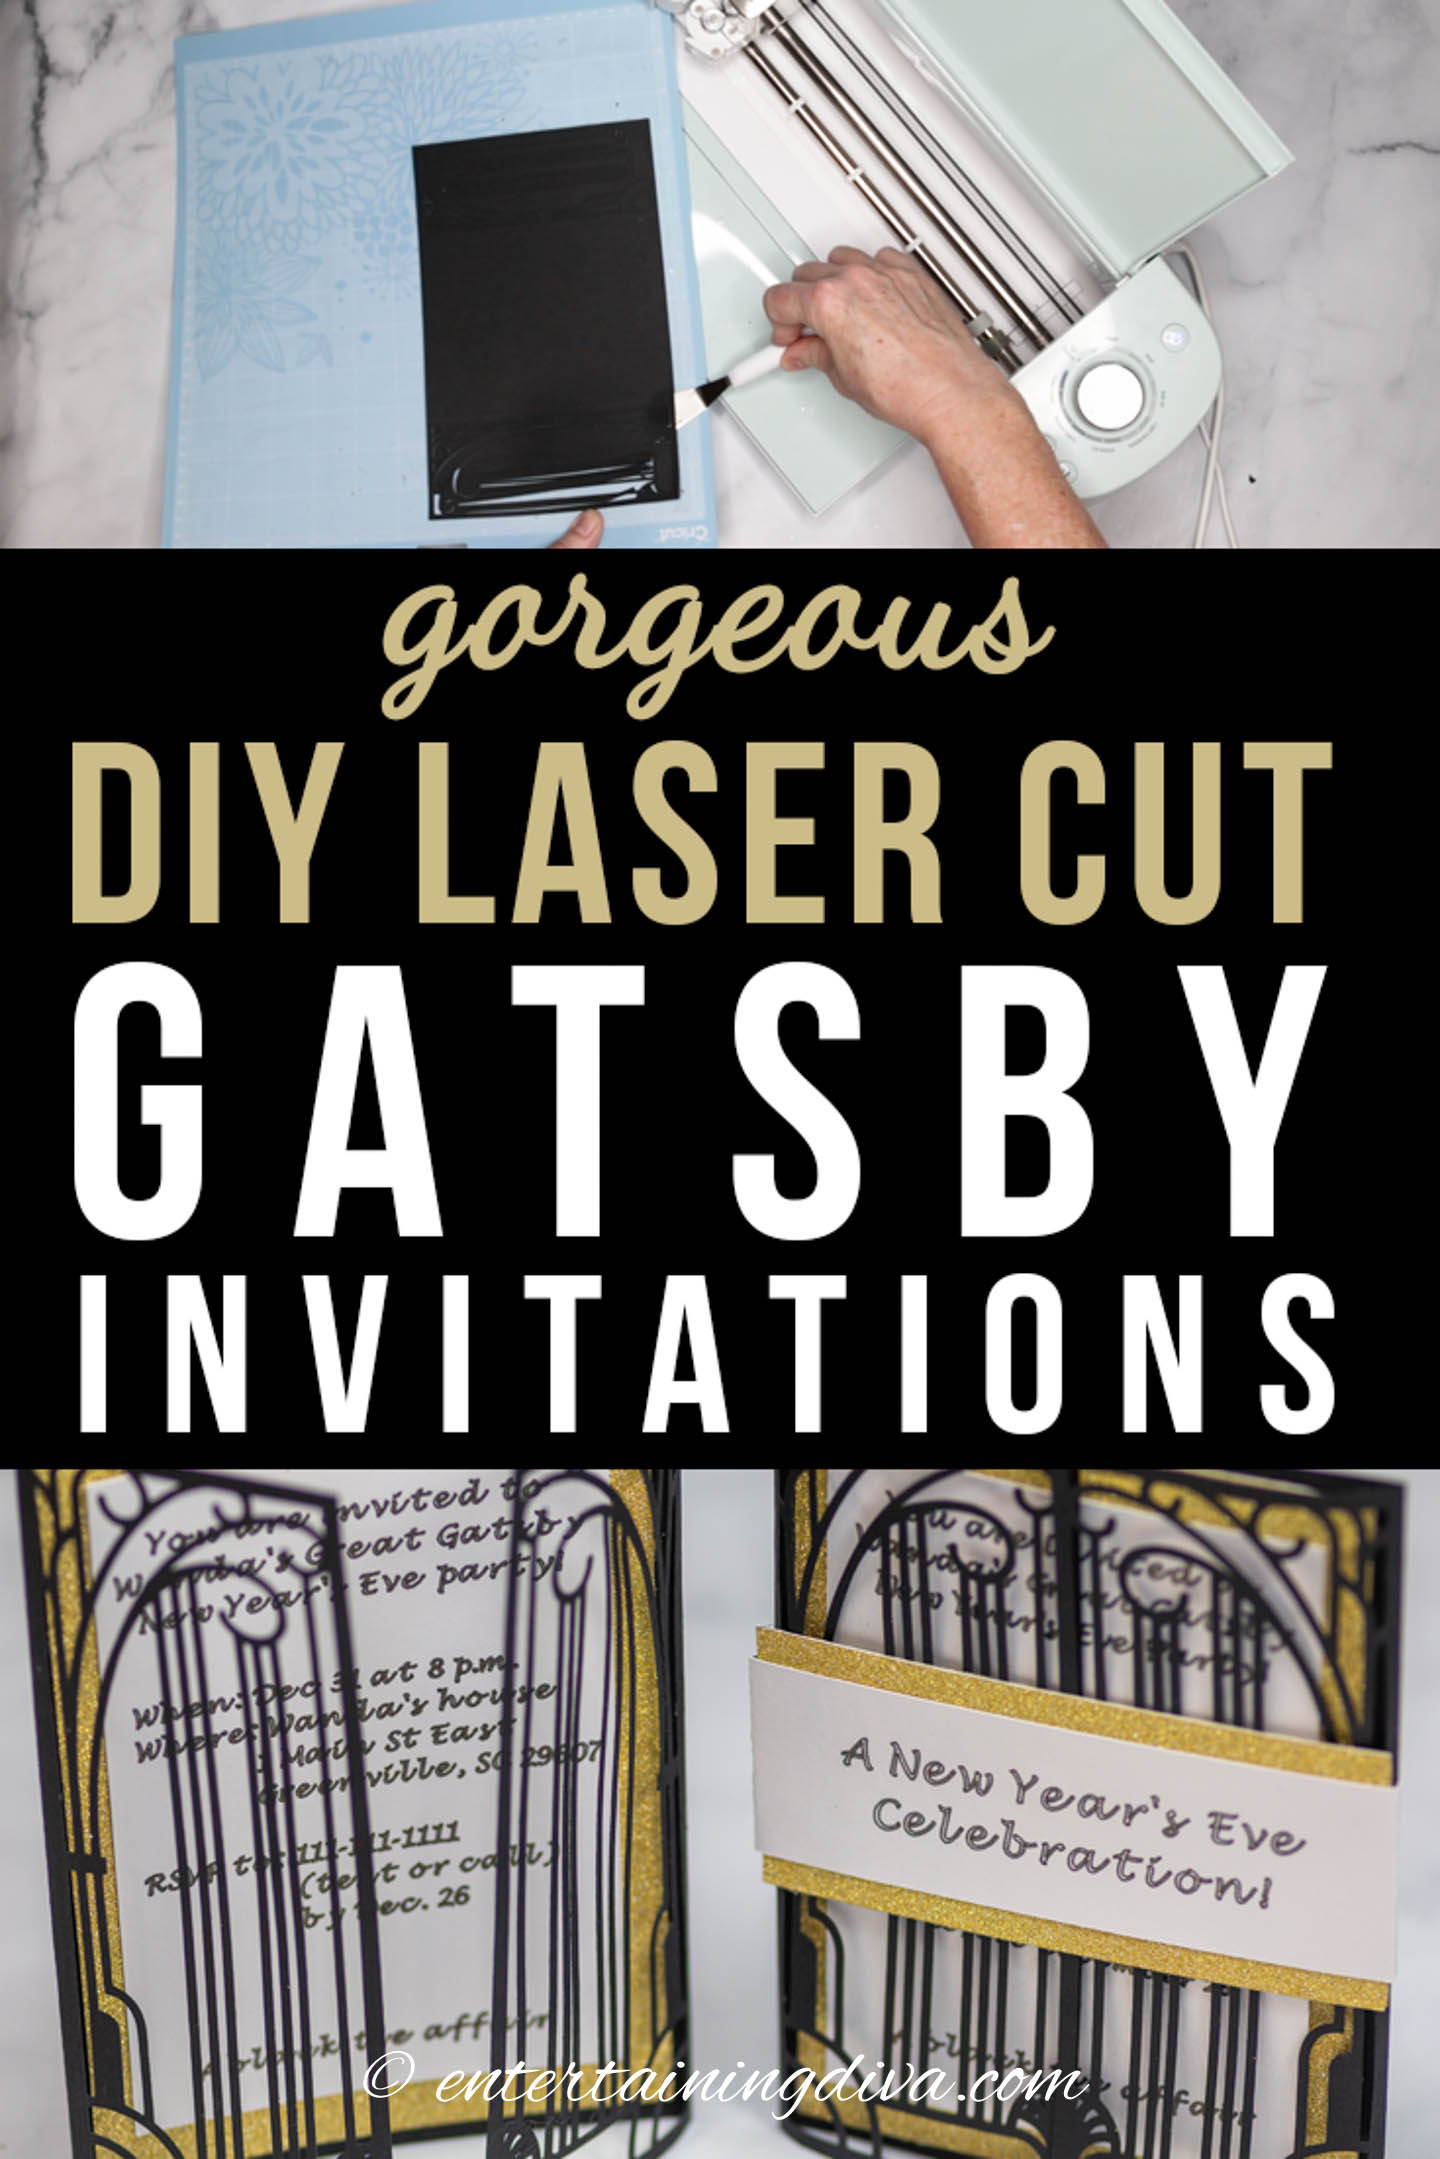
DIY Laser Cut Gatsby Party Invitations
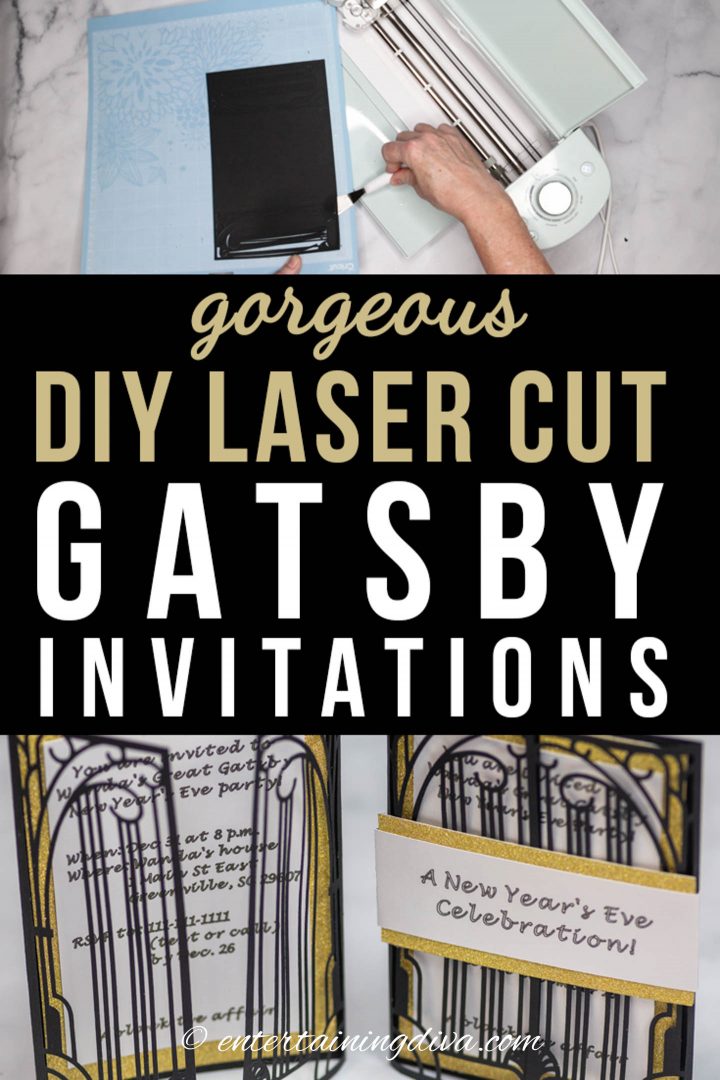

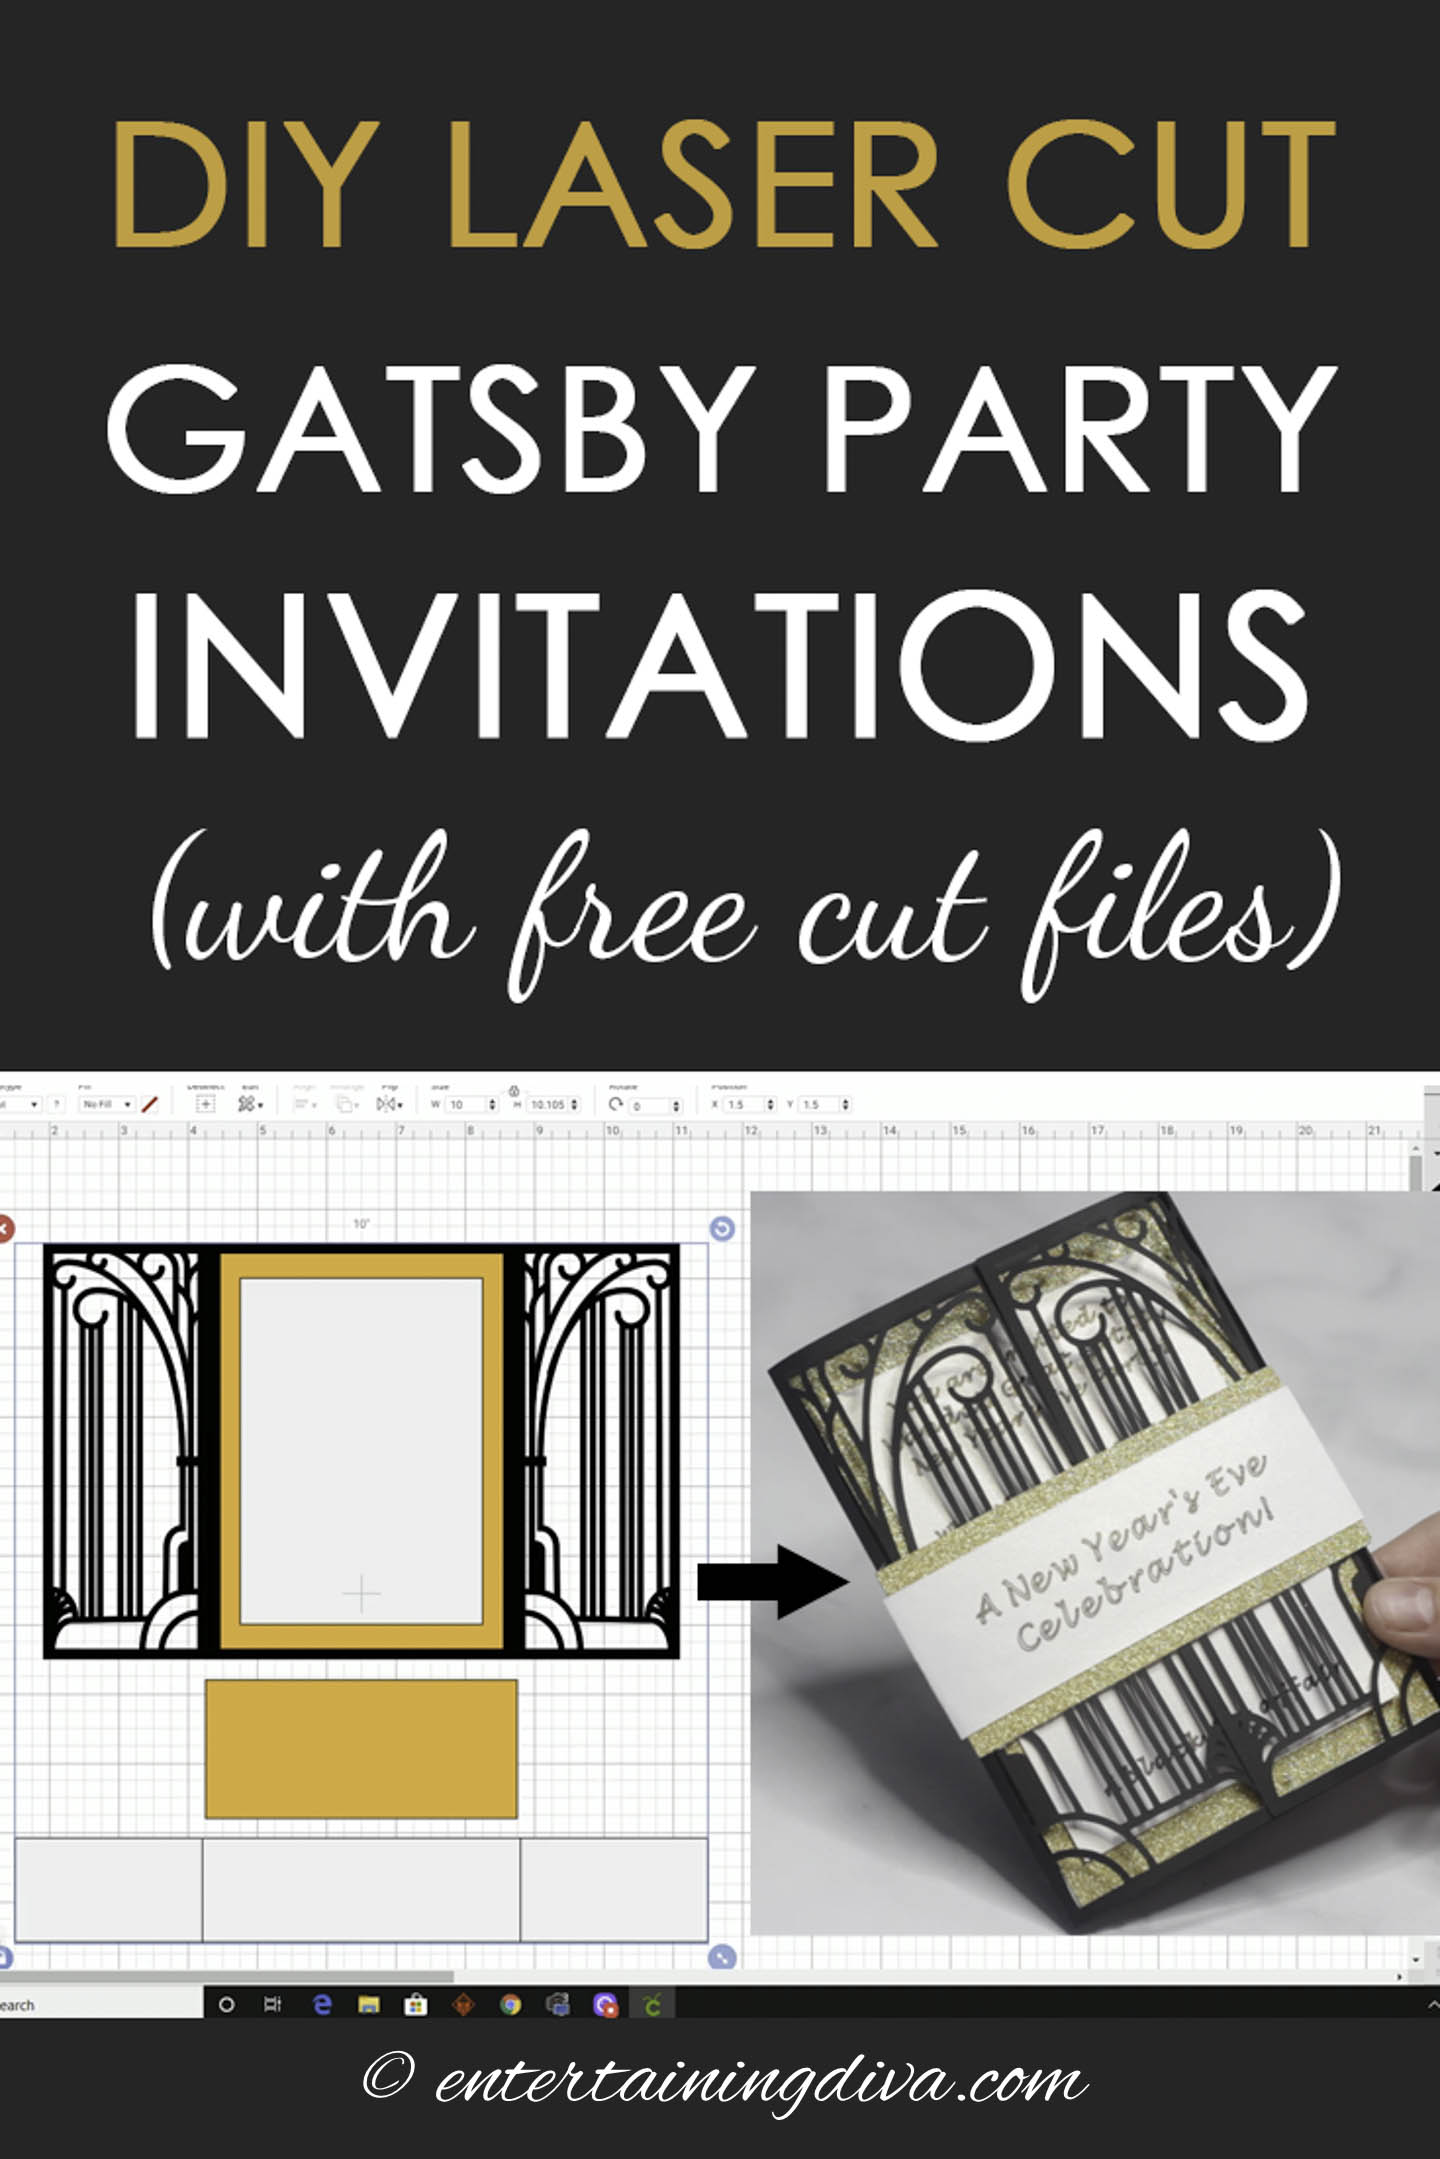
This black, white and gold 1920’s party invitation template has an Art Deco style and looks just like the laser cut invitations that are so popular these days. The difference is that you can make these DIY laser cut Gatsby party invitations at home on your Cricut and customize the wording for whatever event you are having.
Laser cut party invitations are a really pretty way of letting people know about your upcoming event.
However, they can be really expensive to buy.
So I decided to make my own design that’s a gate-type invitation with an Art Deco style…and you can cut it on your Cricut machine.
They are a little time consuming to make, but look at lot more expensive than they are.
To find out how to make our DIY laser cut Gatsby party invitations, you can either watch the video or read the instructions (with pictures) below.
Supplies
Files
To start this 1920’s party invitation, you’re going to need to get the template file(s) from our resource library.
If you’re already a subscriber to our newsletter, you’ll find the password for the resource library at the bottom of every email. If you don’t have a password yet, you can request one by signing up below.
Materials
- White shimmer cardstock*
- Gold glitter cardstock* – you could probably use lighter cardstock than this one, and it doesn’t need to be double-sided. This is the one I used because I already had it on hand.
- Black cardstock*
- Glue stick*
- (optional) Repositionable spray adhesive* – this is only necessary if the gold glitter cardstock won’t stick to the mat (like mine did).
Equipment
- Light grip mat*
- Strong grip mat*
- (optional) Cricut scoring stylus* (for the Cricut Explore) or the Cricut scoring wheel* (for the Cricut Maker) – Scoring the invitation makes it easier to fold, but you can make the design without this if you don’t have a scoring stylus.
- (optional) Cricut 0.4 mm black pen* – A pen is only required if you want the Cricut to write the text of your invitation. It’s very slow, so if you’re doing a lot of invitations, you will probably want to print this part. See the directions below for more details.
- Cricut spatula*
- Cricut fine-tip cutting blade – This is the standard one that comes with the machine
- Cricut machine* – Mine is a Cricut Explore Air 2, but you can use any type of Cricut (or other die-cutting machine) for this project
How To Make The Gatsby Party Invitation
1 | Upload And Ungroup The Cut File
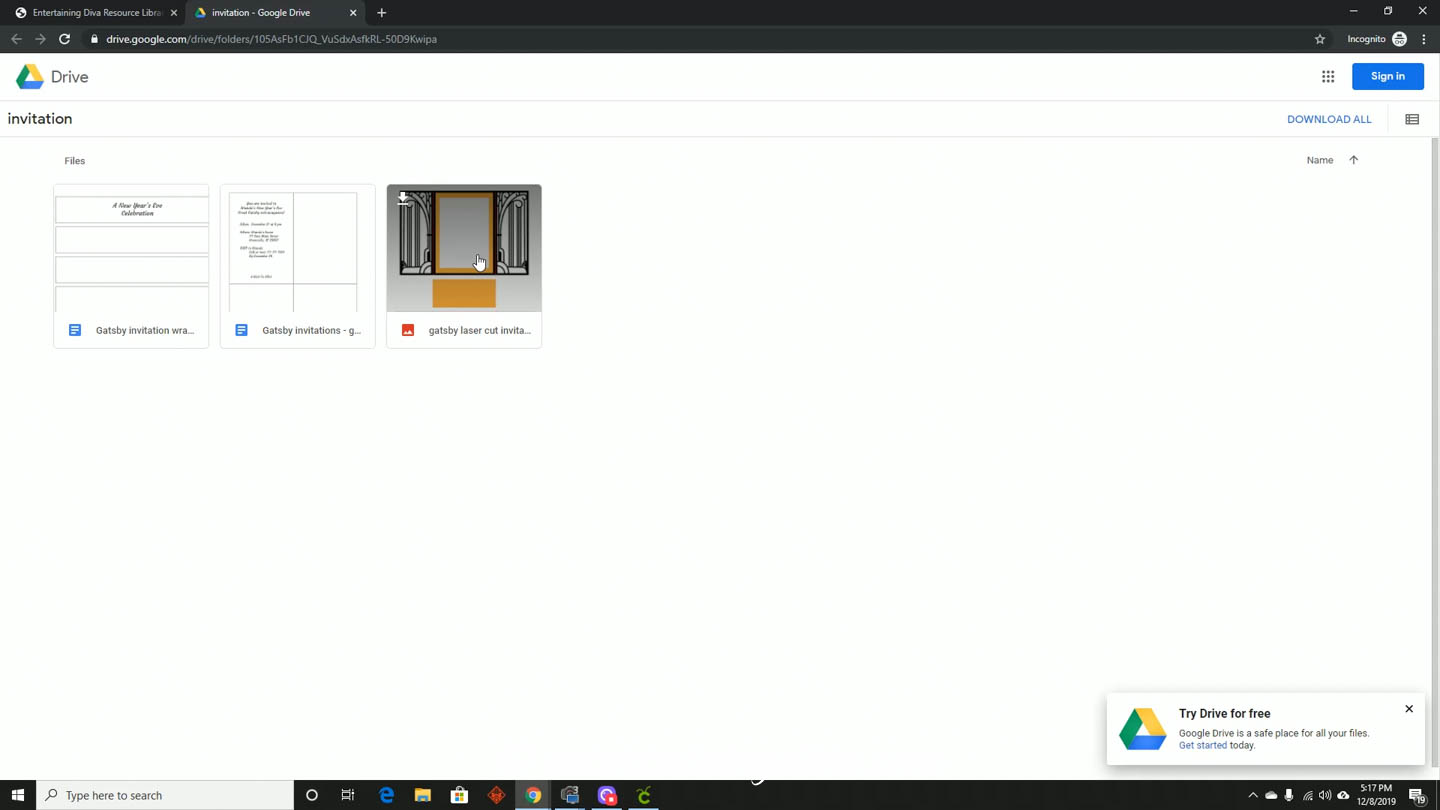
Get the DIY laser cut Gatsby party invitations .svg file from our Resource Library (it’s the one that displays the images of the cut layers).
Open a new project in Cricut Design Space.
Upload the file to your project (if you’re not sure how, click HERE to see our tutorial on how to upload files to Cricut Design Space).
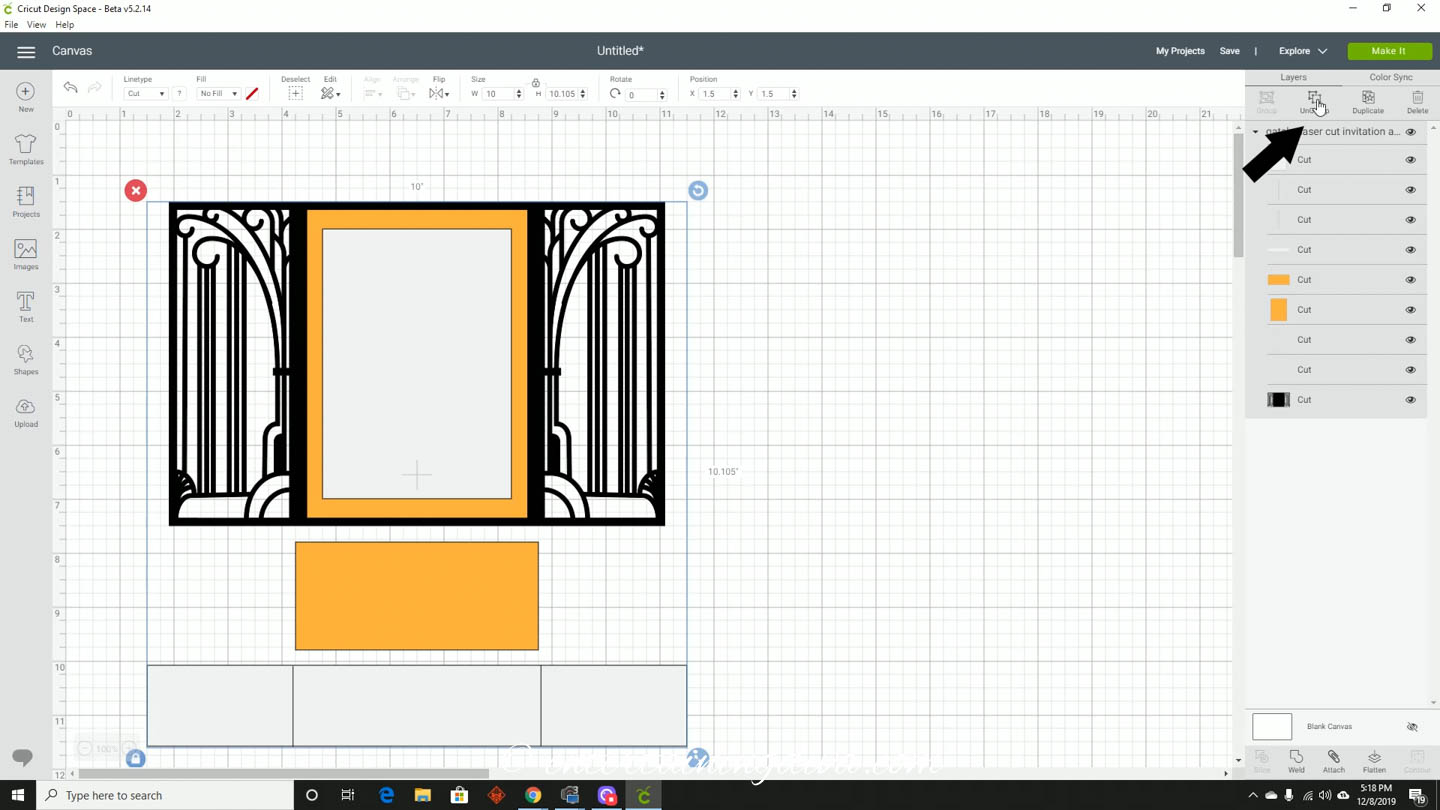
Then go to the Layers panel on the right hand side of the screen and click Ungroup.
Note: These invitations are made to fit A6 (4 3/4″ x 6 1/2″) envelopes. If you wish to change the size, you can make the design bigger or (a little) smaller in Cricut design space by re-sizing the image before you ungroup it. Don’t go too much smaller or you’ll have trouble getting clean cuts because of the small spaces.
2 | Update The Score Layers
Now we need to convert four of the cut layers into score layers. (If you’re not sure how to do this, click HERE to read our instructions on how to create score lines).
Note: If you are not using the scoring tool, you will need to delete these layers instead of updating them.
The first 2 are near the top and have vertical lines for the image.
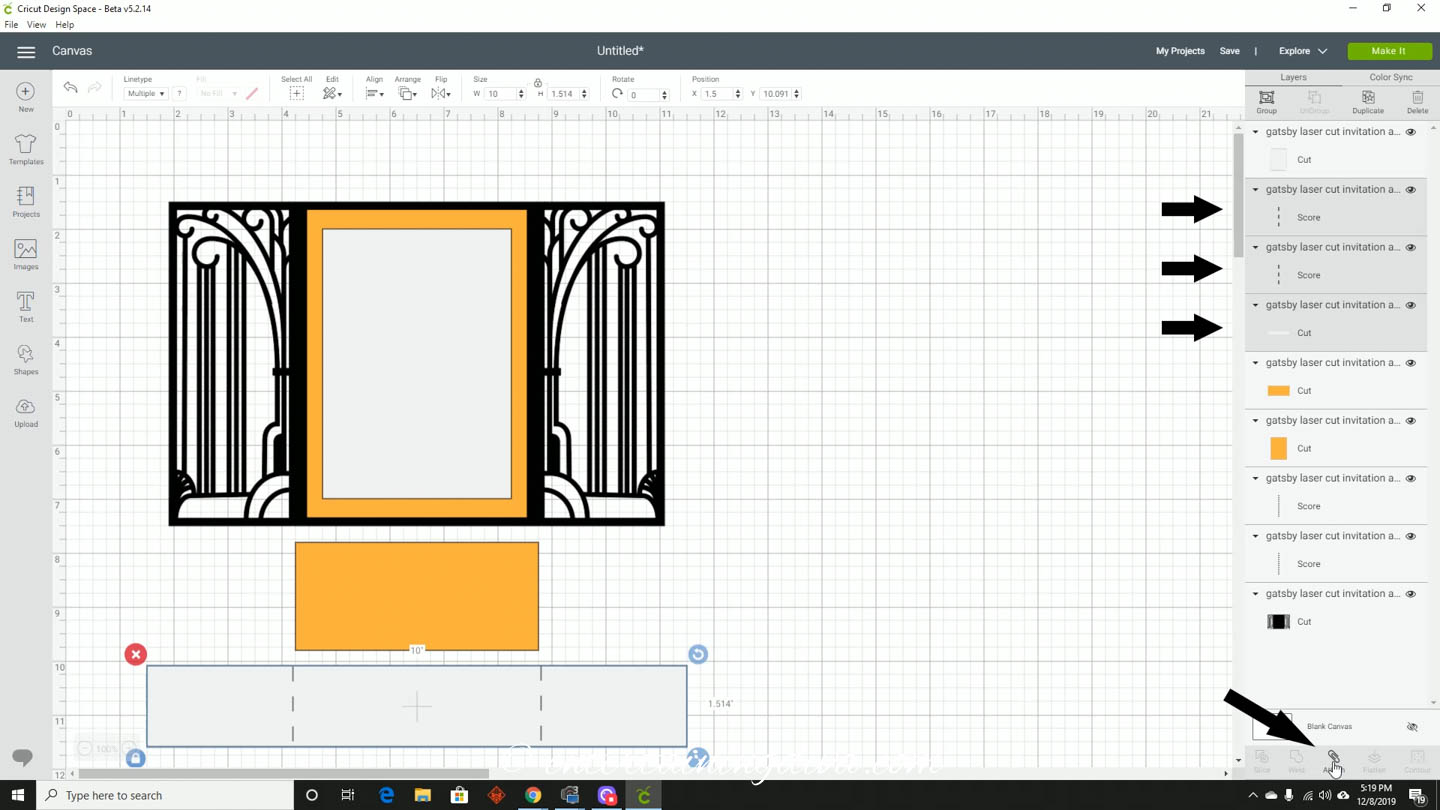
Convert them to the “Score” line type, and then attach them to the wide white rectangle layer that is immediately below them.
The next 2 are near the bottom and look like they don’t have an image associated with them.
Convert them to the “Score line type, and then attach them to the black cut layer located immediately below them.
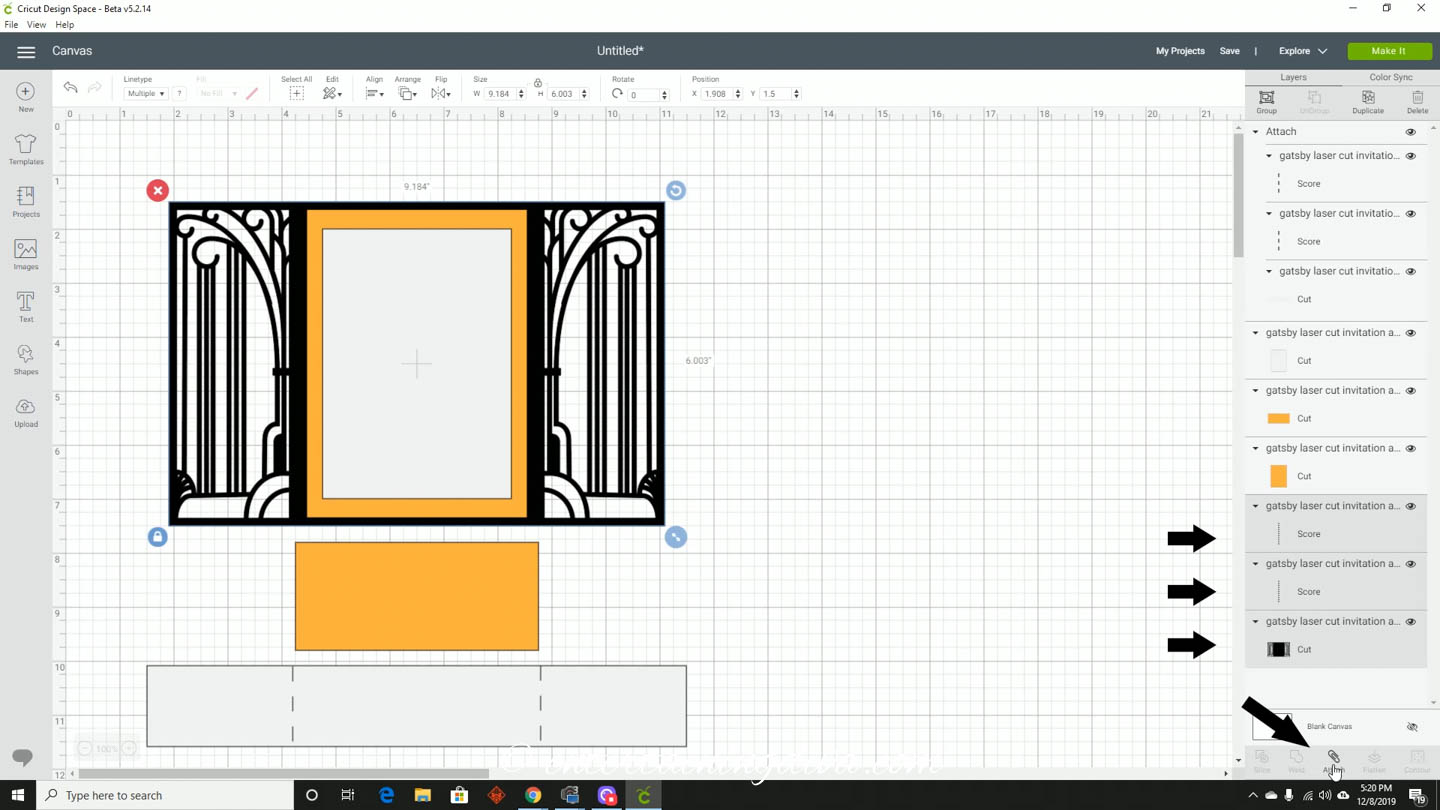
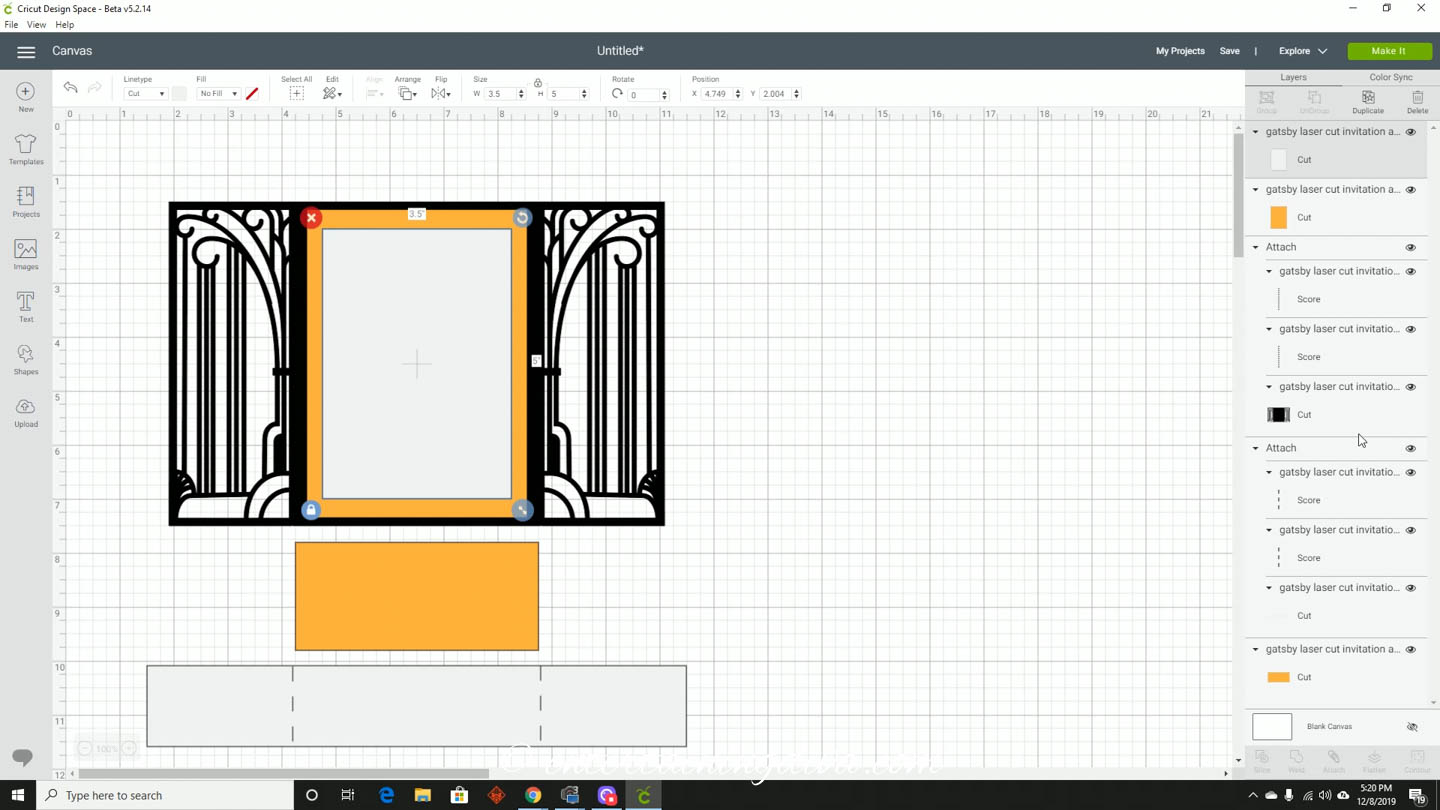
Once you’ve done that, you’ll notice that the gold and white rectangles which were in the middle of the black invitation have disappeared from view.
Bring them to the front to make them show up. To do this:
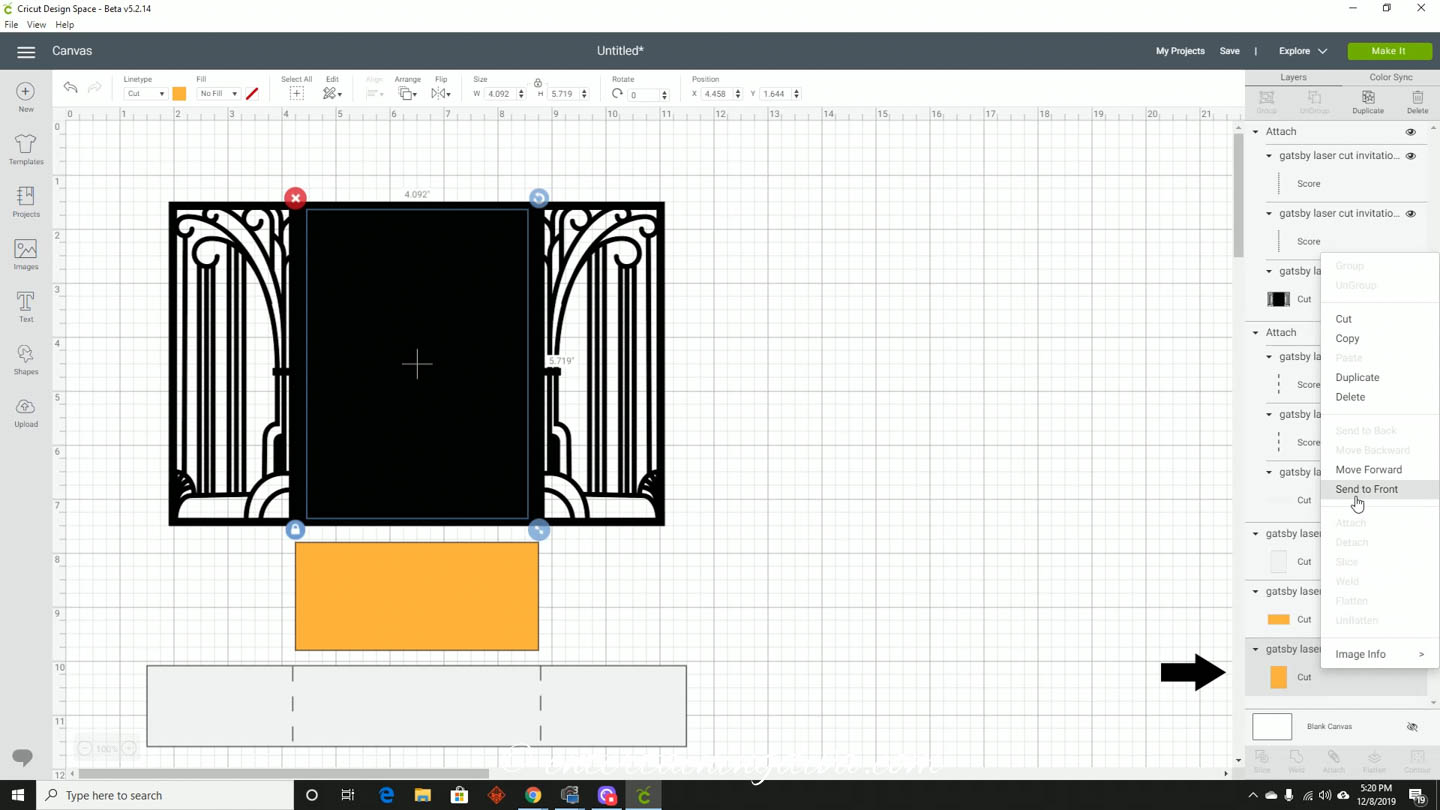
- Right click on the gold rectangle layer and select Send to front from the popup menu
- Then do the same for the white rectangle layer.
3 | Write The Text
If you’re not sure what to include in the text of your invitation, see our guide to party invitations for more information.
With The Cricut
If you decide to have the Cricut write the invitation text for you, be aware that it is very slow (it took 12 minutes to write one invitation for me).
But it does look very pretty…like a hand-written invitation.
To do this:

- Add the text that you want to include in your invitation. Make sure that it is small enough to fit inside the white rectangle in the invitation.
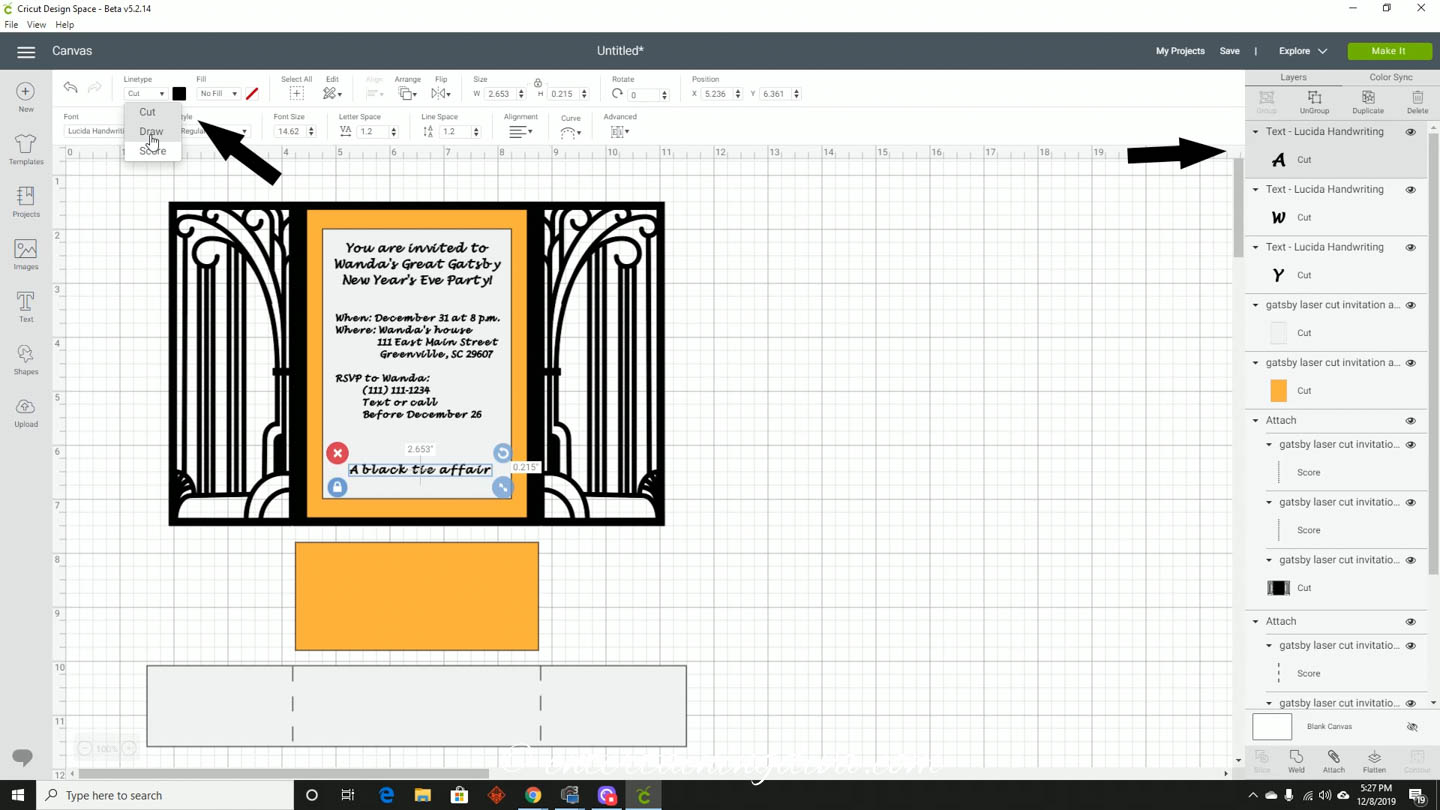
- Convert the text to a “Draw” line type.
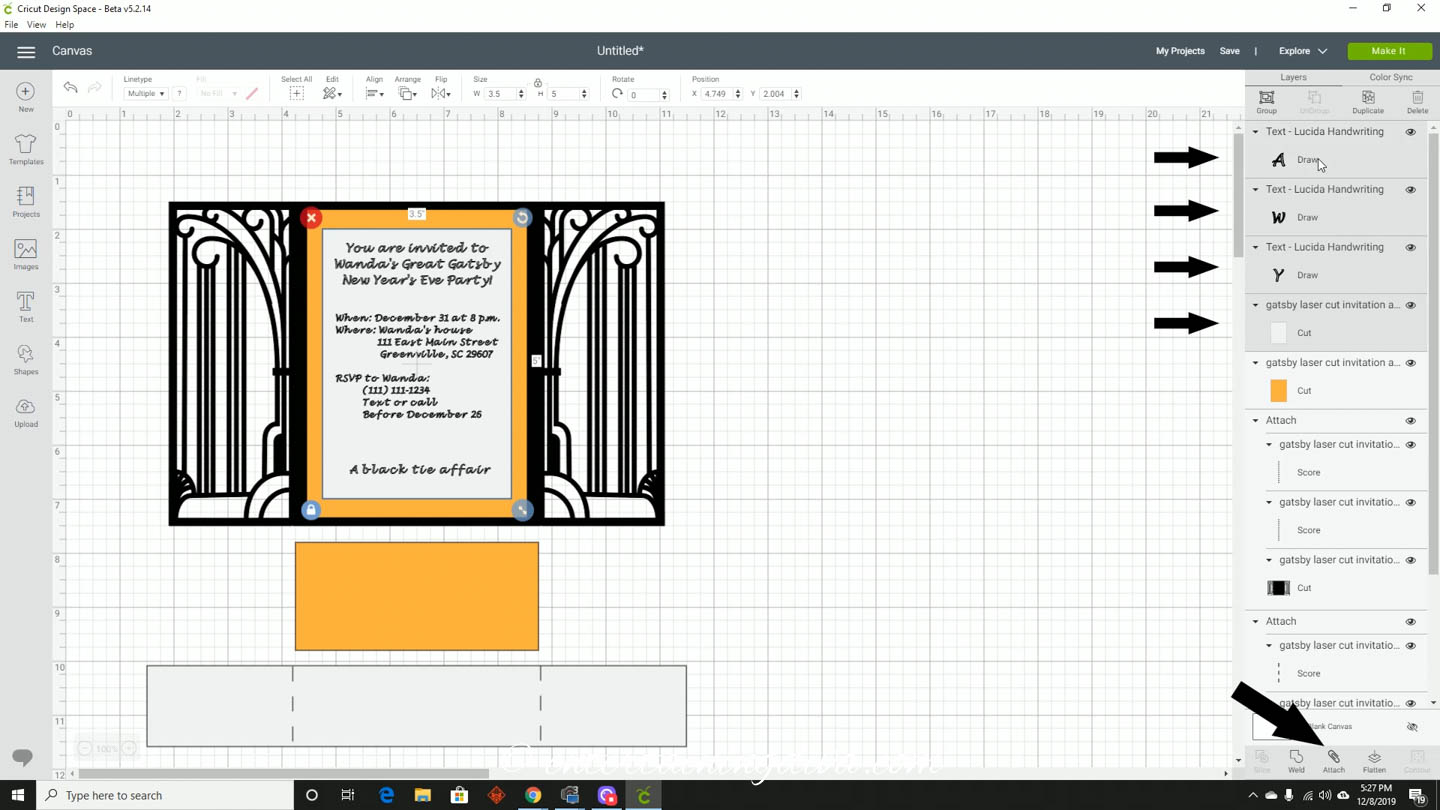
- Attach the text layers to the the white vertical rectangle that is inside the invitation (since that’s where we want it to be written).
You can also use the same process to add some text to the middle of the wide white rectangle. This is the wrapper that goes around the outside of the invitation, so the text here will be seen by your guests before they open the invitation.
If you decide to do this, keep the text inside the score lines to prevent it from wrapping around to the back.
With A Printer
The two white layers in the cut file are mainly there for the Cricut to write on.
So if you are going to print the text on either (or both) of these files with your printer, you can delete them from your Cricut project (you won’t need them there).
To print the text of your invitation with a printer, you will need to go back to the Resource Library.
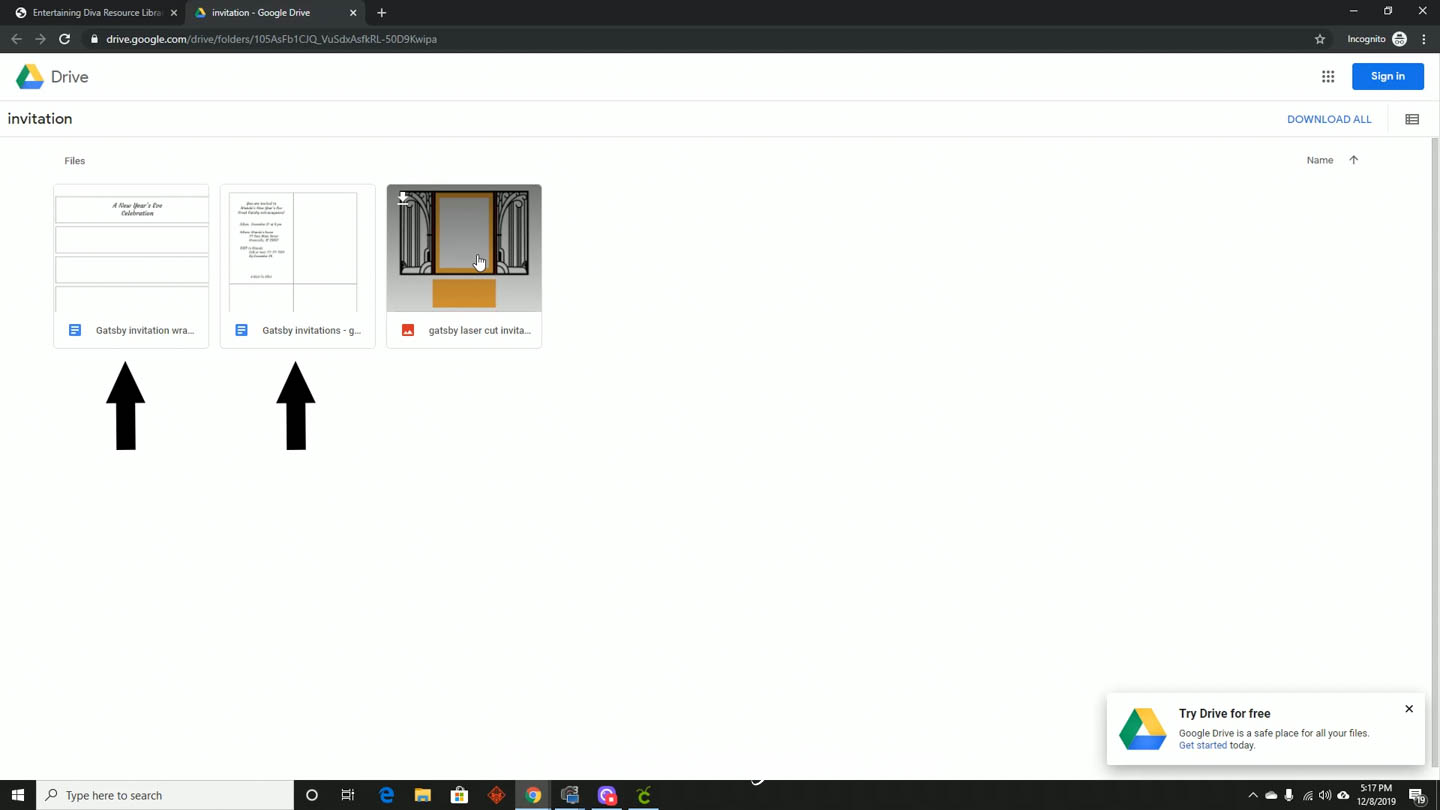
Open the two google docs files — one is for the insert in the invitation, and the other is for the wrapper.
Login to your google or gmail account (or create one if you don’t have one), and make a copy of the files.
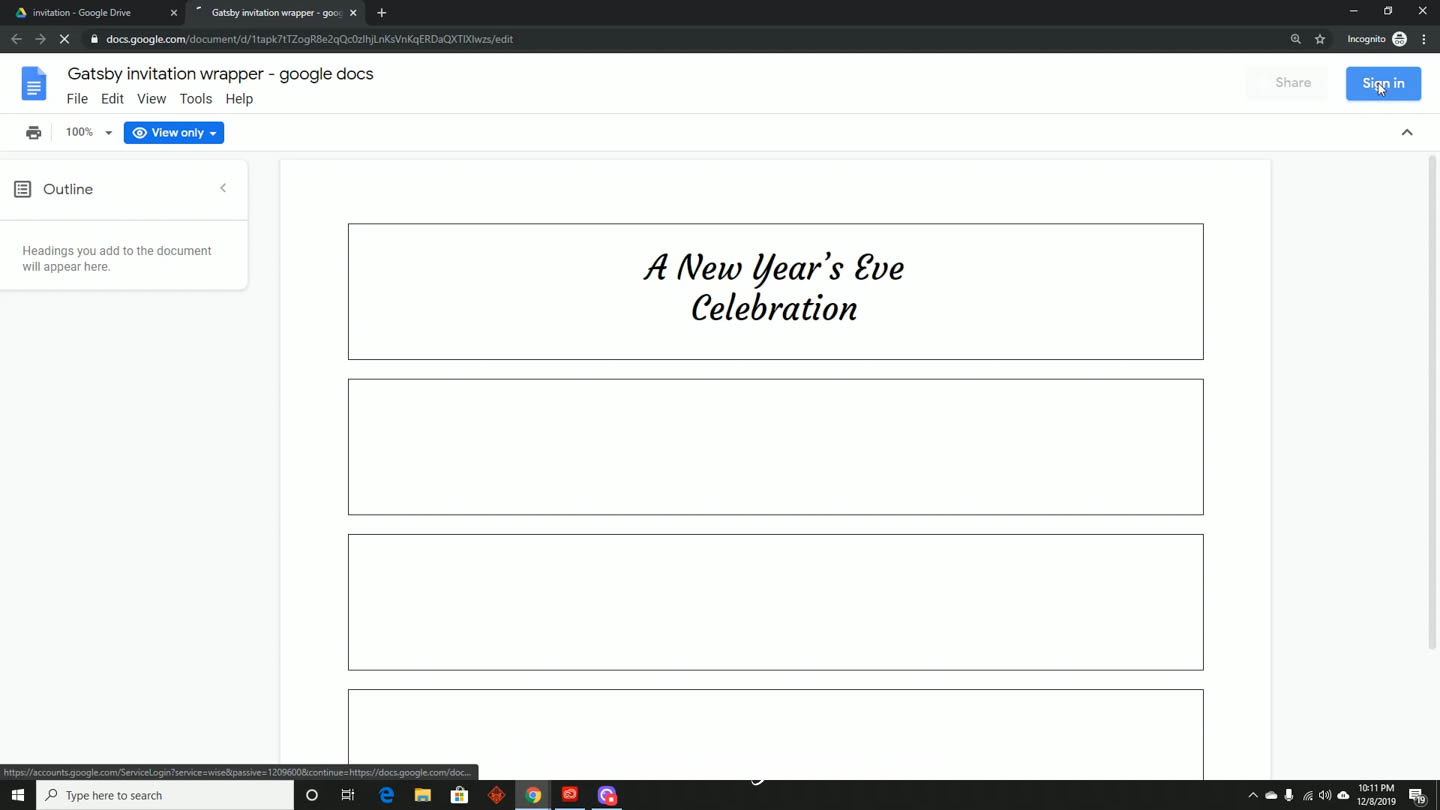
Then you can edit them however you would like.
Copy and paste the finished invitation text to each of the four boxes on the page.
Print with your printer.
Cut out the four boxes just inside the lines and they’re ready to use for your project.
4 | Cut The Layers
Now we’re ready to cut!
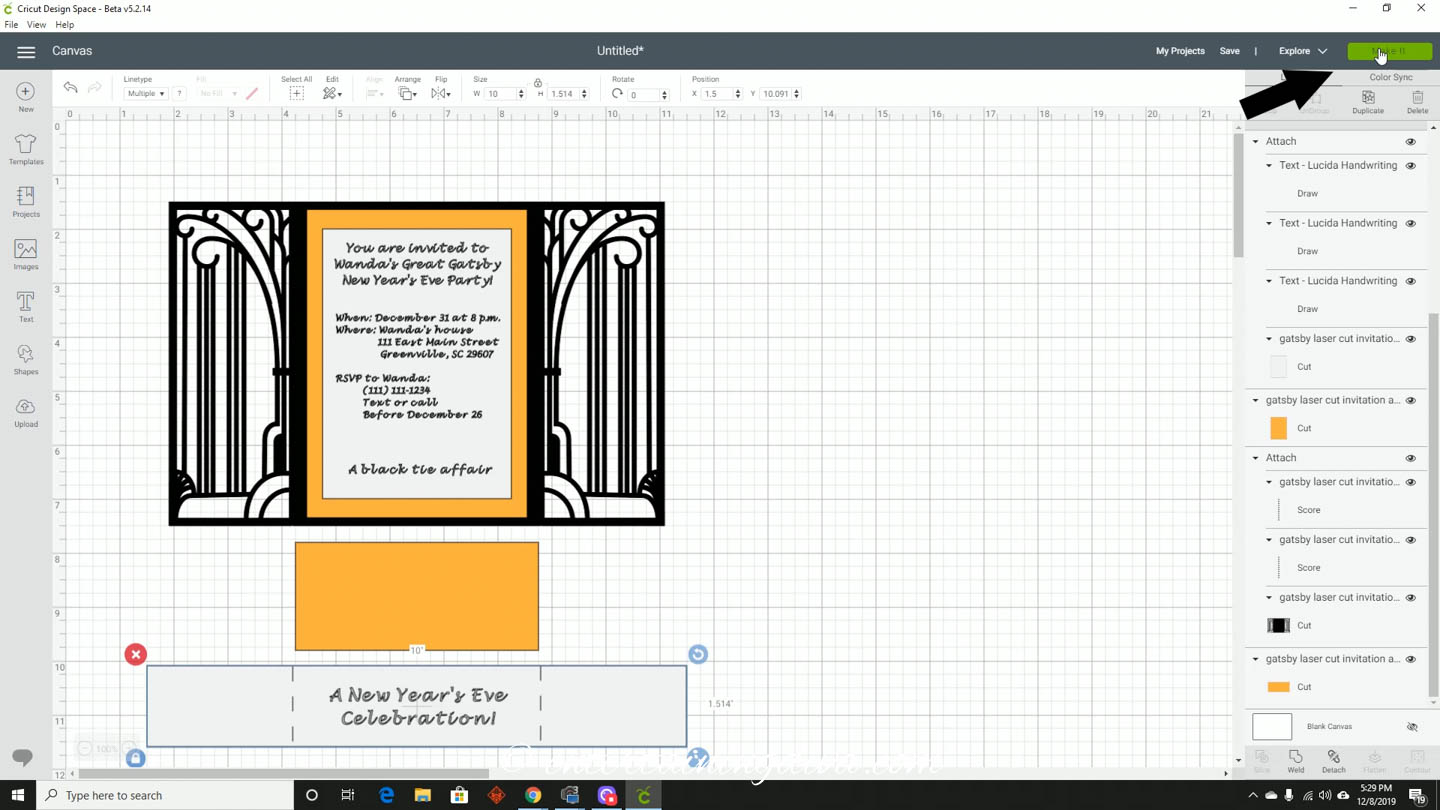
Click Make It in the top right hand corner of your screen.
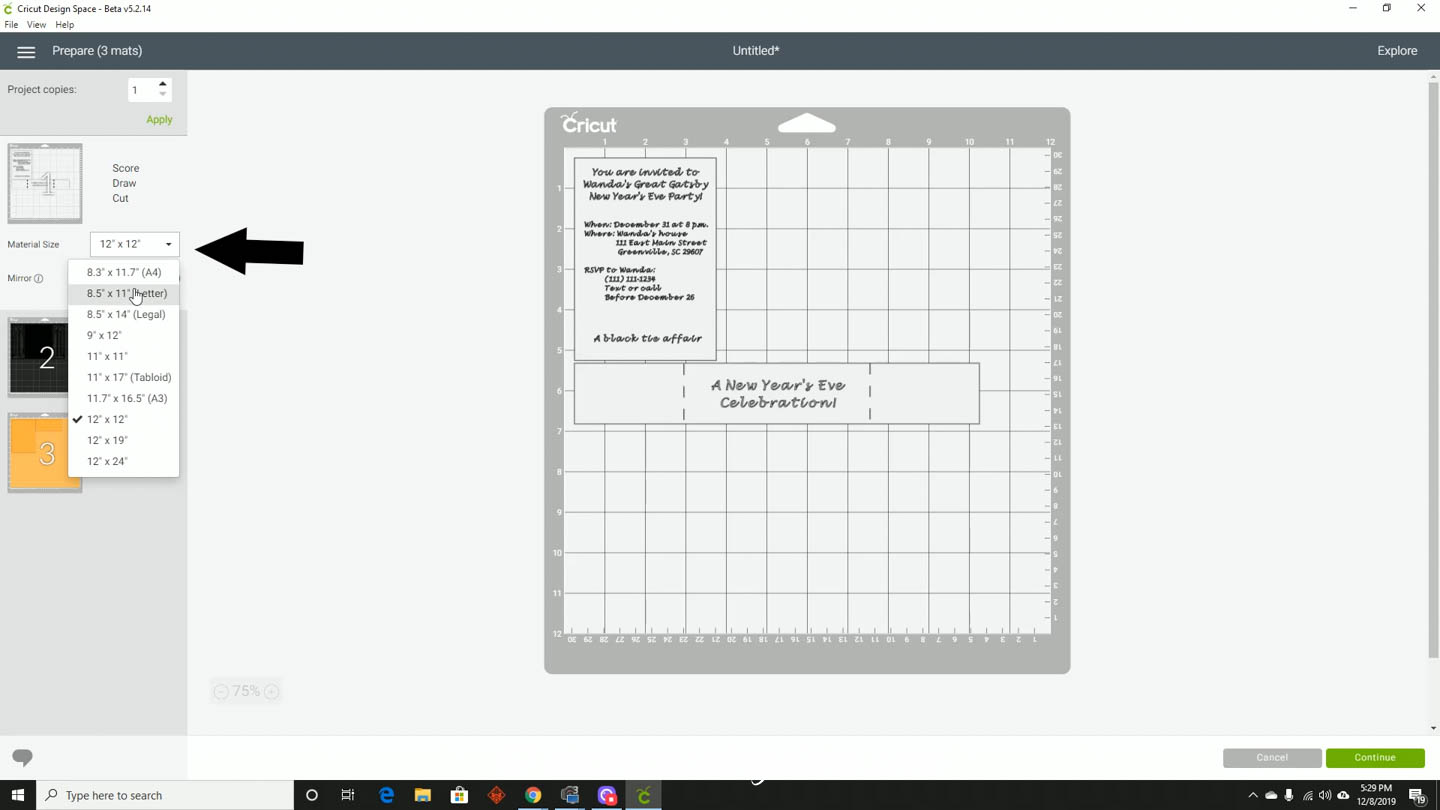
Make sure that you select the right size of paper for each of the layers. Mine were all 8 1/2″ x 11″ sheets so all three colors needed to be adjusted.
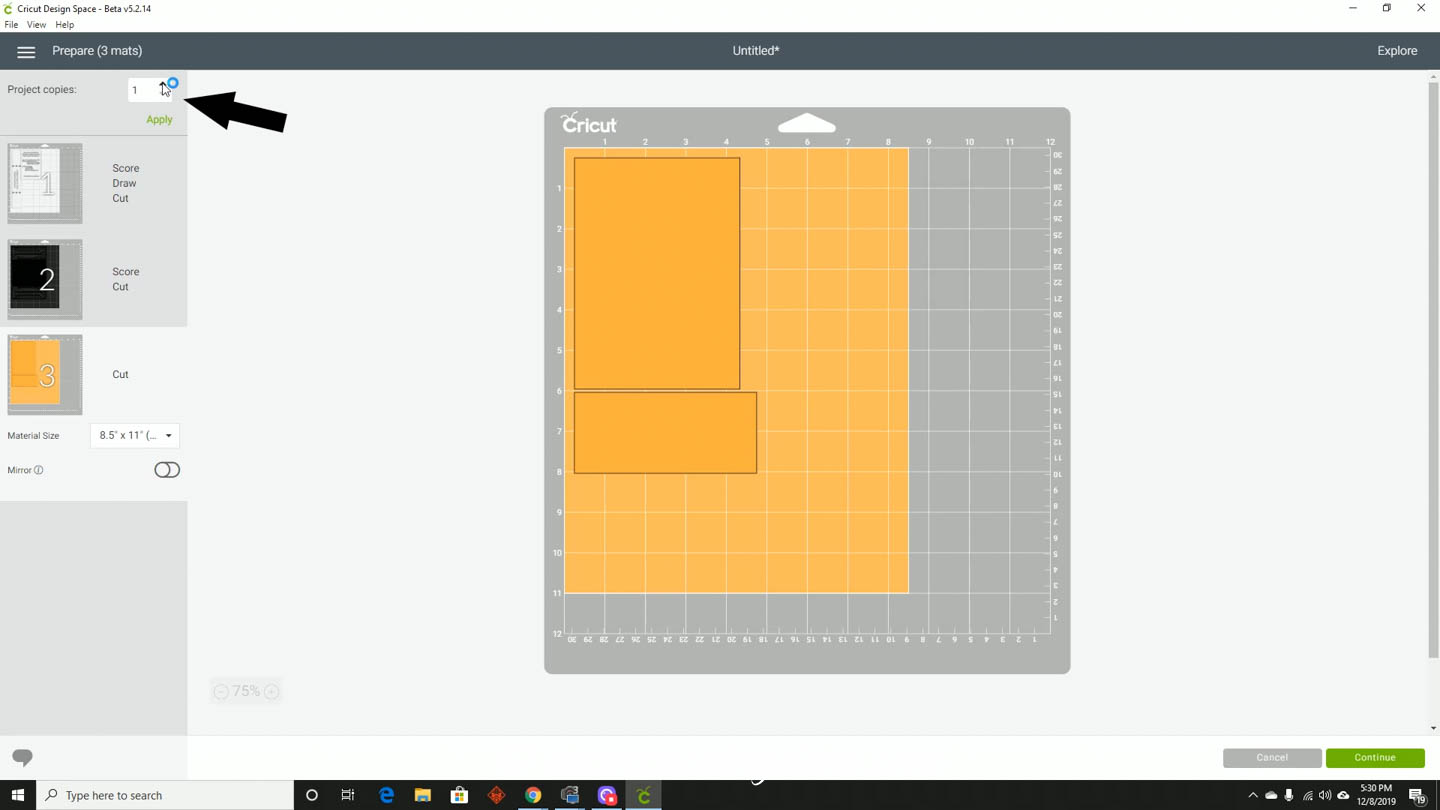
If you are doing more than one invitation at a time, adjust the number of copies to however many you need. That will fit more cuts on a single sheet of paper so it will reduce the amount of wasted paper.
Then click Continue to go to the next screen.
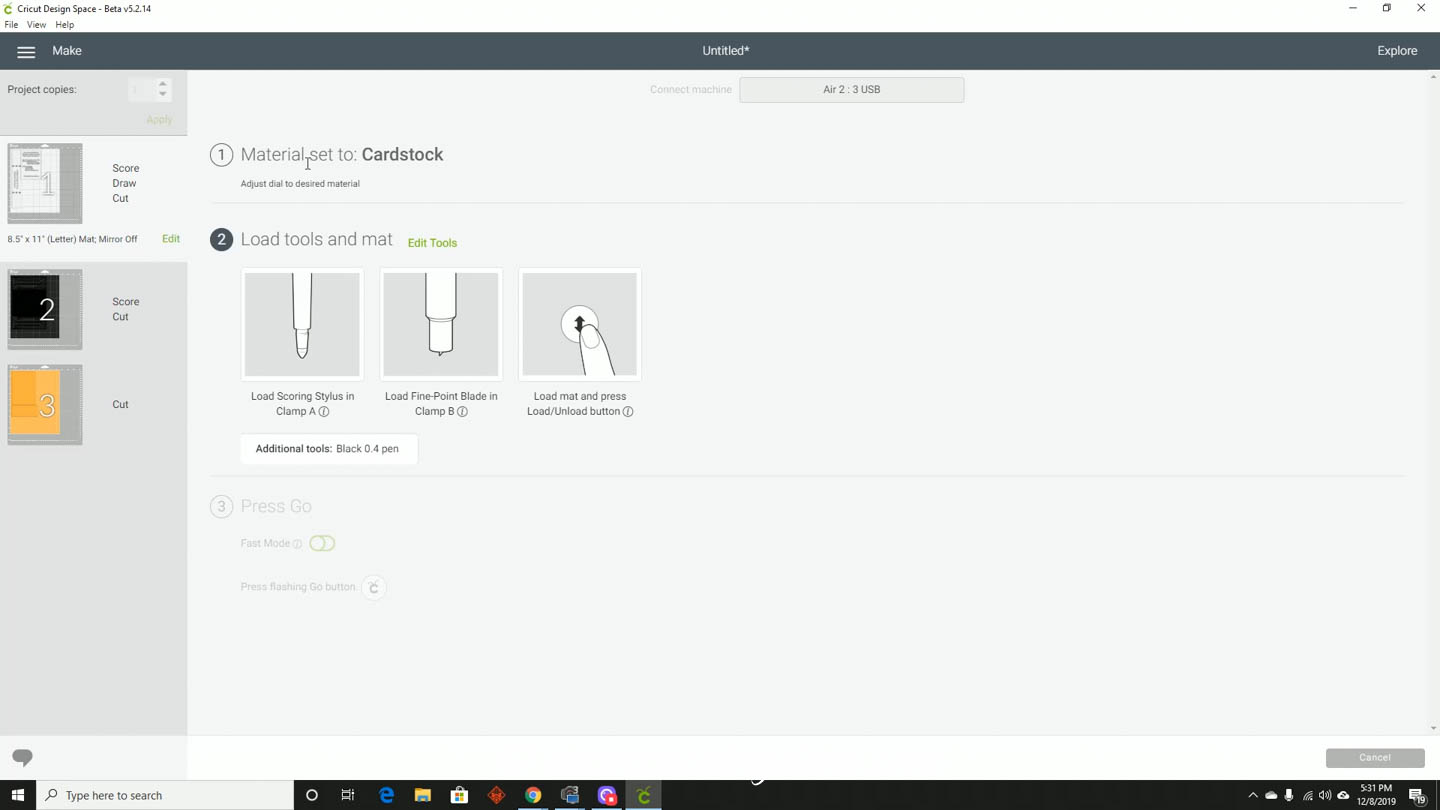
Set your materials and load your mat as follows:
The Material
I found that the highest material level () worked best for the cardstock I used.
And actually I probably should have used a different, double-cut material for the gold cardstock since it didn’t cut all the way through. However, the gold patterns were easy-to-cut rectangles, so I just used scissors to cut through where I needed to.
The Tools
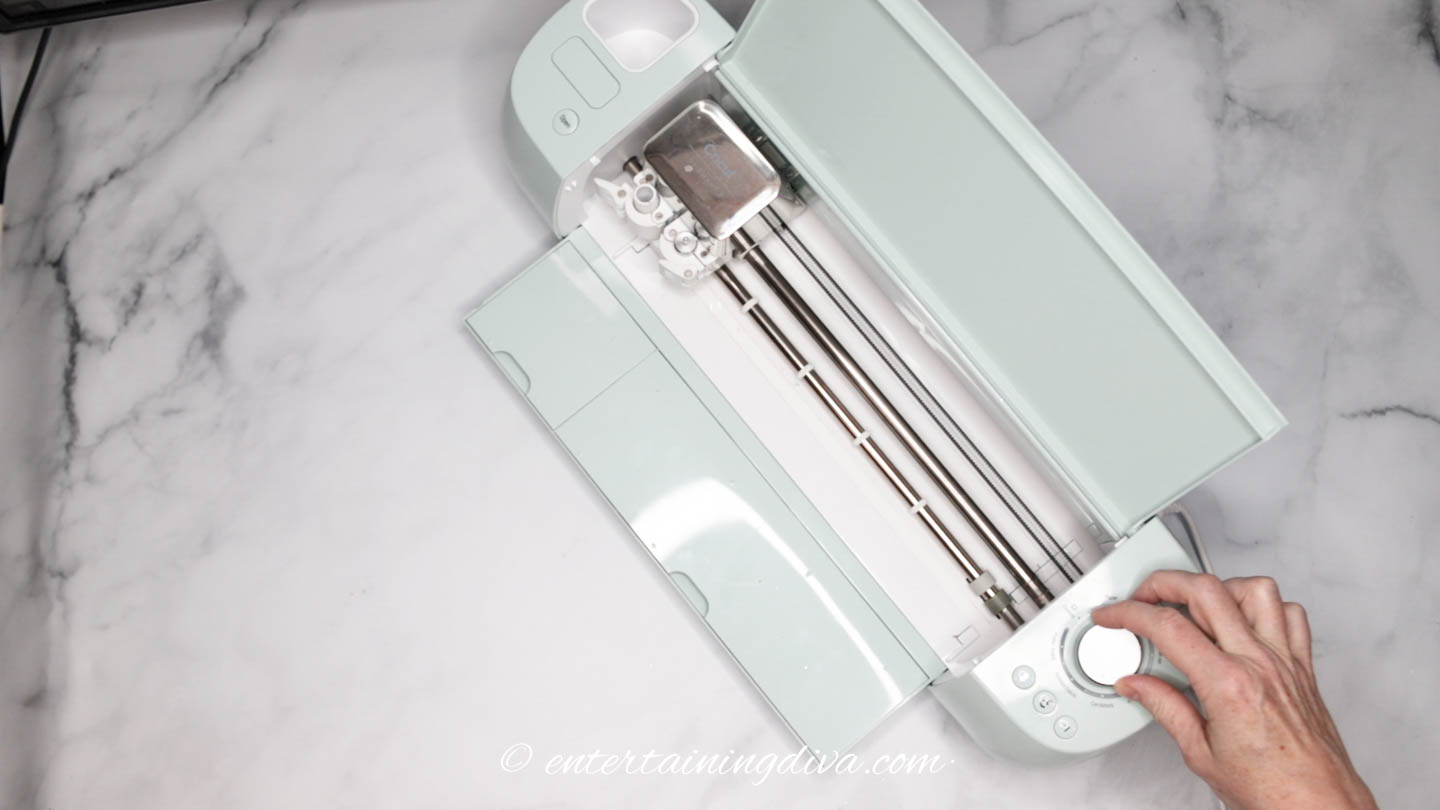
Make sure you have a fine-tip cutting blade loaded in the machine.
If you’re doing the scoring, install the scoring stylus in the B slot to start.
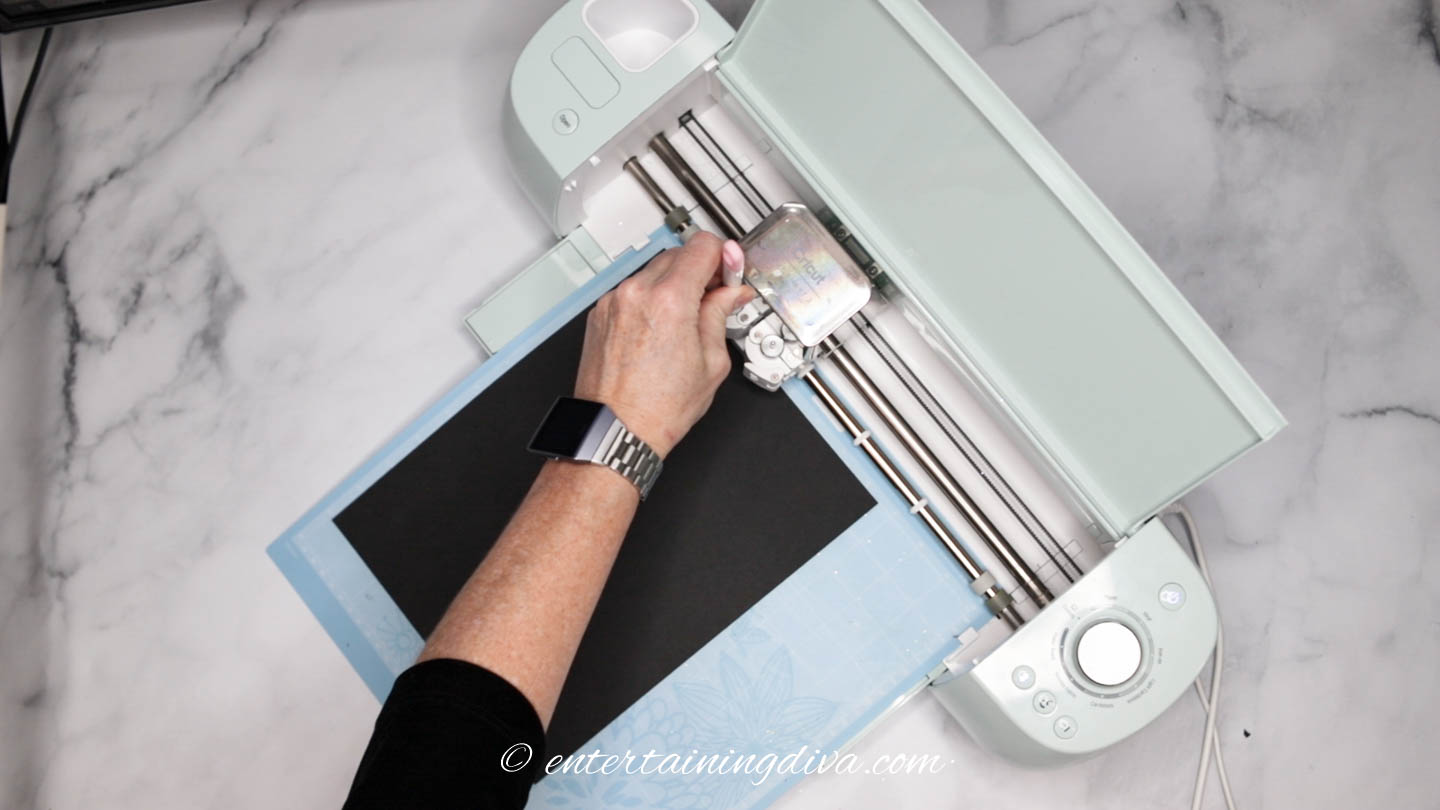
If you are having the Cricut do both scoring and printing, pay attention to the screen when it tells you switch tools. Especially when you get to the black layer…it’s easy to miss that you need to switch back to the scoring stylus.
The Mats
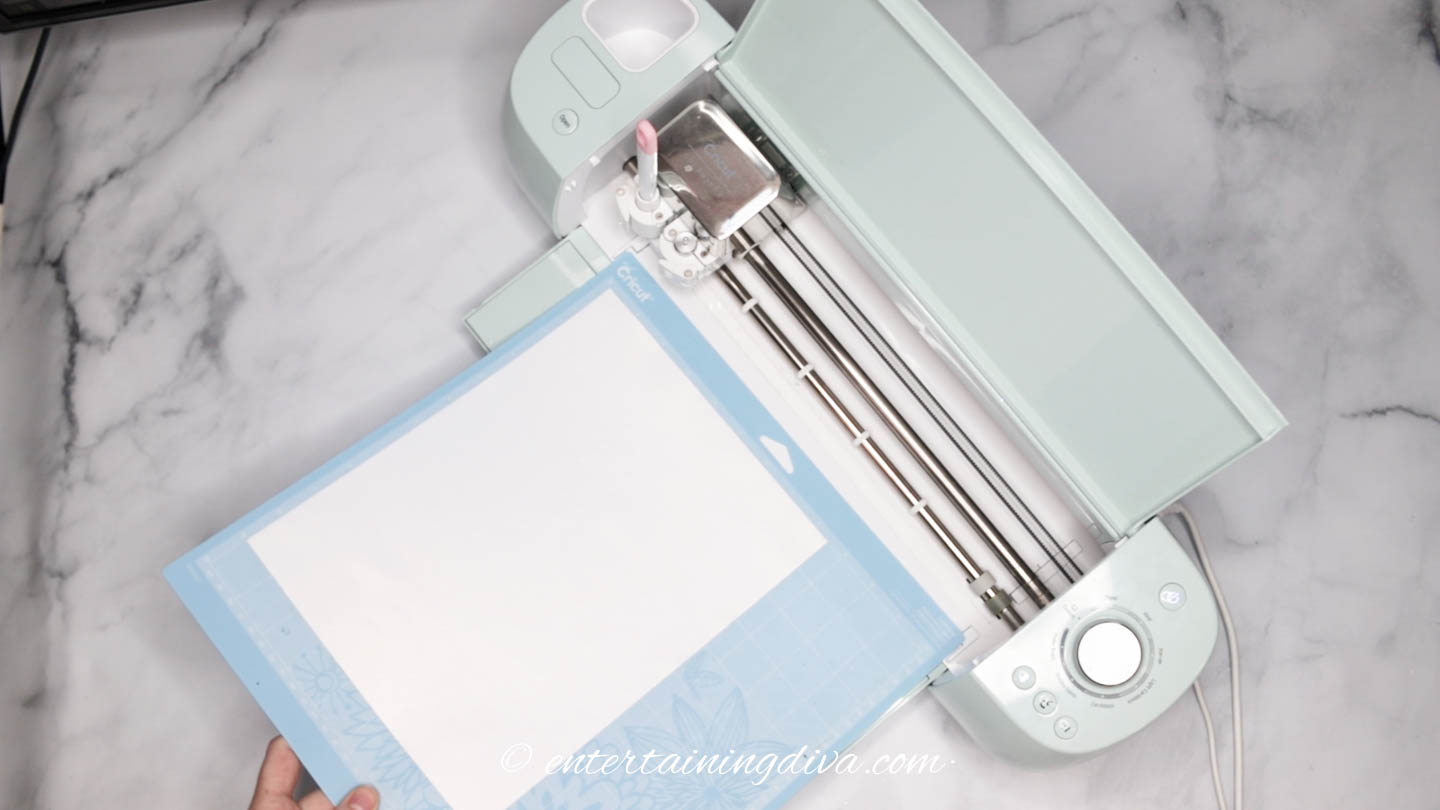
I used a light grip mat for both the white and black layers. The white layer could probably go on a regular grip mat, but the black one really needs a light grip to make sure the thin cuts don’t rip when you are taking it off.
Because my gold glitter cardstock was double-sided and the glitter doesn’t stick as well as flat paper, I had to use a strong grip mat for it. Even then, it wasn’t completely sticking, so I sprayed the mat with some repositional adhesive to make it work better. (That’s a Cricut hack that works any time your mat starts to lose it’s stickiness)
Then you’re ready to cut!
5 | Remove The Paper From The Mats
Both the white and gold cardstock cuts are very straight forward, so removing them from their mats should be pretty easy.
Try to roll the mat rather than the invitation so that the paper comes off straight.
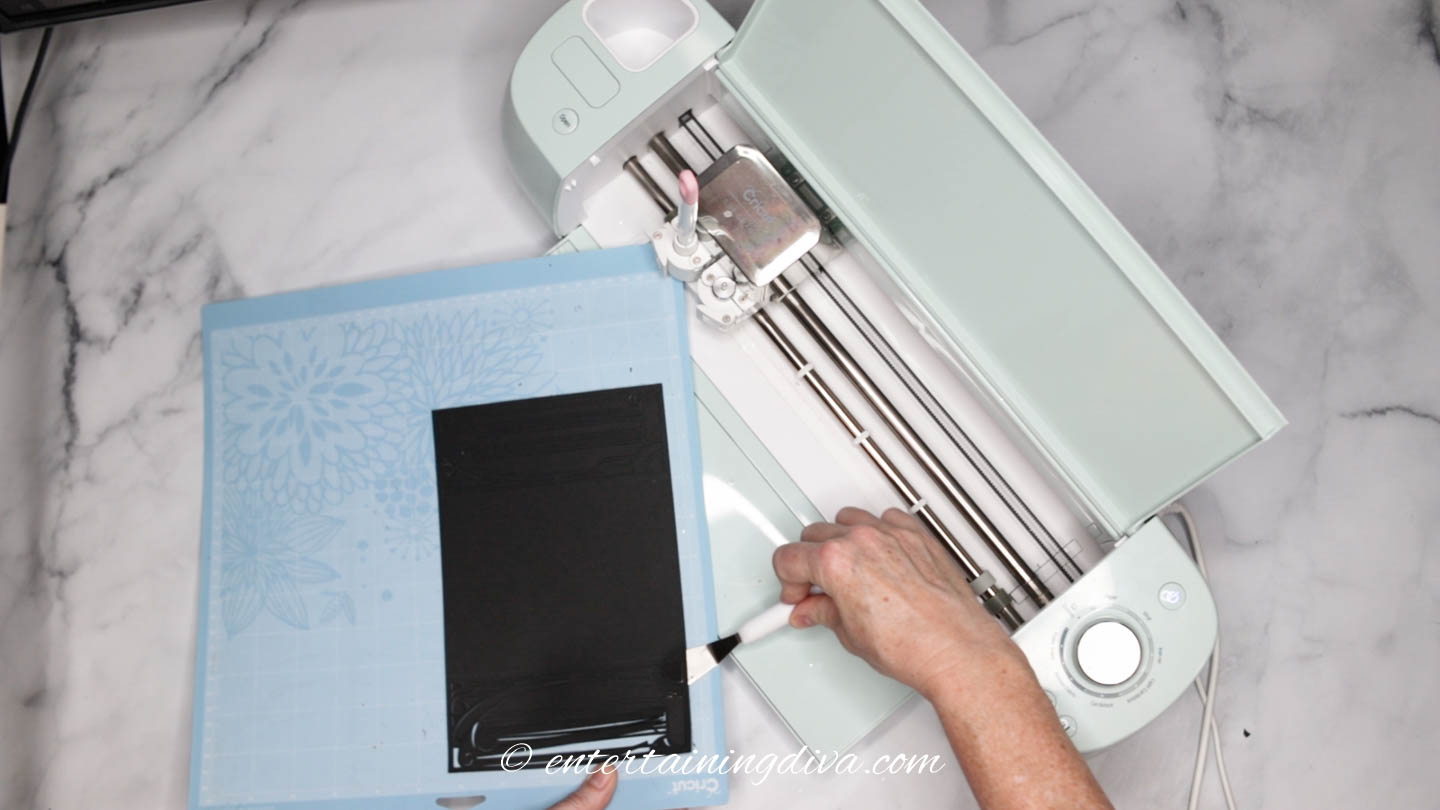
When you get to removing the black cardstock, you need to be a little more careful.
The thin strips on the front of the invitation are very easy to tear.
Using a Cricut spatula weeding tool to scrape them off the mat helps to keep them in one piece. And also helps to keep the paper from curling.
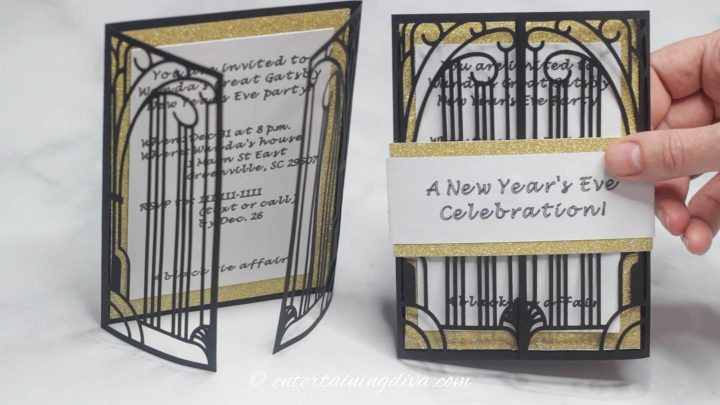
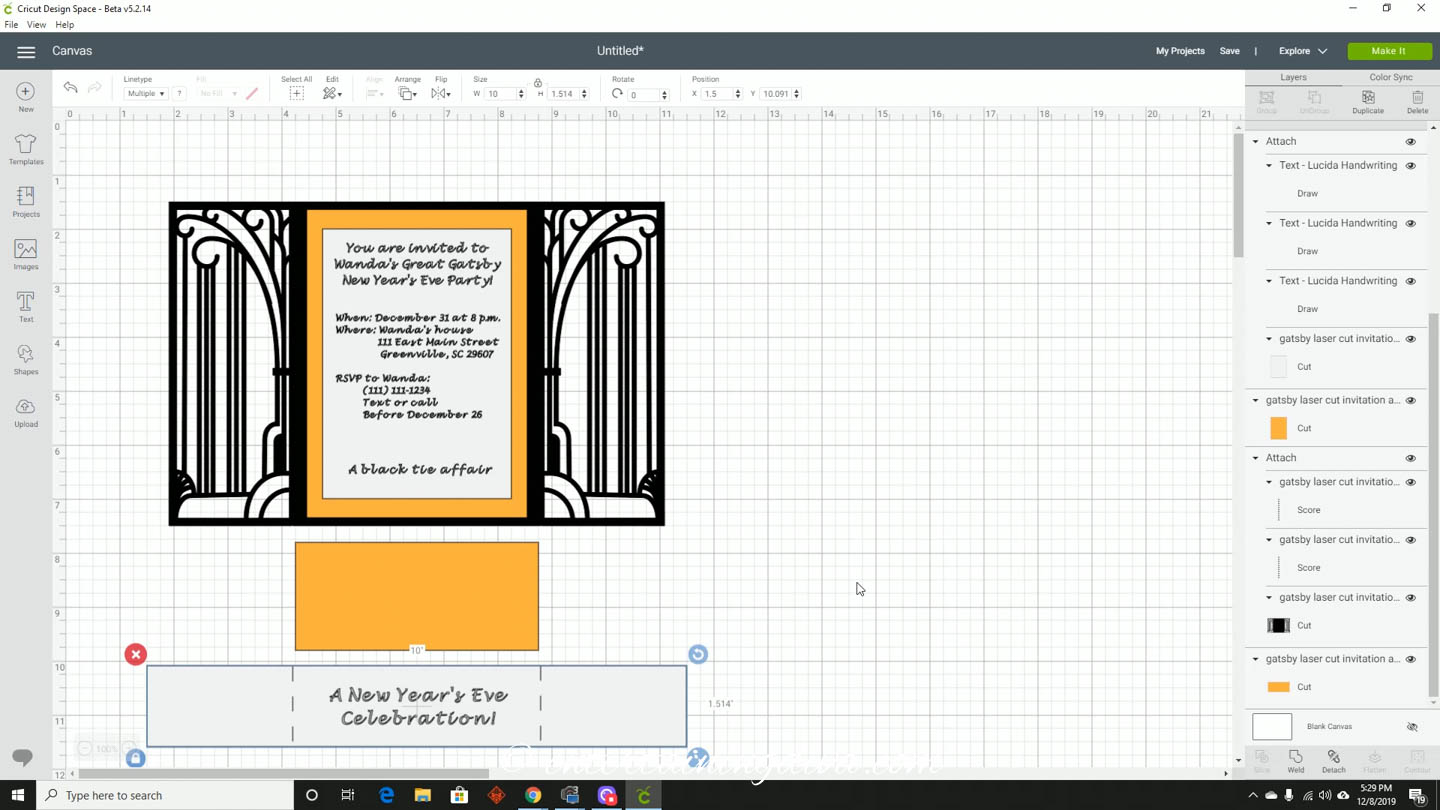
6 | Assemble The 1920’s Party Invitation
Now we’re ready to assemble the invitations.
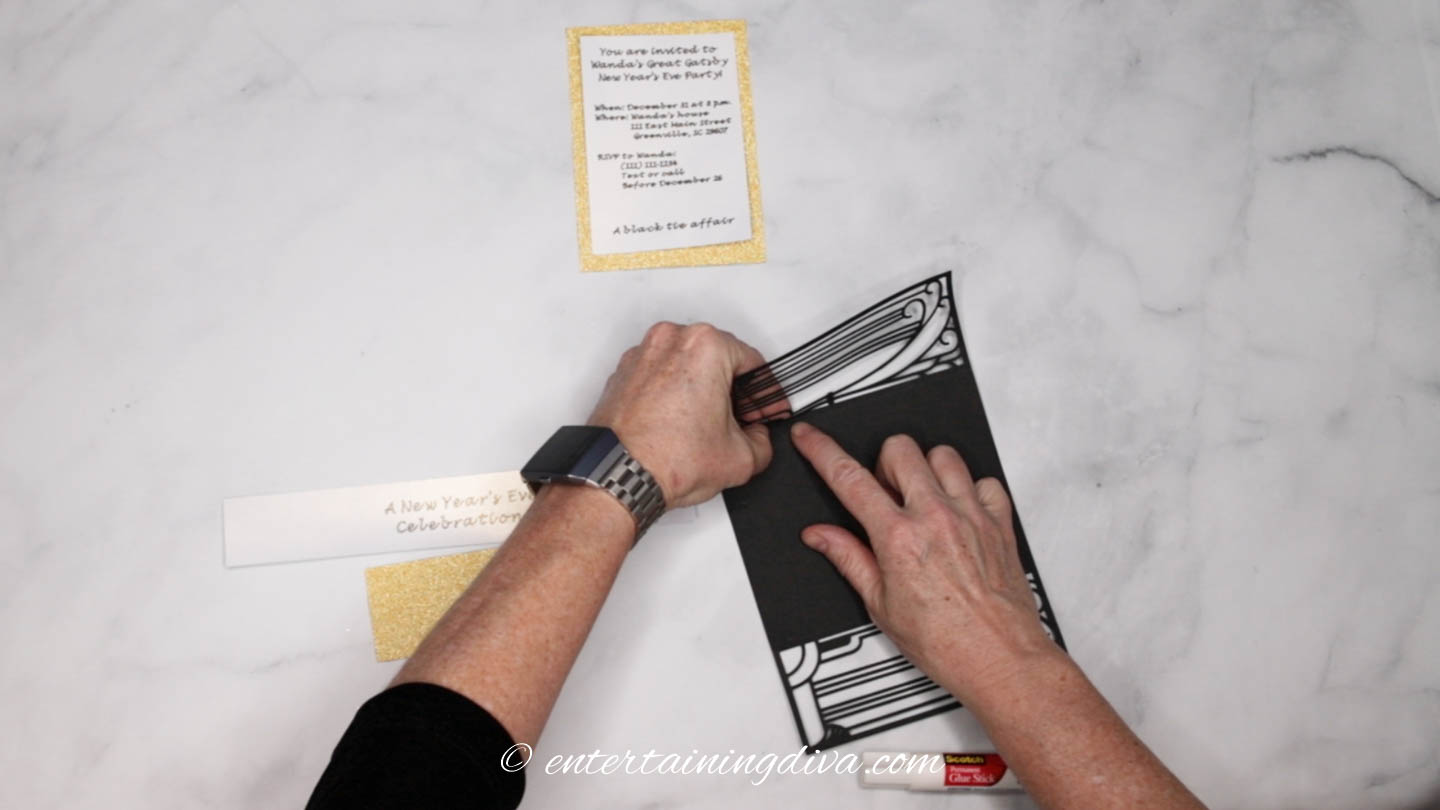
The first thing to do is to fold the black part of the invitation along the score lines on the inside edge of each “gate”.
Then we’re going to glue the large gold rectangle to the inside of the invitation.
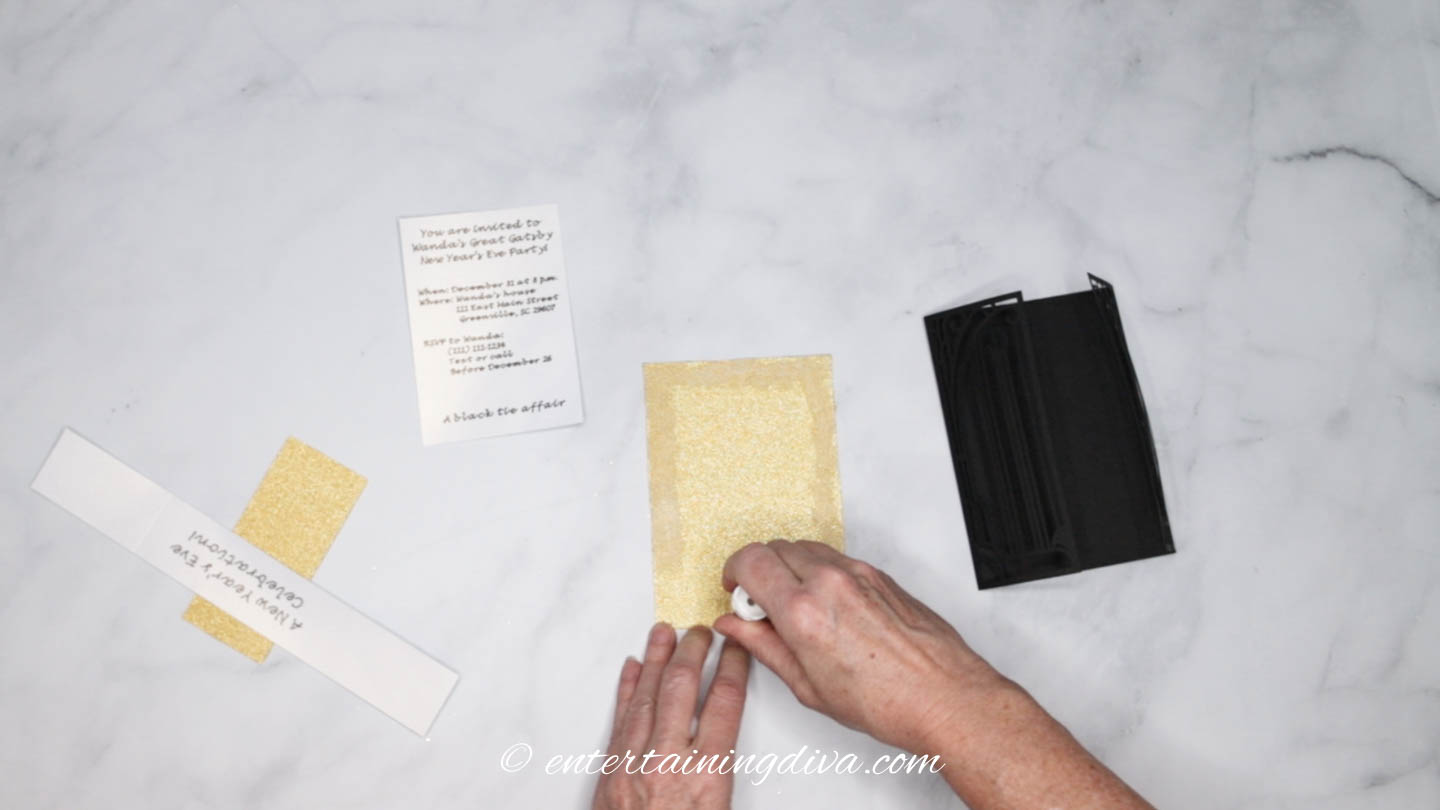
Use the glue stick to cover the entire back side with glue.

Center it on the inside of the black invitation.
Press down all the way around to make sure it sticks.
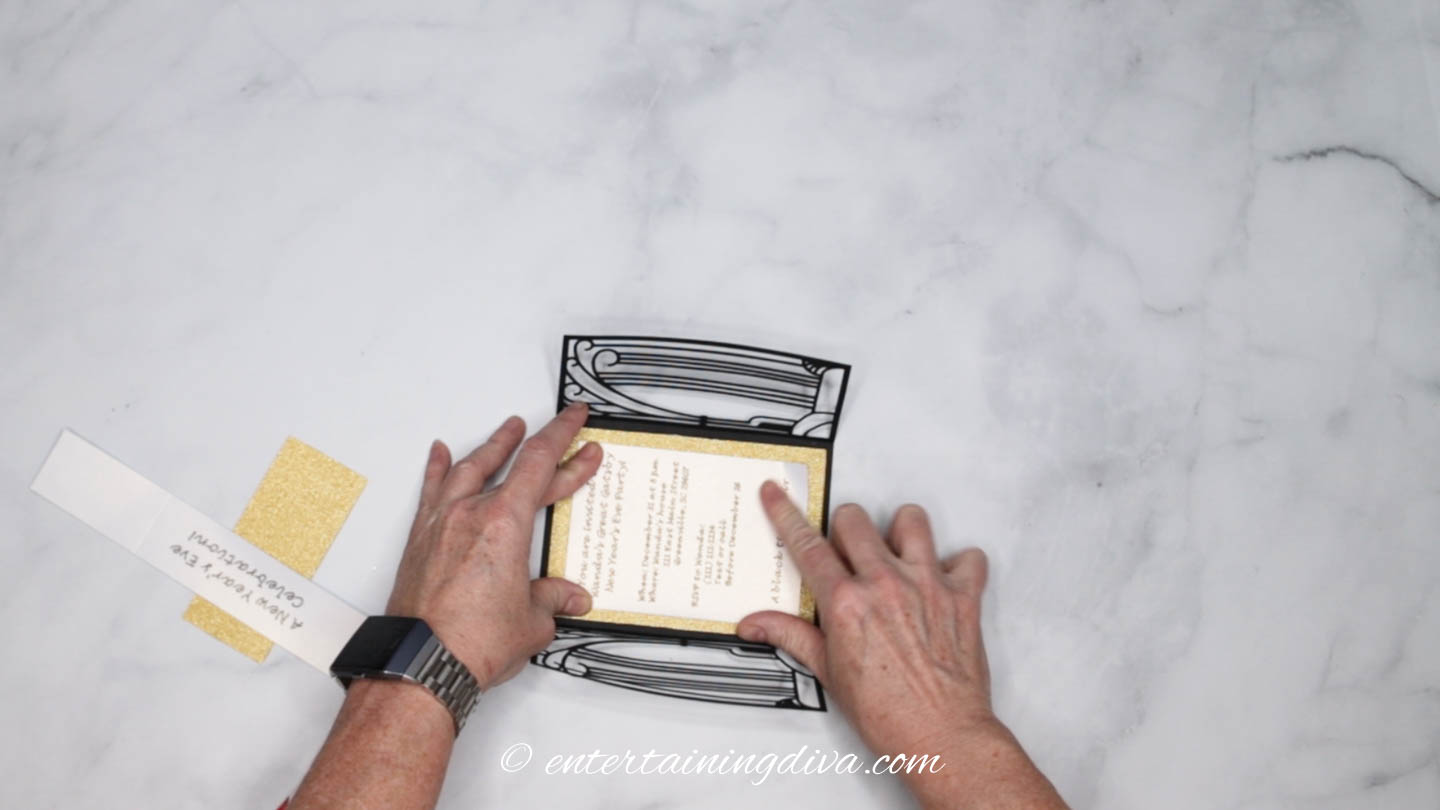
Use the same process to glue the white rectangle with the invitation text printed on it onto the middle of the gold cardstock.
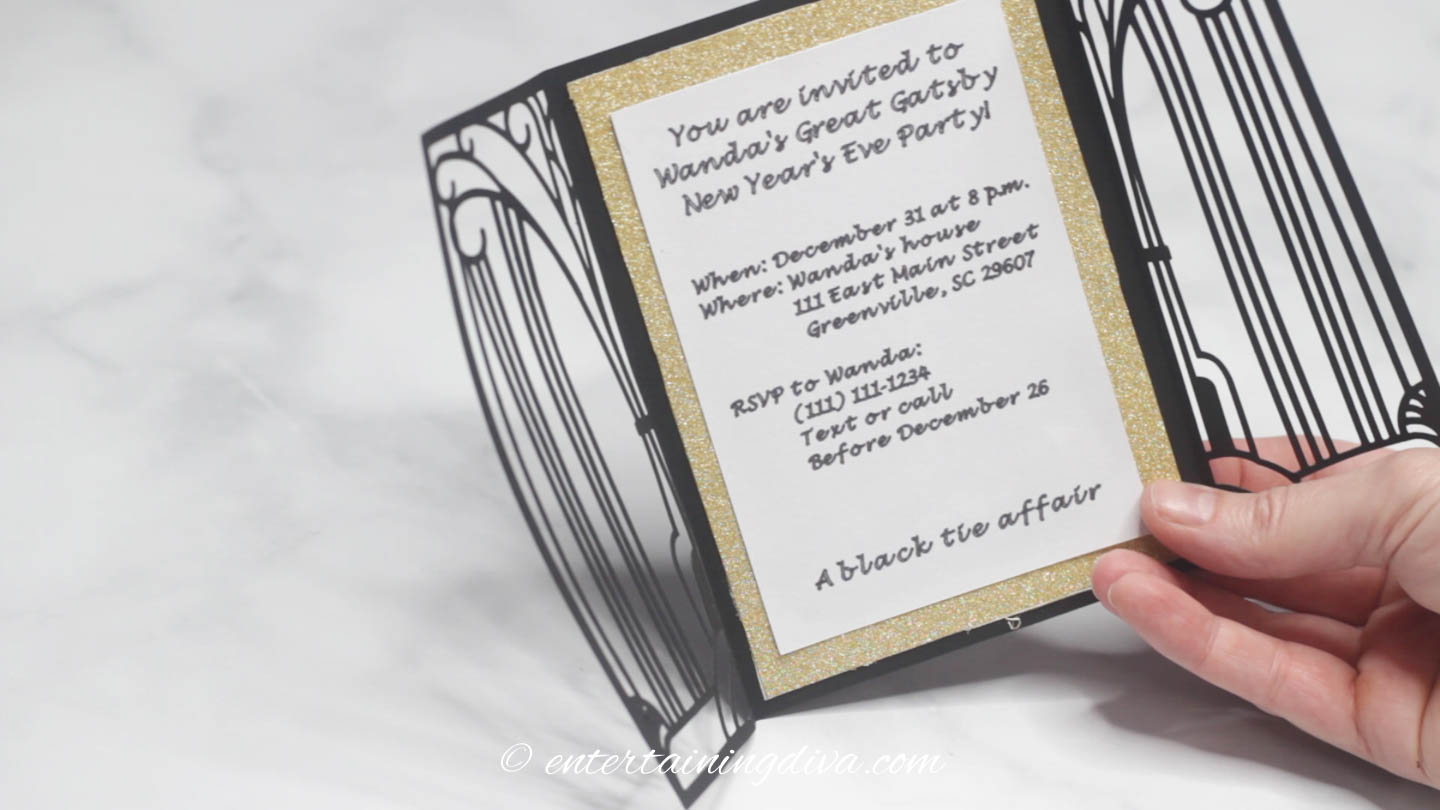
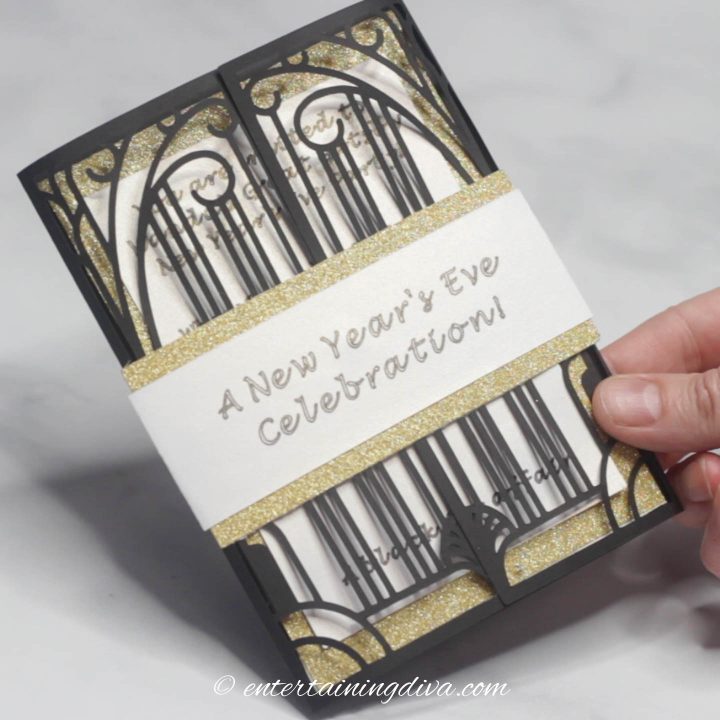
The invitation looks quite nice just like this.
So you could stop right here if you don’t want to add the wrapper. However, I think it adds a nice finishing touch.
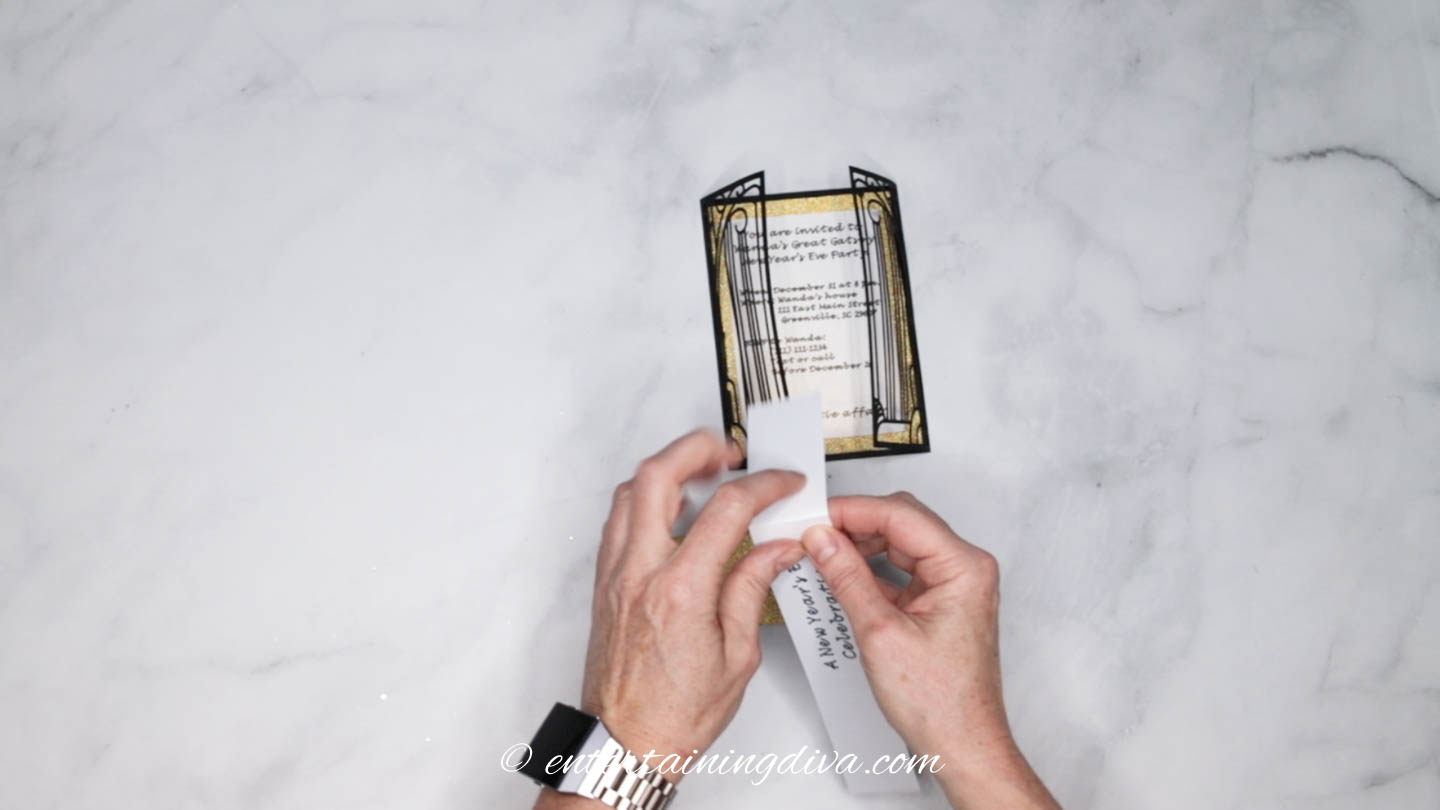
For the invitation wrapper, fold the long white rectangle along the score lines.
If you don’t have score lines, fold the wrapper so that the ends wrap around the edges of the invitation. It should fit snugly but not so tight that you can’t remove it.
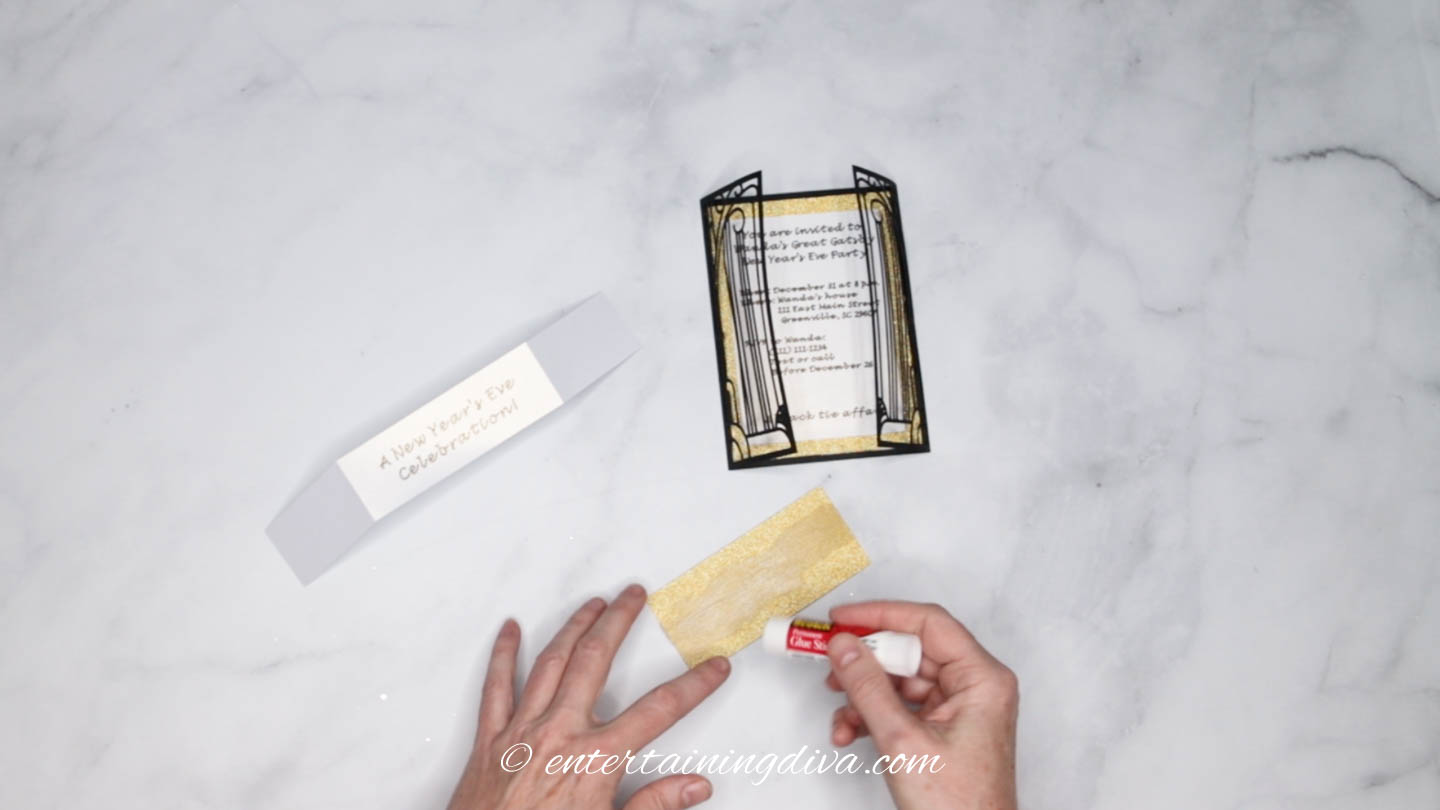
Then spread some glue along the middle of the smaller gold rectangle. This is where the white wrapper paper will go.
I found that it sticks better when you put the glue on the gold glitter cardstock, rather than on the white paper. But you’ll have to make sure to stay in the middle so the glue won’t show outside the wrapper.
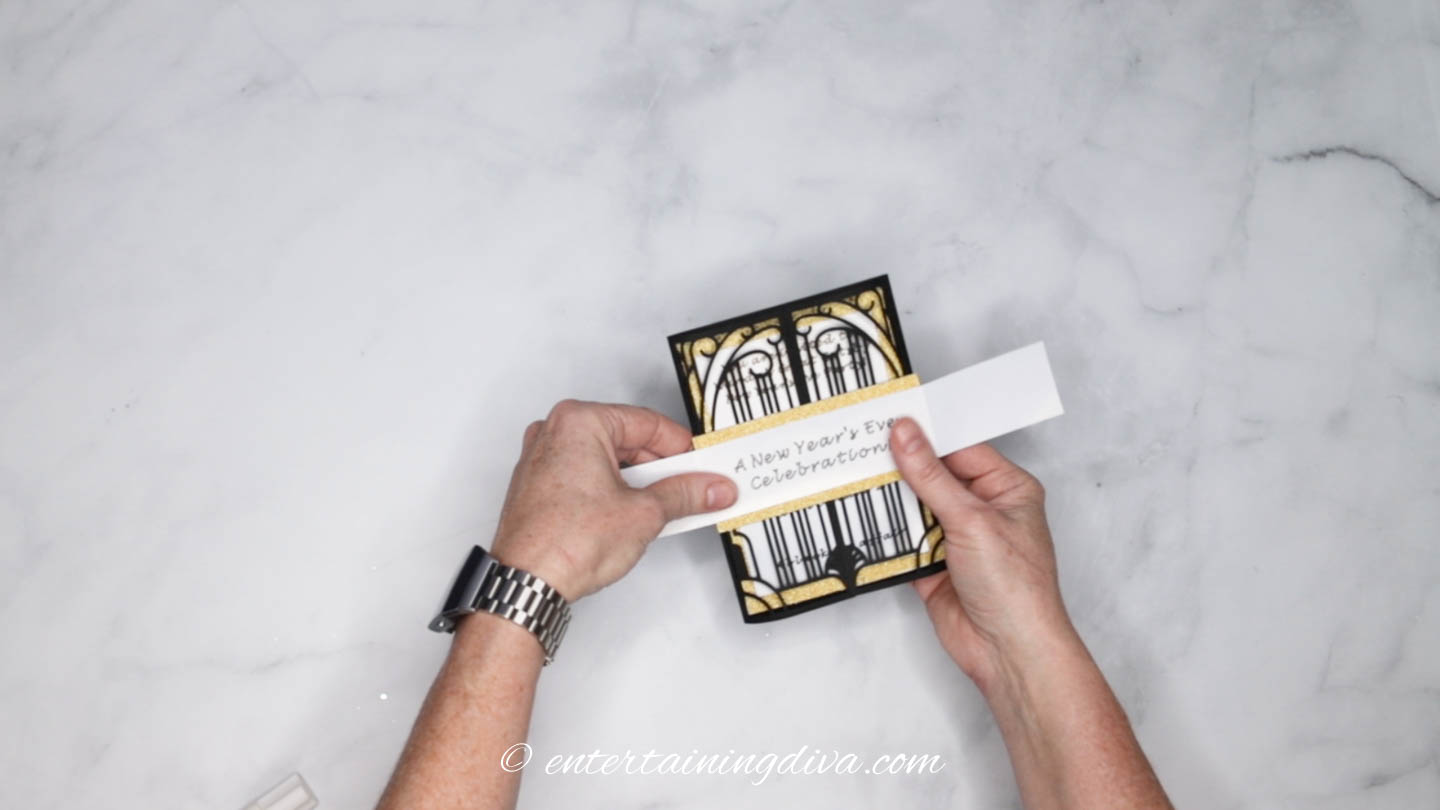
Wrap the ends of the white cardstock around to the back of the invitation.
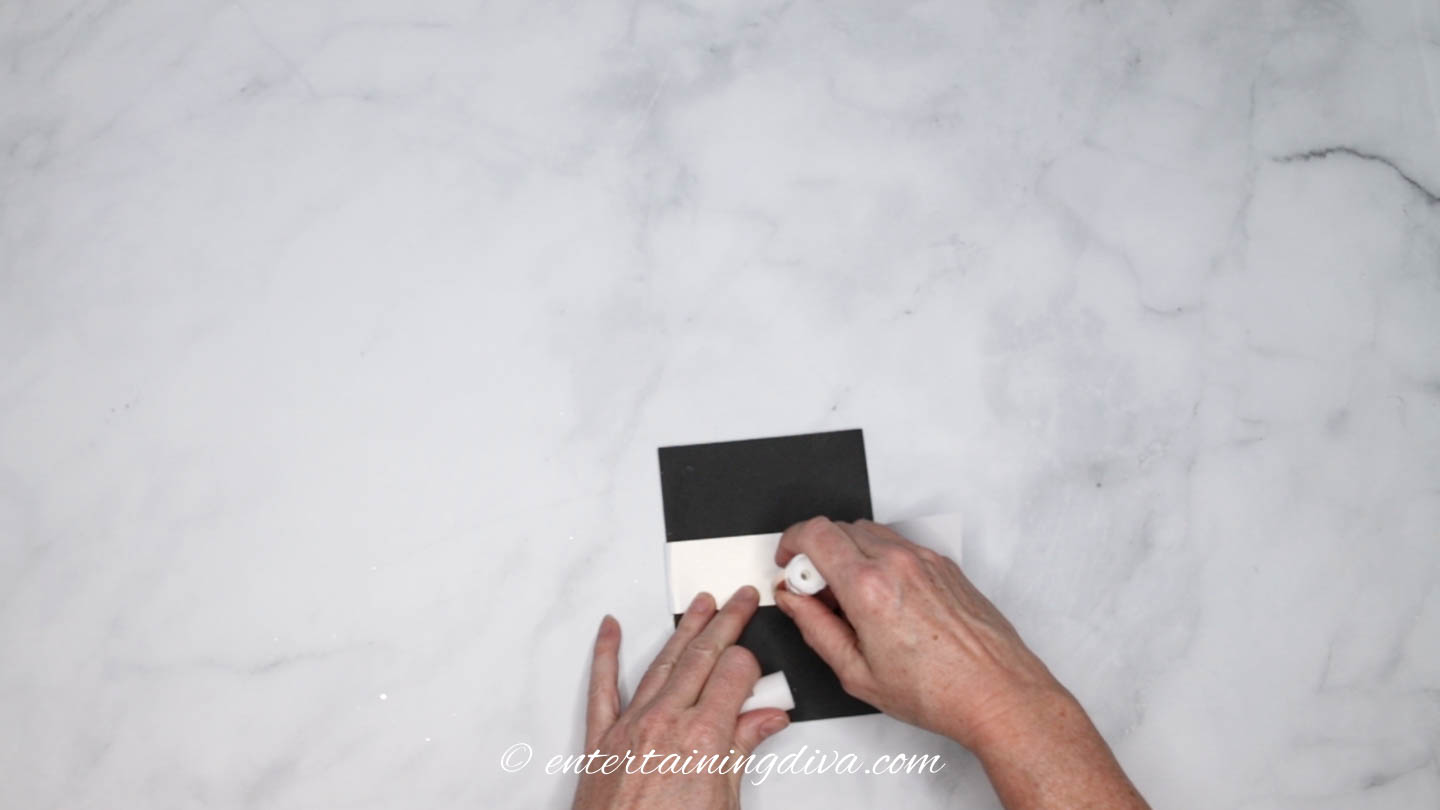
Then turn the invitation over and glue the overlapping ends together. Don’t get any of the glue on the invitation since you want the wrapper to come off easily.
The Finished Great Gatsby Party Invitation
And that’s it!
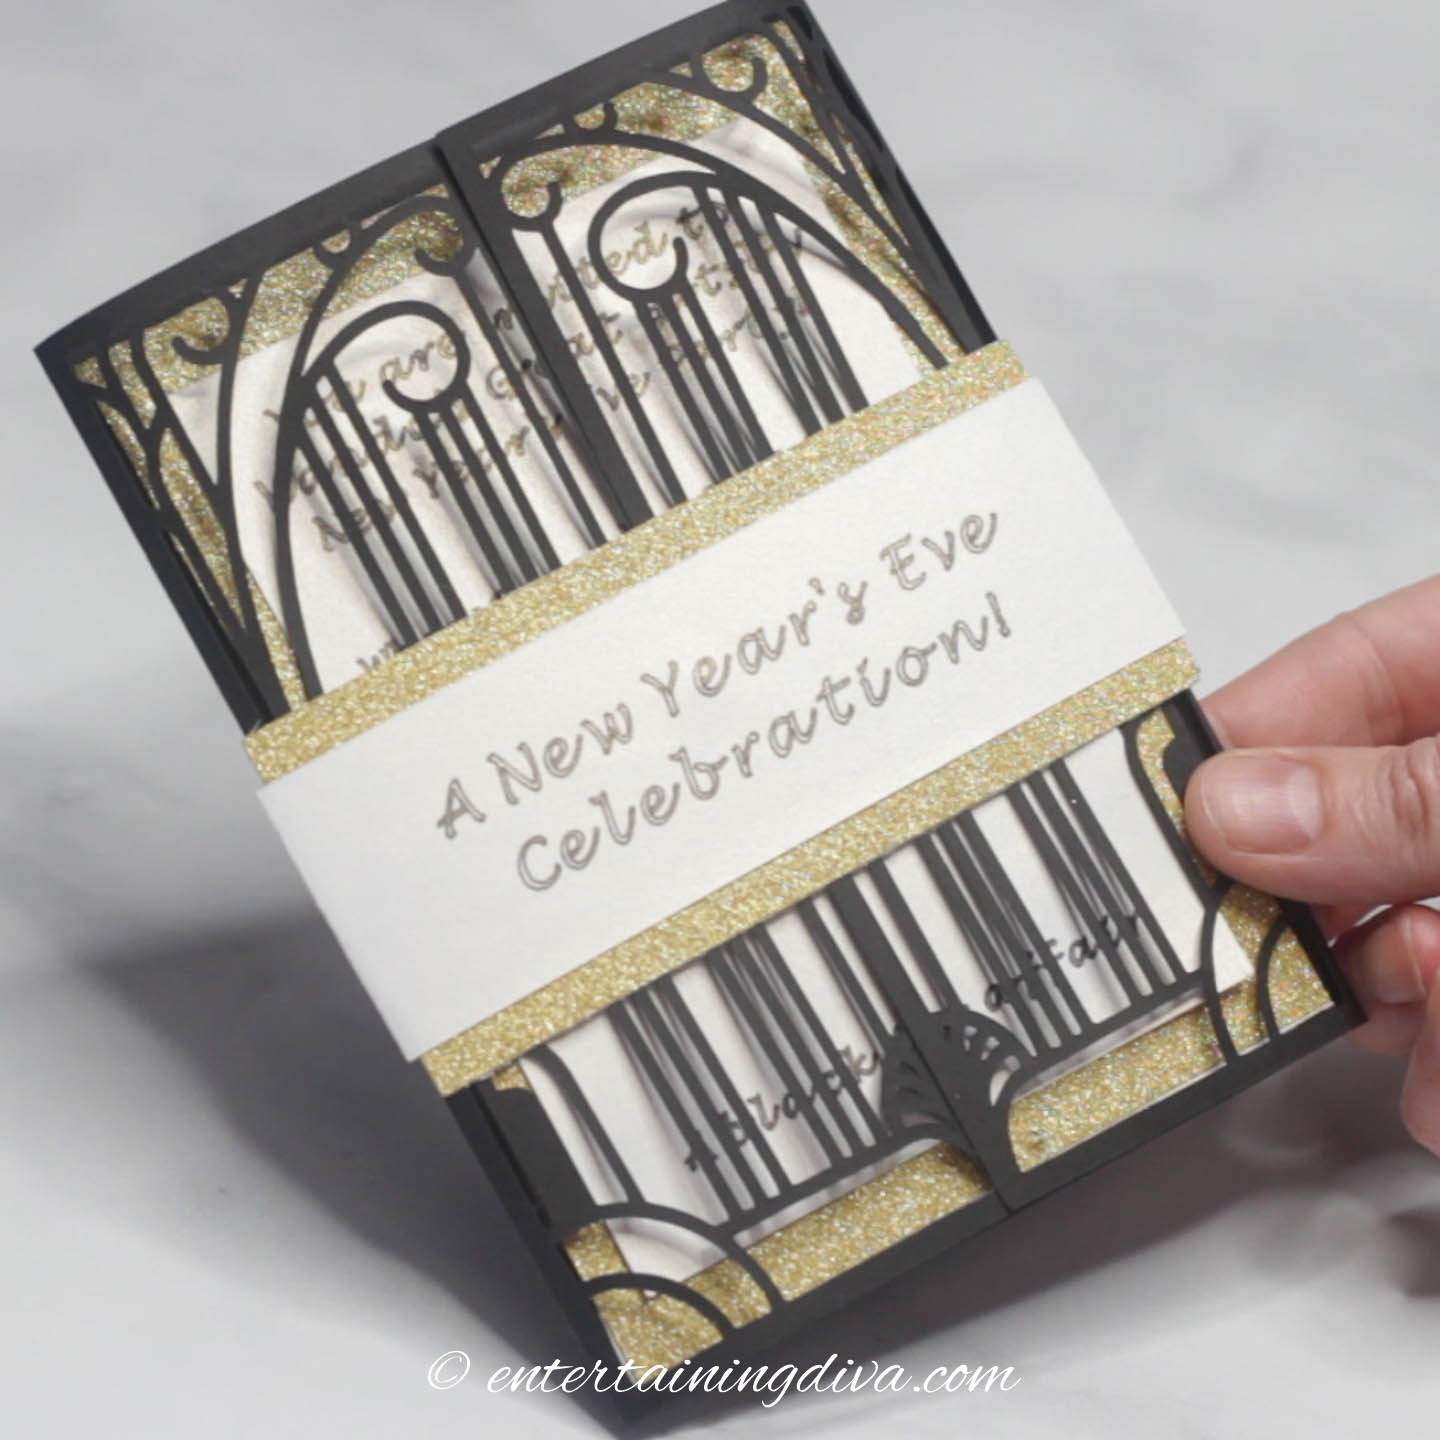
I really like how they turned out.

And whether you decide to use the wrapper or not, you’ll have a beautiful way to let people know about your celebration!
Other Gatsby Party Ideas You Might Like
Have comments or questions about our DIY laser cut Gatsby party invitations? Tell us in the section below.
Pin It So You Don't Forget It!
This post was originally published on December 10, 2019 but was updated with new content on February 12, 2024.