
How To Make A DIY Halloween Bellboy Cart
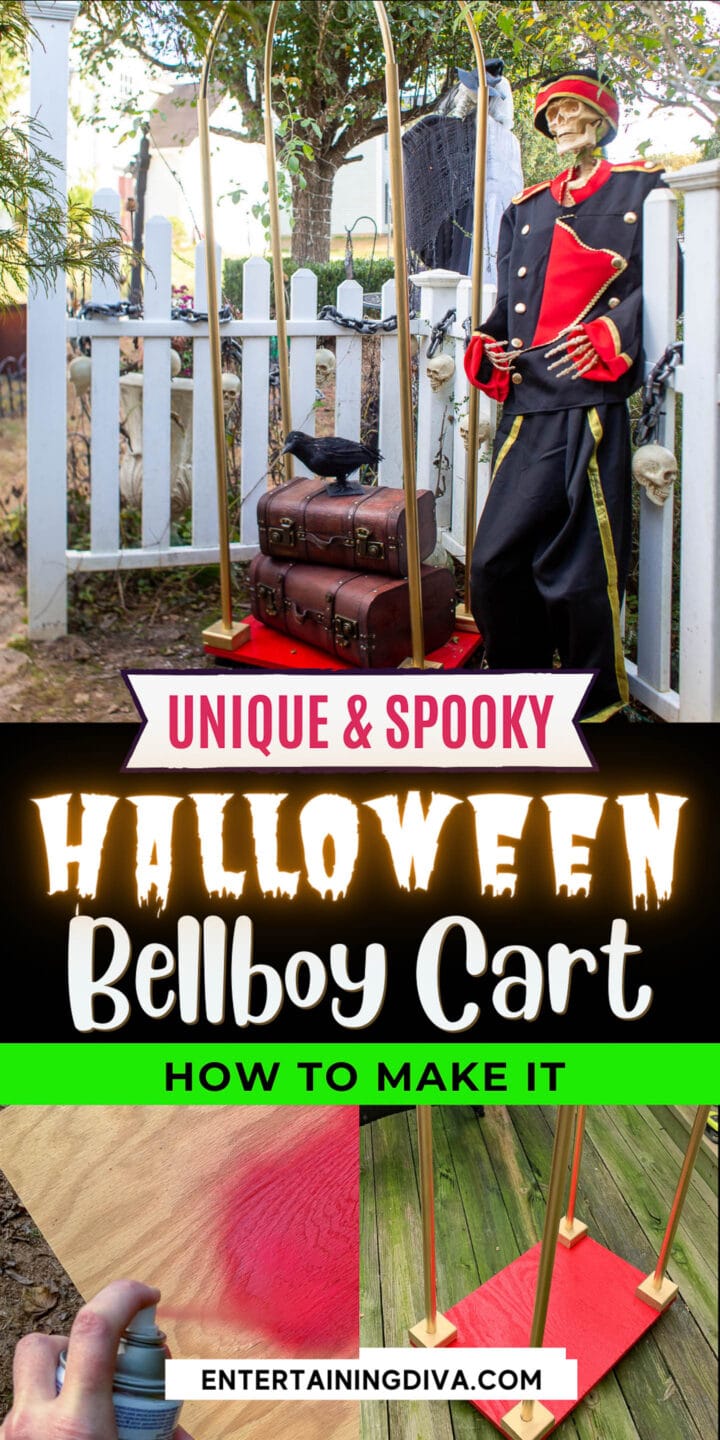
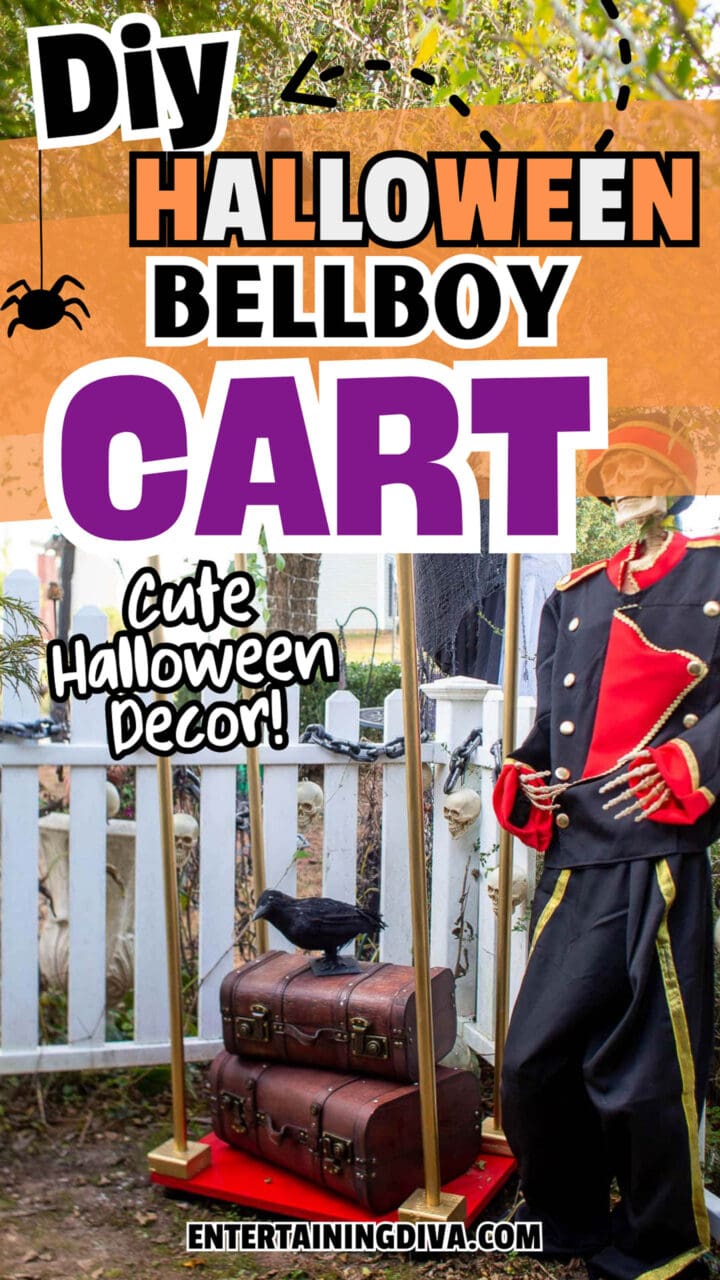
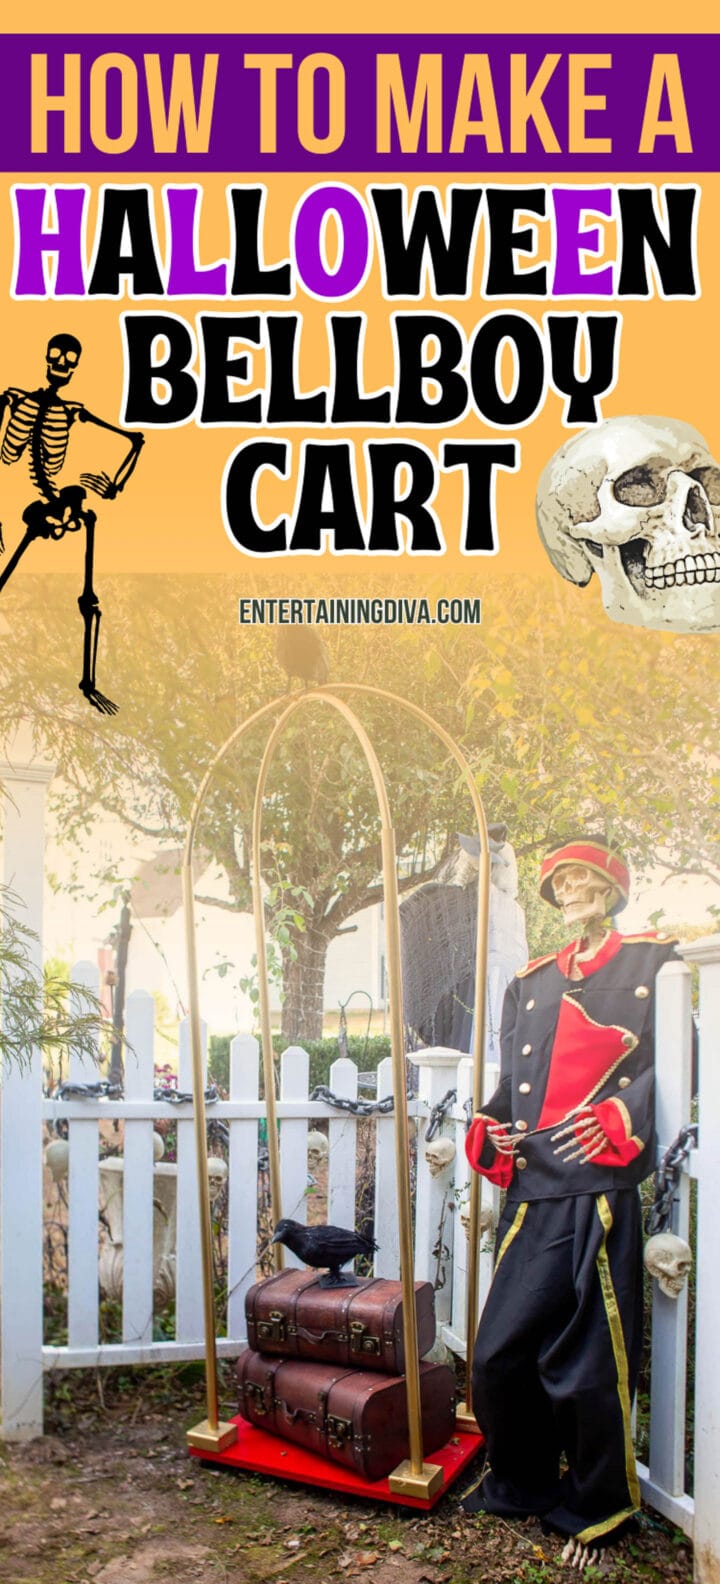
Looking for a unique and spooky Halloween decoration? Look no further than this DIY bellboy cart! Not only is it perfect for a haunted hotel theme, but it’s also easy to make. All you need are some basic supplies and a little bit of creativity.

Halloween is my favorite holiday.
So every year, I pick a theme and put up Halloween decorations to match.
Since I don’t want to spend a ton of money on the decor, I usually end up DIYing a lot of it.
Which is where this DIY bellboy cart came from. It was a prop for my Halloween haunted hotel theme.
Usually, I have a Halloween party with that theme, too, but this was during the height of the pandemic so I had to stick to outdoor decor.
Having said that, it would work just as well indoors if you wanted to set it up that way.
In any case, here’s the step-by-step tutorial.
Supplies
Materials
- 2′ x 2′ piece of ¾-inch plywood
- 14″ long piece of 2″ x 4″ wood
- 2 8′ lengths of ¾-inch PVC pipe. You need 8′ lengths for the project, but they are usually sold in 10′ lengths.
- 8′ length of ½-inch flexible water pump tubing*
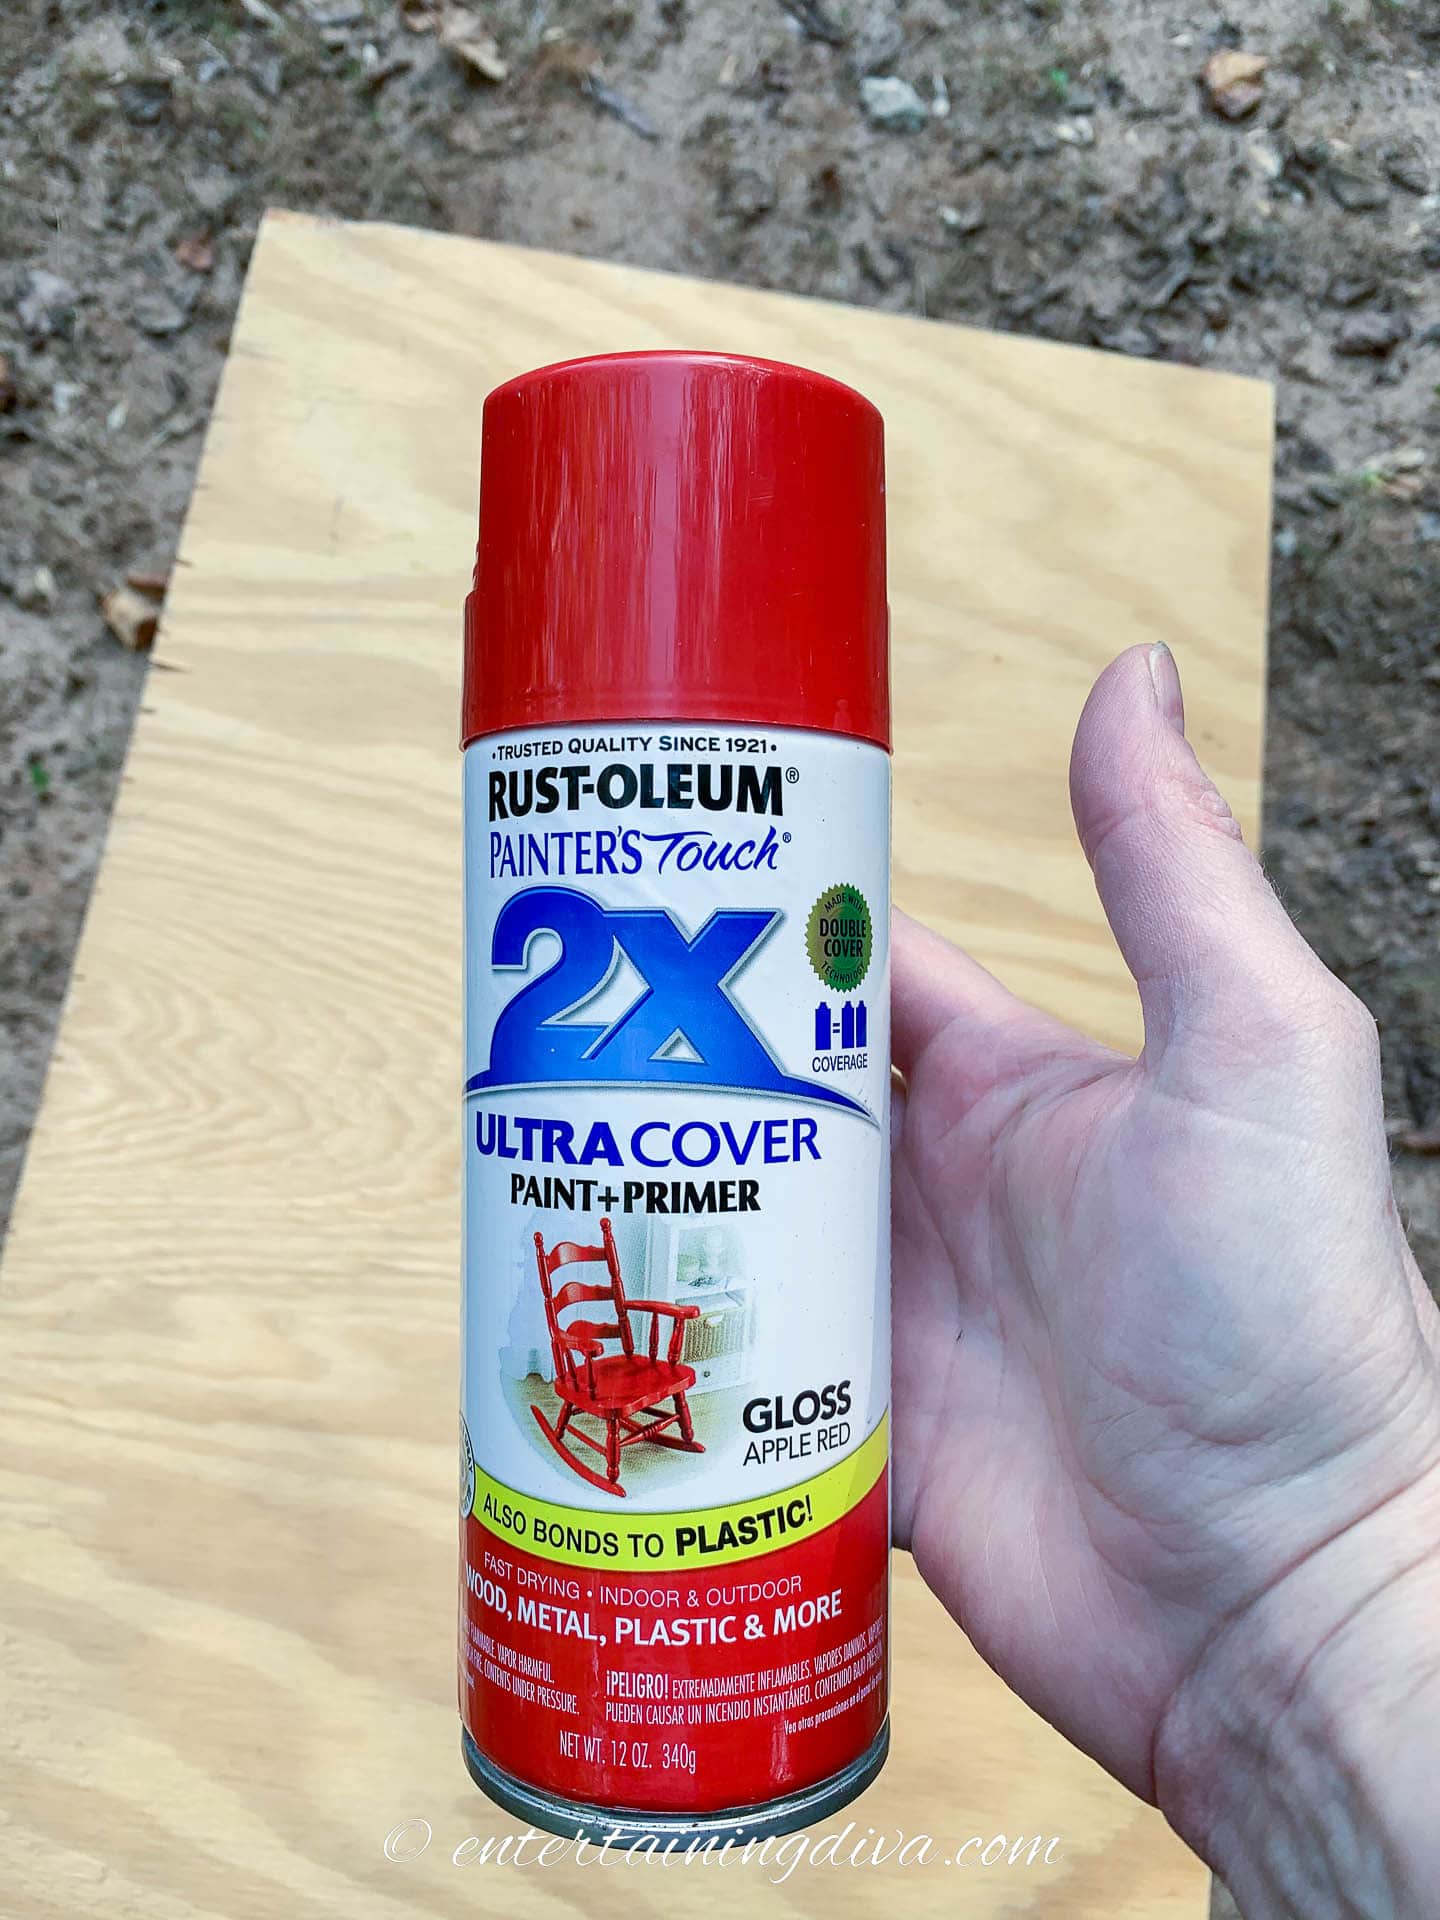
- 1 can red spray paint
- 1 can gold spray paint
- 4 roller wheels
- 2 1/2″ deck or other outdoor screws
Tools and equipment
- Cordless drill / screwdriver
- ¾” drill bit
- Screwdriver bit to match the deck screws
- Miter saw or jig saw – Since I was working outside and not doing any heavy duty cutting, I used a cordless miter saw* for this. I use it for all kinds of projects since it’s so easy to transport wherever you need it.
- Spray paint gun* (optional) – This keeps your finger from getting tired while you’re spray painting.
- 8 thin garden stakes (optional) – I used these to hold up the PVC pipe and pump tubing so it could be painted on all sides easily. But it’s not absolutely necessary.
How to make the Halloween bellboy cart
1 | Cut the wood and tubing
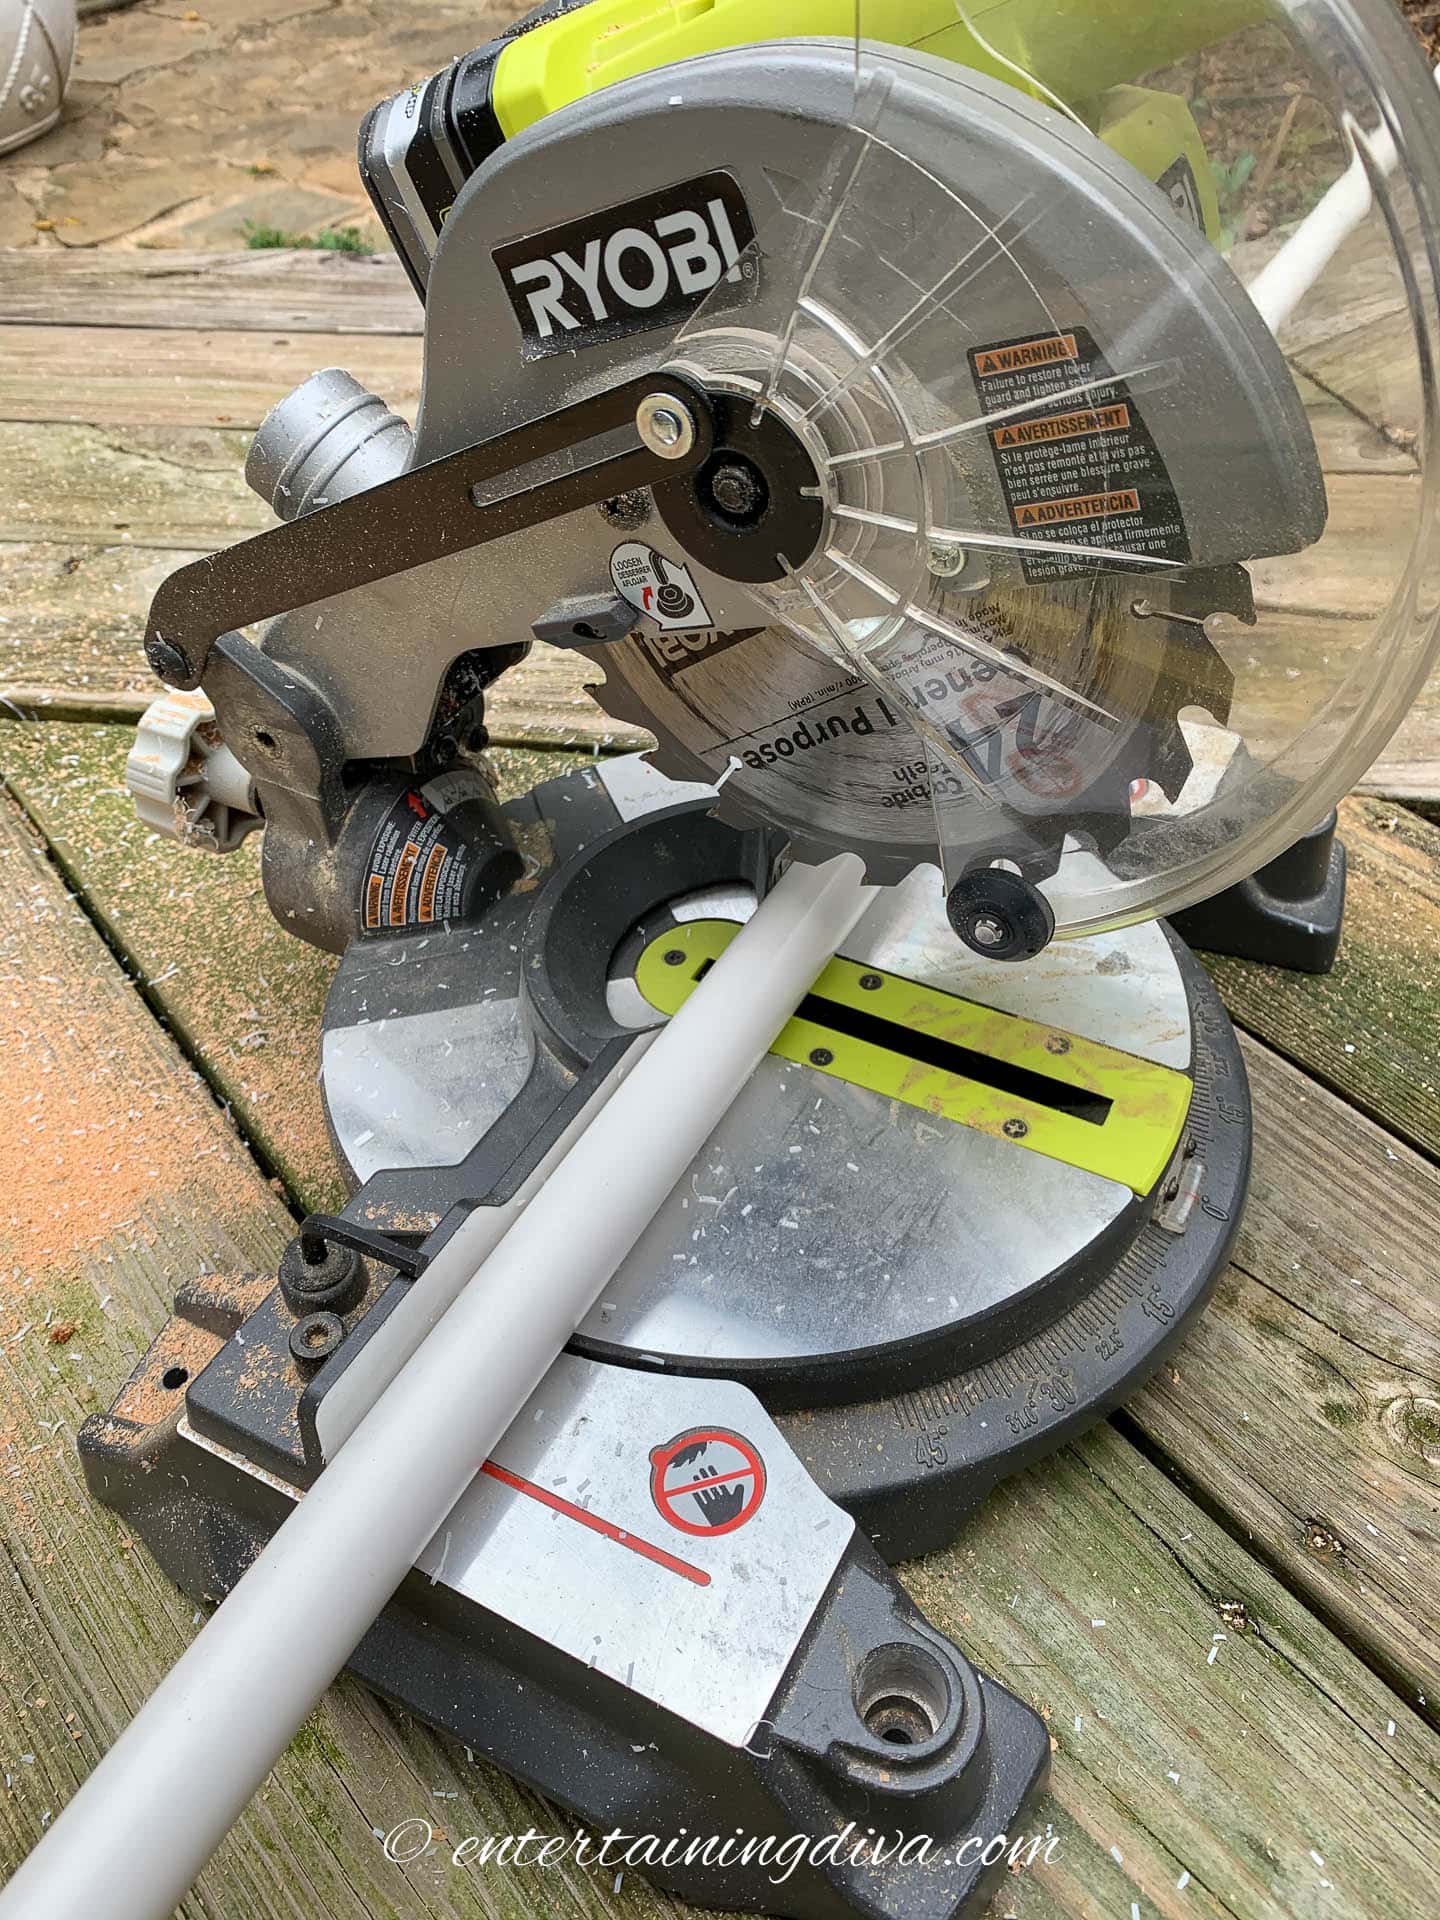
Use the miter saw or jig saw to cut:
- a piece of ¾” plywood into an 18-inch by 2-foot rectangle.
- a 2″ x 4″ board into 4 3½-inch blocks. They should be square.
- the PVC pipes so you have 4 tubes that are 4 feet long.
- the flexible pump tubing into 2 4-foot lengths.
2 | Paint
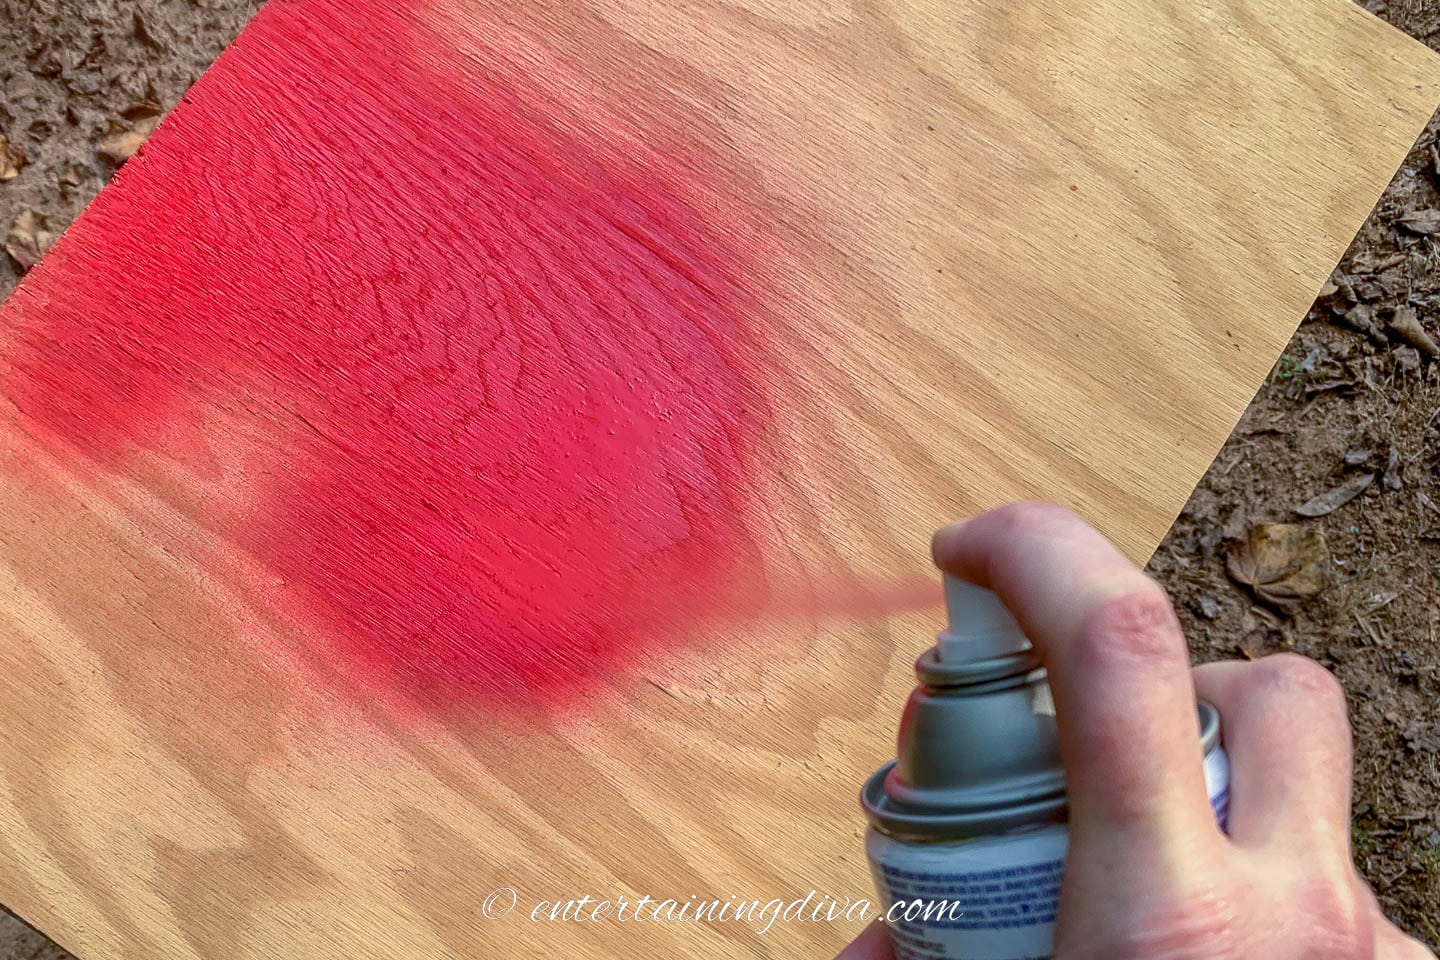
Next we need to paint everything. Using a spray paint gun will save you from getting finger cramps while doing this.
Spray paint the top and one side of the plywood in red.
Spray paint the PVC pipe, the flexible pump tubing and the tops and sides of the 2″ x 4″ blocks in gold.
Wait for the paint to dry before proceeding to the next step.
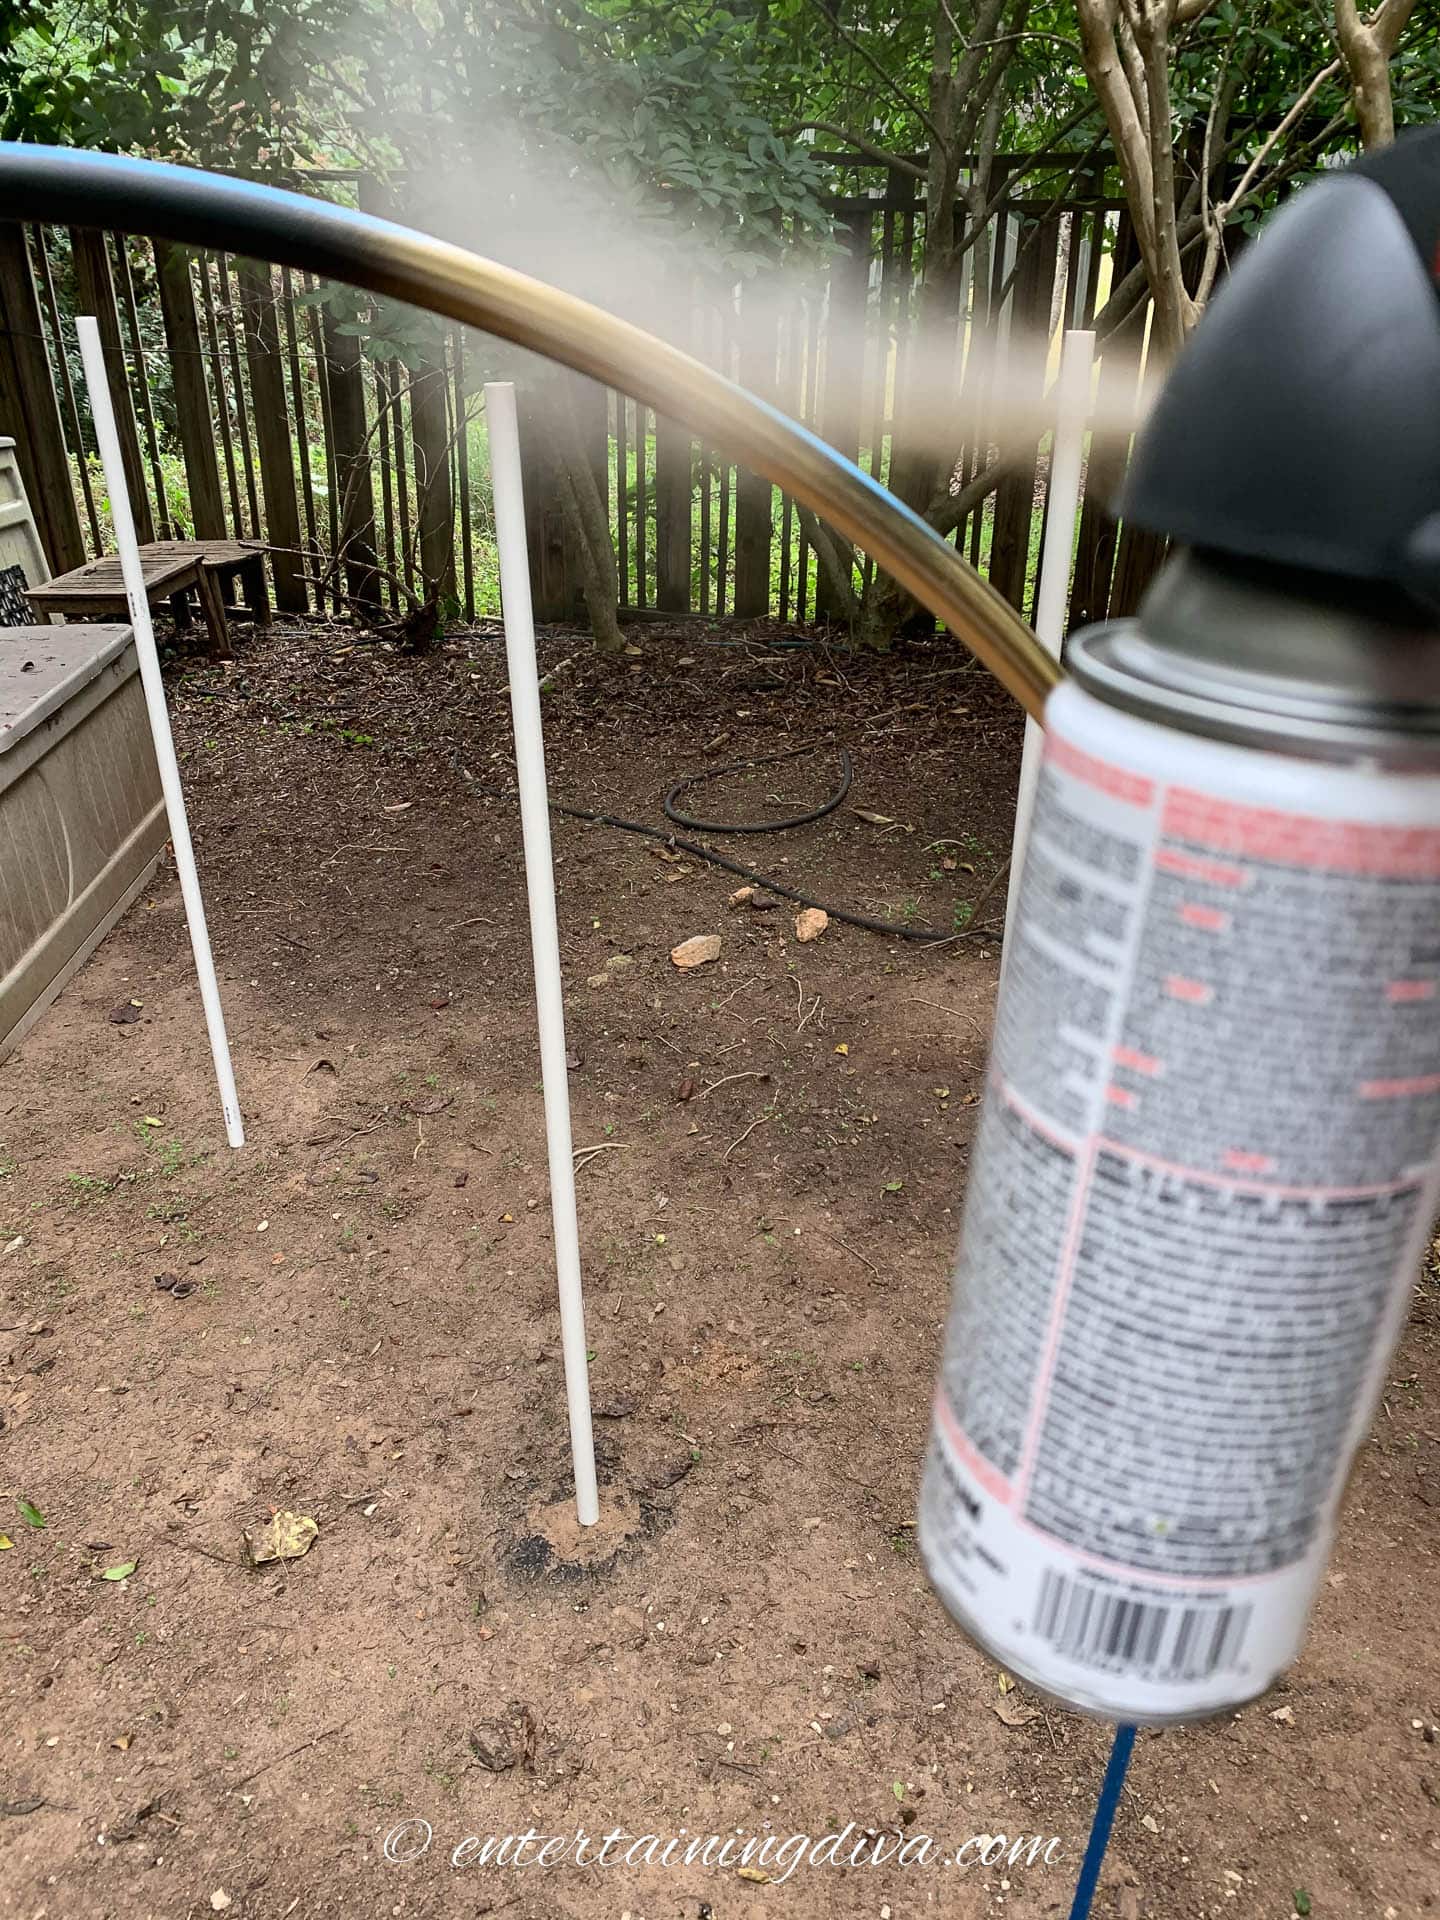
To make it easier to paint the PVC pipe and tubing, hammer 8 thin garden stakes into the ground, about 2 feet apart.
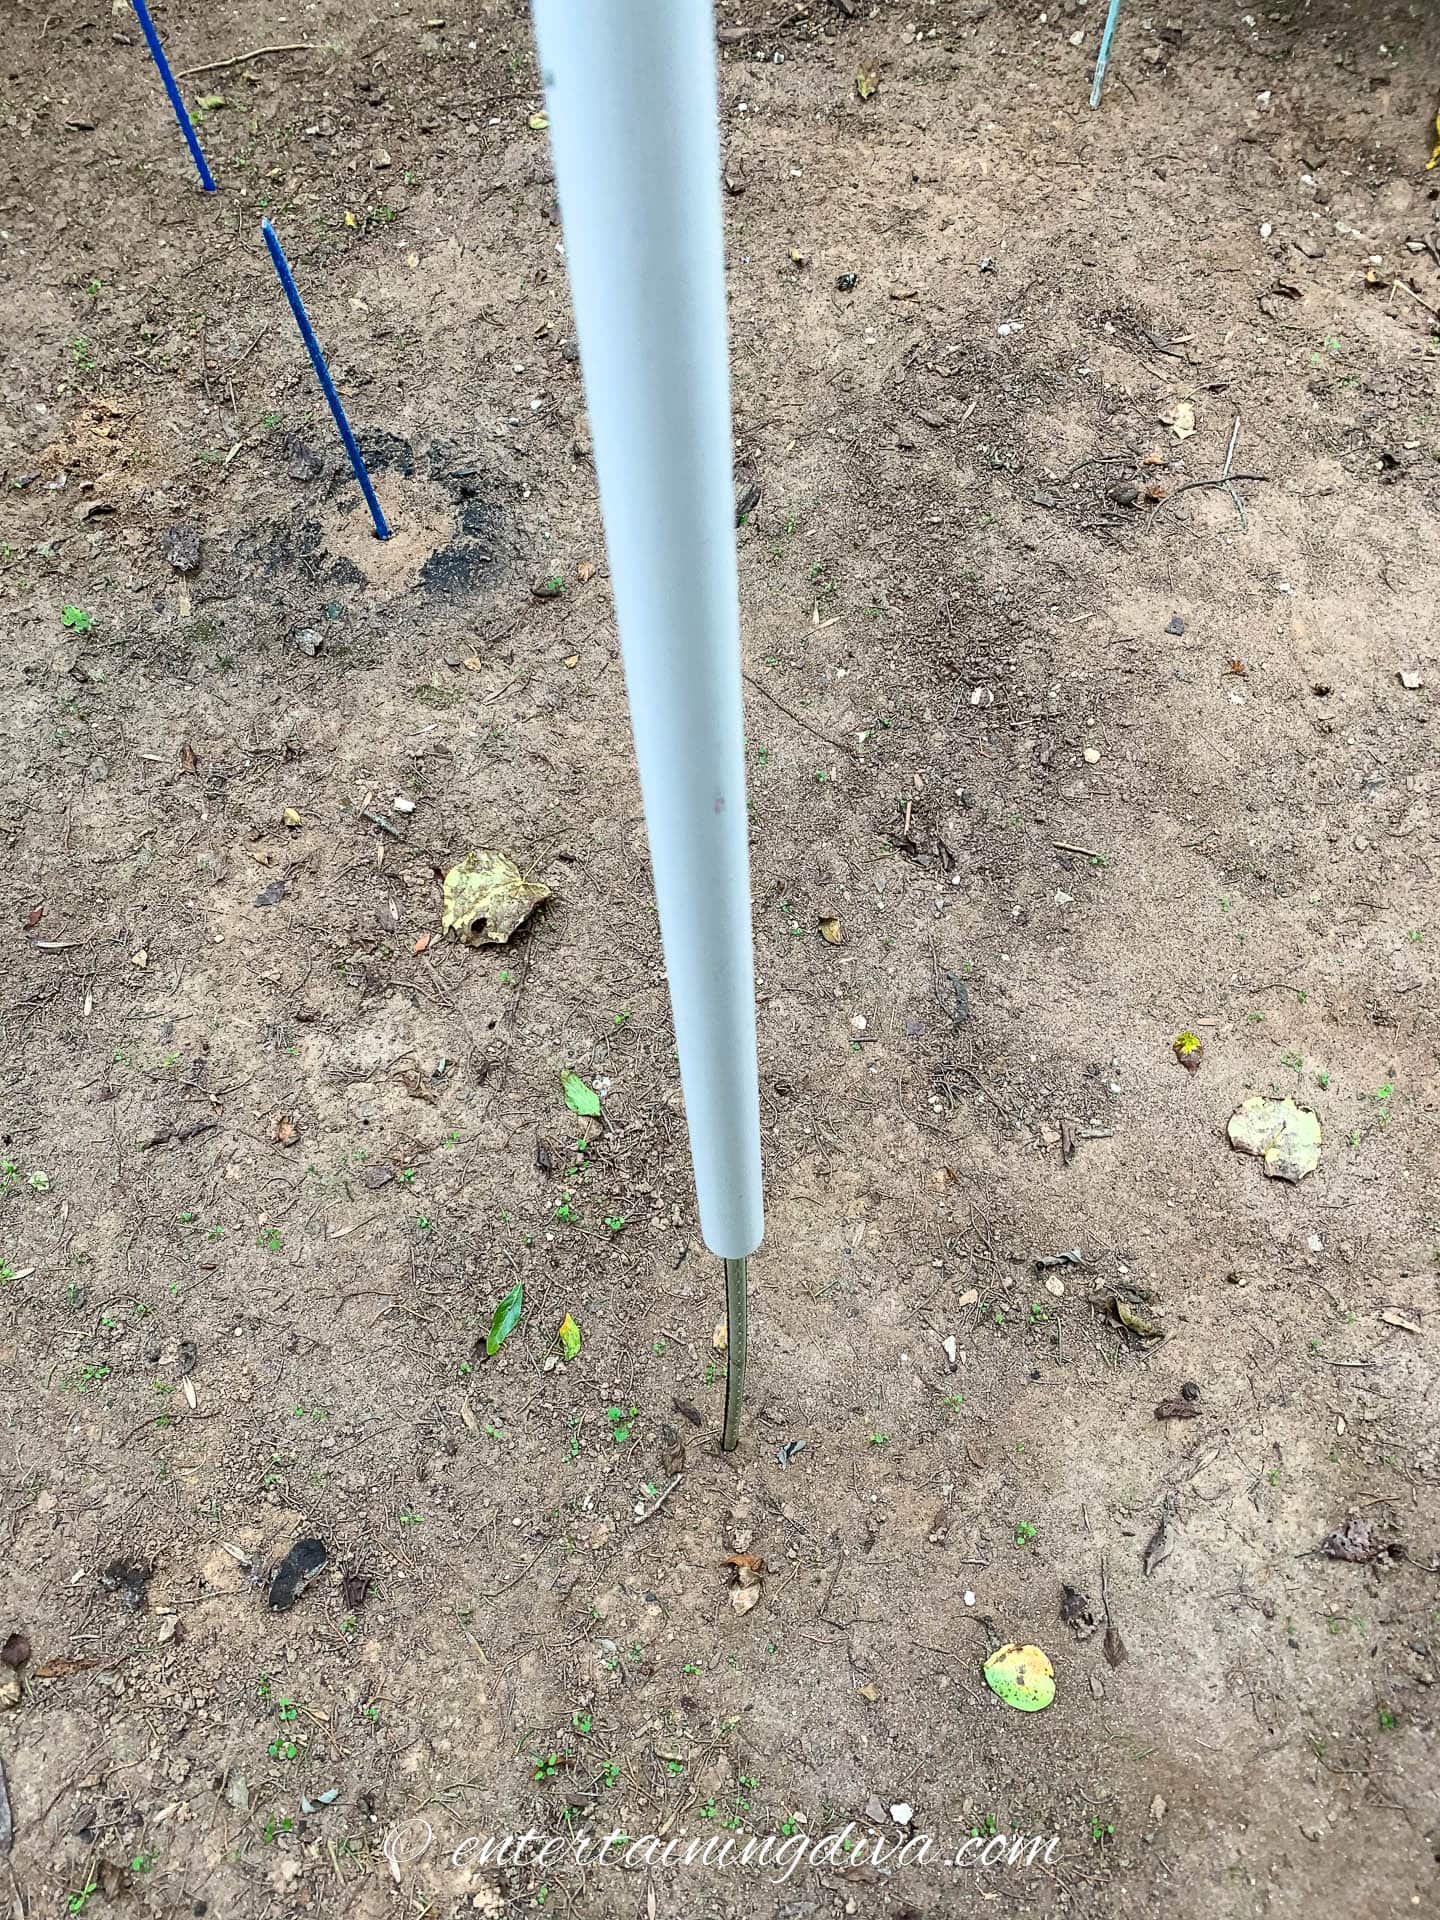
Then slip the PVC pipe over the top so it stands up.
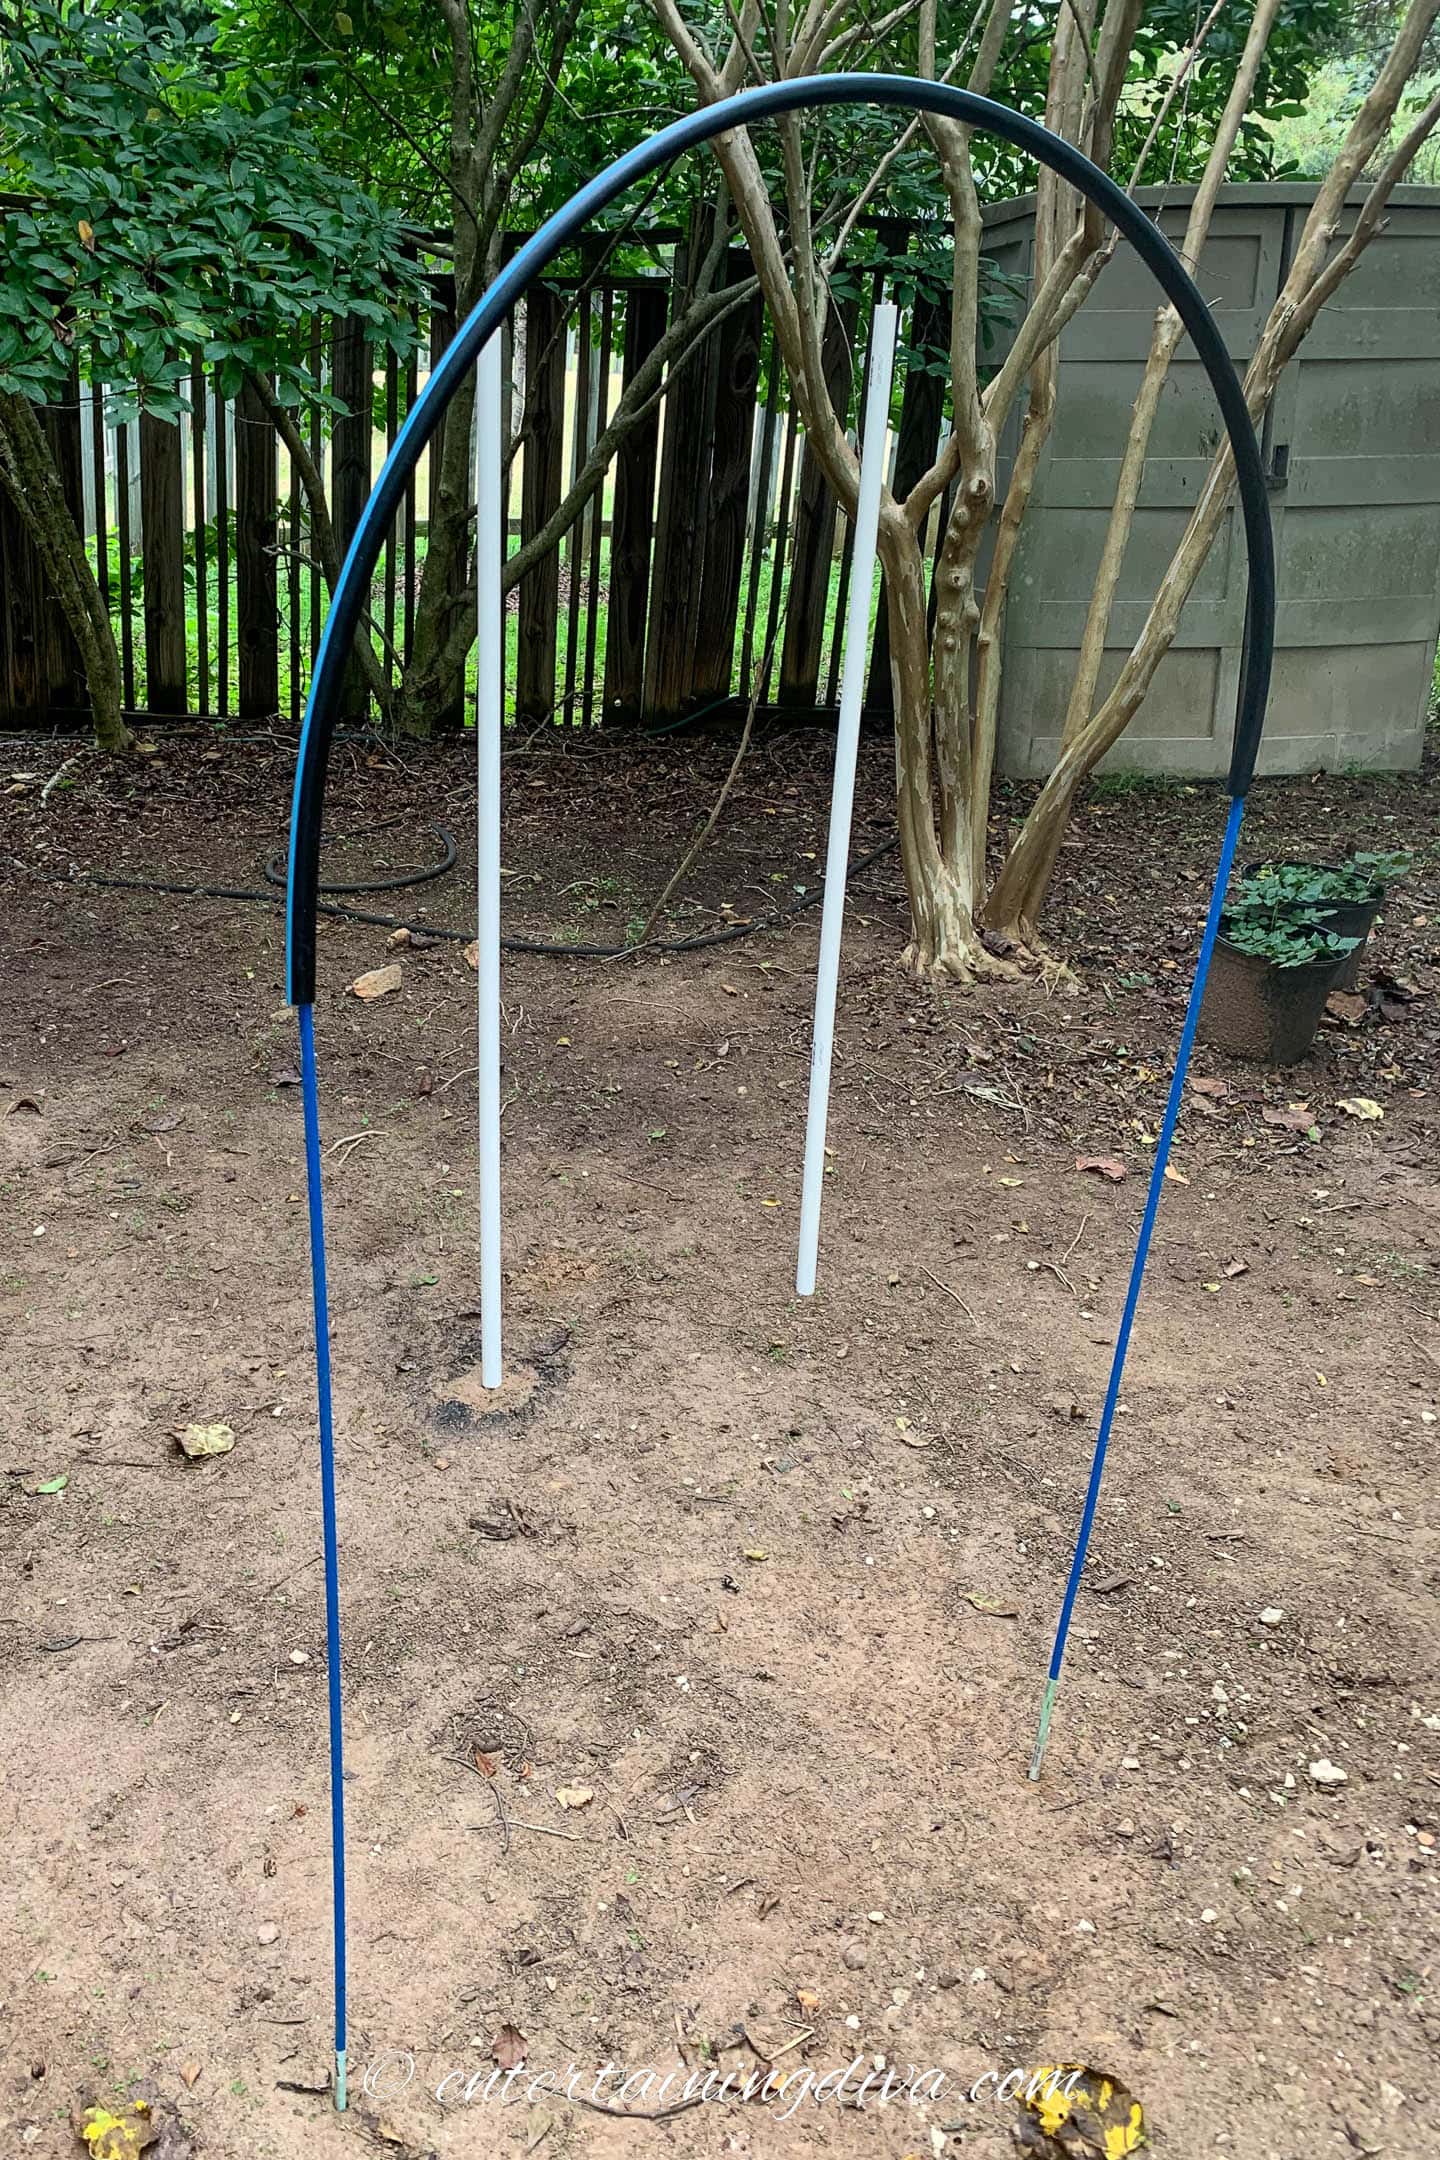
And stretch the flexible tubing between two garden stakes so that it makes an arch.
That way you can paint all sides of the tube without having to wait for part of it to dry.
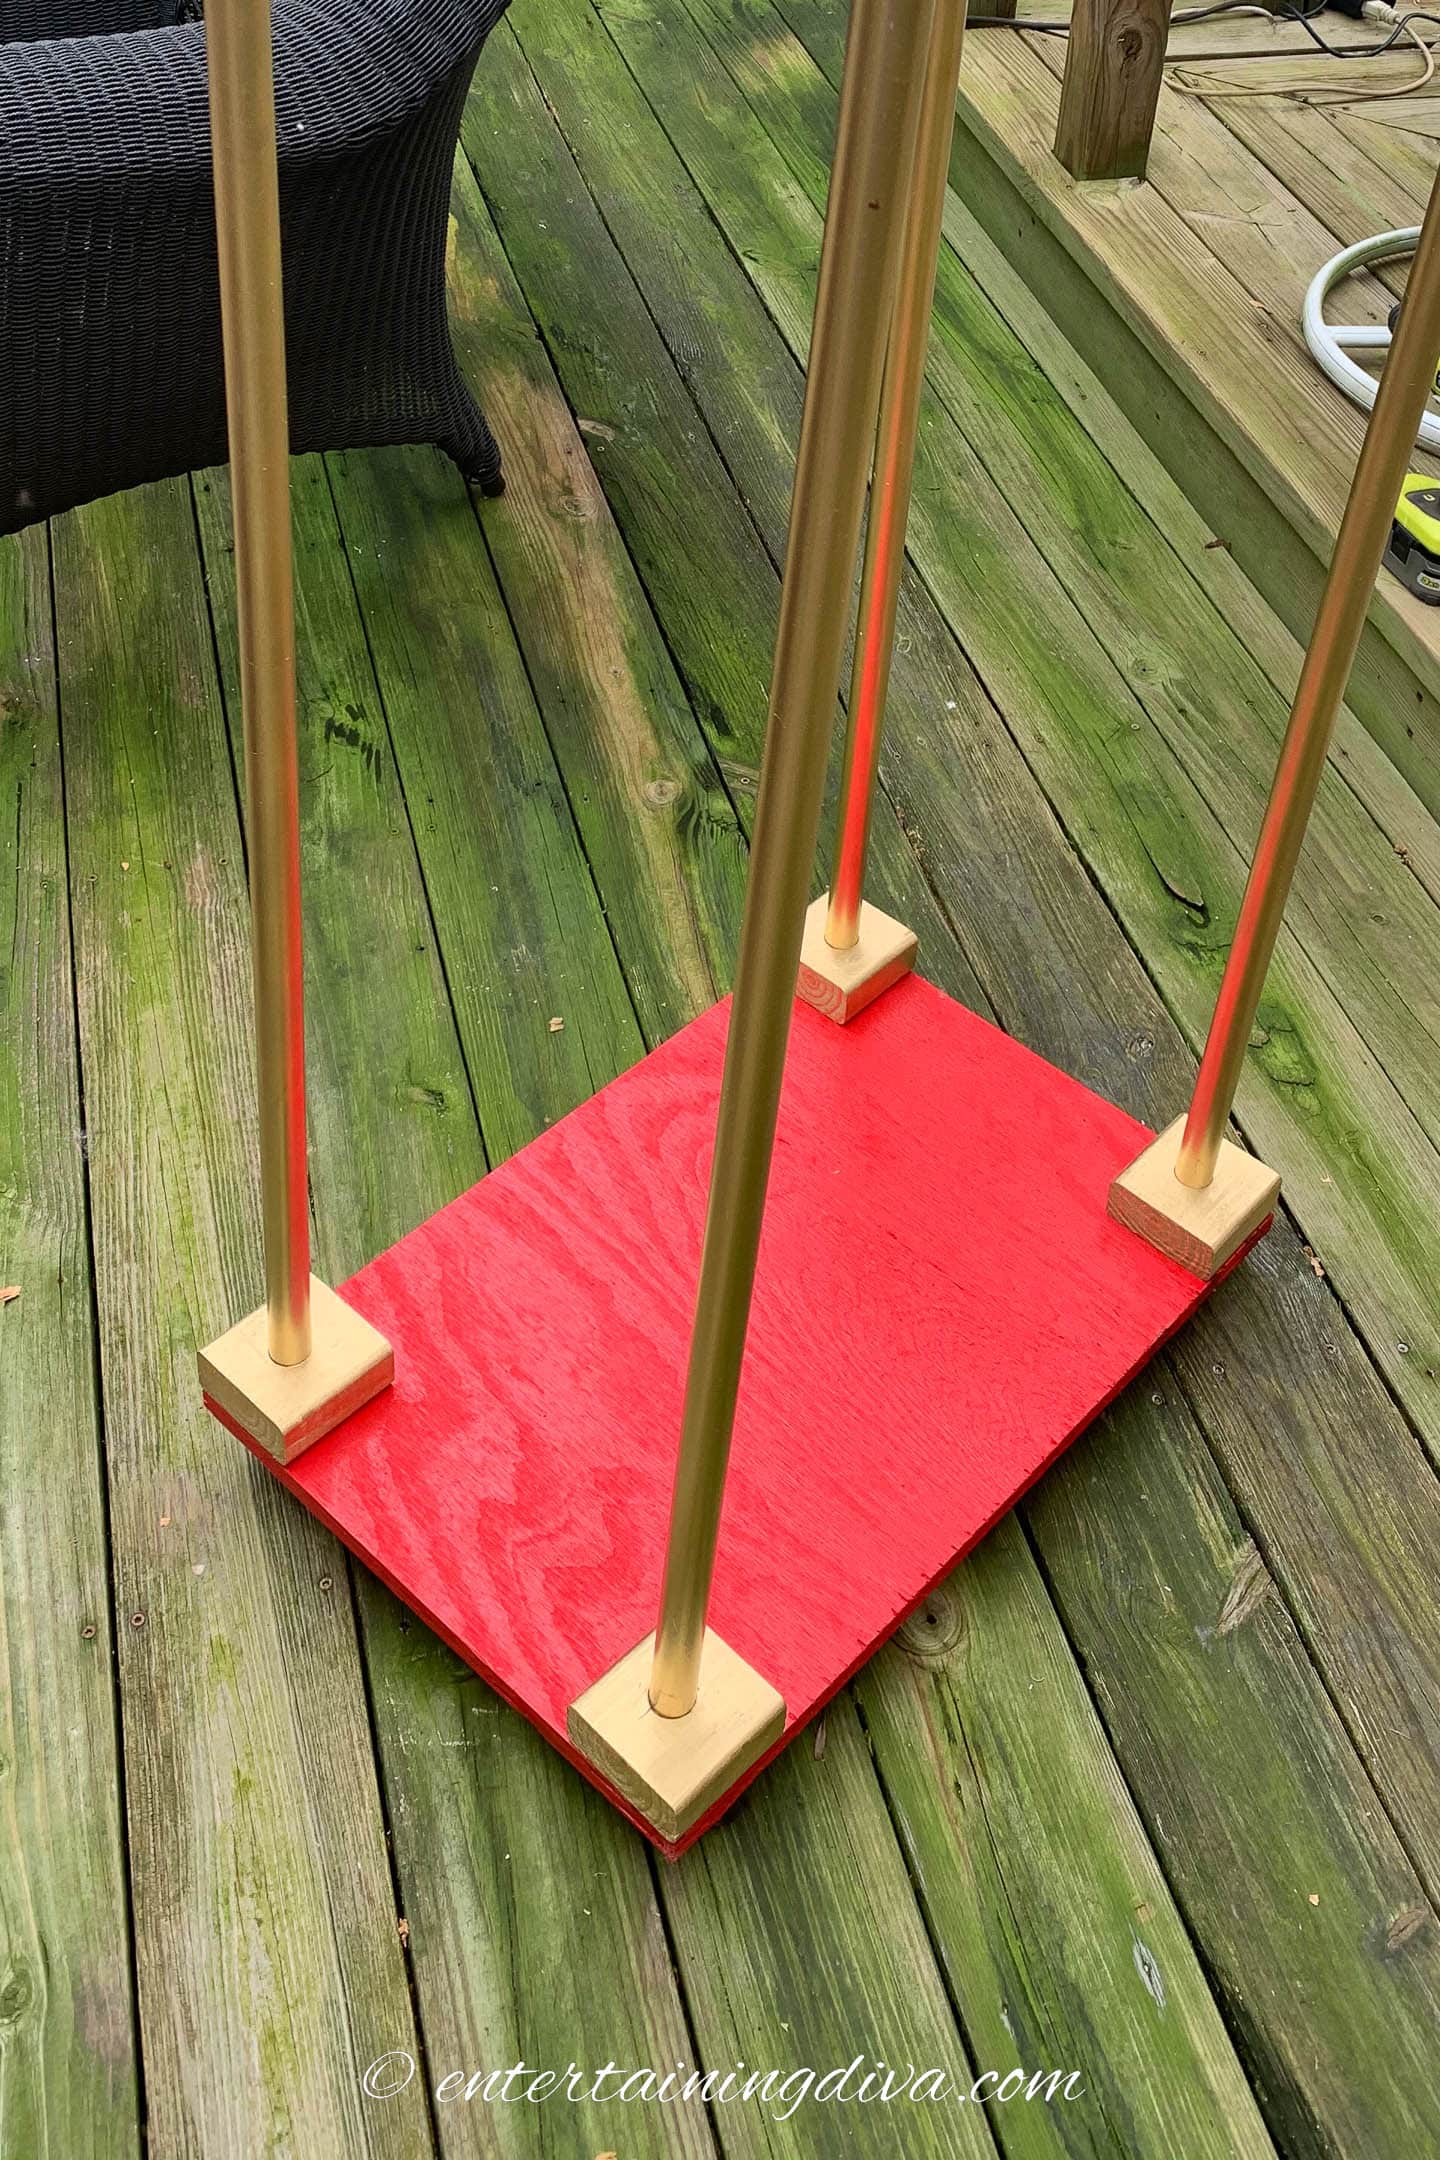
3 | Attach the wood blocks
Next we’re going to attach the wood blocks that will hold the PVC pipe columns in place.
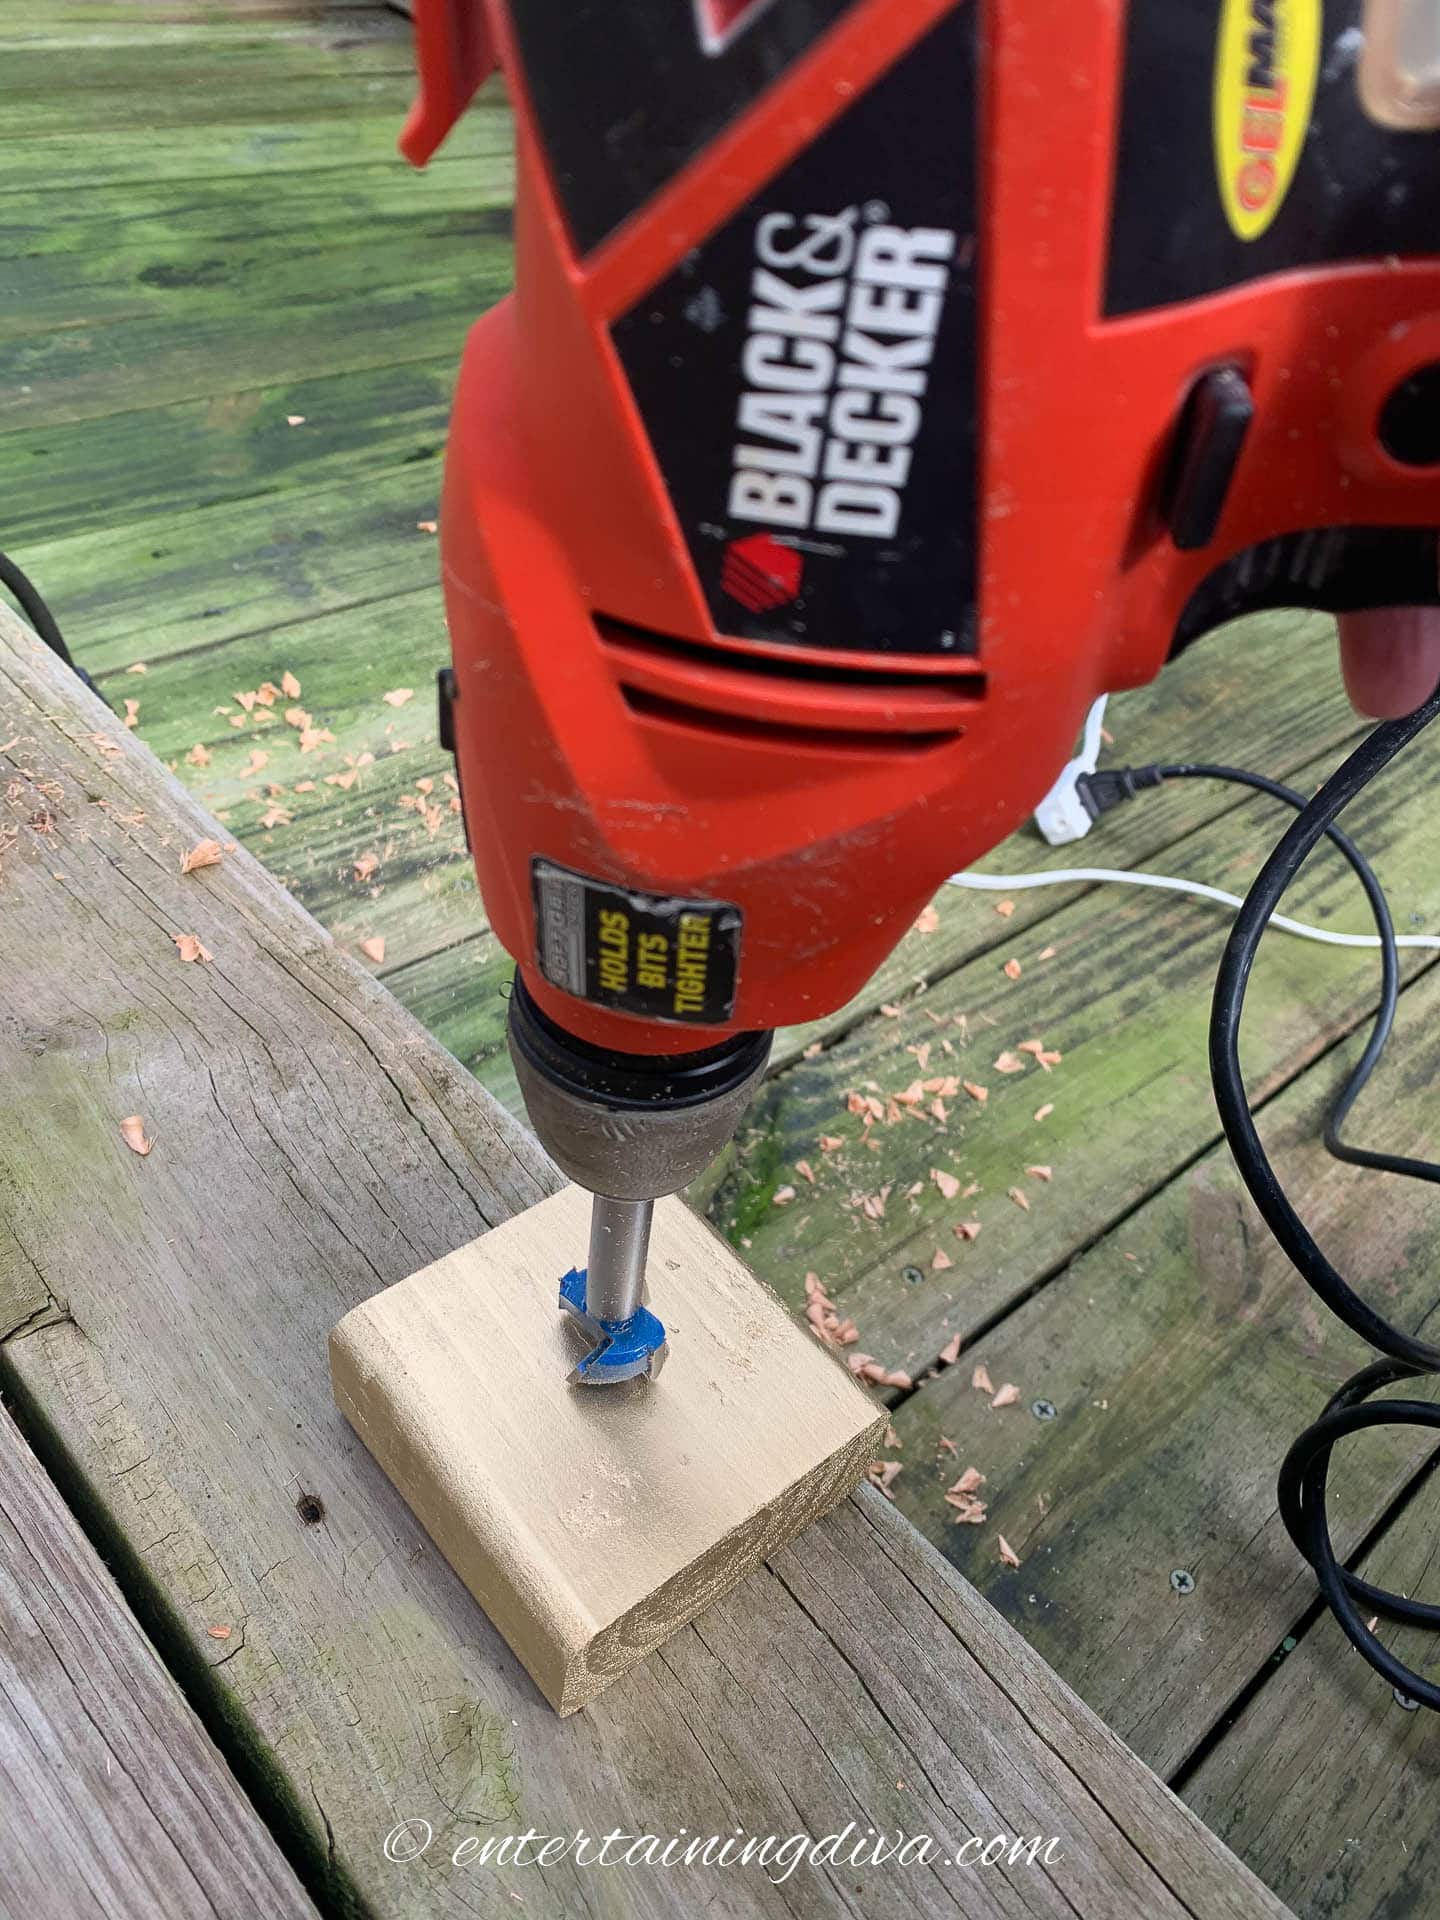
But first you’ll need to drill 3/4″ holes in the middle of each one. (That’s where the pipe will go.)
I drilled them on the painted side because it usually makes a cleaner hole on this side.
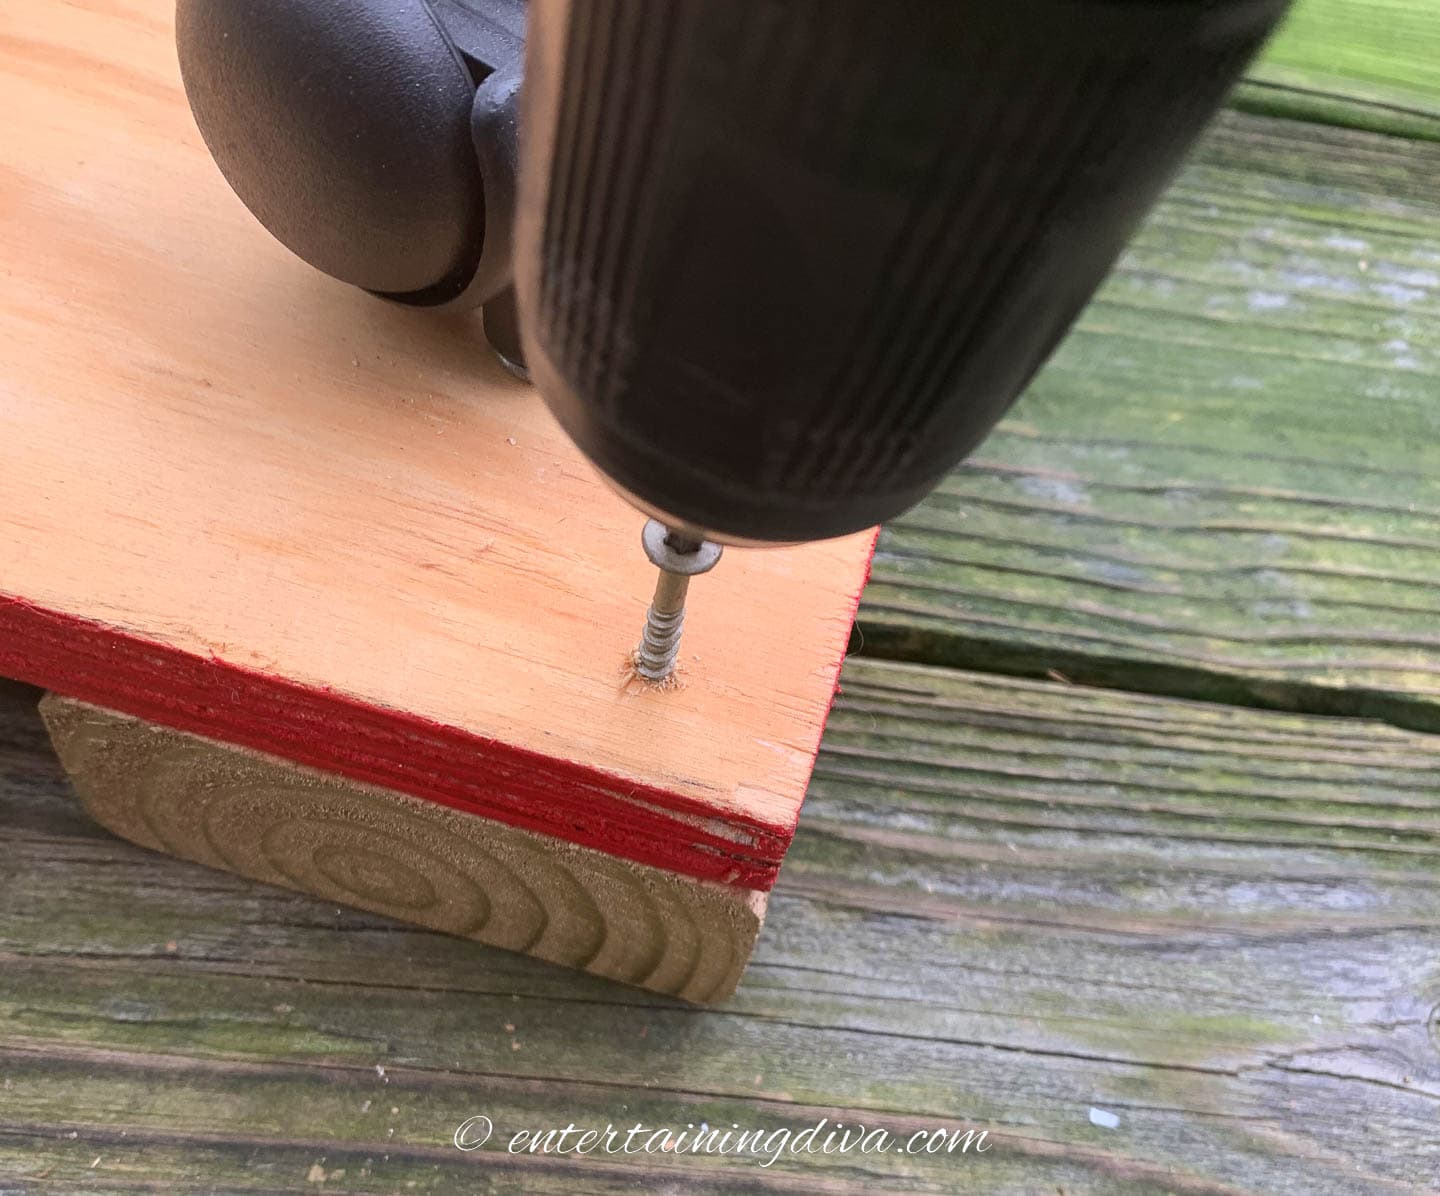
Attach the blocks to each corner of the painted side of the plywood with 2 screws.
Screw through the underside of the plywood to the underside of the block so you can’t see the screws when the cart is upright.
If you only painted one side of the blocks, make sure that the gold side is showing.
4 | Install the castors
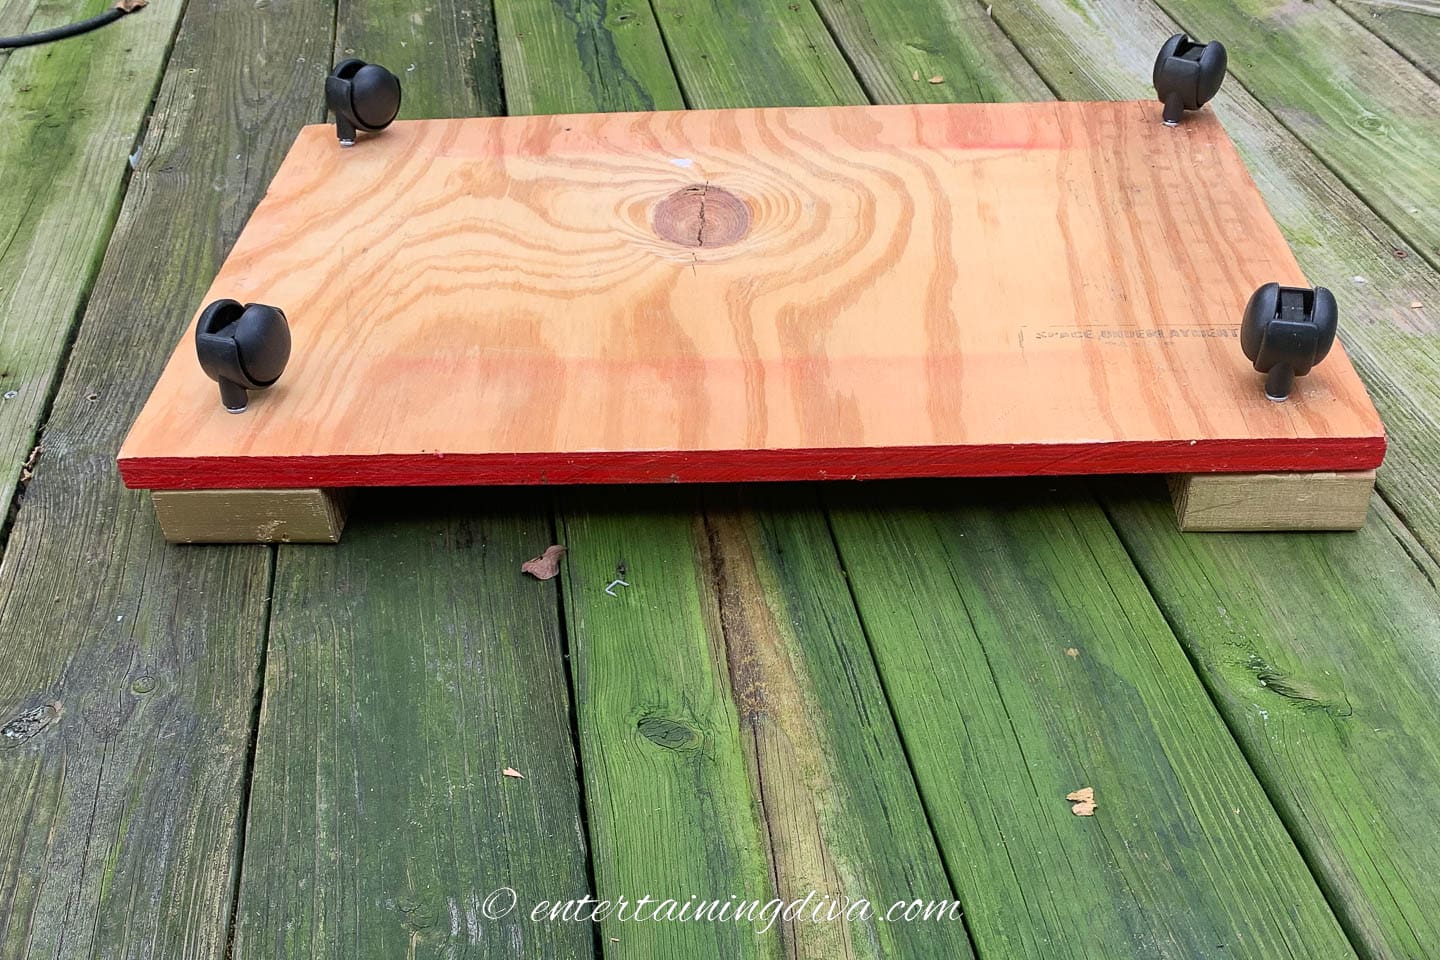
Next we’ll add castors to the four corners on the bottom of the cart so that you can move it around easily.
(Ignore all the algae on my deck. Since I wasn’t having anyone over during the pandemic, I was a little lax on my cleaning schedule).
I used some wheels that I already had on hand which didn’t come with a screw-in base.
So I had to drill holes in the bottom of the plywood that were wide enough for the castor pegs to fit in.
But you could also use the kind with a base that screws on to the wood. These are a little easier to work with because they don’t fall out if you have to lift the cart up for some reason.
5 | Add the top
Now we’re on to the last step. Putting the top of the bellboy cart together.
To do this, insert one of the PVC pipes into each of the holes in the corner blocks.
You can glue them in there if you want to. But I found that they fit snugly, so it wasn’t really necessary.
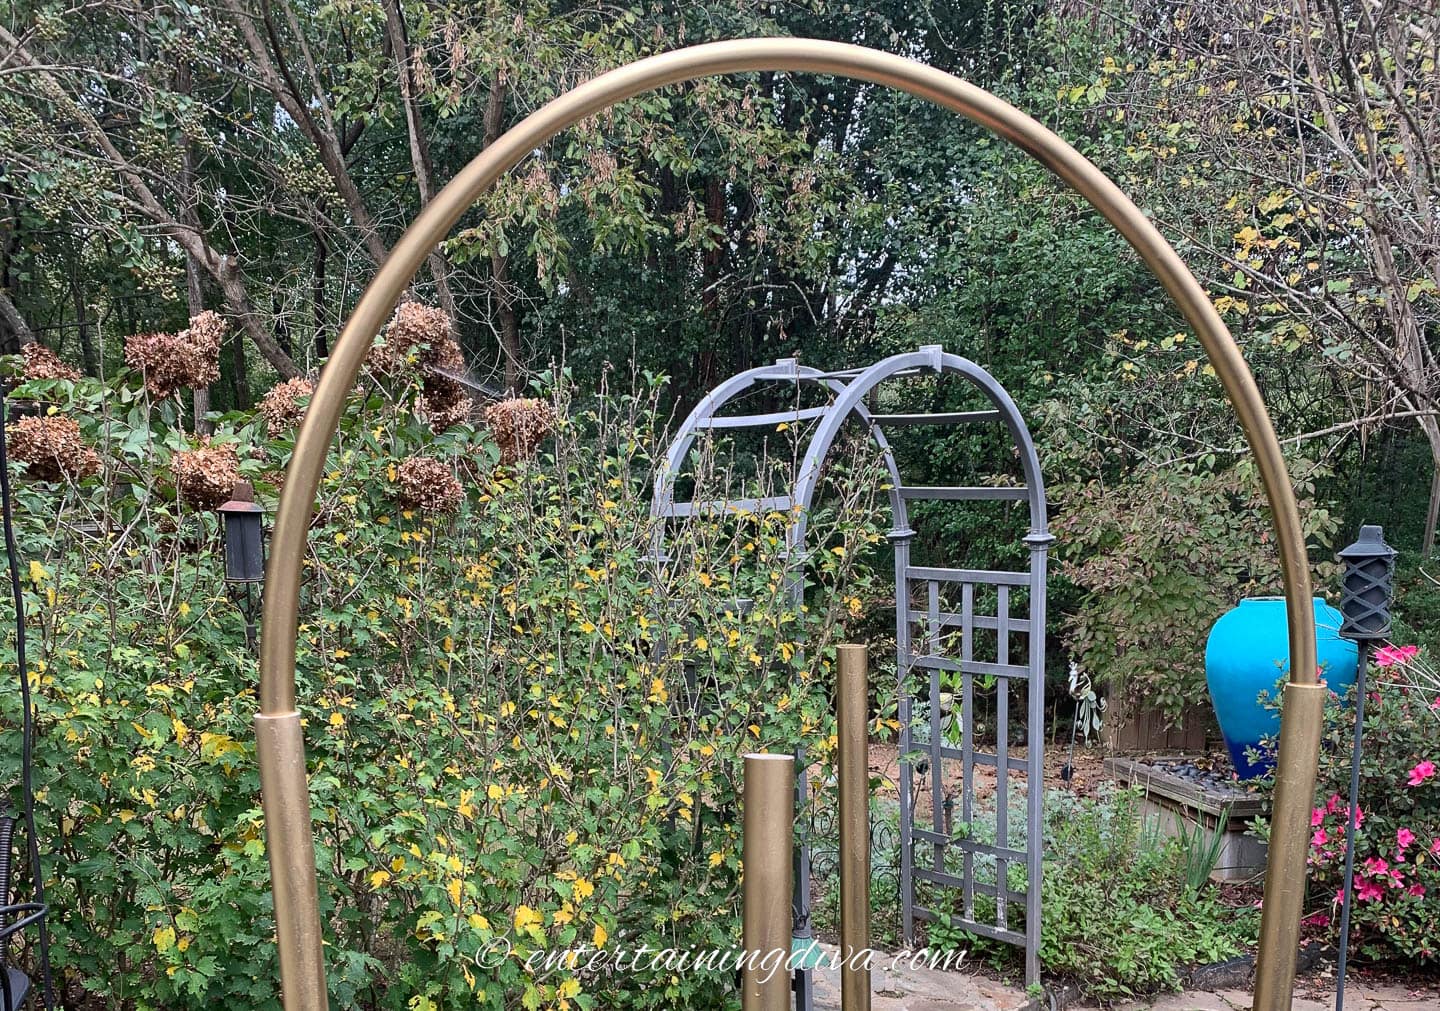
Then insert the first piece of flexible pump tubing into the tops of the PVC pipes so that it crosses the cart diagonally.
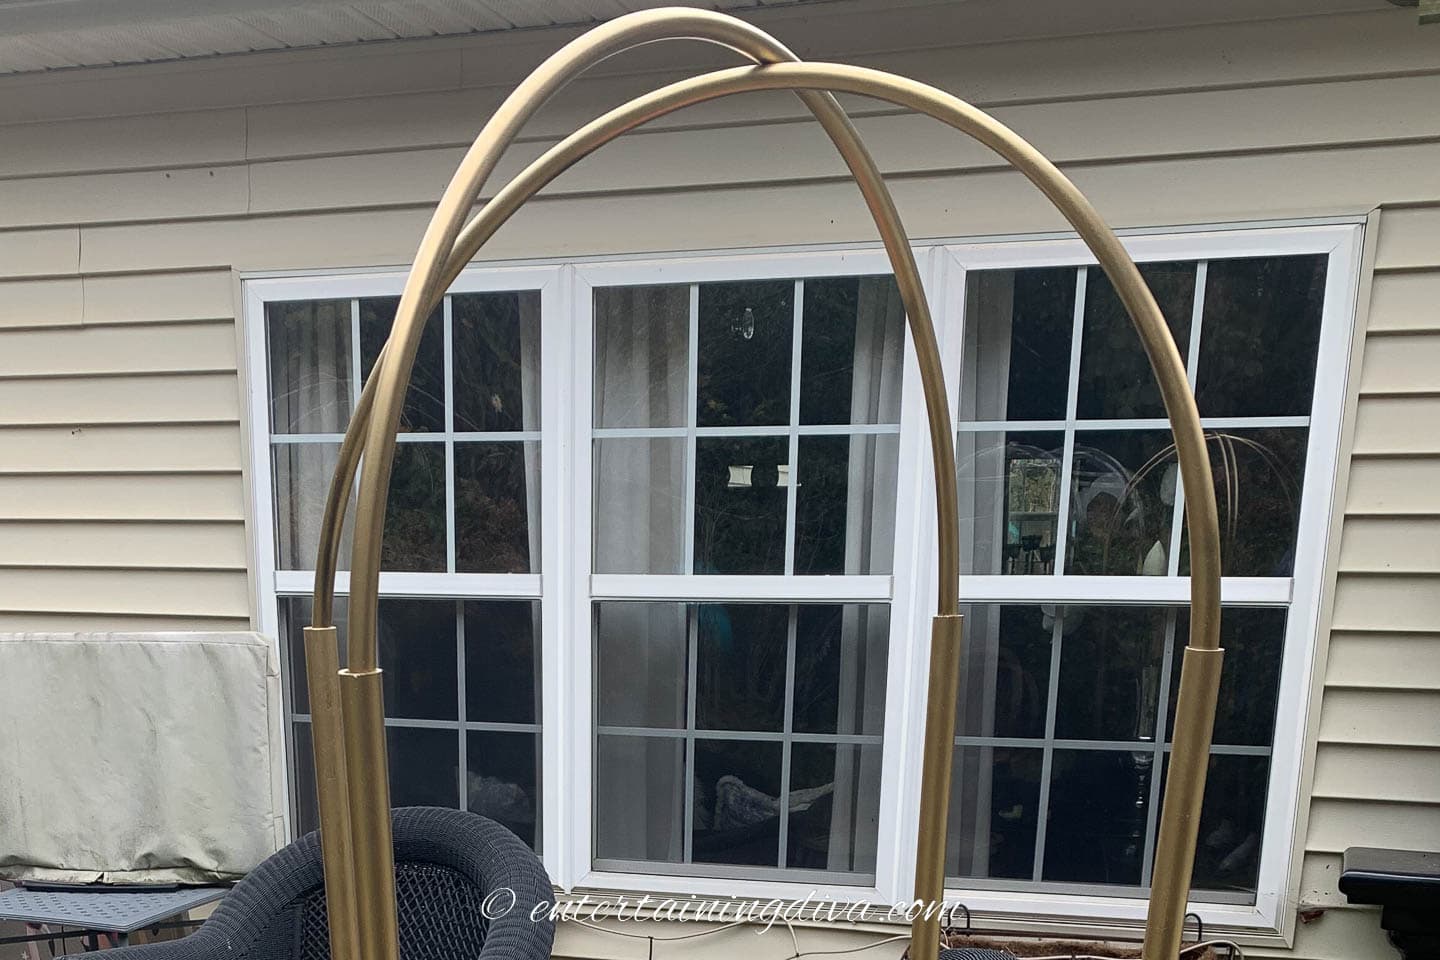
Do the same with other piece of flexible tubing so that they cross in the middle of the cart.
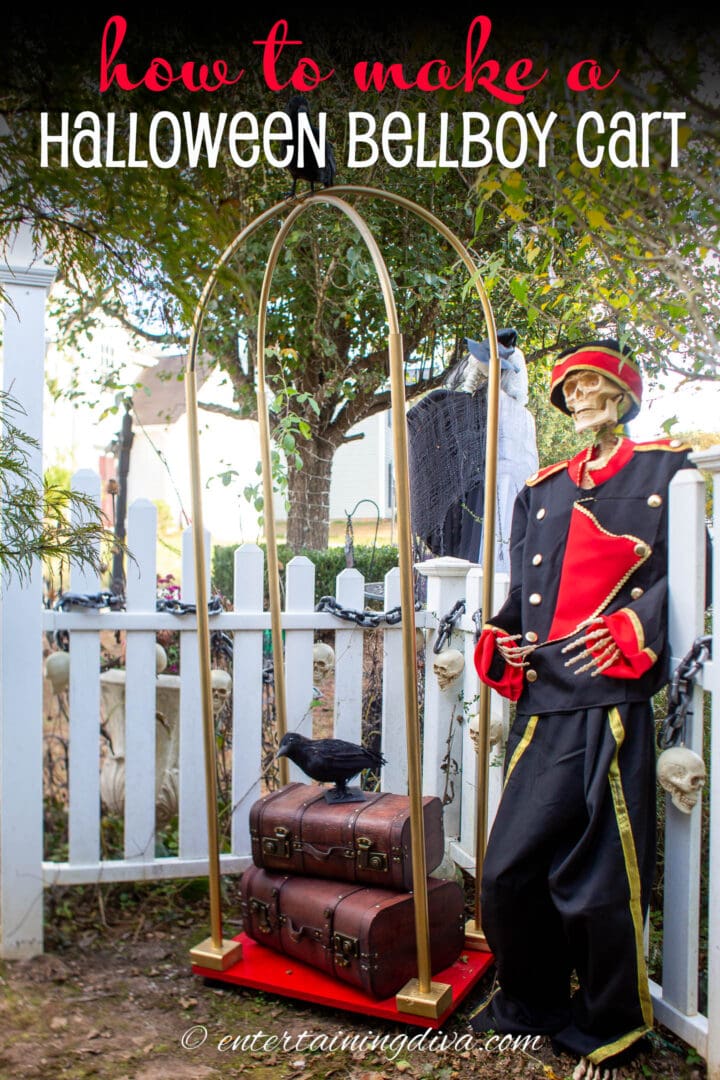
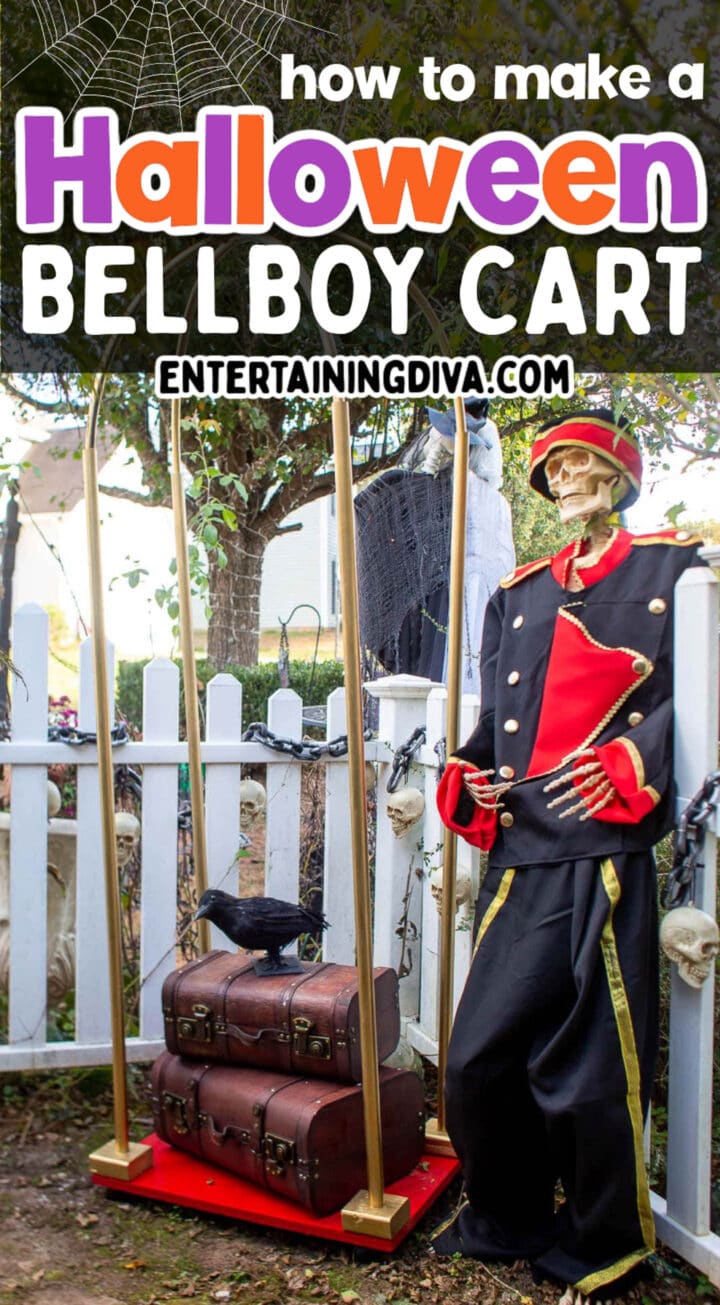
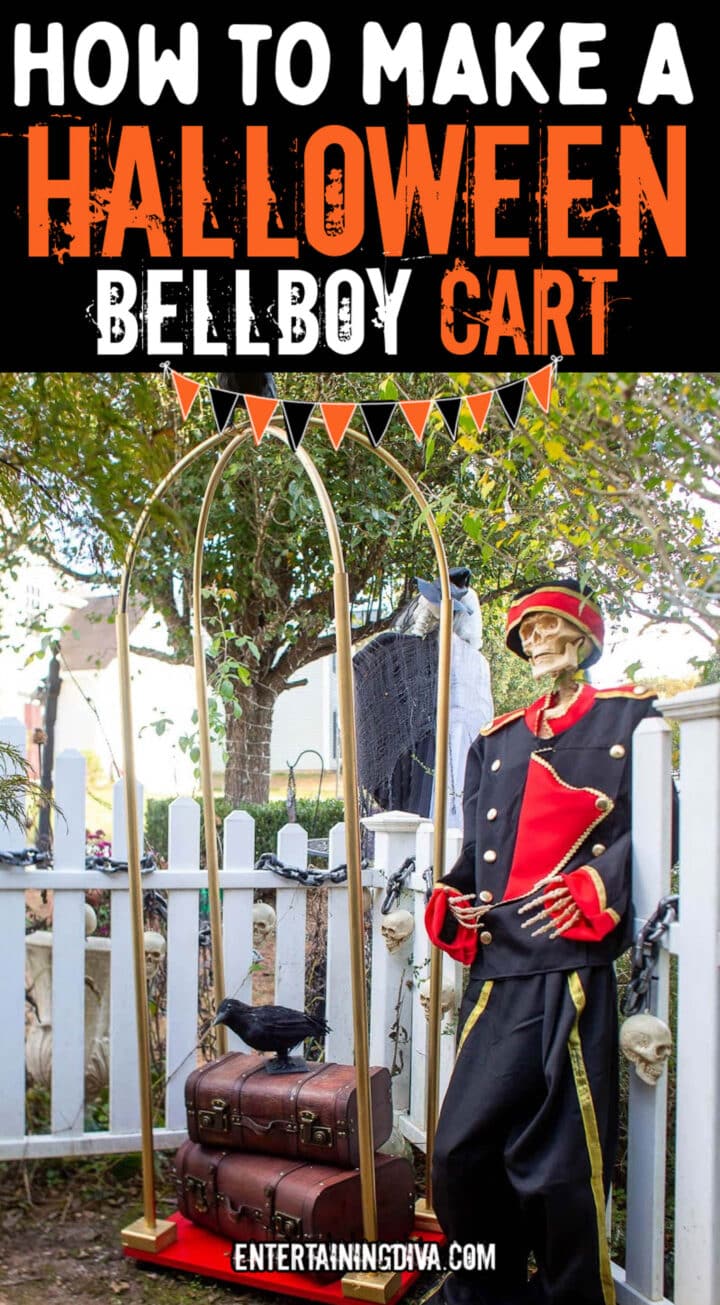
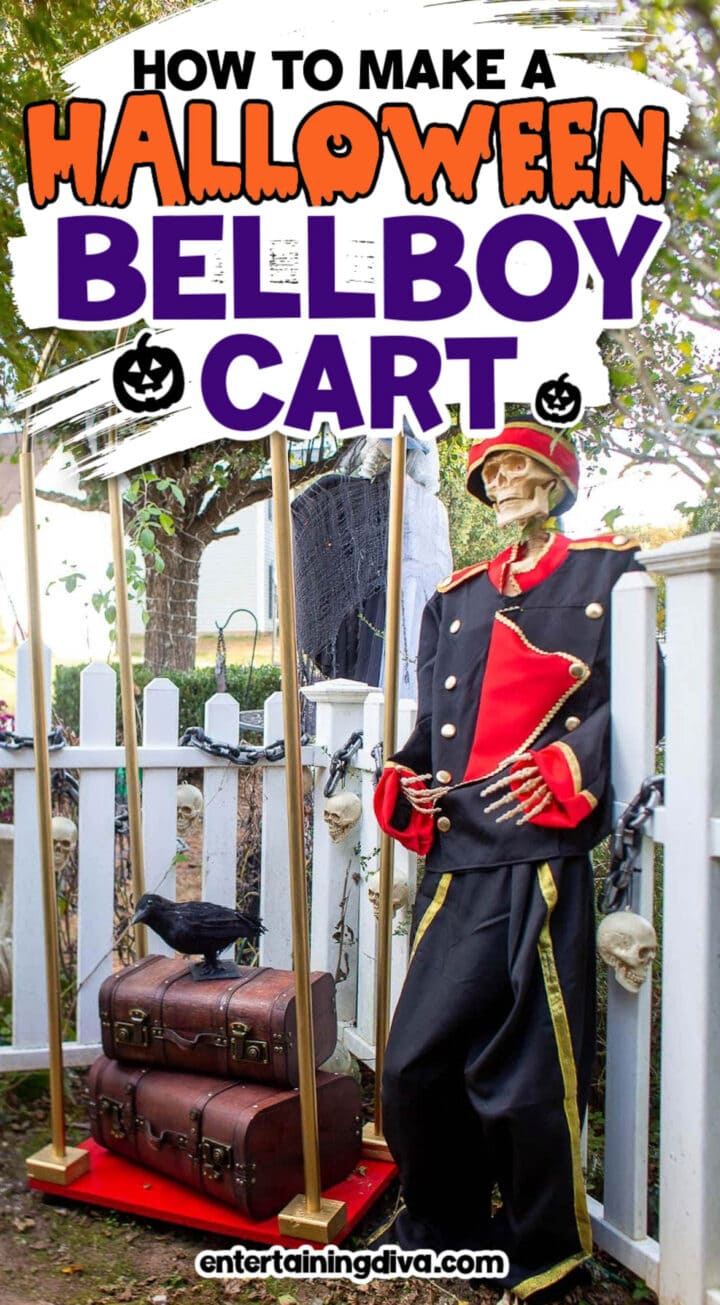
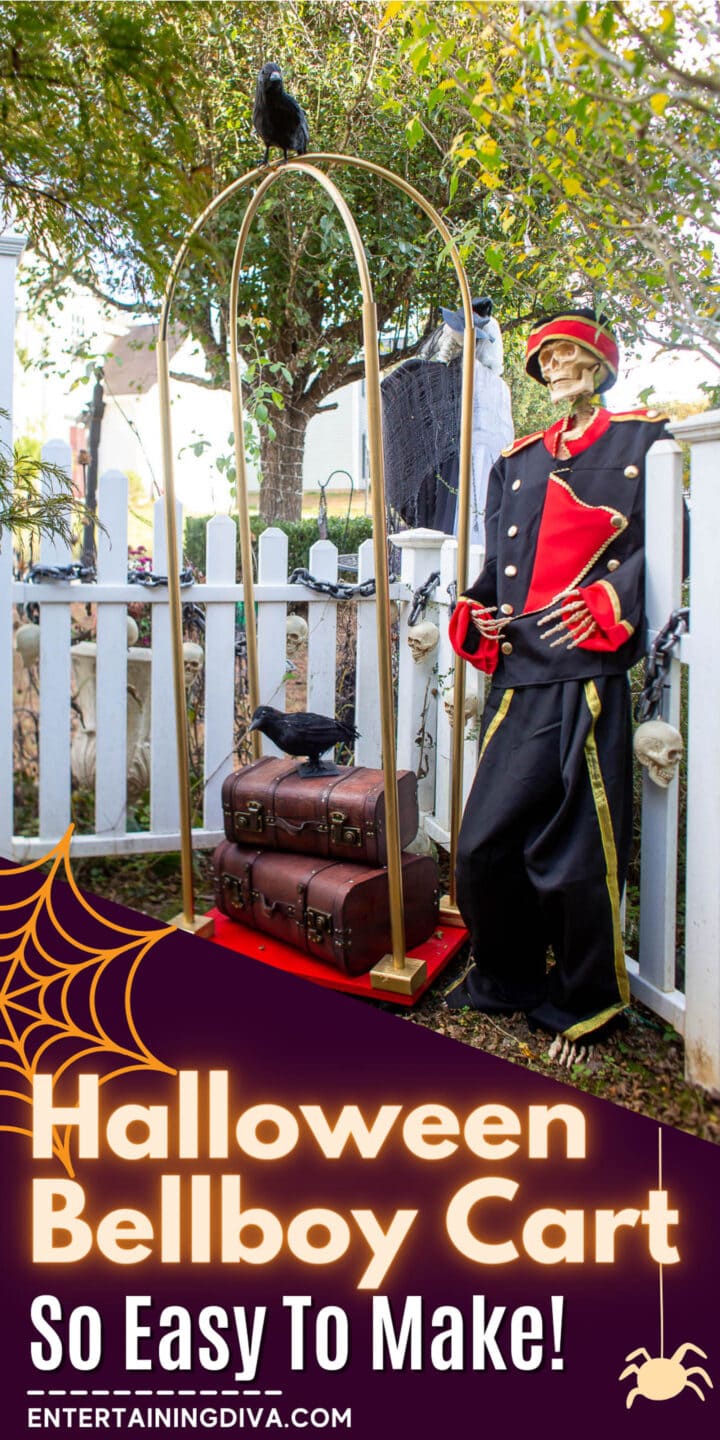
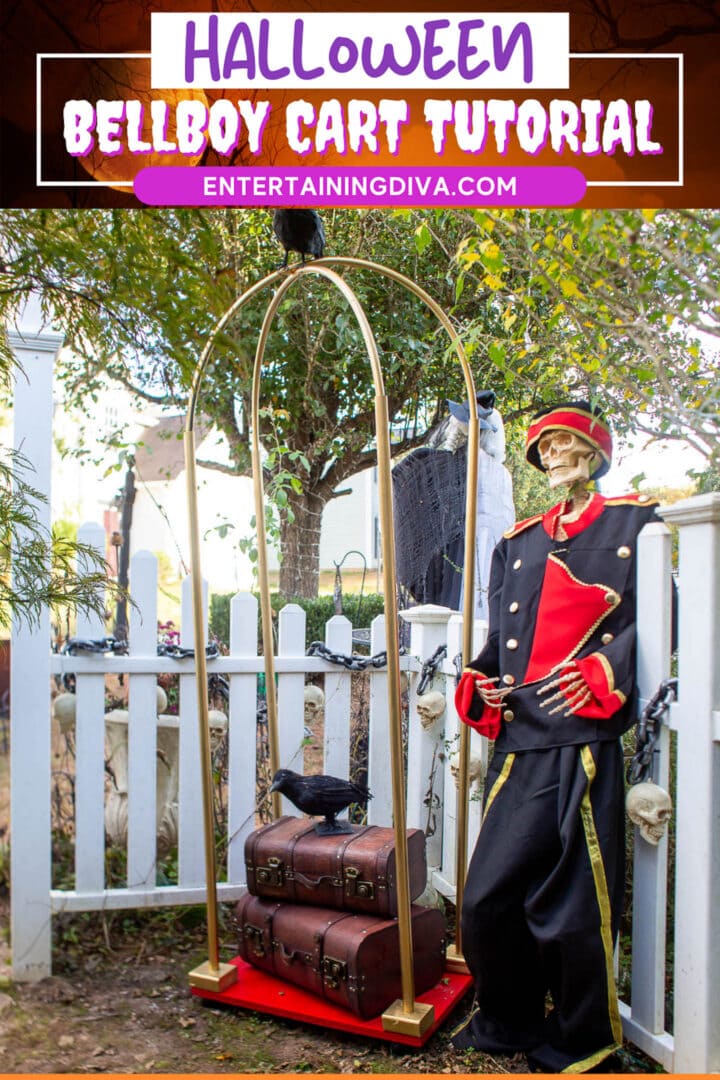
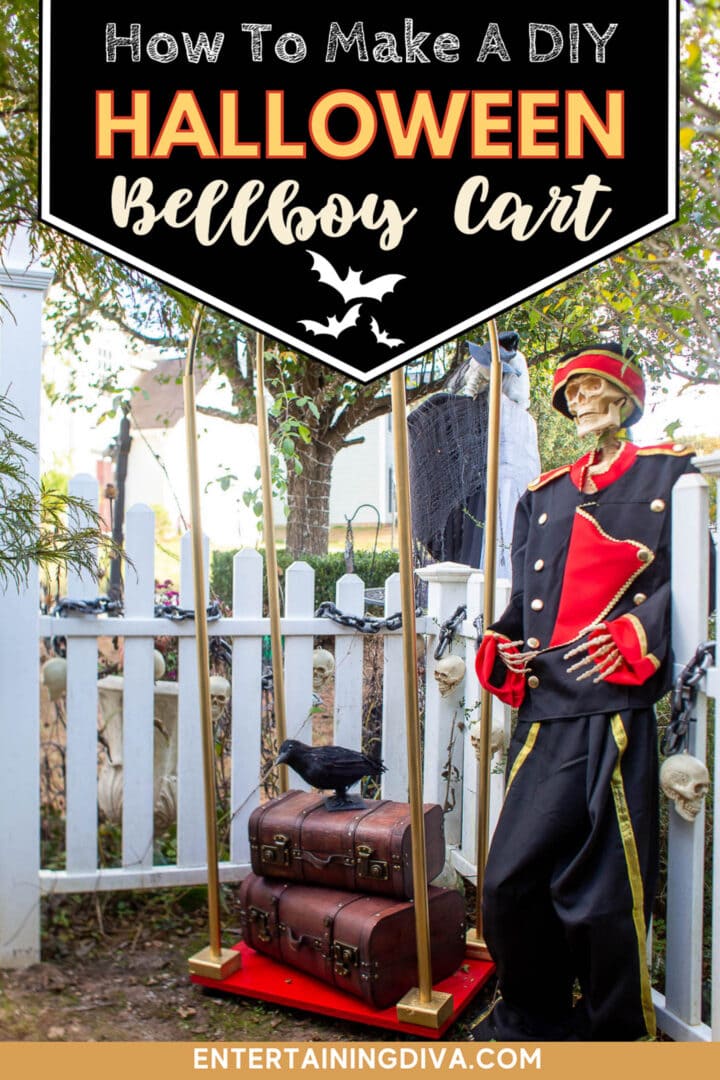
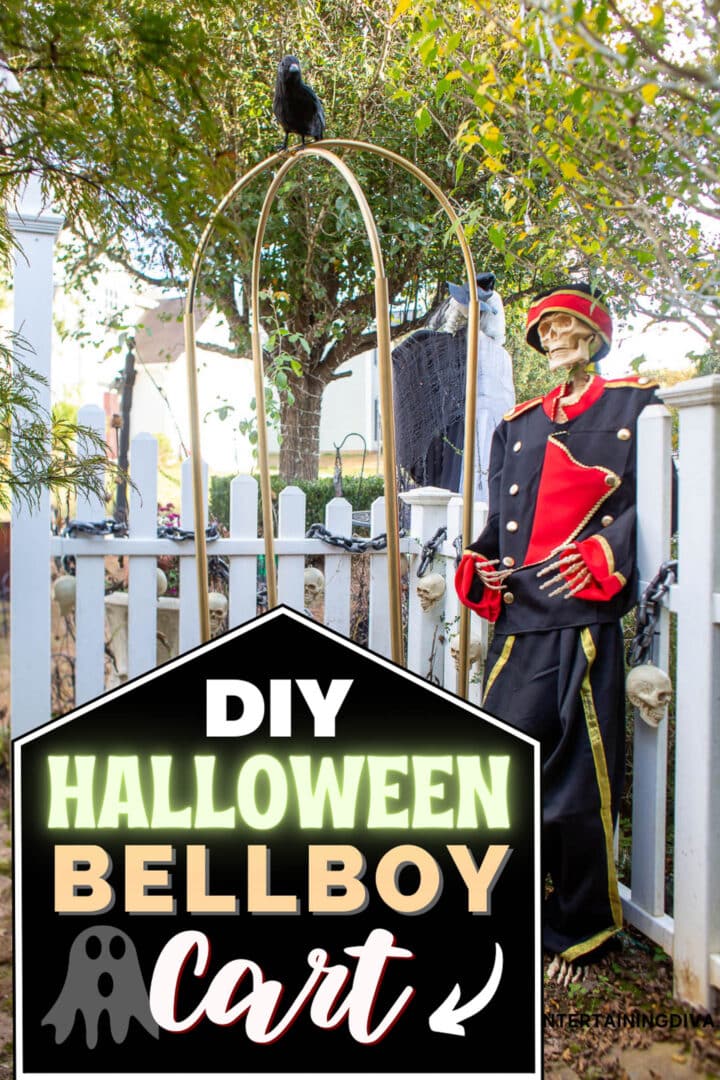
The finished bellboy cart
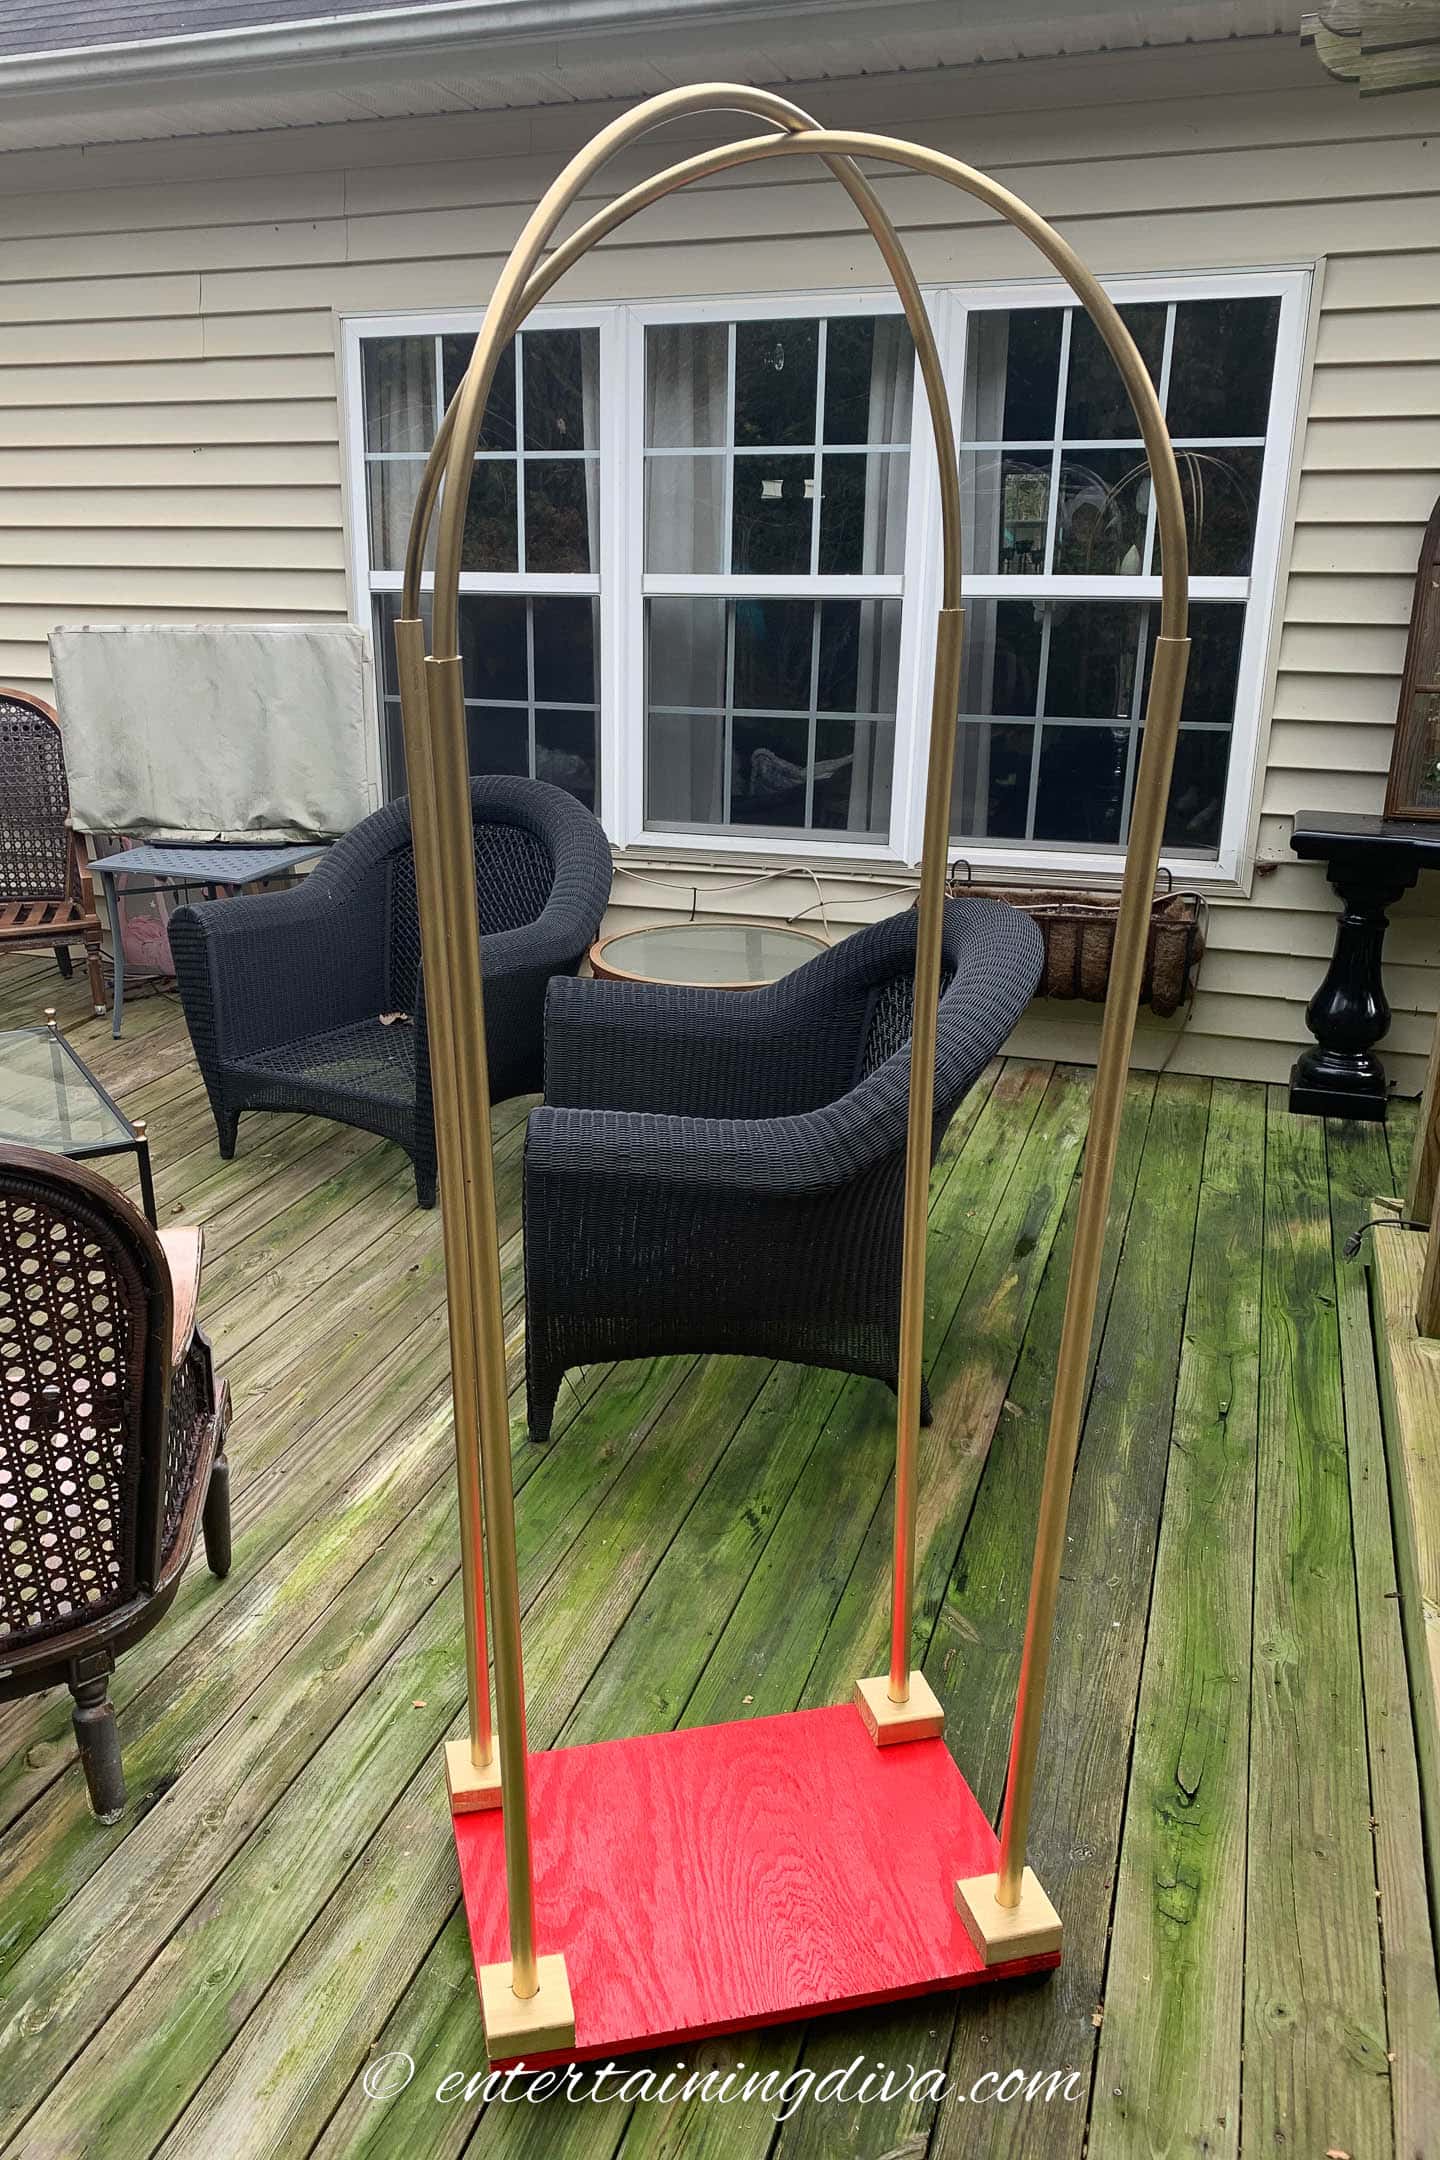
And that’s it! Your cart is finished.
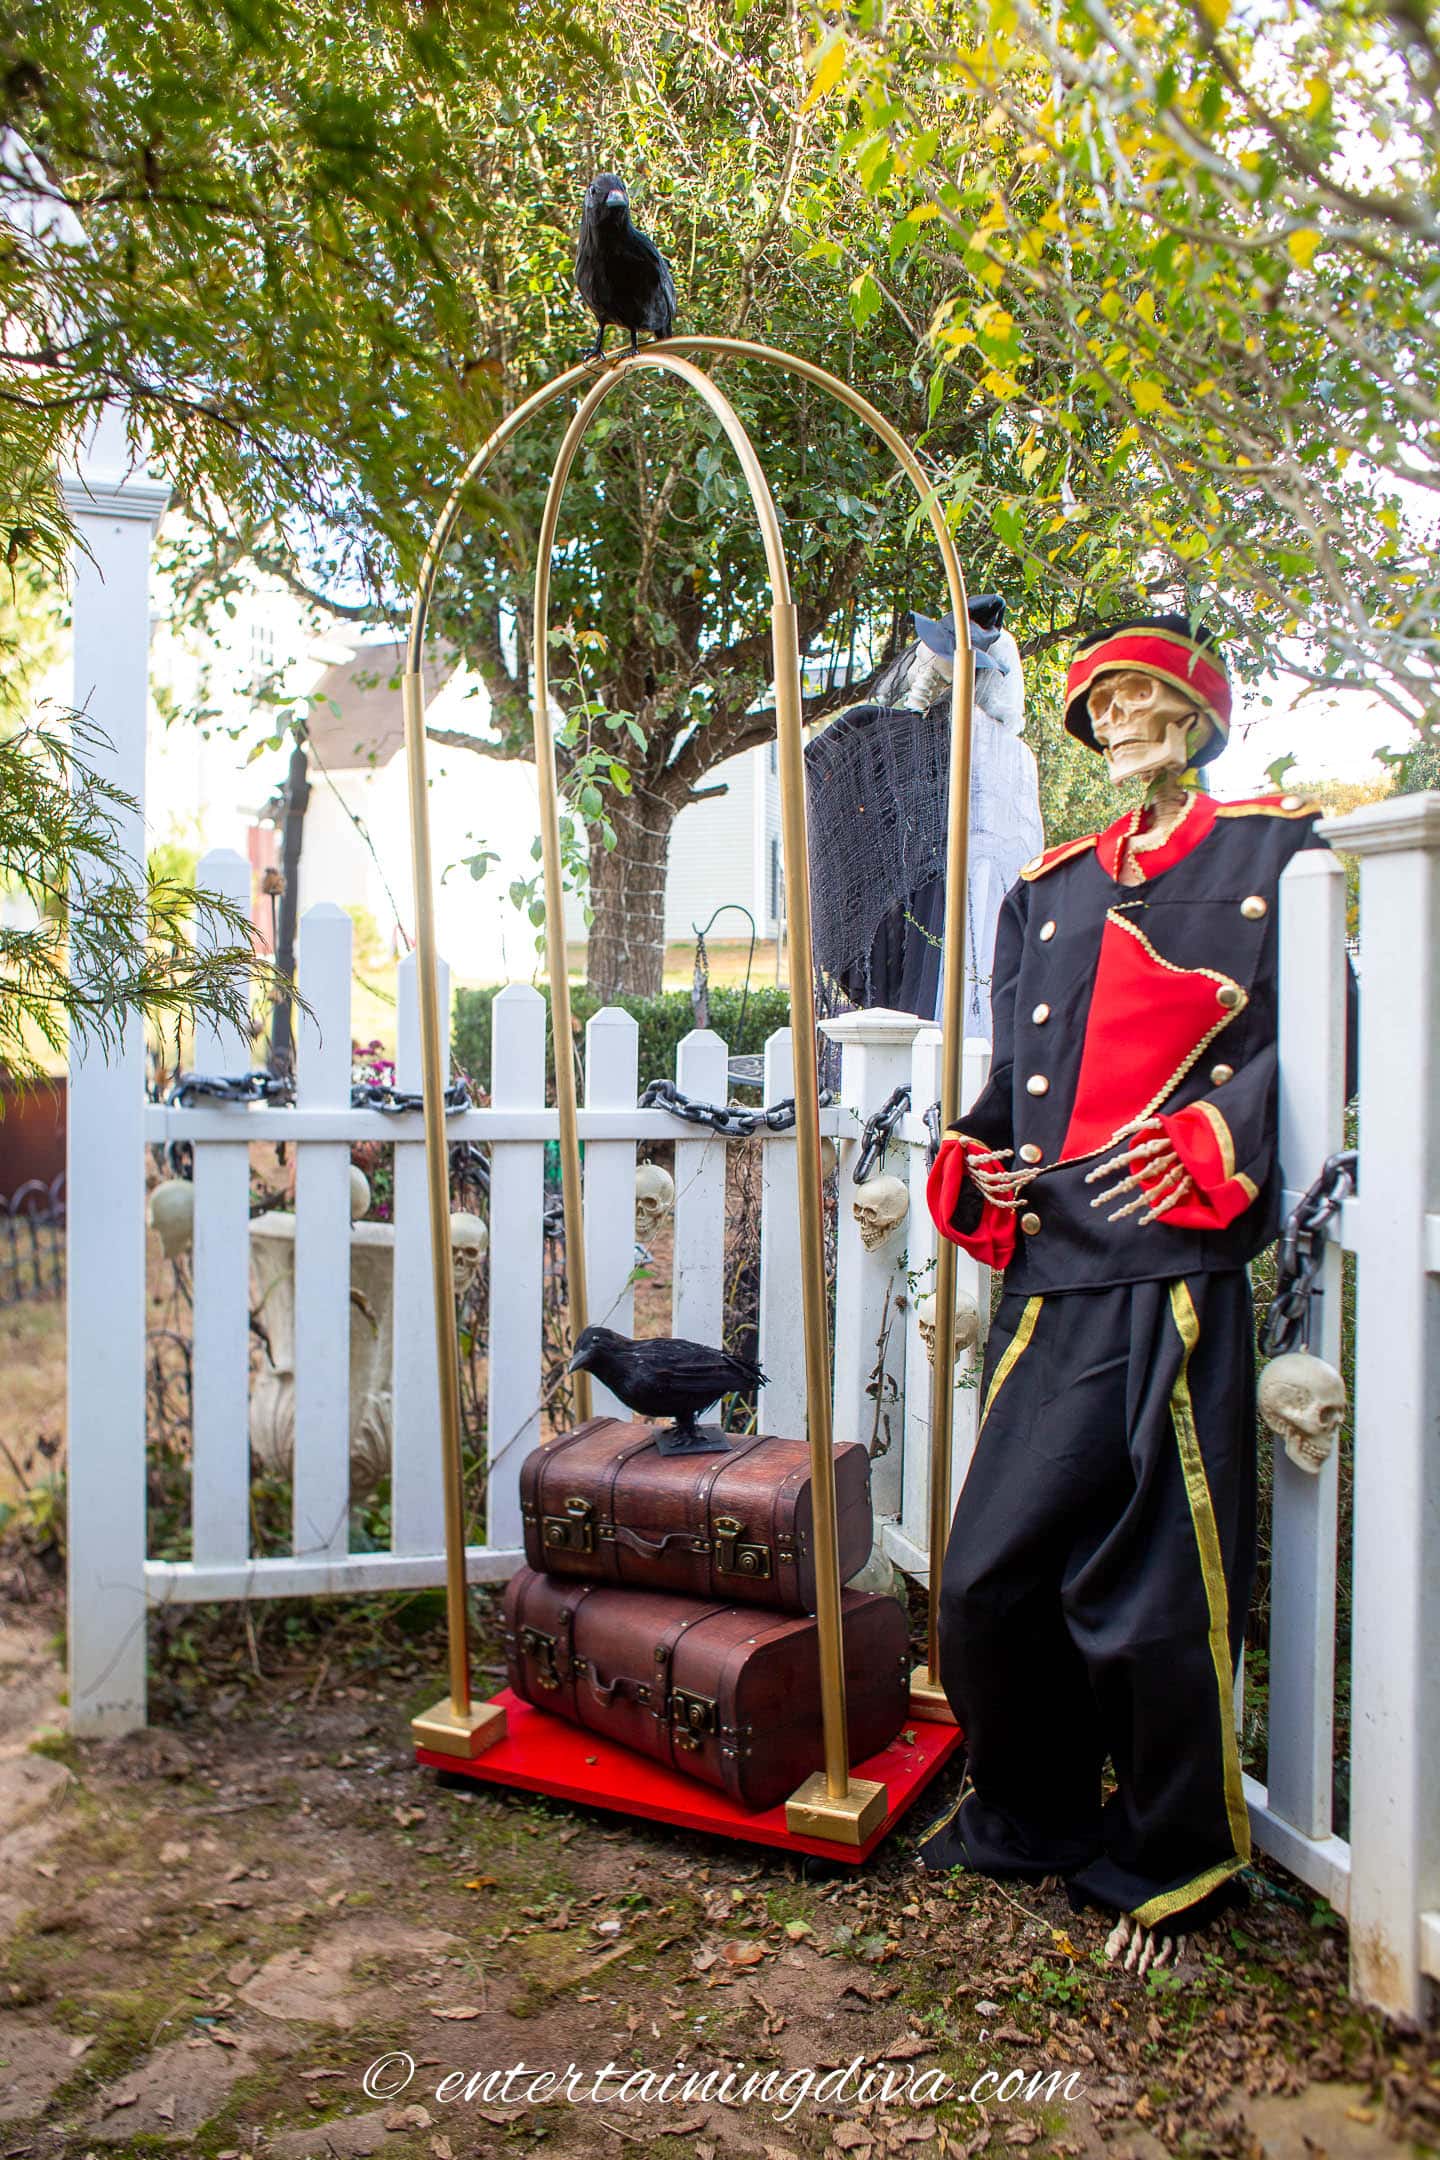
I decorated mine with a couple of vintage-looking suitcases*, a couple of crows* and a skeleton dressed in a bellboy costume*.
It was the perfect addition to my haunted hotel graveyard theme.
Other DIY Halloween ideas you might like
- DIY skeleton hands hotel key holder
- DIY Halloween graveyard ideas
- Outdoor Halloween lighting ideas
- DIY Halloween cemetery picket fence
- DIY Halloween cemetery entrance pillars
Or browse all of our Halloween ideas.
Have comments or questions about our DIY Halloween bellboy cart? Tell us in the section below.
This post was originally published on July 30, 2022 but was updated with new content on November 1, 2023.