
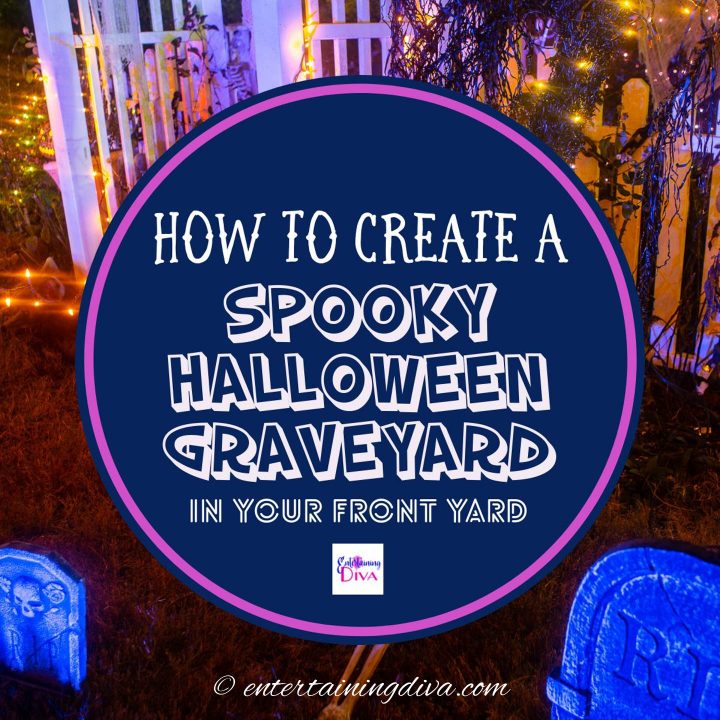
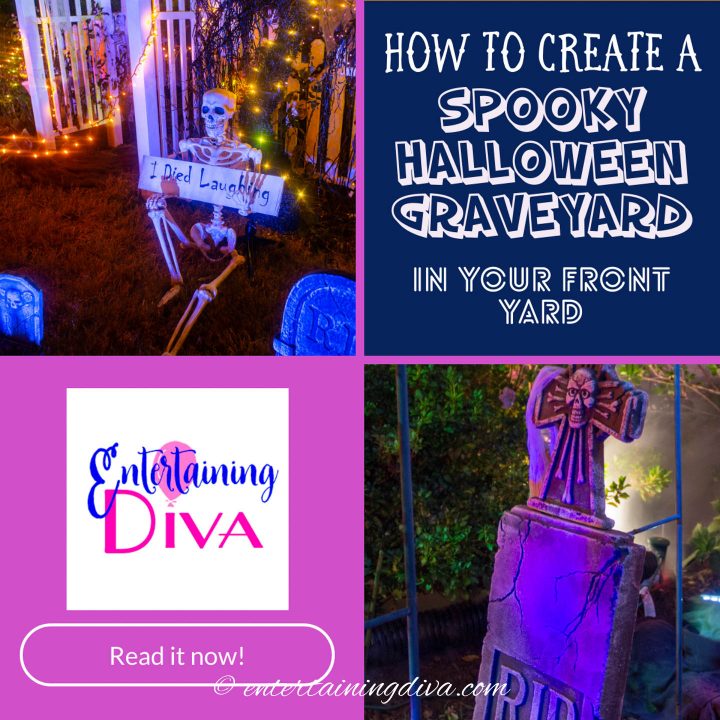
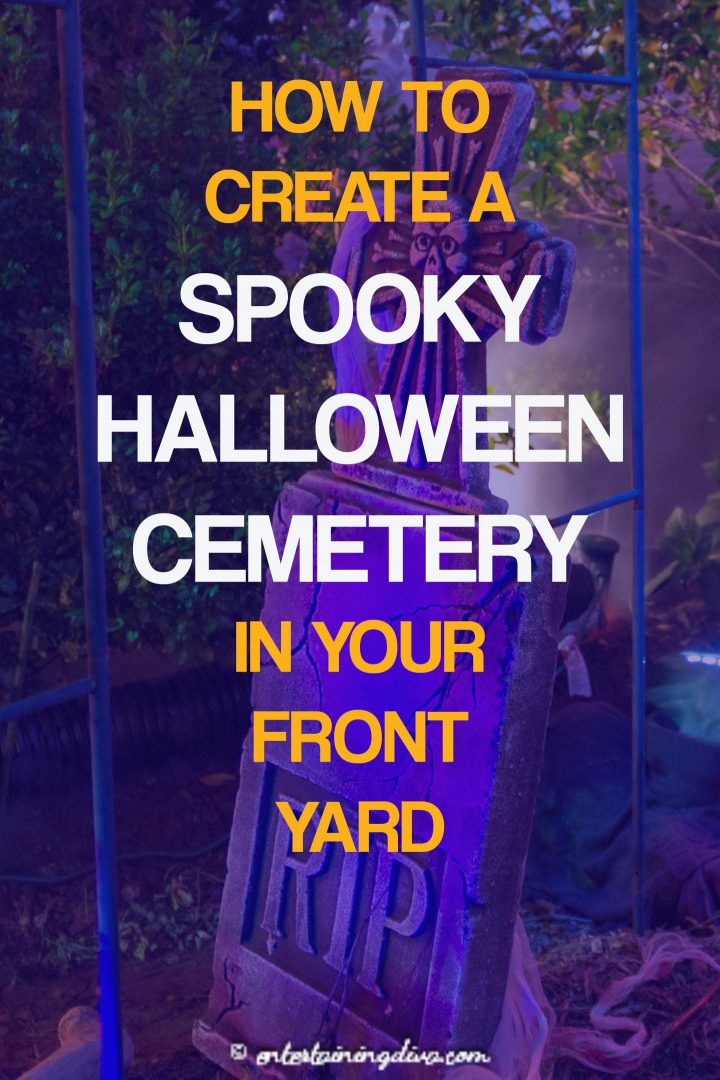
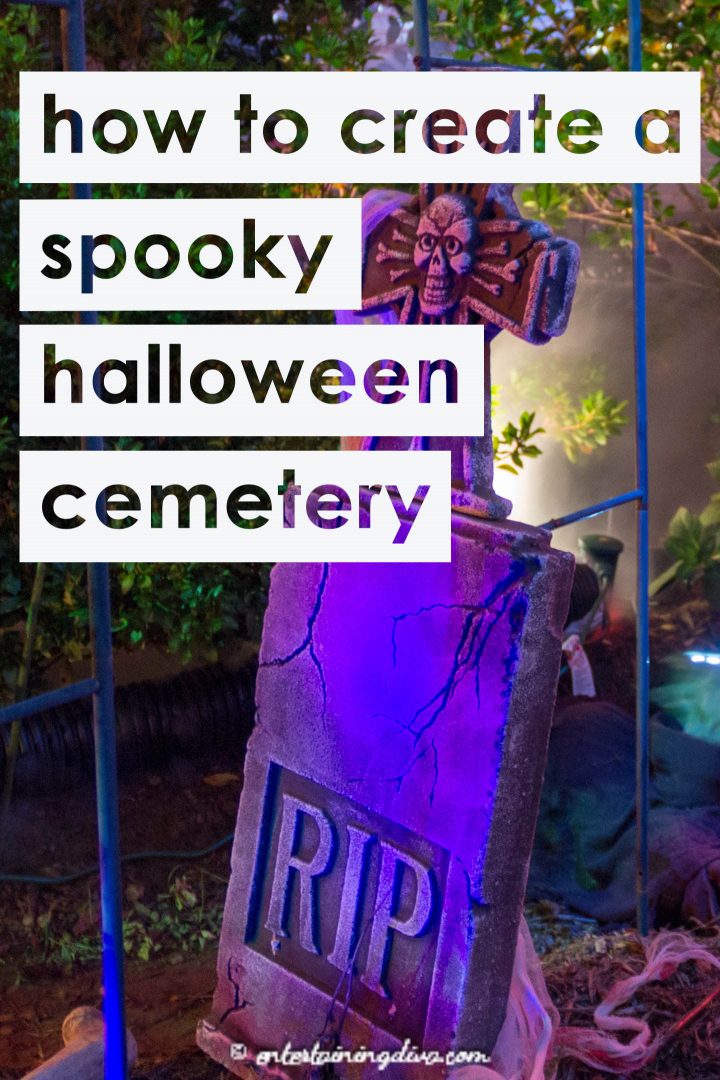
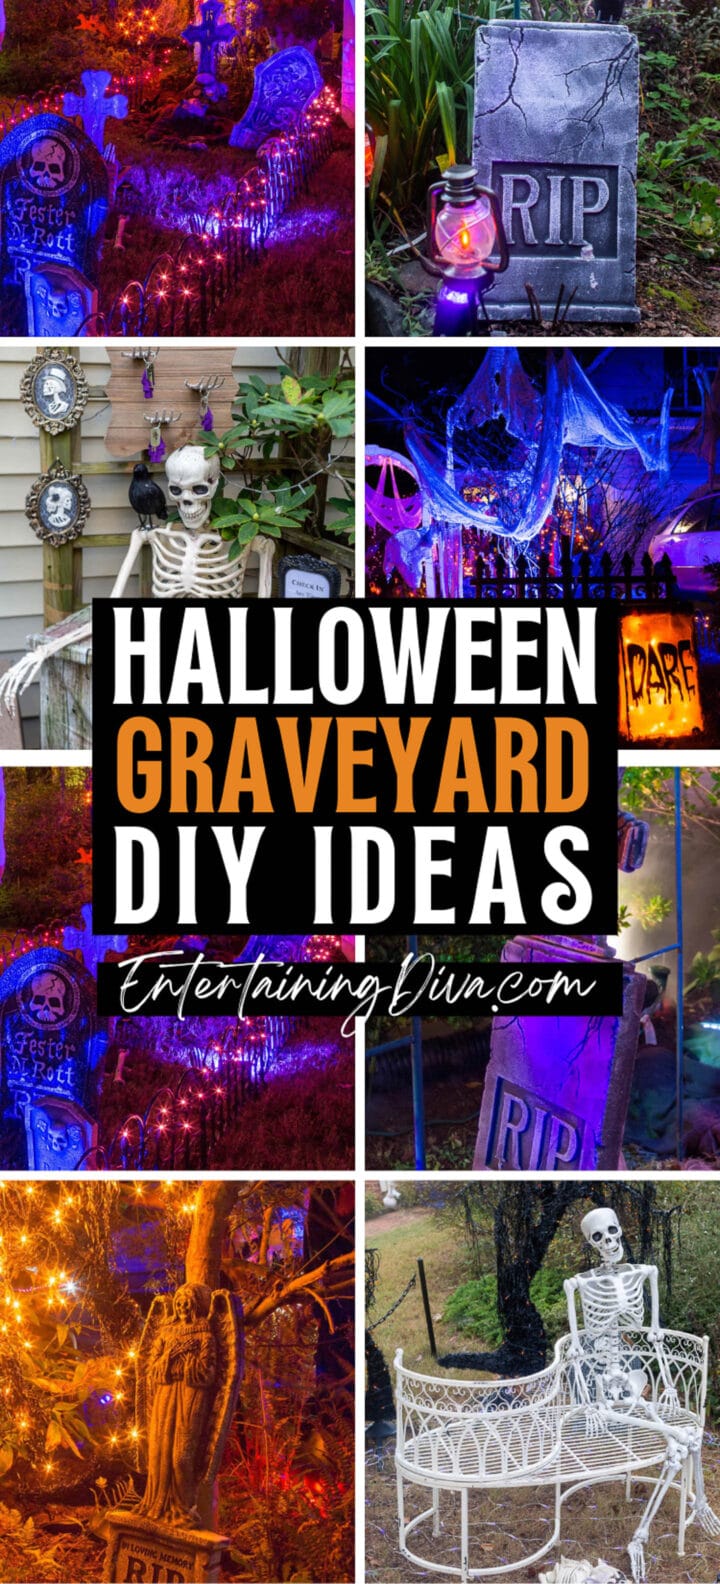
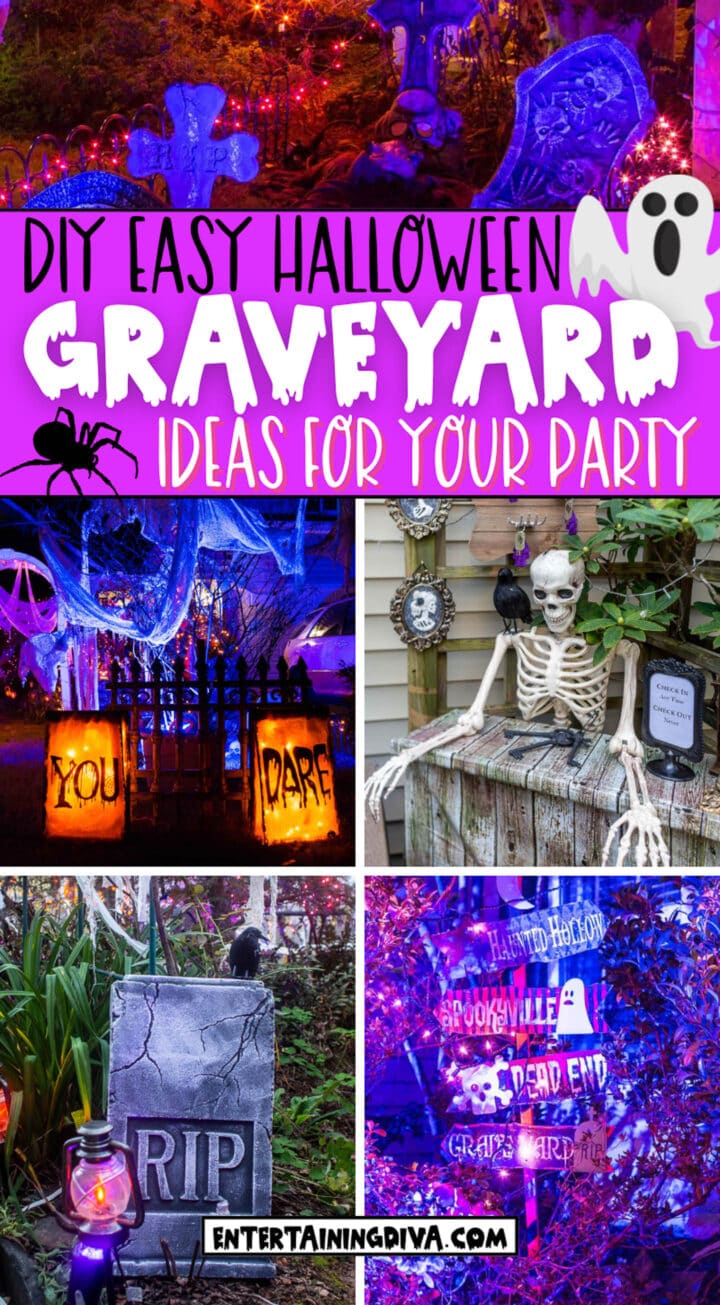
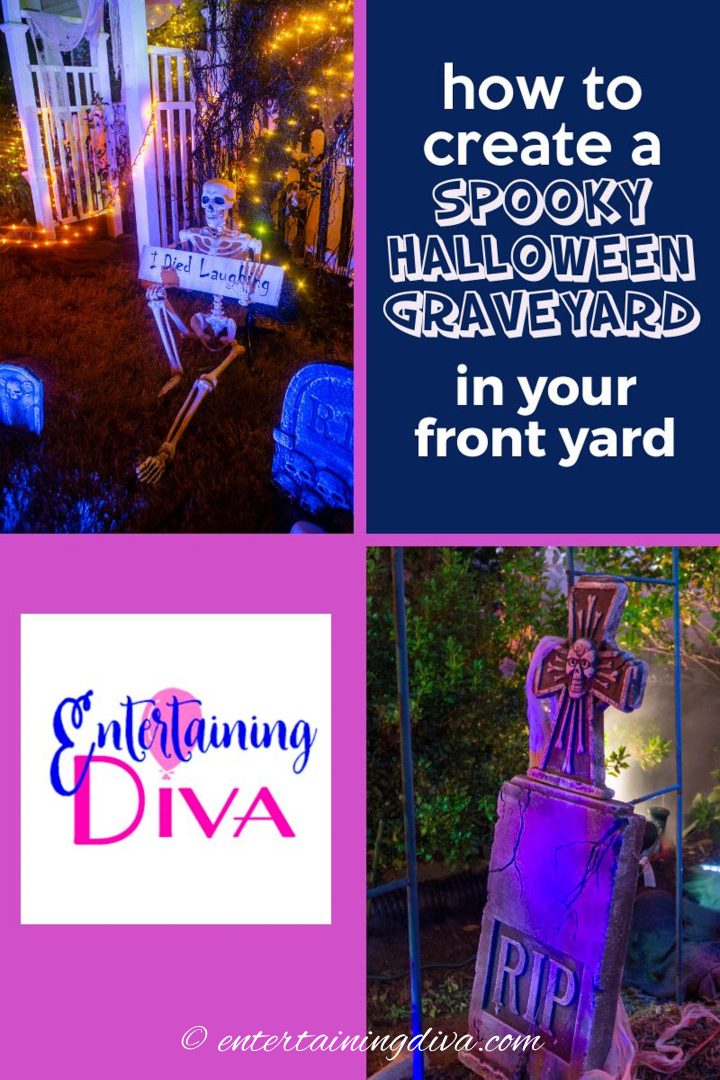
DIY Halloween Graveyard Ideas: How to Make a Halloween Cemetery
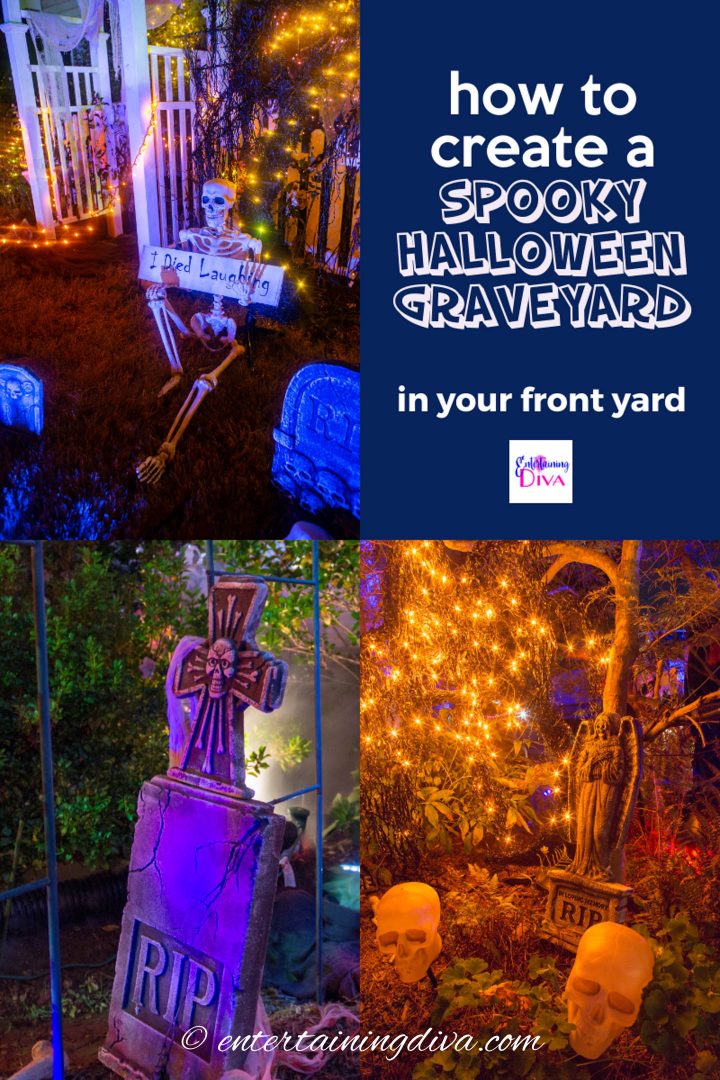
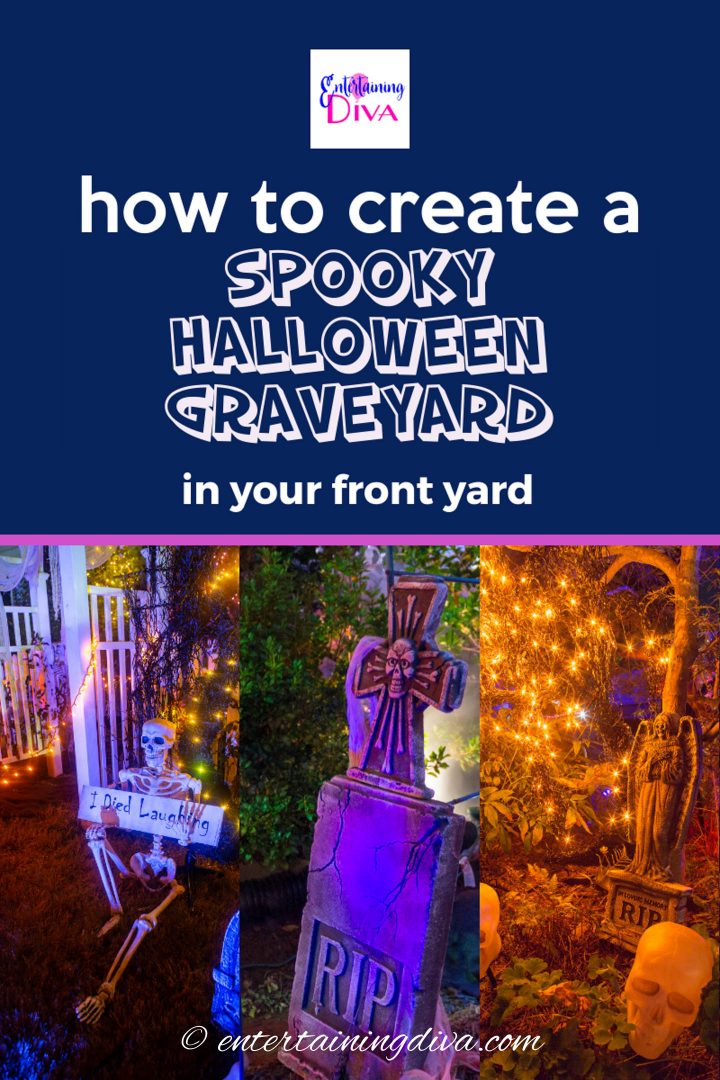


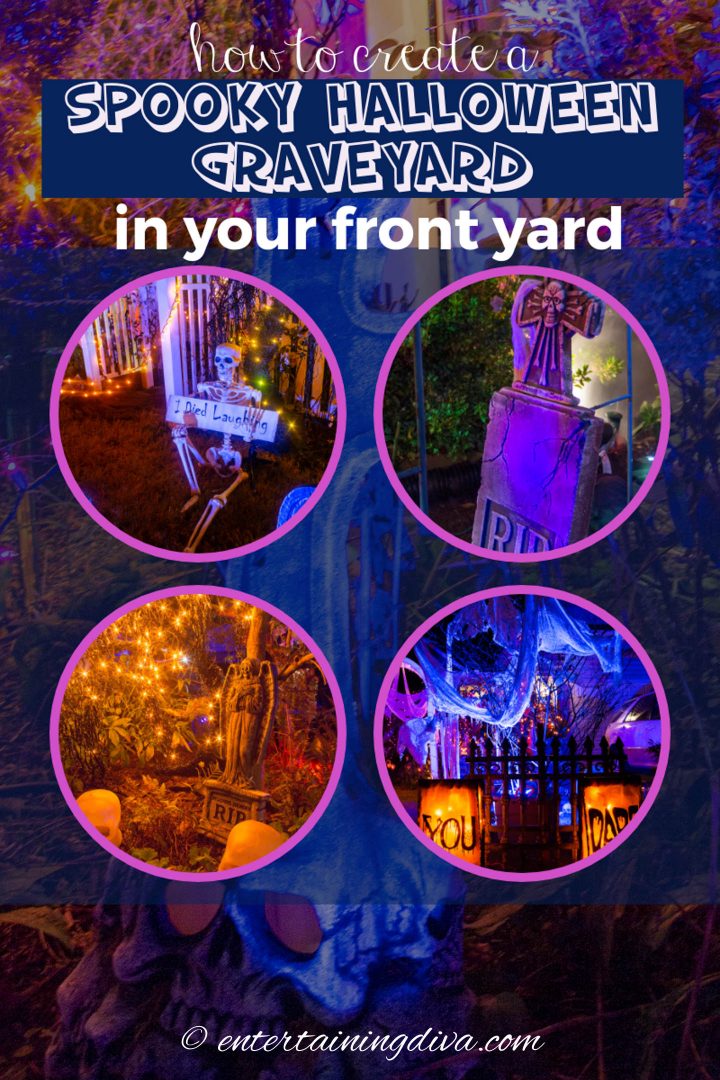


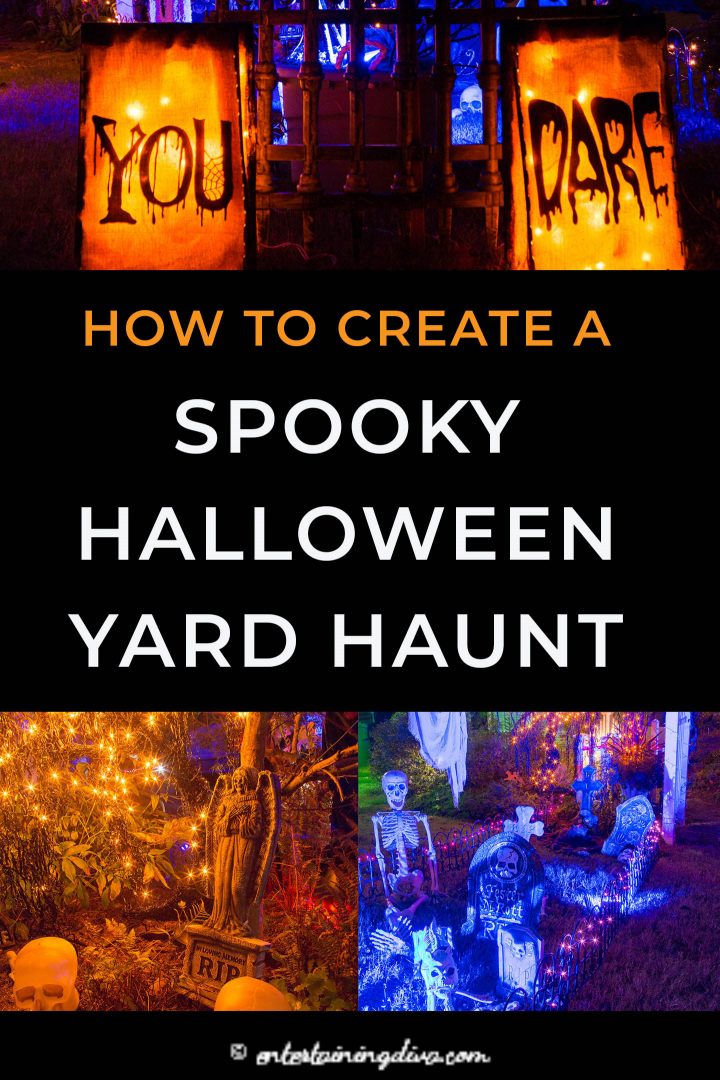

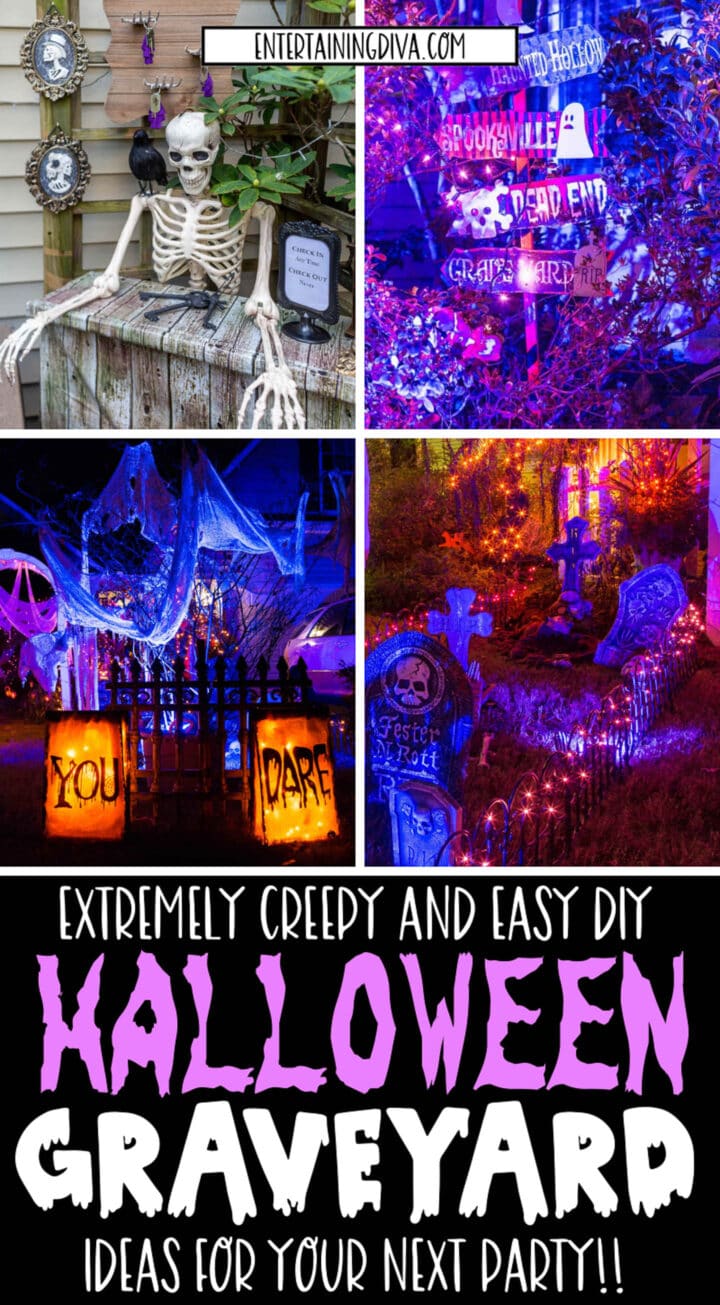

Every year, I make a DIY Halloween graveyard in my front yard which the kids absolutely love! Between the lighting, the fog, and these graveyard decorations, creating a yard haunt is a fun (and slightly scary) way to celebrate the holiday.
Can I just say…Halloween is my favorite holiday. And I think this is why. I LOVE creating my own Halloween graveyard.
I have one in my front yard every year at Halloween, and everyone in my neighborhood knows it. They start driving by around the end of September to see what this year’s version will look like. And I don’t like to disappoint!!
Putting together a Halloween cemetery does take a little work but I think it is worth it…and so do all the kids in my area 🙂
Having done this for a number of years now, I have some decorations that work really well for creating an awesome yard haunt, so I thought I would share what I do.
Keep reading to find out my spooky Halloween graveyard ideas.
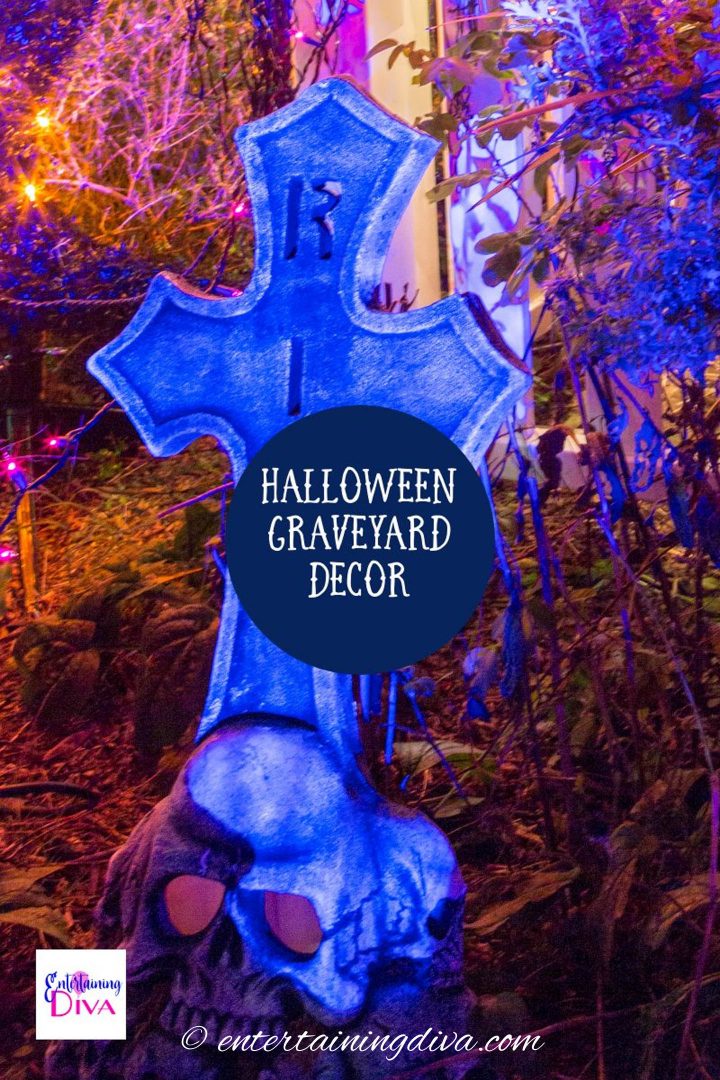
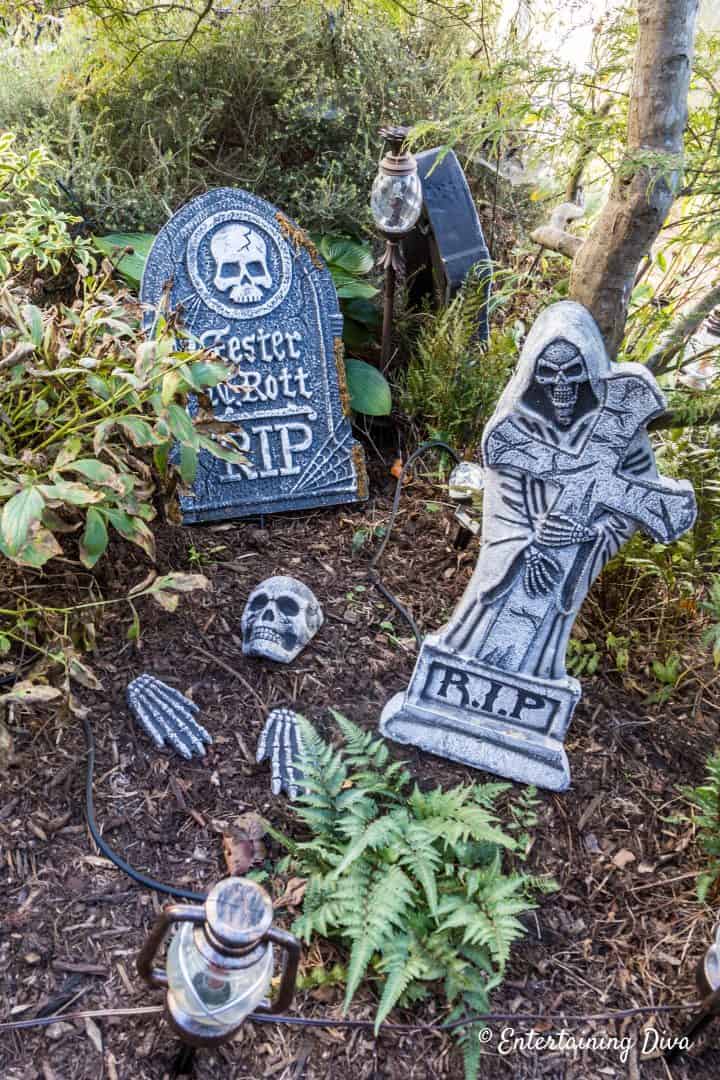
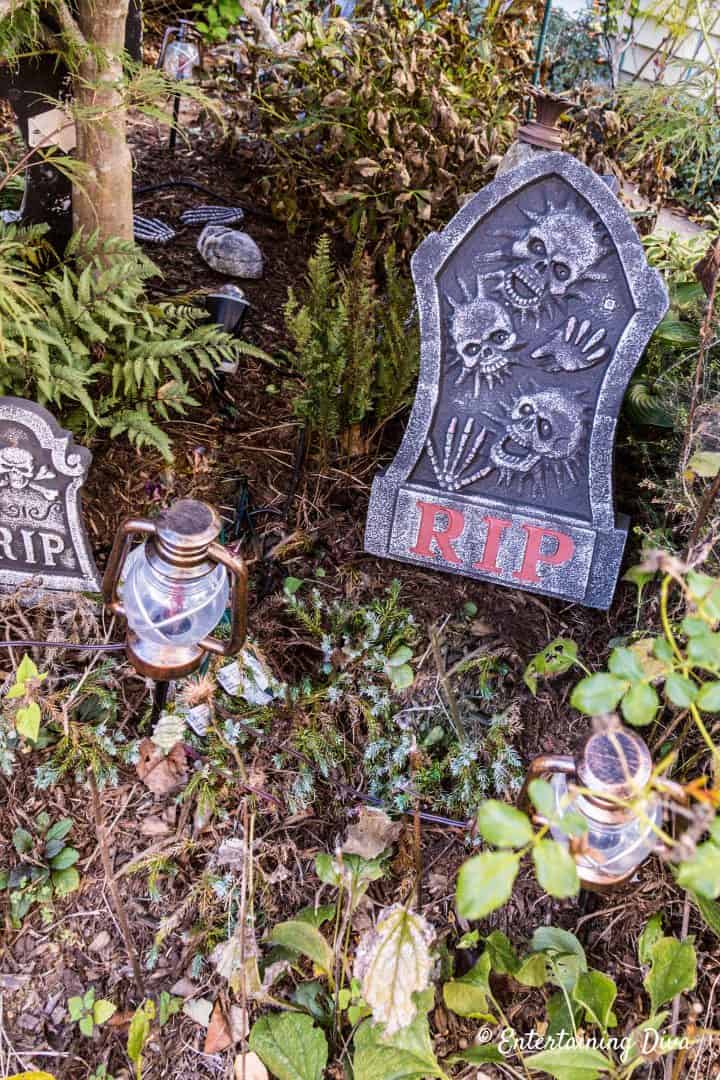
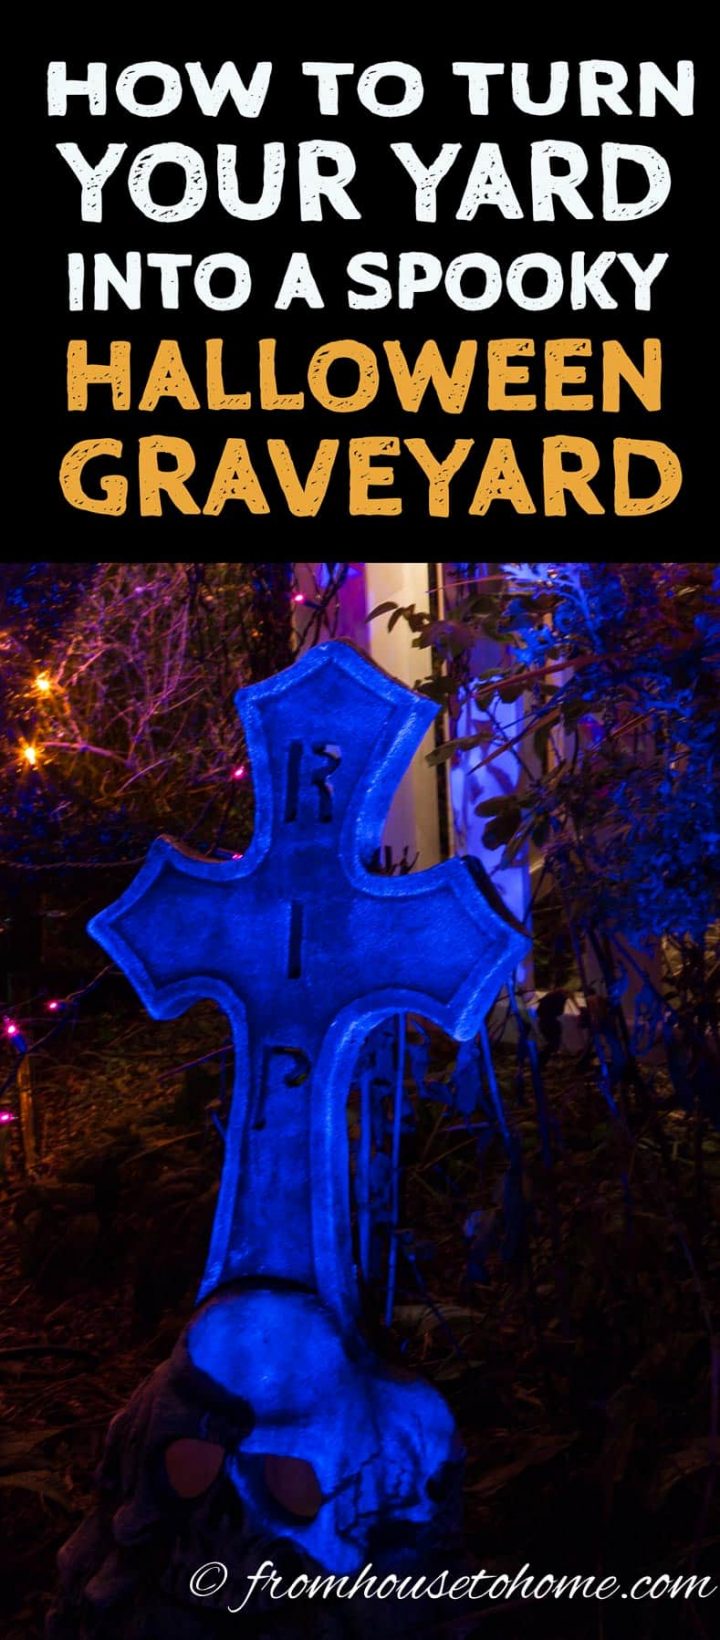
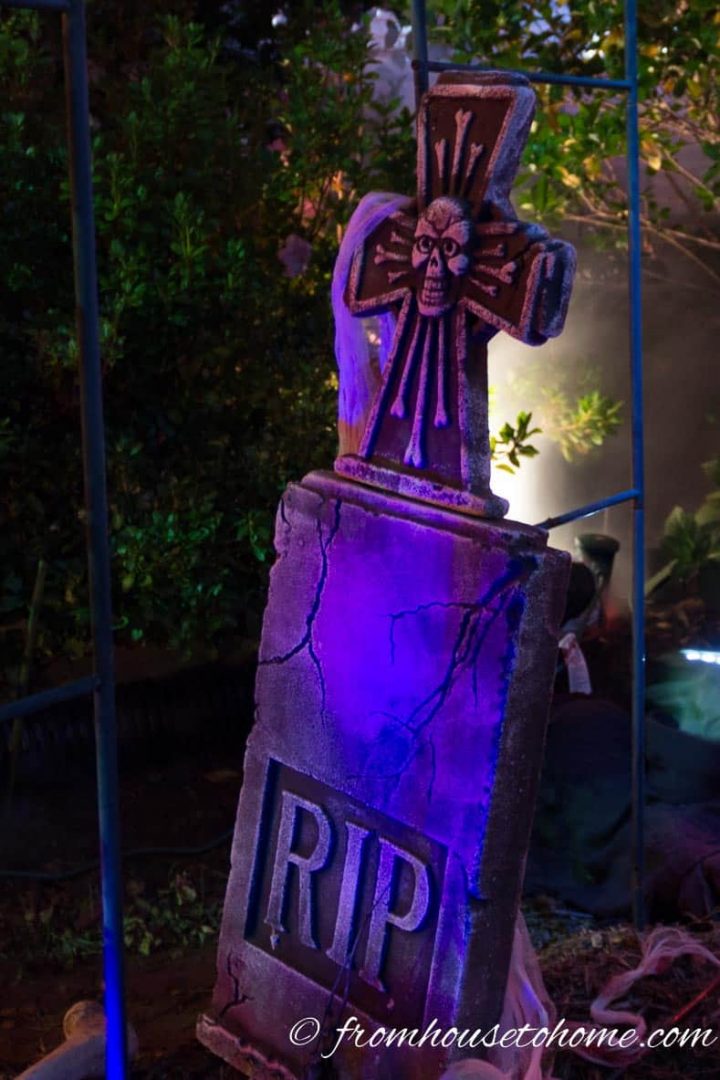
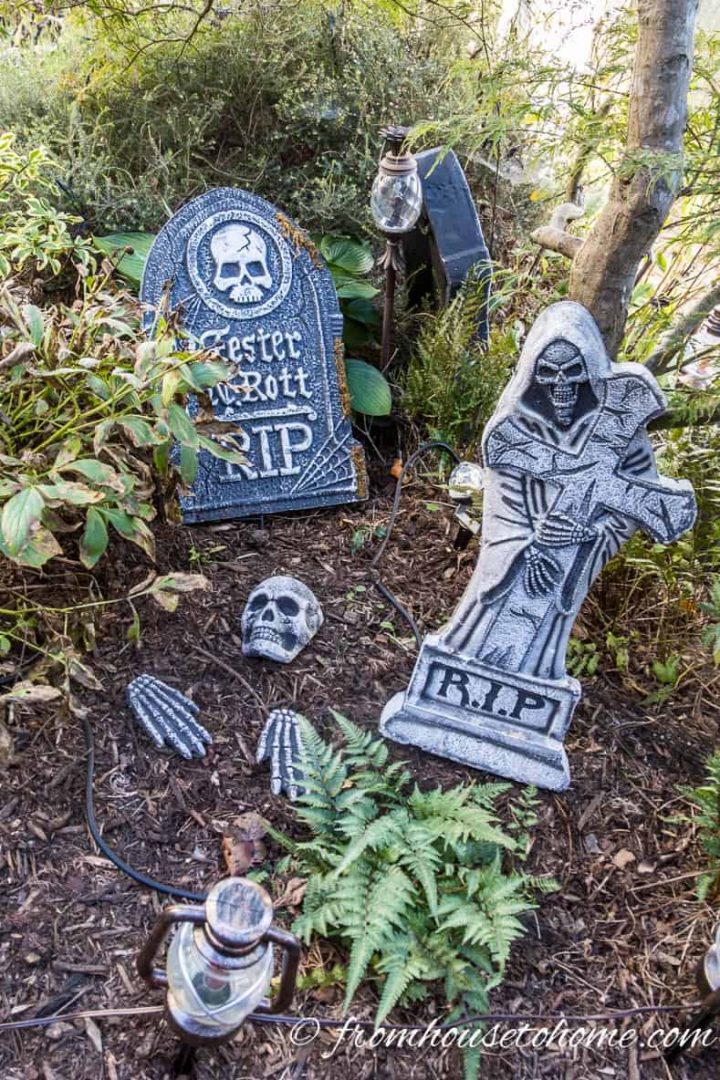
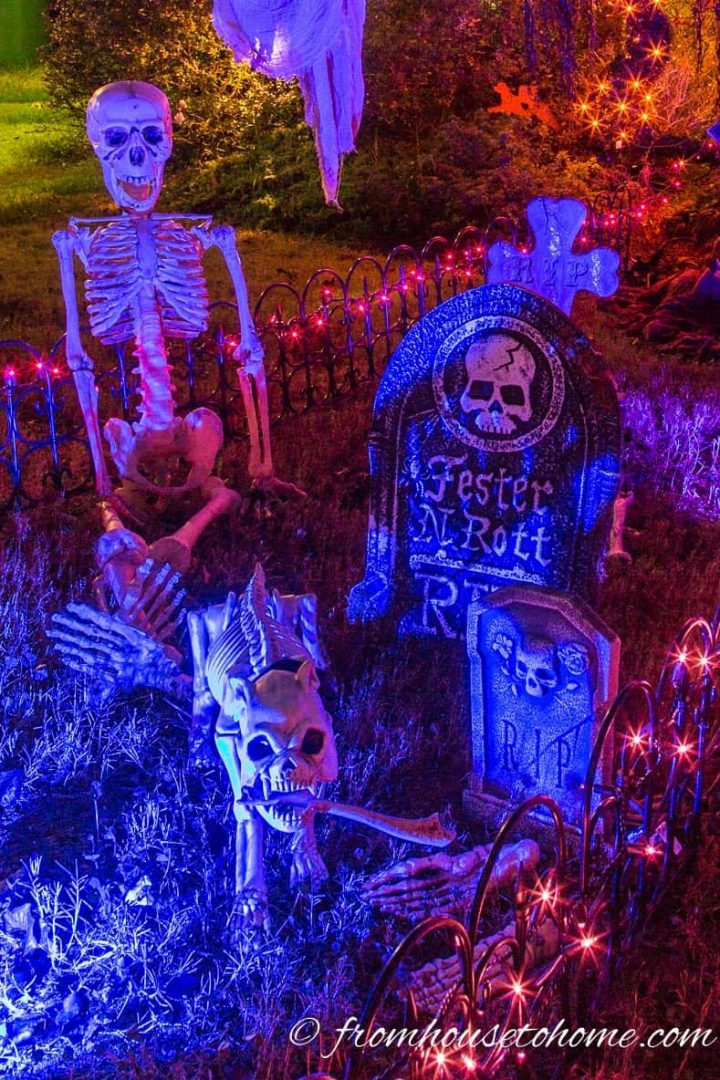
1 | Install Halloween tombstones
This post may contain affiliate links. We make a small commission if you buy the products from these links (at no extra cost to you). As an Amazon Associate, I earn from qualifying purchases. But we only recommend products we would use ourselves. For more information, click here to see our disclosures

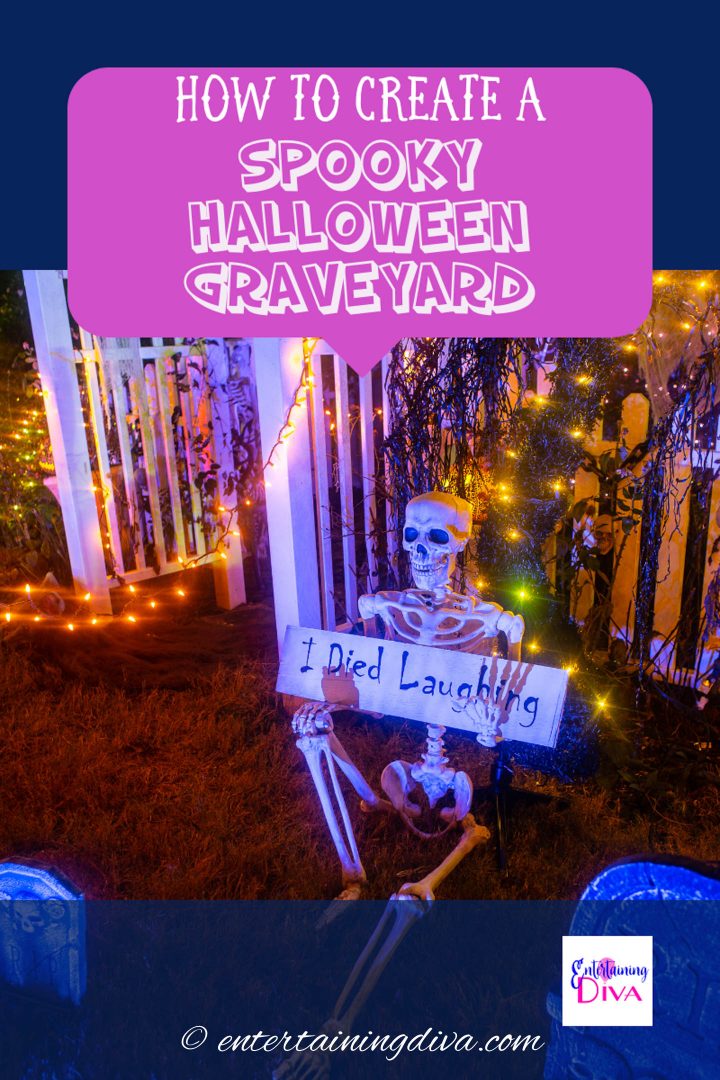
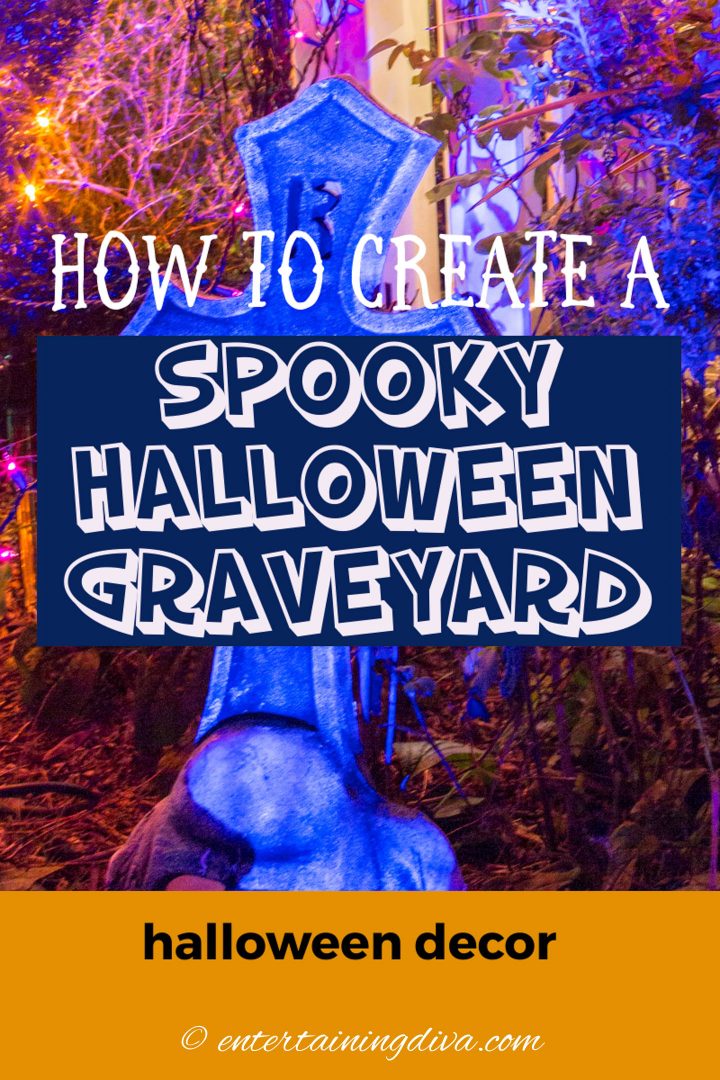
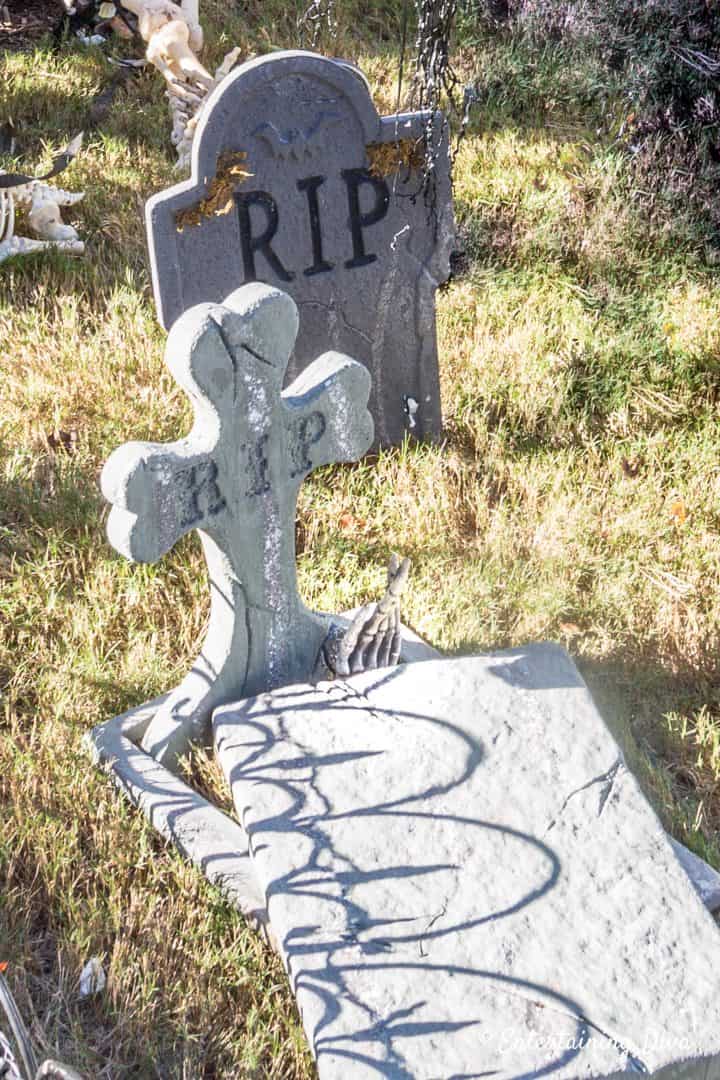
This is the obvious part of a Halloween yard haunt…gravestones are required!

For the best effect, try to buy (or make) tombstones* of different sizes and shapes.
I have to admit that I buy mine. They are so inexpensive and I’m usually crunched for time, so I have never tried to make them.
However if you want to create your own DIY tombstones, check out this article and video for the tutorial.
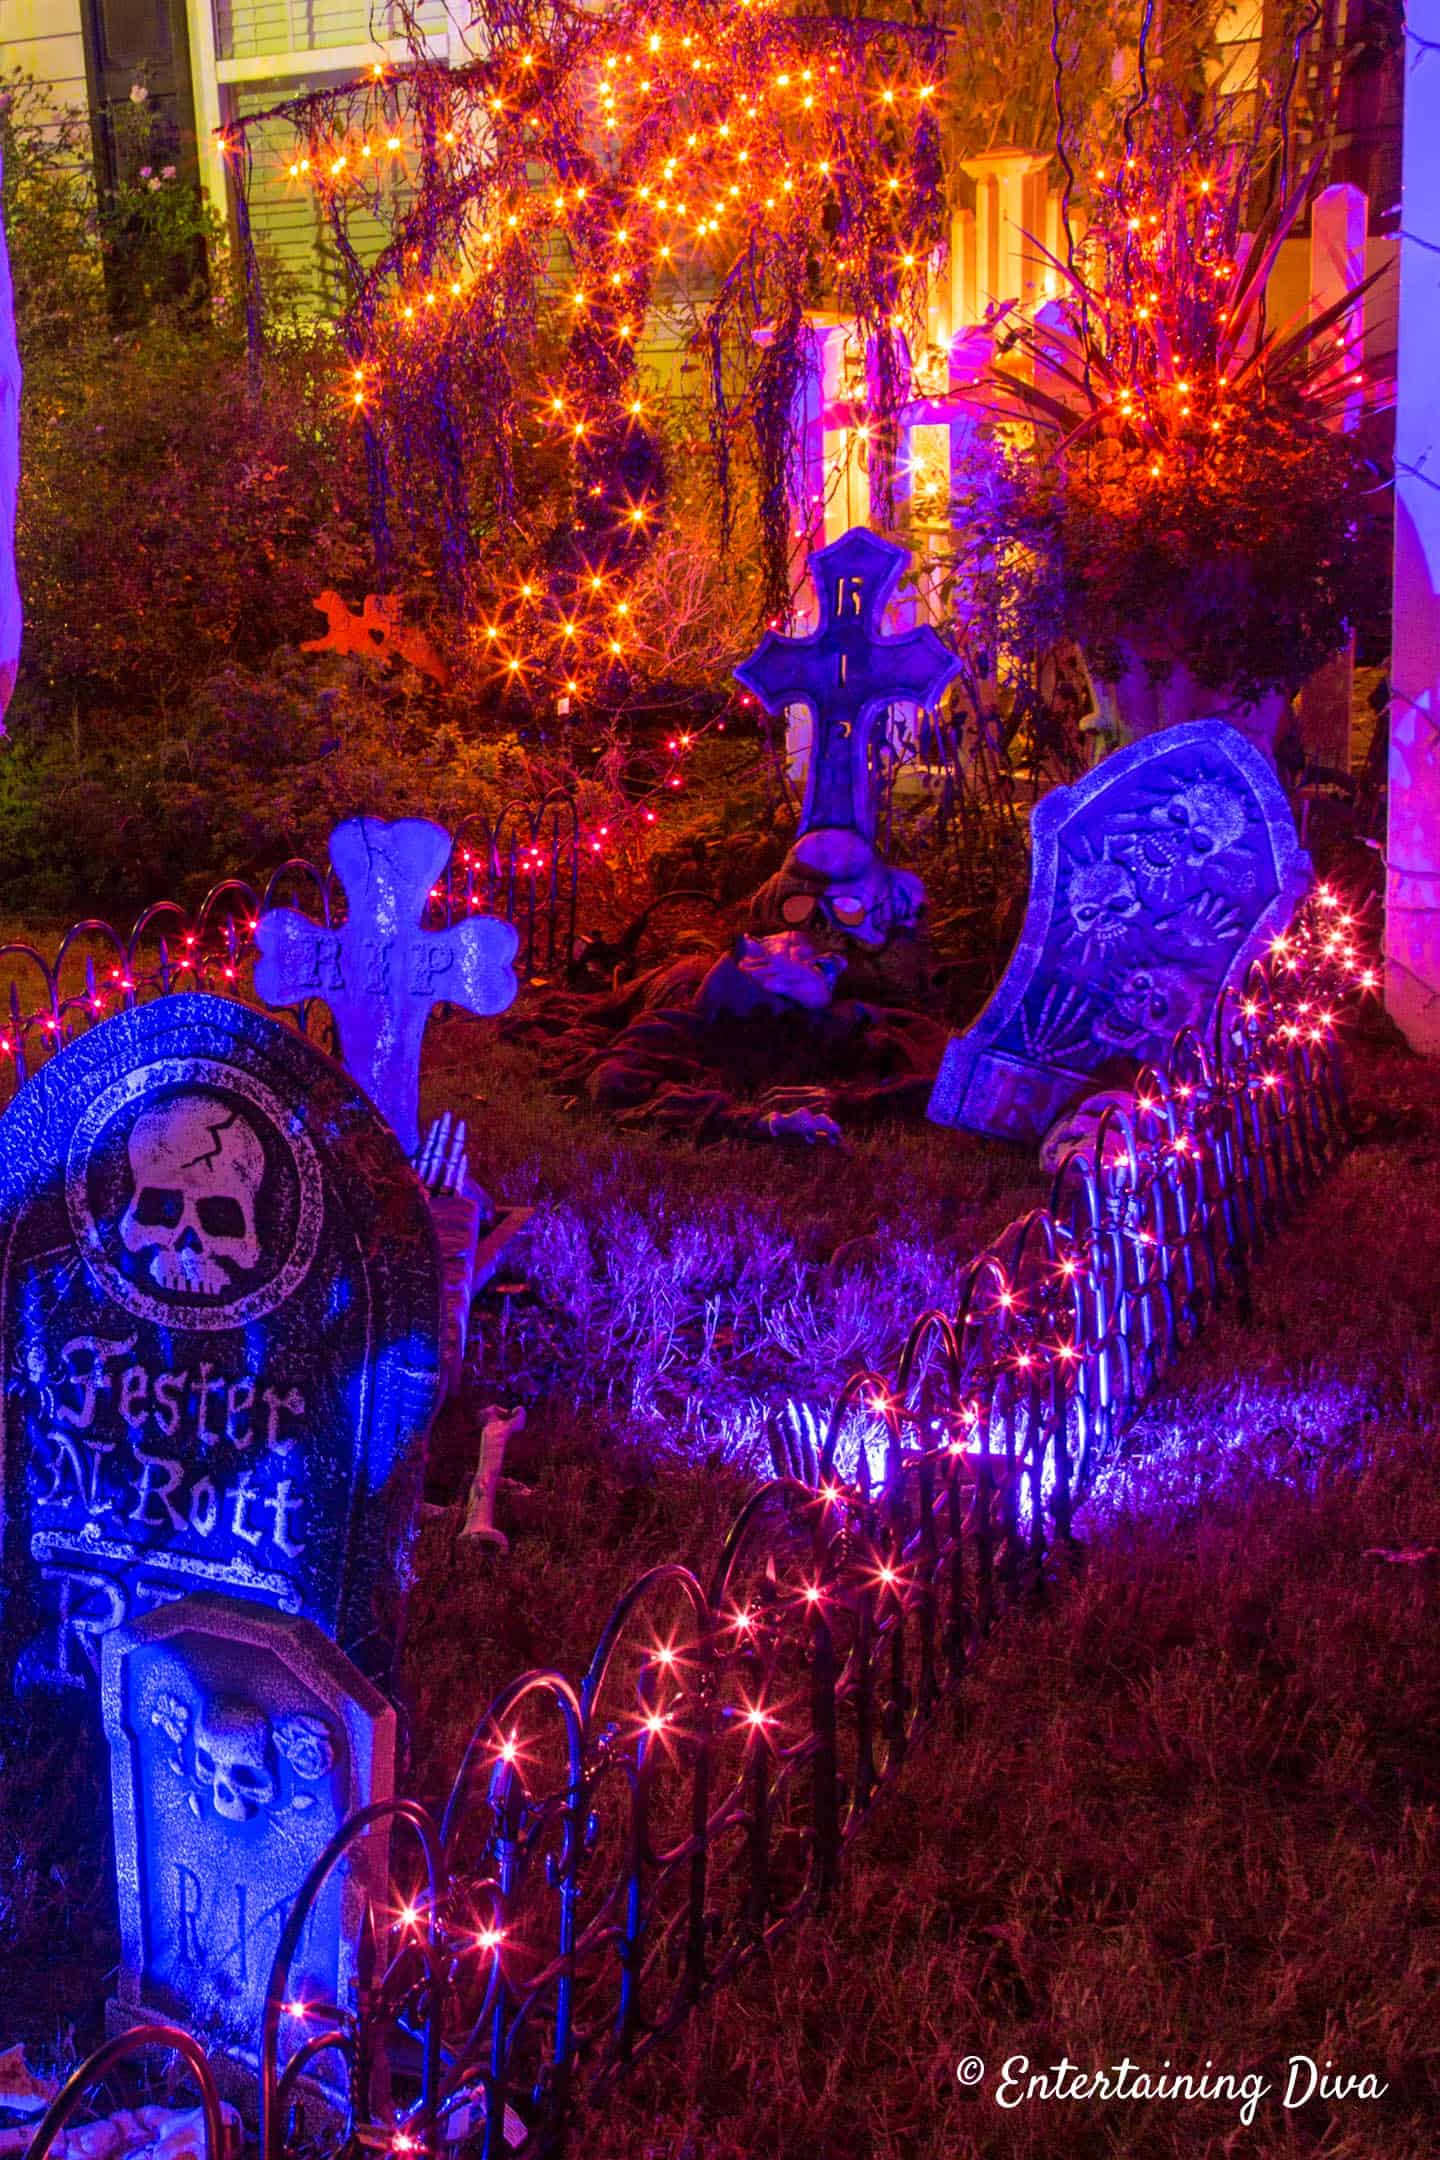
Then place them randomly around the yard, some at odd angles, to make it look like your cemetery is very old and neglected.
This is one time when not having cut your lawn for a couple of weeks may be a benefit…the longer grass adds to the neglected feeling.
Putting your Halloween gravestones in the garden helps to make them feel like they have always been there.

Even during the day, they look like they are a part of the landscape.
Having some of your Halloween decor look like it is meant to be a part of your yard always makes it a little more interesting because people aren’t expecting it to be there.
And if you have trouble keeping your gravestones standing, try our hack for securing Halloween tombstones.
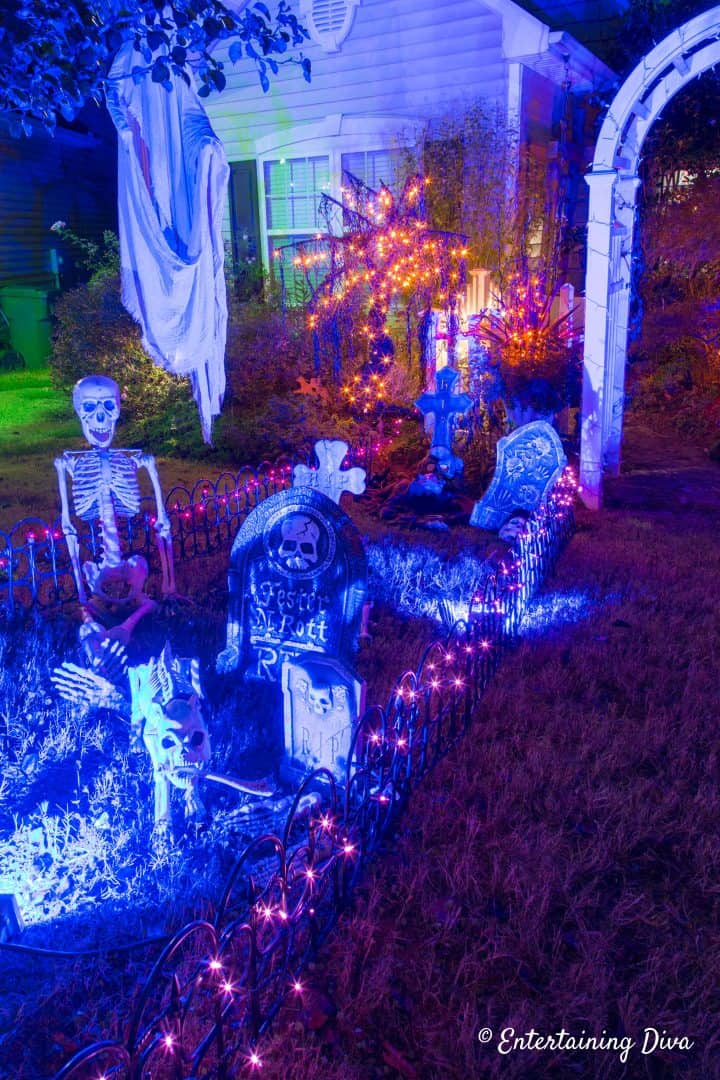
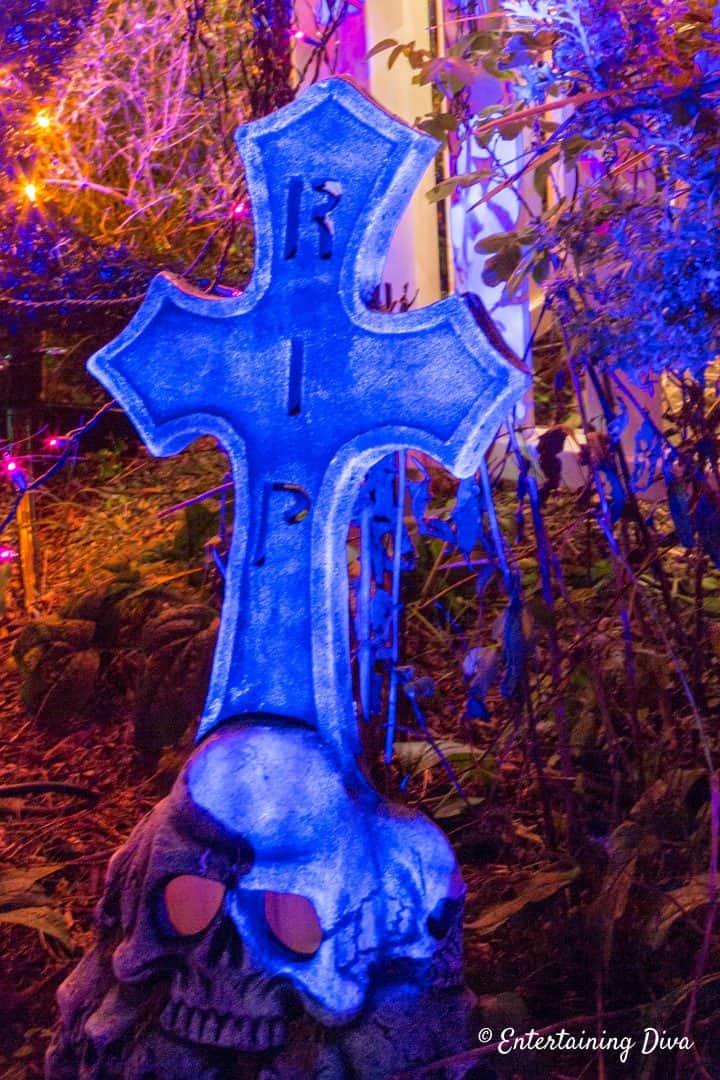
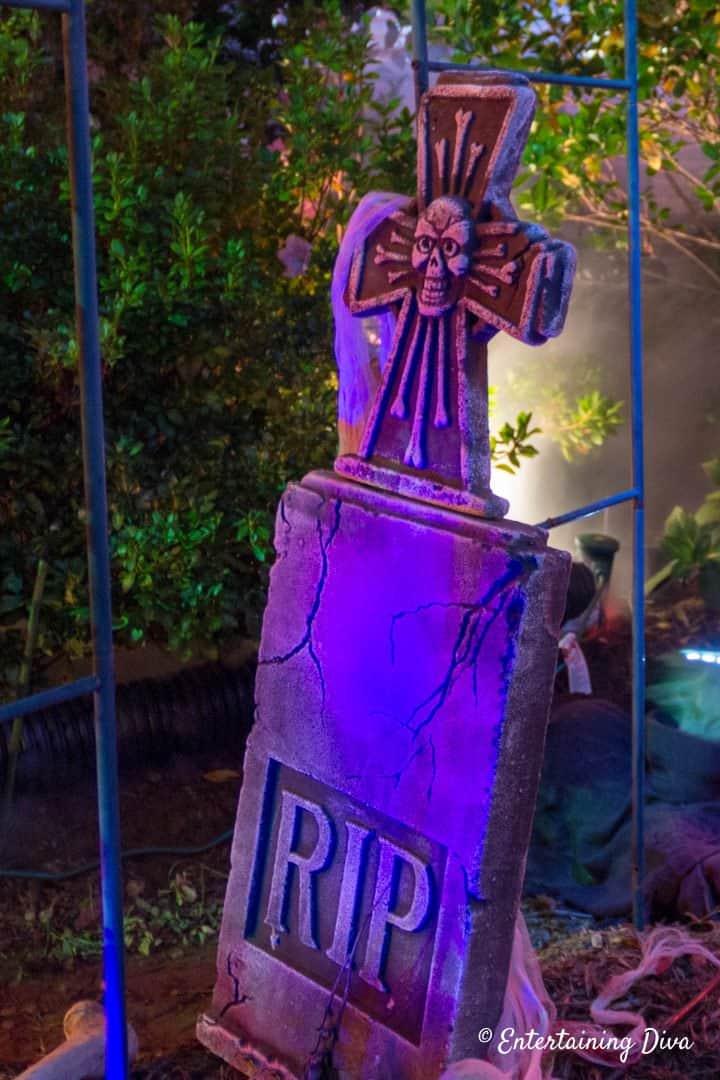
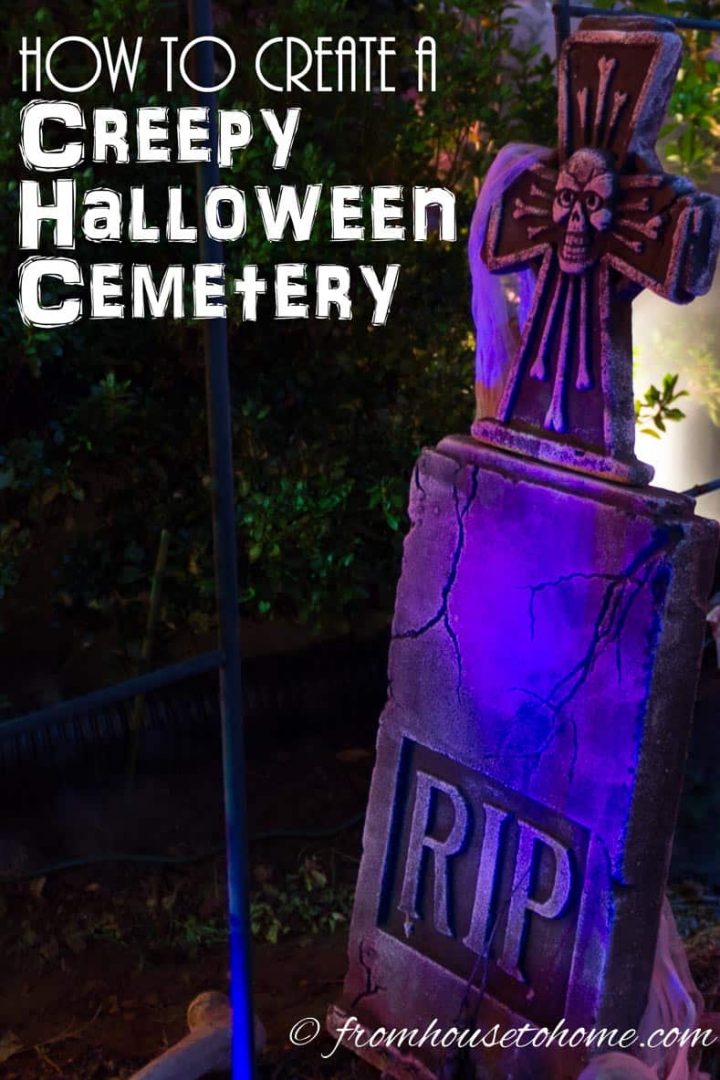
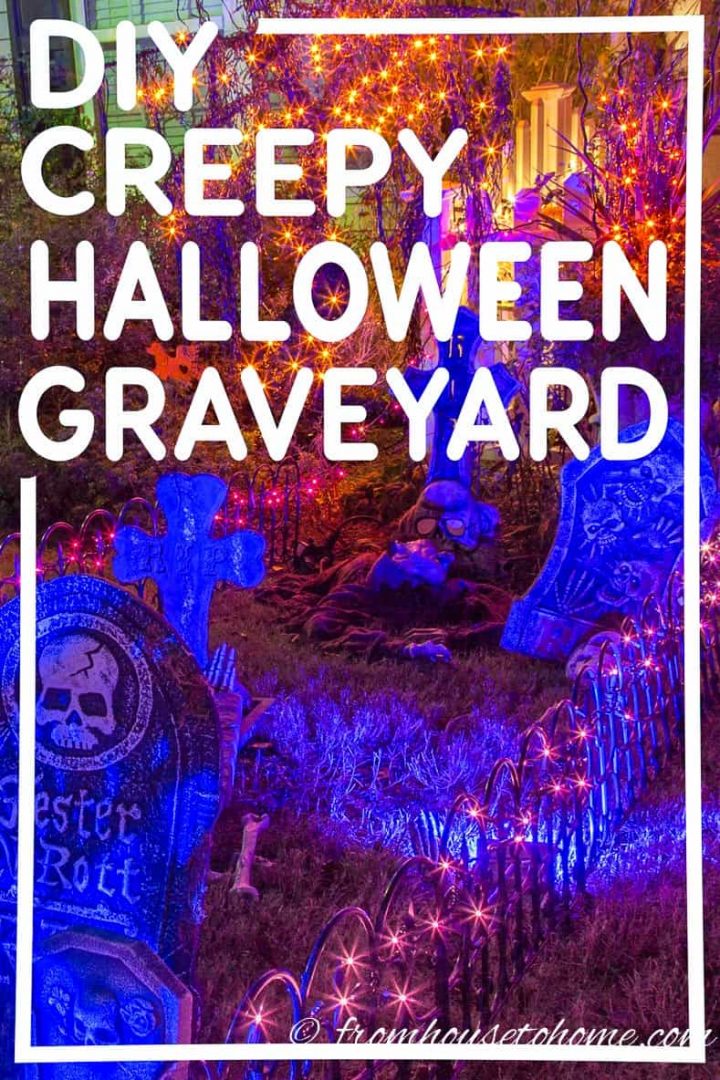
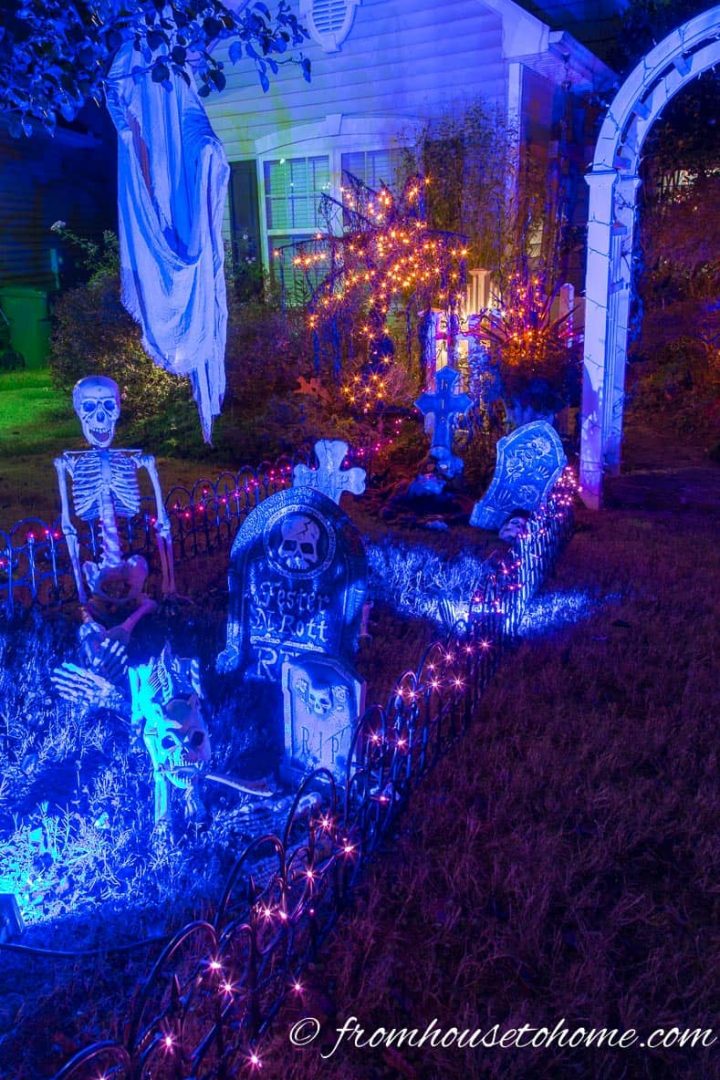
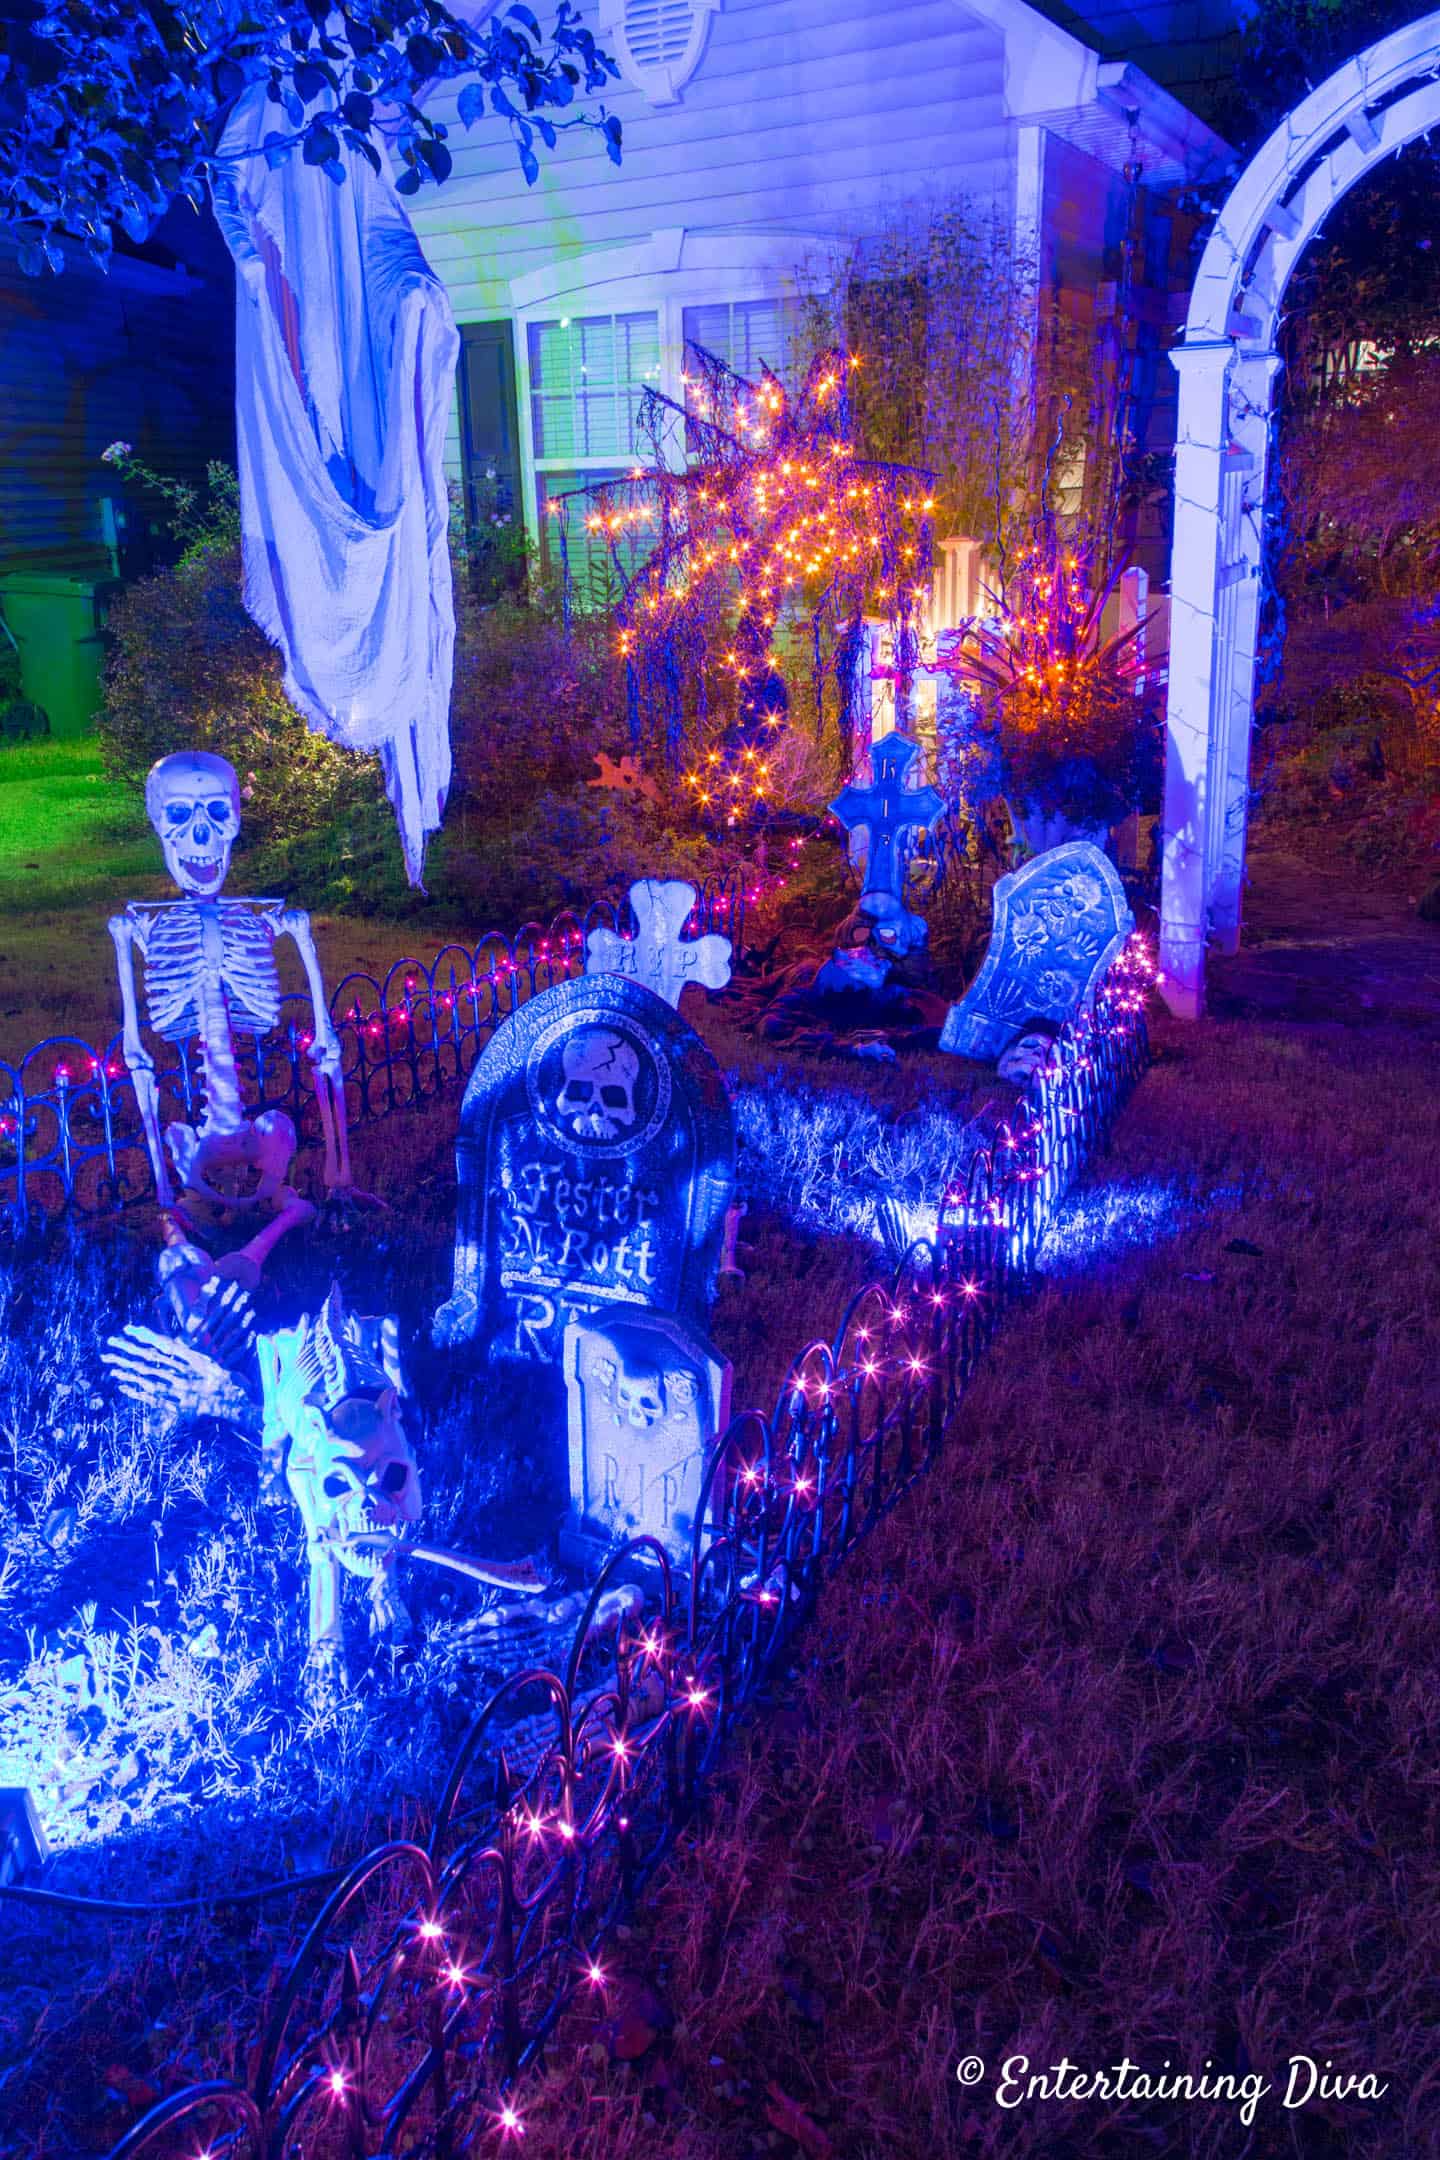
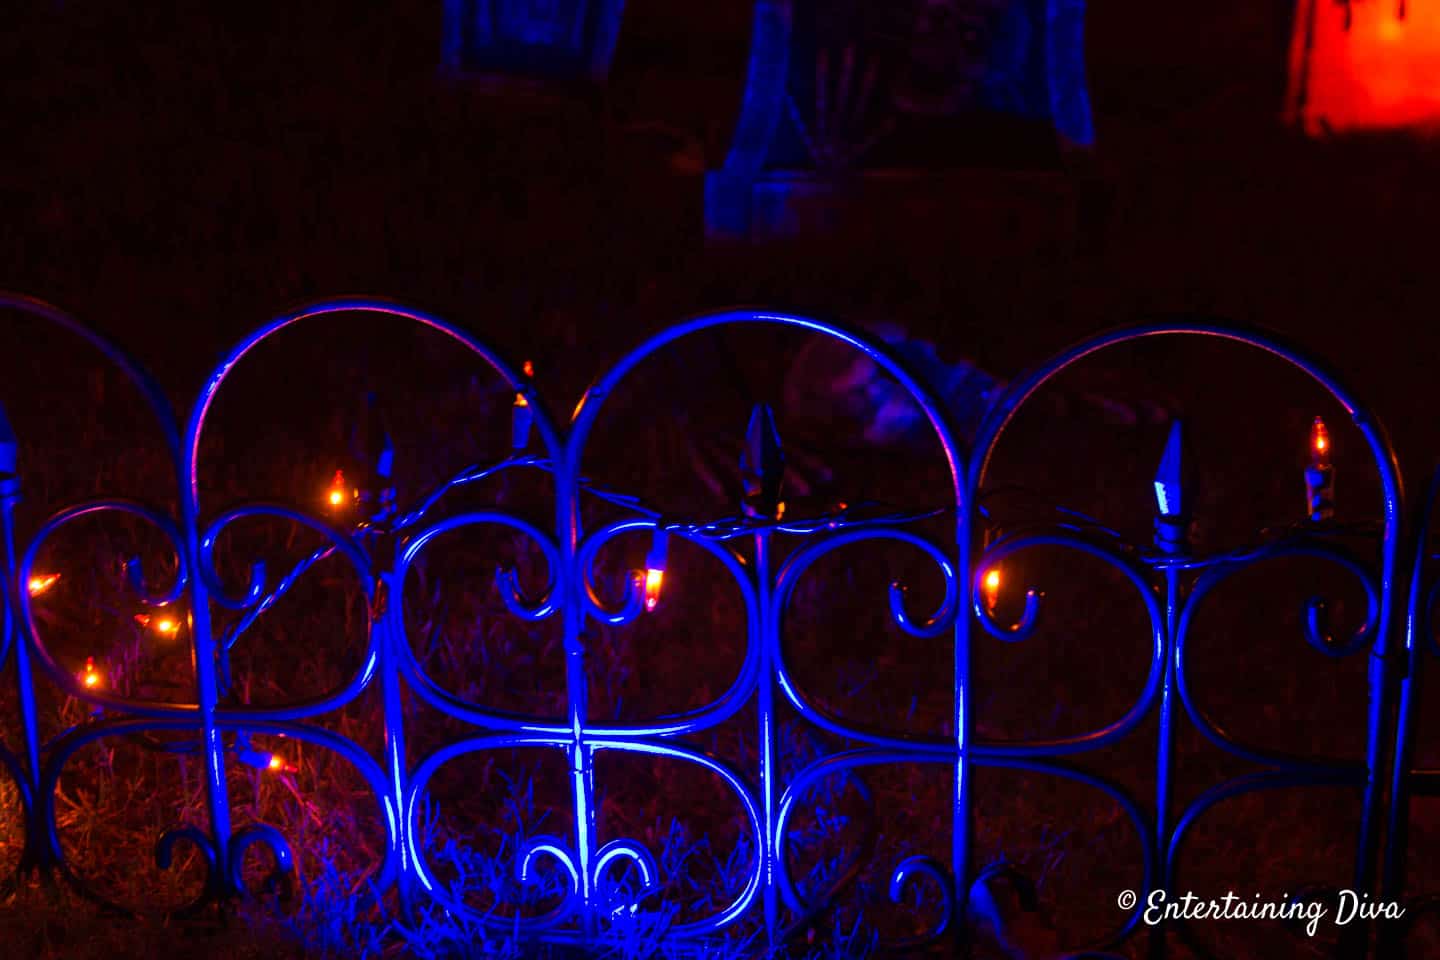
2 | Add spooky lighting

Lighting is very important to add that spooky vibe, and make your Halloween graveyard visible at night.
I find that cool colored spotlights like blue and green work well to highlight tombstones and skeletons.
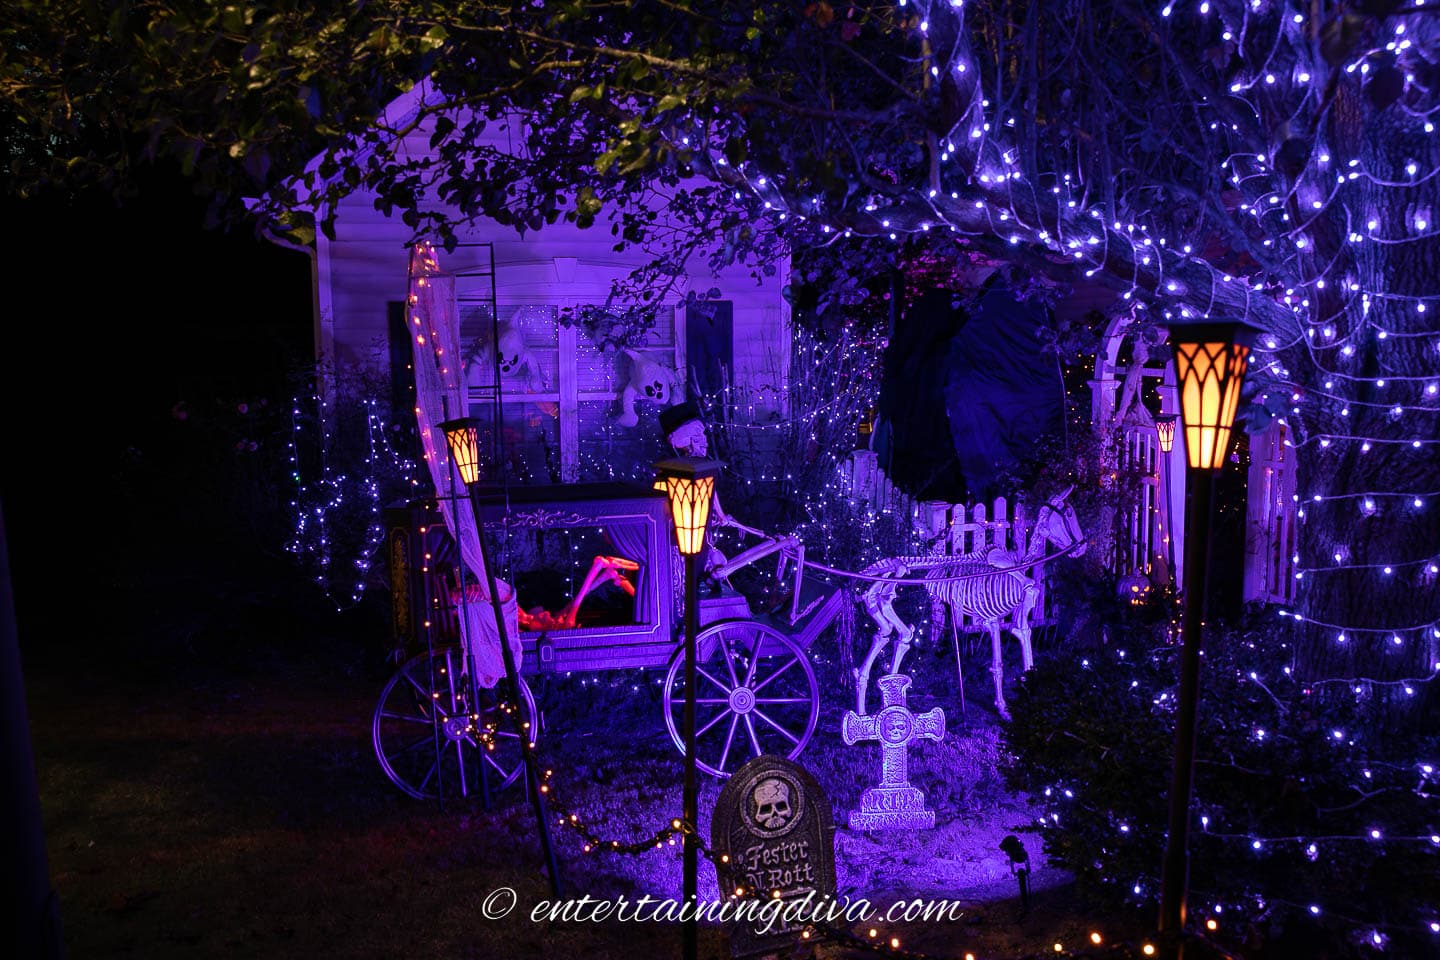
Or try purple spot lights and string lights combined with some orange solar torch lights* for a dramatic effect.
Those are really garden path lights that just happen to work well for Halloween. So you can use them in your yard the rest of the year, too.

The newer variety of LED spotlights* let you change the color of the light to match your decor. So you don’t have to keep buying different colored bulbs.
Since I’m such a fanatic about lighting, I could go on and on about lighting.
If you’re interested in reading more, you can find out how to set up Halloween outdoor lighting HERE.
3 | Create some fog
The next Halloween yard idea is to add fog.
It’s one of the best ways to create a graveyard atmosphere…it just isn’t as spooky without it!
And with inexpensive fog machines*, it is really easy to do.
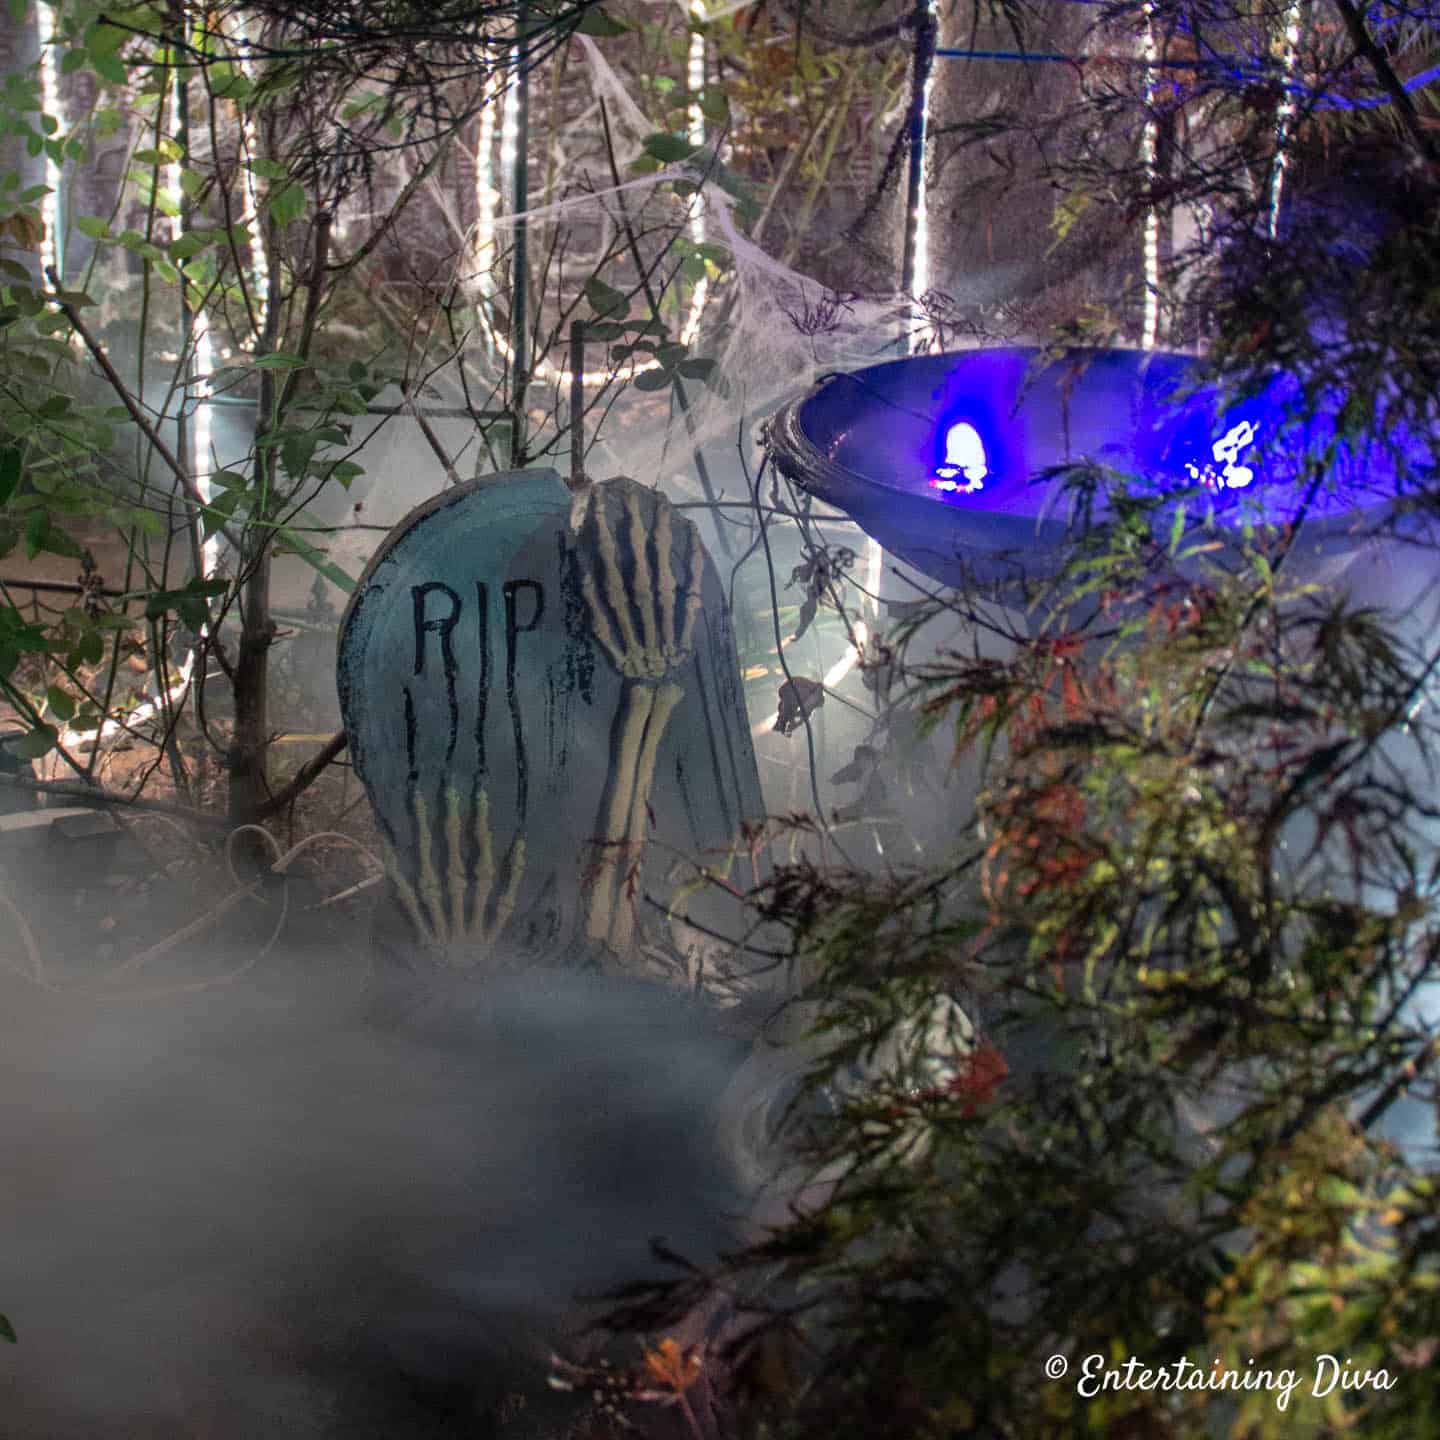
However, there is a trick to making thick fog that actually stays on the ground. Find out how to make great Halloween cemetery fog HERE.
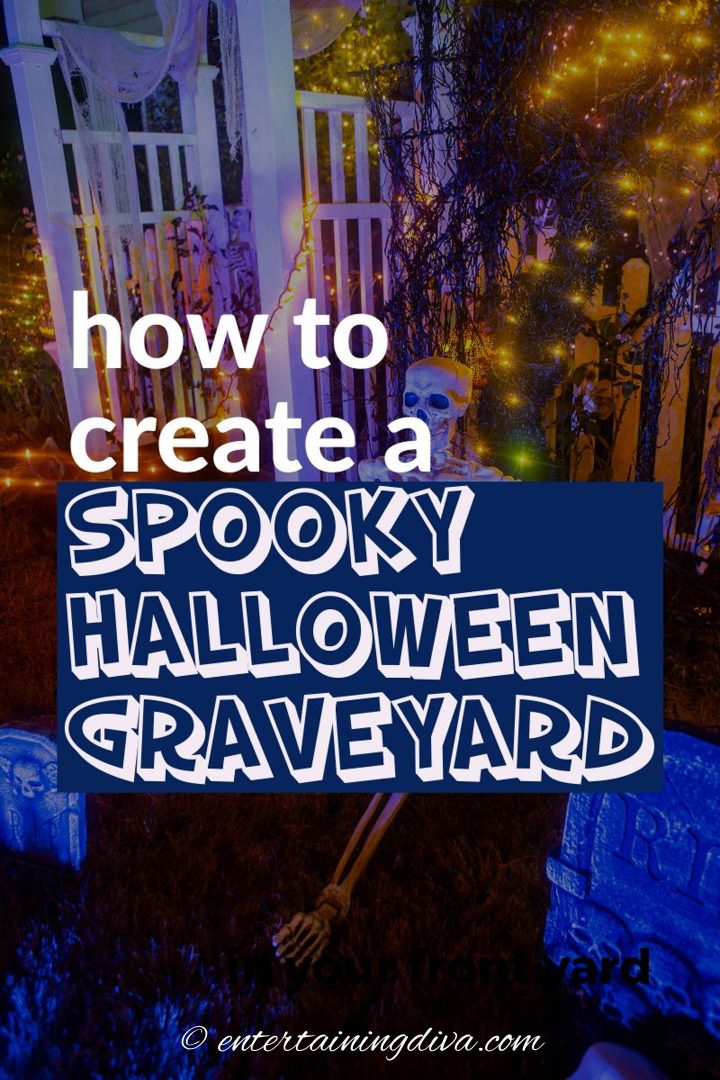
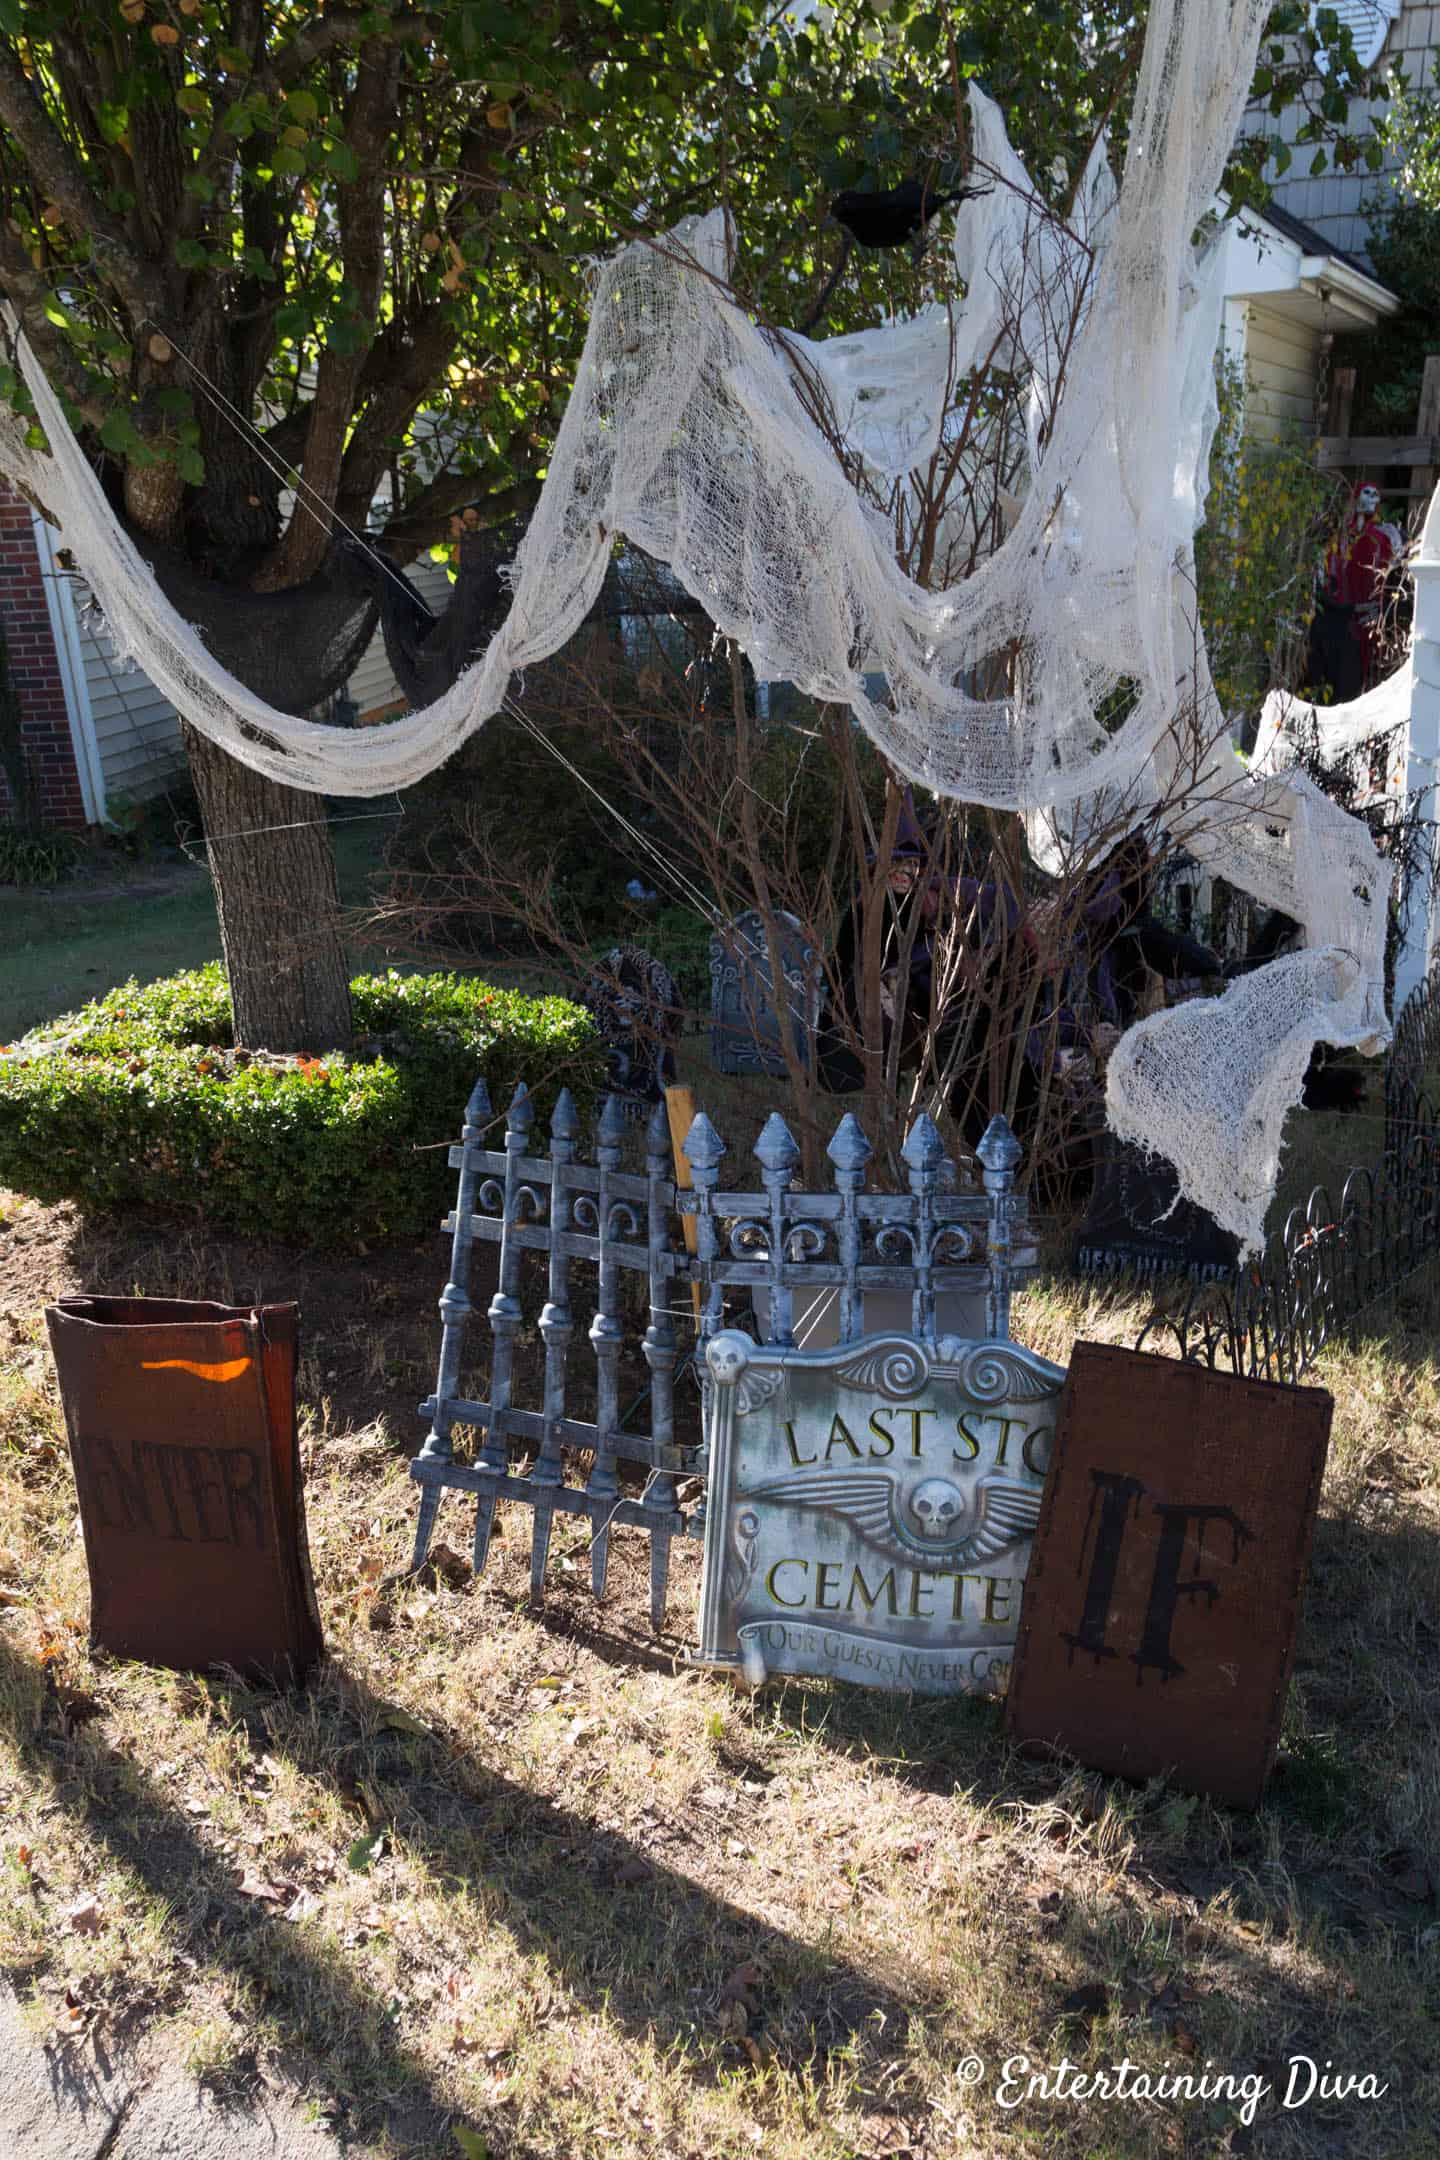
4 | Add a Halloween cemetery archway entrance
Another thing that all good Halloween graveyards have in common is a spooky entrance. And I love to use an arbor for this purpose.
To create a Halloween cemetery archway entrance, you can take advantage of what you already have, buy something specifically for Halloween or make your own.
Option 1 | Light an arbor
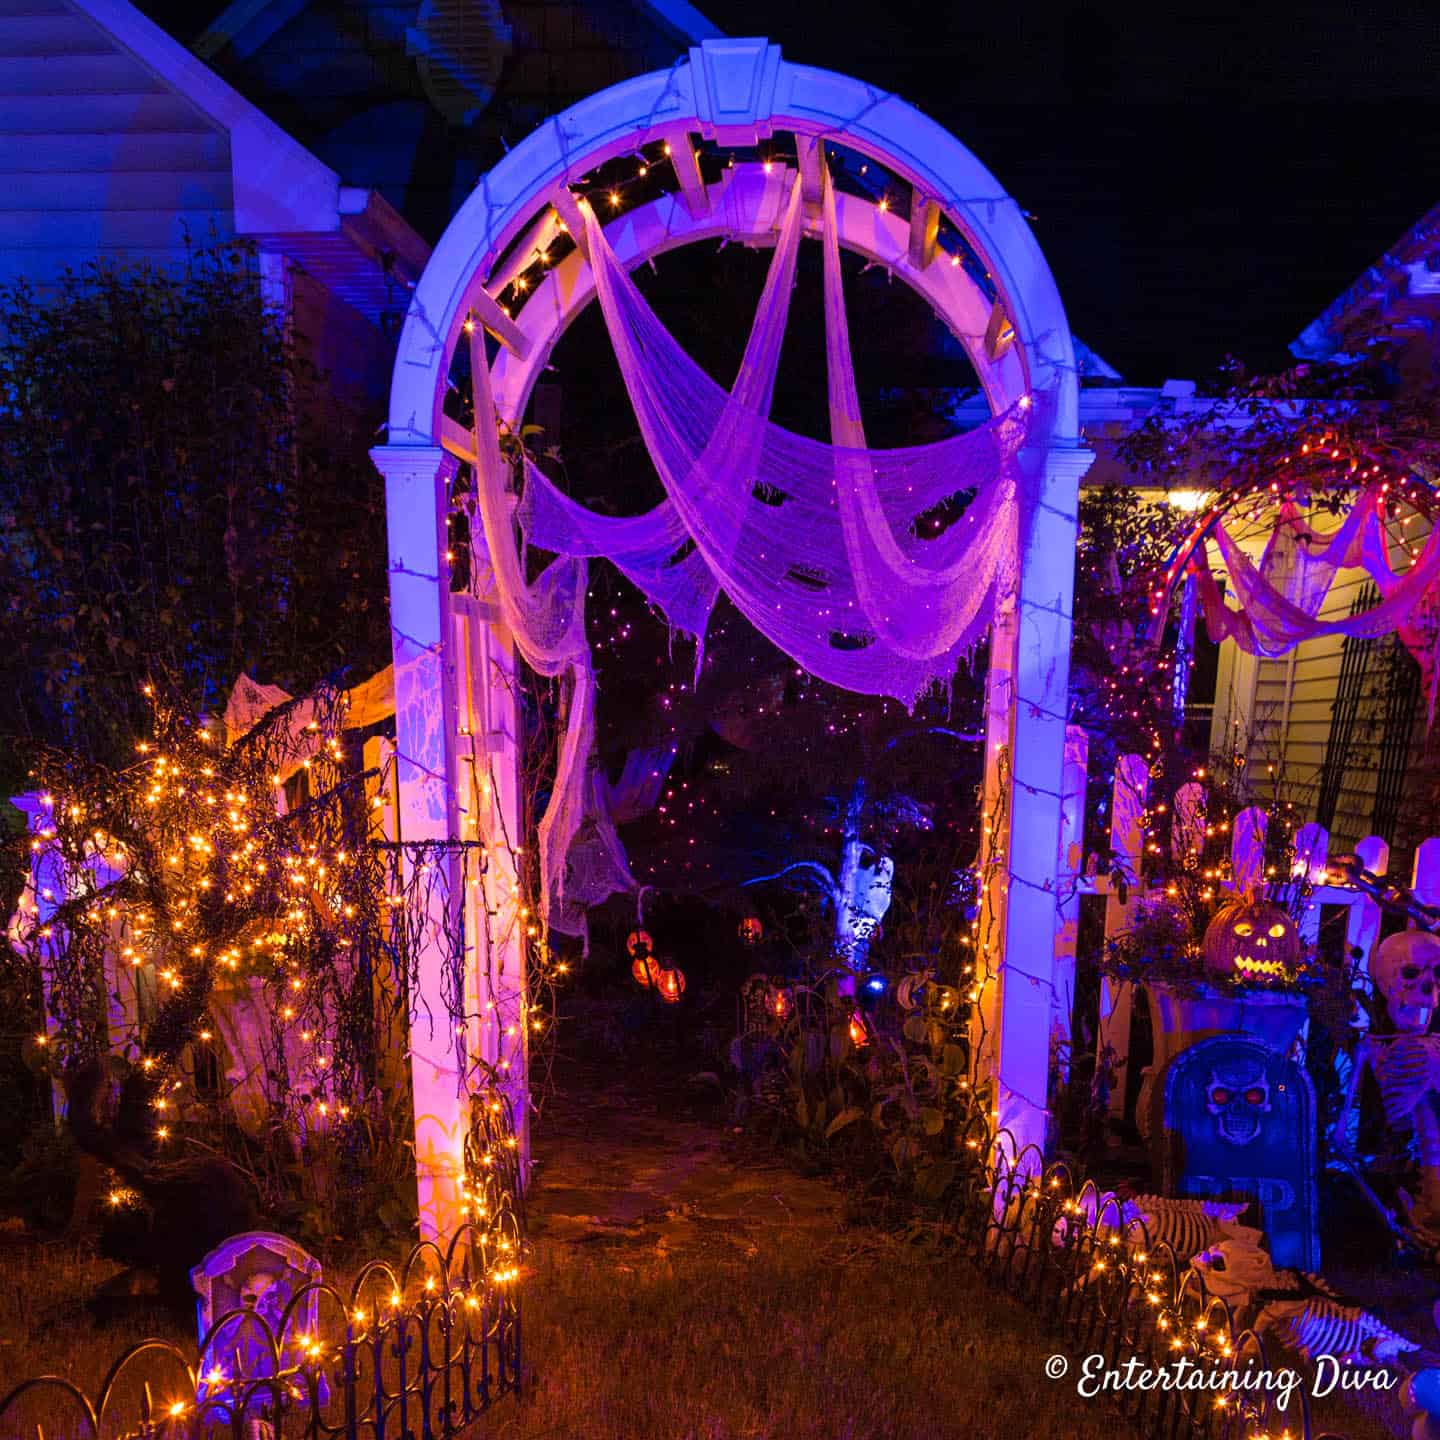
If you happen to have an arbor in your front yard (like I do), then you have a ready-made archway entrance for your graveyard.
Just add some lighting and you’re all set. (Find out more about my Halloween outdoor lighting effects.)
Of course, if you don’t have an arbor in your front yard, you could buy an inexpensive one like this* (usually meant for weddings) and add some graveyard decorations to it.
Option 2 | Buy a Halloween cemetery archway

You can purchase archways that are meant for Halloween cemeteries, like this one.
Update: Unfortunately, this archway is no longer available but I have found a couple of similar ones that you might like:
- Inflatable Halloween archway*
- Or if you have a big budget, this iron Halloween cemetery archway* is awesome!
Option 3 | Make a DIY Halloween cemetery arch
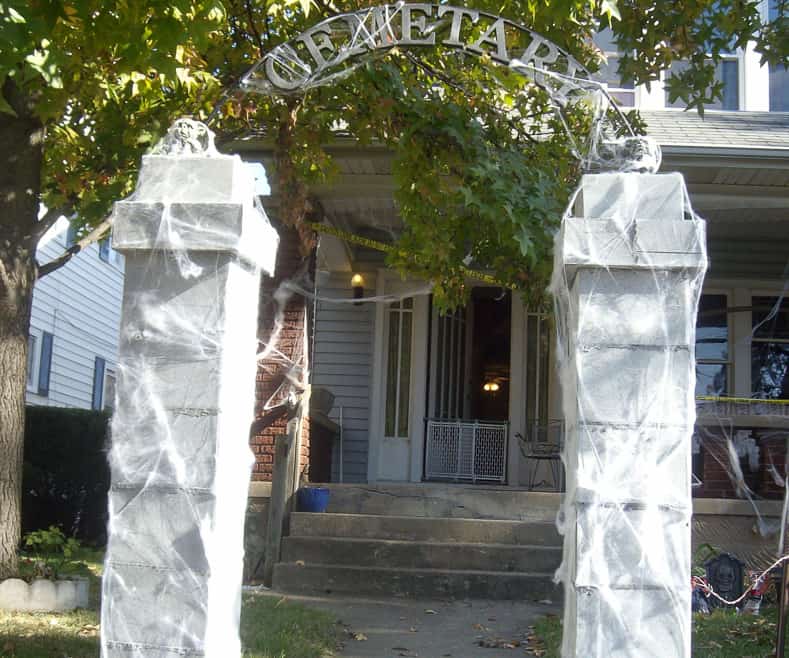
Finally, if you have the time, you can make your own DIY Halloween cemetery entrance with these instructions available at instructables.com.
Option 4 | Repurpose a metal garden arbor
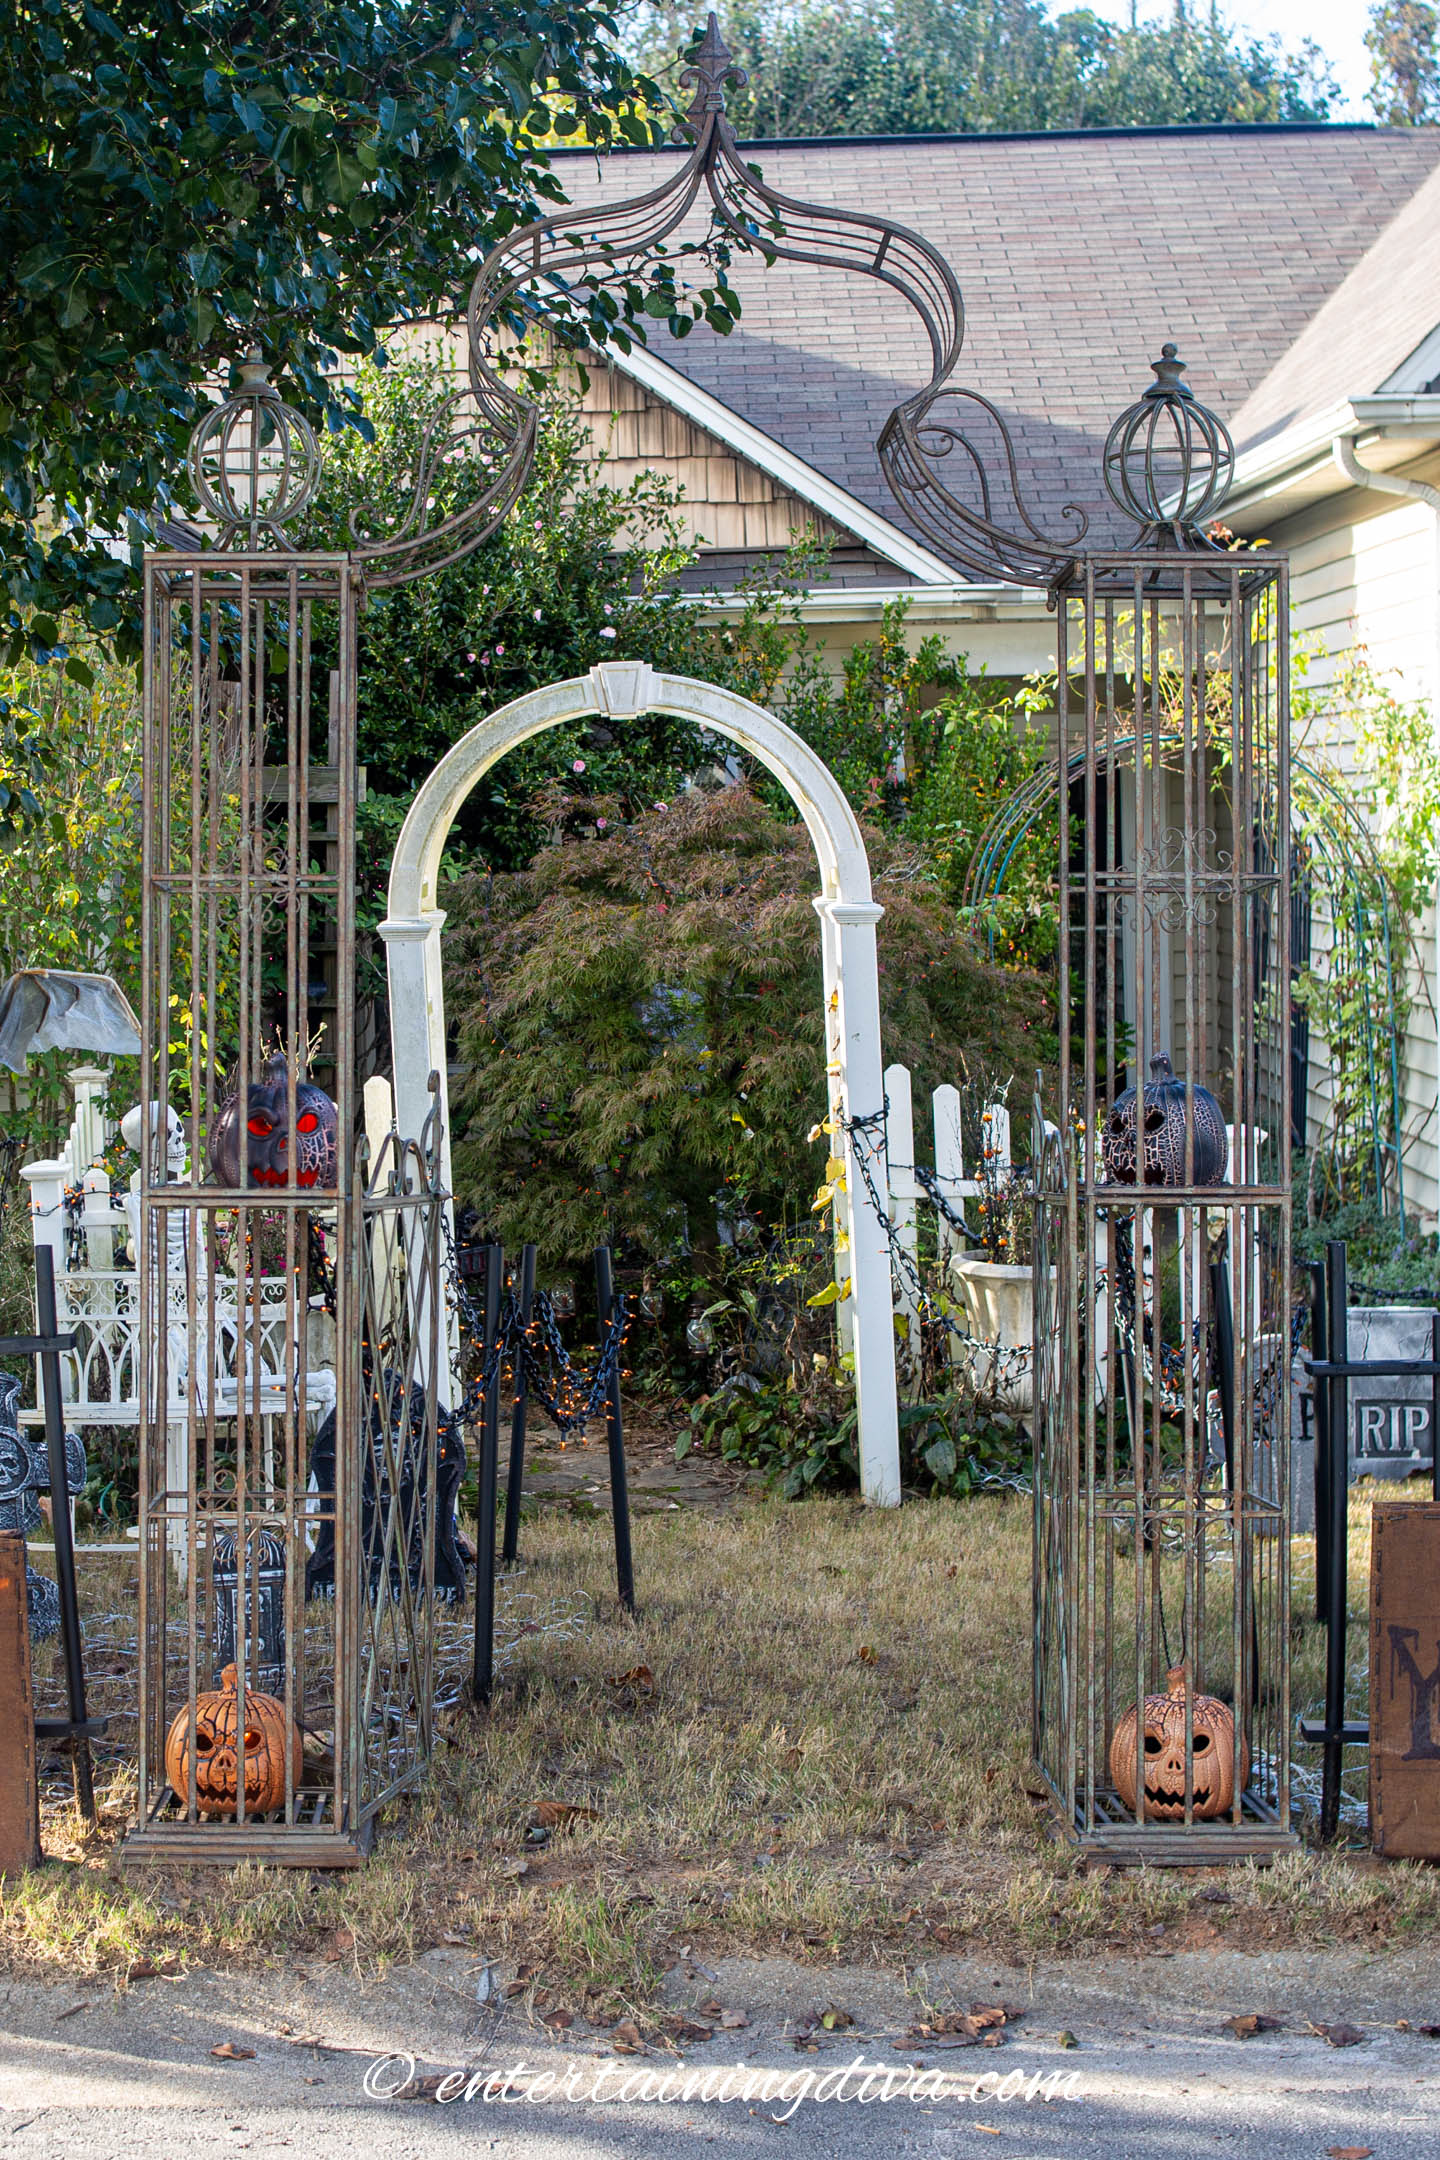
If you have a metal arbor somewhere else in your garden (or you want to add one), you can use it as your Halloween graveyard entrance temporarily.

For a more old-time look, wrap the posts in plastic stone scene setter**.
It makes the posts look more substantial.
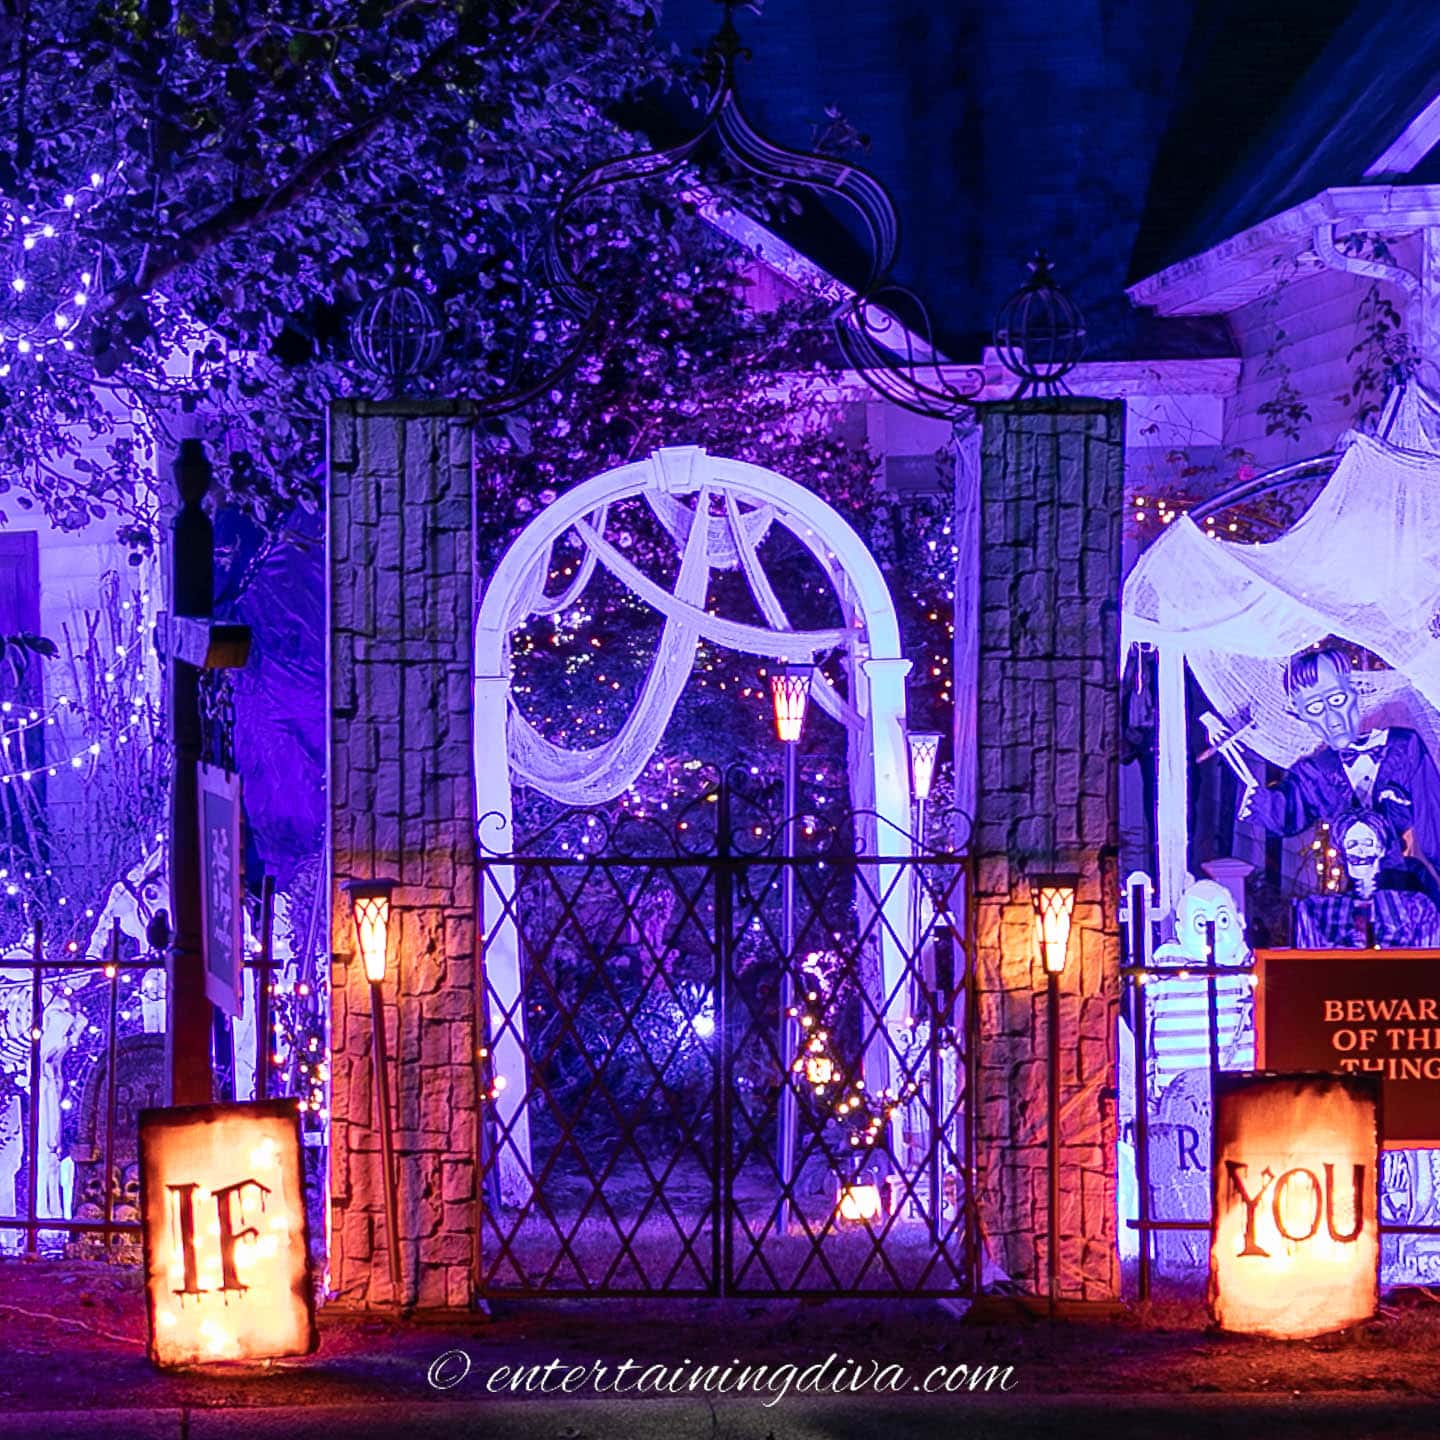
And looks pretty cool at night, too.
To do this, I bought this garden arbor* and put it up for my Halloween display.
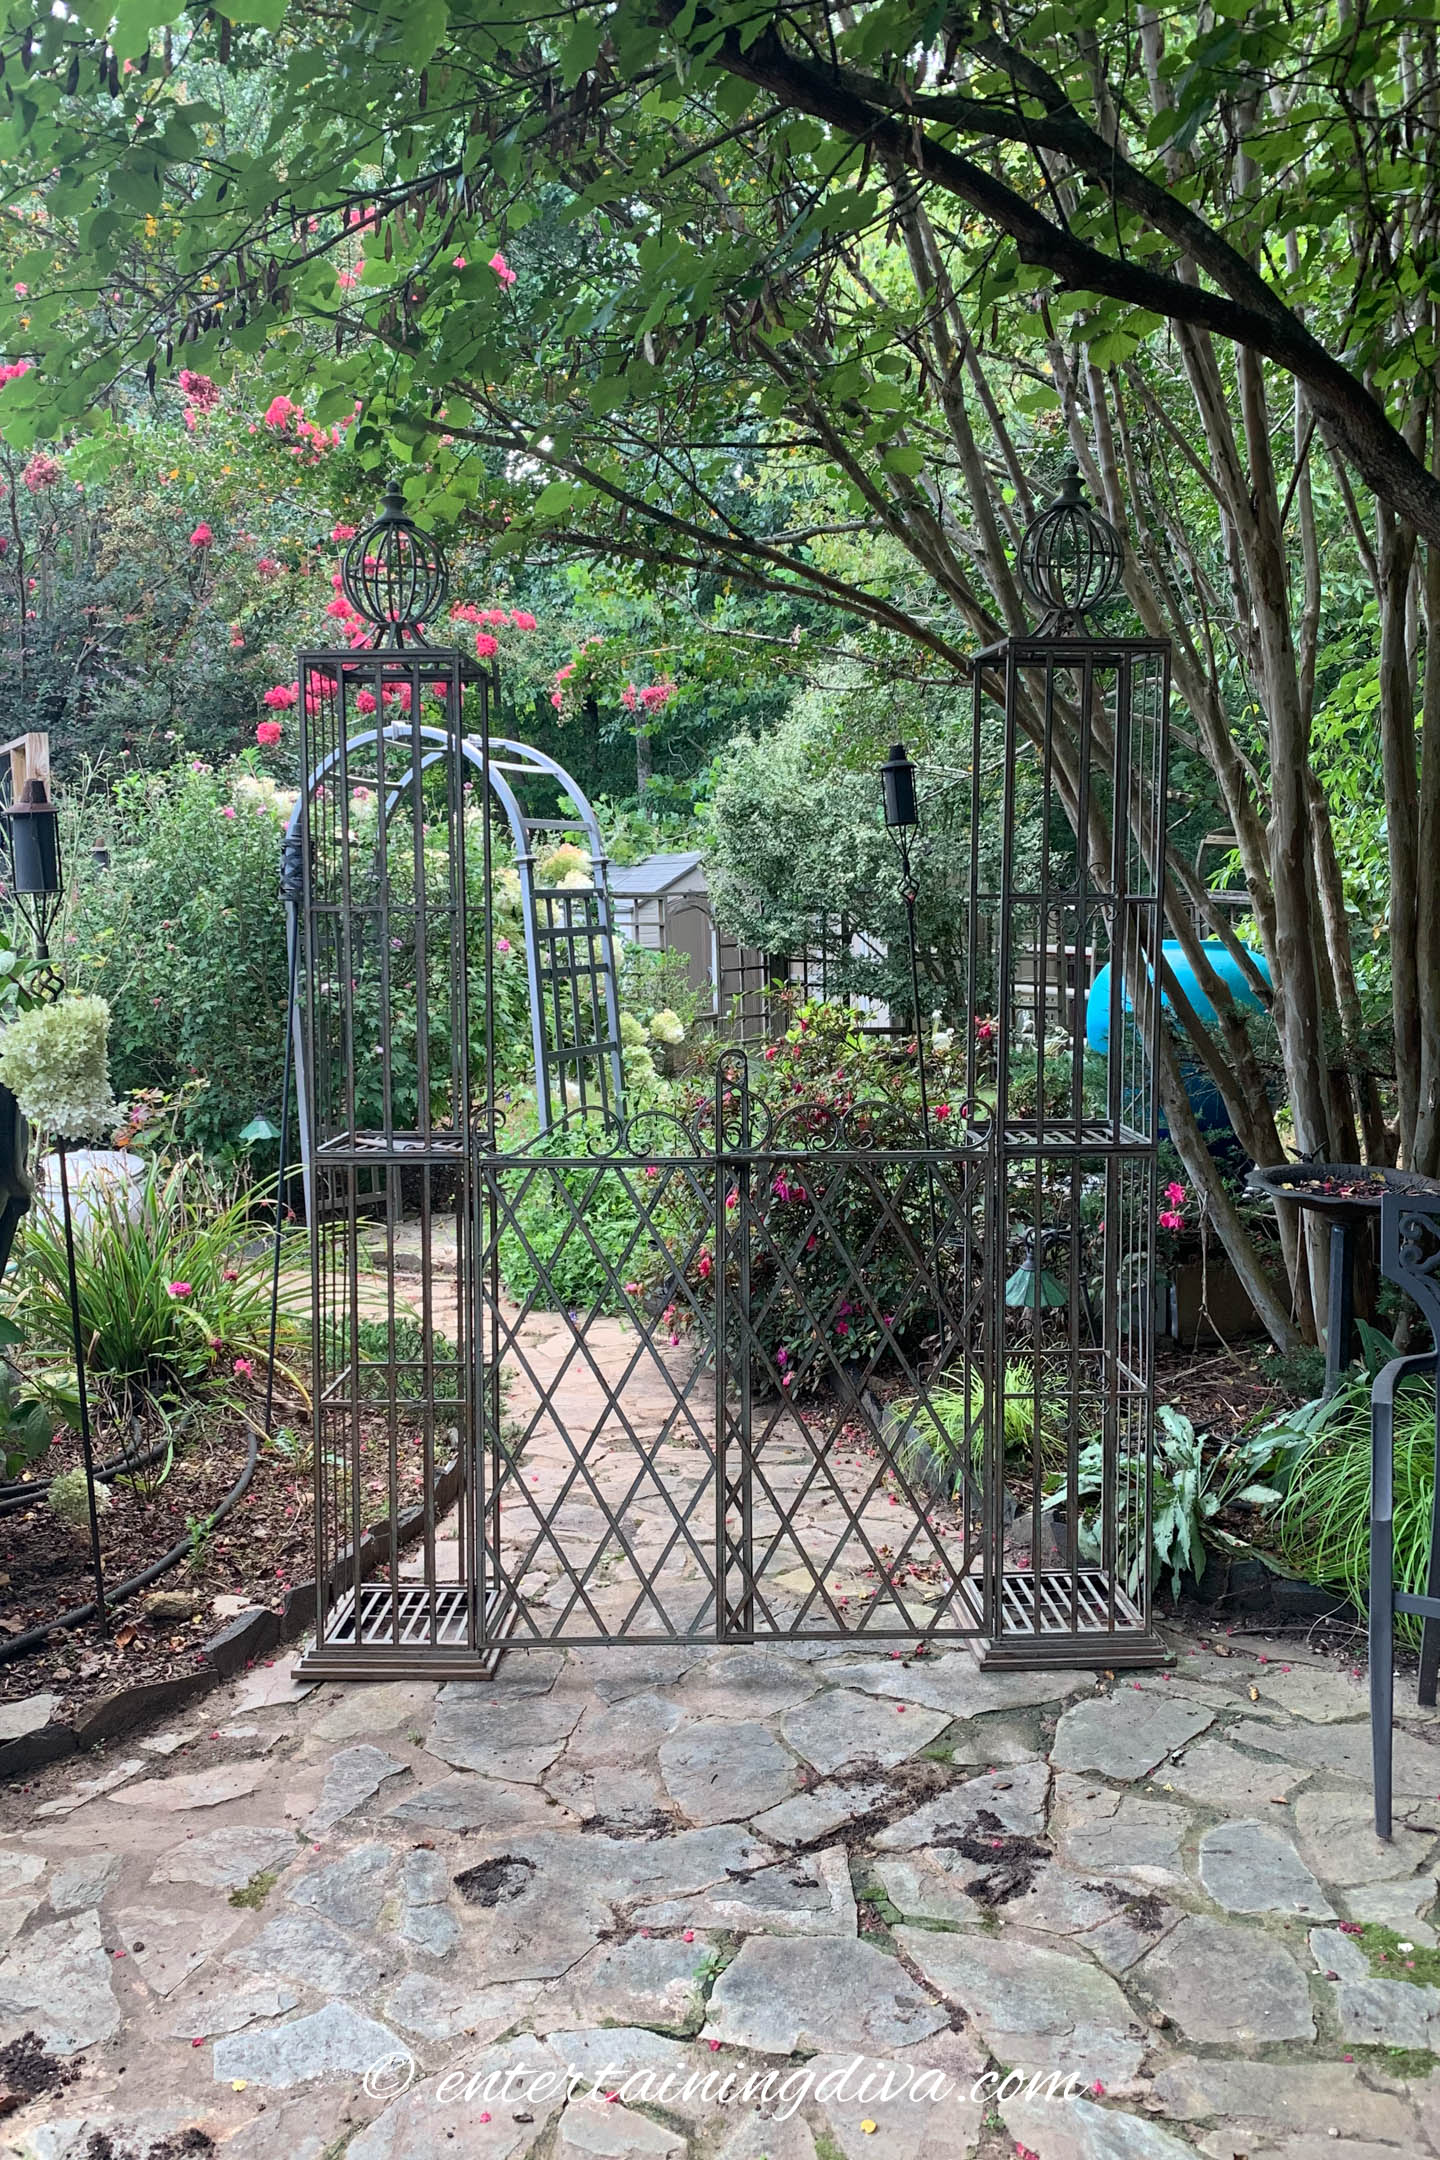
Then moved it into the backyard where it looks beautiful in my garden.
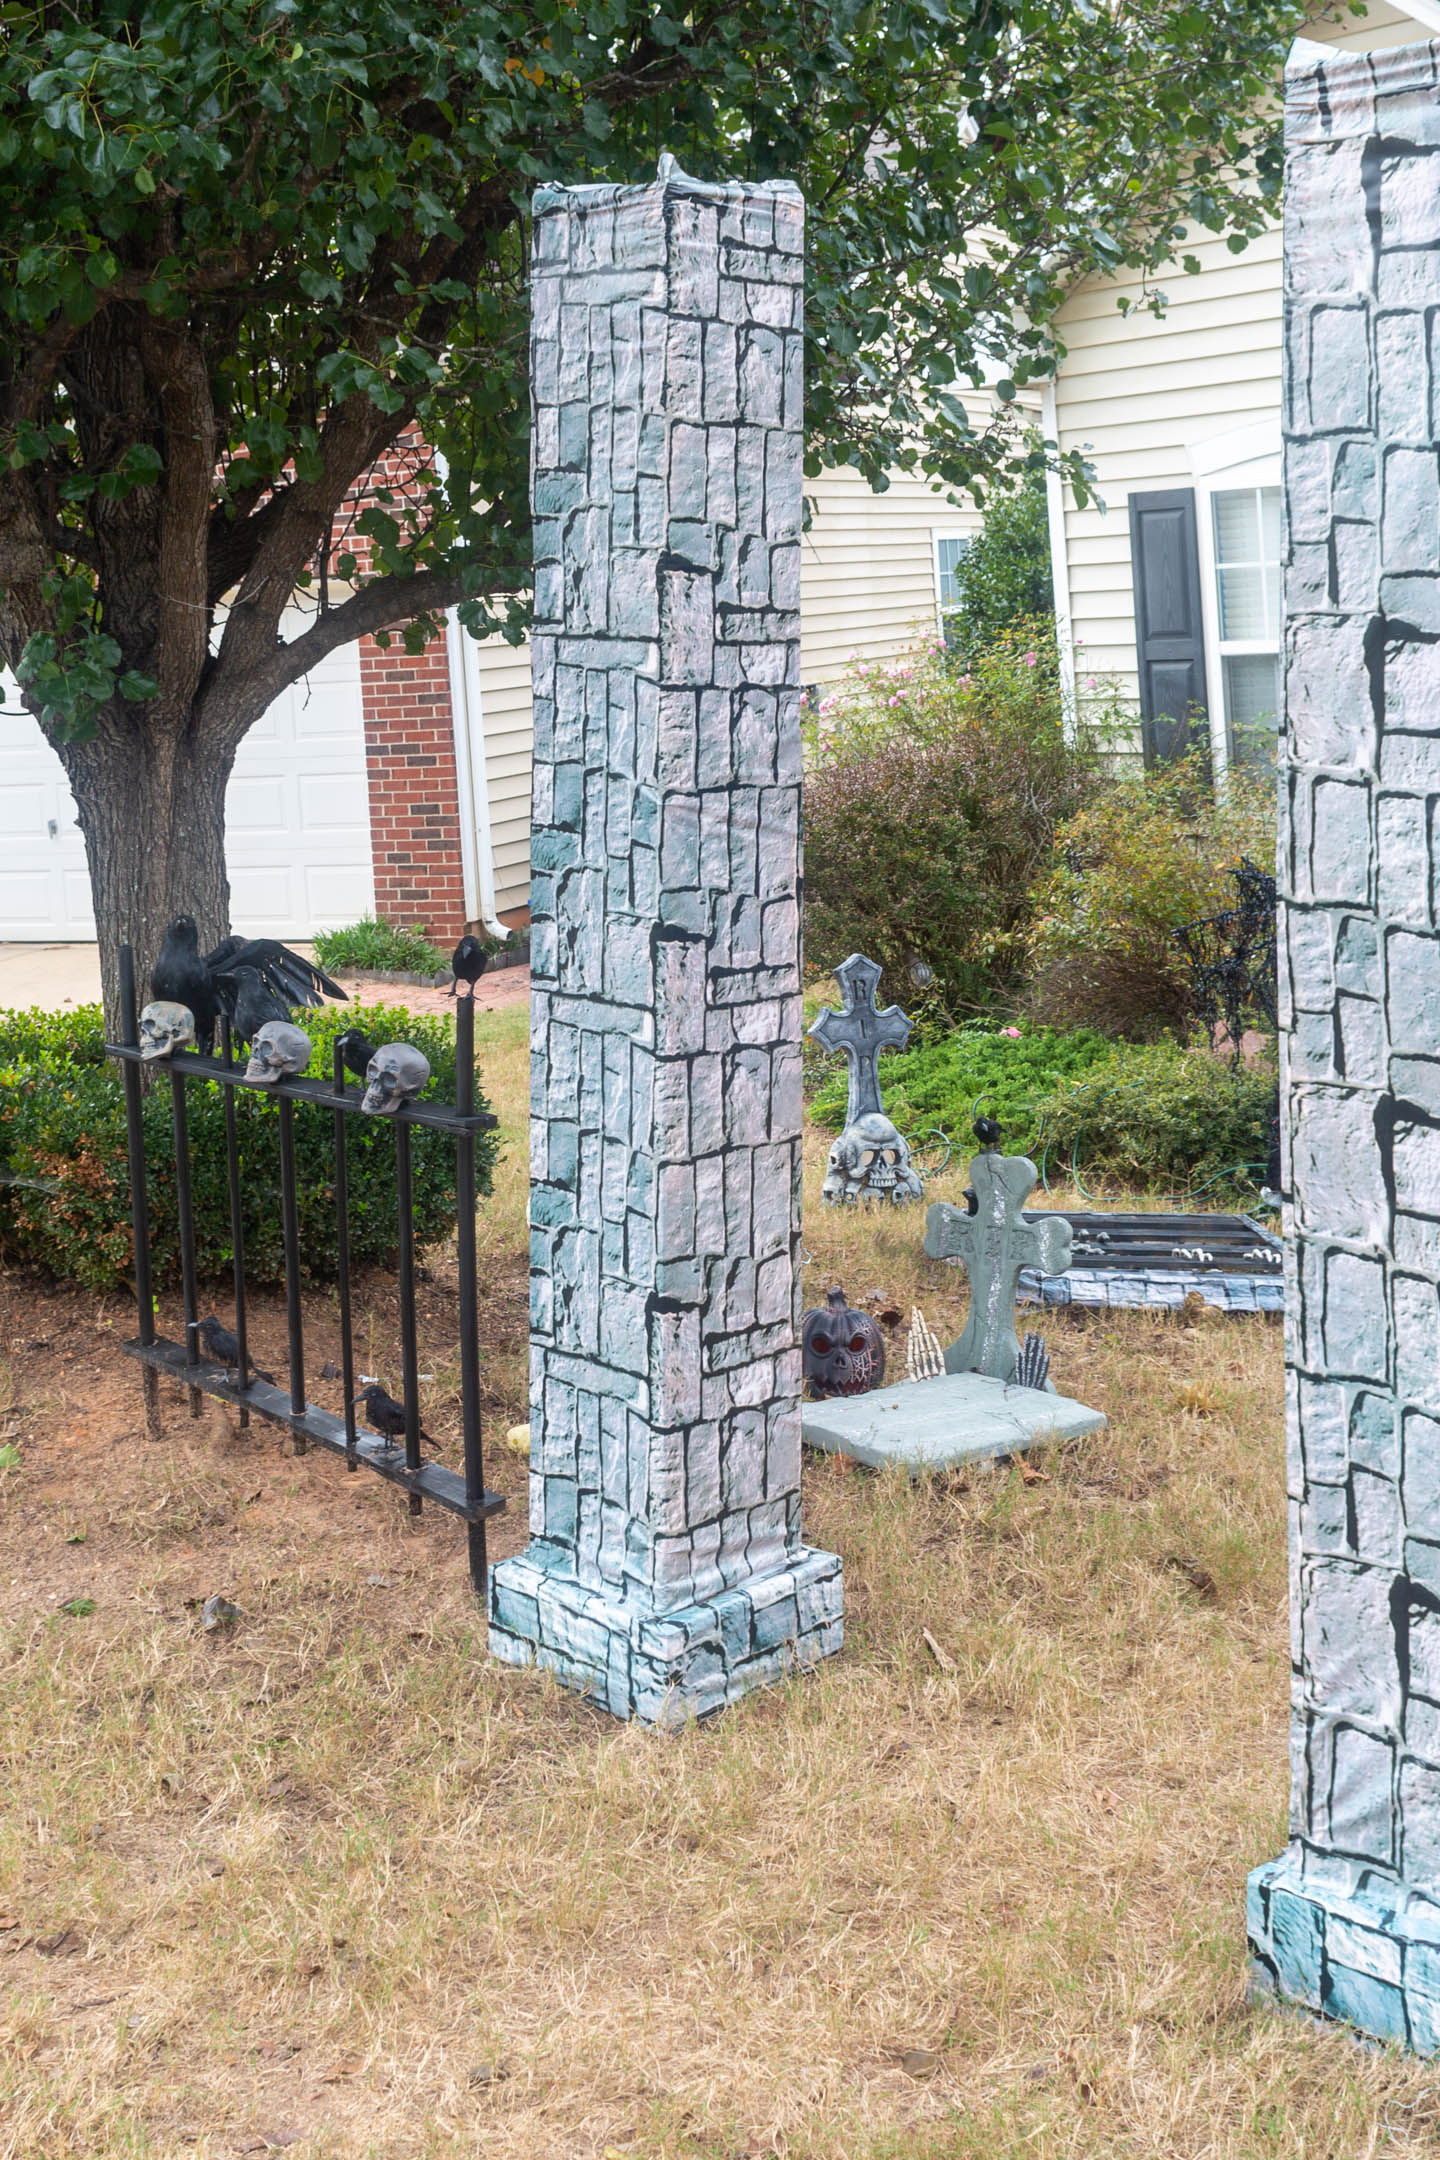
5 | Make DIY Halloween pillars
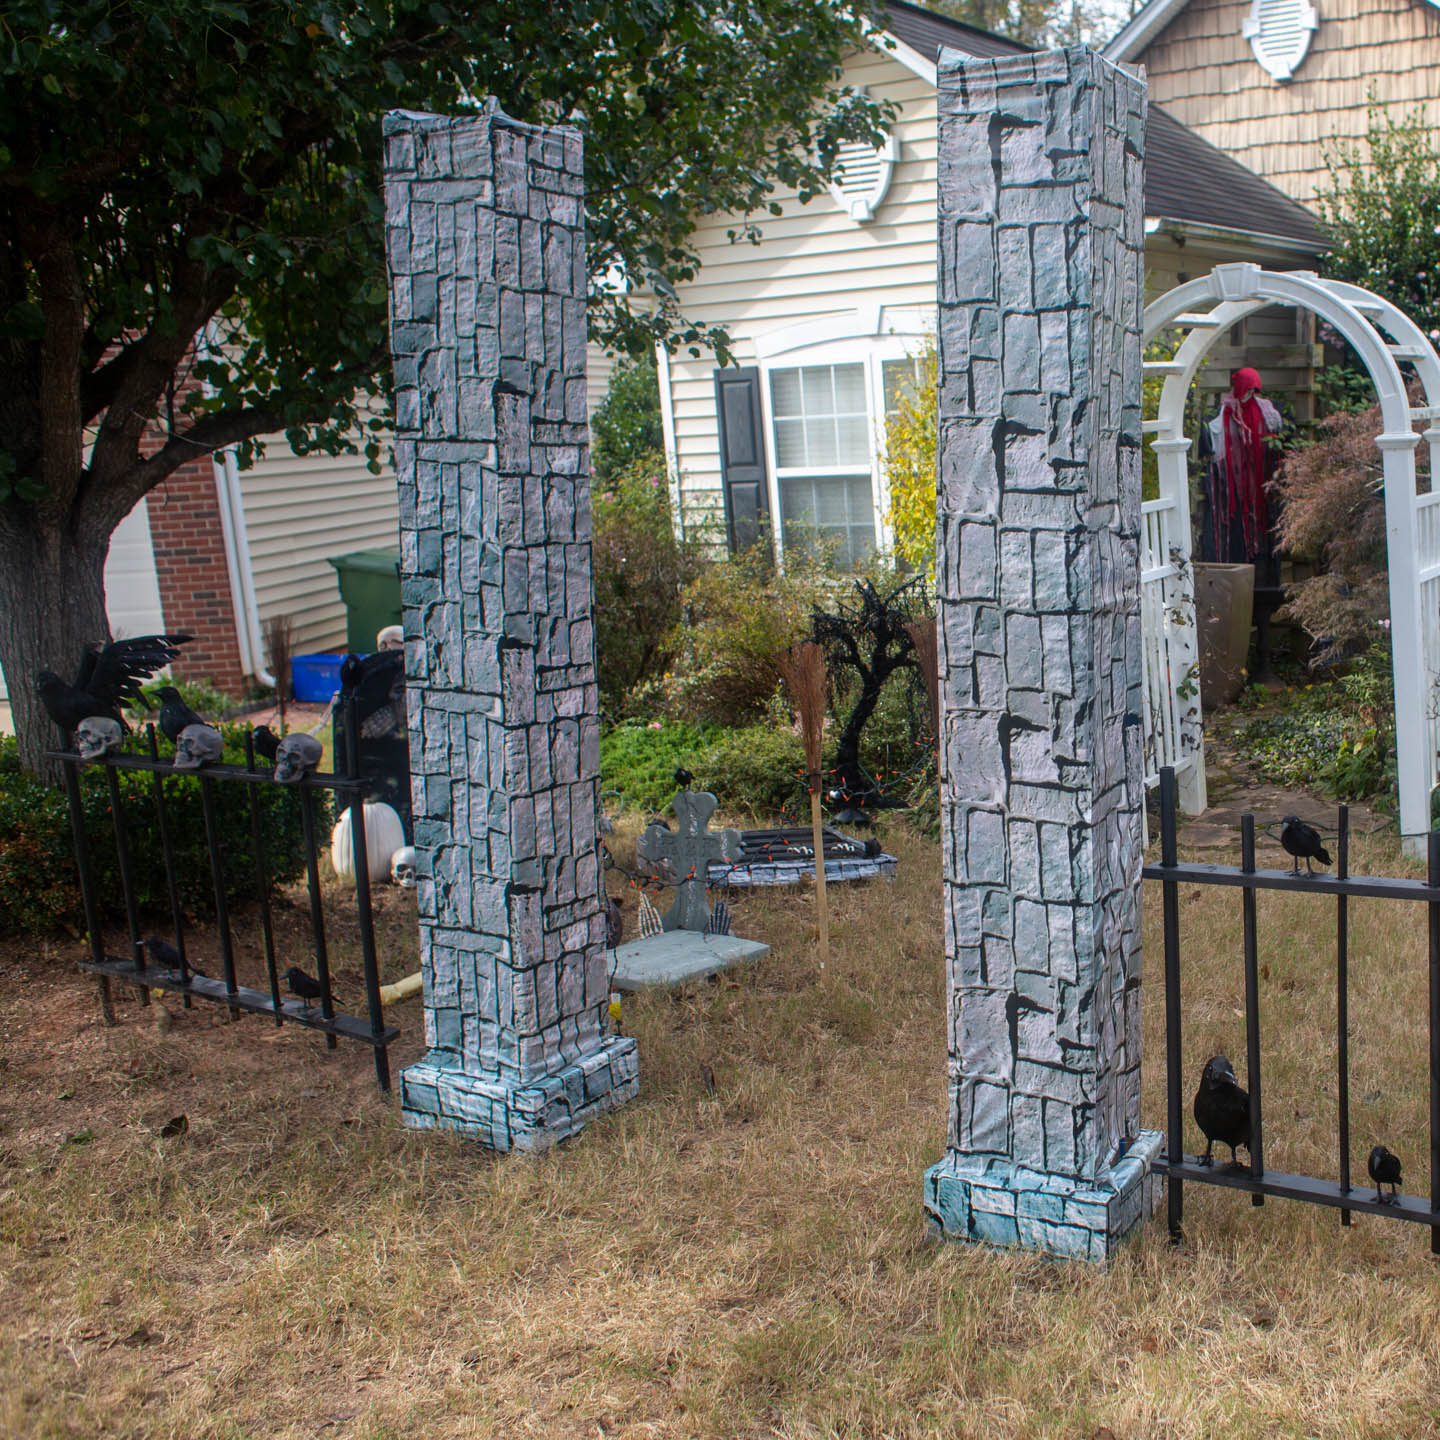
If you don’t want to go all out creating an archway for your Halloween cemetery entrance, DIY Halloween pillars are another option that are a little easier to construct.
I made mine with a wood frame wrapped in a plastic scene setter with a brick pattern** . Get my step-by-step Halloween cemetery columns tutorial HERE.
But if you prefer a more 3-D look to the bricks, try out this tutorial for making DIY Halloween cemetery columns using styrofoam.
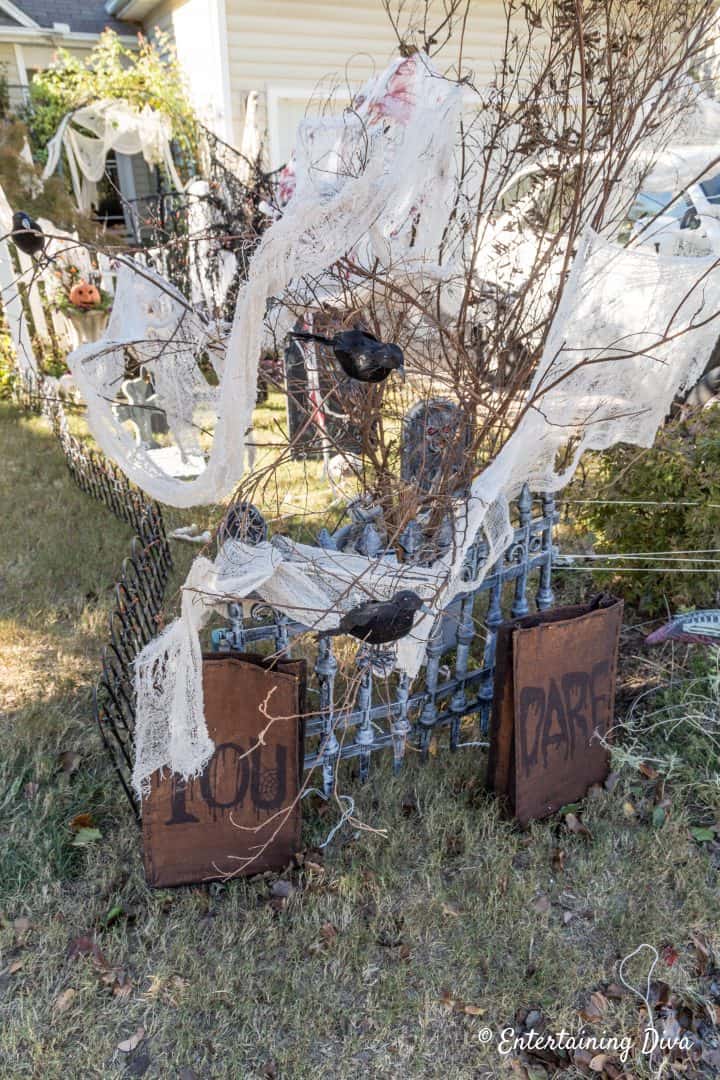
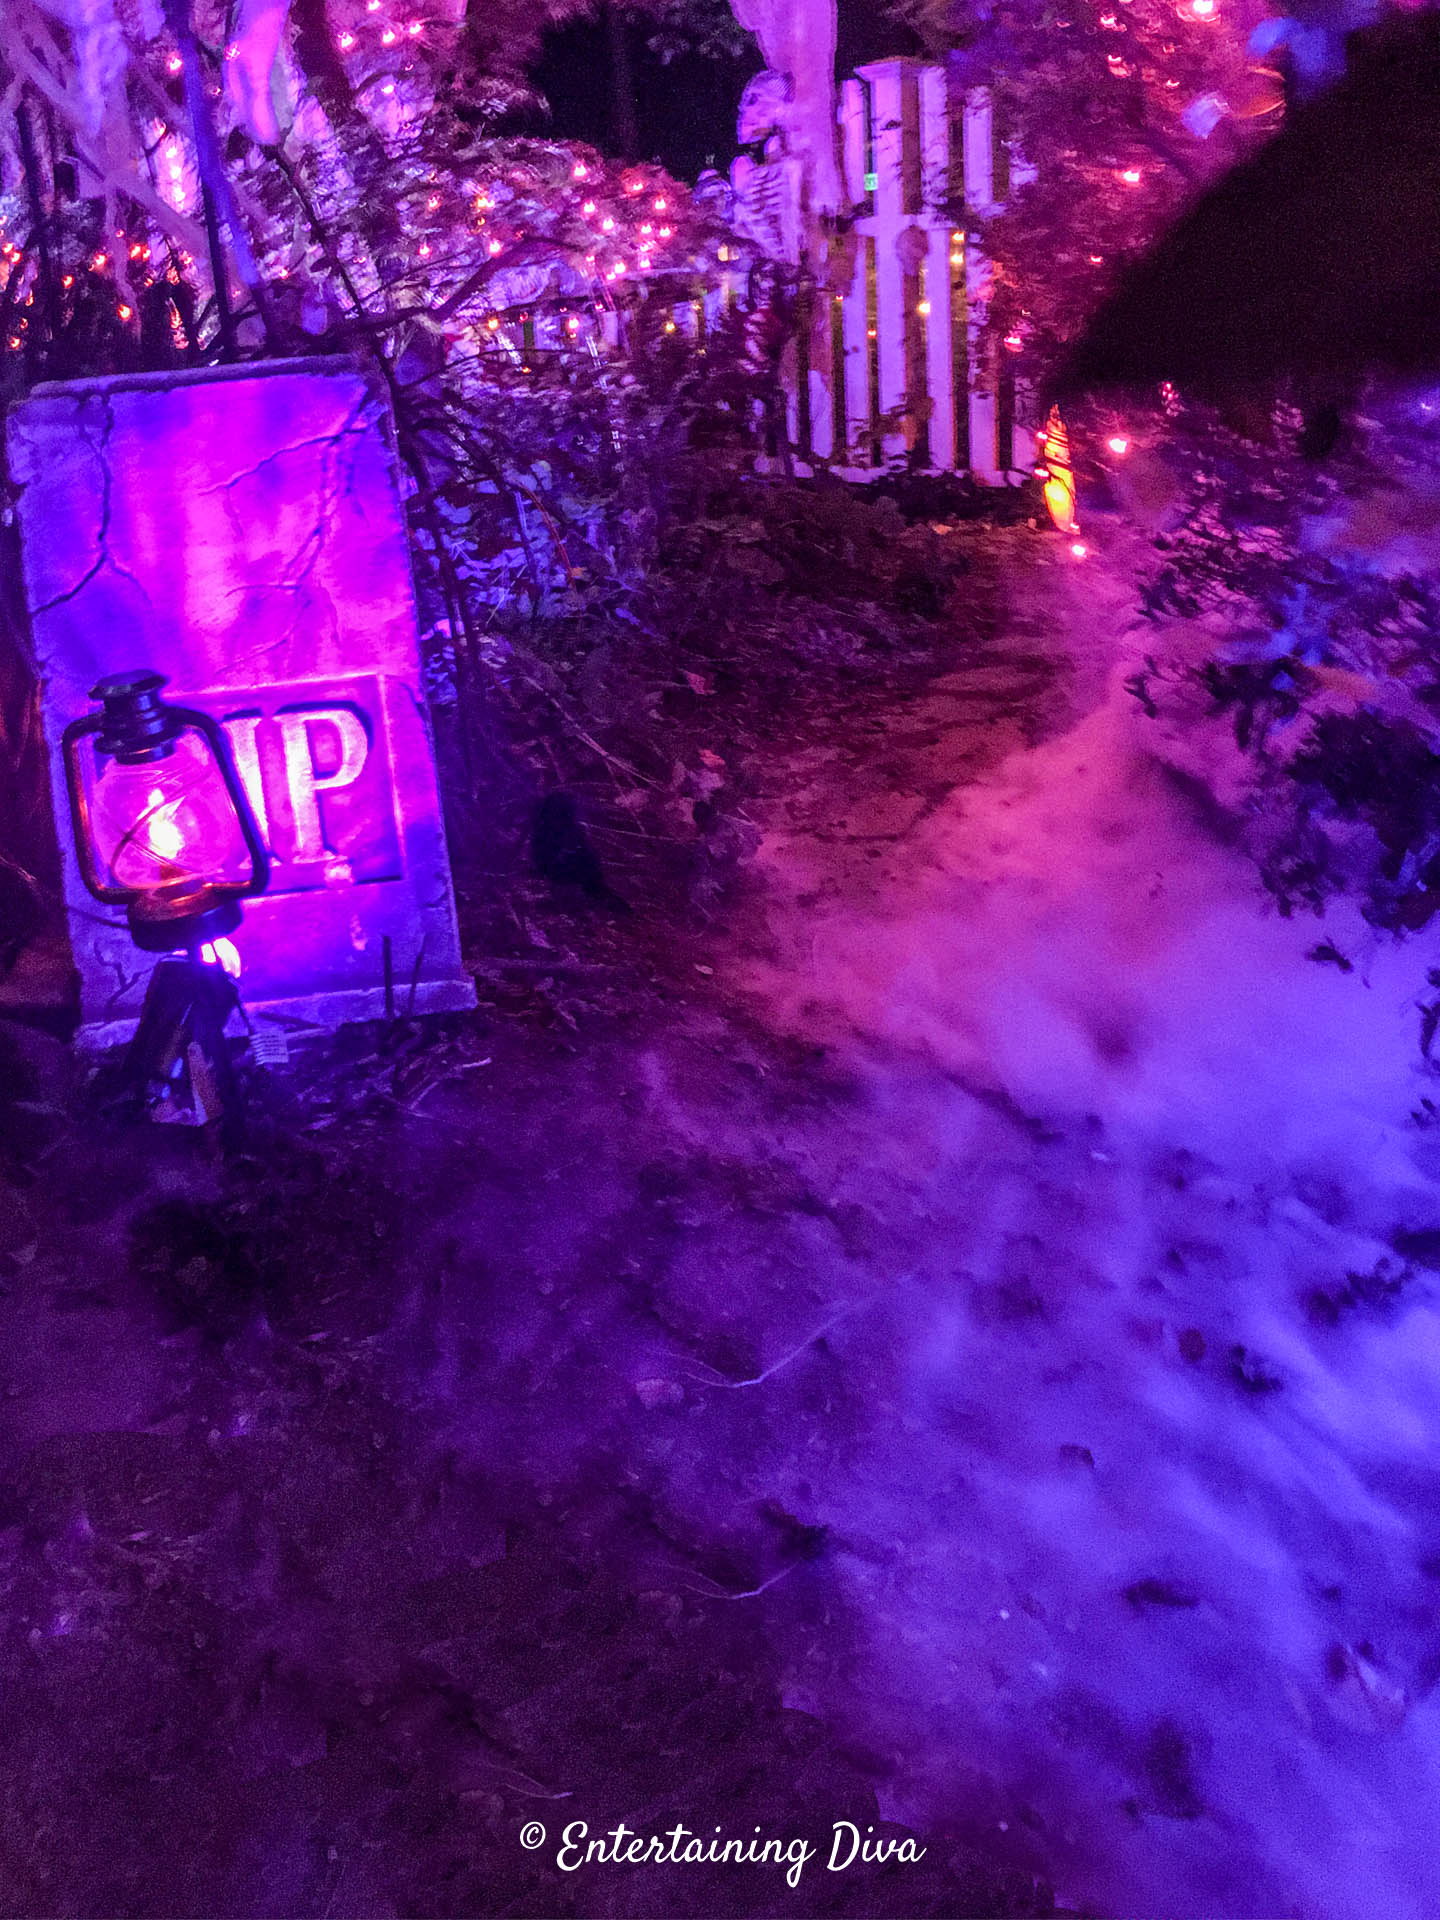
6 | Create a Halloween graveyard fence
I think installing a Halloween fence around your graveyard is a must.
It prevents people from walking through your cemetery, and potentially tripping on the wires that you most likely have scattered around to connect the lighting.
When it comes to putting up a Halloween fence, there are a few options to choose from.
Option 1 | Make a DIY cemetery fence
The most economical option for Halloween fences is to make your own.
It takes a little bit of time, but that way you can fit them exactly to your space. And they’re much less expensive than the pre-made Halloween fences.
Read my Halloween picket fence tutorial.
Option 2 | Buy a Made-For-Halloween Fence
If you don’t want to spend the time to make a Halloween fence, this option may be the one for you: Buy one that is specifically made for Halloween.
Like the plastic one in the picture (which you can find HERE*) or this metal one* that looks more realistic.
For small spaces (or if you just want to use it as a prop like I did above), this is a great option.
But these store-bought fences can get really expensive if you actually want to use it as a fence.
And many of them don’t stand up very well on their own.
Option 3 | Use garden edging
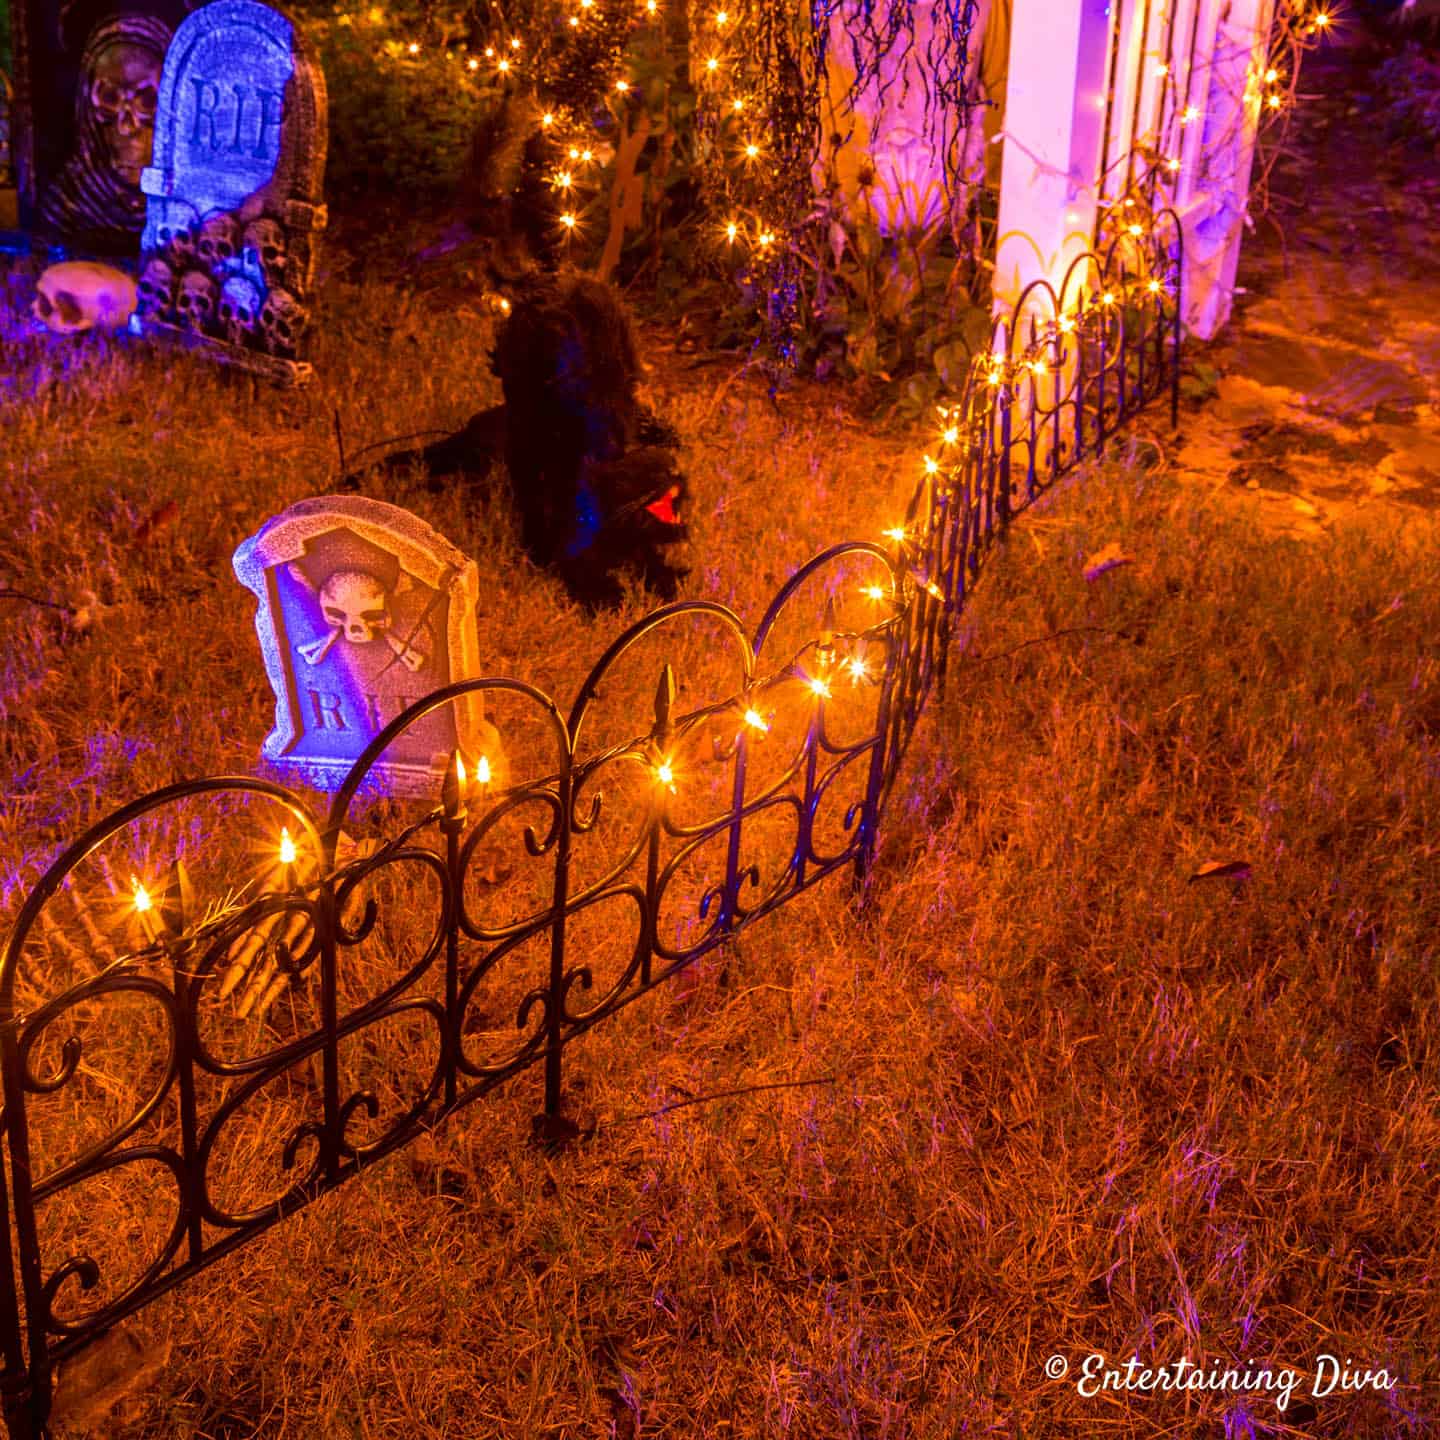
My third Halloween fence option is a little unconventional…garden edging*.
You get a lot more for your money and it’s easier to install than a traditional store-bought Halloween fence.
Plus it’s not as much work as making a DIY Halloween fence from scratch.
Since garden edging isn’t very tall, I always string lights through it so that people can see where it is.
Highlighting it with floodlights helps to make it more visible, too.
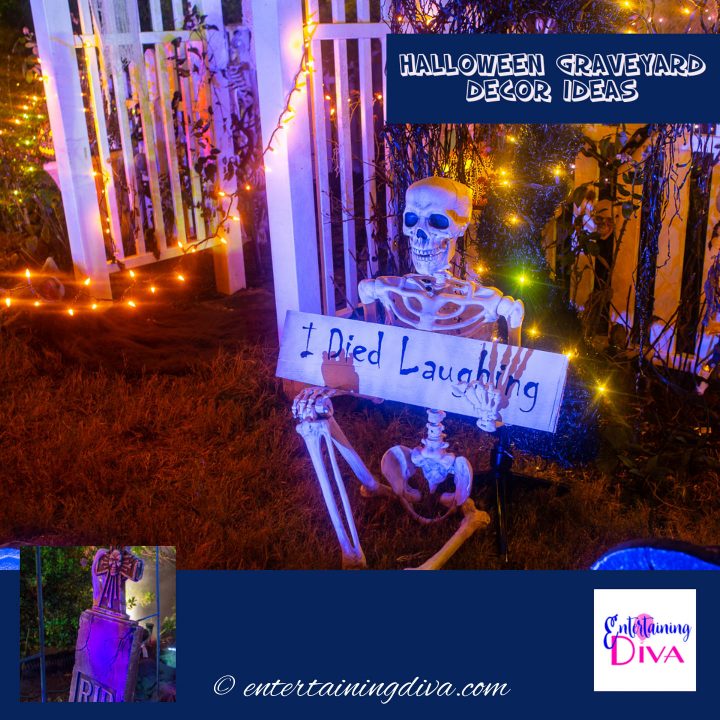
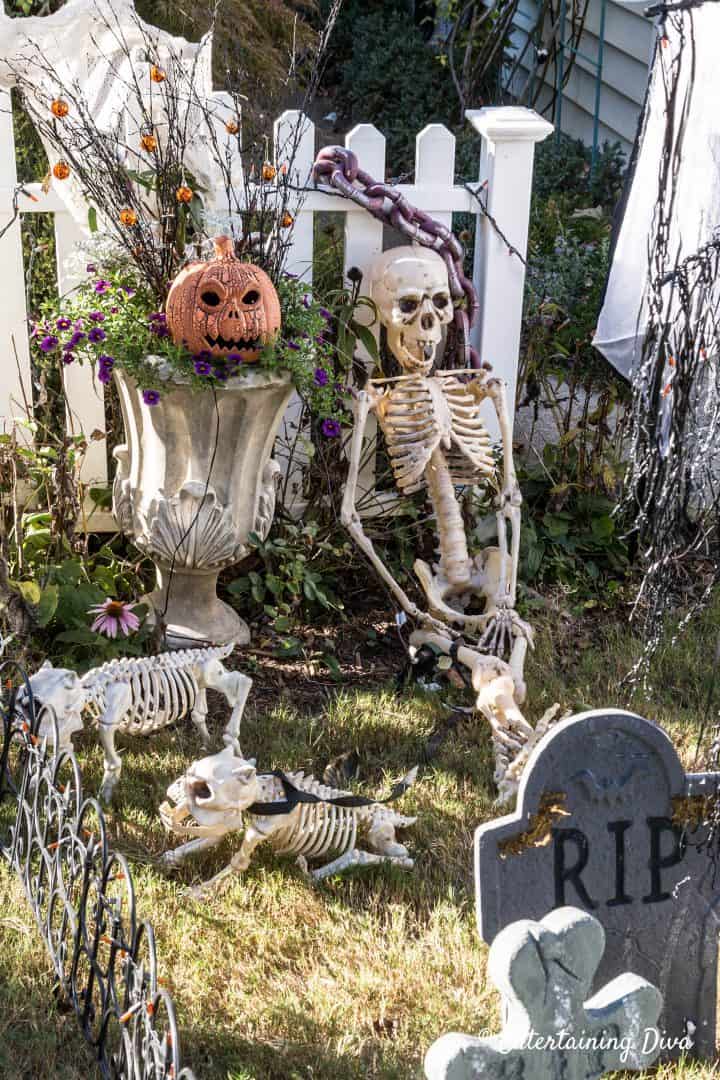
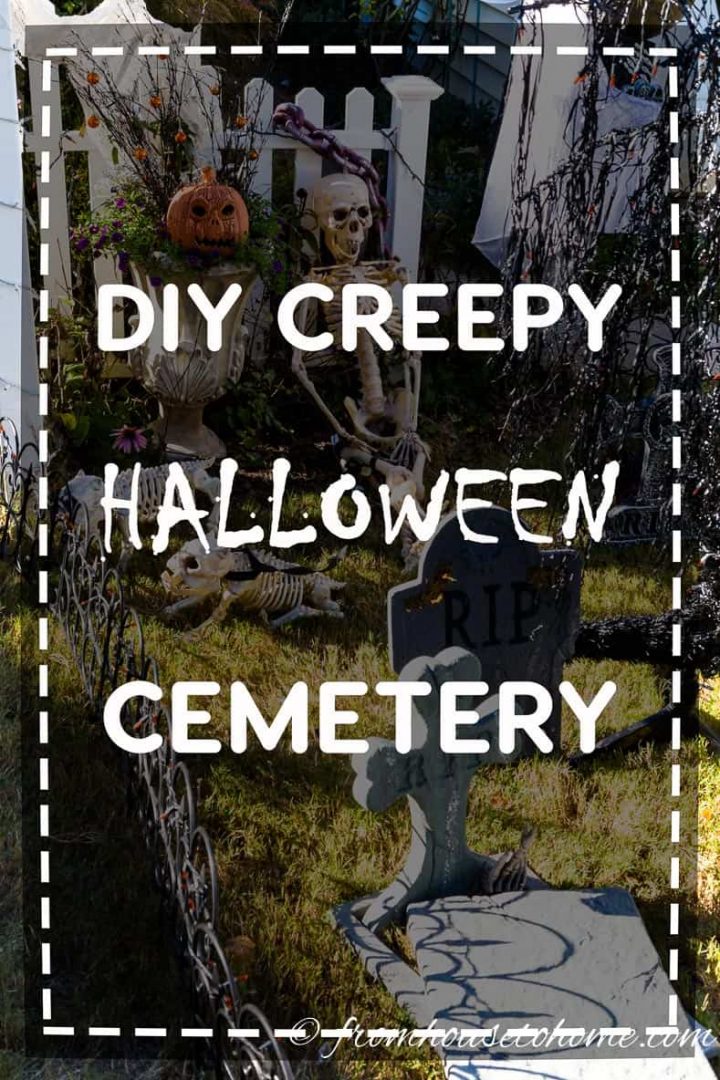
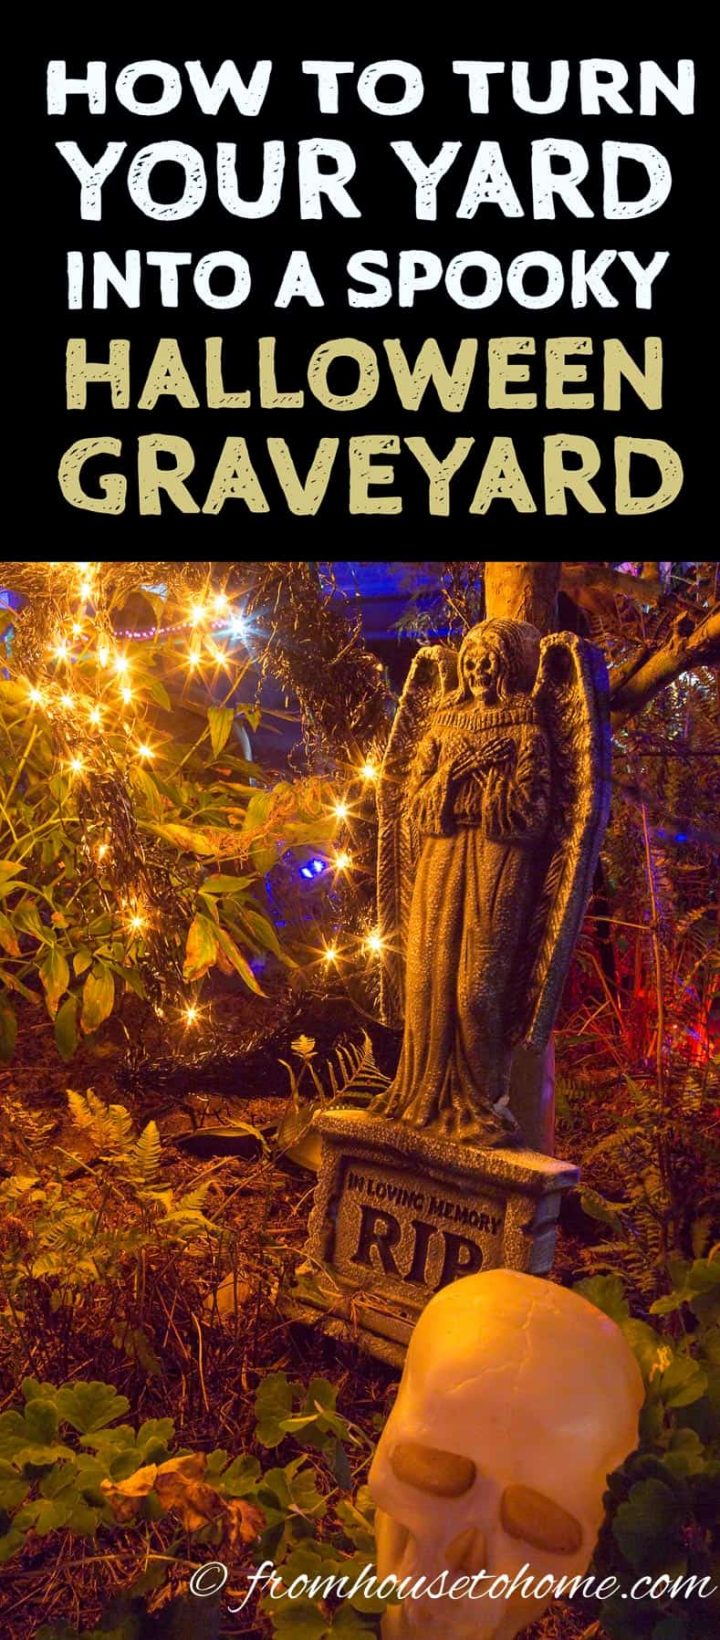
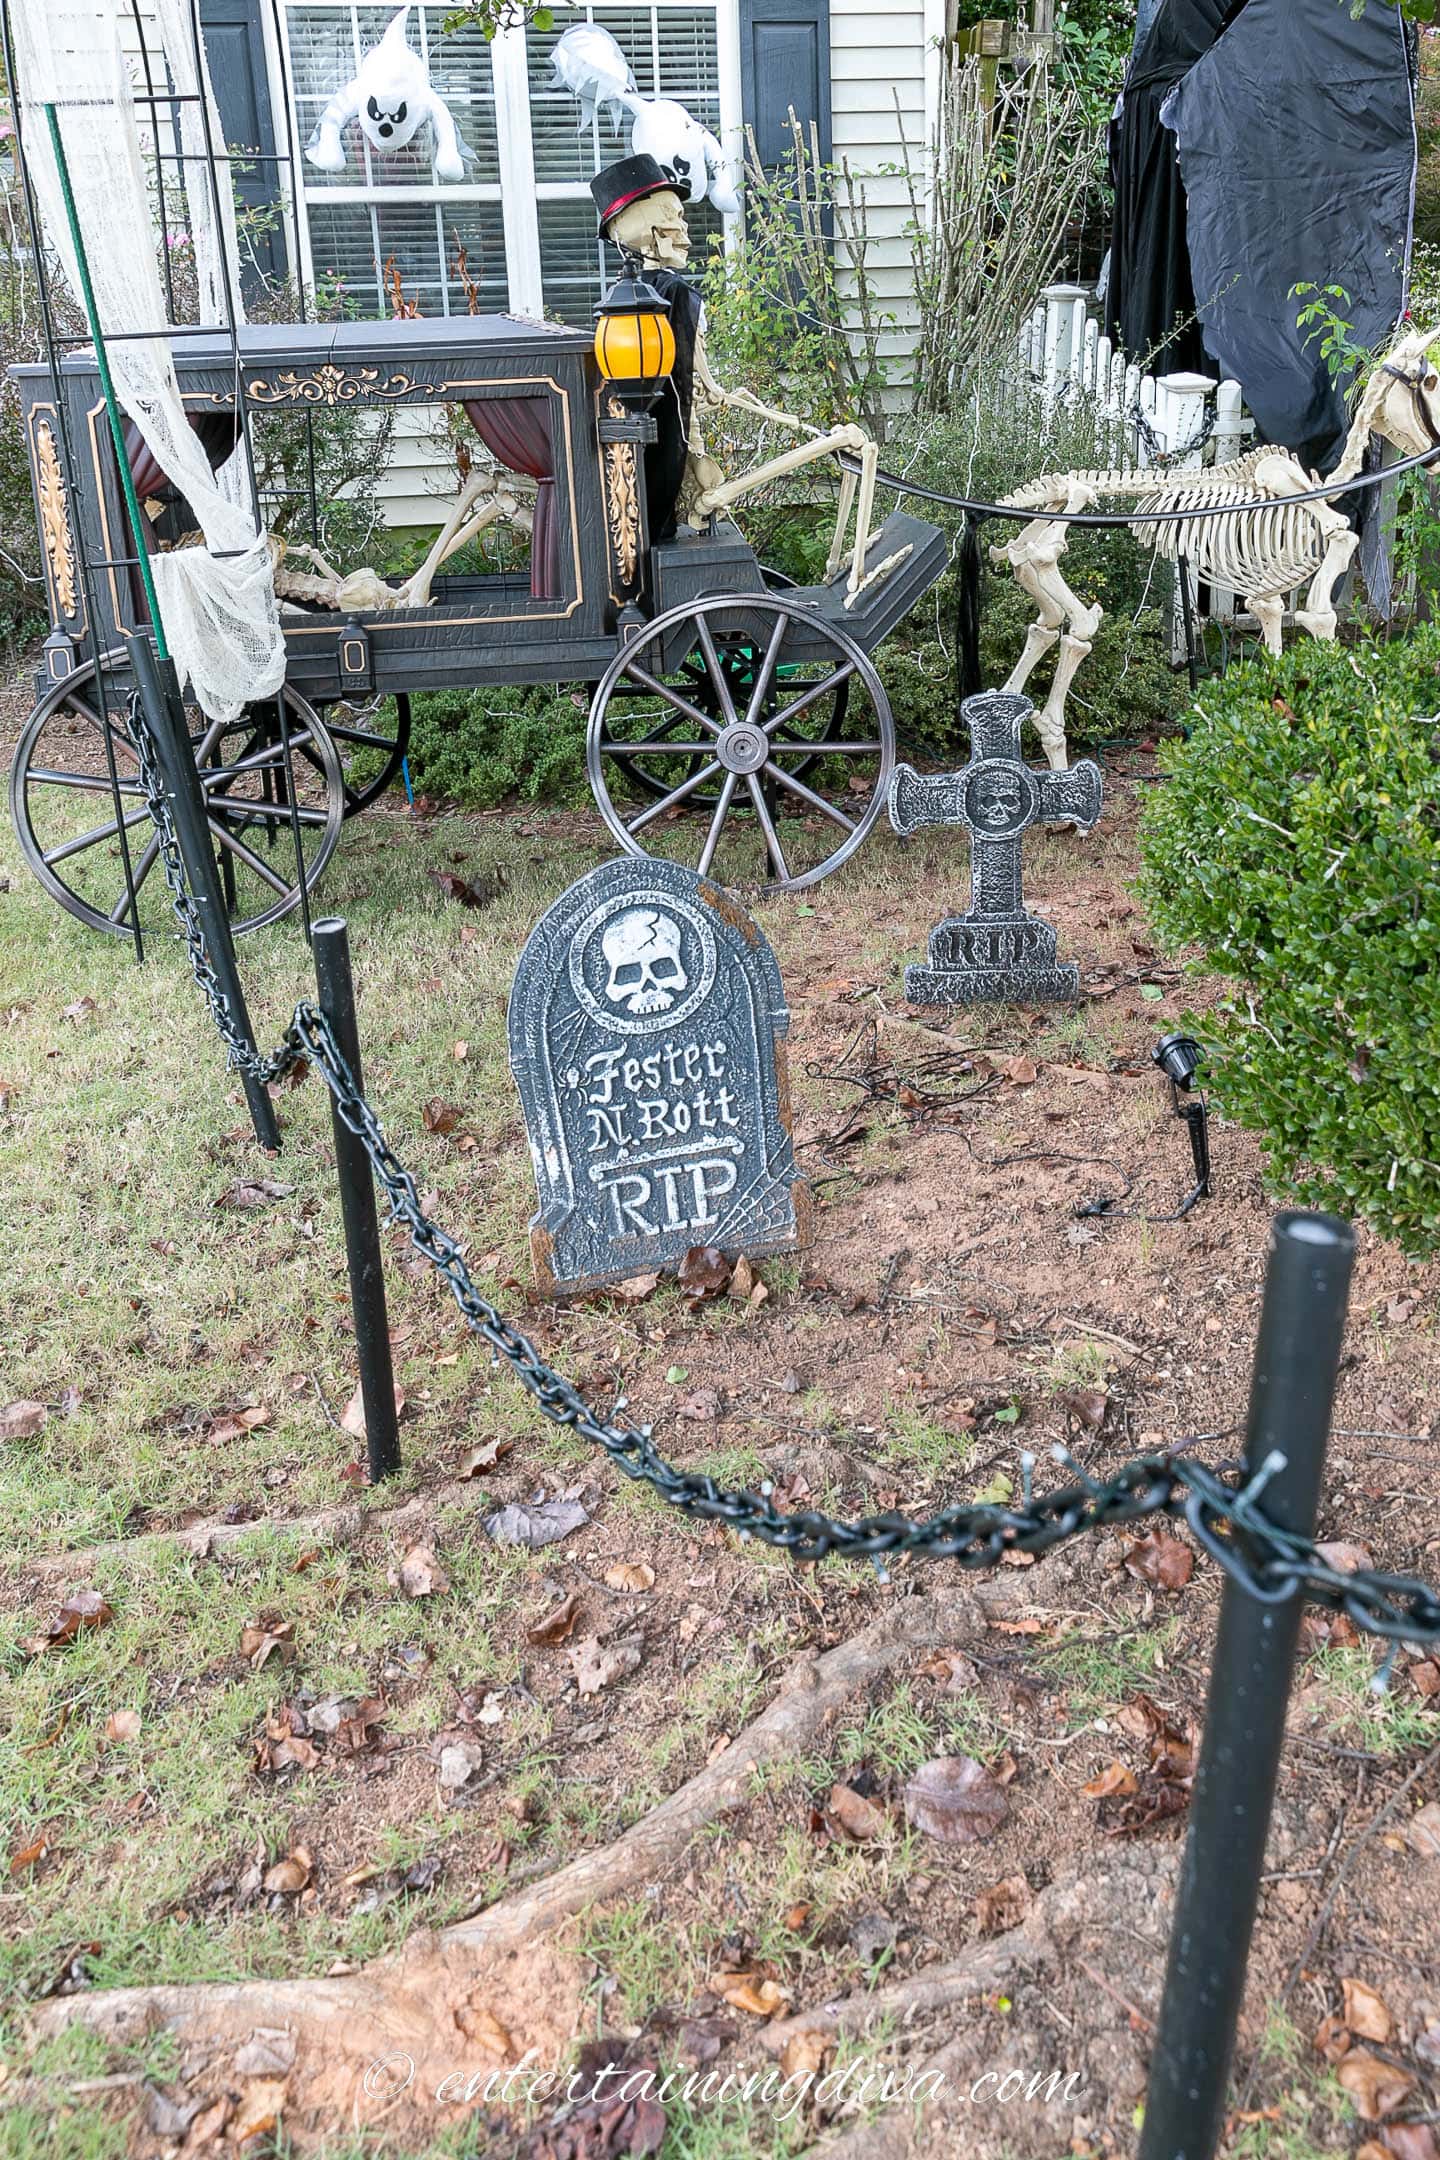
7 | Create skeleton scenes

Once you have the Halloween cemetery foundation in place, it’s time to start adding the creepy Halloween decorations!
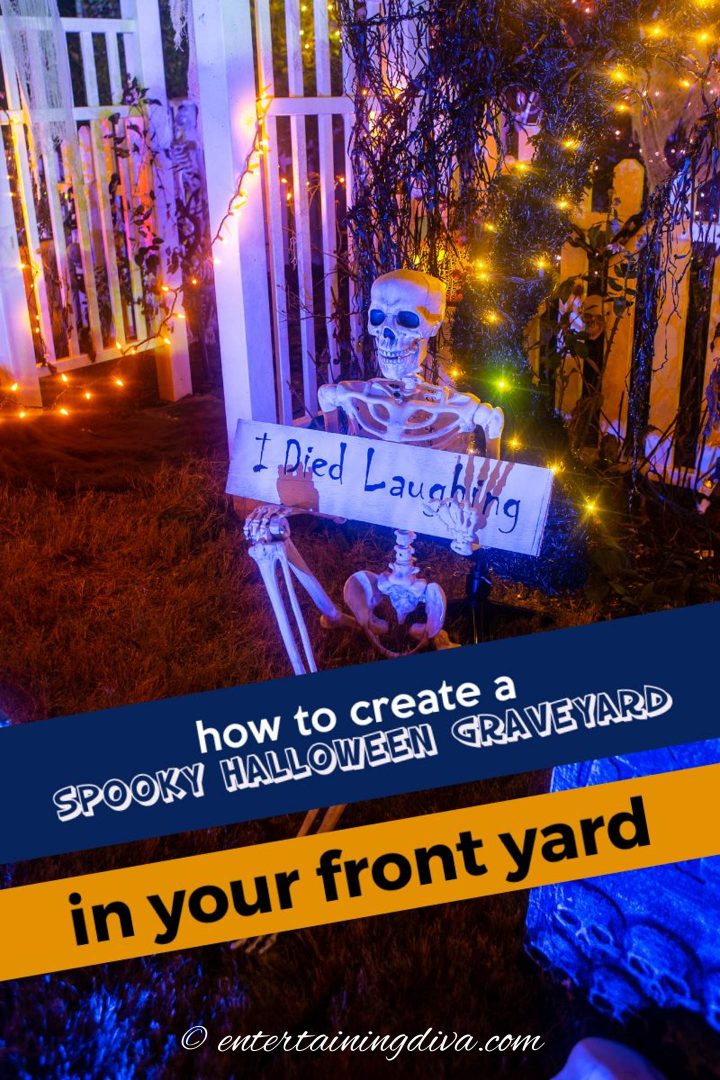
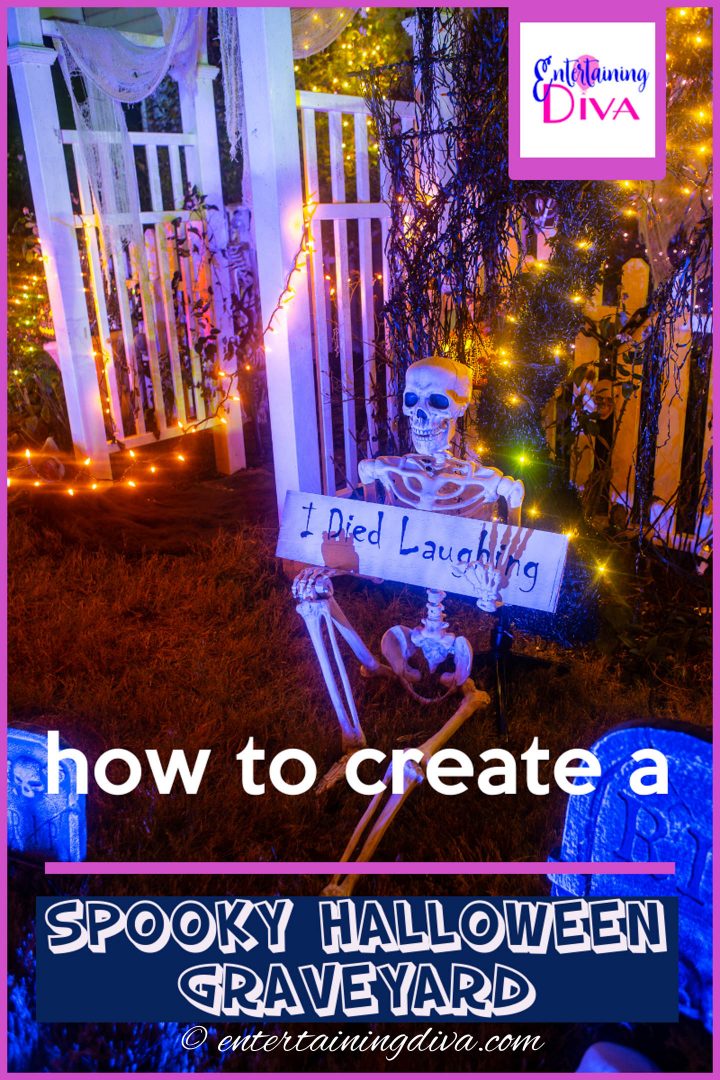
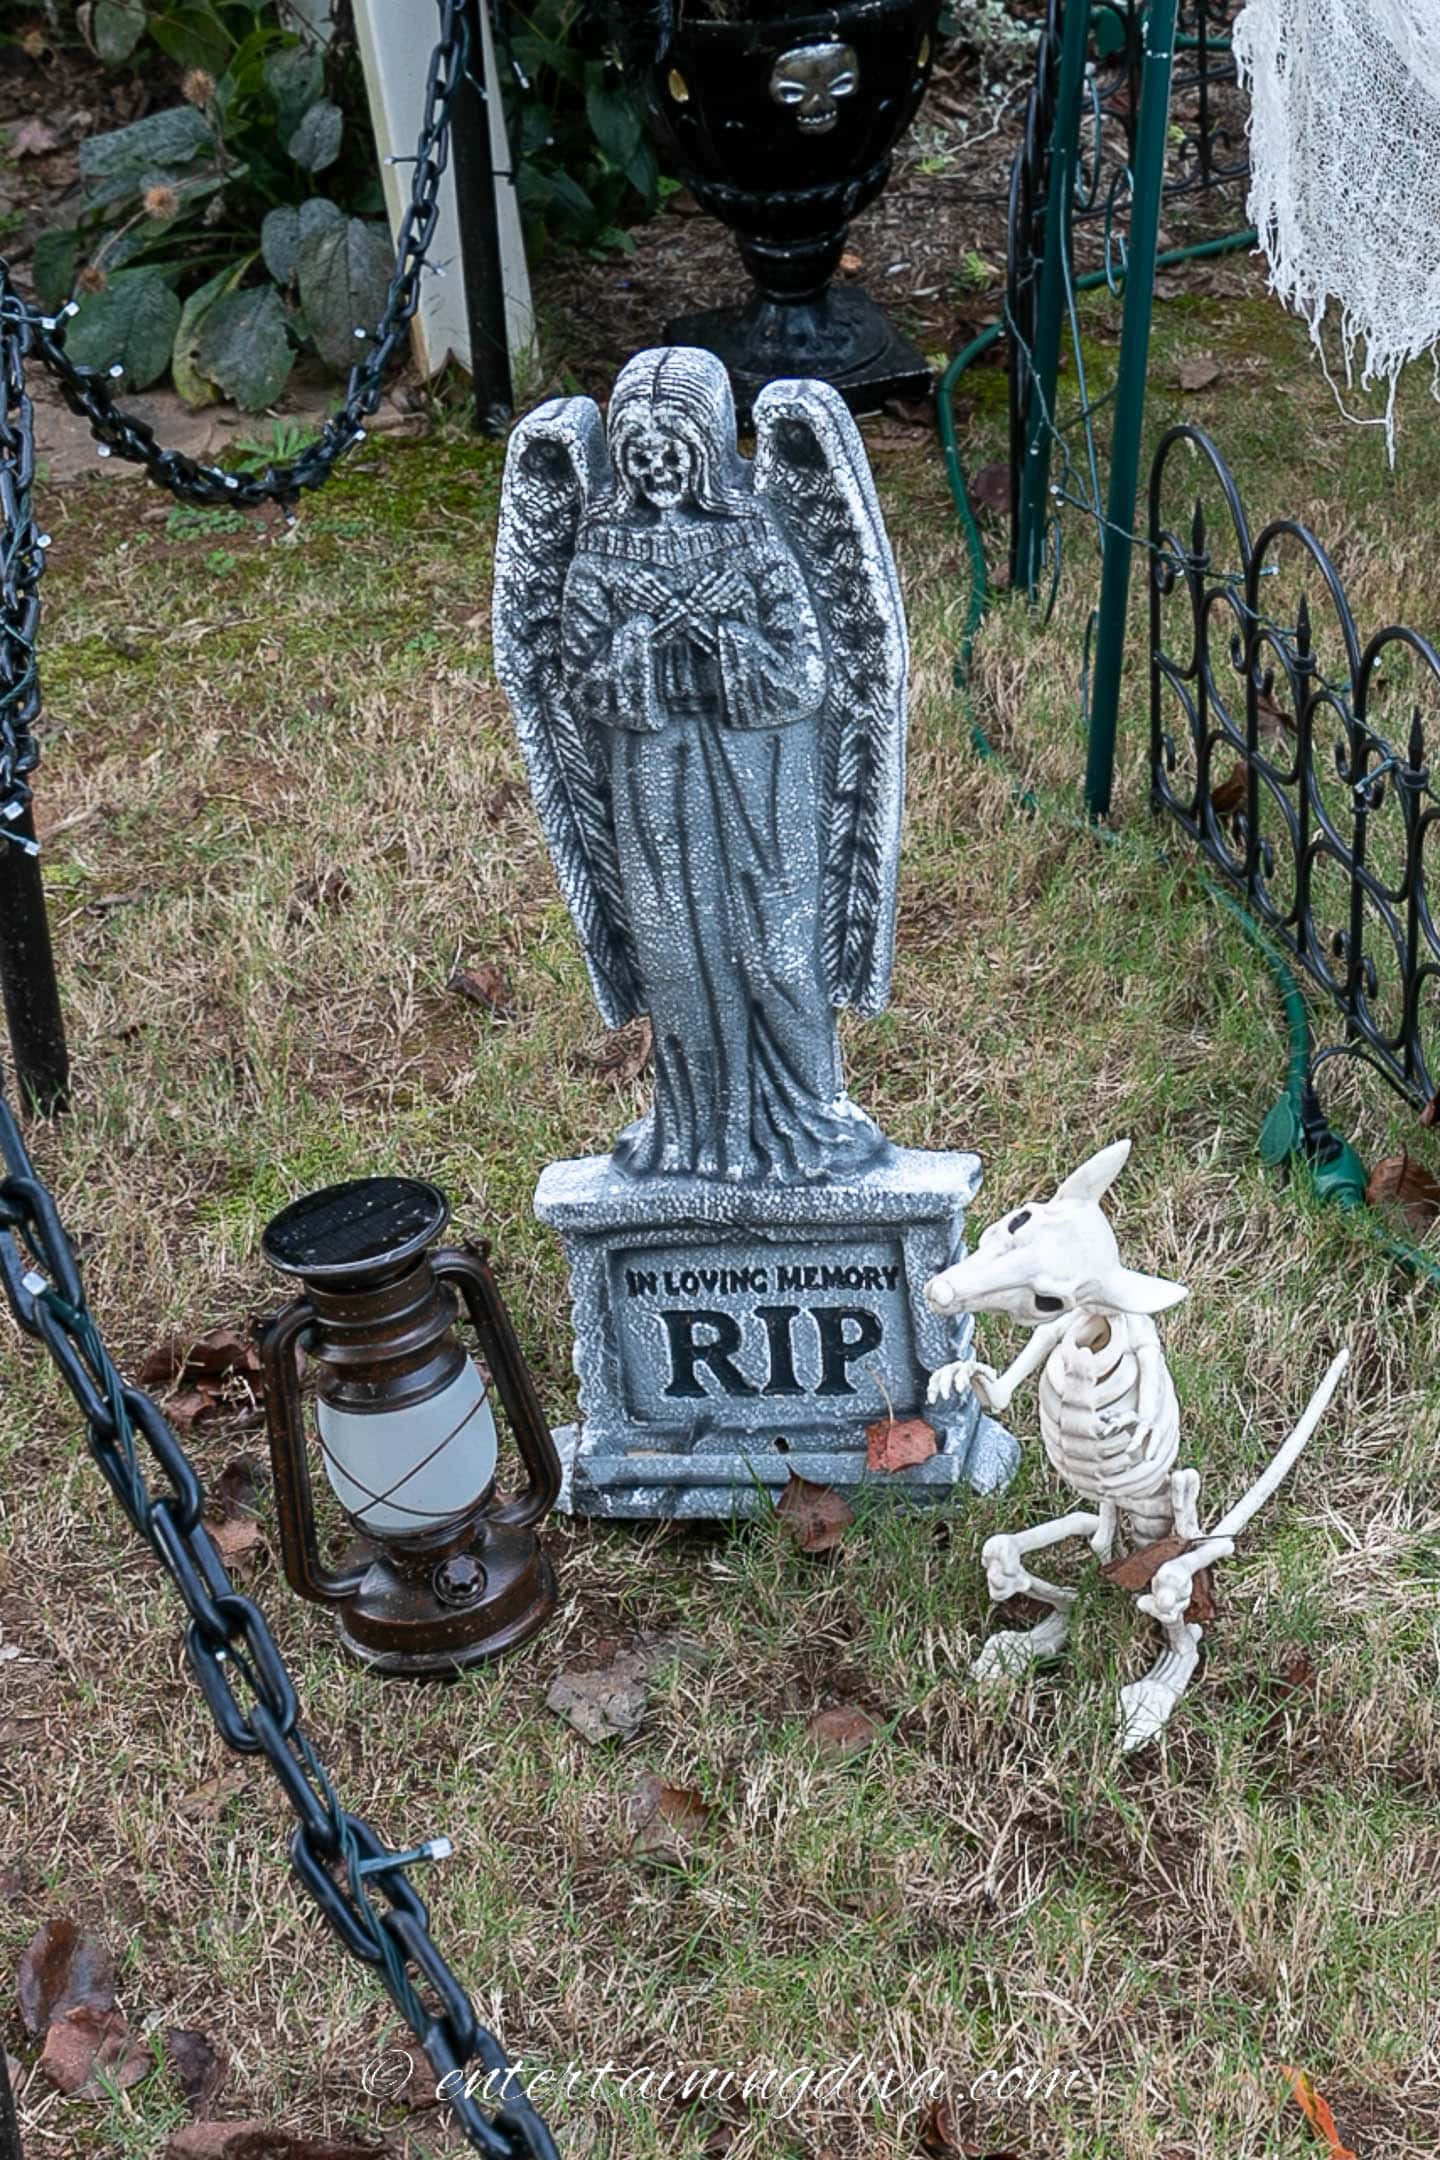
Prop a skeleton* up against one of the tombstones to make it look like he escaped his grave.
Since I wouldn’t go anywhere without my pets, I use these skeleton dogs* as decorations in my Halloween graveyard, too.
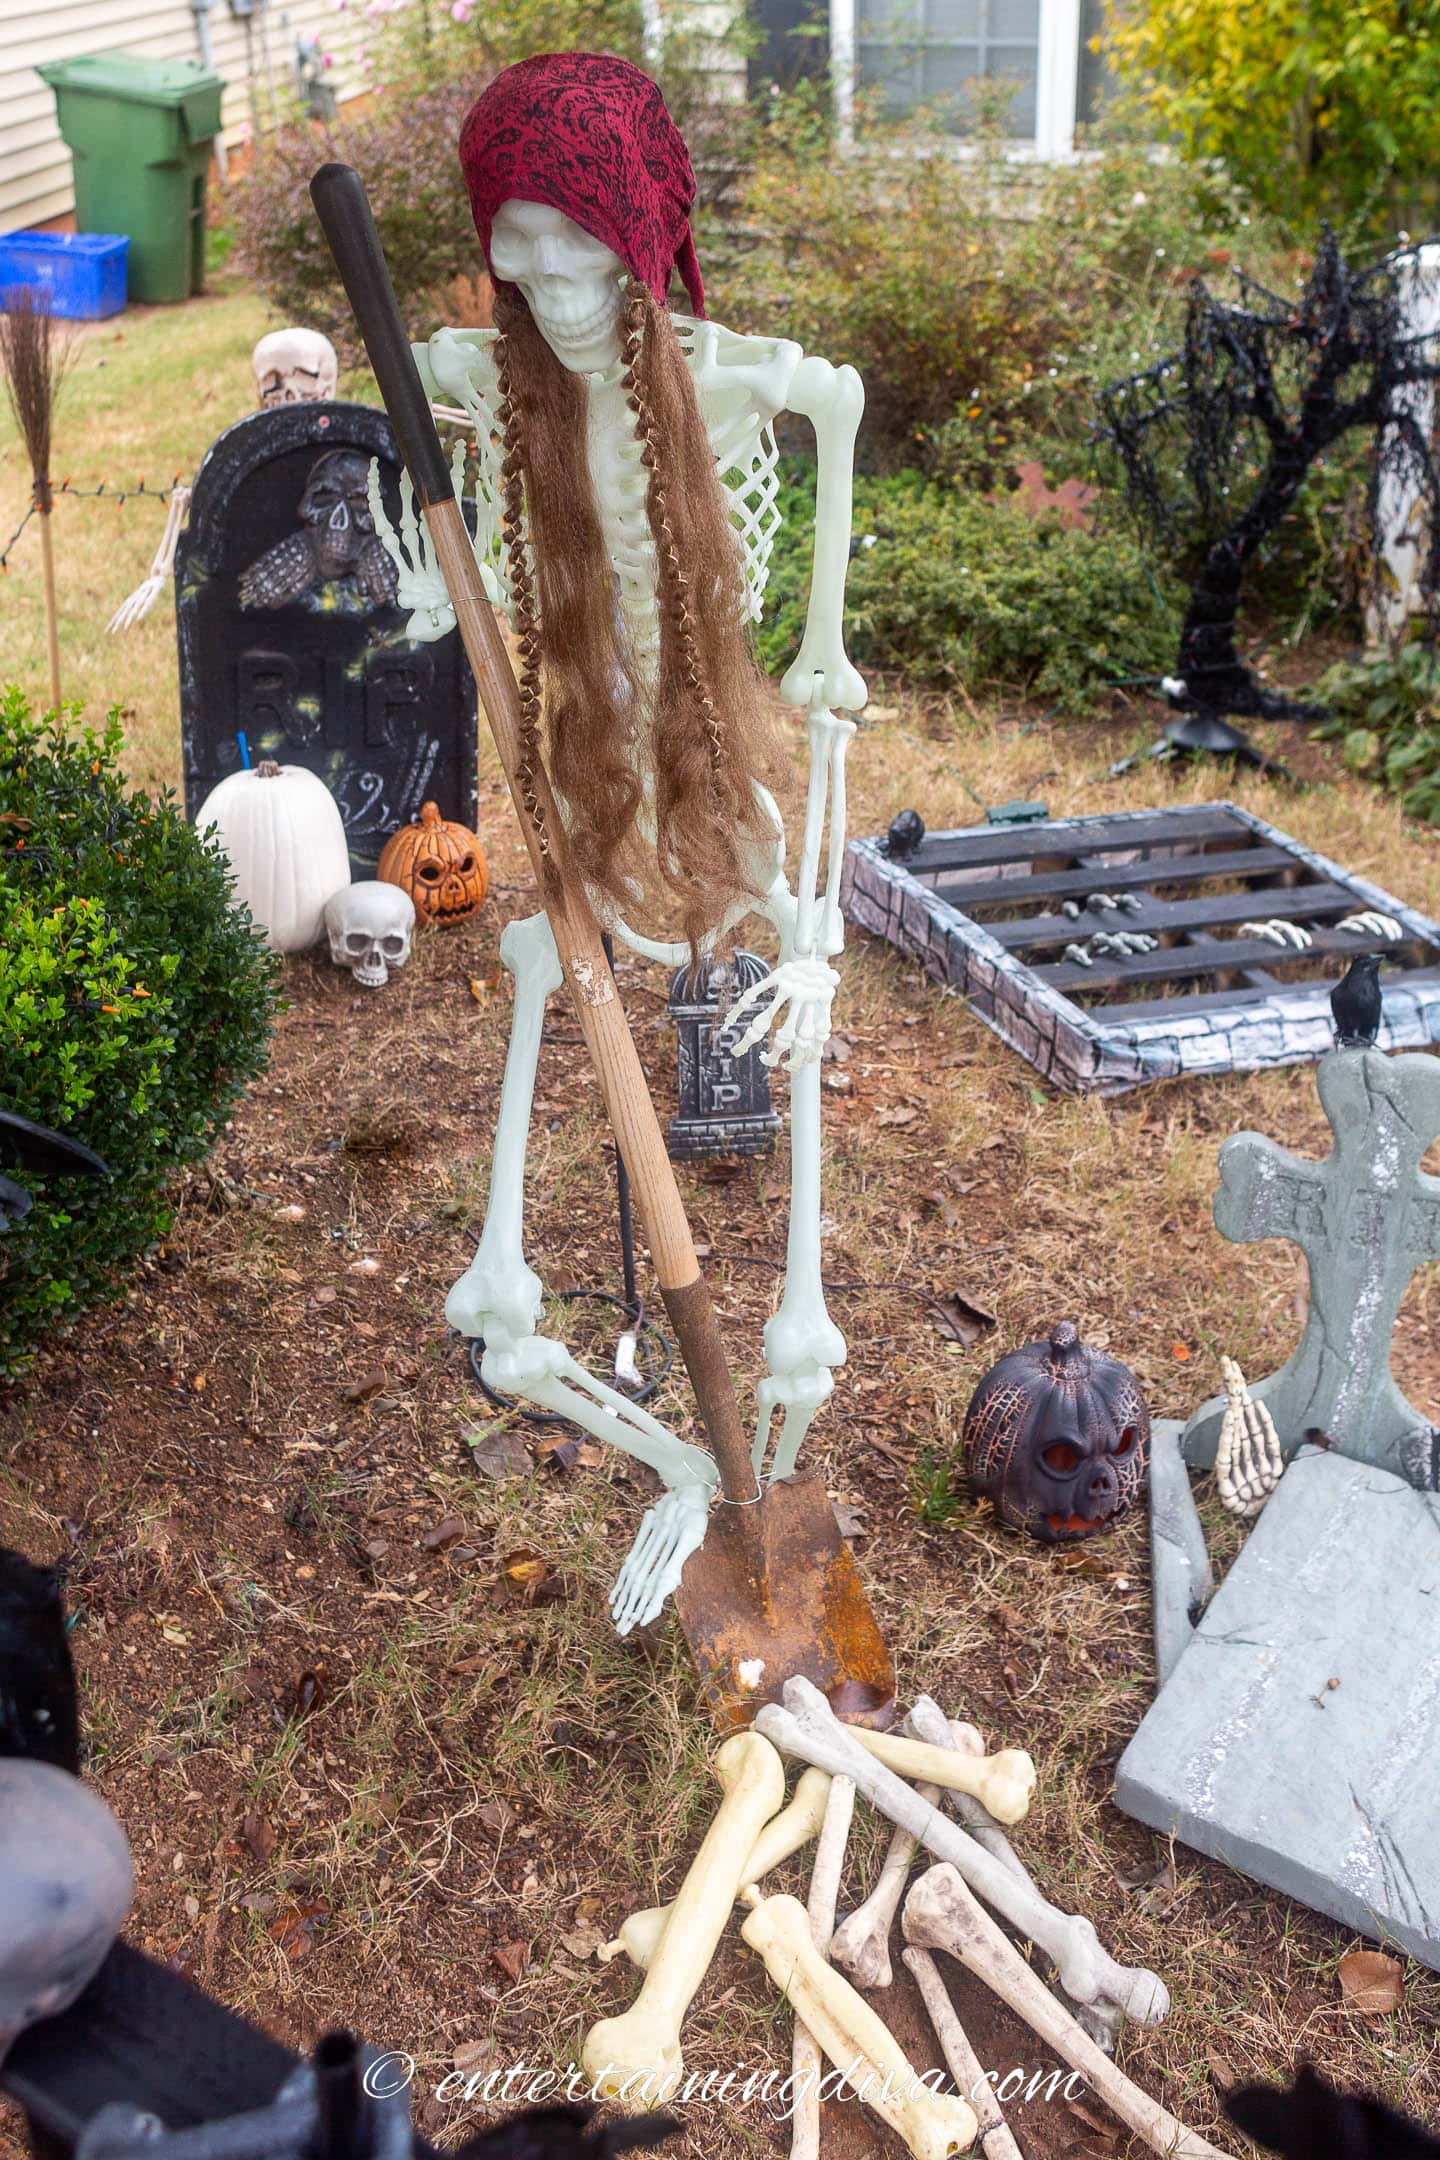
Or make one look like he’s a grave digger, by giving him a shovel with a pile of bones.
I stood him up by hooking the back of his rib cage onto a tall garden hook (the kind you use for hanging flower baskets).
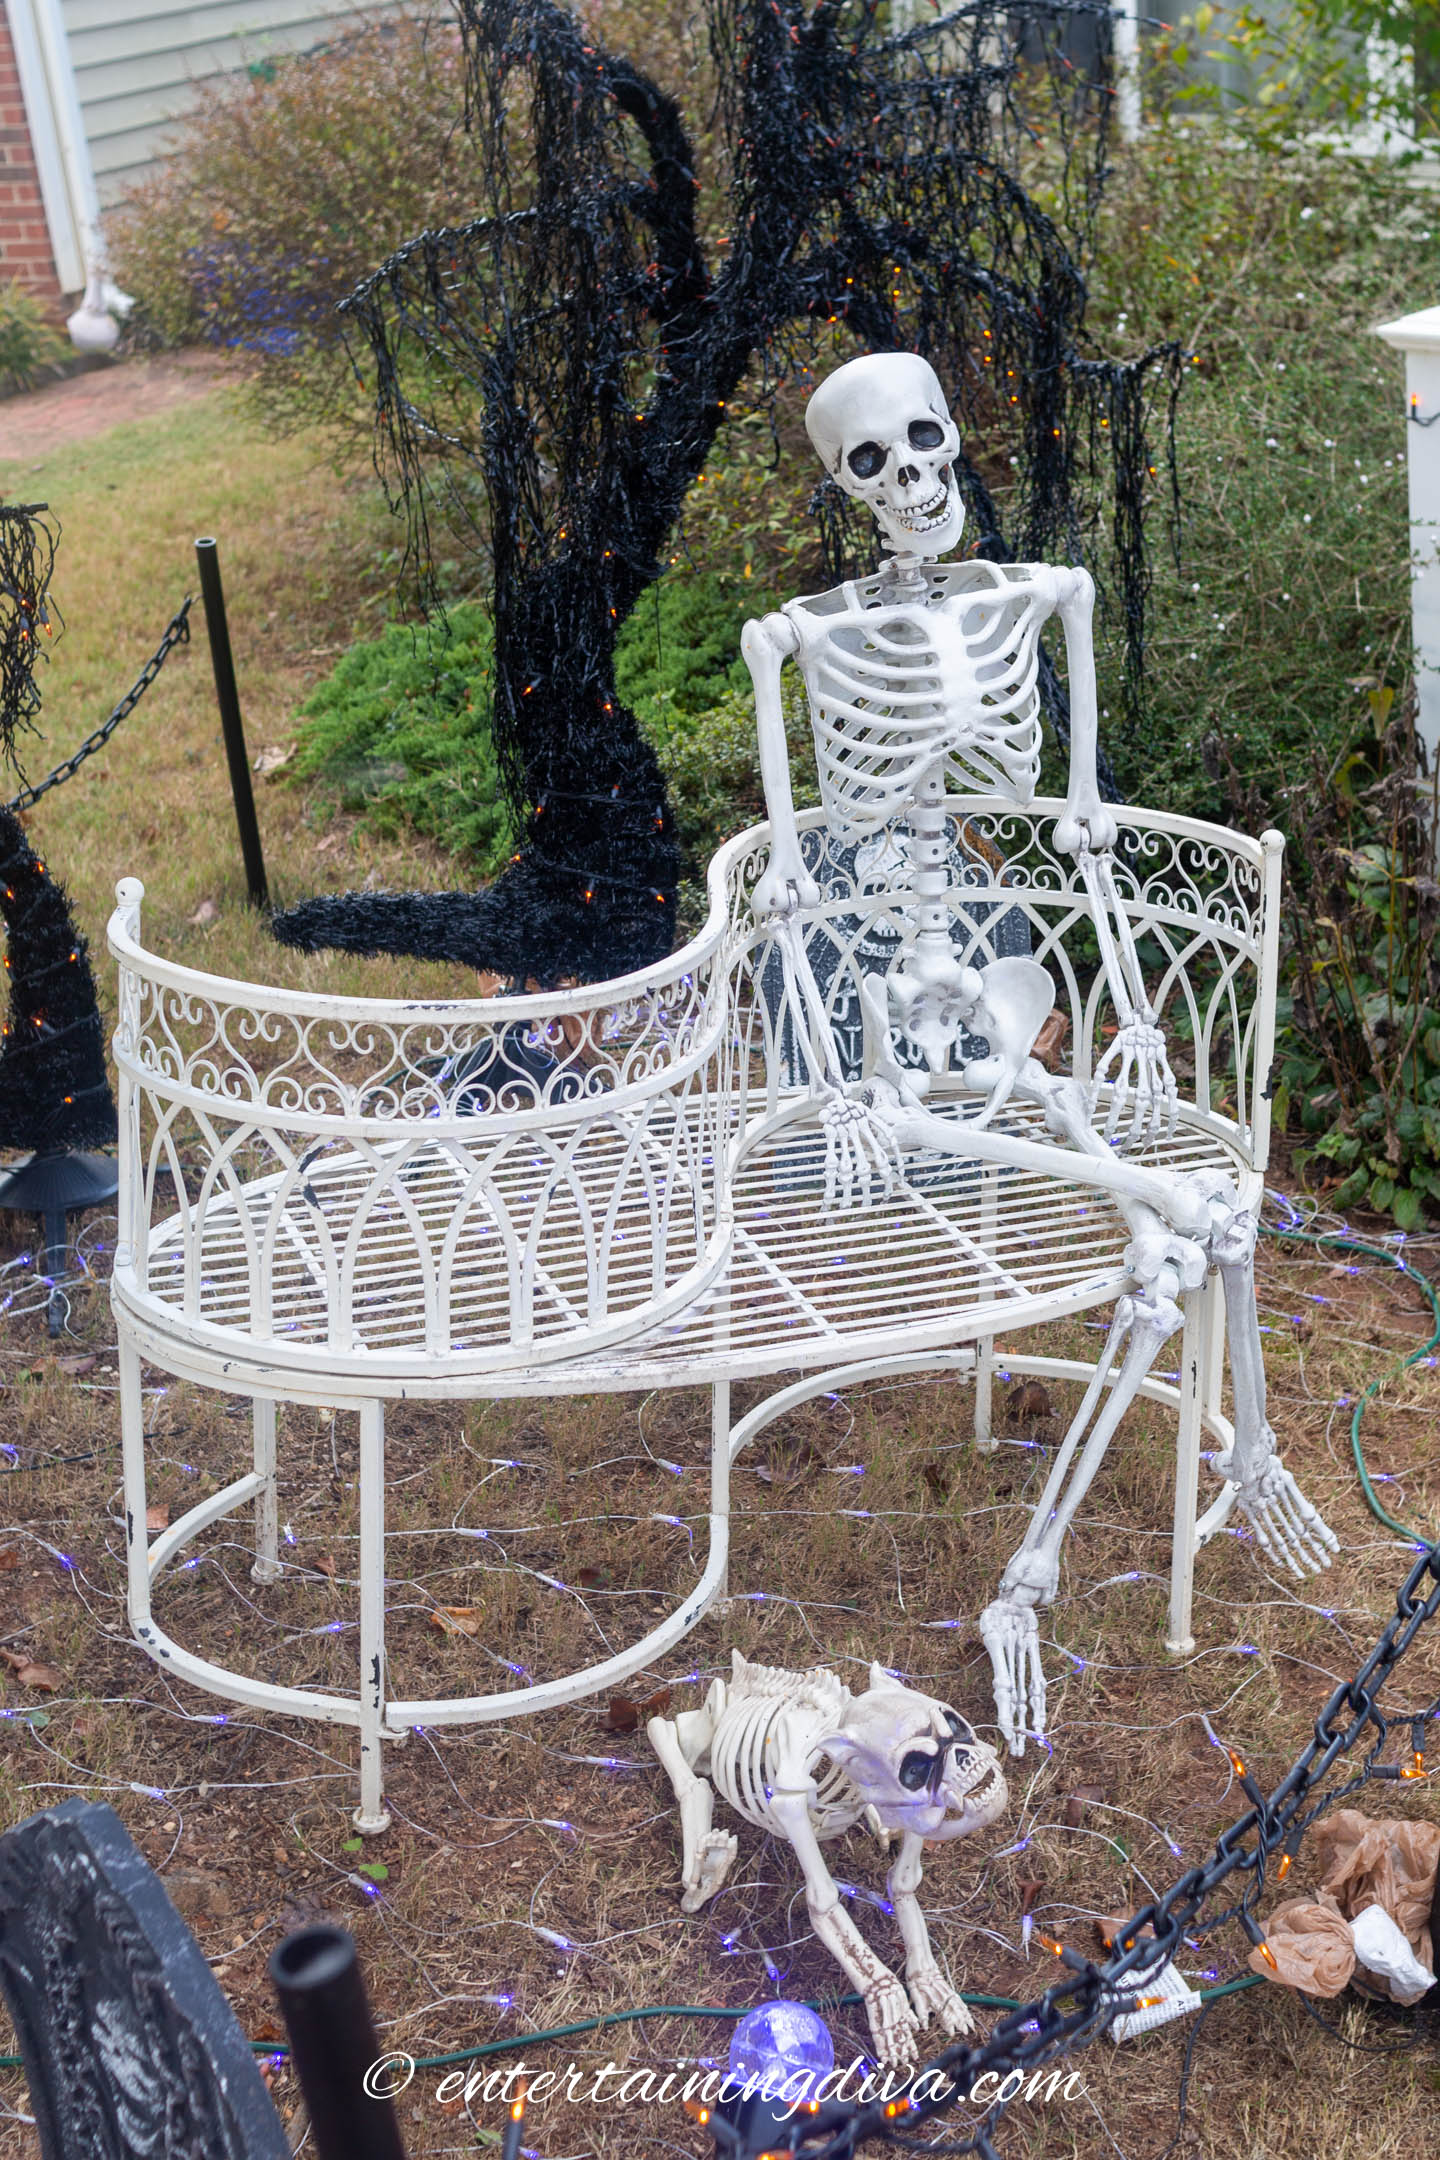
I also like to use real garden furniture and accessories in my graveyard displays.
Like this vintage-look garden bench that makes the perfect seat for a skeleton.
8 | Pick a theme
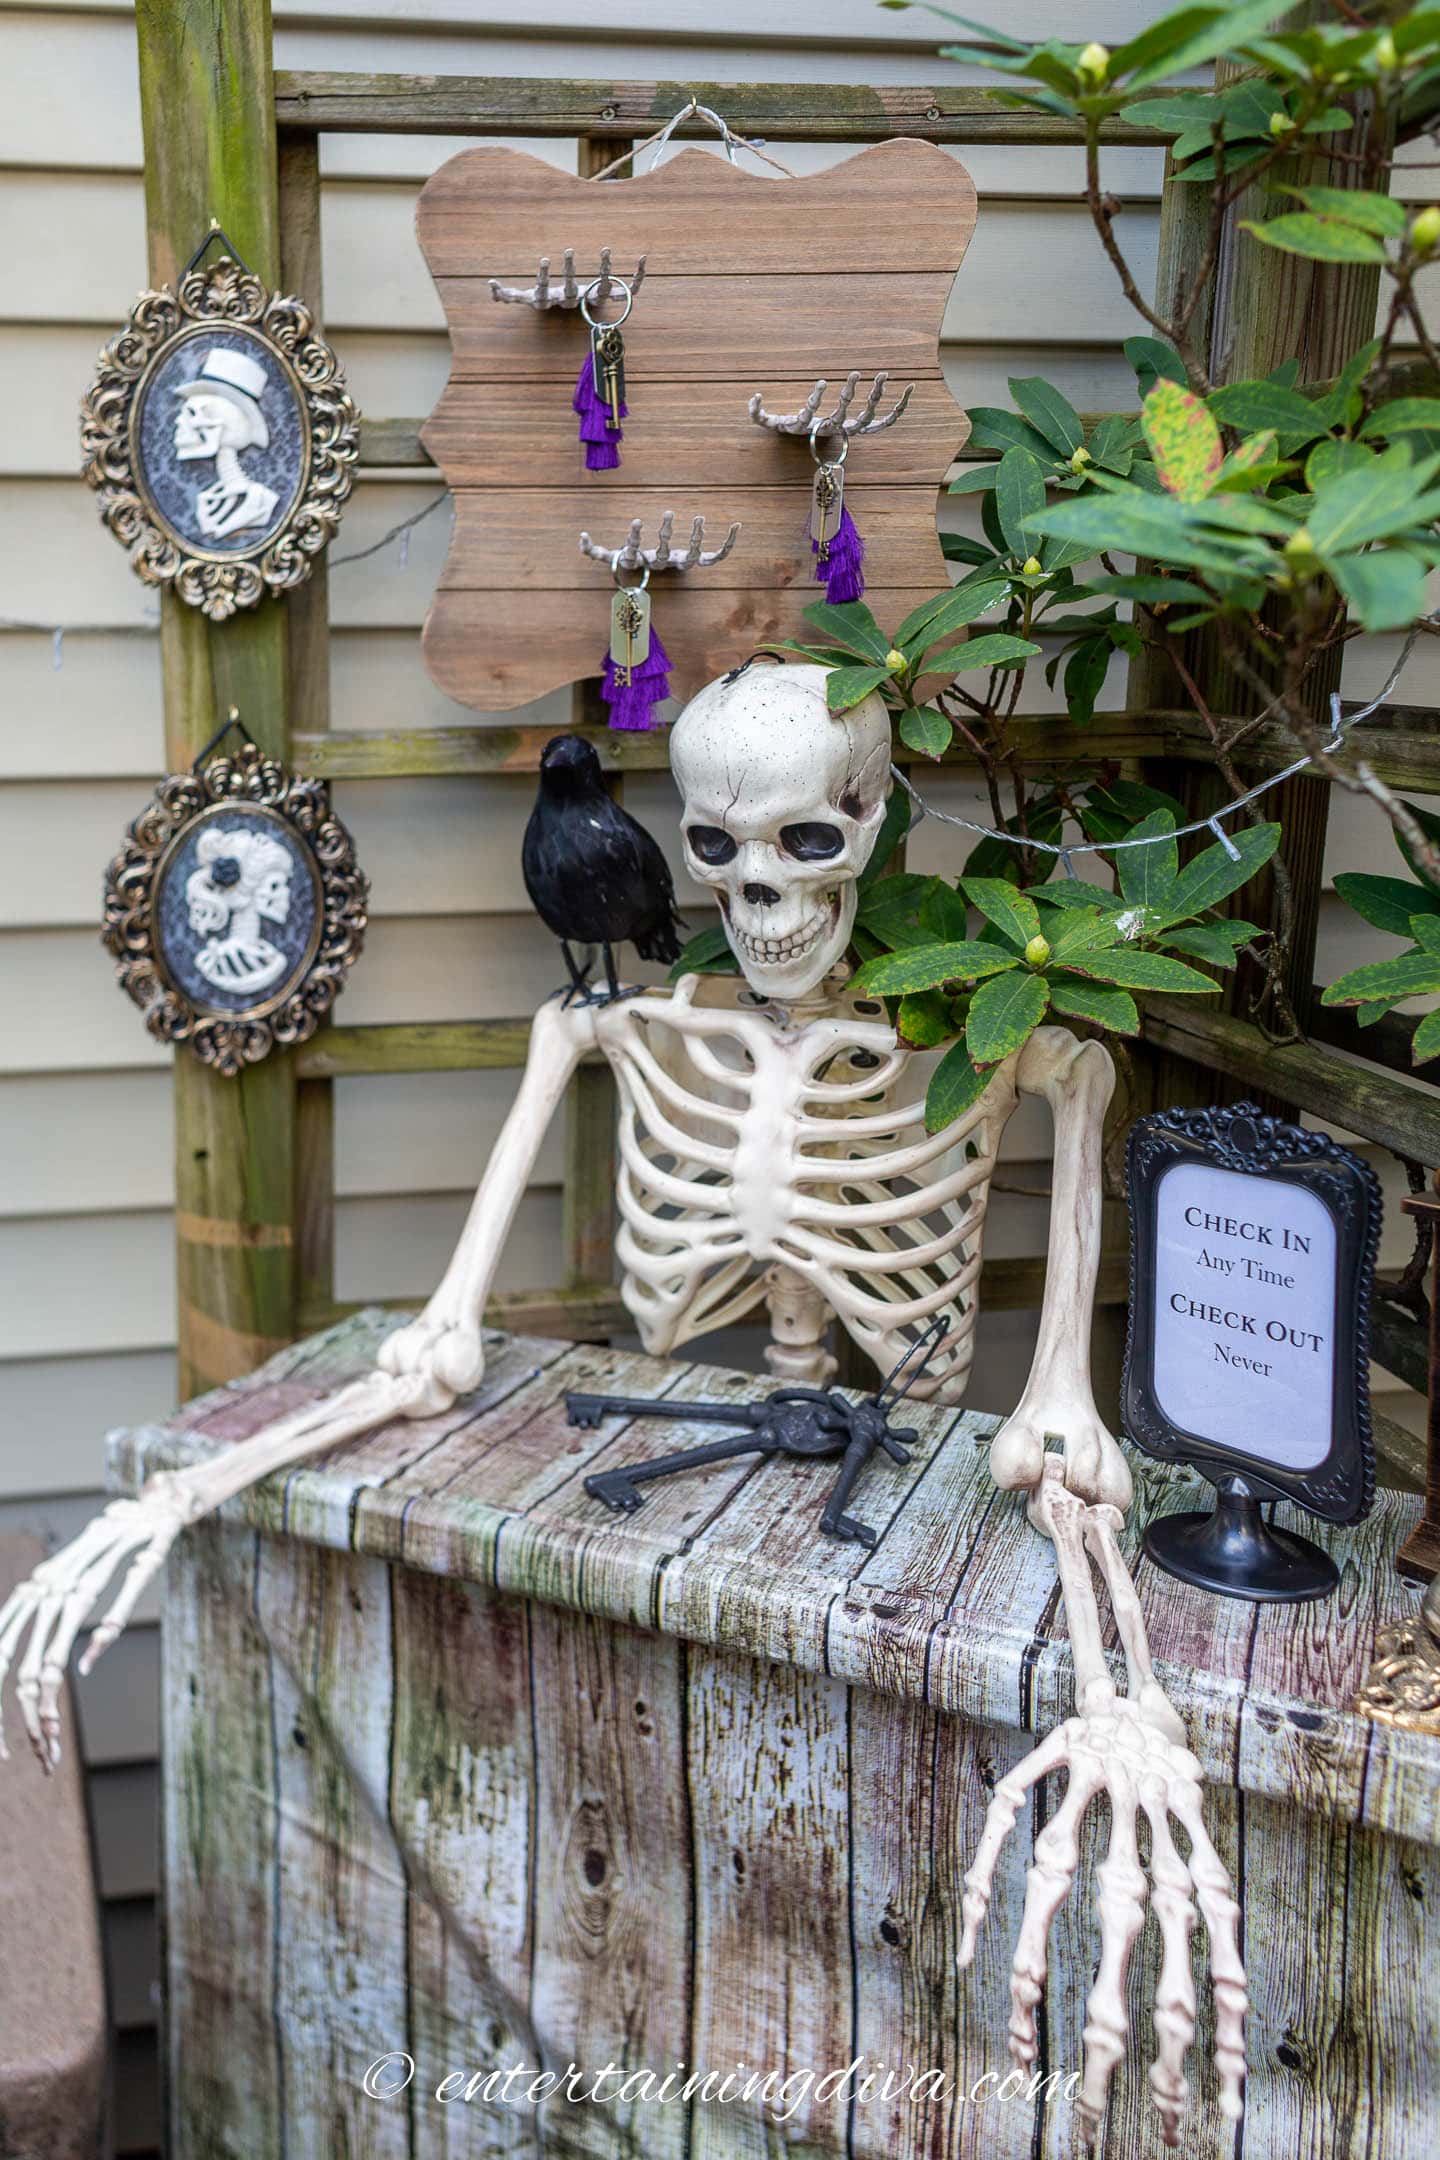
If you’re having trouble deciding how you want to decorate your graveyard, it helps to pick a theme.
Then use the theme to help you come up with scenes that you can re-create with skeletons or ghosts.
Like this concierge desk from my haunted hotel graveyard.
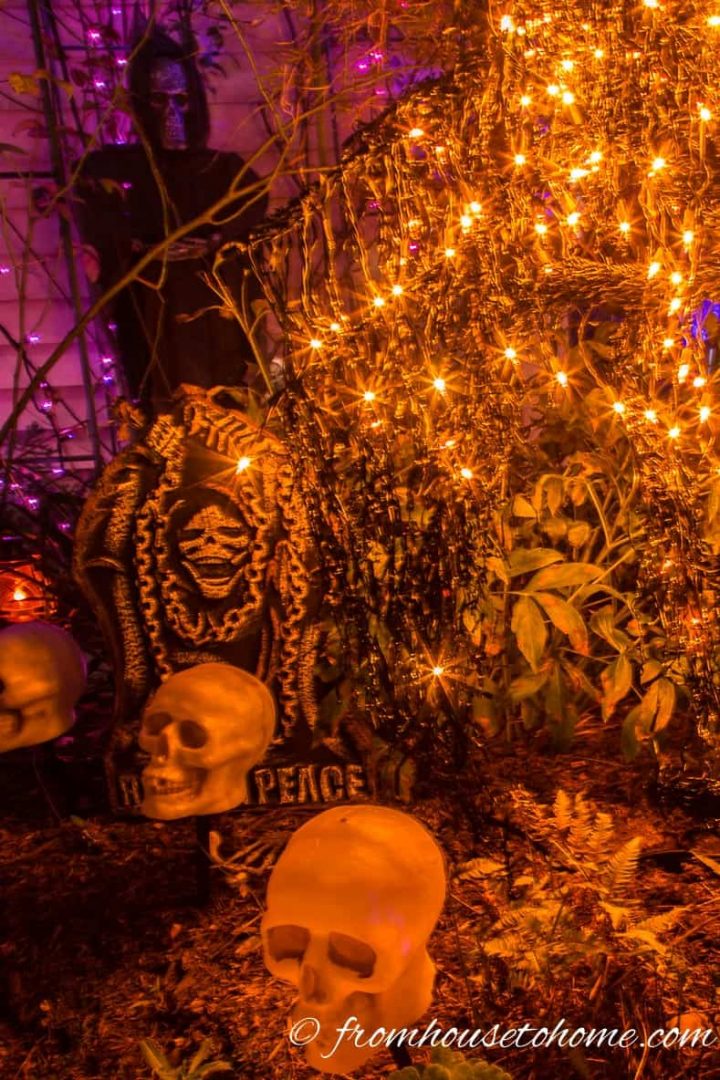
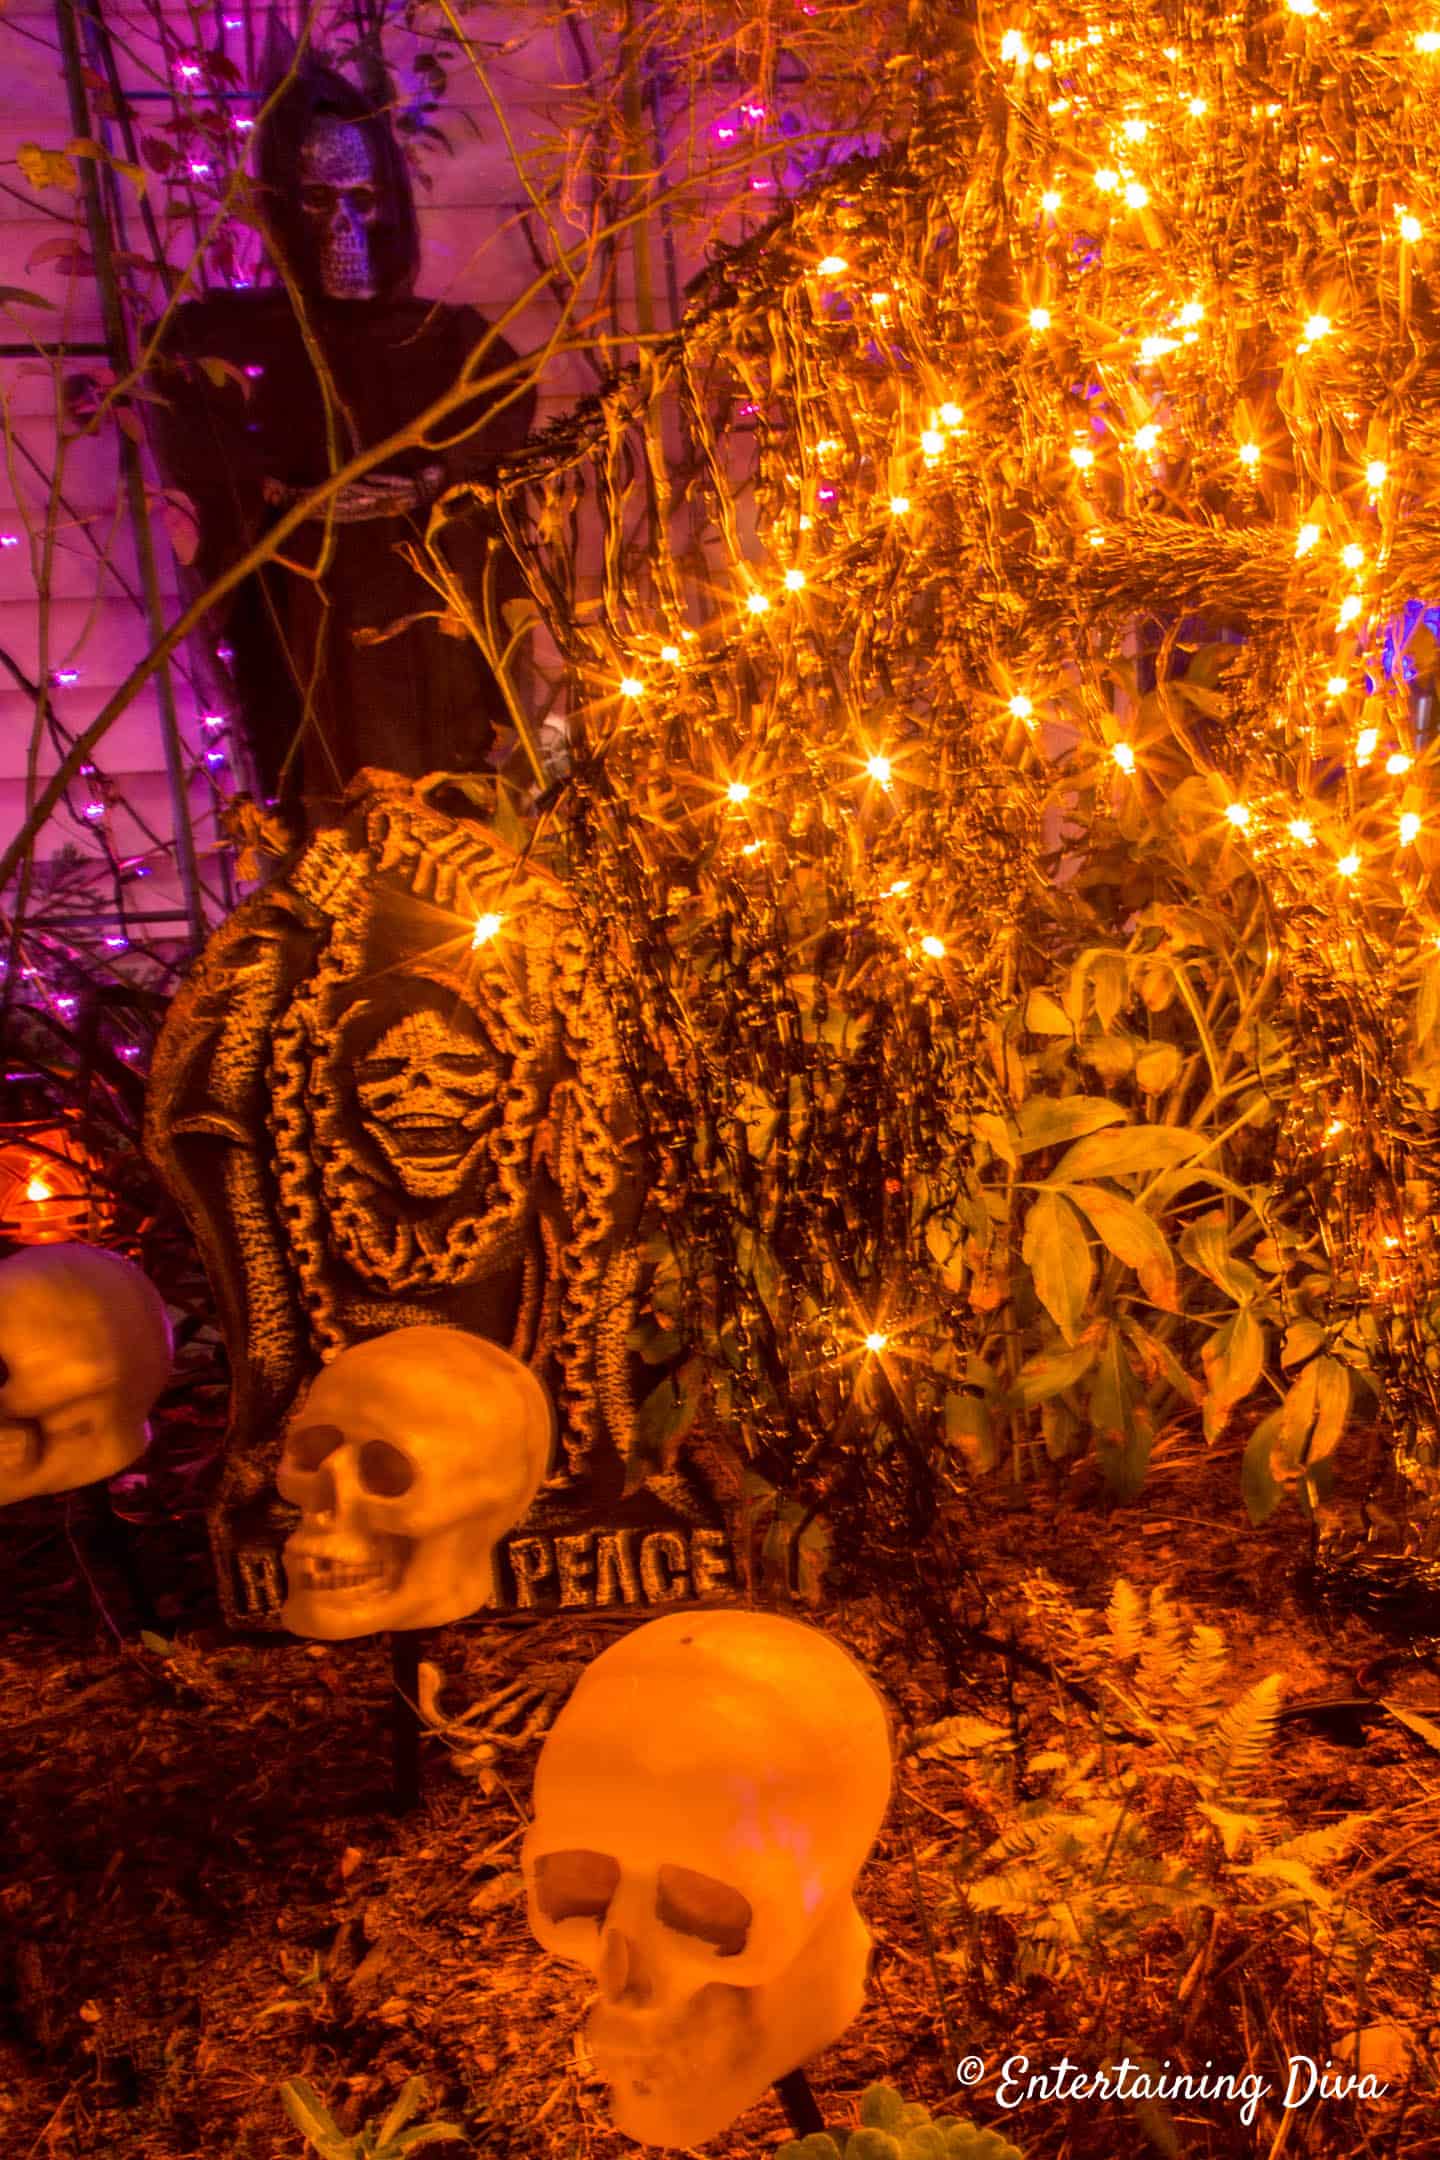
9 | Scatter skeleton bones

Skeleton bones also make great Halloween decorations for outside.
Scatter some of them randomly around your Halloween cemetery. 5 or 6 bones in each “bone location” creates a noticeable scene.
I keep them close to the tombstones which makes it looks like they’ve risen from the grave.
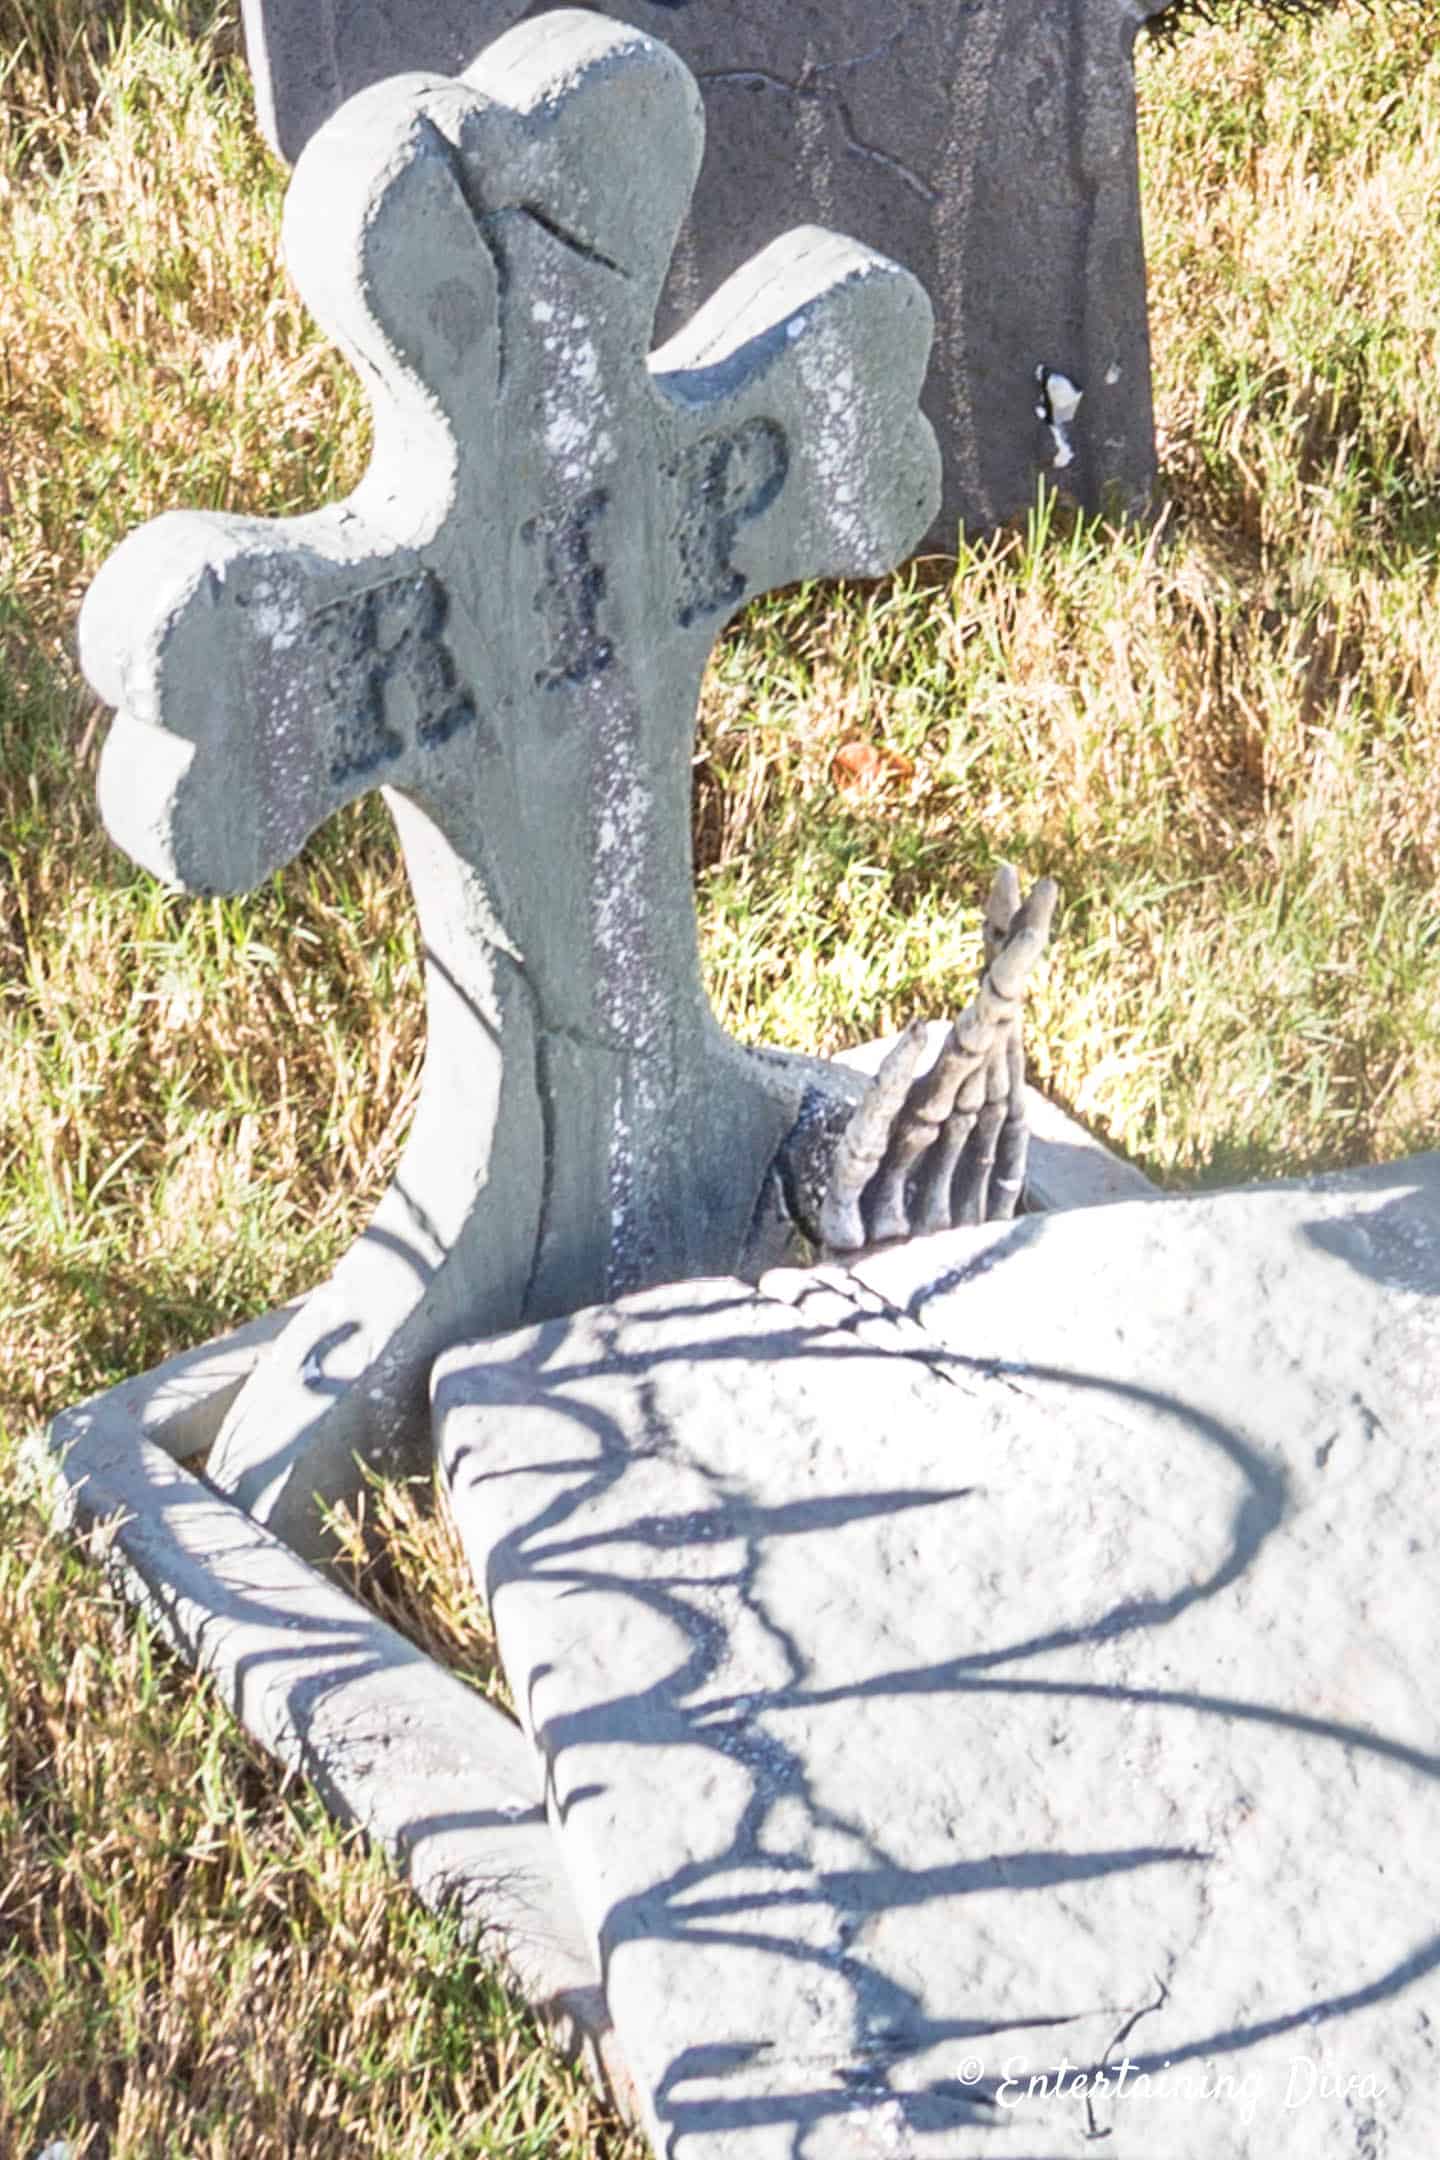
I also like to position skeleton hands to make it look like someone is trying to escape from their grave. Sometimes it’s the little details that count 🙂
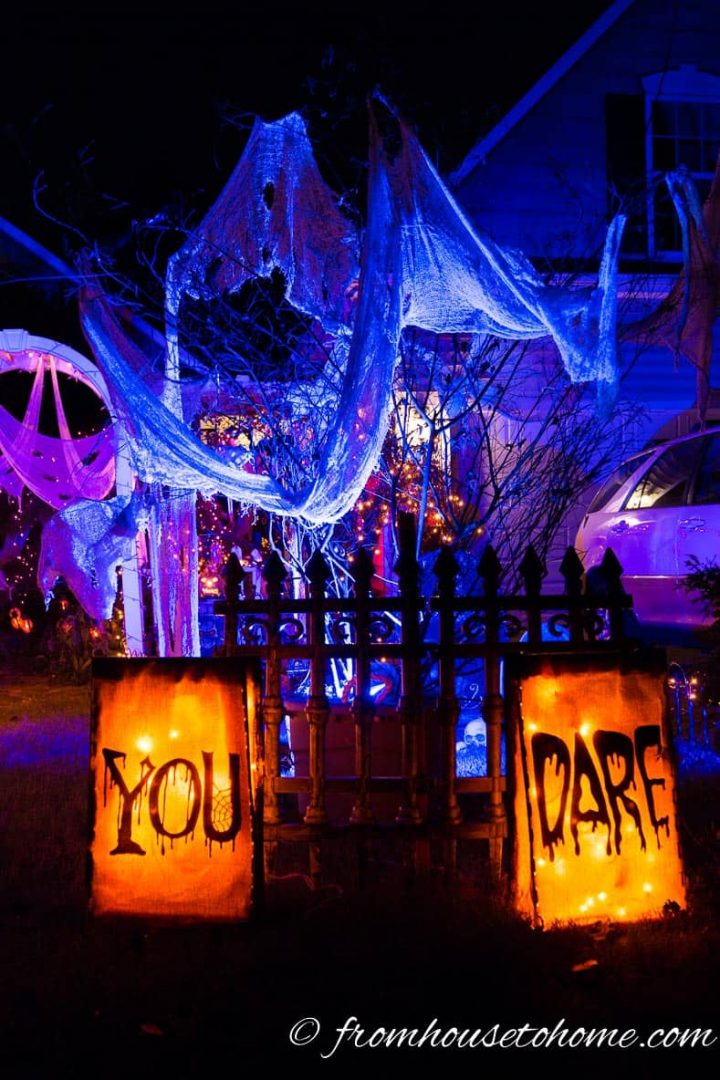
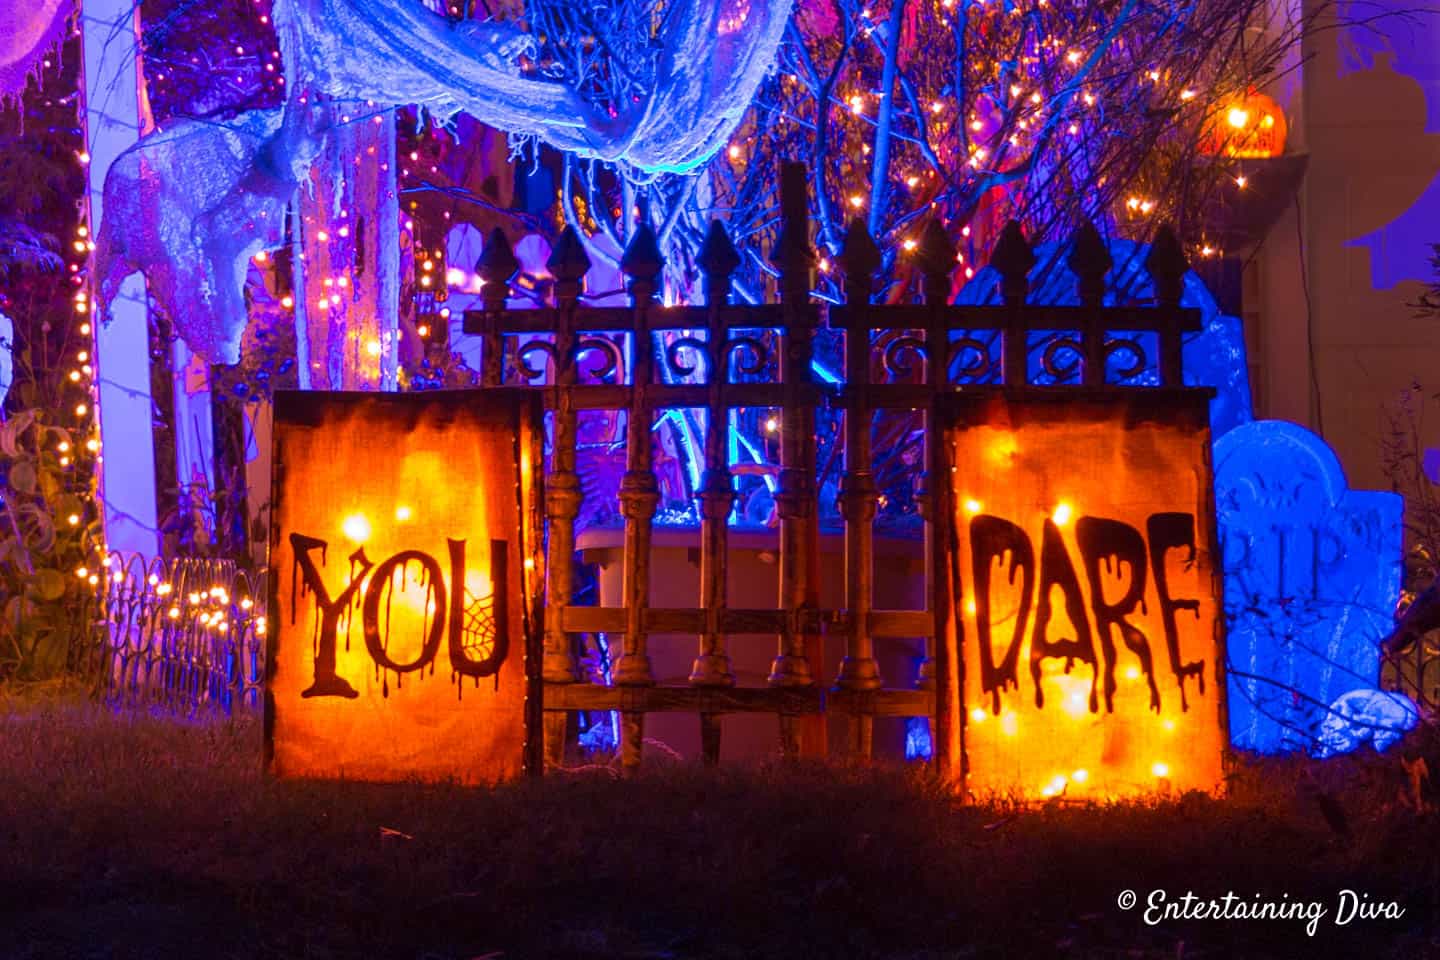
10 | Hang a “welcome” sign
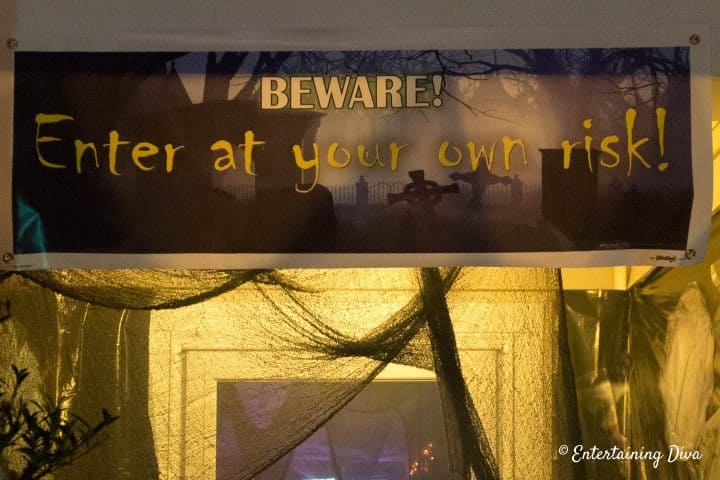
A sign lets people know they are entering your cemetery and gives you lots of opportunity for adding graveyard decor.
Hanging it in front of a light fixture makes sure that everyone can see it!
You can also have a custom banner* made.
Then you can use whatever wording you want. And you can get them with pre-made holes so they are easy to hang.
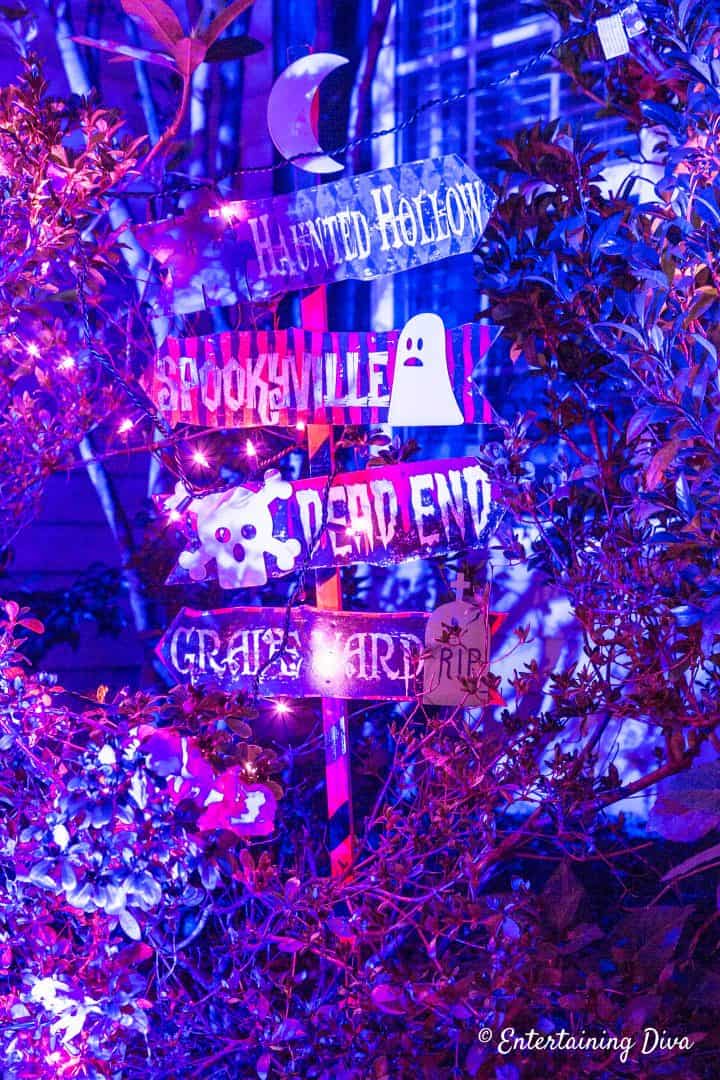
Signs are also a great way to add some interest to your cemetery.
I placed this one on the edge of my yard so that the “Graveyard” arrow is pointing in the right direction.
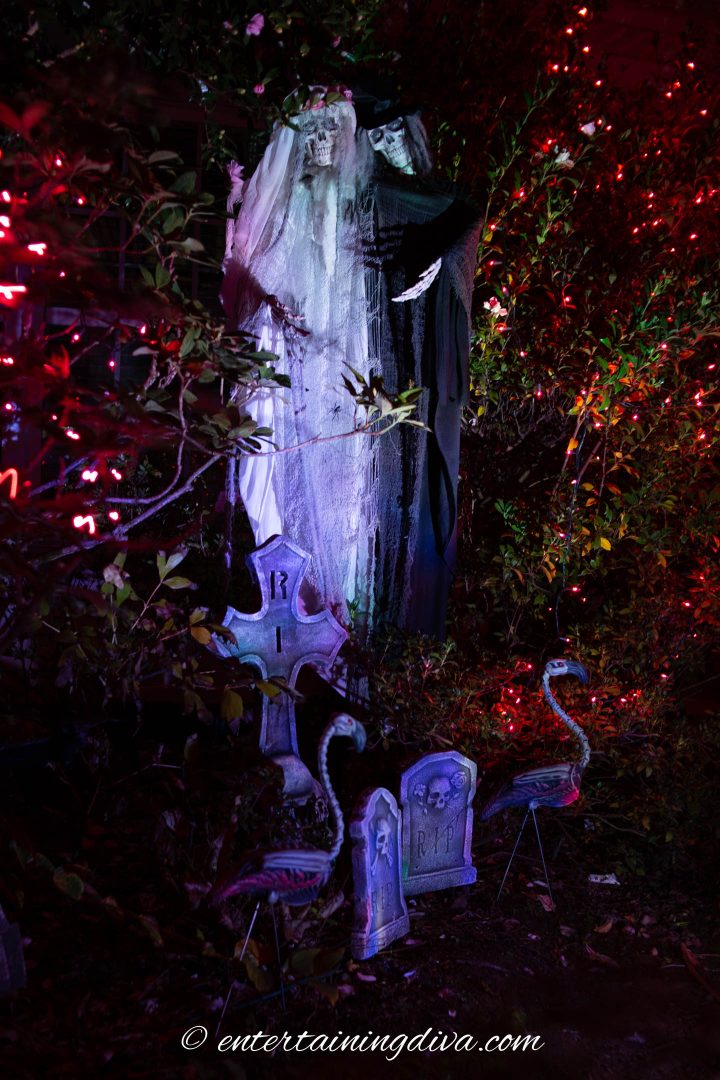
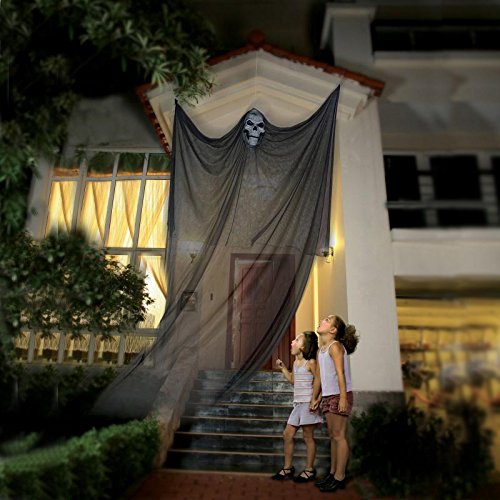
11 | Use at least one ghost
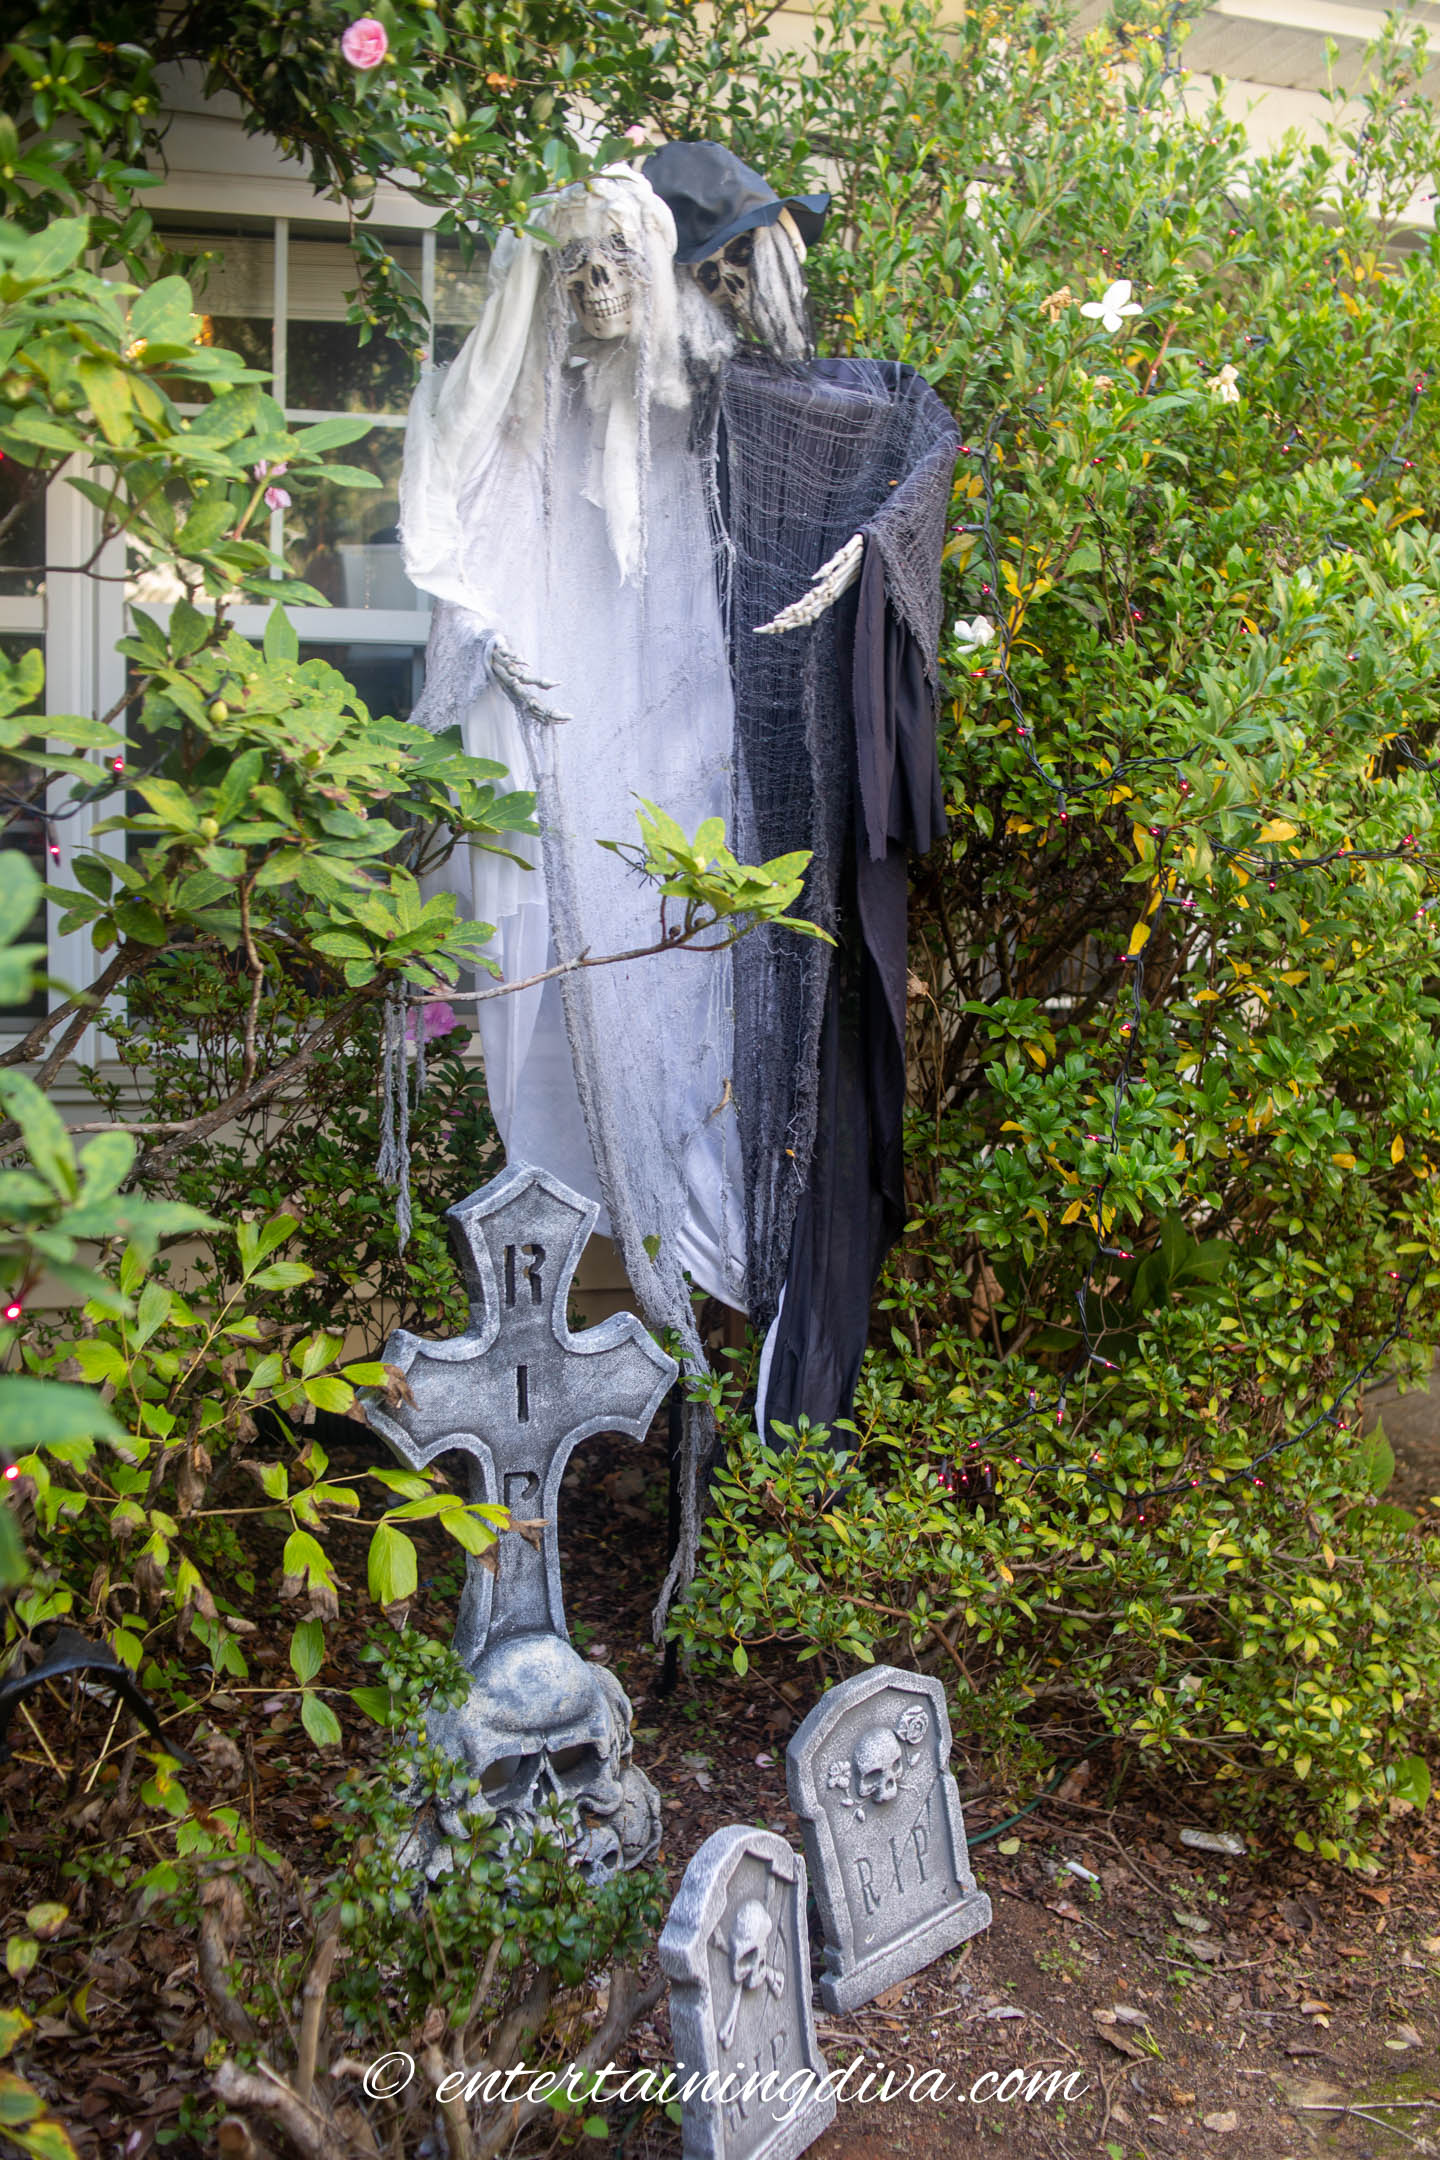
Every Halloween graveyard needs at least one ghost!
I like to hang them in places that are somewhat hidden so they blend in with the scenery.

Then add some uplighting.
Since ghosts are white, the lights reflect off of them and really make them stand out.
How to make DIY Halloween yard ghosts
Fortunately, ghosts are pretty easy to make.
Here’s what you need:
- white creepy cloth*
- styrofoam ball*
- black marker
- hook
Draw eyes and a round mouth on the styrofoam with a black marker.
Drape the creepy cloth over the styrofoam.
Screw the hook into the top of the styrofoam. (If it doesn’t stay very well, add some glue to the hole.)
Then hang him where you want him!
Of course if you don’t want to DIY a ghost, they are usually very inexpensive to buy (like this one*).
12 | Spider Web and Creepy Cloth
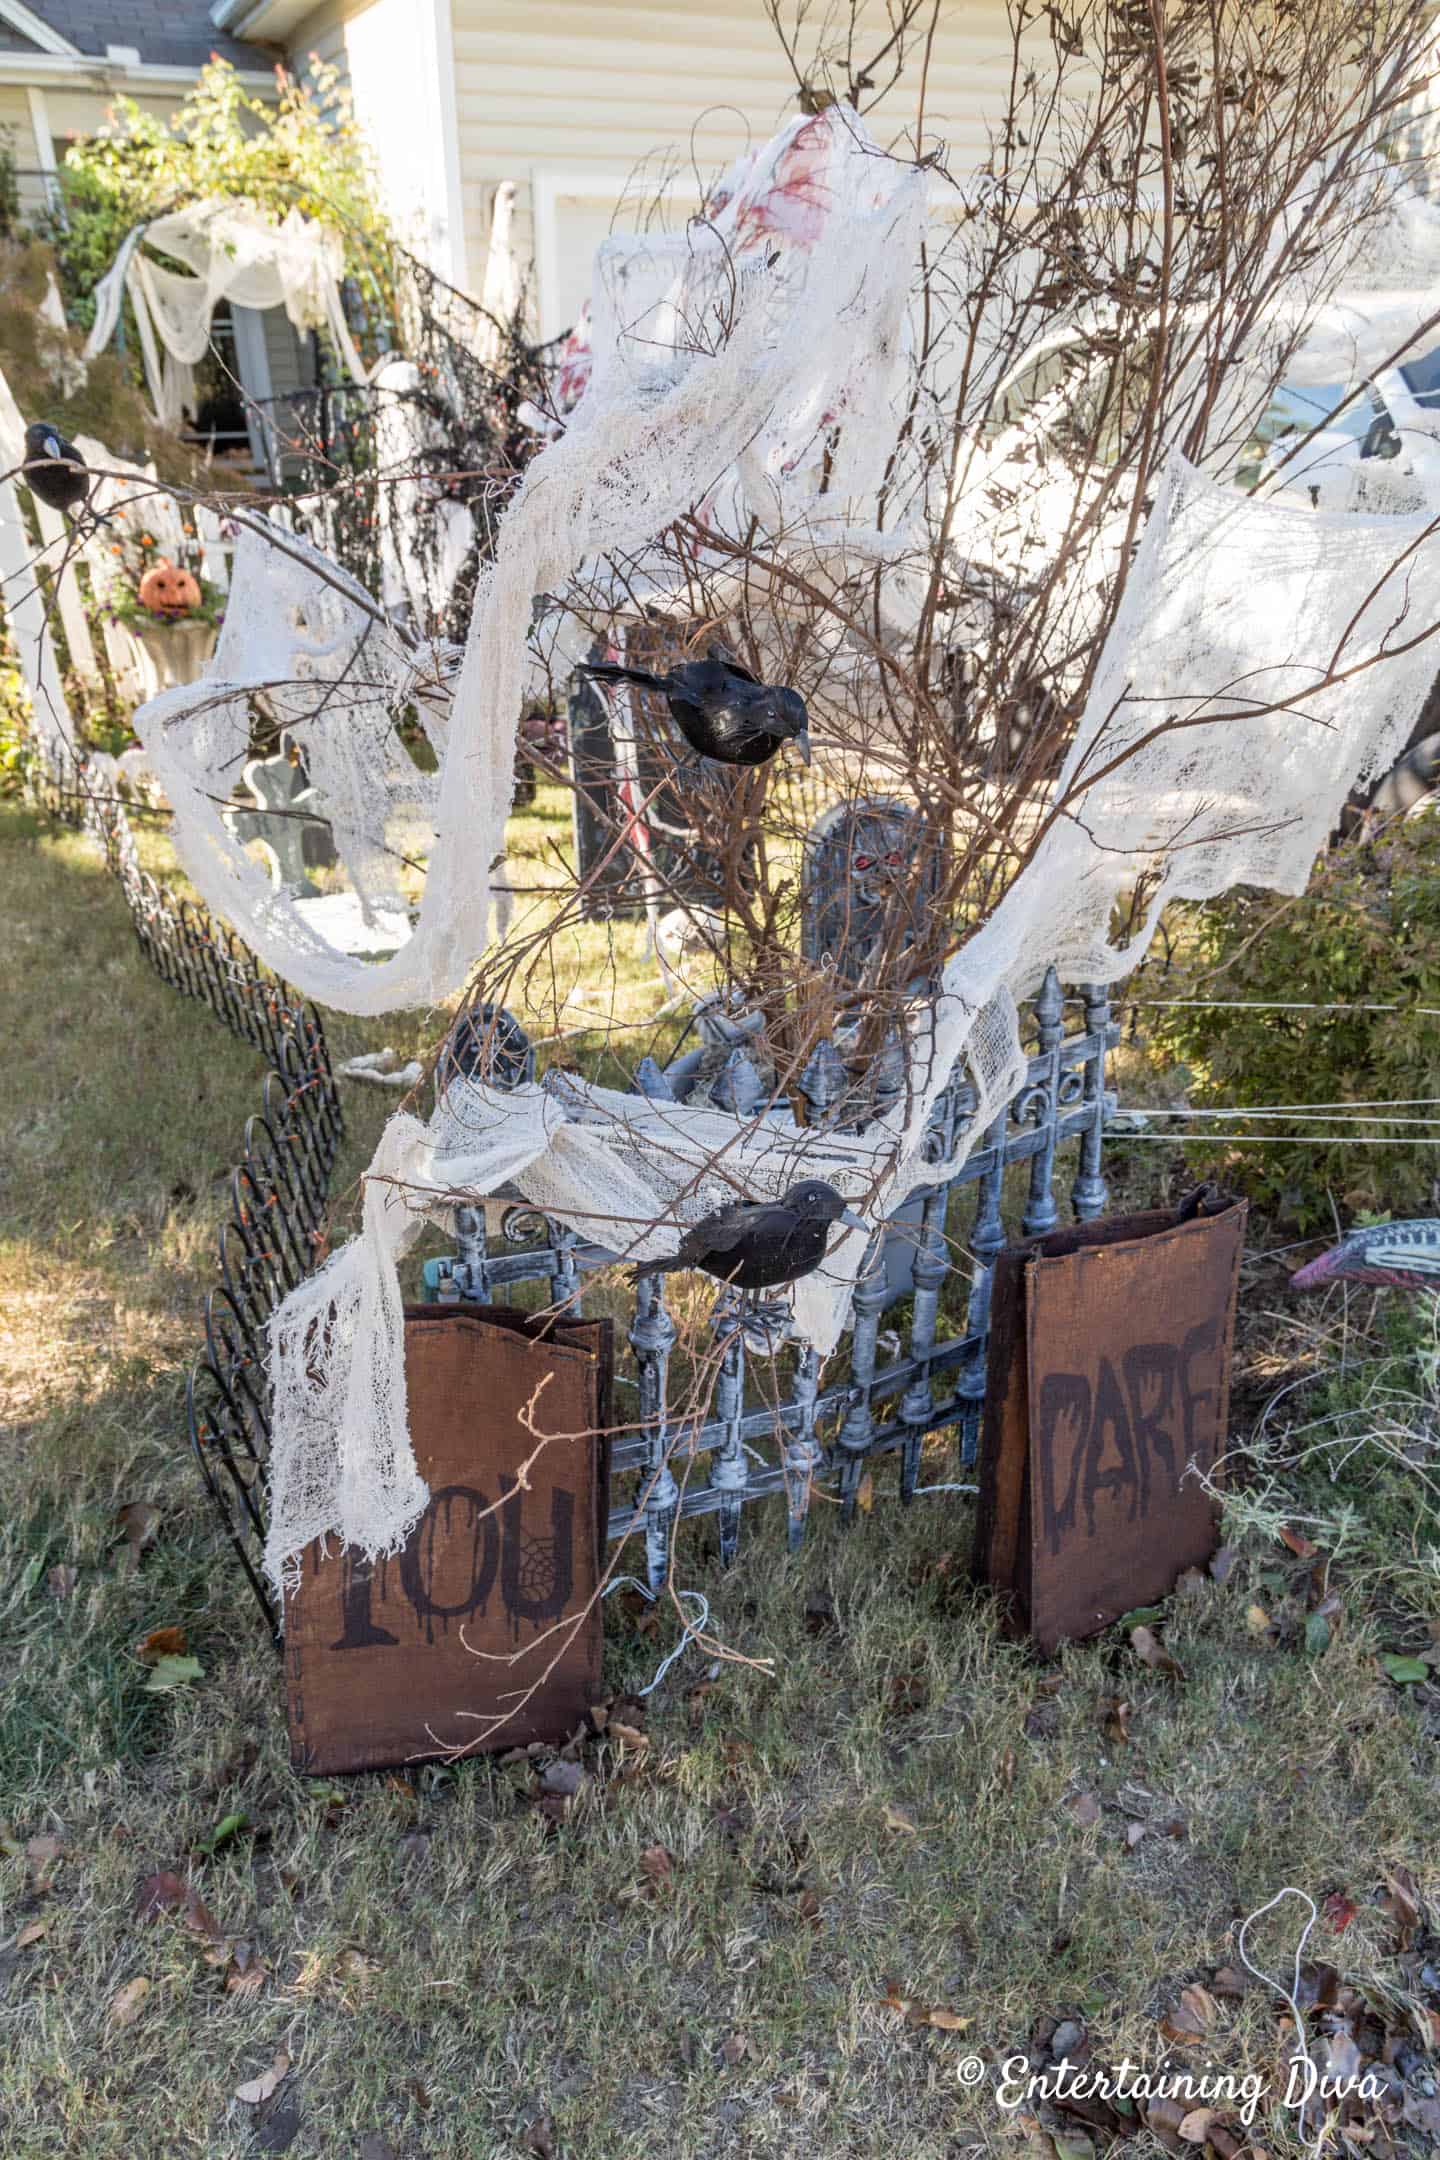
To make your Halloween graveyard look more authentic, it helps if your cemetery looks neglected.
Creepy cloth* is a great way to do this. Draped over fences, or arbors and hung from trees, it looks like giant cobwebs.
If people have to walk through it, it feels like walking through spider webs, too.
It also adds some mystery by blocking part of the view.
With lights at night, white creepy cloth* looks like it is glowing and definitely adds some spookiness to your Halloween cemetery.
You can also use stretchy spider webs* across tombstones and bushes. Just make sure to stretch it out enough that it actually looks like a spider web.
Find more ideas on using fake spider webs in your Halloween decor.
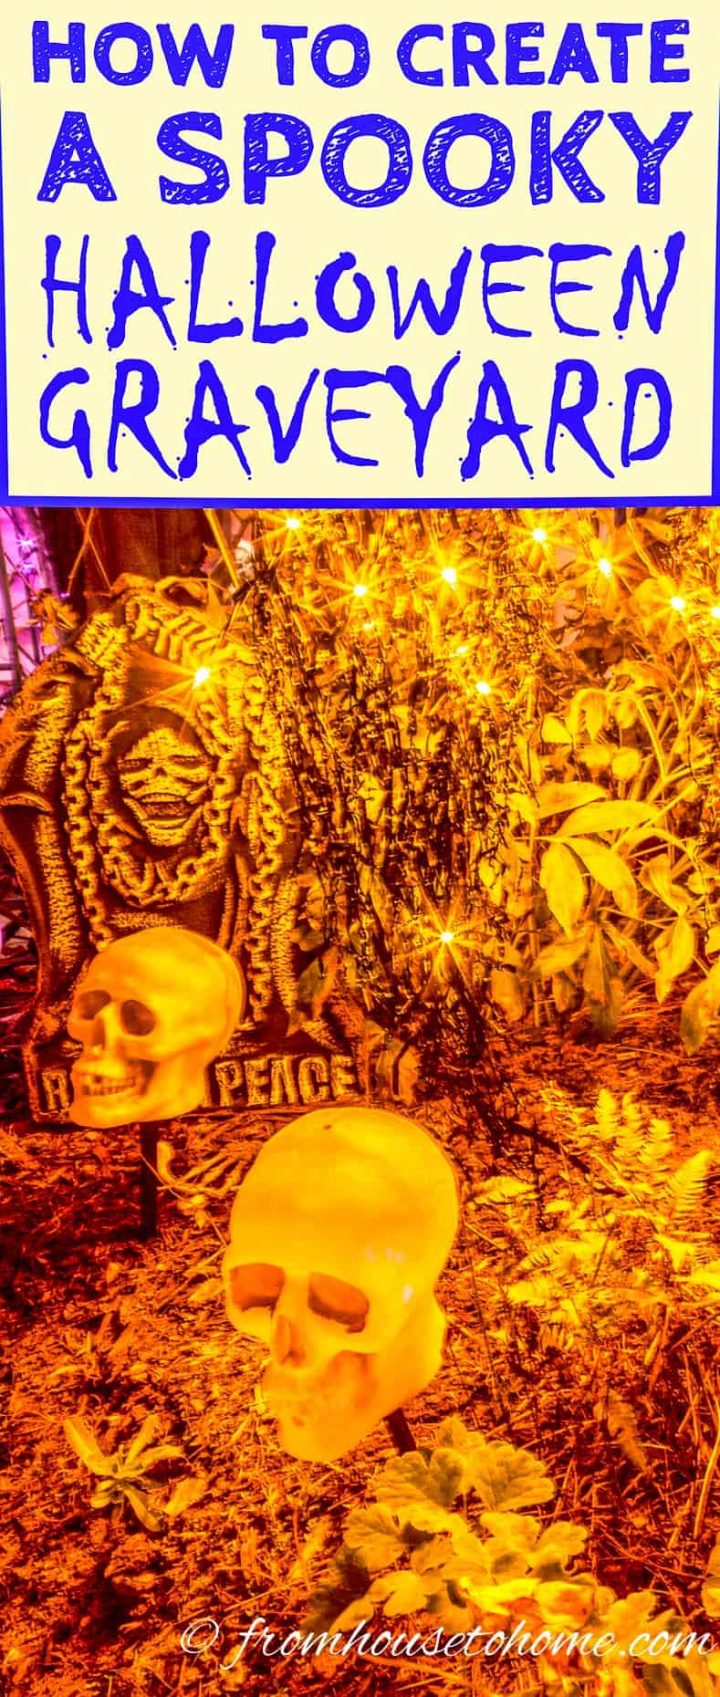
13 | Drape Some Chains

Chains are another easy, inexpensive way to add to your creepy outdoor Halloween decorations.
Drape them over the fence, or on some of your larger tombstones.
I also use chains as a fence around the areas I don’t want people walking in. (The posts are just PVC pipe painted black).
If you’re worried about the weight, use plastic chains*. They look like the real thing but are much easier to work with.
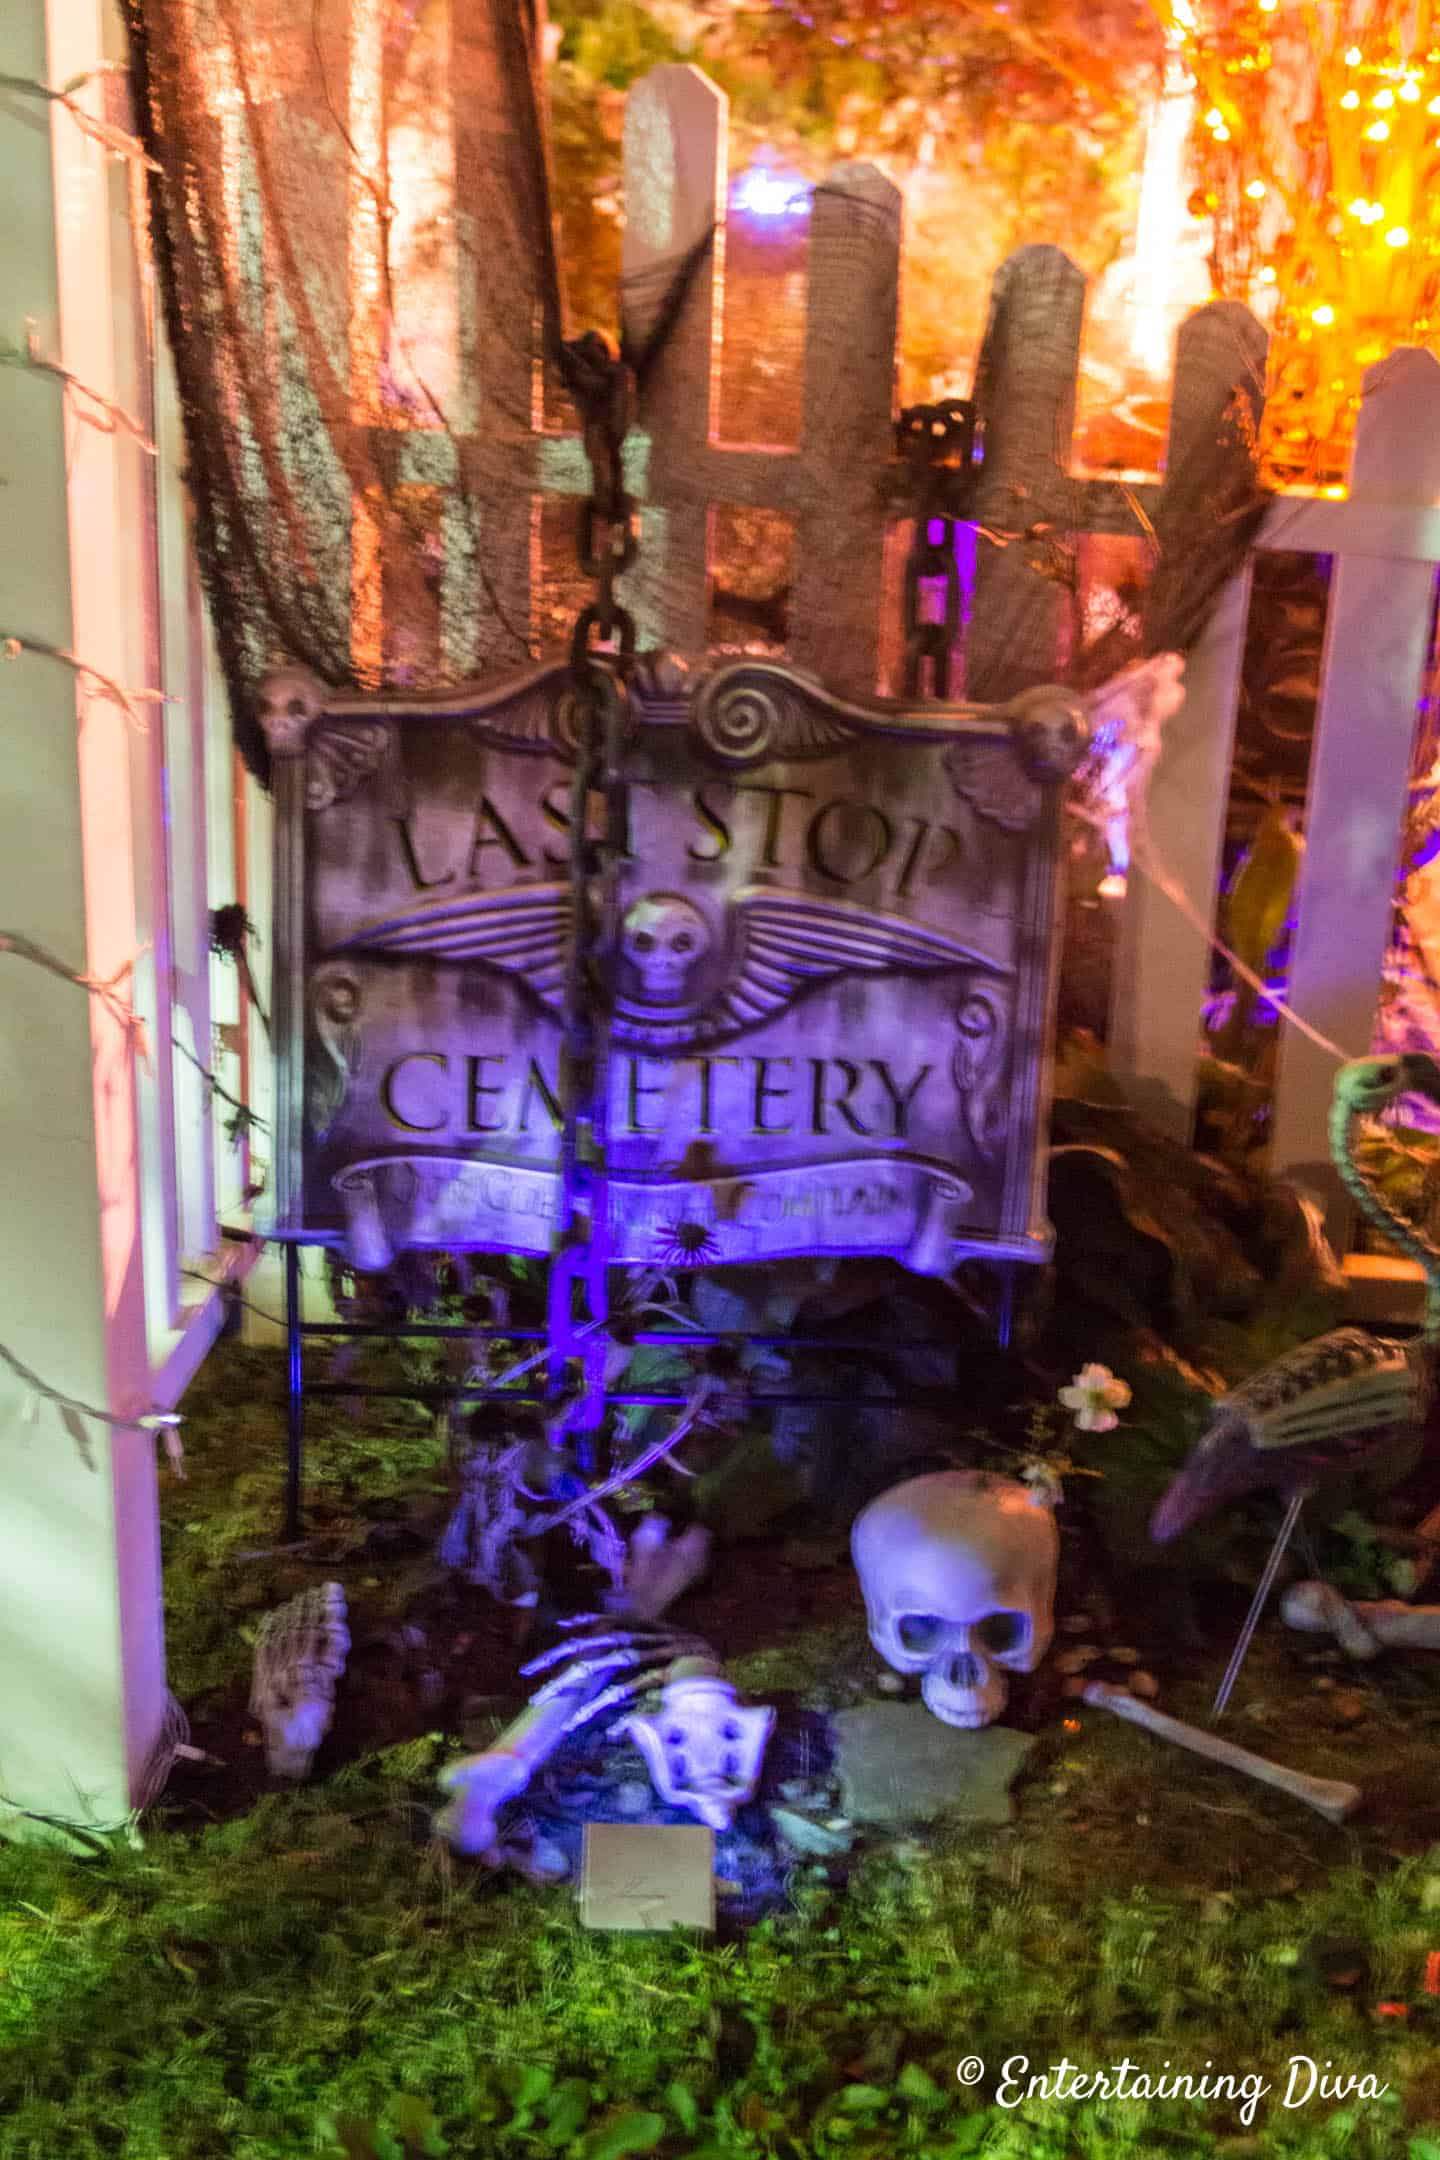
In this case, the chain falls over the fence and the cemetery sign and makes it look like the place is falling down.
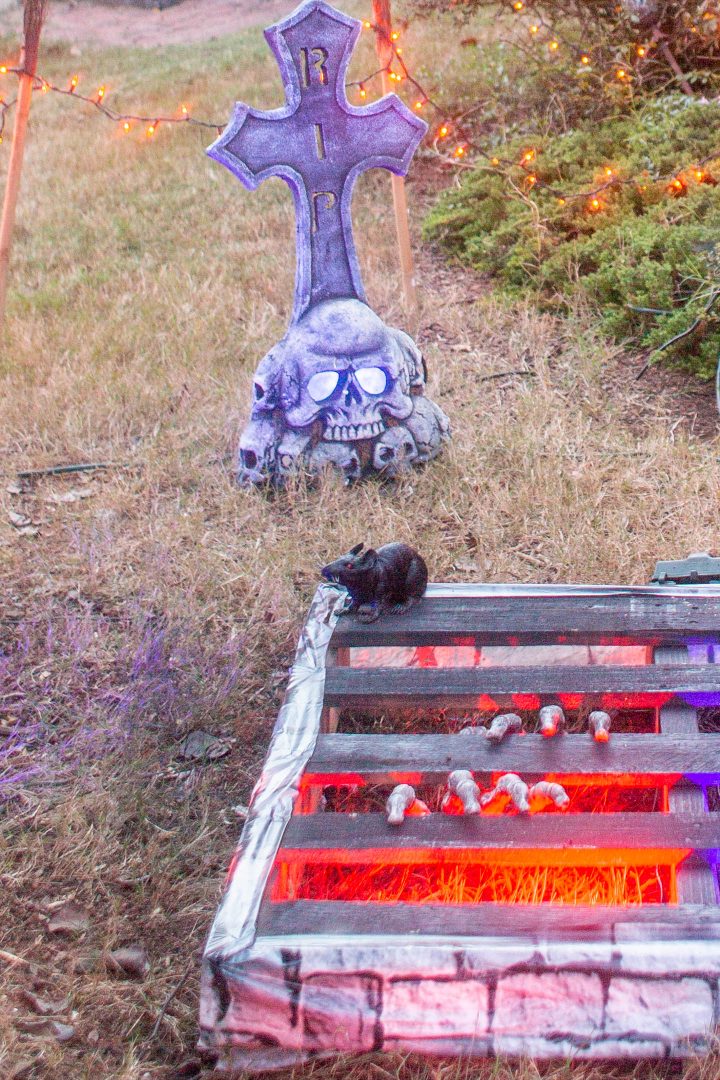
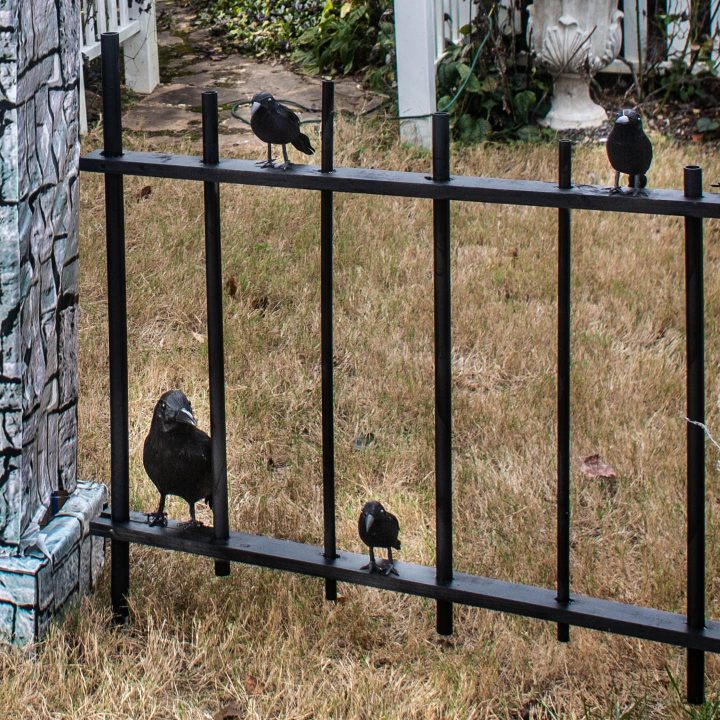
14 | Add Rats, Bats, Mice, Crows, Spiders and Other Spooky Critters

Use critters like fake bats*, rats*, spiders* and crows* to add to the atmosphere.

Perching your animal props where you might normally find them makes them look real. Which I think makes it a little spookier.
Like sitting a fake crow on top of a tombstone. (Wrap picture wire around its feet and stick it into the styrofoam to make the bird stay in place.)

Or grouping different sized birds on a Halloween cemetery picket fence.

Or setting a plastic rat in the middle of your Halloween graveyard somewhere that people will notice him.
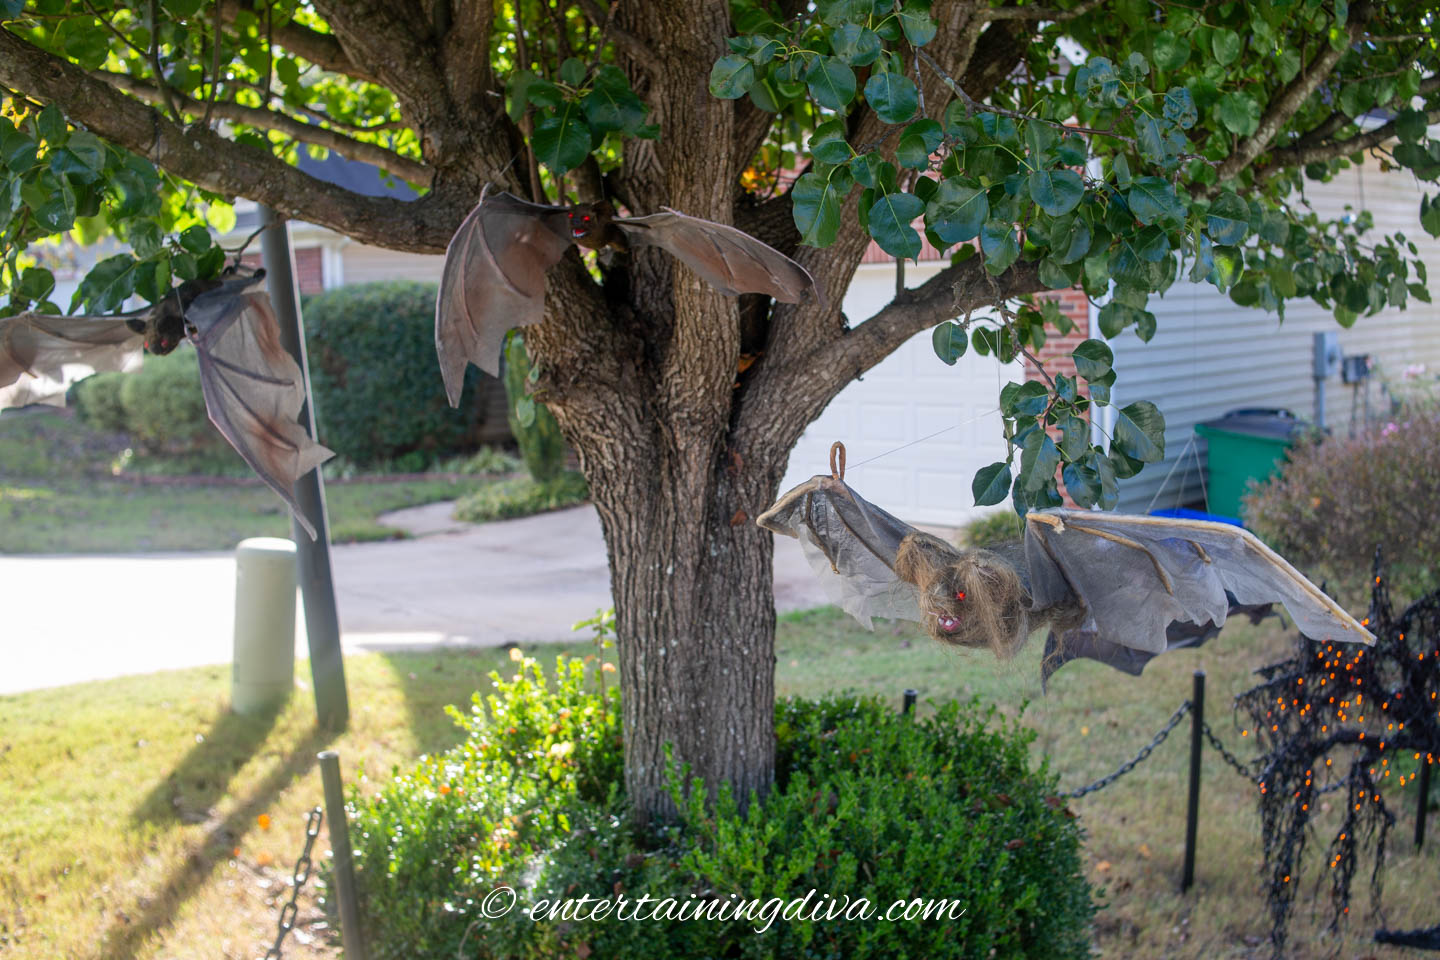
Or hanging bats from a tree.
Many of these critters are also available in skeleton form.
Which look great beside a tombstone.

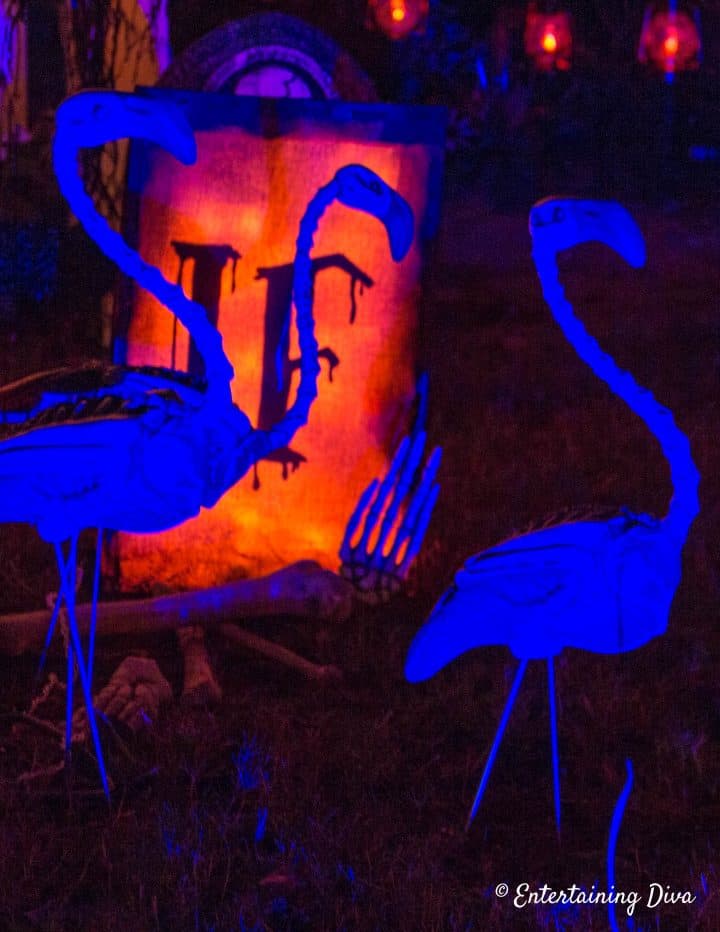
Just make sure the props are positioned where people can find them, and are big enough for people to be able to see in the dark, like these skeleton flamingos*.
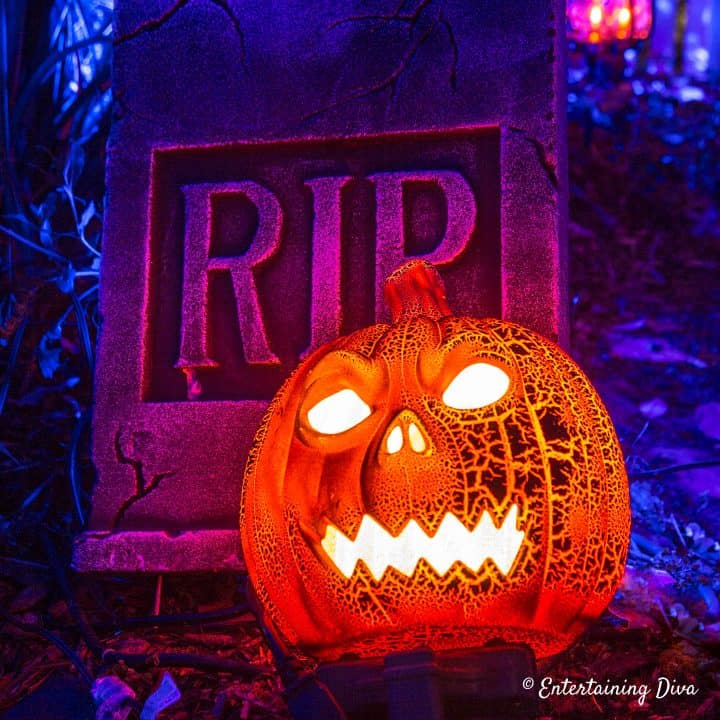
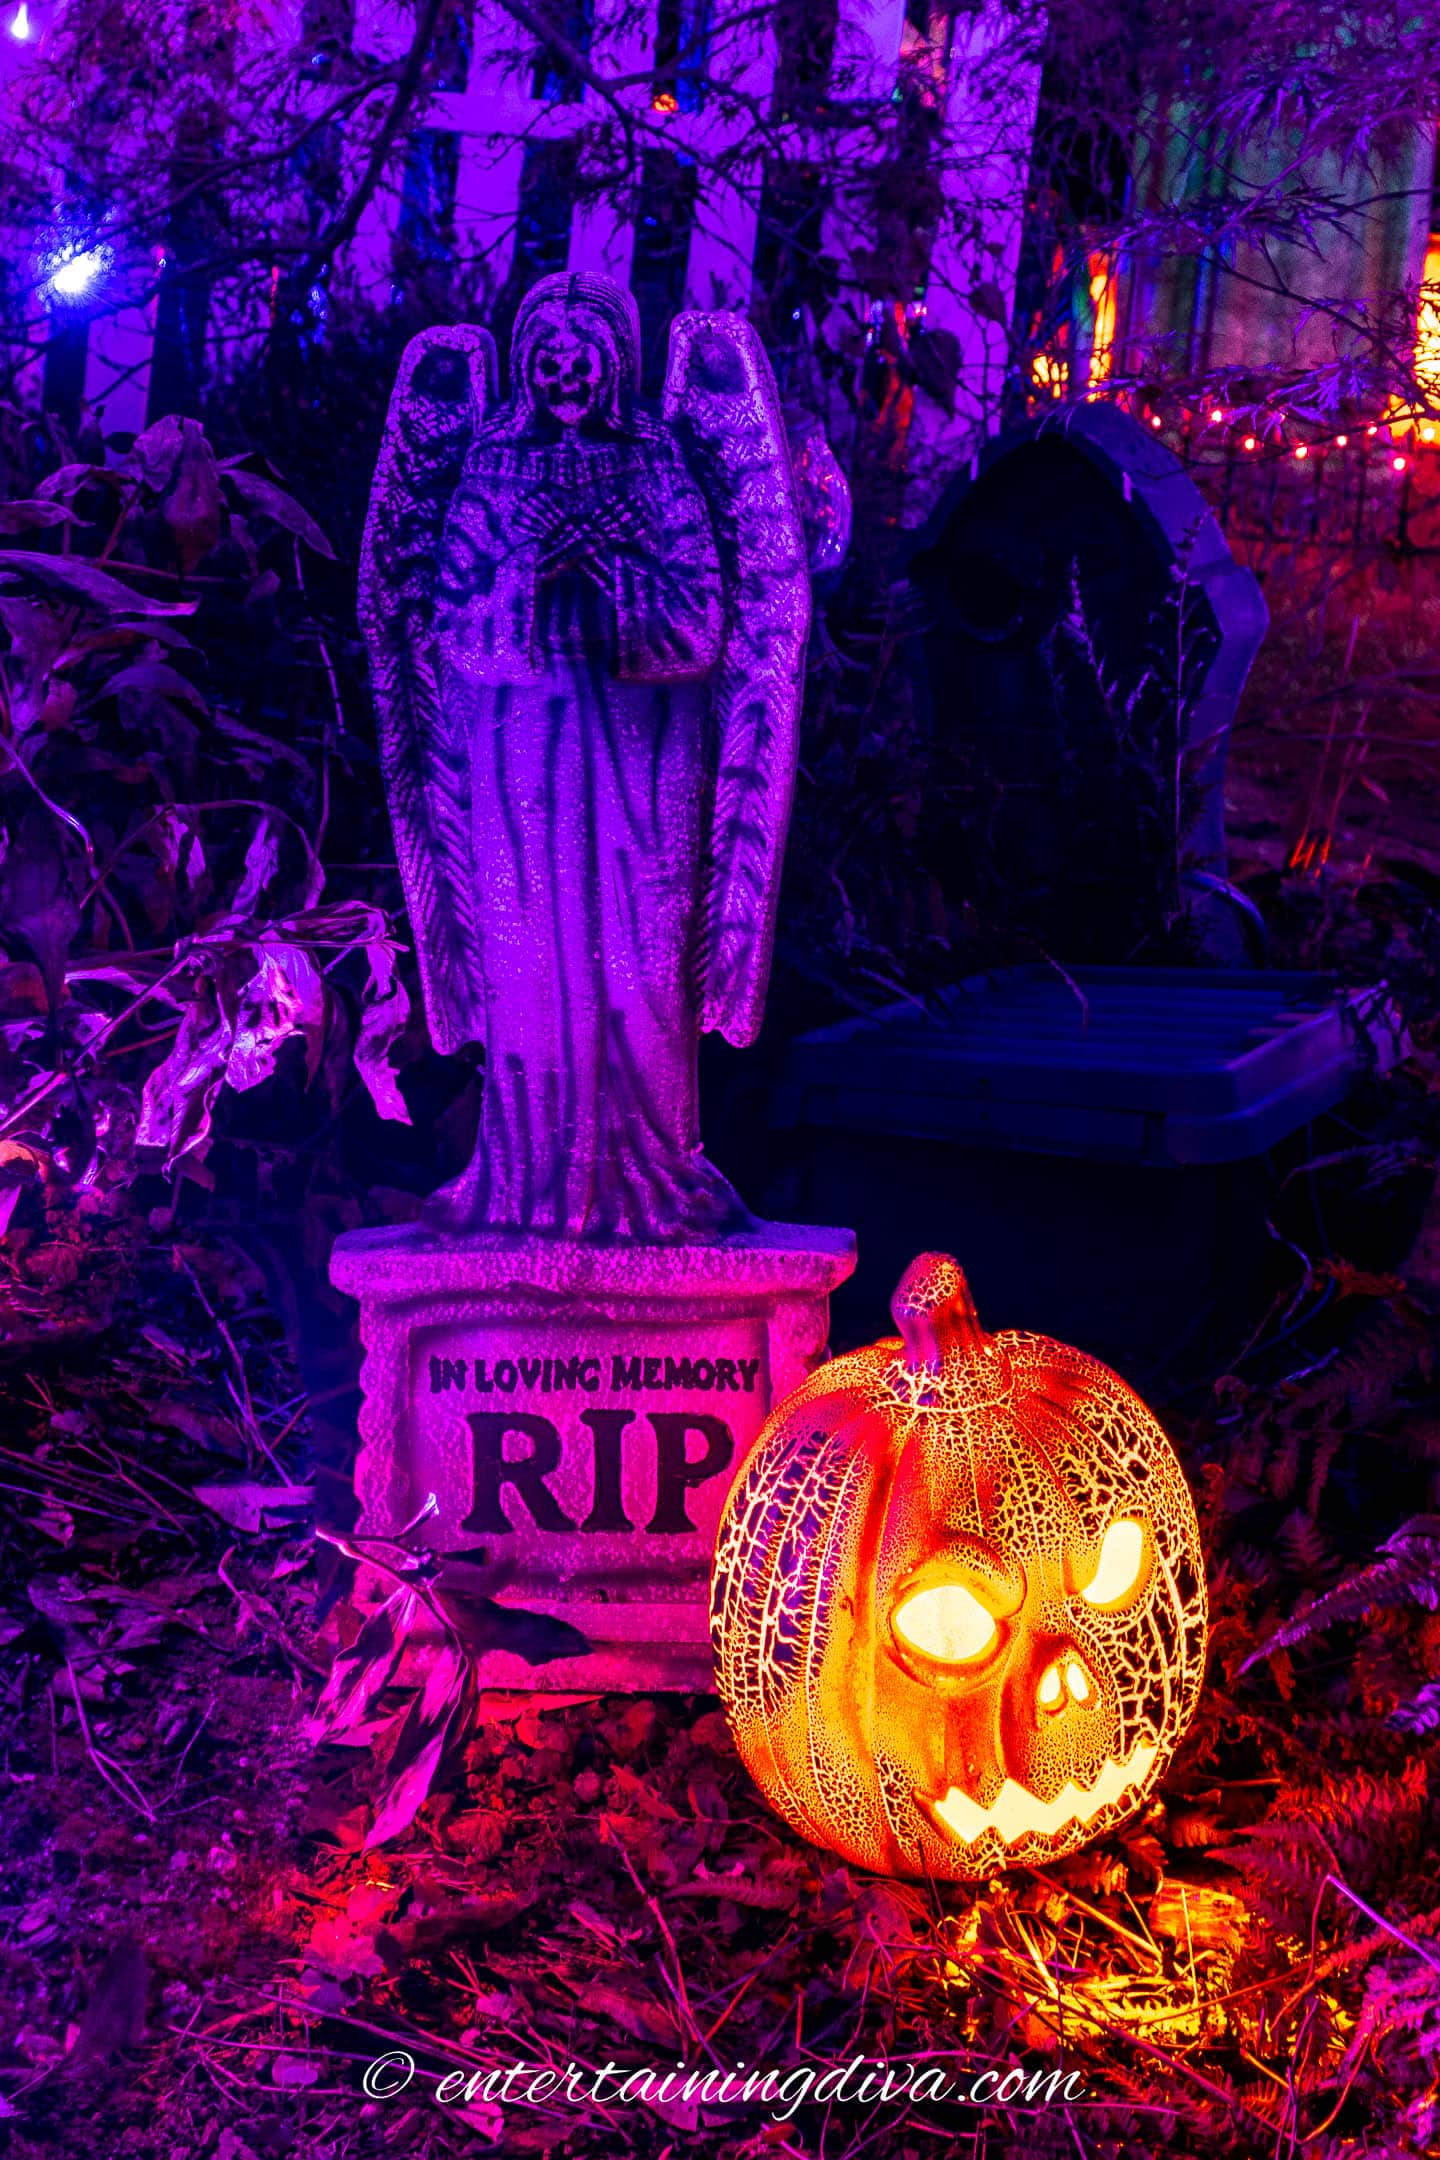
15 | Put Out Pumpkins
Pumpkins are another Halloween staple that I like to include in my Halloween cemetery.
Whether you use real ones or plastic ones, leaning them up against a tombstone is an easy way to include them.
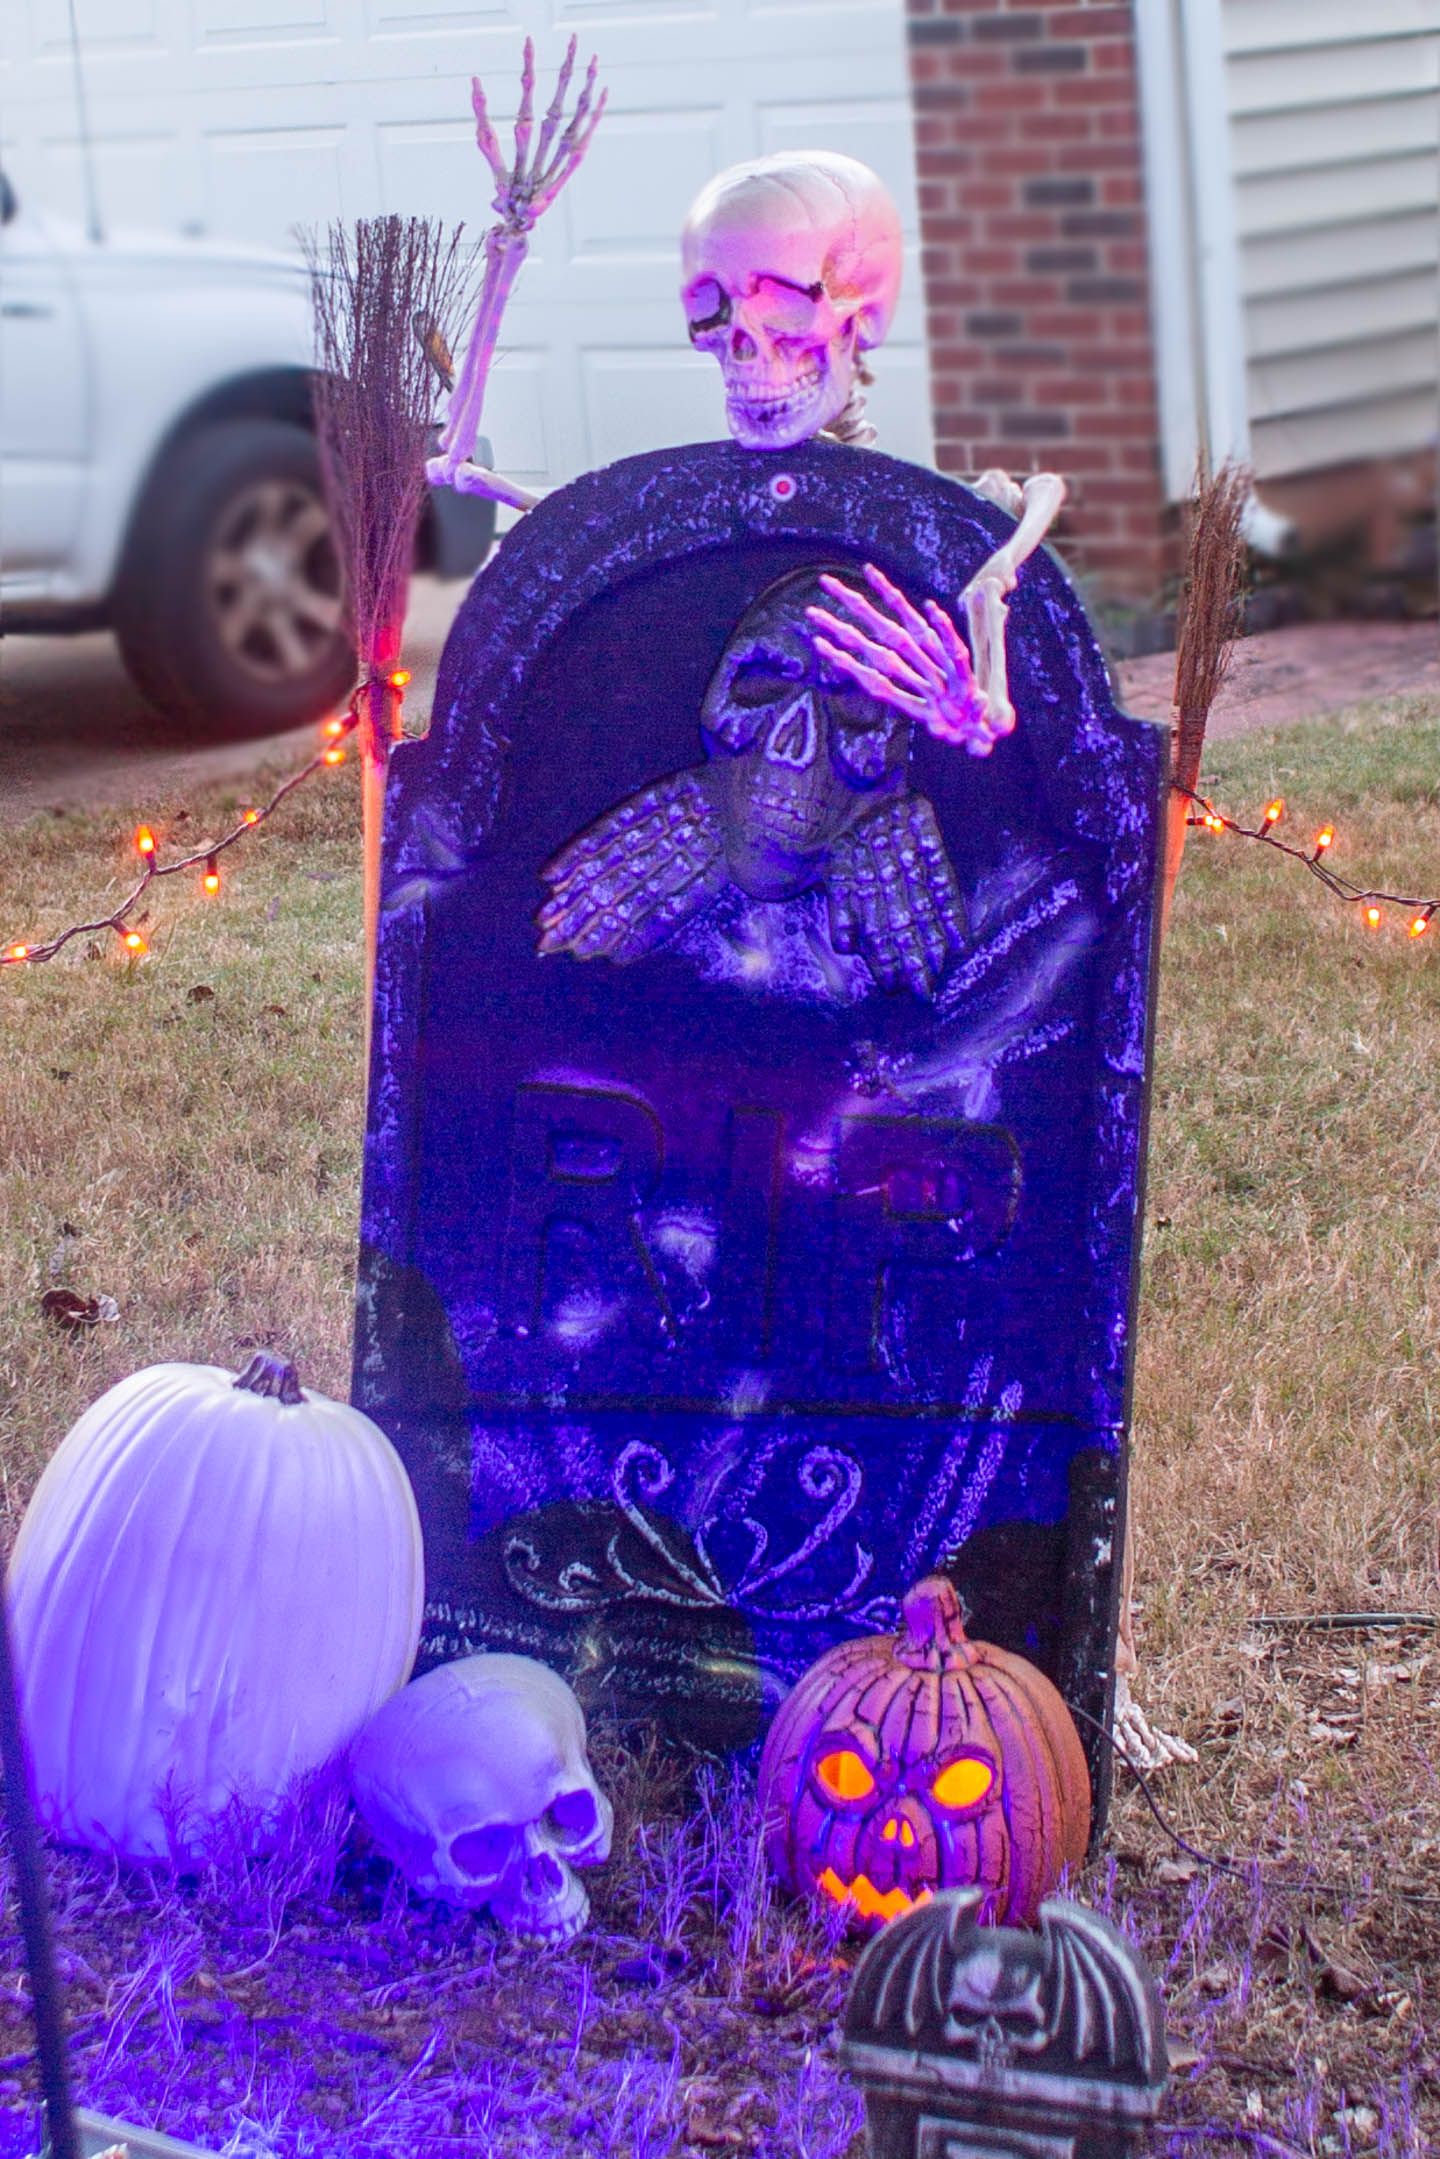
Putting them out in groups of two or three, mixed in with a skull or two makes them look like they belong.
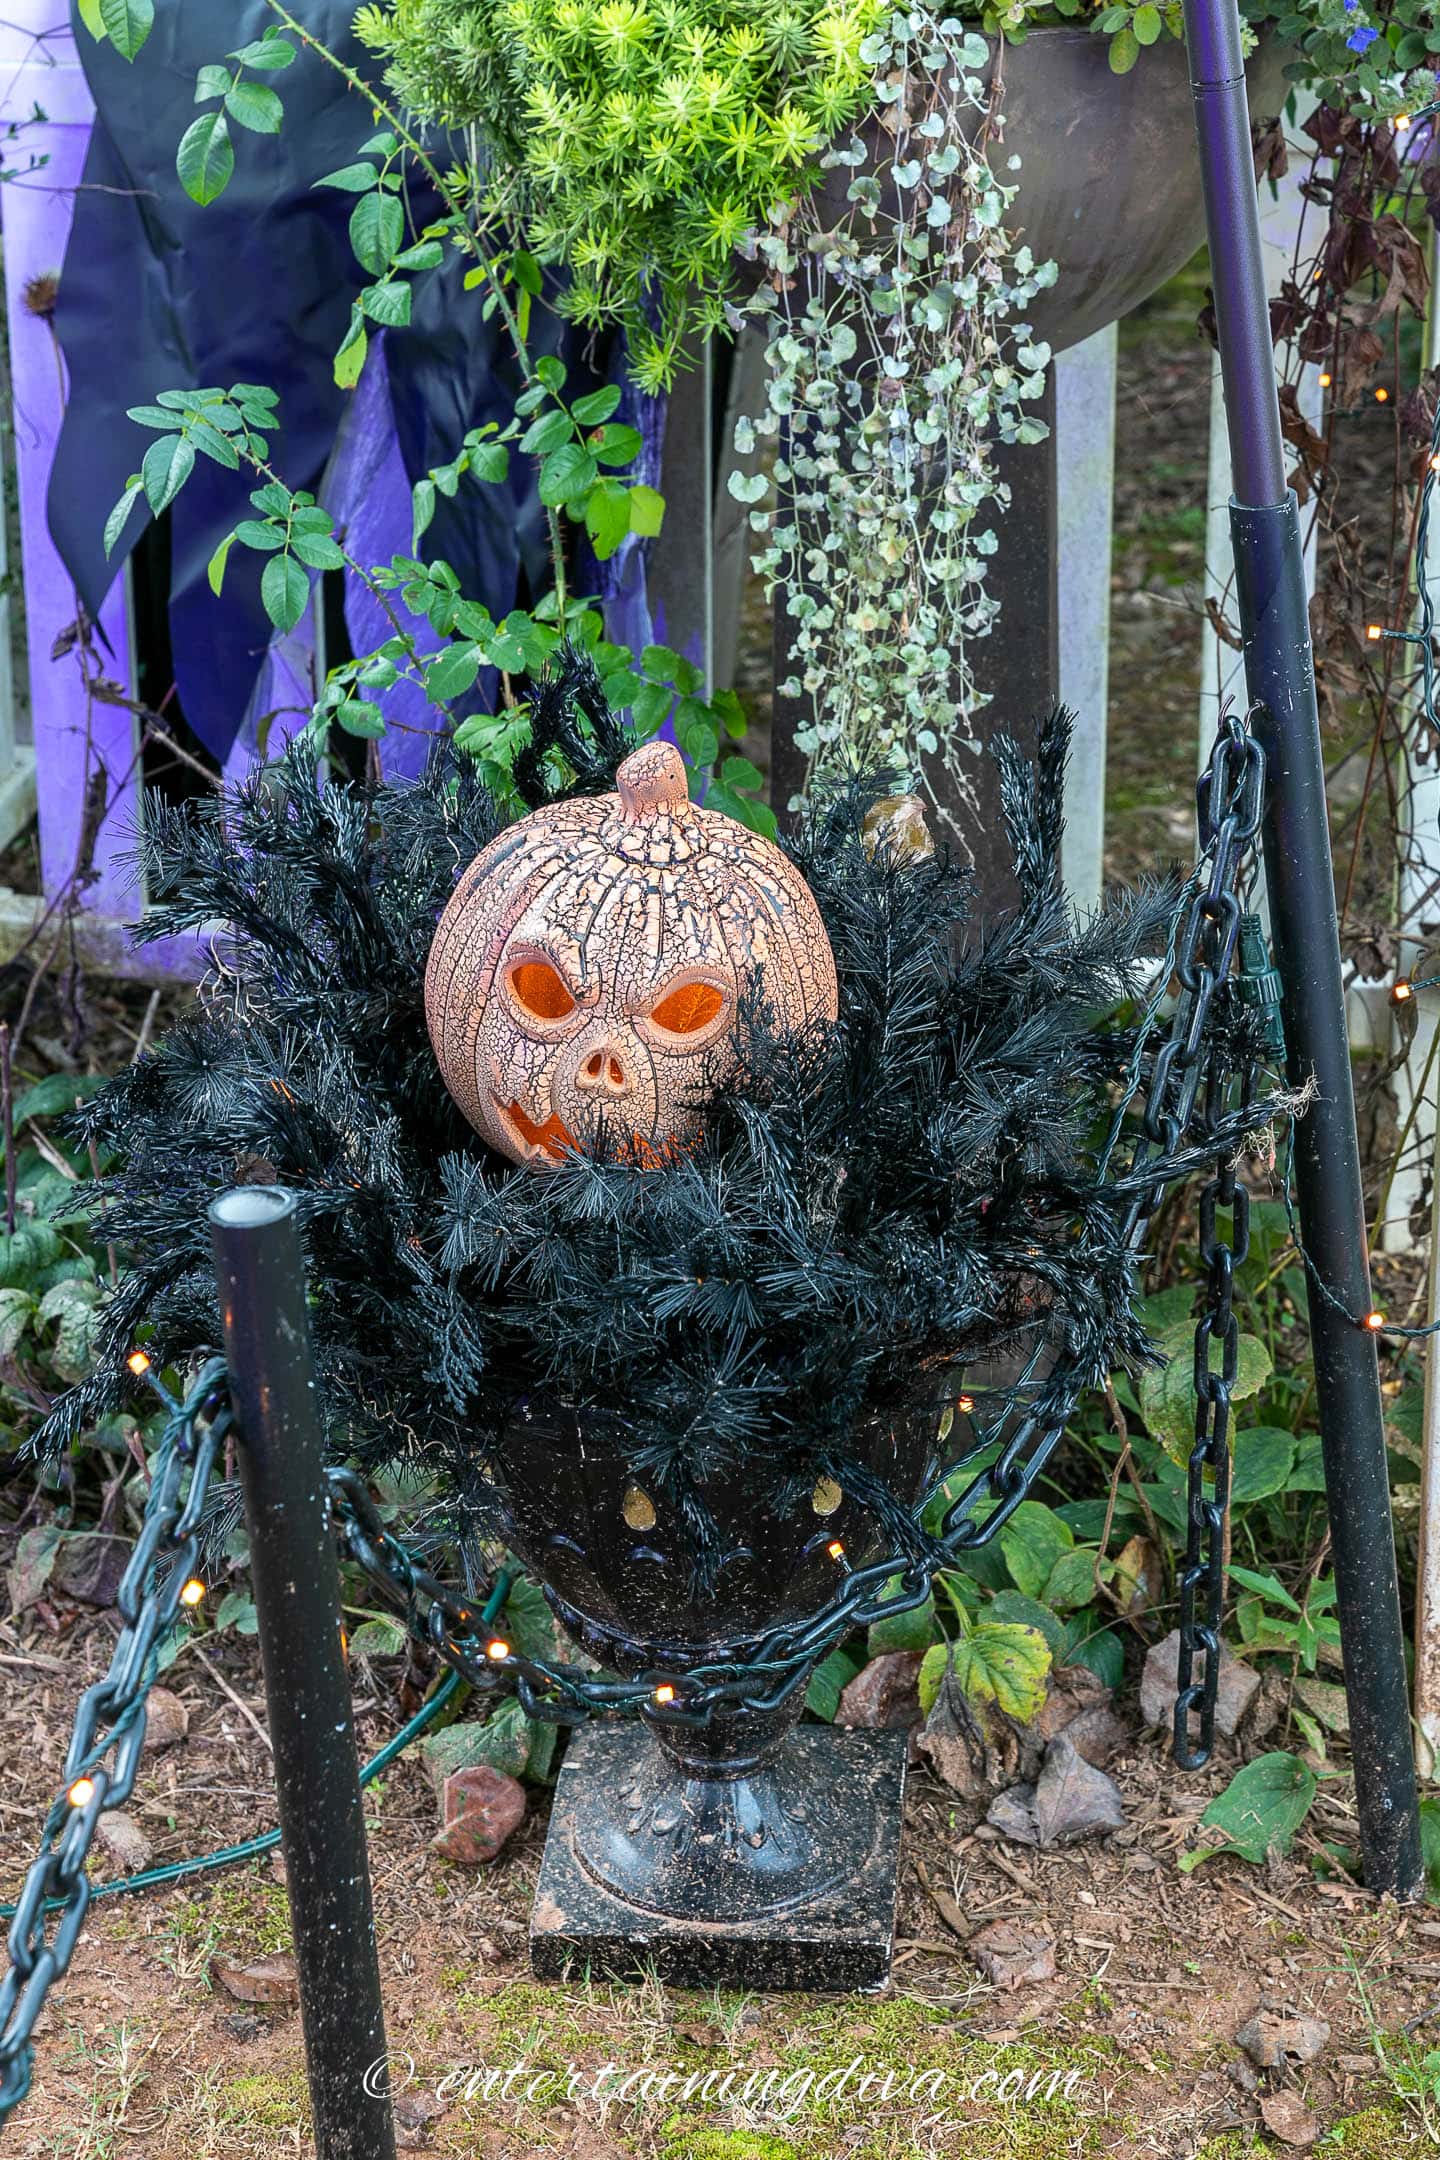
Or add them to a planter if you want them to blend in more with your garden.
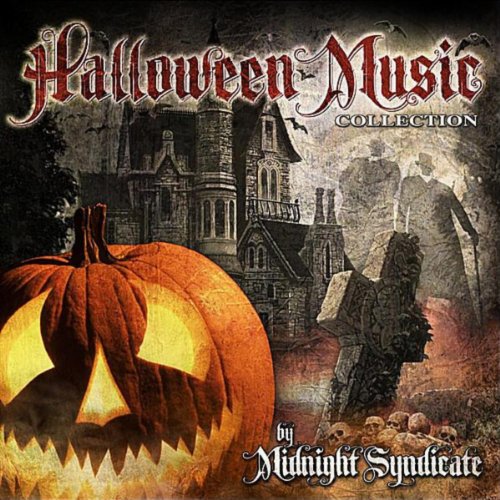
16 | Music
Playing Halloween cemetery sounds on a looping tape or CD will automatically make your graveyard seem scary.
For my graveyard, I like the Raven’s Hollow track from Midnight Syndicate’s Halloween Music Collection*.
It sounds like you are outdoors in the middle of a forest somewhere. There are other options on the CD that are good, mostly organ or scary-music type soundtracks.
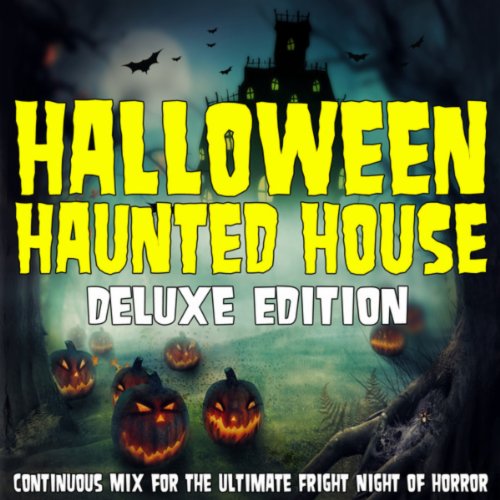
The haunted house sound effects are also pretty good in this Halloween Haunted House album* if you want more traditional haunted house type sounds (witches cackling, doors creaking, etc.)
Well, that’s how I put my annual Halloween graveyard together. Of course you are always free to add as many props and animated ghosts, skeletons, or ghouls as you can afford and have space for. It’s hard to go too over the top with a Halloween cemetery!
Other Halloween Ideas You Might Like
- Spooky Ways To Light Your Yard
- Halloween Fog Machine Ideas: How To Make Low Lying Fog
- Crows Nest DIY Halloween Wreath
Or browse all of our outdoor Halloween decor ideas.
Have comments or questions on how to create a spooky Halloween graveyard? Tell us in the section below.
Pin It So You Don't Forget It!

This post was originally published on October 7, 2014 but was updated with new content on February 12, 2024.
I live in a very windy area. To keep my tombstones up I bought cheap wire garden border fencing and separated the sections and placed a section behind each tombstone. Then went to the fabric store and bought grey netting by the yard. Tied the tombstone to the fence section with a wide piece of netting. String or a narrow piece of netting will cut into the tombstone & the grey color is invisible against the tombstone . Works perfectly, give it a try!
Hi Sheri…That sounds like it would work really well. I will give that a try this year!
Outstanding!!
Thanks, Kathy! Glad you liked it 🙂
WE try to make a scene that is great for the kids, I am going to get a new fog machine . party store in STC. I have been doing Franknstein custom, I sit next to the steps, and get smoke on when they come. I got the costome face ,from a high price decaor store many years ago. More then 20 years + I am chained to the steps, so they can see I will not get up. Most mothers try to tell the kids it is OK.But they are more scared watching them . MY wife come to the door and says he is a nice guy. it is fun to have them see if it is real. when kids can’t see getting the candy,I raise my arm for the mothers, they tend to step back!!!!! My wife tells the boys not to touch Frank!!! they tend to poke at your face to see if you are in there. In the last more than 25 years I’m sure!!! Parents bring there kids, as they were there when they were kids. So I am sure I have gone through 3 rd family’s for sure. I am now 79 yrs and and go back a long long time. they now come as a important part of there experience when they were kids. We do have some that stop ,then slowly dive by. but we work on 100 kids. most of the time. When I get tired or cold I go in and she gets request for Frank. That is a big deal for our house. wish i could post some pic. I had a guerilla !!!But loaned it to school for a party. But they tore the mask. $150.00 custom. These are props from LA Hollywood. Have a skeleton also but no one to ware it. I just put the plastic one near me. Wonder what the weather is ??/ nice to be warm. starts at 5 pm and goes till 9 pm or longer. e mail me for a picture of the scene. with ME.
It sounds like you have a great Halloween haunt at your house, Gary! I would love to see a picture 🙂
I want to say the frozen water bottles in the drainage pipe are FANTASTIC! I have used it and it works wonderfully! Also wanted to thank you for the link to the LED spotlights that change colors. I will definitely be switching over to those!
I would like to leave a suggestion about keeping tombstones in place. I adhere a piece of PVC pipe to the back and then hammer rebar into the ground. You slide the PVC pipe over the rebar and BAM they don’t go anywhere.
I also use pallets to make my cemetery fence. I use wooden stakes to drive into the ground and screw the pallets to those to keep them standing upright. I cut the tops of the pallets to look like a pointed fence. I was able to get all the pallets I needed for free. My cemetery is completely enclosed. I do a haunted house on my driveway and into my garage.
Thanks, Heather! Those are great suggestions. I’ll be trying them out this year 🙂
Where did you purchase the small lanterns?
Hi Jean…I have a couple of different types of lanterns (not sure which one you were looking at). The first kind are pathway lights and come with 4 on a light string. I bought them at Target a few years ago, but haven’t seen them the last couple of years so I’m not sure if they’re still carrying them. The second kind are individual lanterns that are solar powered. You can find them on Amazon by searching for “solar halloween lanterns”. (They also have battery operated versions if that works better for you).
Amazing!Could you please tell me where you purchased or how you made the headstone/tombstone crypt Cover on the ground set?
Hi Dila…I bought it many years ago so I don’t actually remember where I got it. But I think you could make one pretty easily out of styrofoam. Start with a regular tombstone (you could buy it or make it) and then 2 rectangular piece of styrofoam that are cut about 3 inches wider and longer than the tombstone. Cut out the middle of one of the rectangles so it is just wide enough for the tombstone to fit inside…this is the bottom of the crypt. Then use the other one as the top. Make a few slashes in the styrofoam to make them look beat up and then spray paint them with grey spray paint. The spray paint will eat away at the styrofoam and give it that worn look. Hope that helps!