
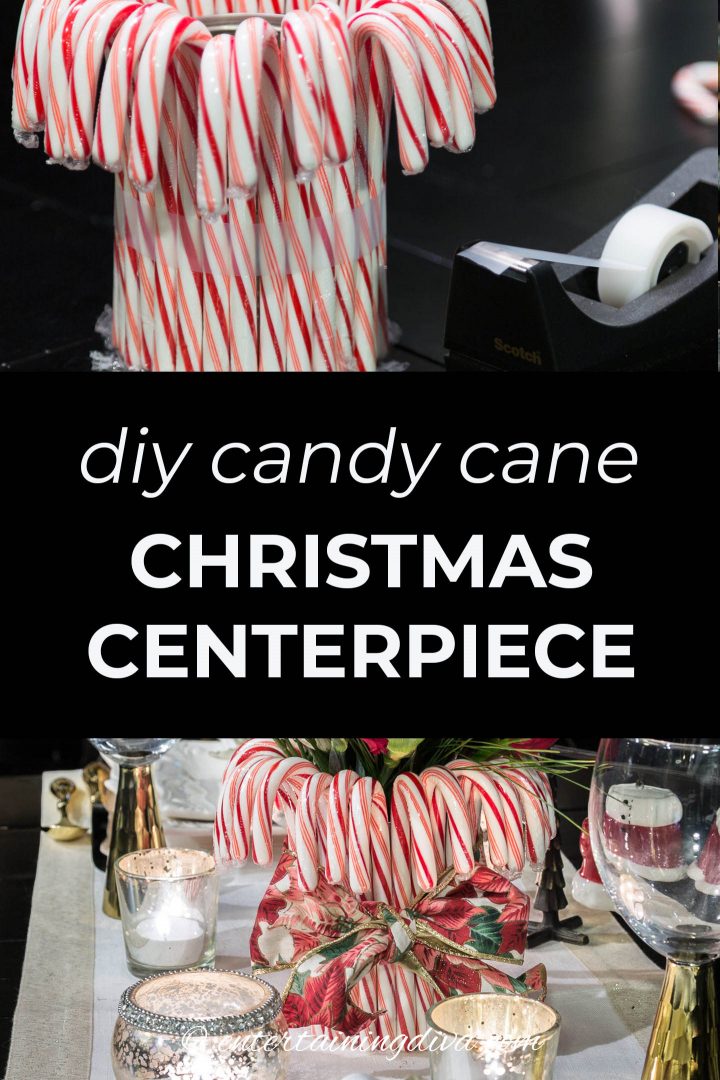
How to Make An Easy Candy Cane Christmas Centerpiece


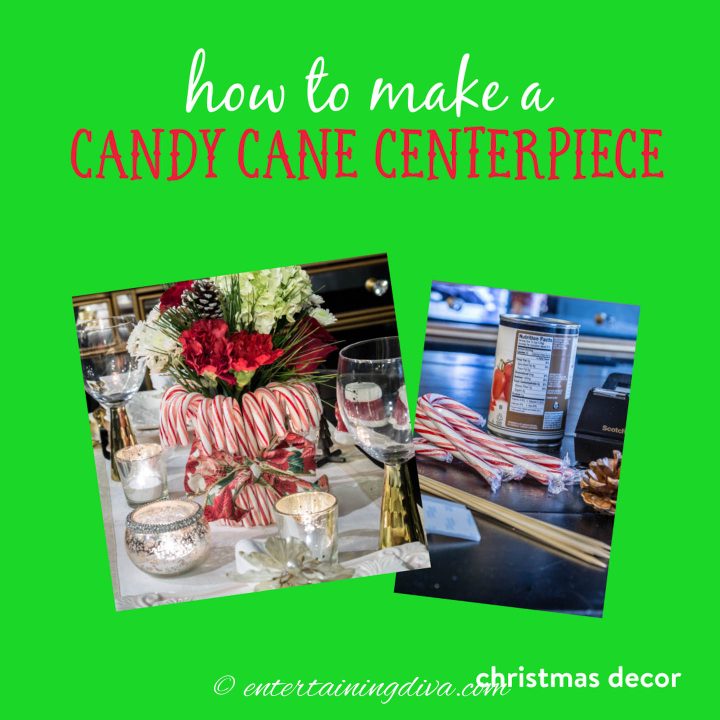

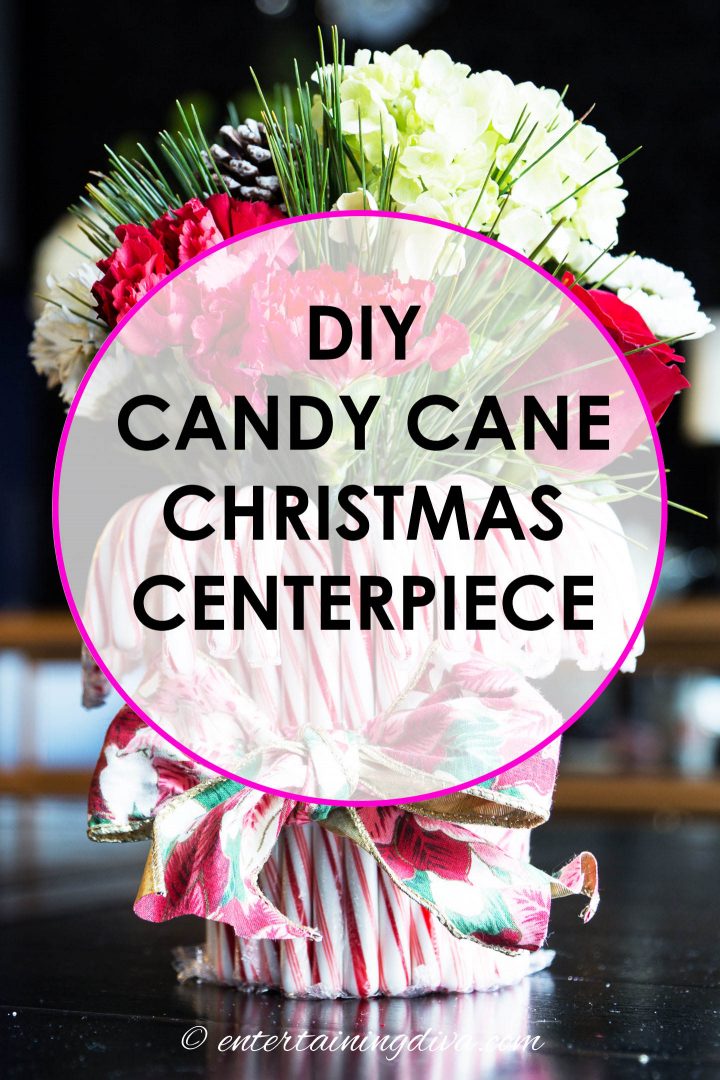
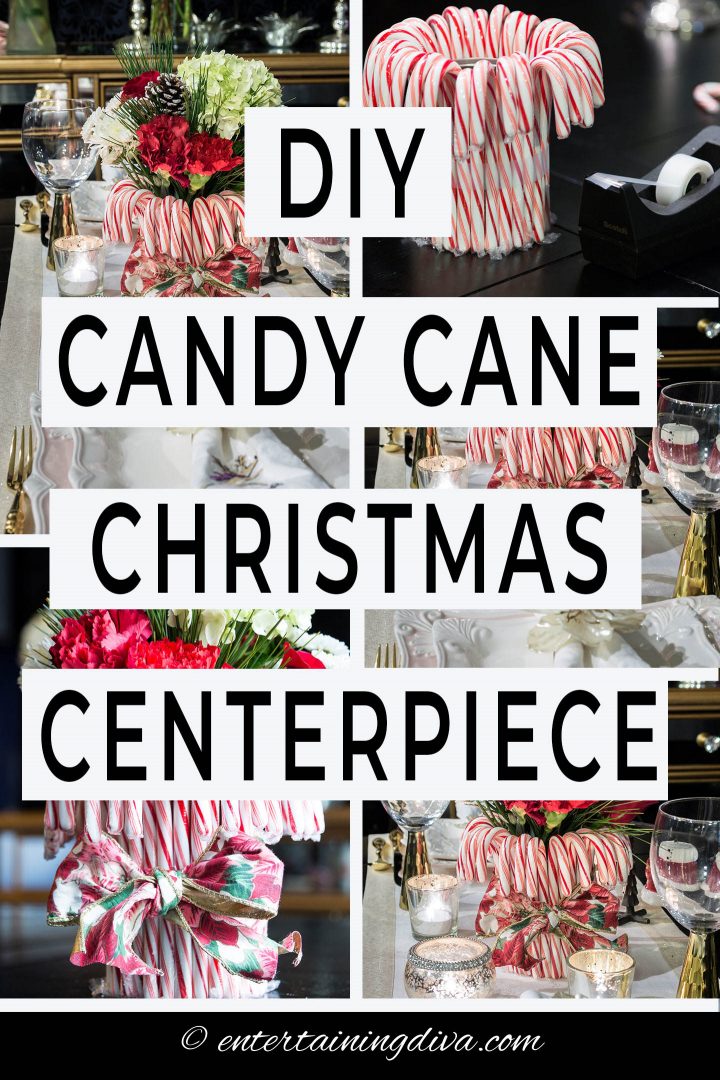


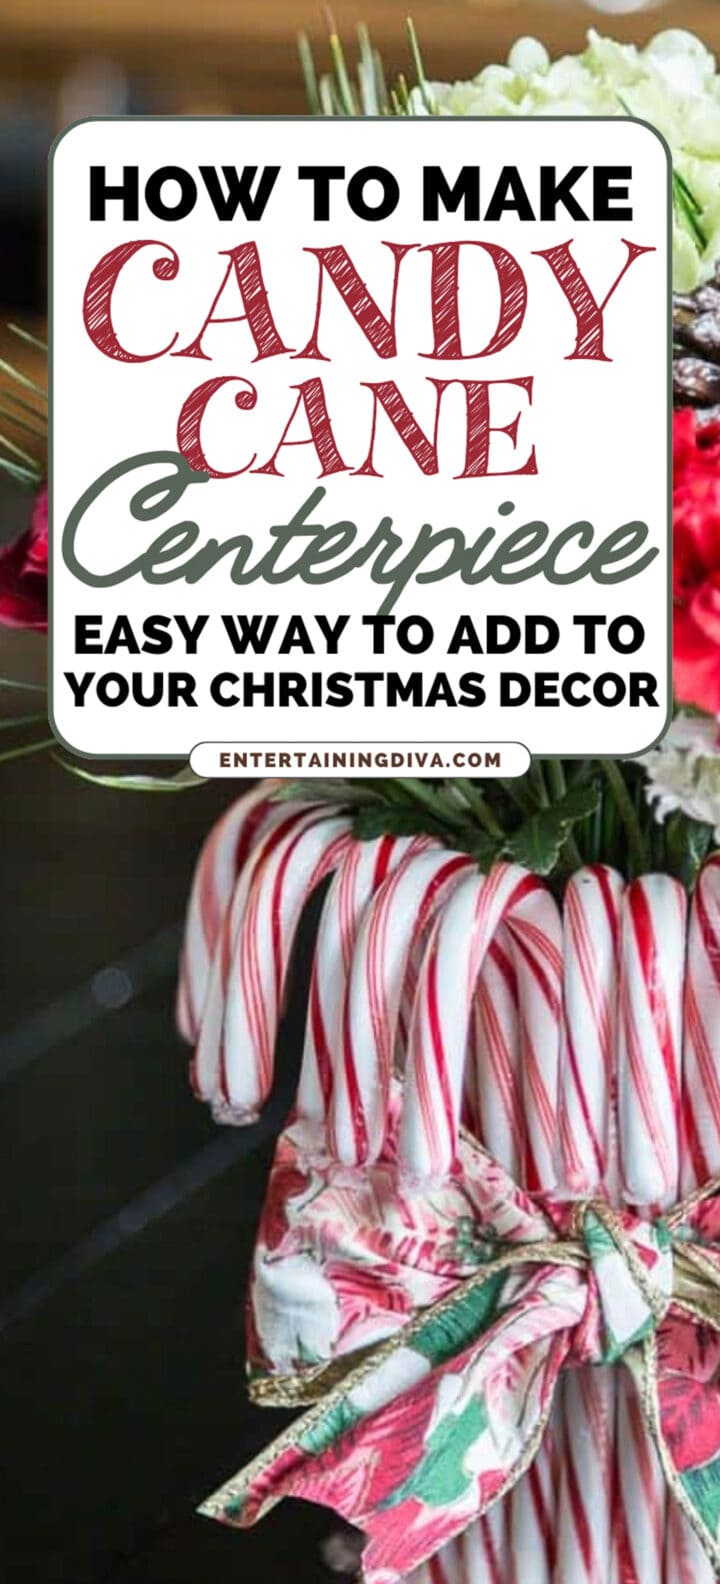
Looking for a quick and easy way to add to your Christmas table decor? Try this red and white Christmas centerpiece made with candy canes.
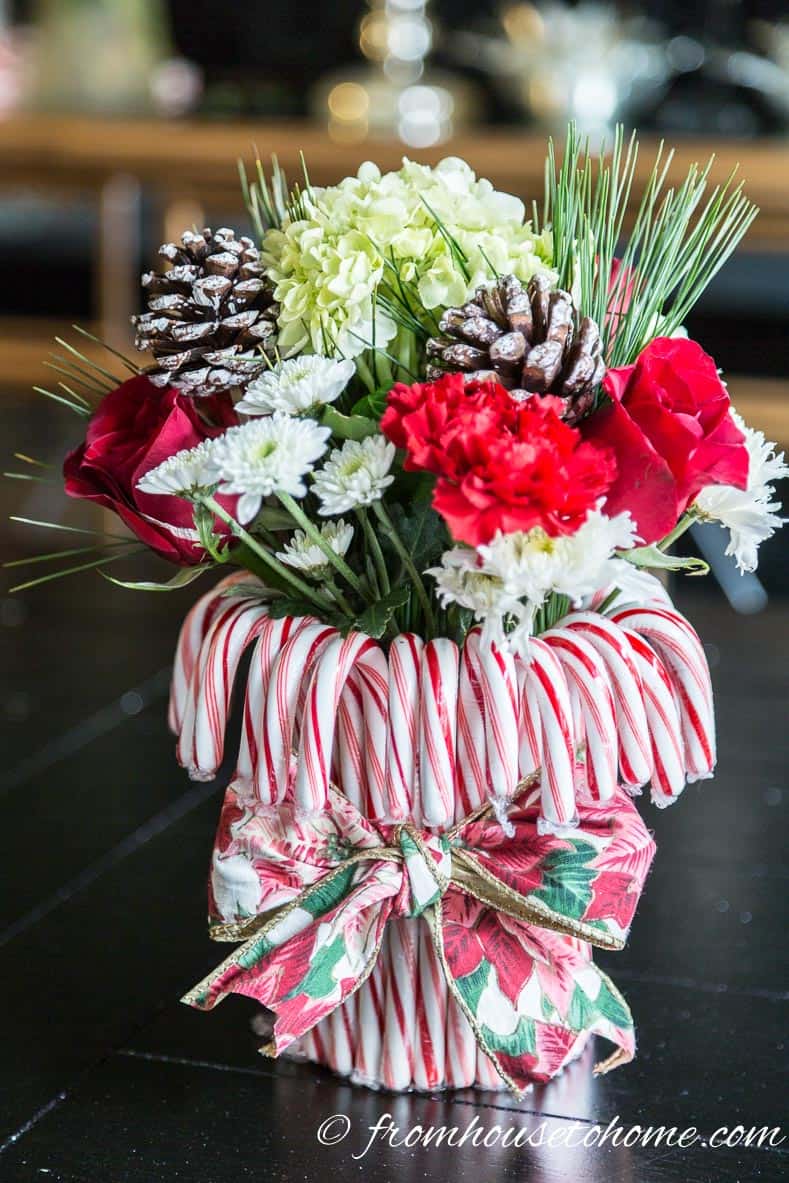
Red and white is a traditional Christmas color combination that never gets old. I love using it with gold like I did with my DIY white feather Christmas wreaths that I hung in the windows as part of my living room red and white Christmas decor. Which is why I opted for a gold trimmed ribbon for this candy cane Christmas centerpiece.

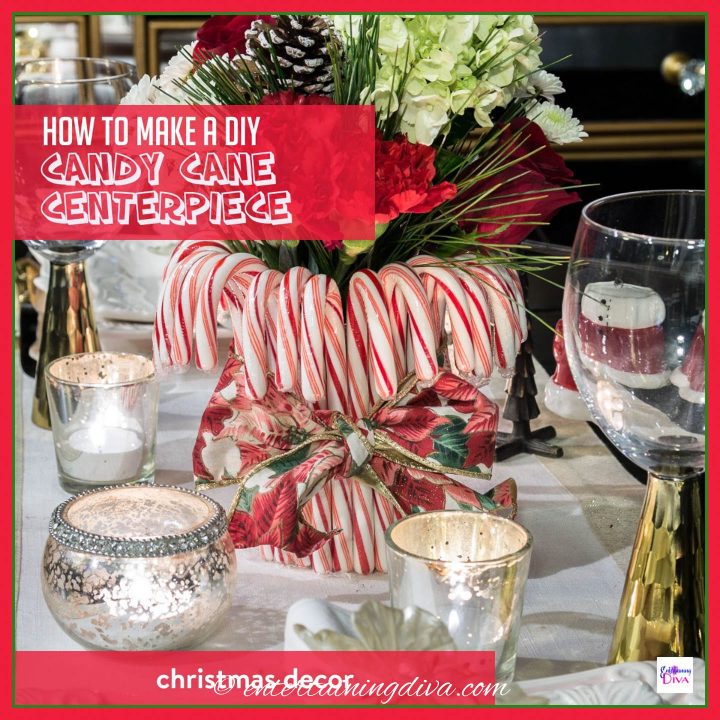
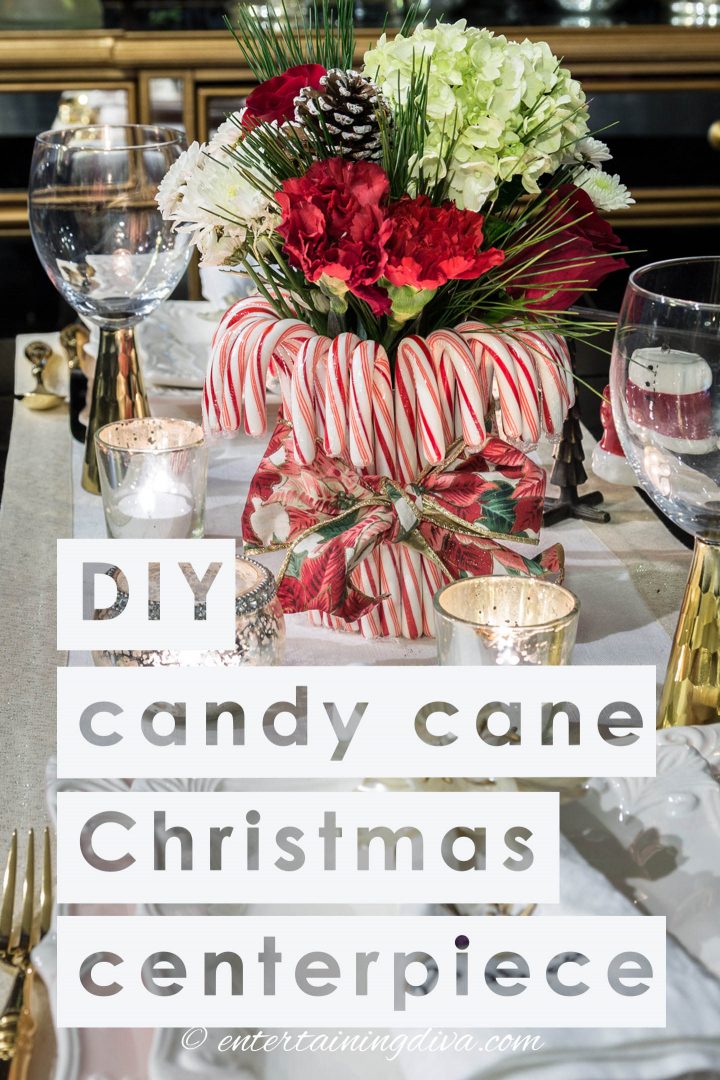
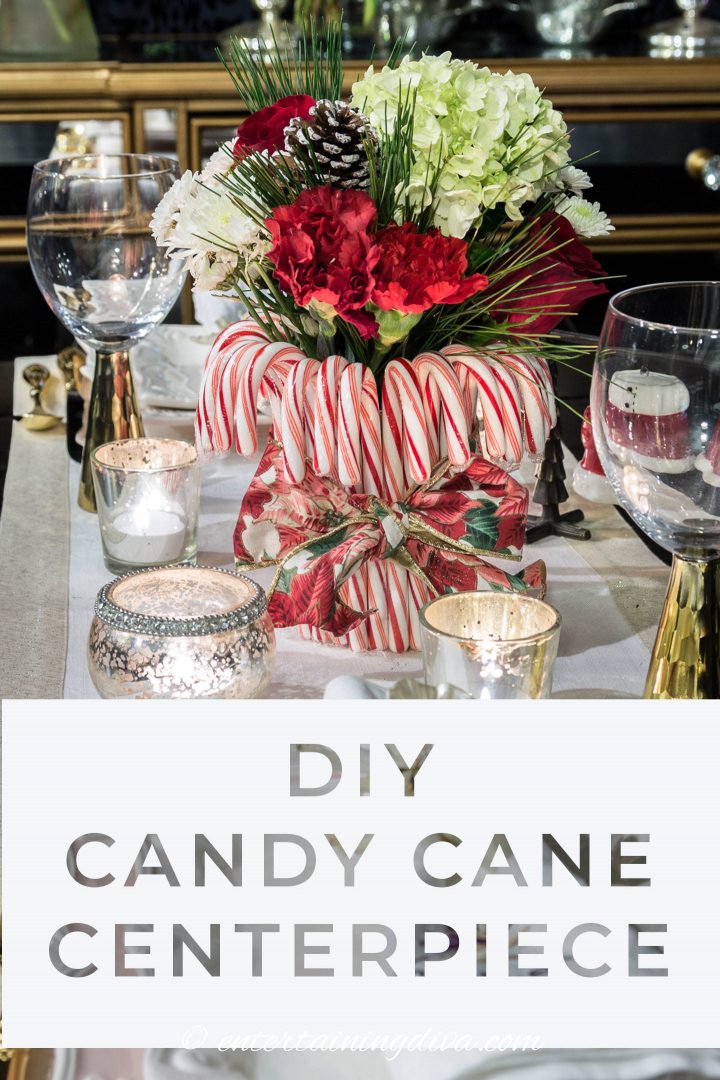
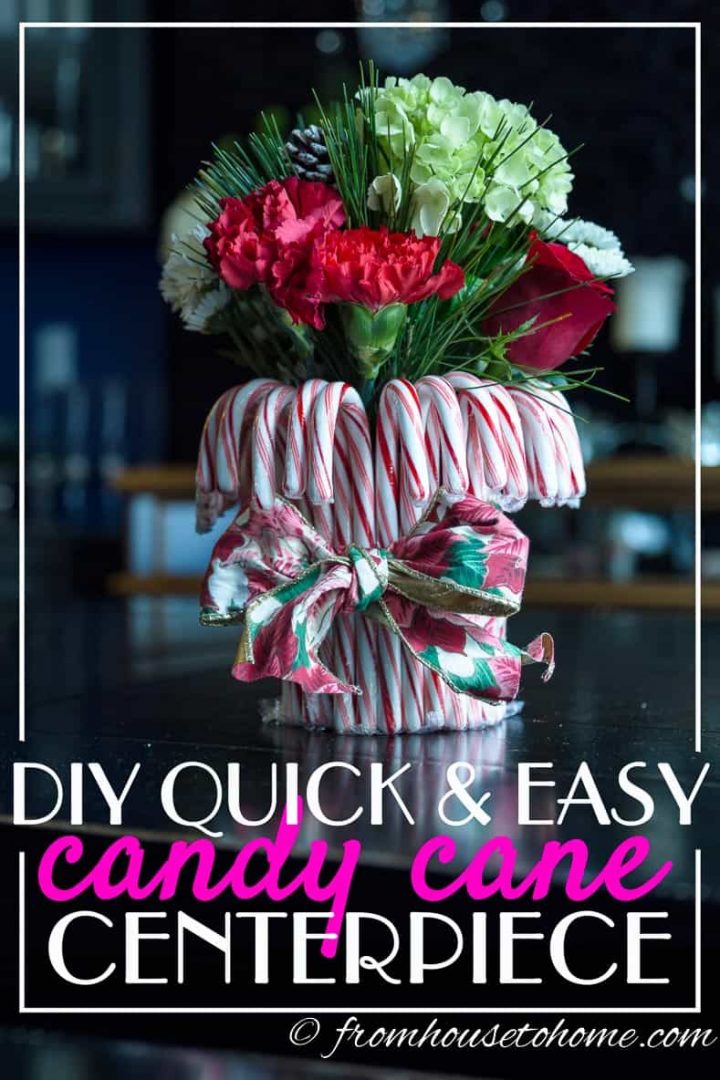
Red and White Candy Cane Christmas Centerpiece
This post may contain affiliate links. We make a small commission if you buy the products from these links (at no extra cost to you). As an Amazon Associate, I earn from qualifying purchases. But we only recommend products we would use ourselves. For more information, click here to see our disclosures
I don’t know about you, but I always seem to be looking for table centerpieces that are easy, inexpensive and small enough that people can see each other across the table.
And my Christmas table this year was no different…
Then I saw this red and white Christmas centerpiece on decoholic.com that was perfect. It’s simple, easy and inexpensive, but still looks elegant and feels “Christmas-y”.
So I set out to figure out how to make something similar…click next to find out what I came up with.
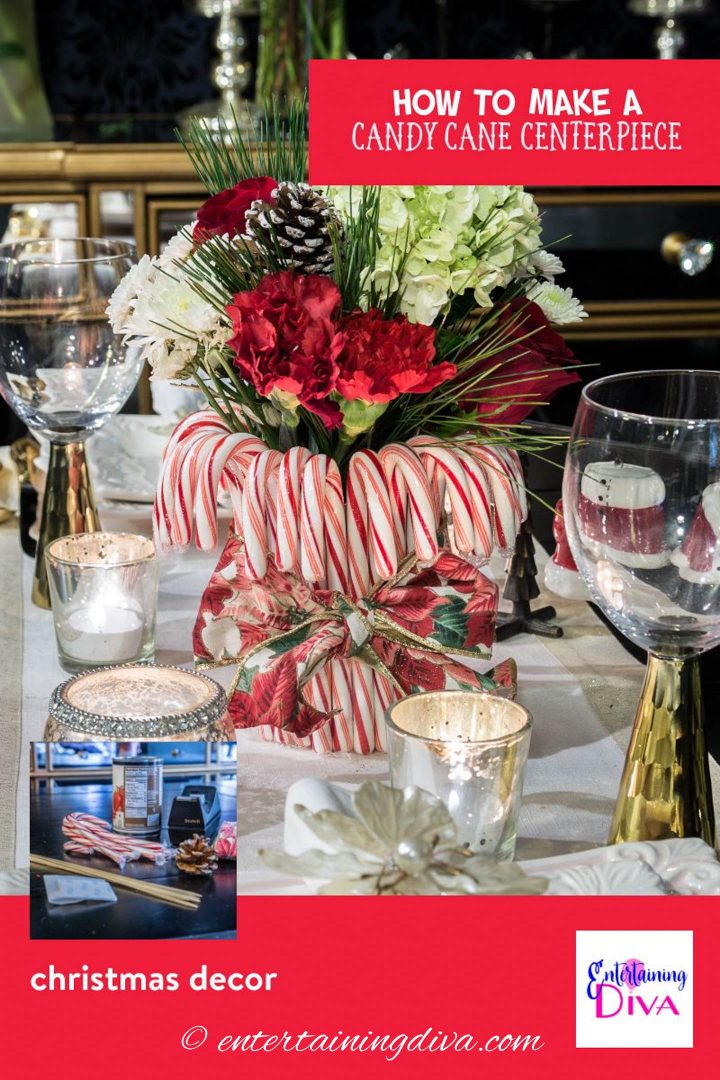
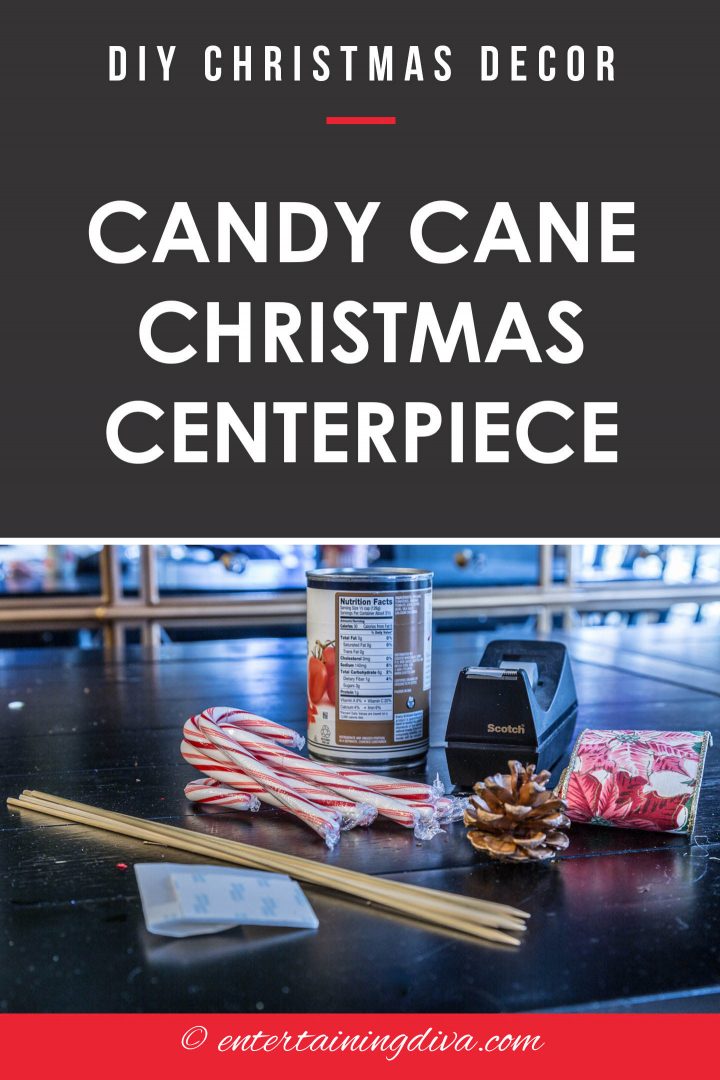
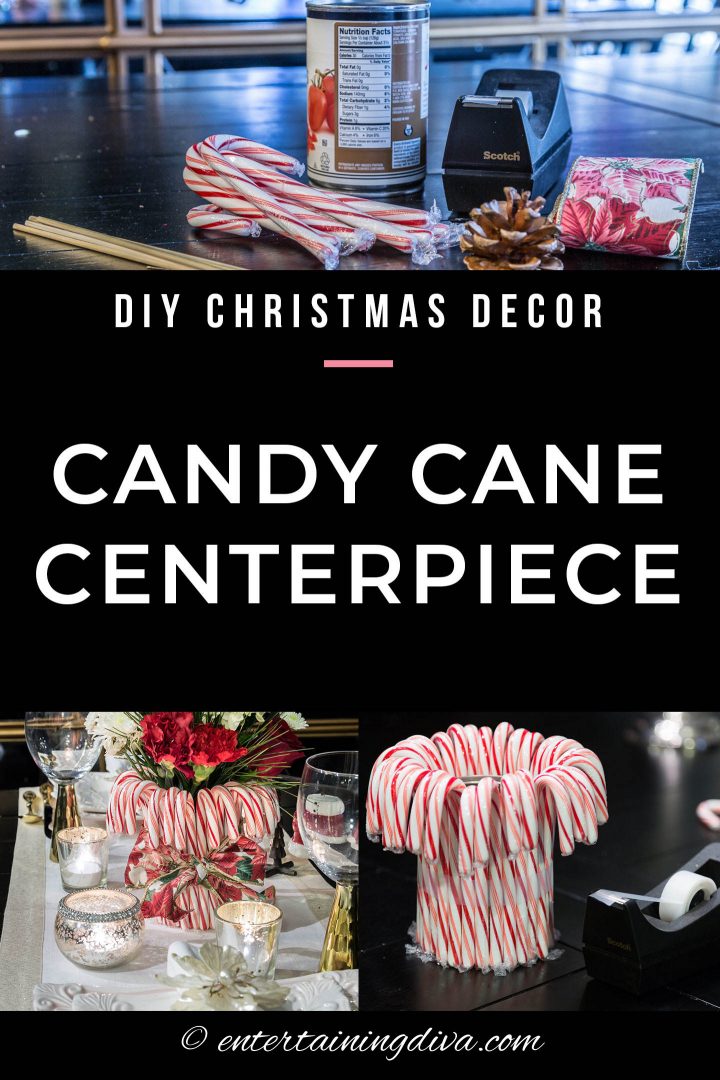
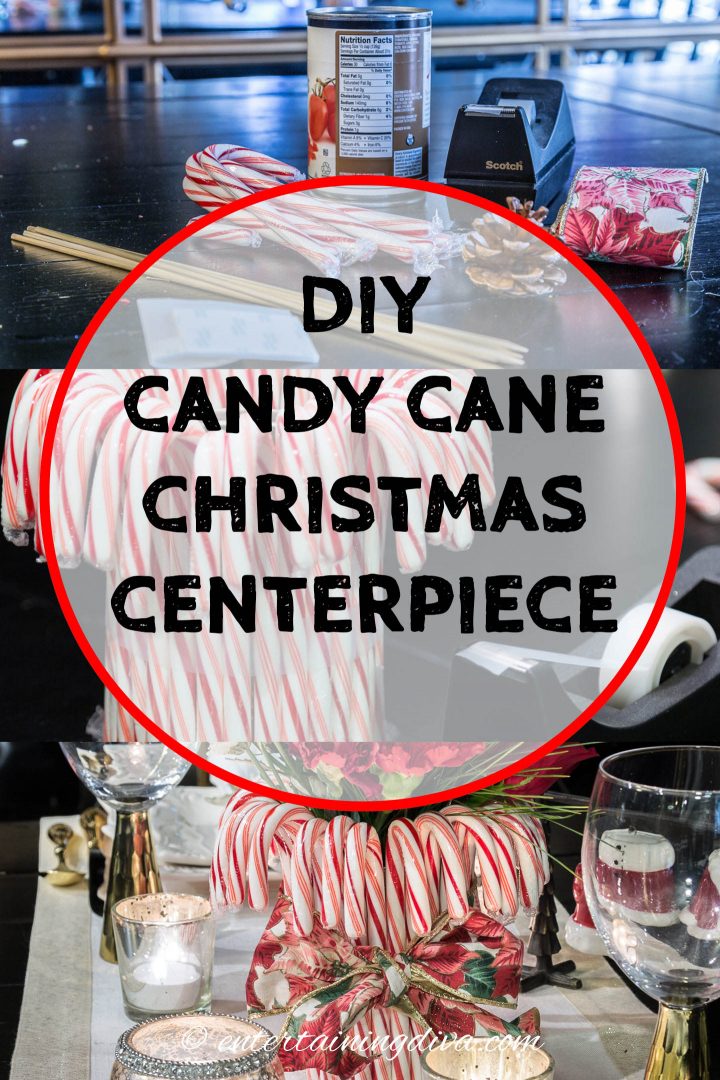
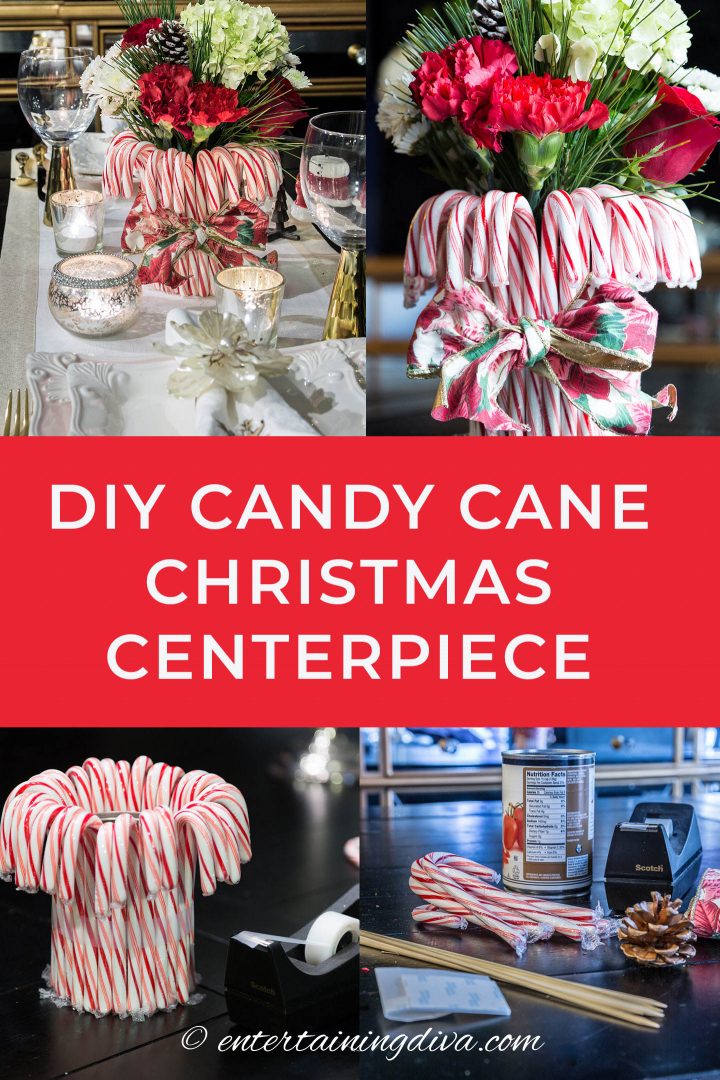
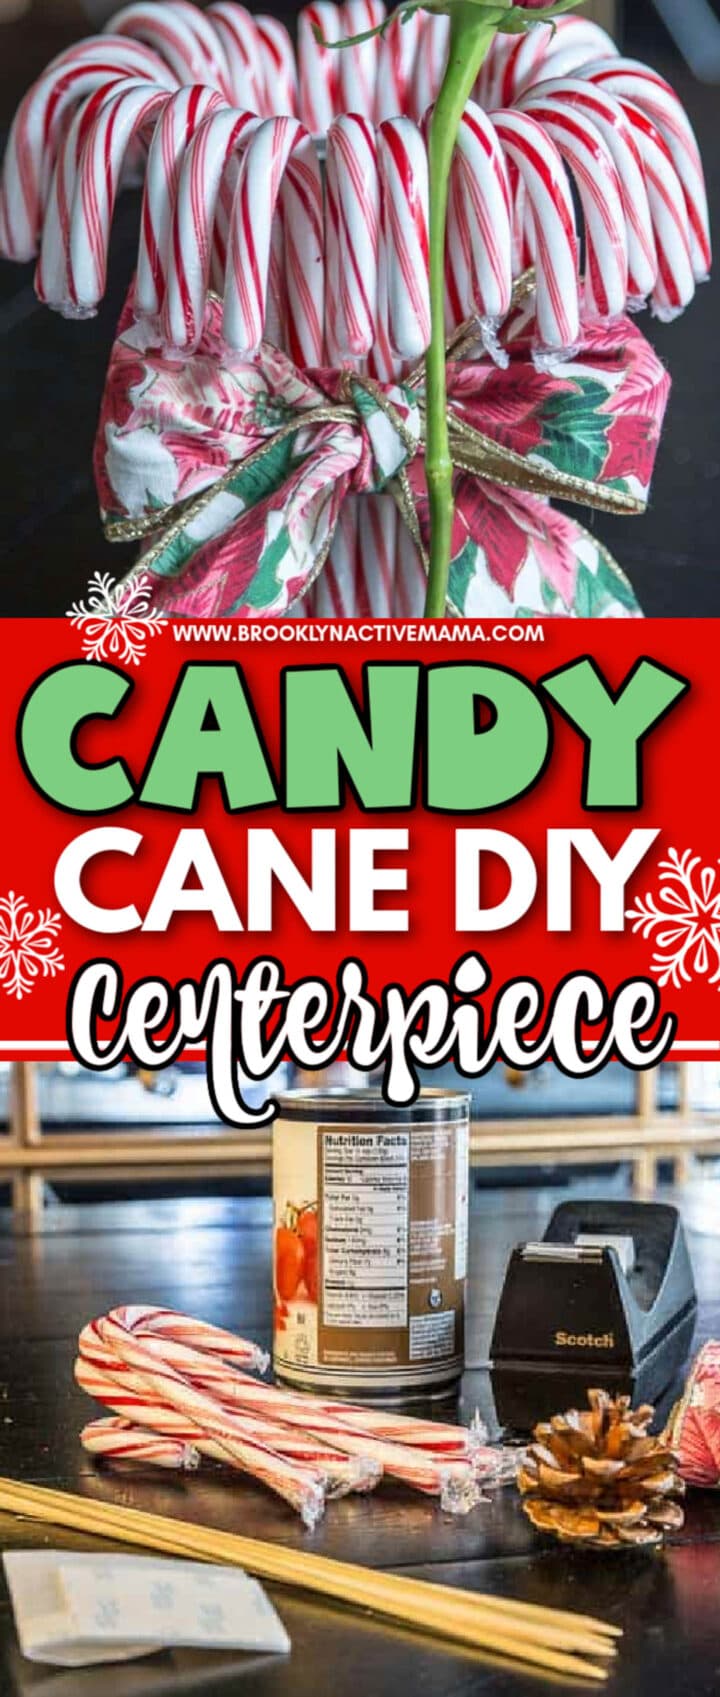
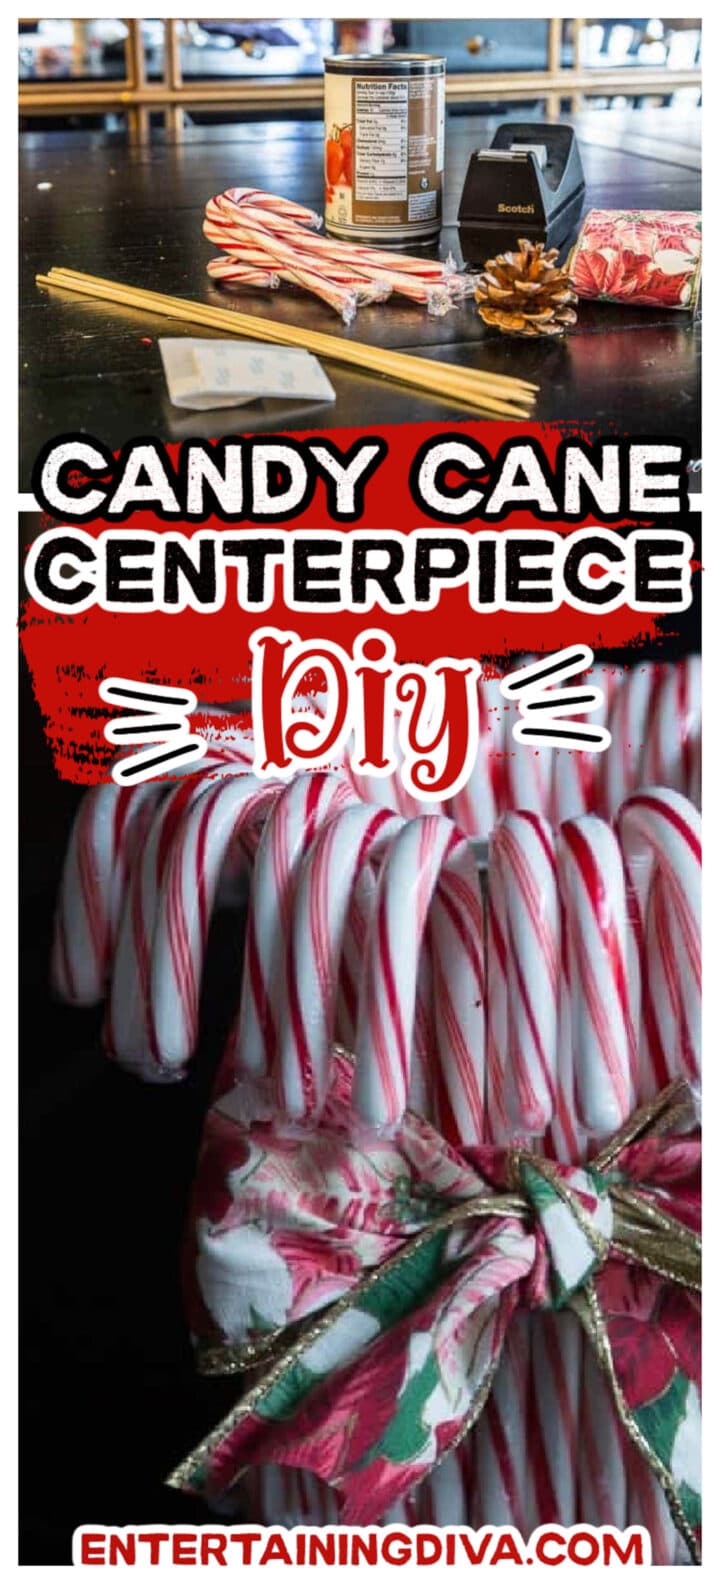
Supplies
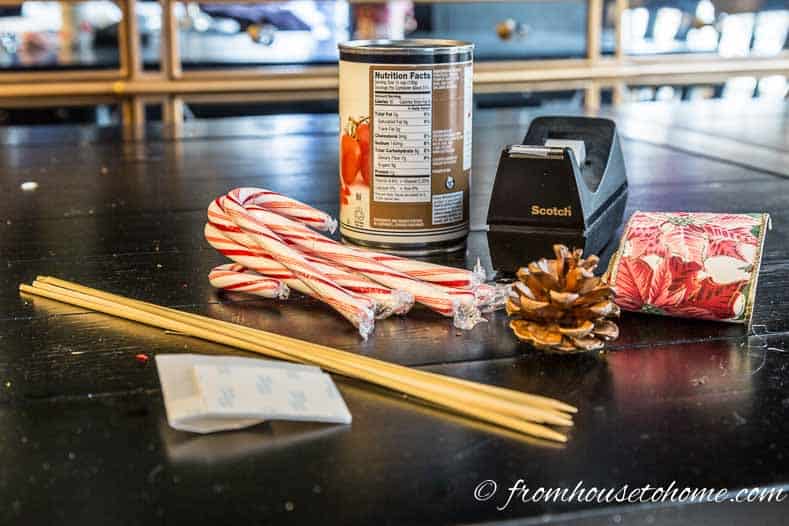
Materials
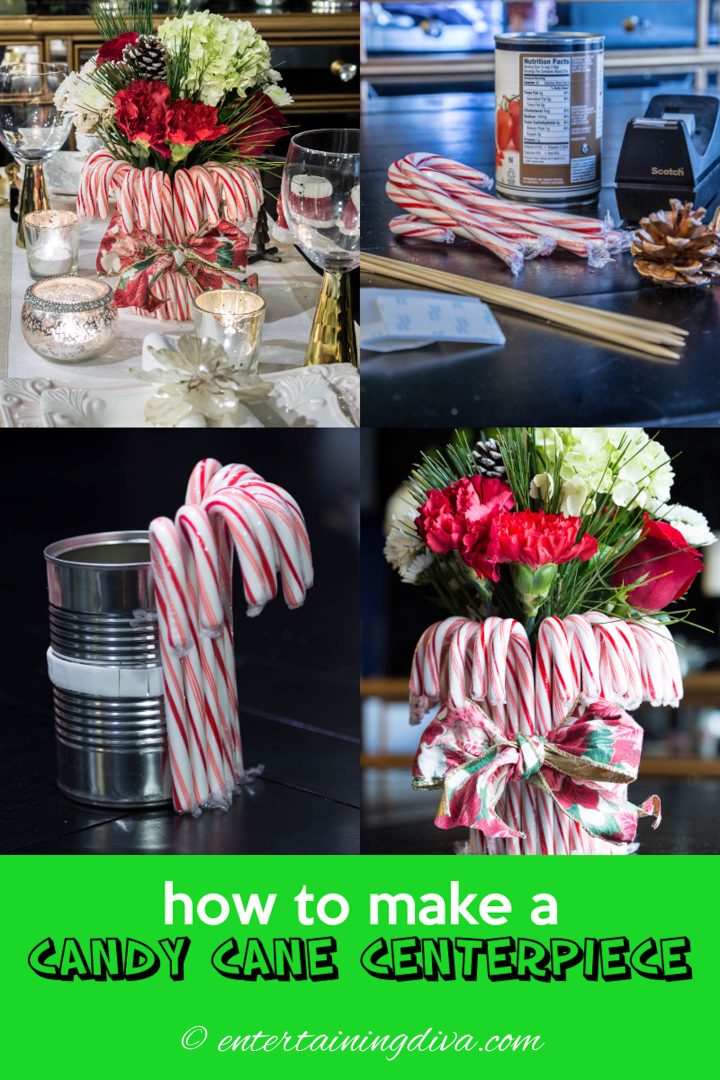
- Tin can or mason jar
- Double-sided tape*
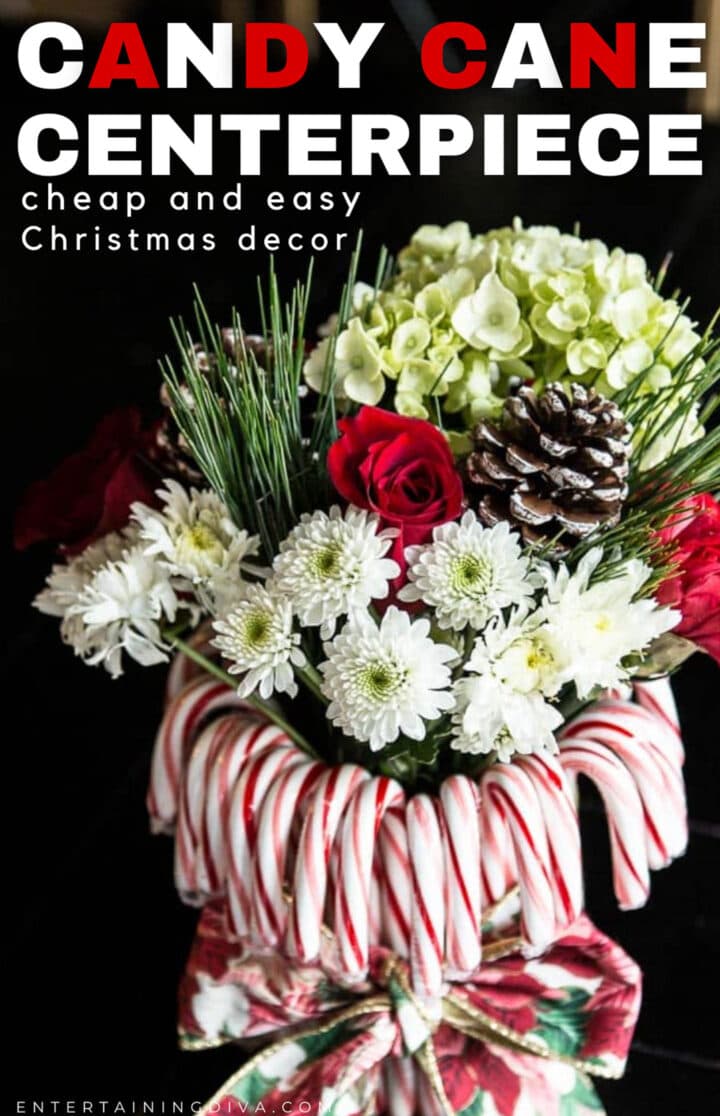
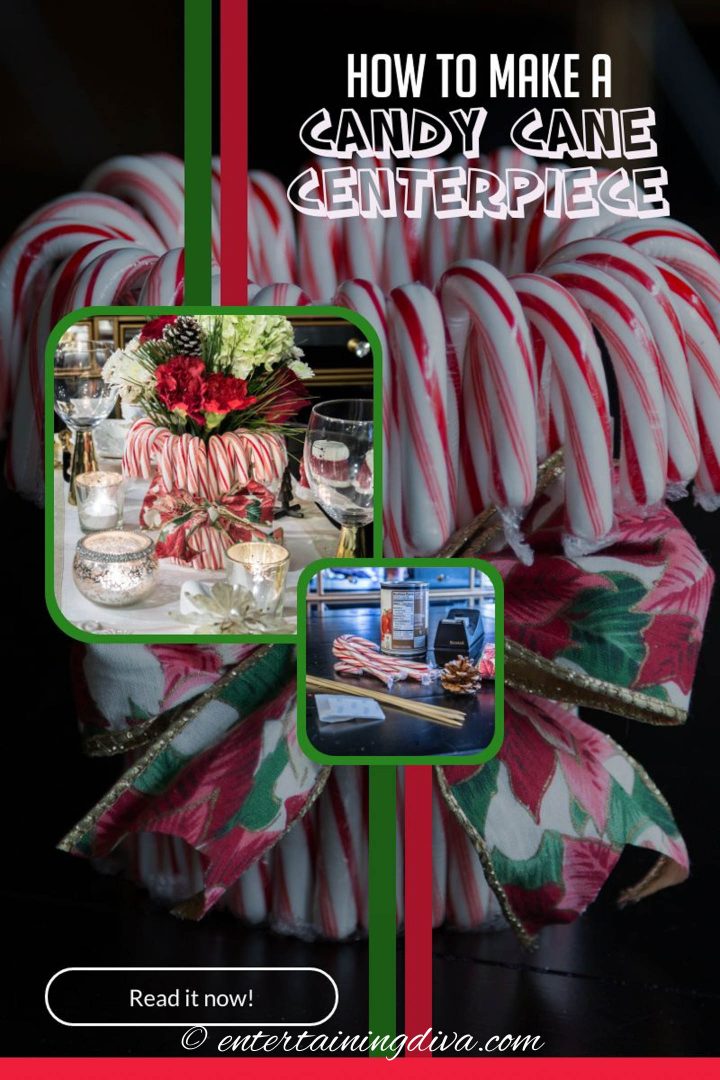
- 30 full size Candy Canes*
- Scotch Tape
- Red and White Ribbon
- Velcro Dots* (optional)
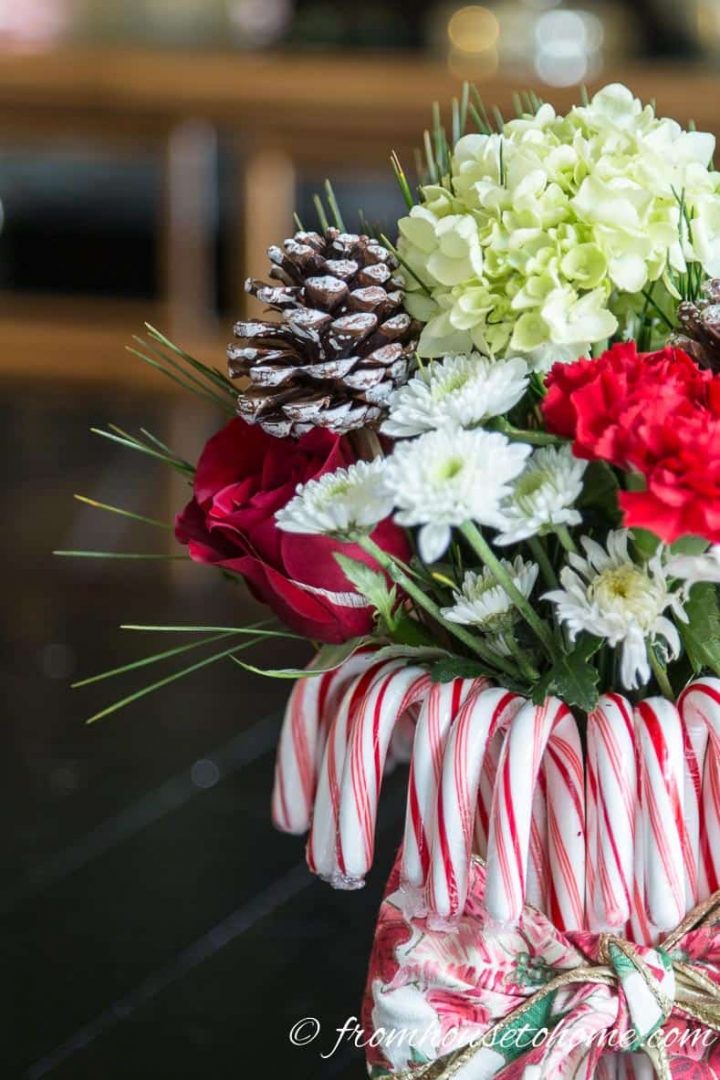
- 3 or 4 Pine Cones
- 3 or 4 Wood Skewer Sticks*
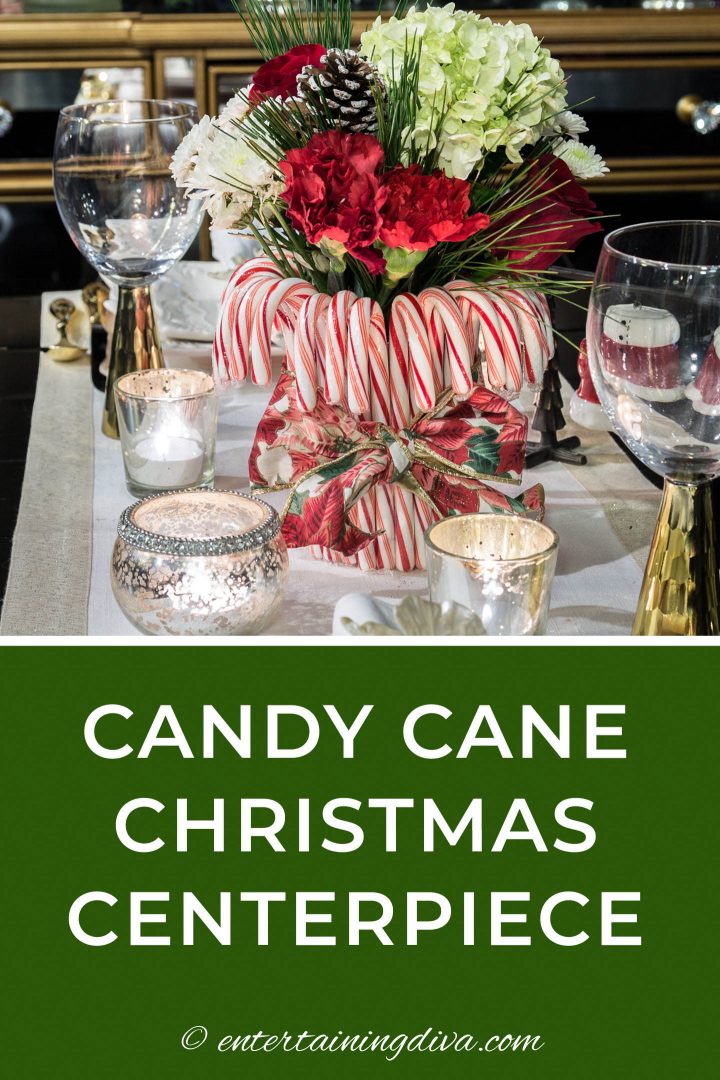
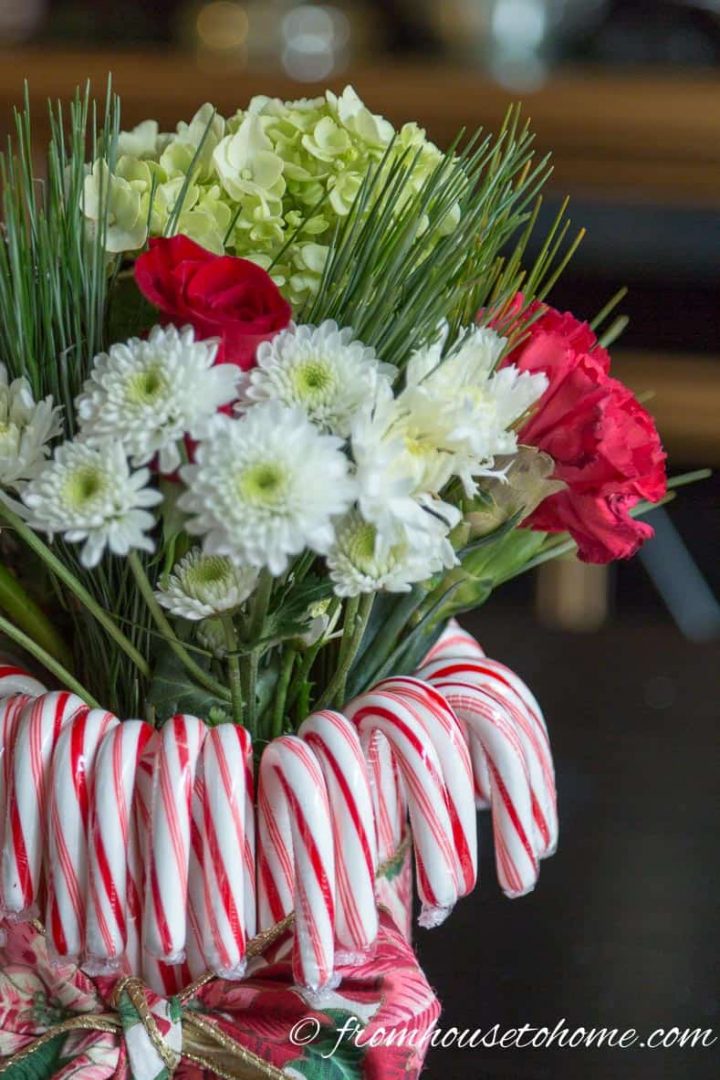
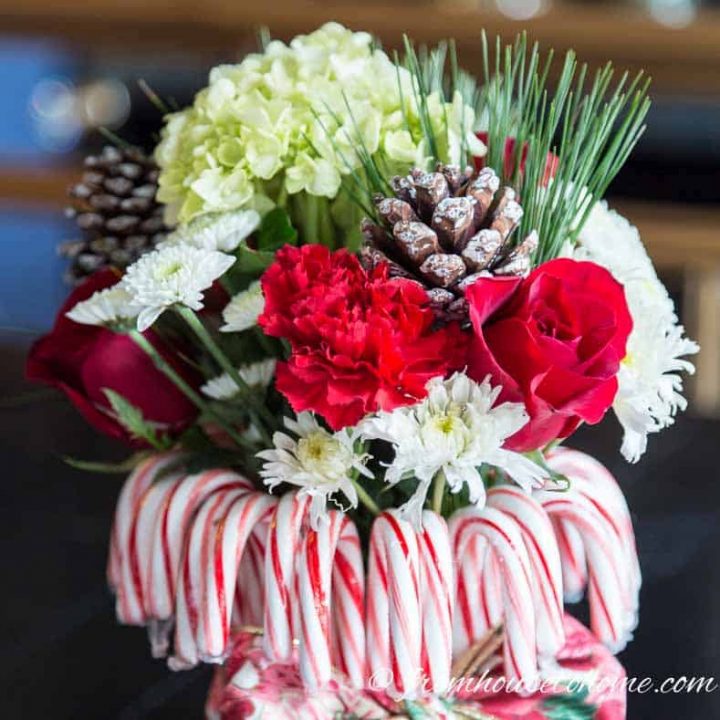
- Red and/or White Flowers. I used a hydrangea, red carnations, white mums, and red roses…basically what came in the bouquet from the grocery store. Of course, you could also do all roses like the original version did.
- Evergreen Stems
Tools
- cordless drill (optional)
- small drill bit (optional)
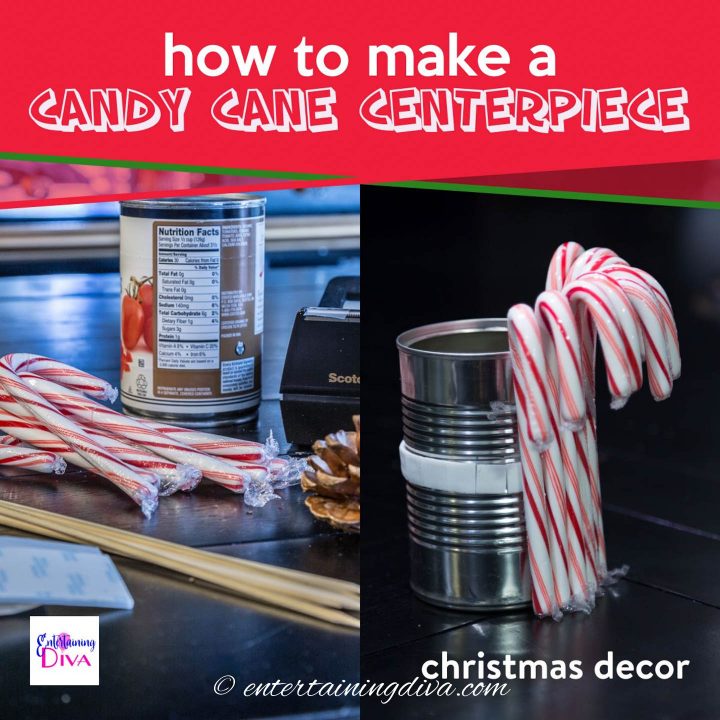
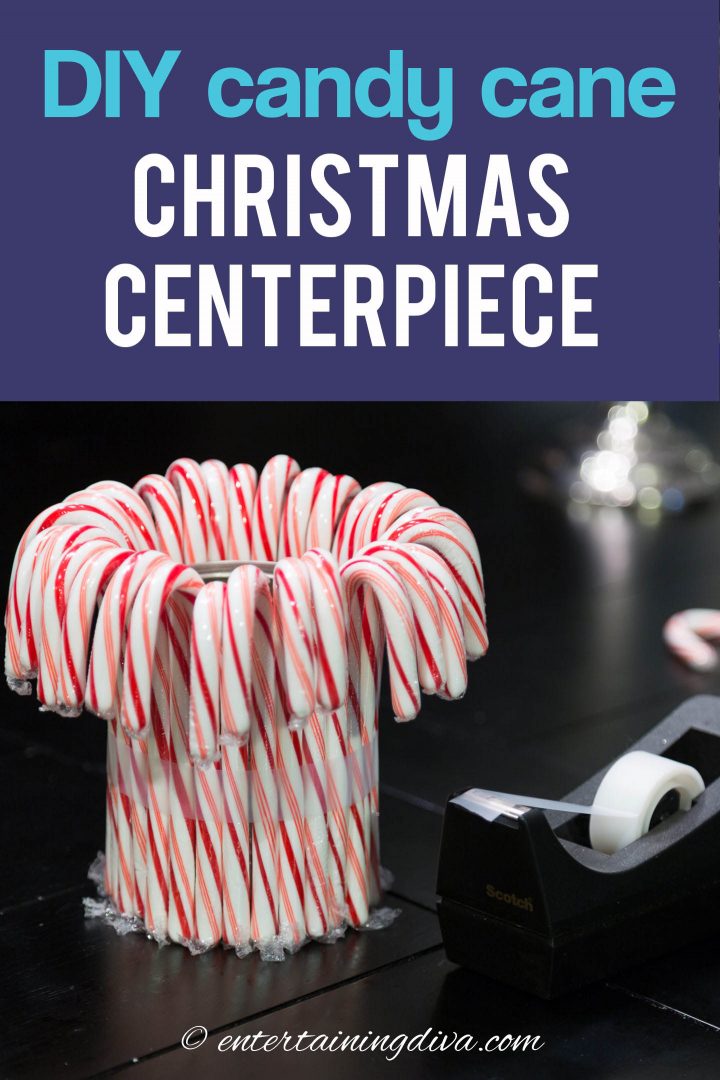
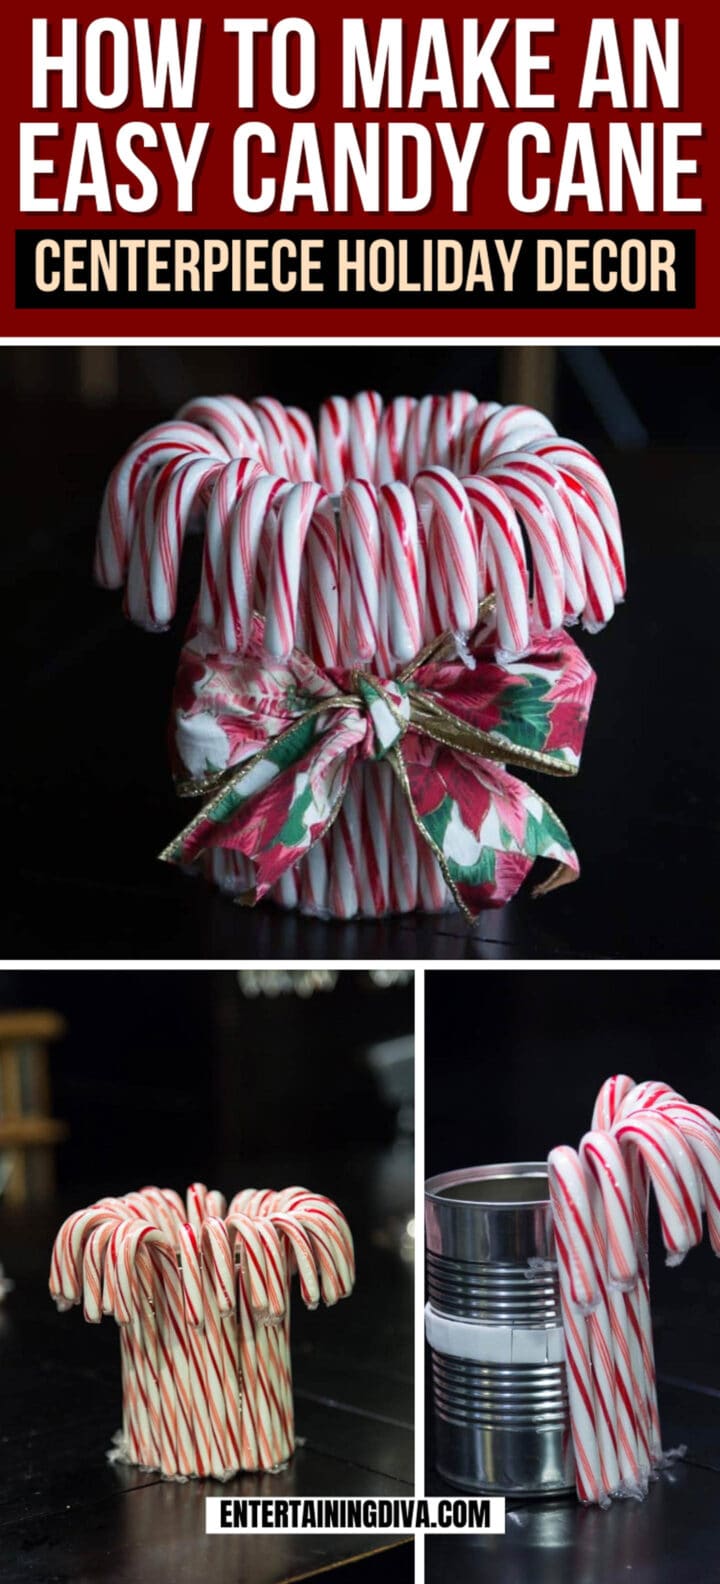
Prepare The Tin Can or Mason Jar
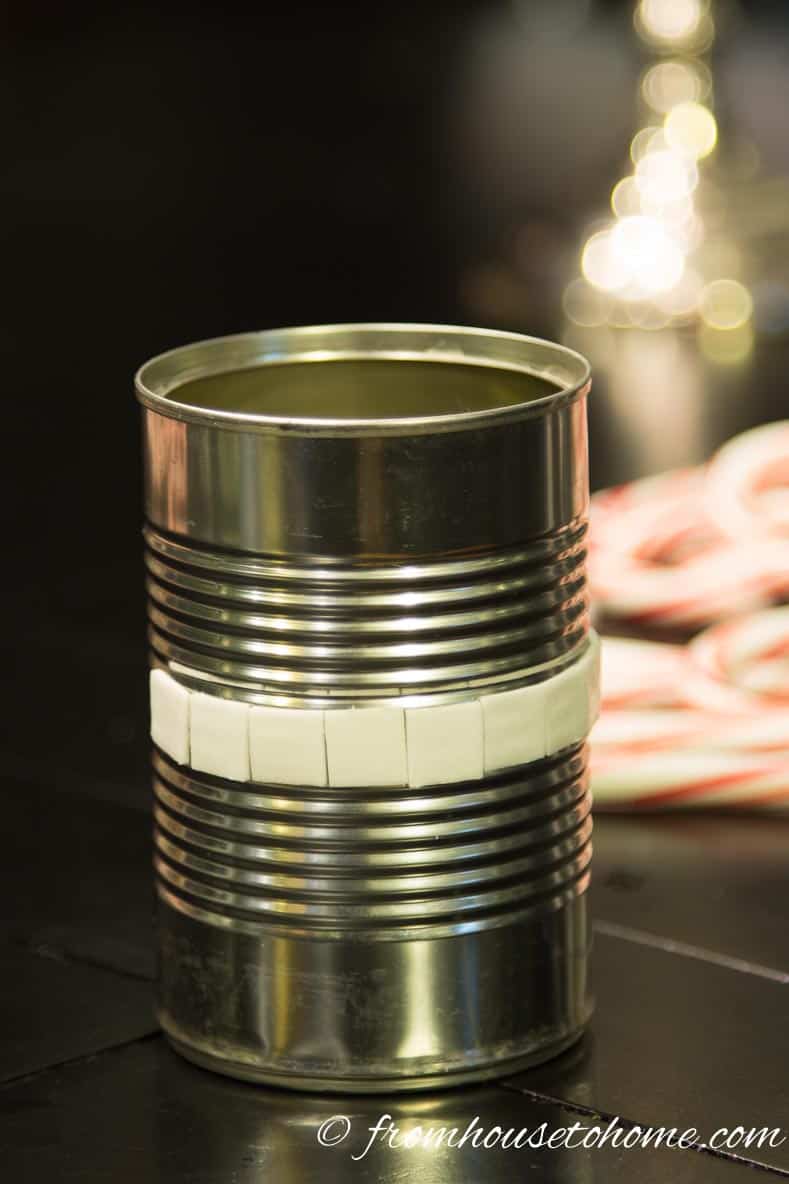
If your can (or mason jar) has a label, remove it and make sure the container is clean.
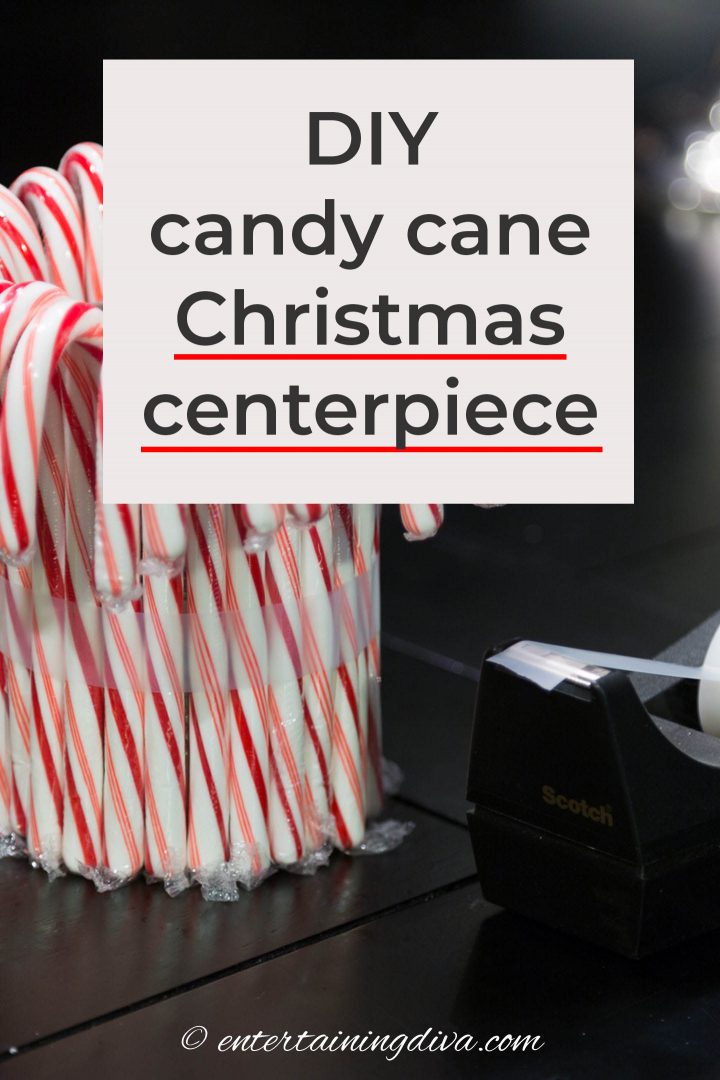
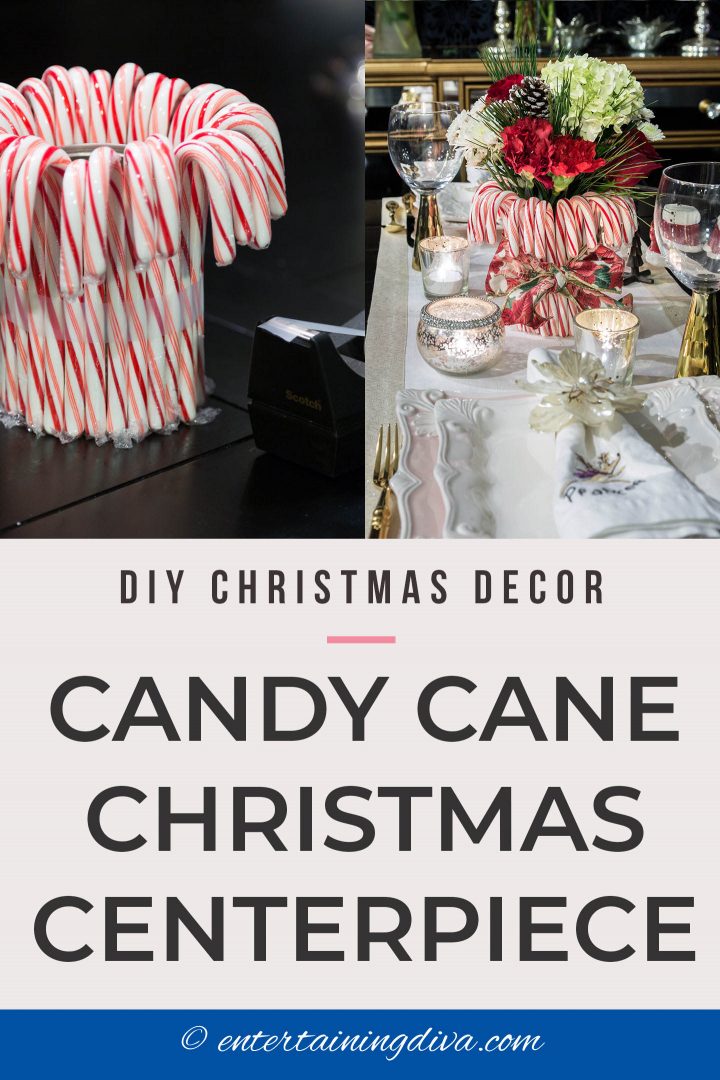
Wind the double-sided tape around the middle of the can or jar. I had mounting tabs on hand, so that’s what I used…but regular double-sided tape would be a little faster. Just make sure to get the thick white type…double-sided scotch tape won’t work. It doesn’t stick out past the lip of the tin so the candy canes won’t stick to it.
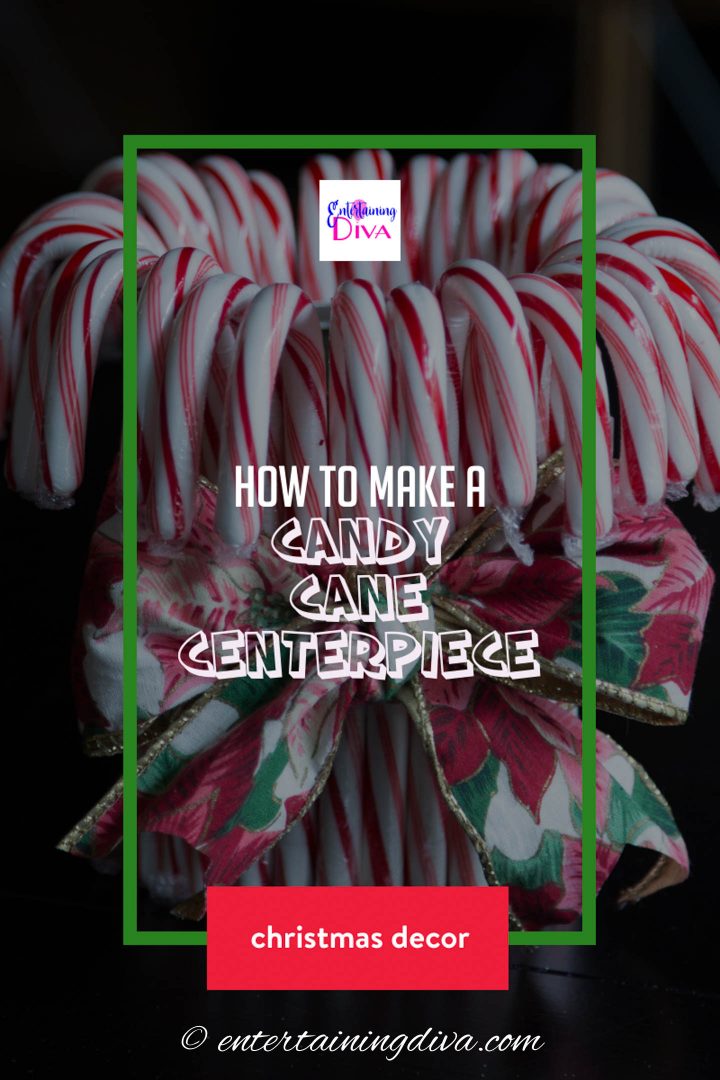
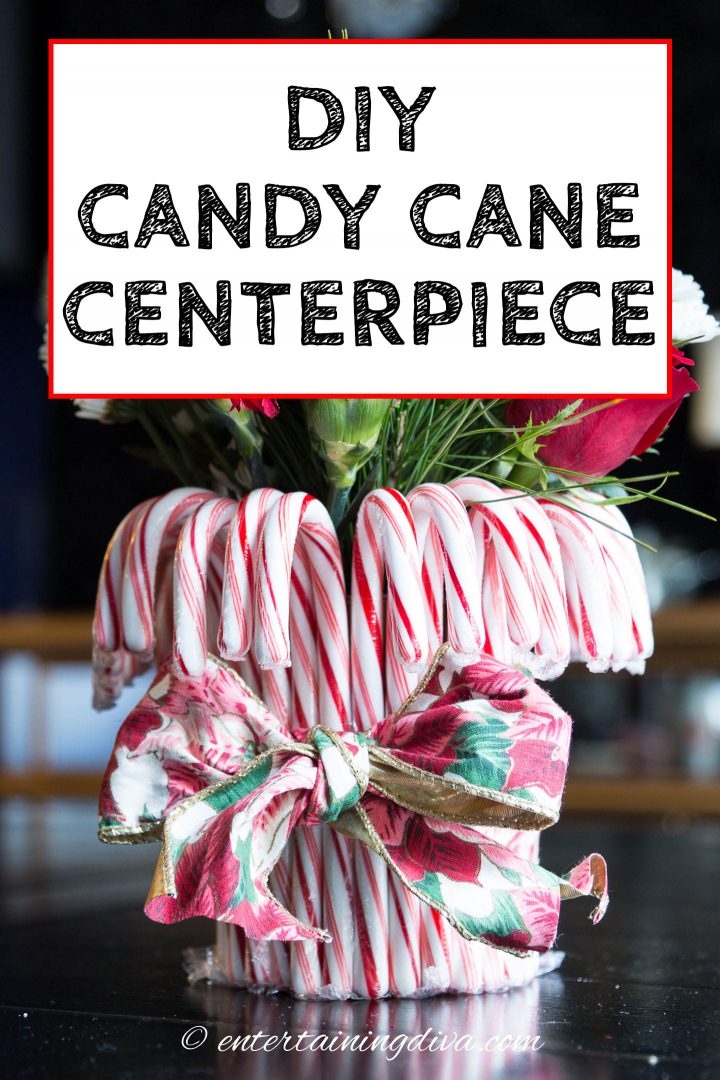
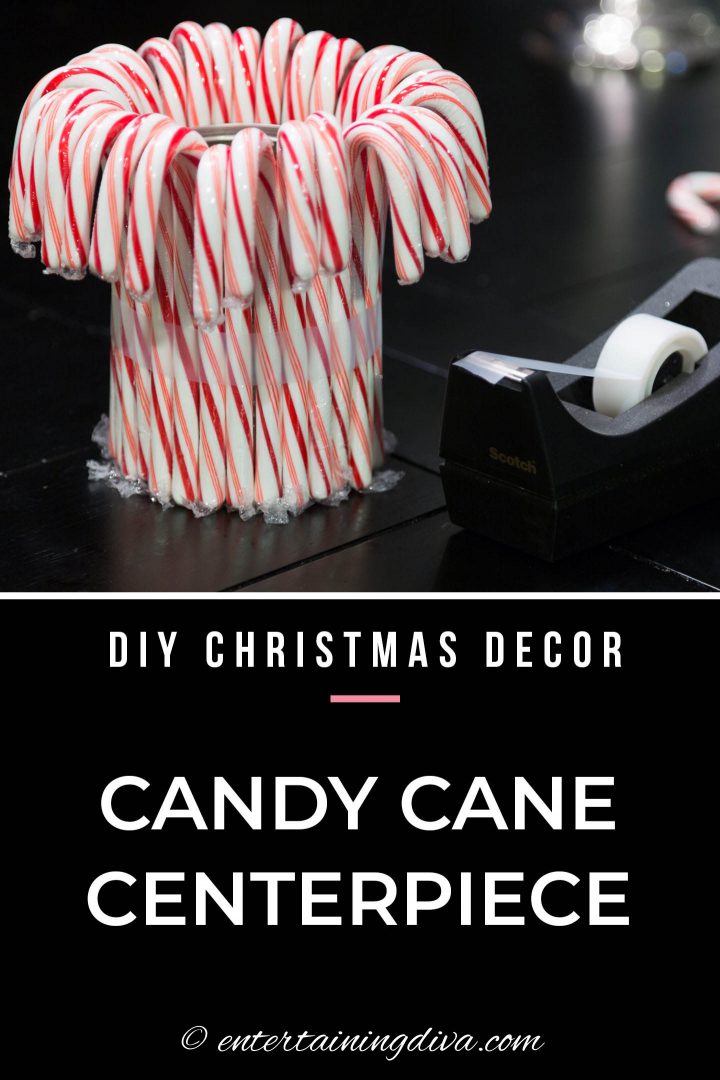
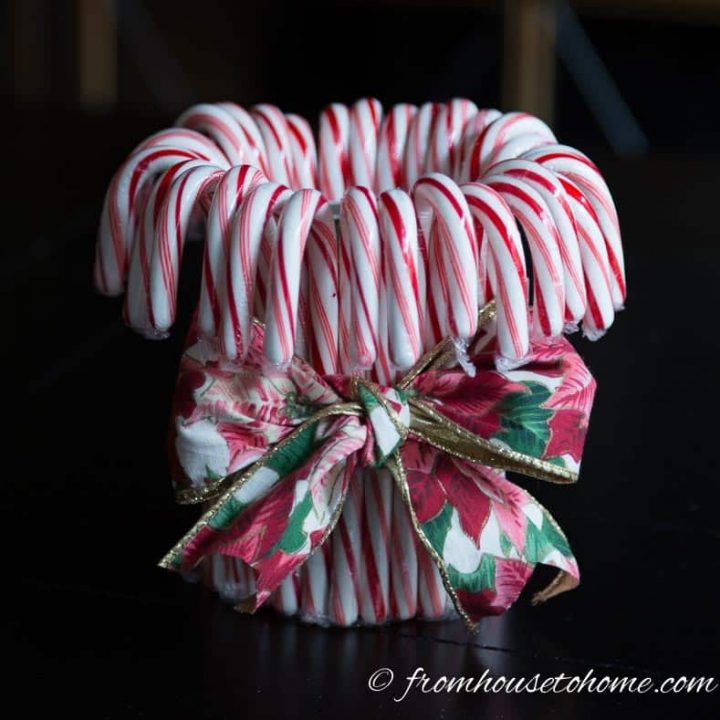
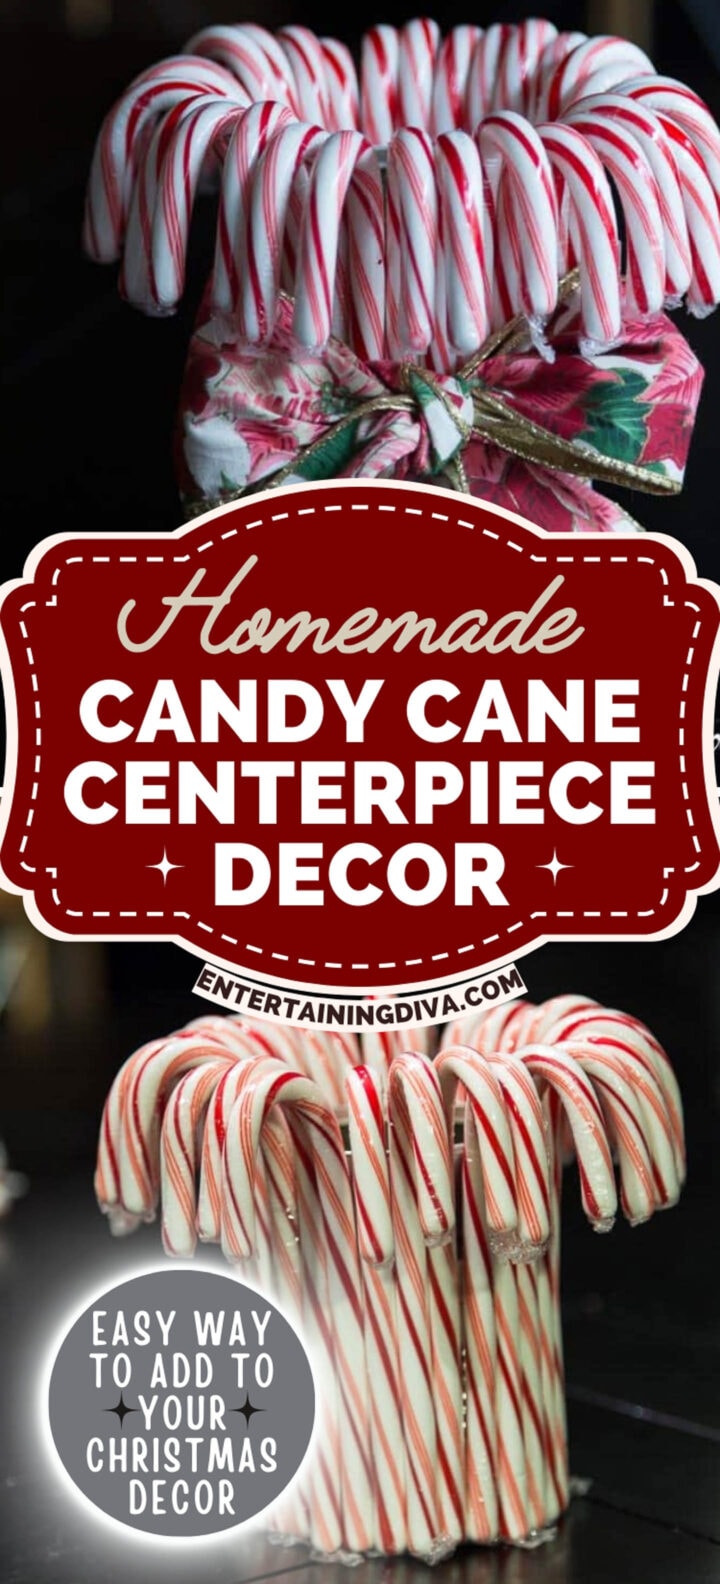
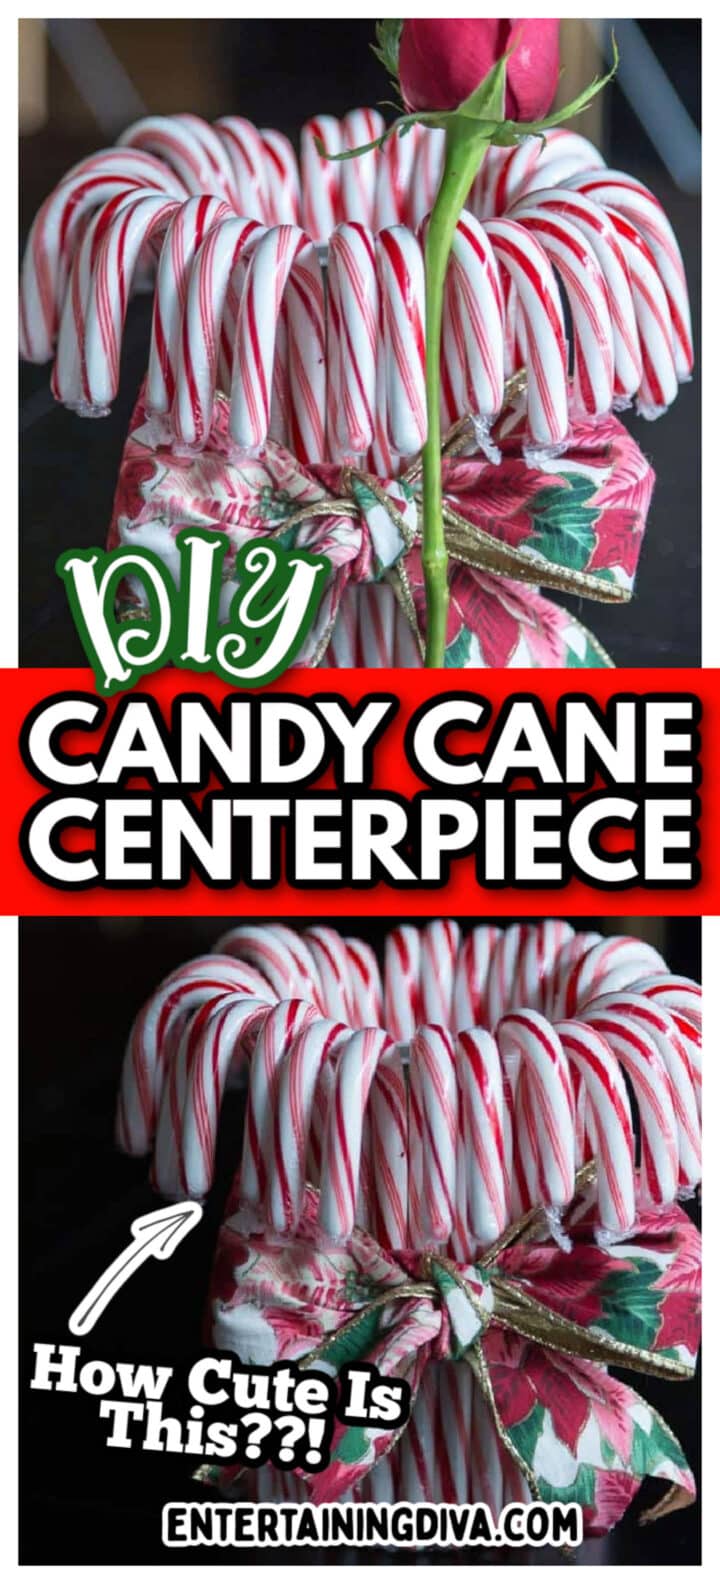
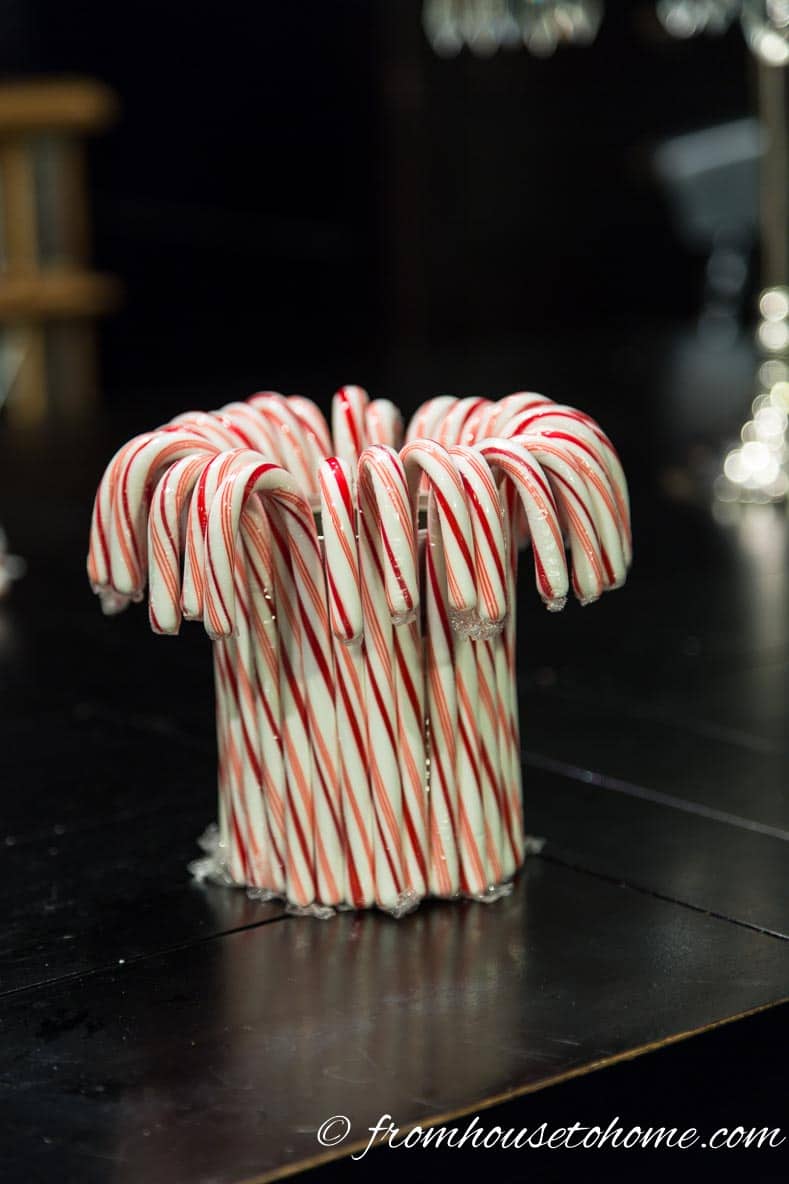
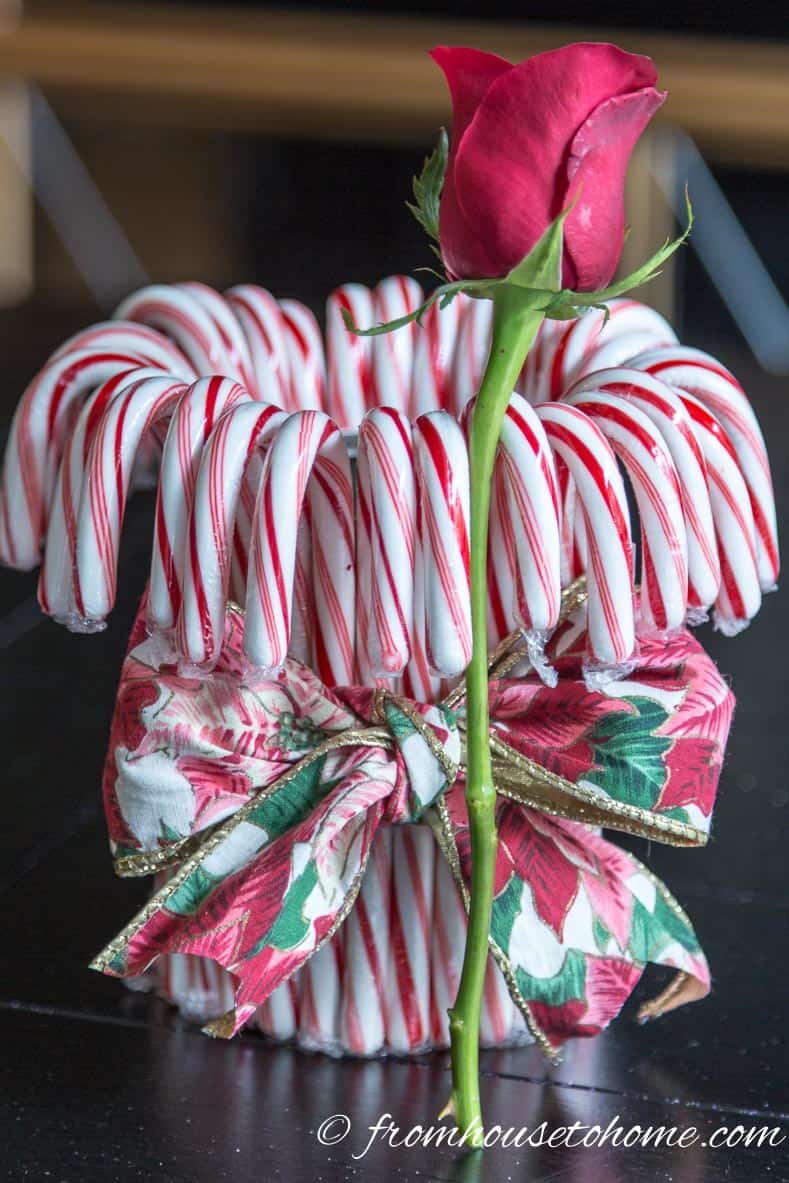
Add The Candy Canes And Ribbon
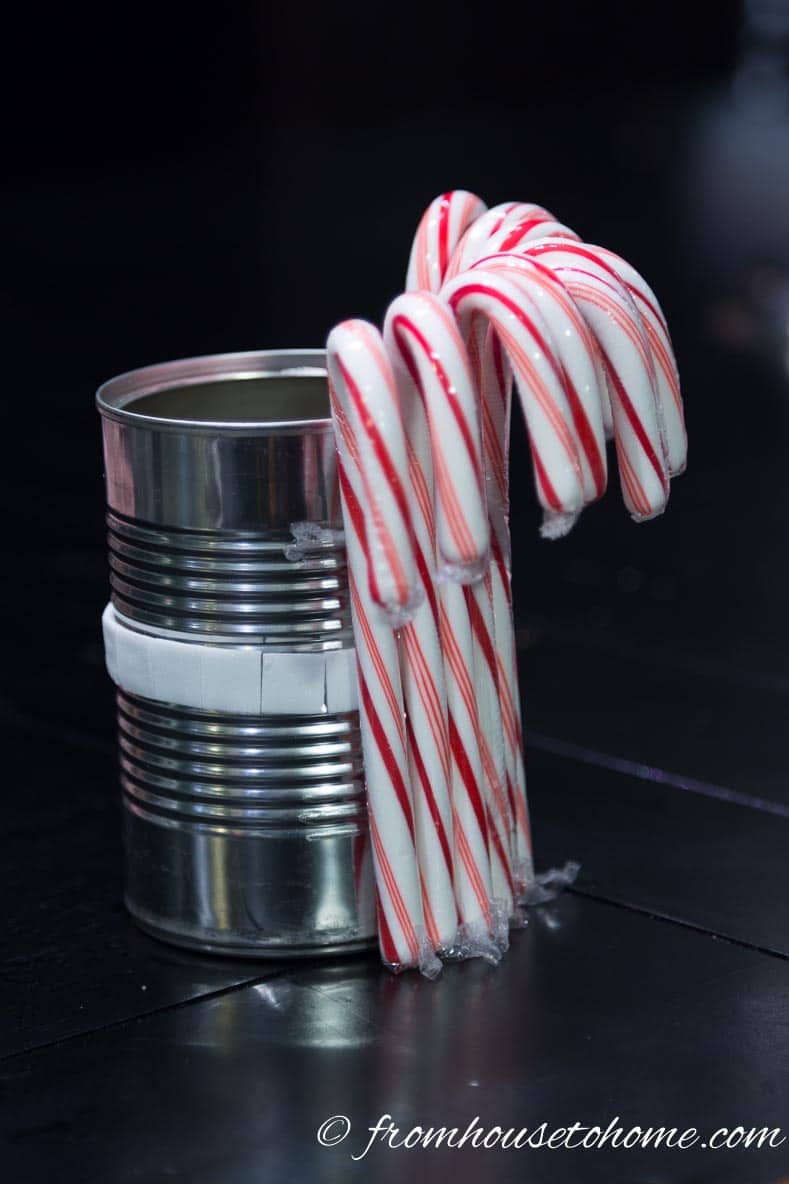
1. Stick the first candy cane to the double-sided tape, making sure that it is straight. If this one isn’t straight, none of the rest of them will be either 🙂
2. Keep adding candy canes around the can. They do come off pretty easily so you may need to re-attach some of them as you go.
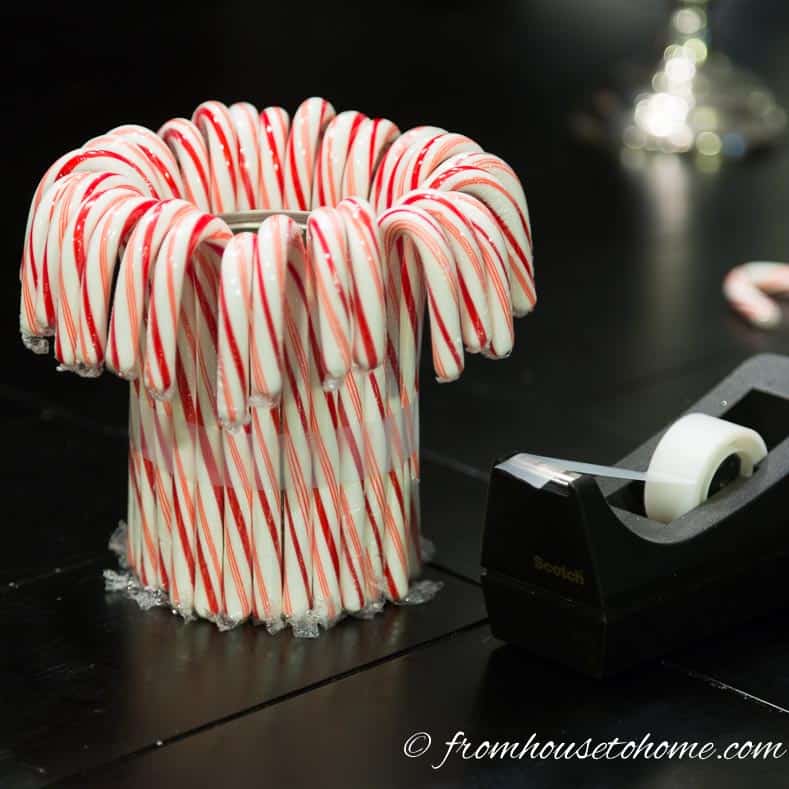
3. When you are finished, wrap scotch tape around the candy canes to hold them in place.

4. Wrap the ribbon around the outside of the candy canes so that it hides the tape. Depending on the type of ribbon you are using, you may or may not want to tie a bow. If you don’t want to do a bow, you can use velcro dots to hold the ends of the ribbon together (like I did when I was wrapping ribbon around these mason jar candle holders).
Make The Pine Cone Sticks
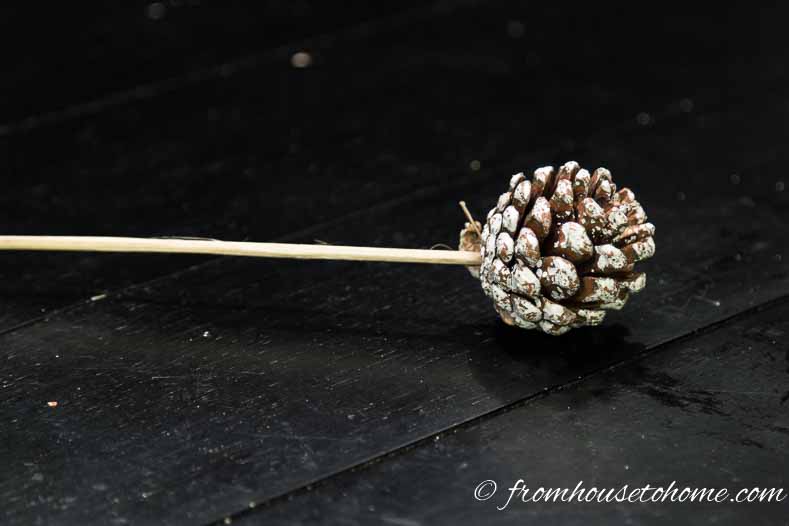
1. Stick the sharp end of the skewer into the bottom of the pine cone. You may need to drill a small hole if the skewer isn’t strong enough to stick into the pine cone (especially if you are using artificial ones).
2. Break the skewer so it is just a little longer than the height of the tin can.
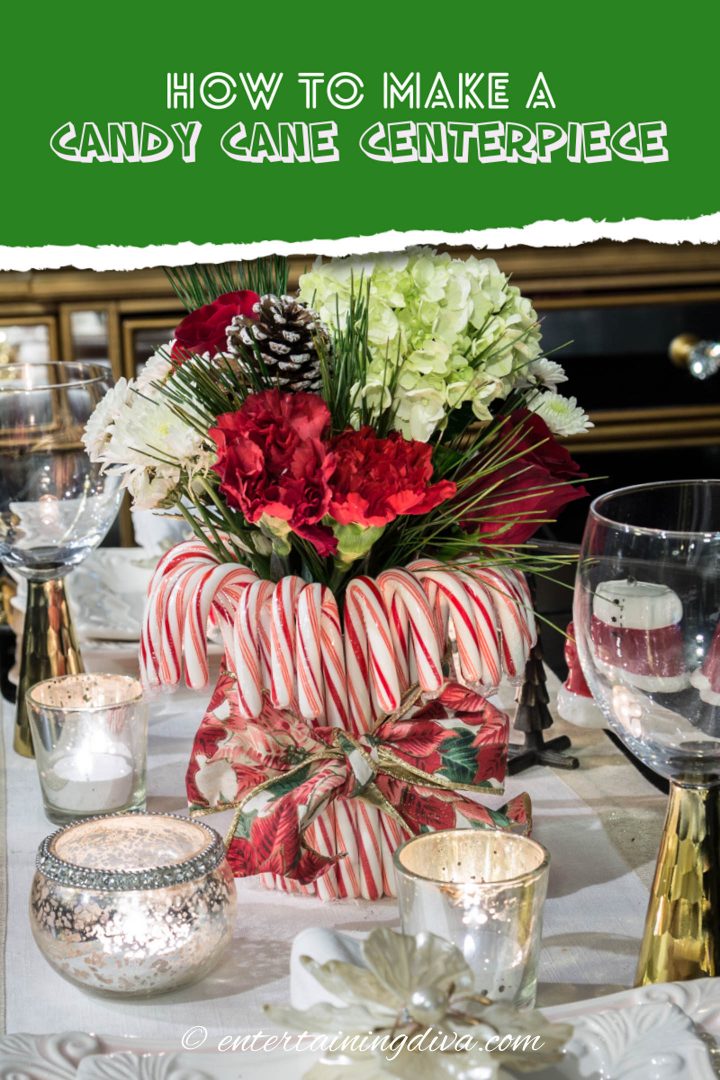
Add The Flowers
1. Fill the can with water.
2. Cut the flower stems so the flowers are just taller than the height of the can.
3. Remove most or all of the leaves from the stem. When you have a small container like this, the leaves tend to get in the way.
3. Cut the evergreen stems so that they are about the same height as the flowers.

3. Add the flowers to the tin.
4. Fill in the gaps between the roses with the greens.

5. Add the pine cones.
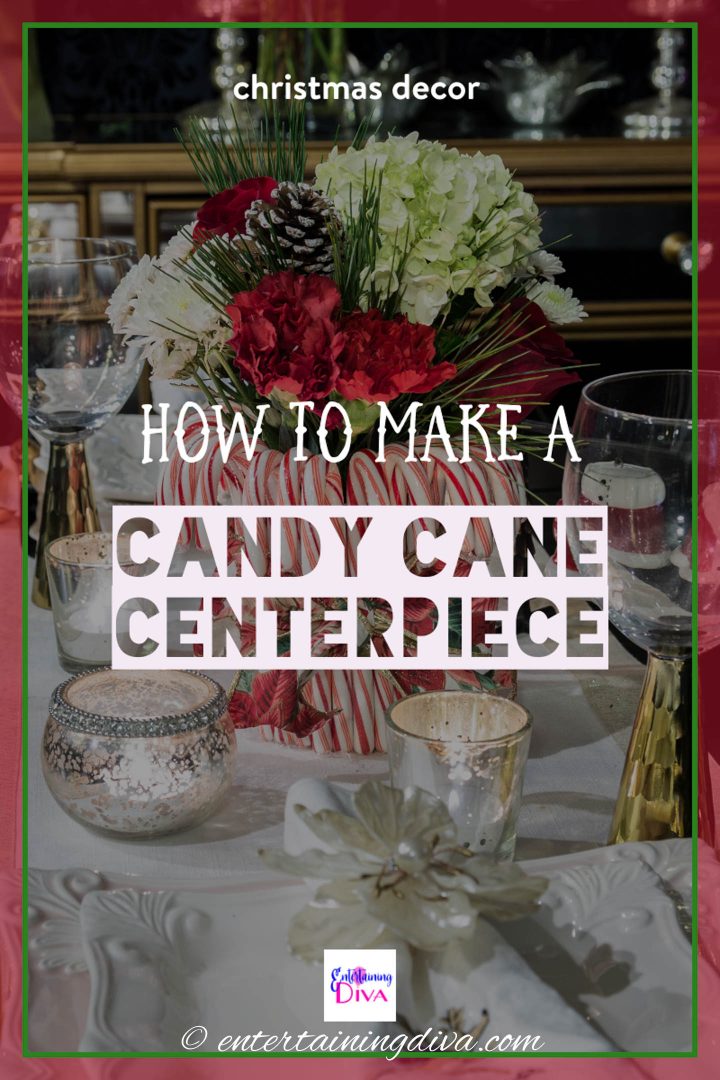
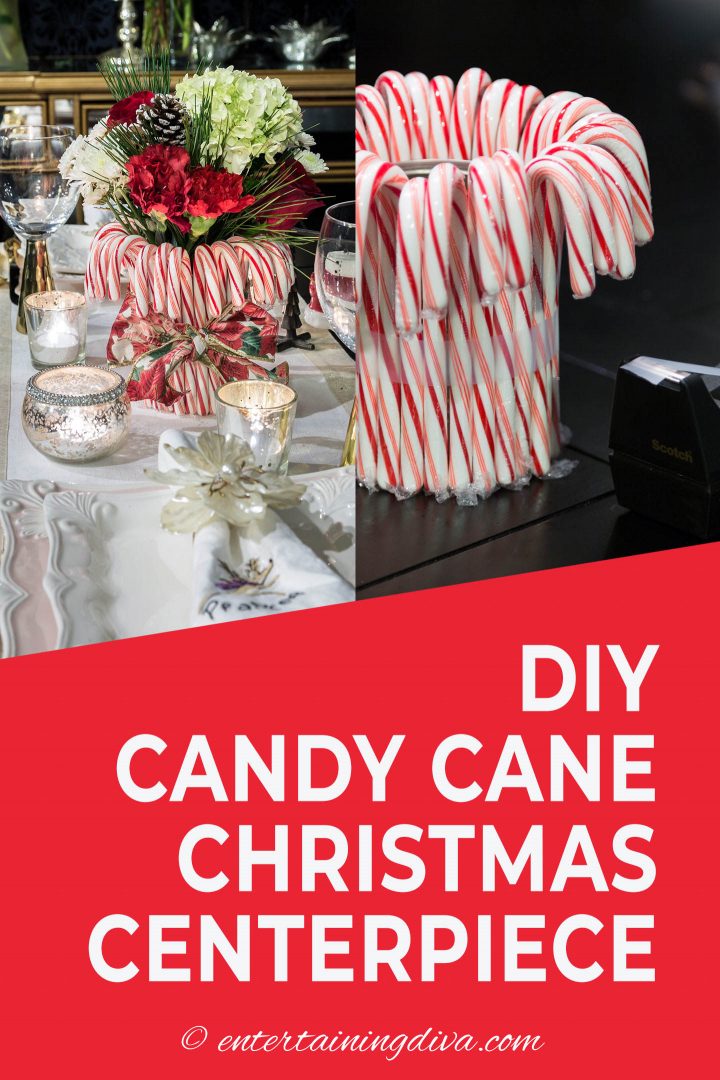
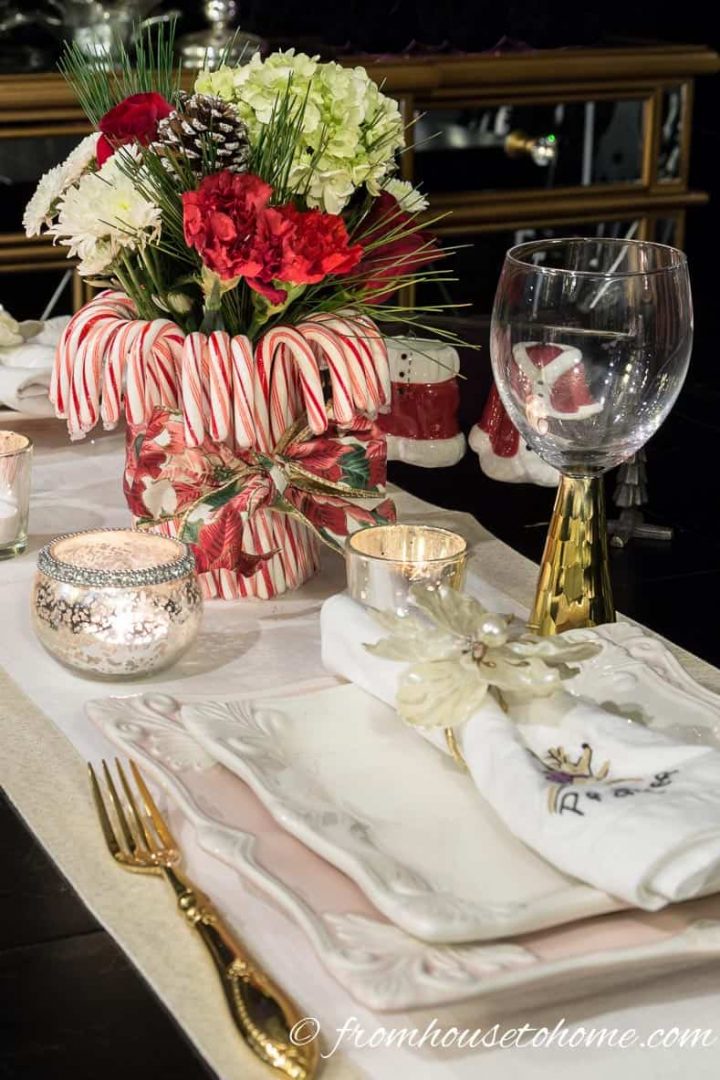
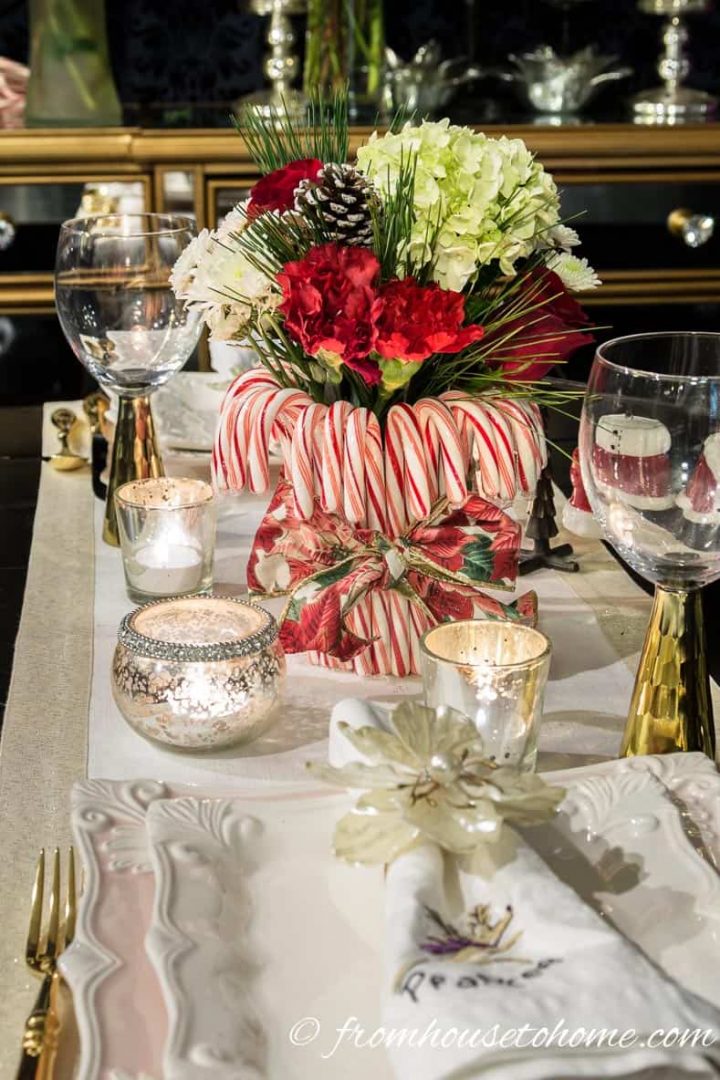
The Finished Red and White Christmas Centerpiece
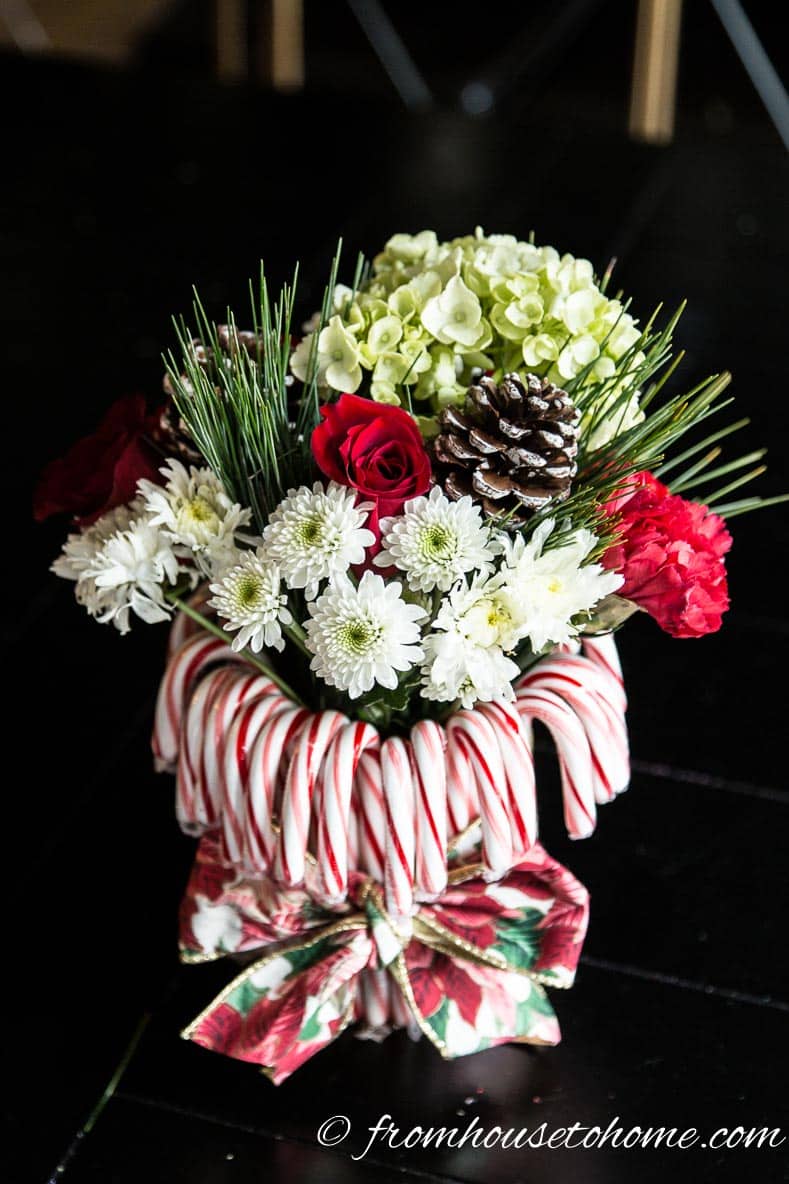
The finished centerpiece is very festive looking and doesn’t take long to make!

It looks great on my table.
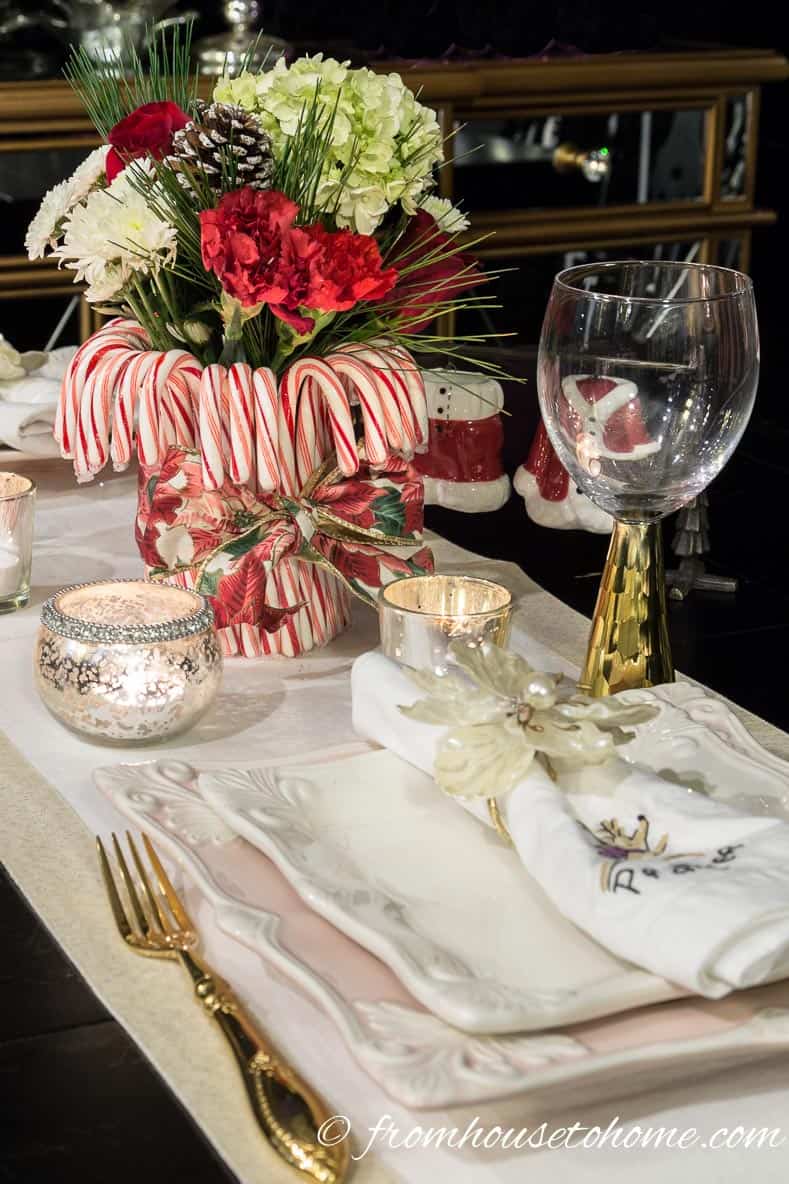
It doesn’t take up too much room, but still makes a statement.
It would make a really pretty hostess gift, too…

Have comments or questions about our quick and easy red and white Christmas centerpiece? Tell us in the section below.
This post was originally published on December 20, 2016 but was updated with new content on December 16, 2023.
I love this yummy looking centerpiece. Happy holidays!
Thanks, Ivory! Hopefully I’ll be able to keep the candy canes from being eaten until after Christmas 🙂
This is adorable and elegant at the same time, Wanda!
Thanks, Cyndi! Now if I can just keep the candy canes from disappearing… 🙂
Do you keep the cellaphane on the candy canes and do you spray the finished project with a clear adhesive to keep the canes from getting sticky or eventually melting?
Hi Elaine…I left the cellophane on and the candy canes are still fine (I’ve had it for a few years now). If you didn’t want to leave the cellophane, then I think you would need to coat them with urethane.
I love this and plan to make it for my Christmas dinner party table. I’m curious about what size the can is. Is it a 15 oz. or a 28 oz.can?
Hi Barb…I used a 15-ounce can. But if you want it to be bigger, a 28 ounce can would work, too. You would just need more candy canes (and make sure they are tall enough to cover the can).
I’m so glad I found your instructions. I was getting very frustrated trying to attach the candy canes to my glass container with a glue gun. The double sided tape will make this so much easier to do. Thanks for sharing how you made yours. Merry Christmas!
I’m glad you found it helpful, Virginia! Merry Christmas!