
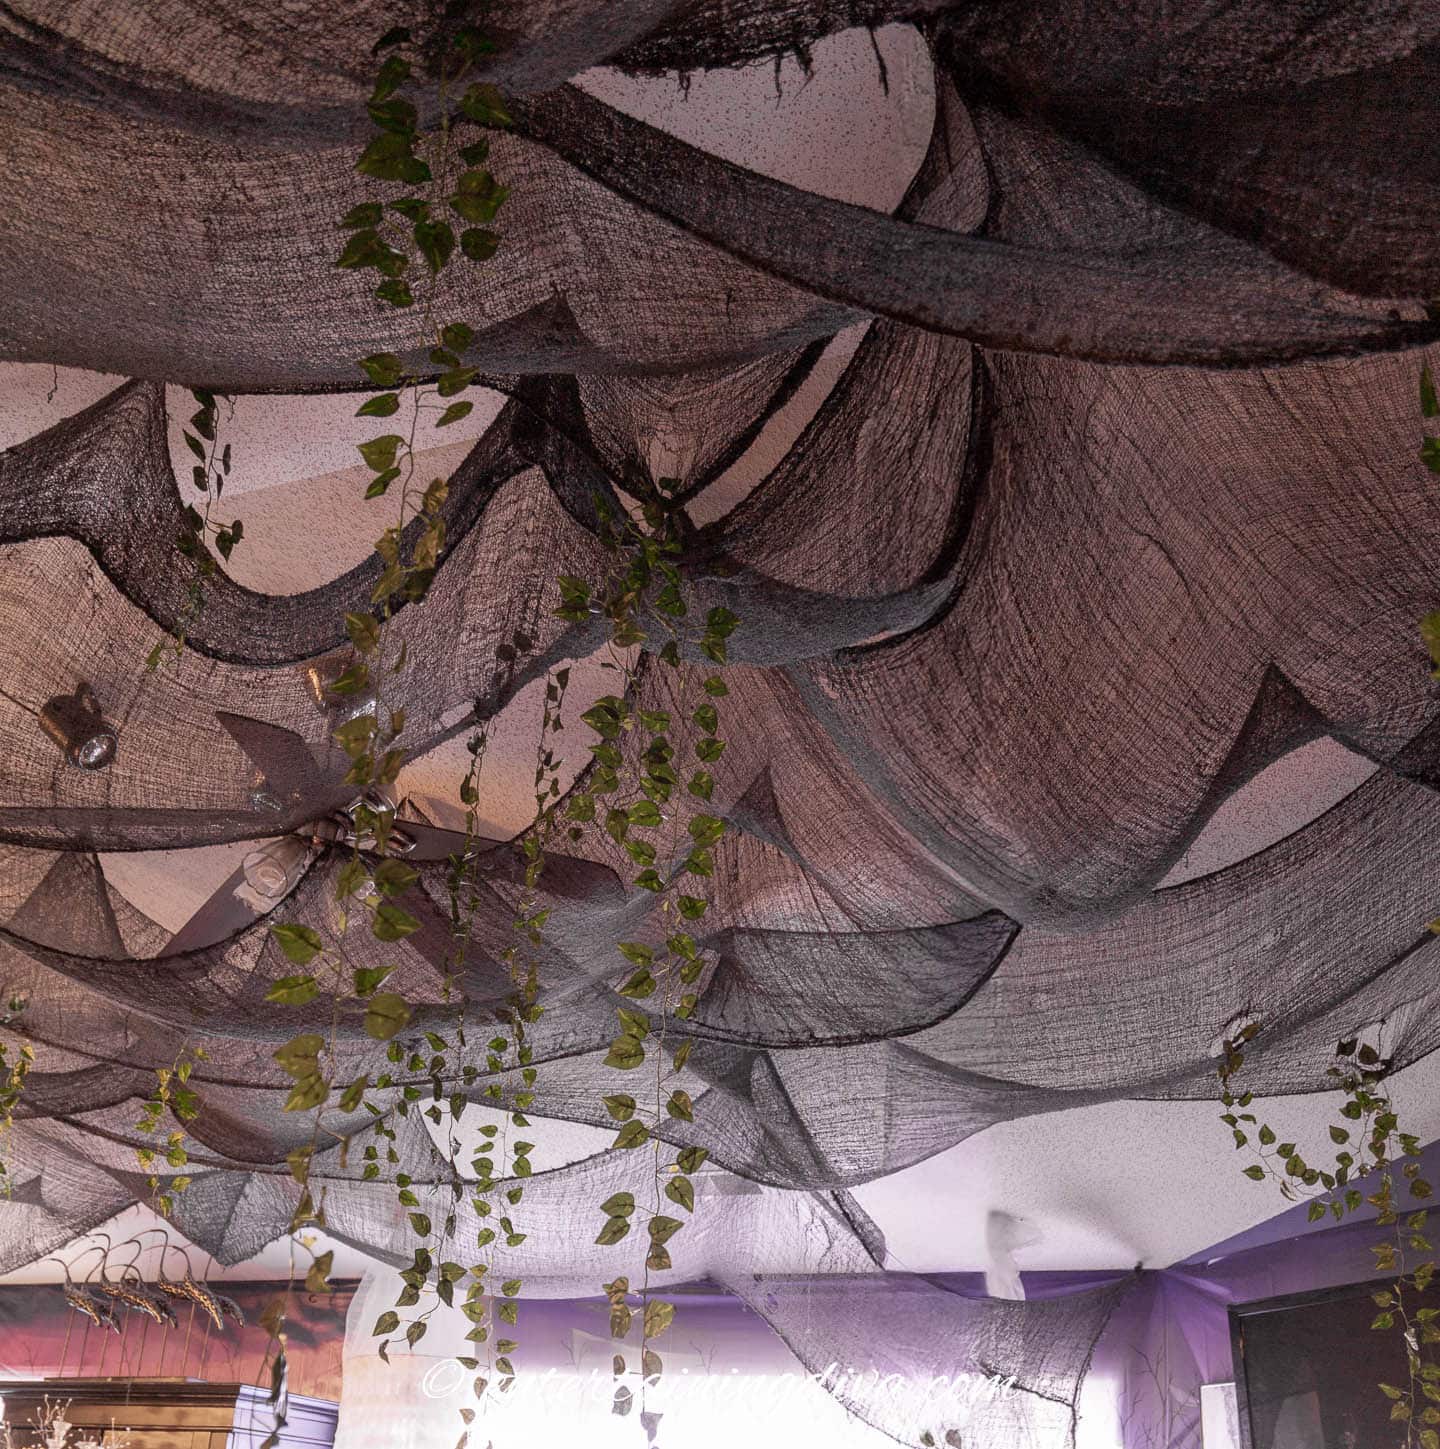
Learning how to hang creepy cloth from the ceiling can transform your Halloween party decor into a spooky, atmospheric setting. I’ll walk you through a simple, step-by-step method that won’t cause lots of damage to your walls and ceiling.

If you’re planning a Halloween party and want to add some spooky atmosphere, learning how to hang creepy cloth from the ceiling is a game-changer.
It is one of those decorations that completely changes the feel of a room.
The minute those tattered layers go up, the space looks darker, older, and just a little bit haunted. Like you’ve stepped straight into an old mansion instead of your everyday living room.
But it can be a bit tricky to install if you don’t want to make a bunch of holes in your ceiling.
Fortunately, there’s an easy trick that lets you hang it with minimal damage to your ceiling and walls.
Keep reading to find out how.
Looking for more Halloween DIY decorations? You'll love Halloween Scene Setters and DIY Skeleton Hands Halloween Wall Decor.
Supplies
Materials:
- curtain rod brackets – I usually install one every 5 to 6 feet. Using 2 or 3 of these round ones* will keep the rod from pulling out of the hanger.
- curtain rods or plumbing pipes –
½-inch copper plumbing pipes will fit in standard curtain rod hangers and are usually a lot less expensive than actual curtain rods. Especially if you have a wide space to cover. - strong netting* – Don’t worry about the color too much. Once you have it up on the ceiling with stuff hanging from it, nobody will notice it.
- S-hooks
- zip ties – I like to use this variety pack* so I have different lengths from 4″ to 12″ on hand. While you don’t need much width once they are actually tied, you sometimes need a longer piece to attach to the mesh and pull it in.
- creepy cloth – I recommend using the larger panels (usually about 80″ x 300″) rather than the shorter ones. You’ll need a lot fewer of them (so it will cost you less in the long run) and they will cover the ceiling a lot faster. How many you need will depend on the size of your room and how far down you want the creepy cloth to hang. A general rule is that the total size of your creepy cloth panels should be at least 2 times (and probably closer to 3 or 4 times) the size of the area you are trying to cover. (It is reusable so this is a one-time purchase).
- Christmas ornament hooks
Tools:
- screw driver – only needed to install the curtain rod brackets.
Substitutions
- If you don’t want to install curtain rods, you can use these heavy duty backdrop stands* instead. They are more expensive, but are very useful for lots of things if you throw a lot of parties.
- If you don’t mind putting holes in your ceiling, a simpler (and less expensive) option is to screw cup hooks into the ceiling wherever you want to hang the creepy cloth. Then you can bypass the curtain rods and mesh installation altogether.
How to hang creepy cloth from the ceiling
1 | Hang curtain rods

NOTE: If you have windows with curtain rods already installed, you can re-use those rather than putting up new ones. But you may need to replace the curtain rod with a longer one (or a plumbing pipe) if it doesn’t reach all the way across the room.
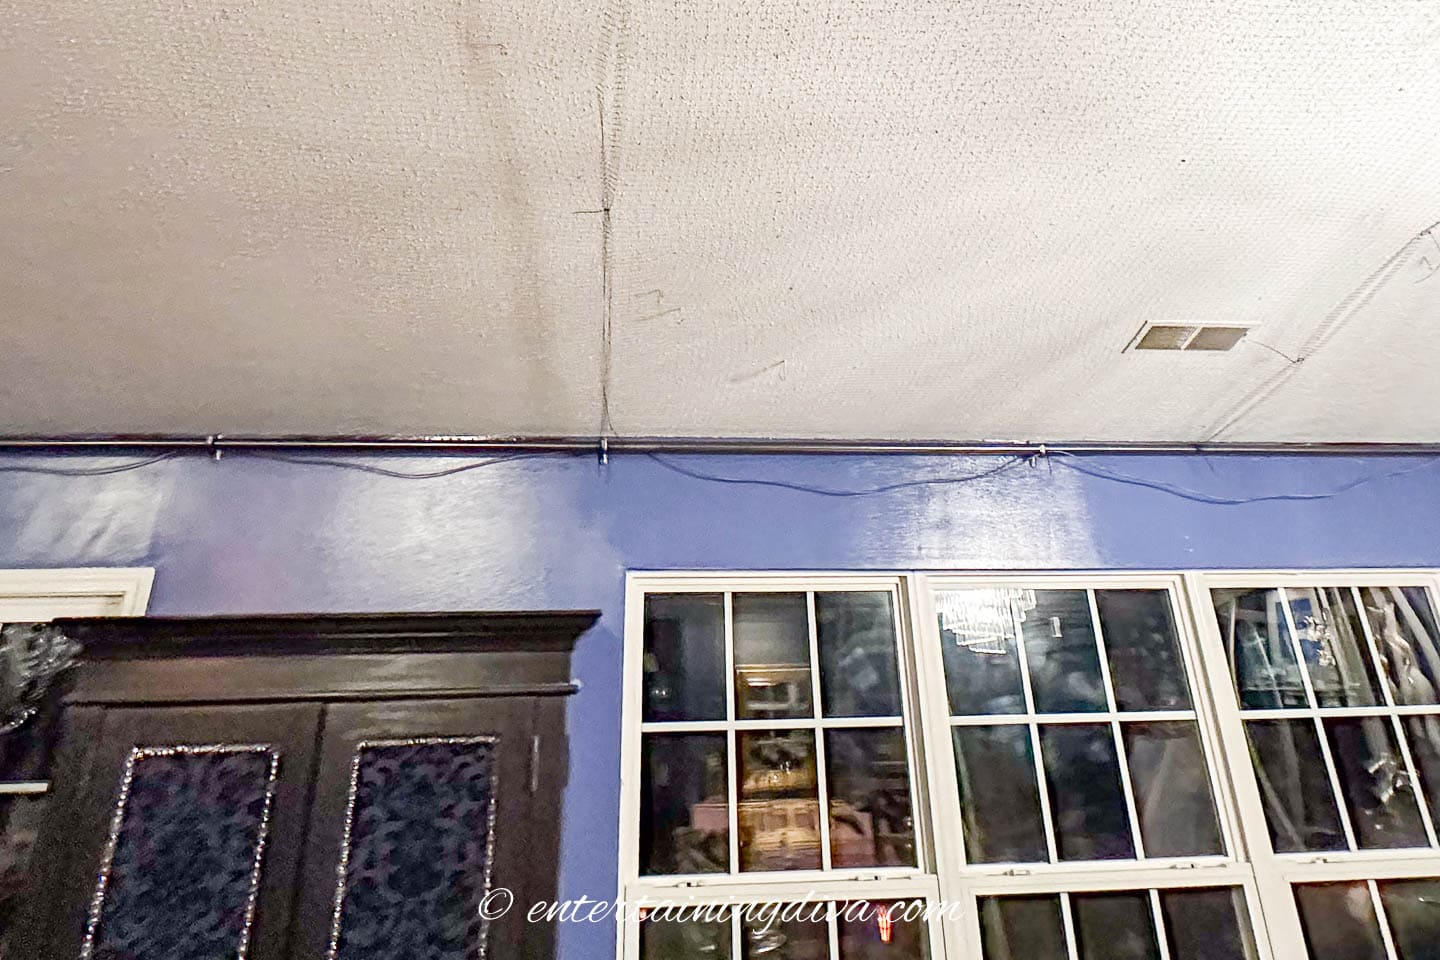
Begin by installing curtain rods on both sides of the area where you want to hang the creepy cloth.
You can place these rods either on the wall near the ceiling or directly on the ceiling close to the wall (choose what works best for your space).
Make sure the rods are level and securely anchored into studs or use appropriate wall anchors if you’re drilling into drywall.

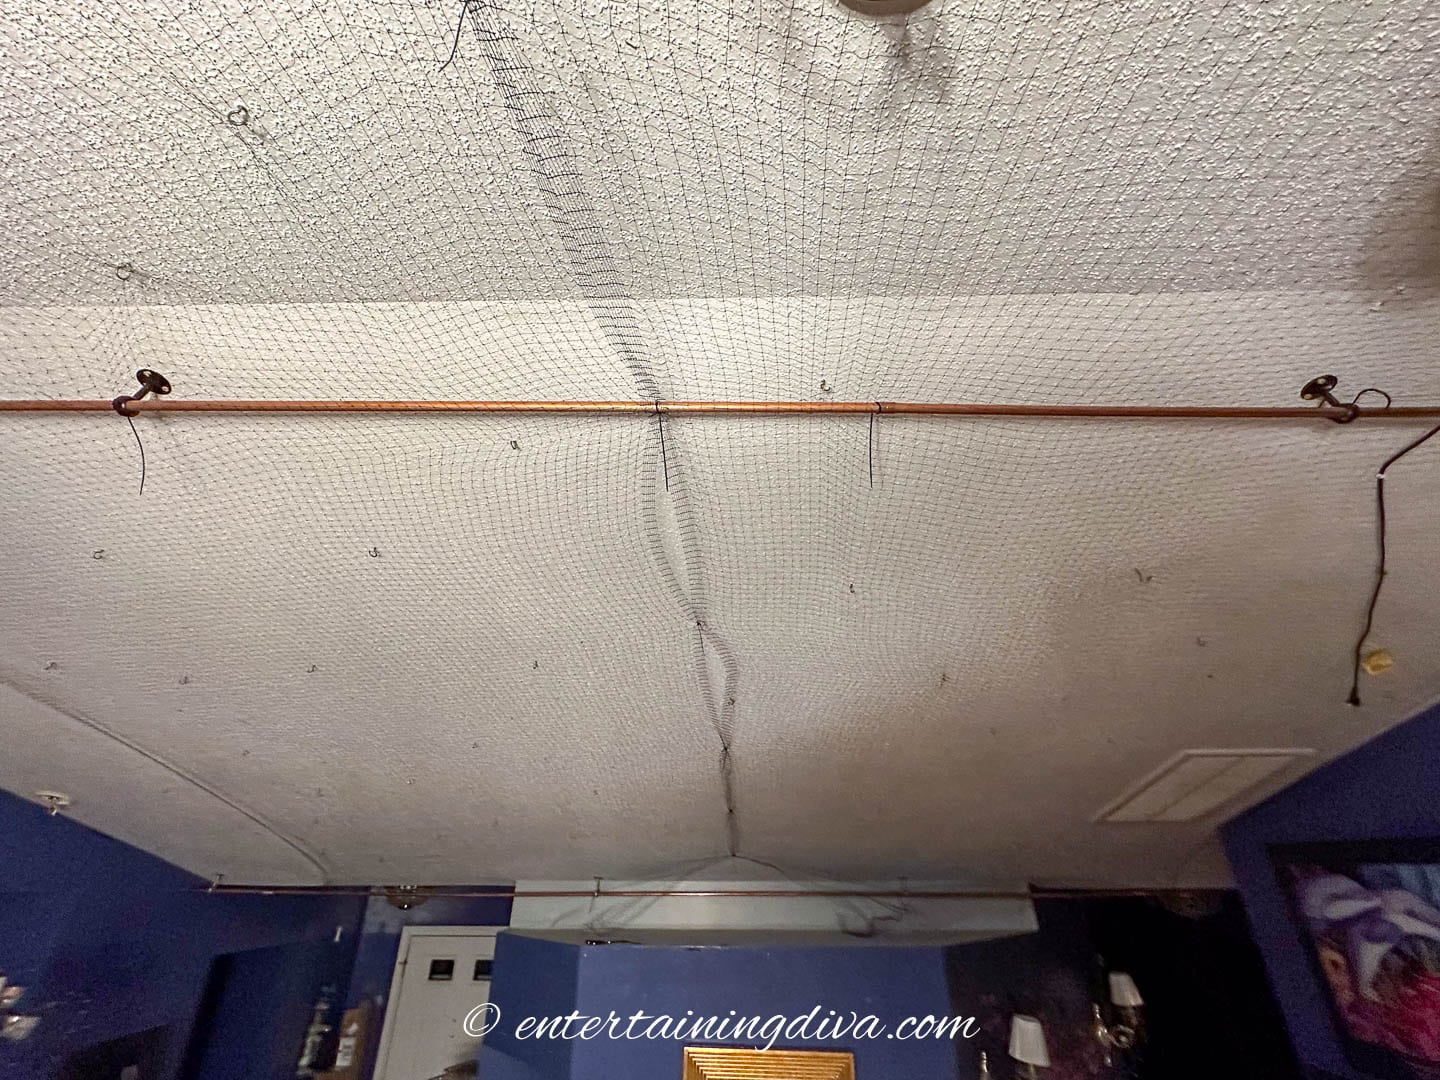
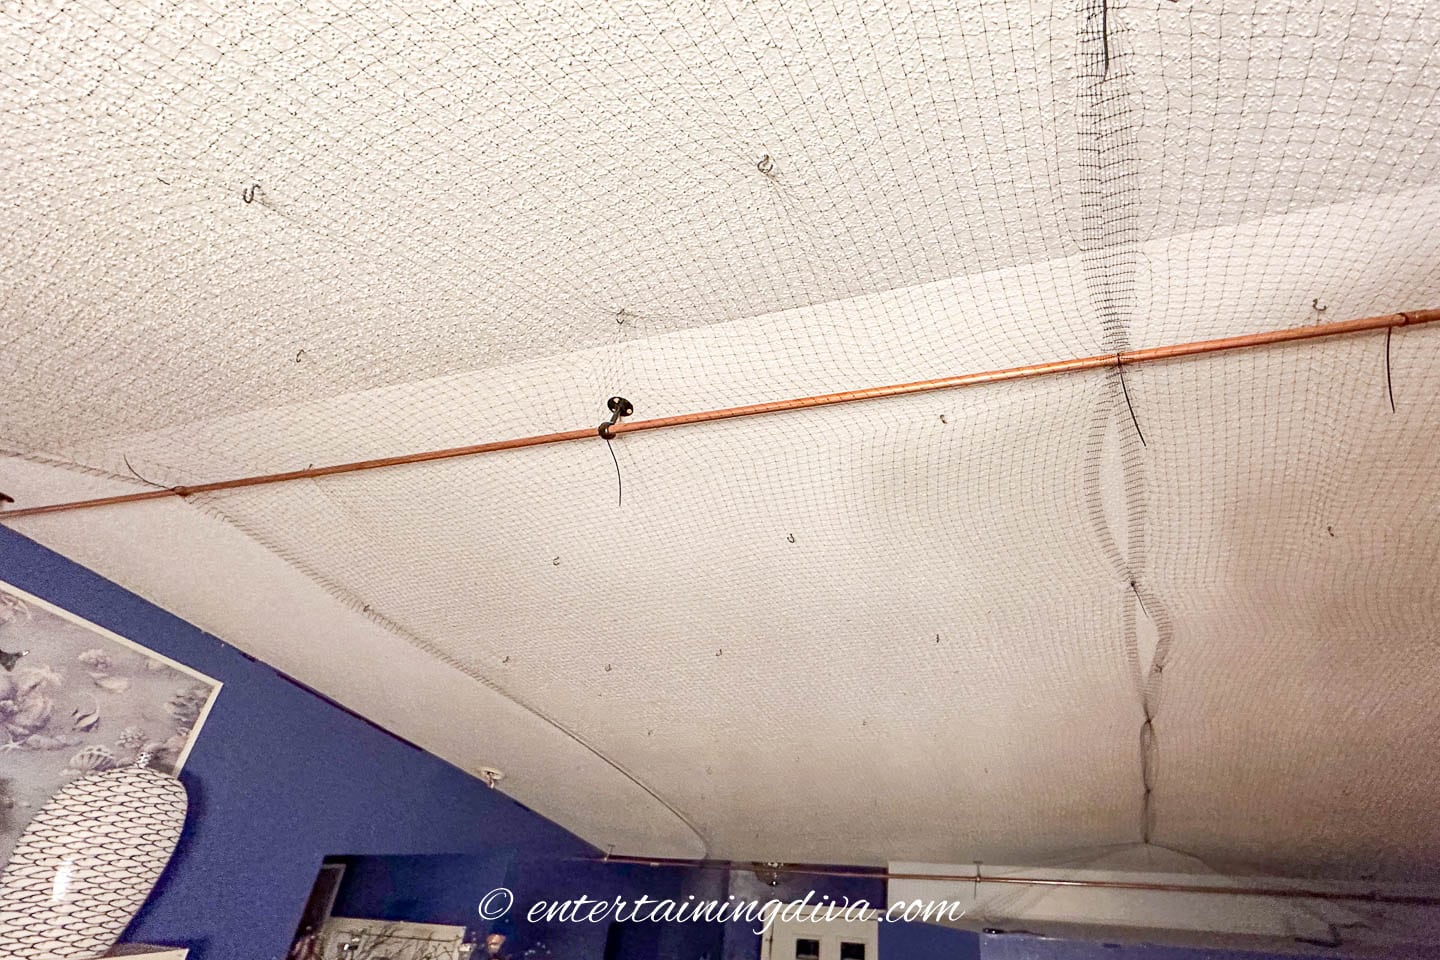
If your ceiling spans more than 15 feet, add a third rod across the middle of the ceiling, running parallel to the other two. This extra support helps prevent sagging and keeps the mesh taut. (If your ceiling is really wide, you may need to install more than one center rod.)
For vaulted ceilings, you can take advantage of the extra height by hanging a curtain rod across the ceiling where the vault is. You’ll want to hang the curtain rods at the walls so they are parallel to the one in the middle.
2 | Attach one side of netting
Next we will attach the netting to the curtain rod on one side of the room.
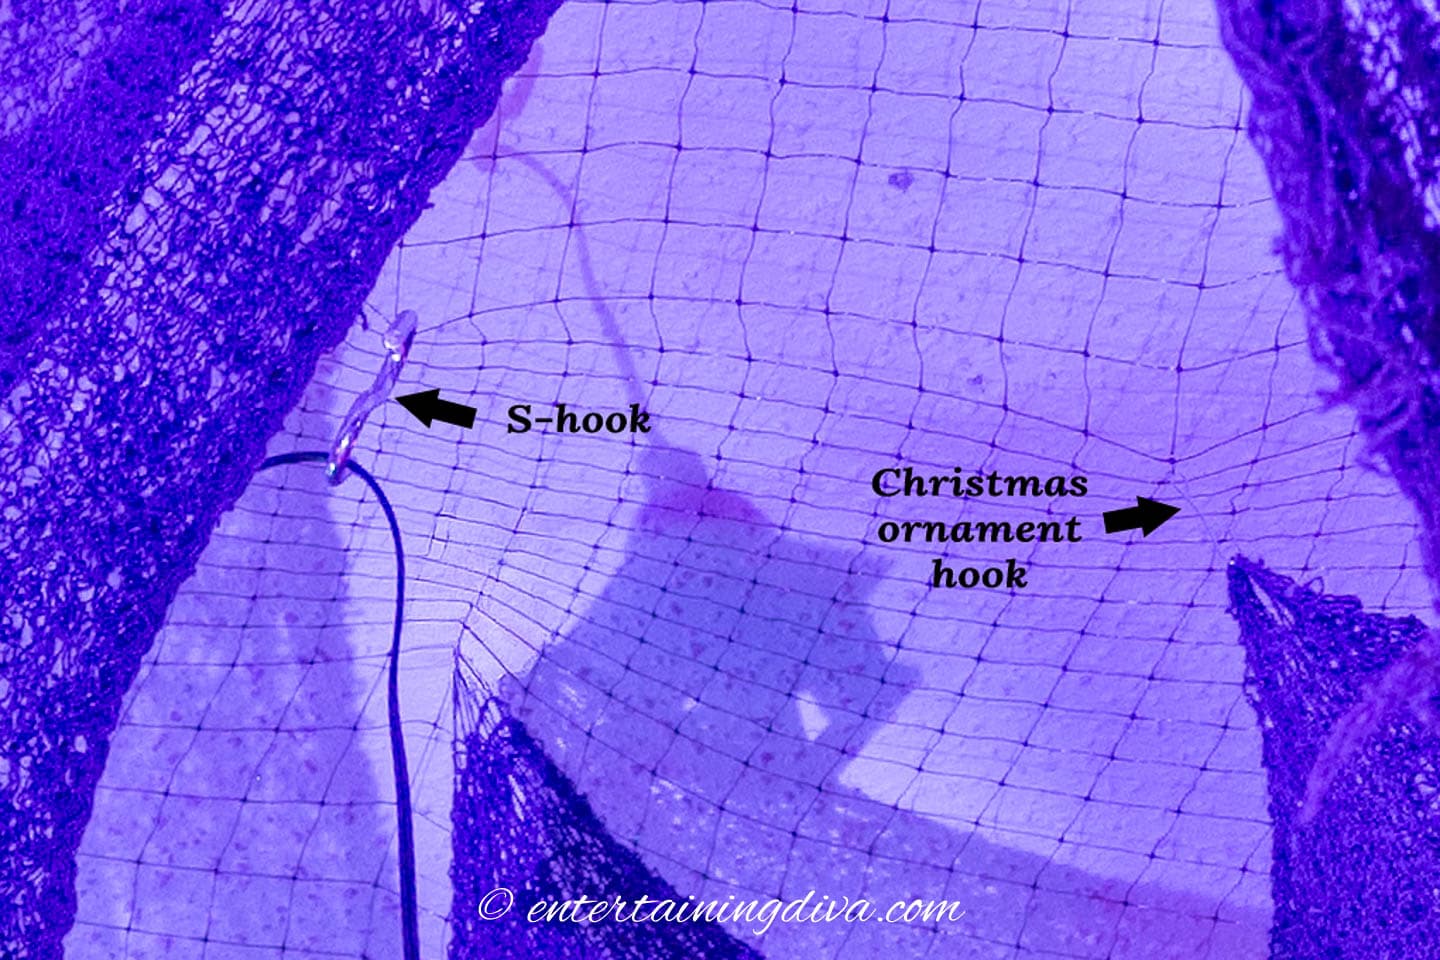
Use S-hooks to hook the netting onto the rod.
To do this, slide the S-hooks through the edge of the netting and then hang them onto the curtain rod. Make sure the netting is pulled straight along the length of the curtain rod and fairly tight as you do this.
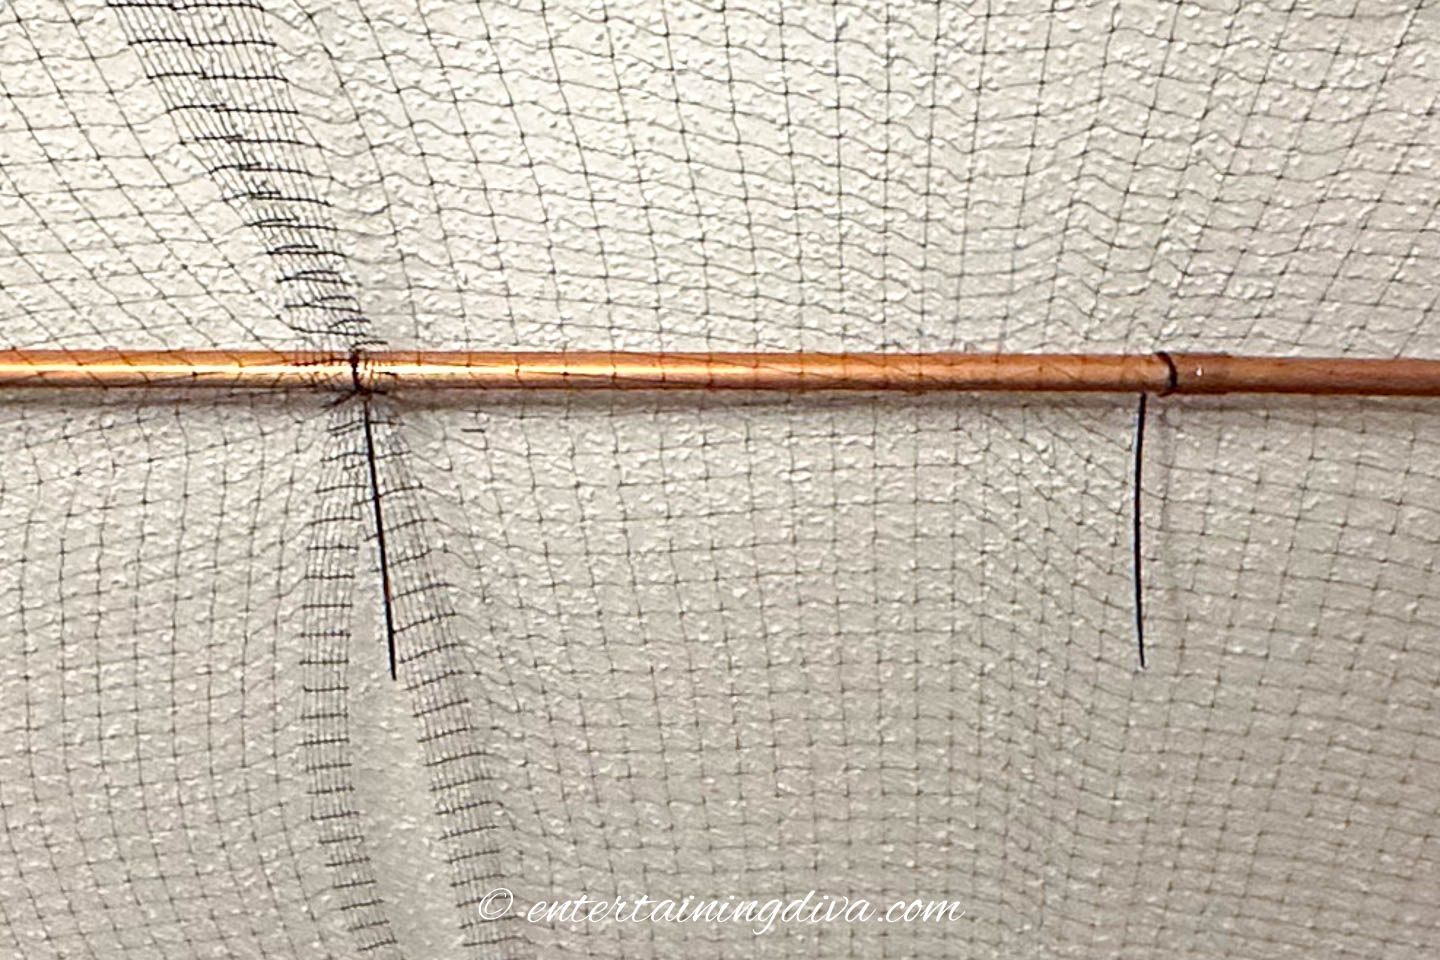
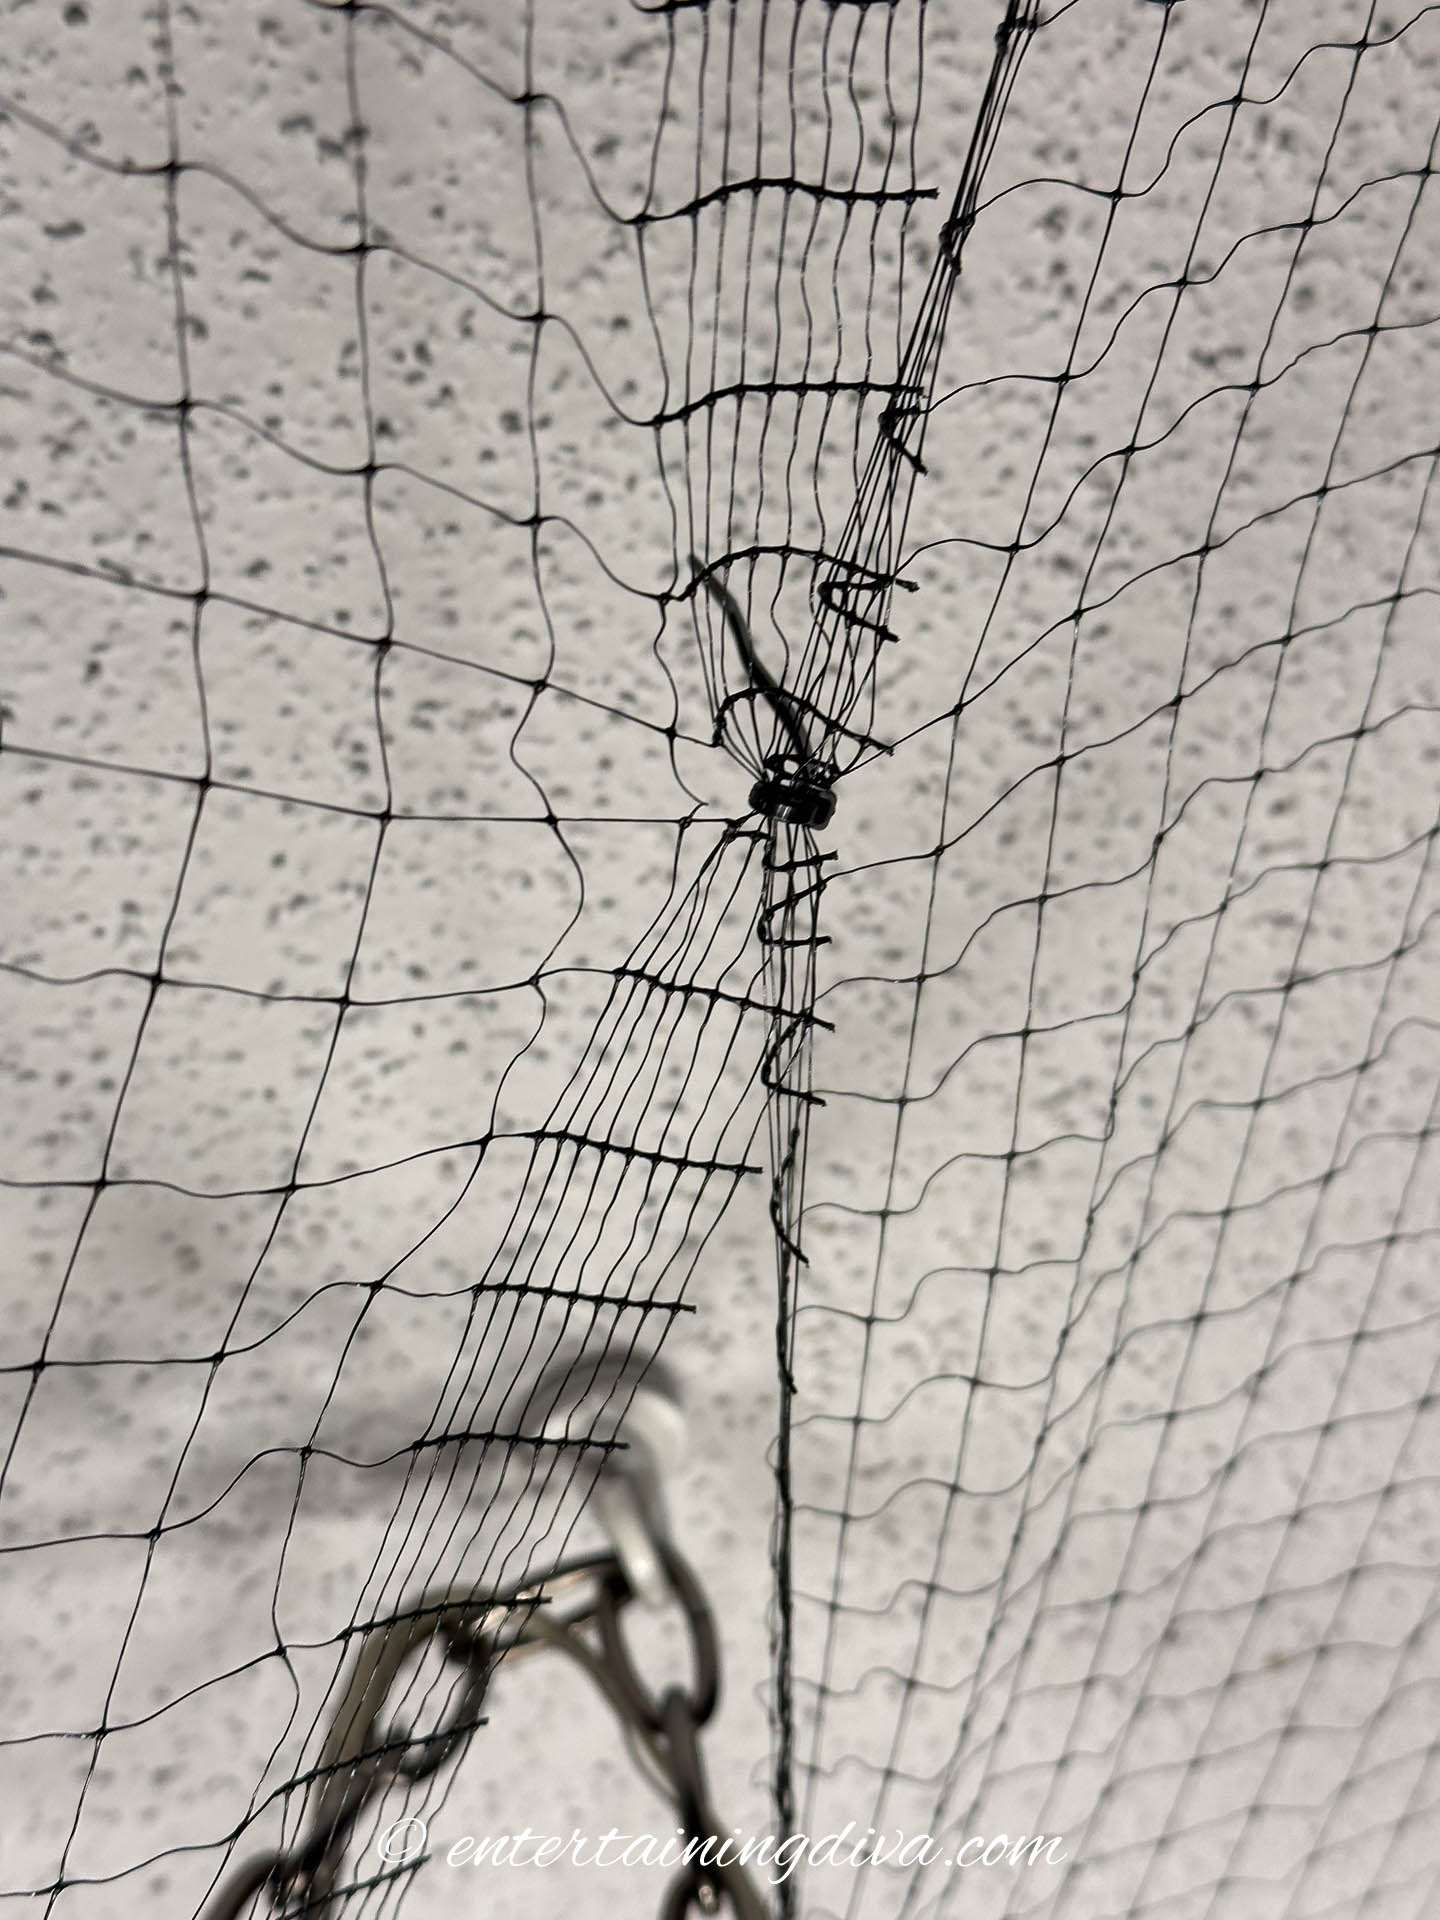
Once the netting is in place and straight, secure it further with zip ties about every 6 to 12 inches along the length of the curtain rod. (Sorry, I don’t have a good picture of the edge at the wall, so this is a middle rod with the zip ties attached).
Wrap a zip tie around the netting and the curtain rod, then tighten it until it’s snug. This will hold the netting securely in place. After the zip ties are in, you can remove the S-hooks since the netting is now firmly attached with the zip ties.
Use scissors to trim excess zip ties for a clean look.
3 | Attach the other side of the netting
Then we need to attach the netting to the curtain rod on the other side of the room.
Begin by pulling the netting across the room toward the curtain rod on the opposite side. Make sure to keep it as straight and smooth as possible to avoid wrinkles or sagging.
Once you have the netting in the right position, attach it to the curtain rod using S-hooks.
As you attach the netting, pull it to make it as tight as you can. A snug fit helps prevent sagging when you hang decorations or other items from the netting later.
When the netting is secured all along the curtain rod, replace the S-hooks with zip ties and tighten them as much as possible.
Then cut off any extra netting.
If your ceiling has a curtain rod in the middle, attach the netting to it with zip ties.
For vaulted ceilings with a central curtain rod, don’t attach the zip ties on the curtain rod at the wall until you have secured the middle of the netting to the middle curtain rod(s) with S hooks. This will make sure that the netting can be pulled up that high. If not, adjust the S-hooks at the wall to let out some more of the netting. When your sure it all works, attach the netting with zip ties at the wall and on the middle rod.
4 | Install additional netting panels
If your room is longer than the width of your netting, install additional netting panels right beside your first one using the same process.

To keep the panels securely connected, use zip ties to attach the sides together.
Wrap the zip tie around the edge of one panel and then around the edge of the other, pulling it tight to hold them firmly in place. Repeat this process along the entire adjoining edges to create a seamless, larger netting cover.
You can trim the ends off the zip ties with scissors for a clean look.
5 | Hang creepy cloth
Finally, we’re ready to hang the creepy cloth.
Start hanging the cloth from one corner of the ceiling, attaching it to the netting with a Christmas ornament hook.
Work your way across the ceiling, attaching the cloth at various points to create a spooky, draped effect.
Pieces of the fabric should be pulled up and attached to the netting at least 2 feet (and often 3 or 4 feet) away from the previous hook.

Vary how far down the cloth hangs and how far apart the Christmas ornament hooks are to make the setup look more natural and less uniform. Also, make sure they aren’t in a straight line.

Let the corners drip down more to enhance the spooky vibe.
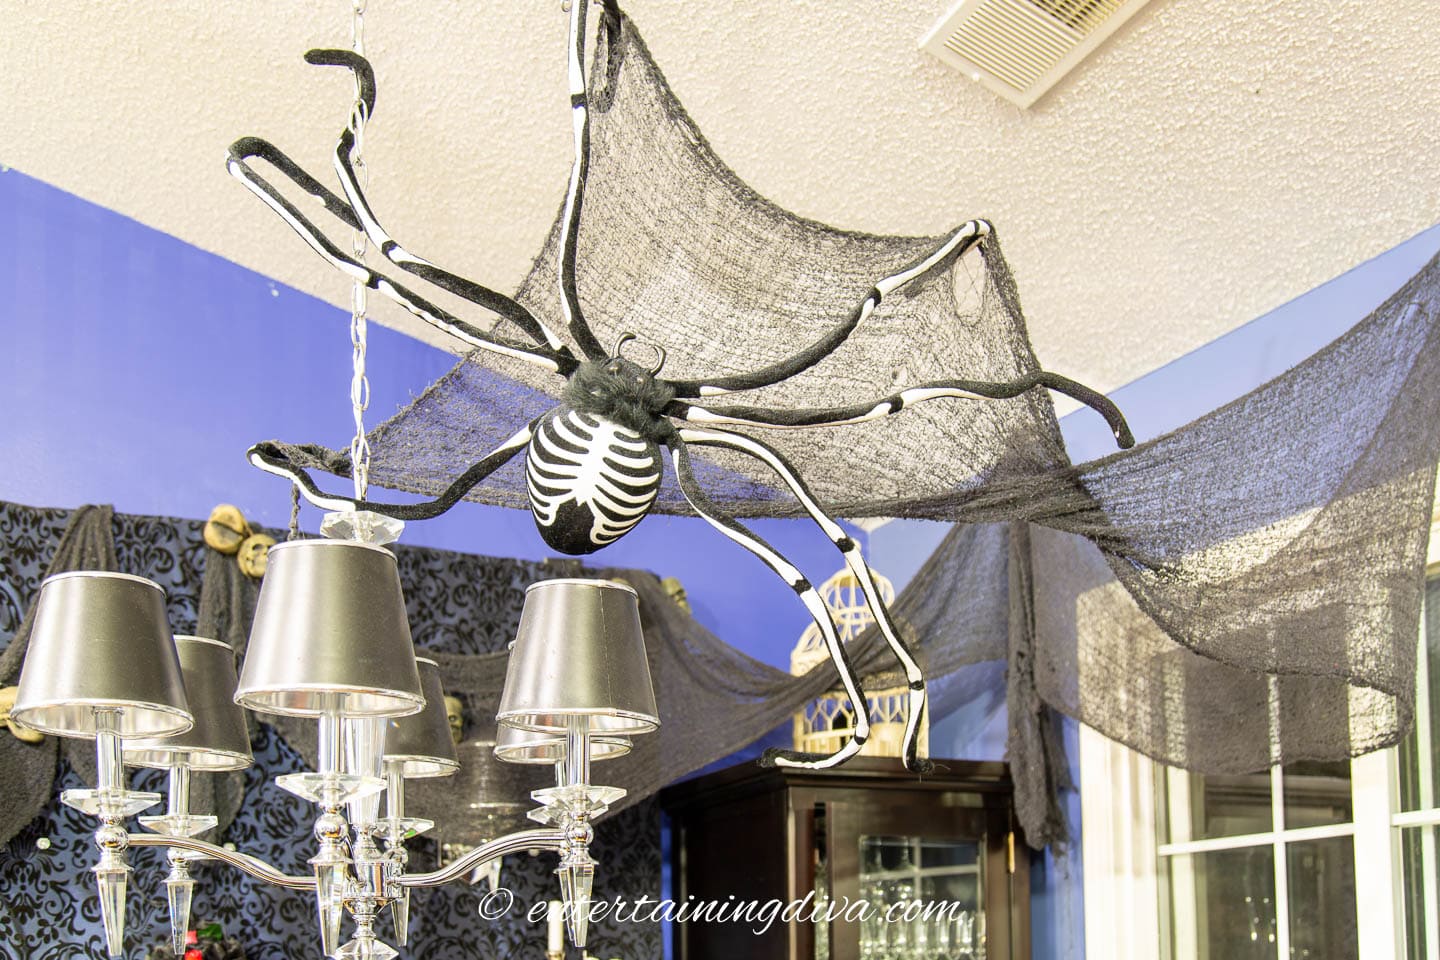
For added dimension, drape some sections onto the wall or chandelier.
Or overlap panels by hooking through one panel and attaching it to another. This creates depth and a more chaotic, haunted look.
You can cover the entire ceiling or just focus on specific areas like corners, entrances, or focal points (whichever suits your desired effect).
You can also hang other light objects such as string lights or paper lanterns from the mesh.
If you plan to hang heavier decorations like glass lanterns or cascading flowers, consider installing extra curtain rods or individual ceiling hooks for extra support to keep everything secure.
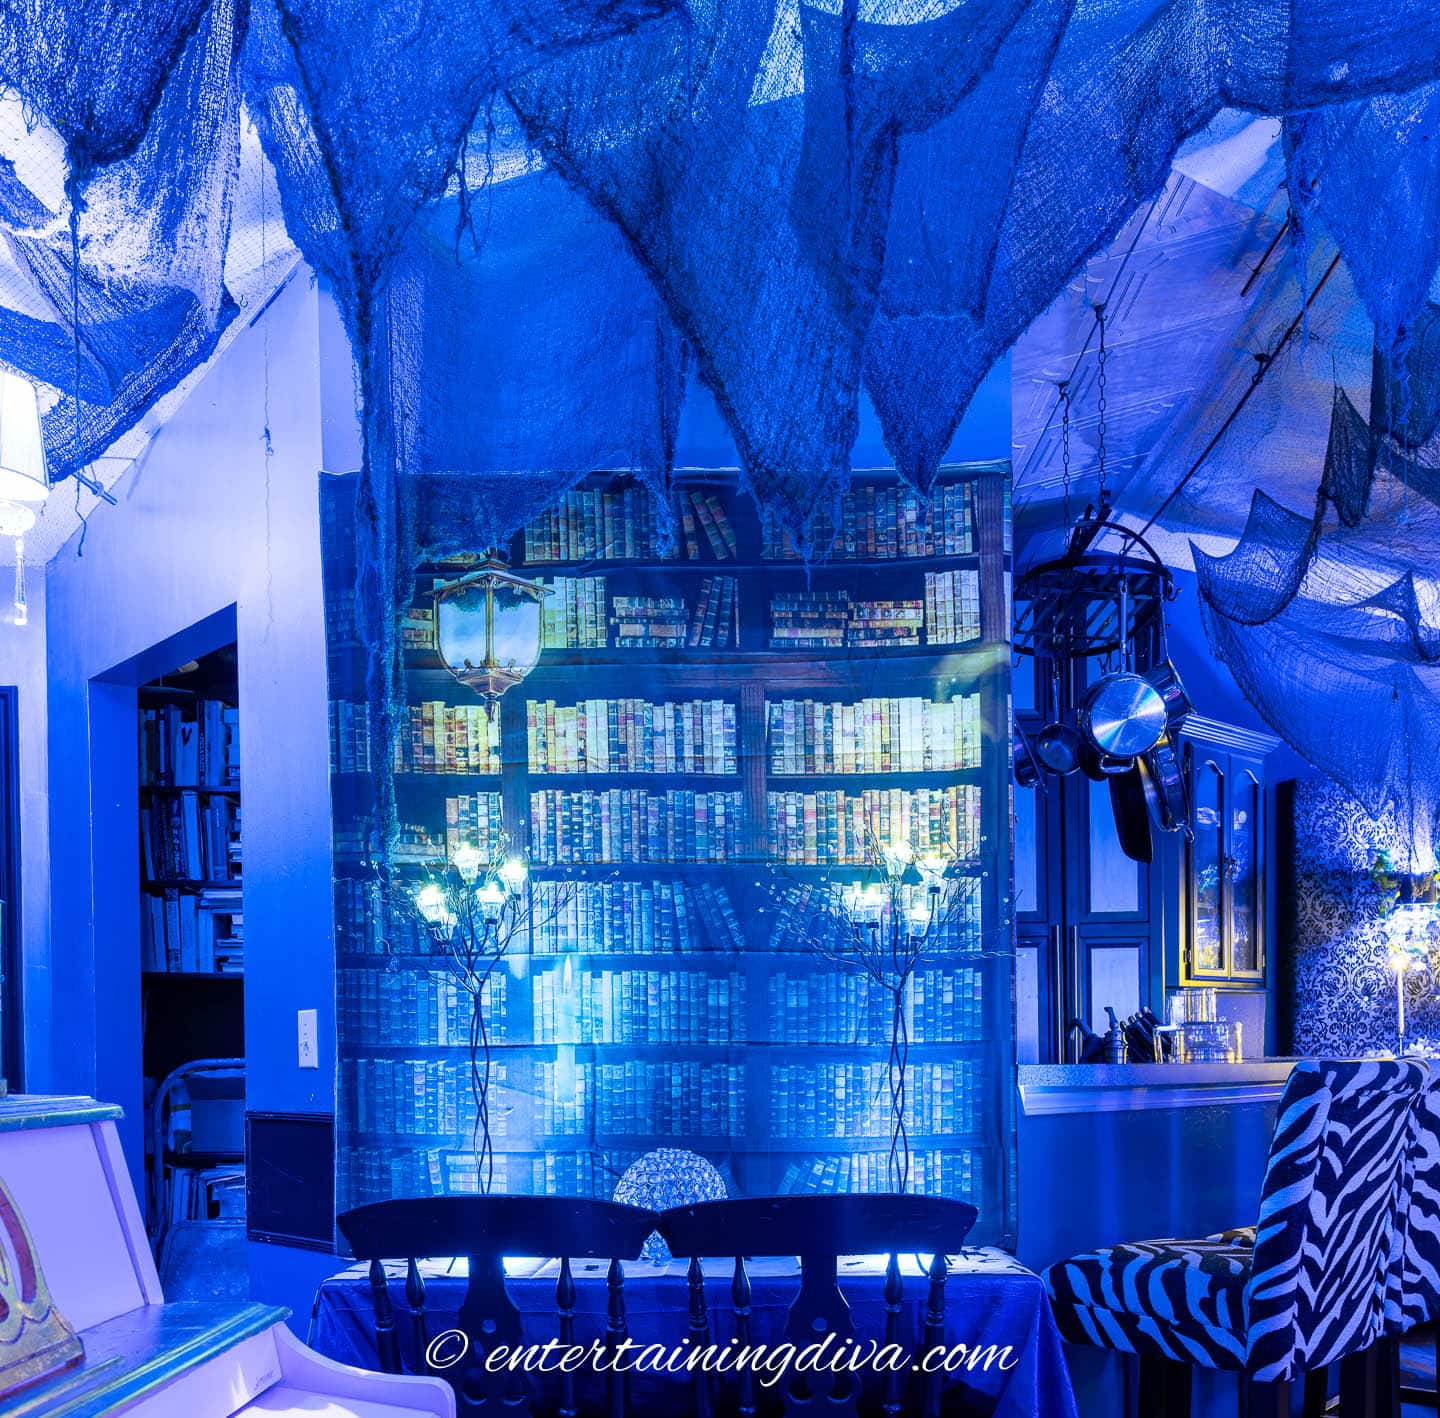
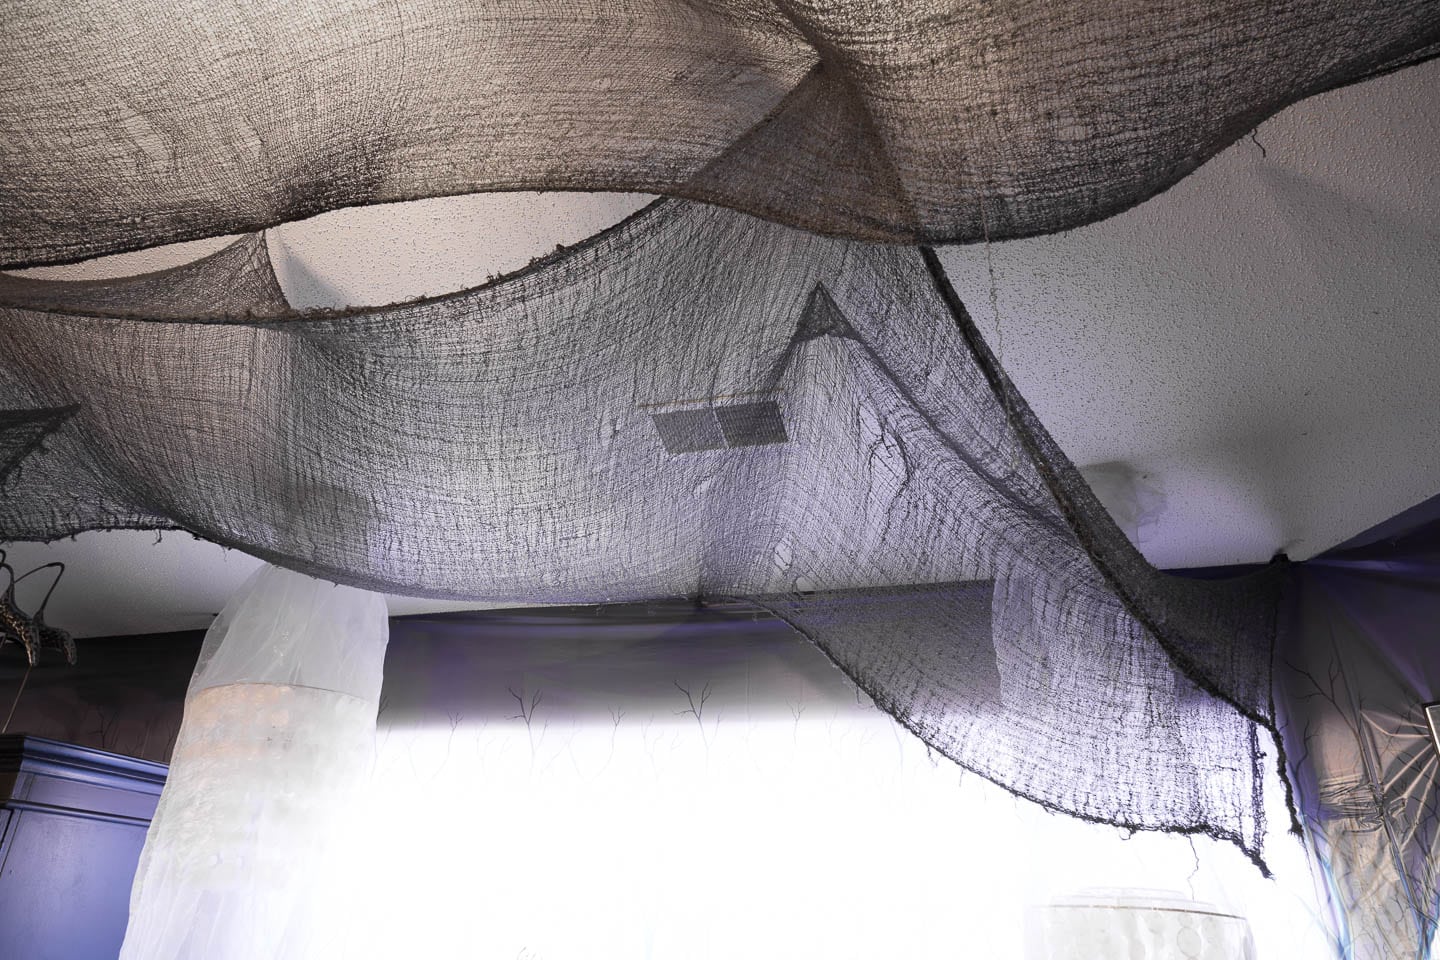
If you look closely at the picture above, you can see the mesh and the curtain rods on the ceiling above the creepy cloth. But no-one at the party noticed.

Especially at night with the lights turned down.


Have comments or questions about how to hang creepy cloth from the ceiling? Tell us in the section below.