
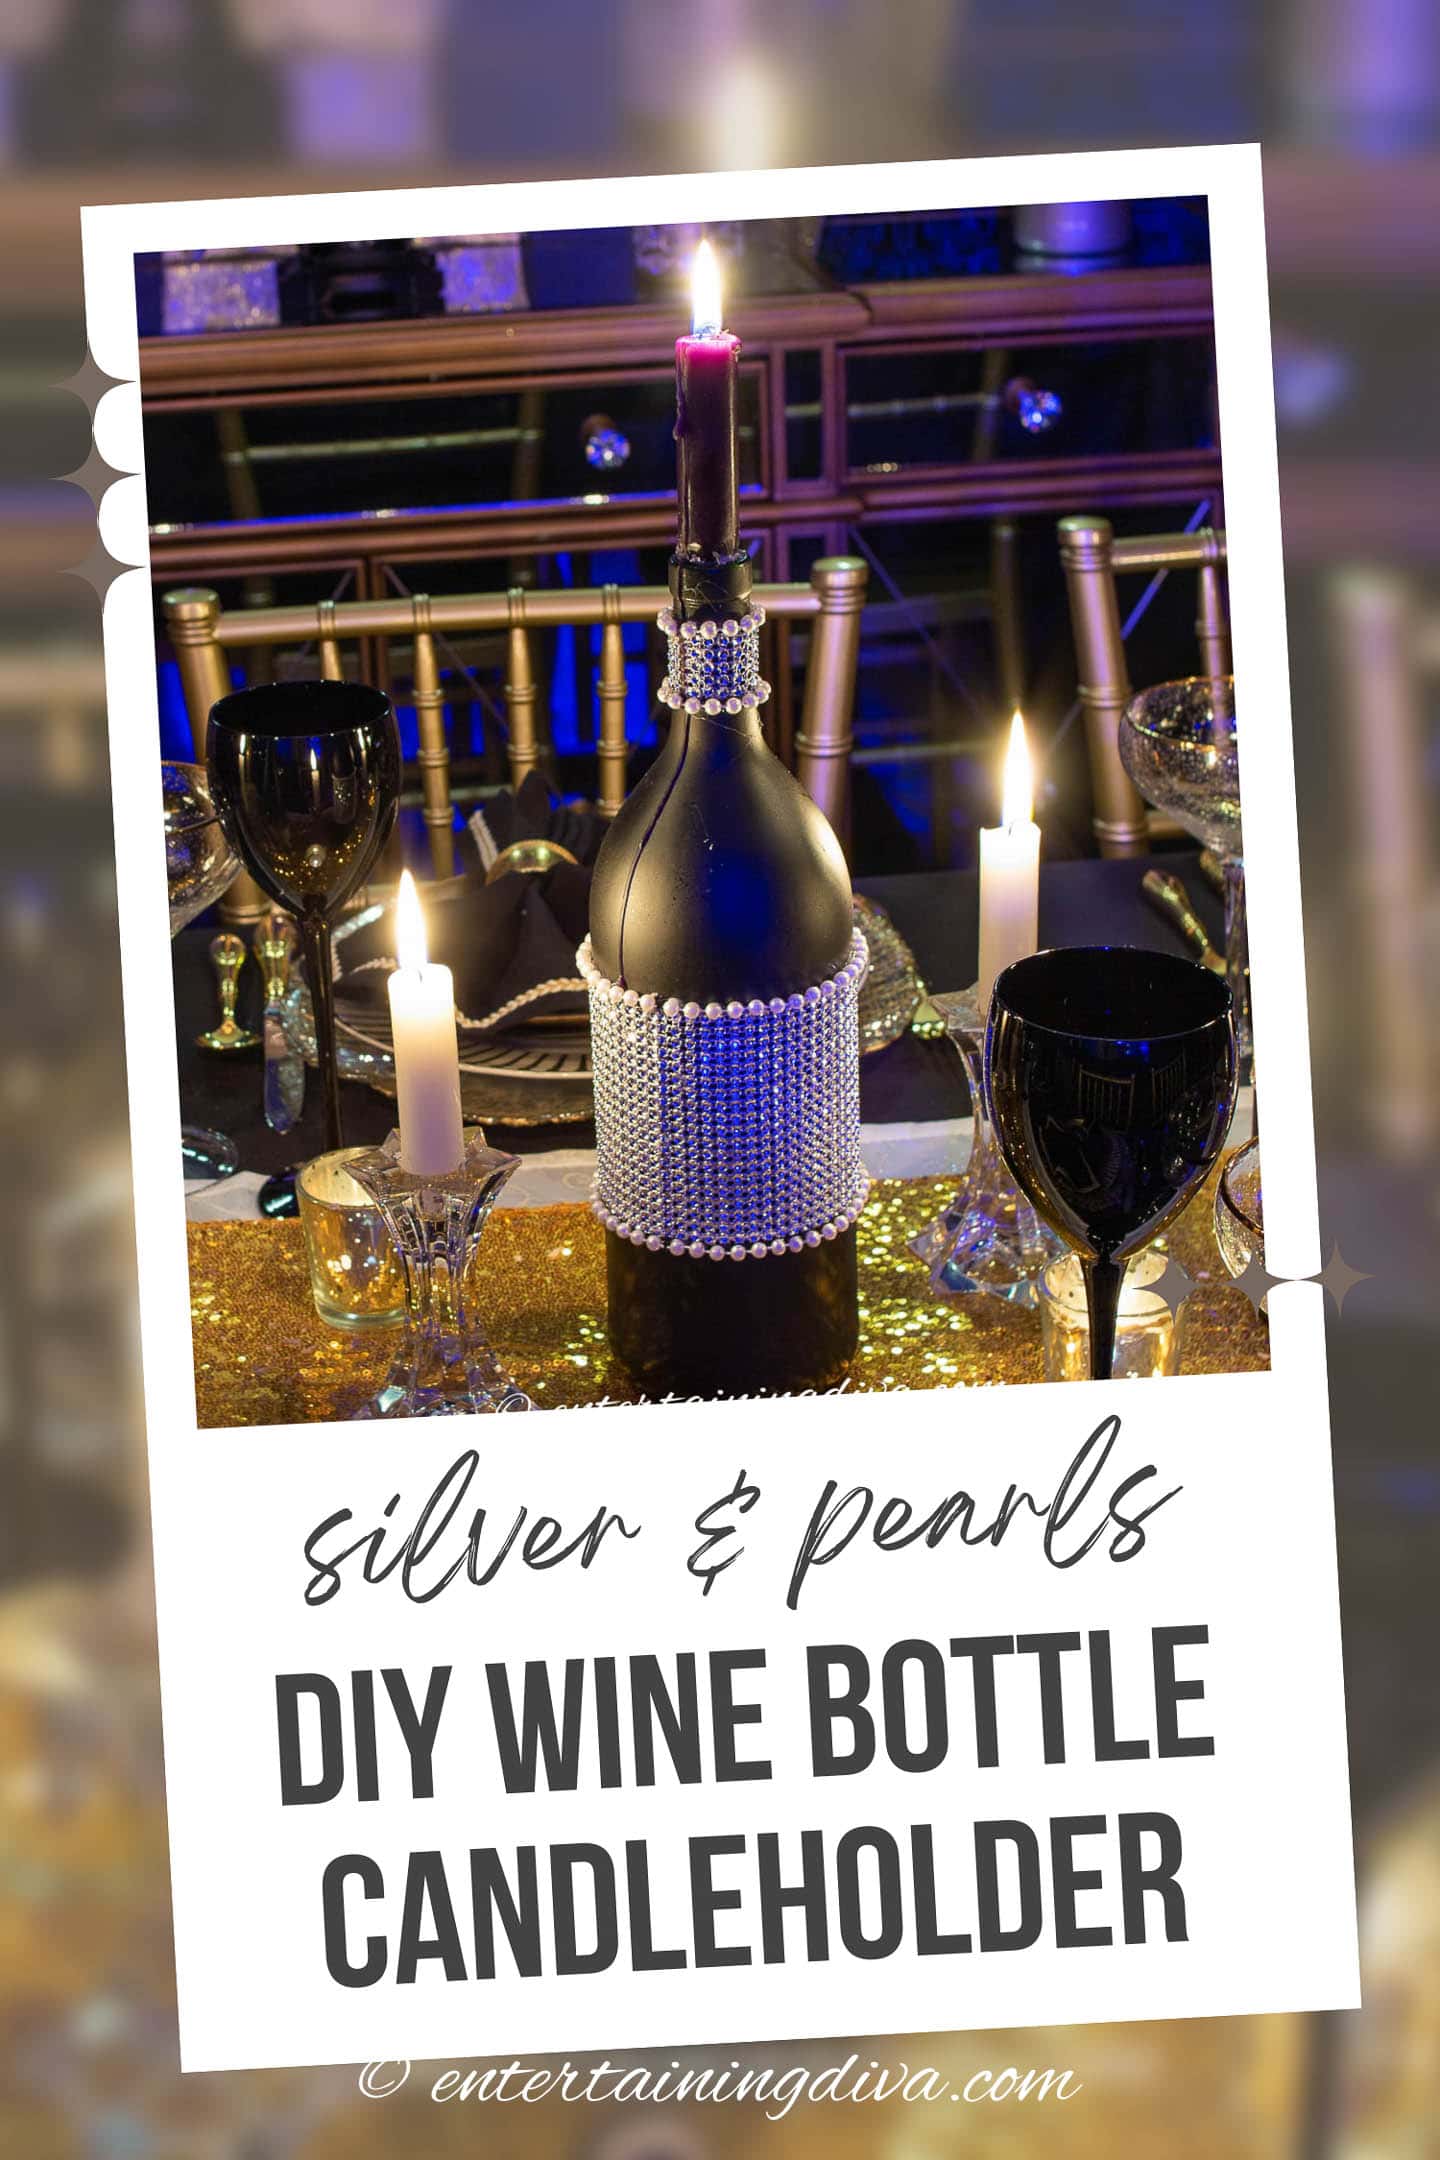
DIY Rhinestone Black Wine Bottle With Pearls (For Centerpieces)
If you are looking to add a touch of elegance and sophistication to your next party, you’re in the right place. This easy DIY rhinestone black wine bottle with pearls creates an eye-catching centerpiece that will add some glam to any table setting.
Hosting a party that requires multiple centerpieces can get expensive really quickly.
Which is why I always try to find inexpensive ways to make them.
I still want them to look pretty without costing a ton of money.
Decorating wine bottles to turn them into inexpensive but elegant candle holders (or vases) is one of my favorite ways to do this.
They don’t take very long to put them together. The bottle opening is the right size to fit a taper candle (or a few flowers). And you can use paint and all kinds of different embellishments to make the bottles match your party decor.
This version uses flat black spray paint, rhinestone ribbon and some faux pearls to create a bedazzled wine bottle that has the perfect amount of bling for any glam party centerpiece.
To see the details for decorating this wine bottle (plus a few other variations), watch the video:
Or keep reading to find out how.
Supplies
This post may contain affiliate links. We make a small commission if you buy the products from these links (at no extra cost to you). As an Amazon Associate, I earn from qualifying purchases. But we only recommend products we would use ourselves. For more information, click here to see our disclosures
Here’s what you’ll need to make these:
Materials
- flat black spray paint*
- 4 1/2″ wide rhinestone ribbon* – Using the ribbon instead of individual rhinestones will make this project go much faster.
- faux pearl string*
Tools
- repositionable spray adhesive*
- mini glue gun on low heat
- scissors
How to decorate wine bottles with rhinestones
1 | Remove the bottle labels
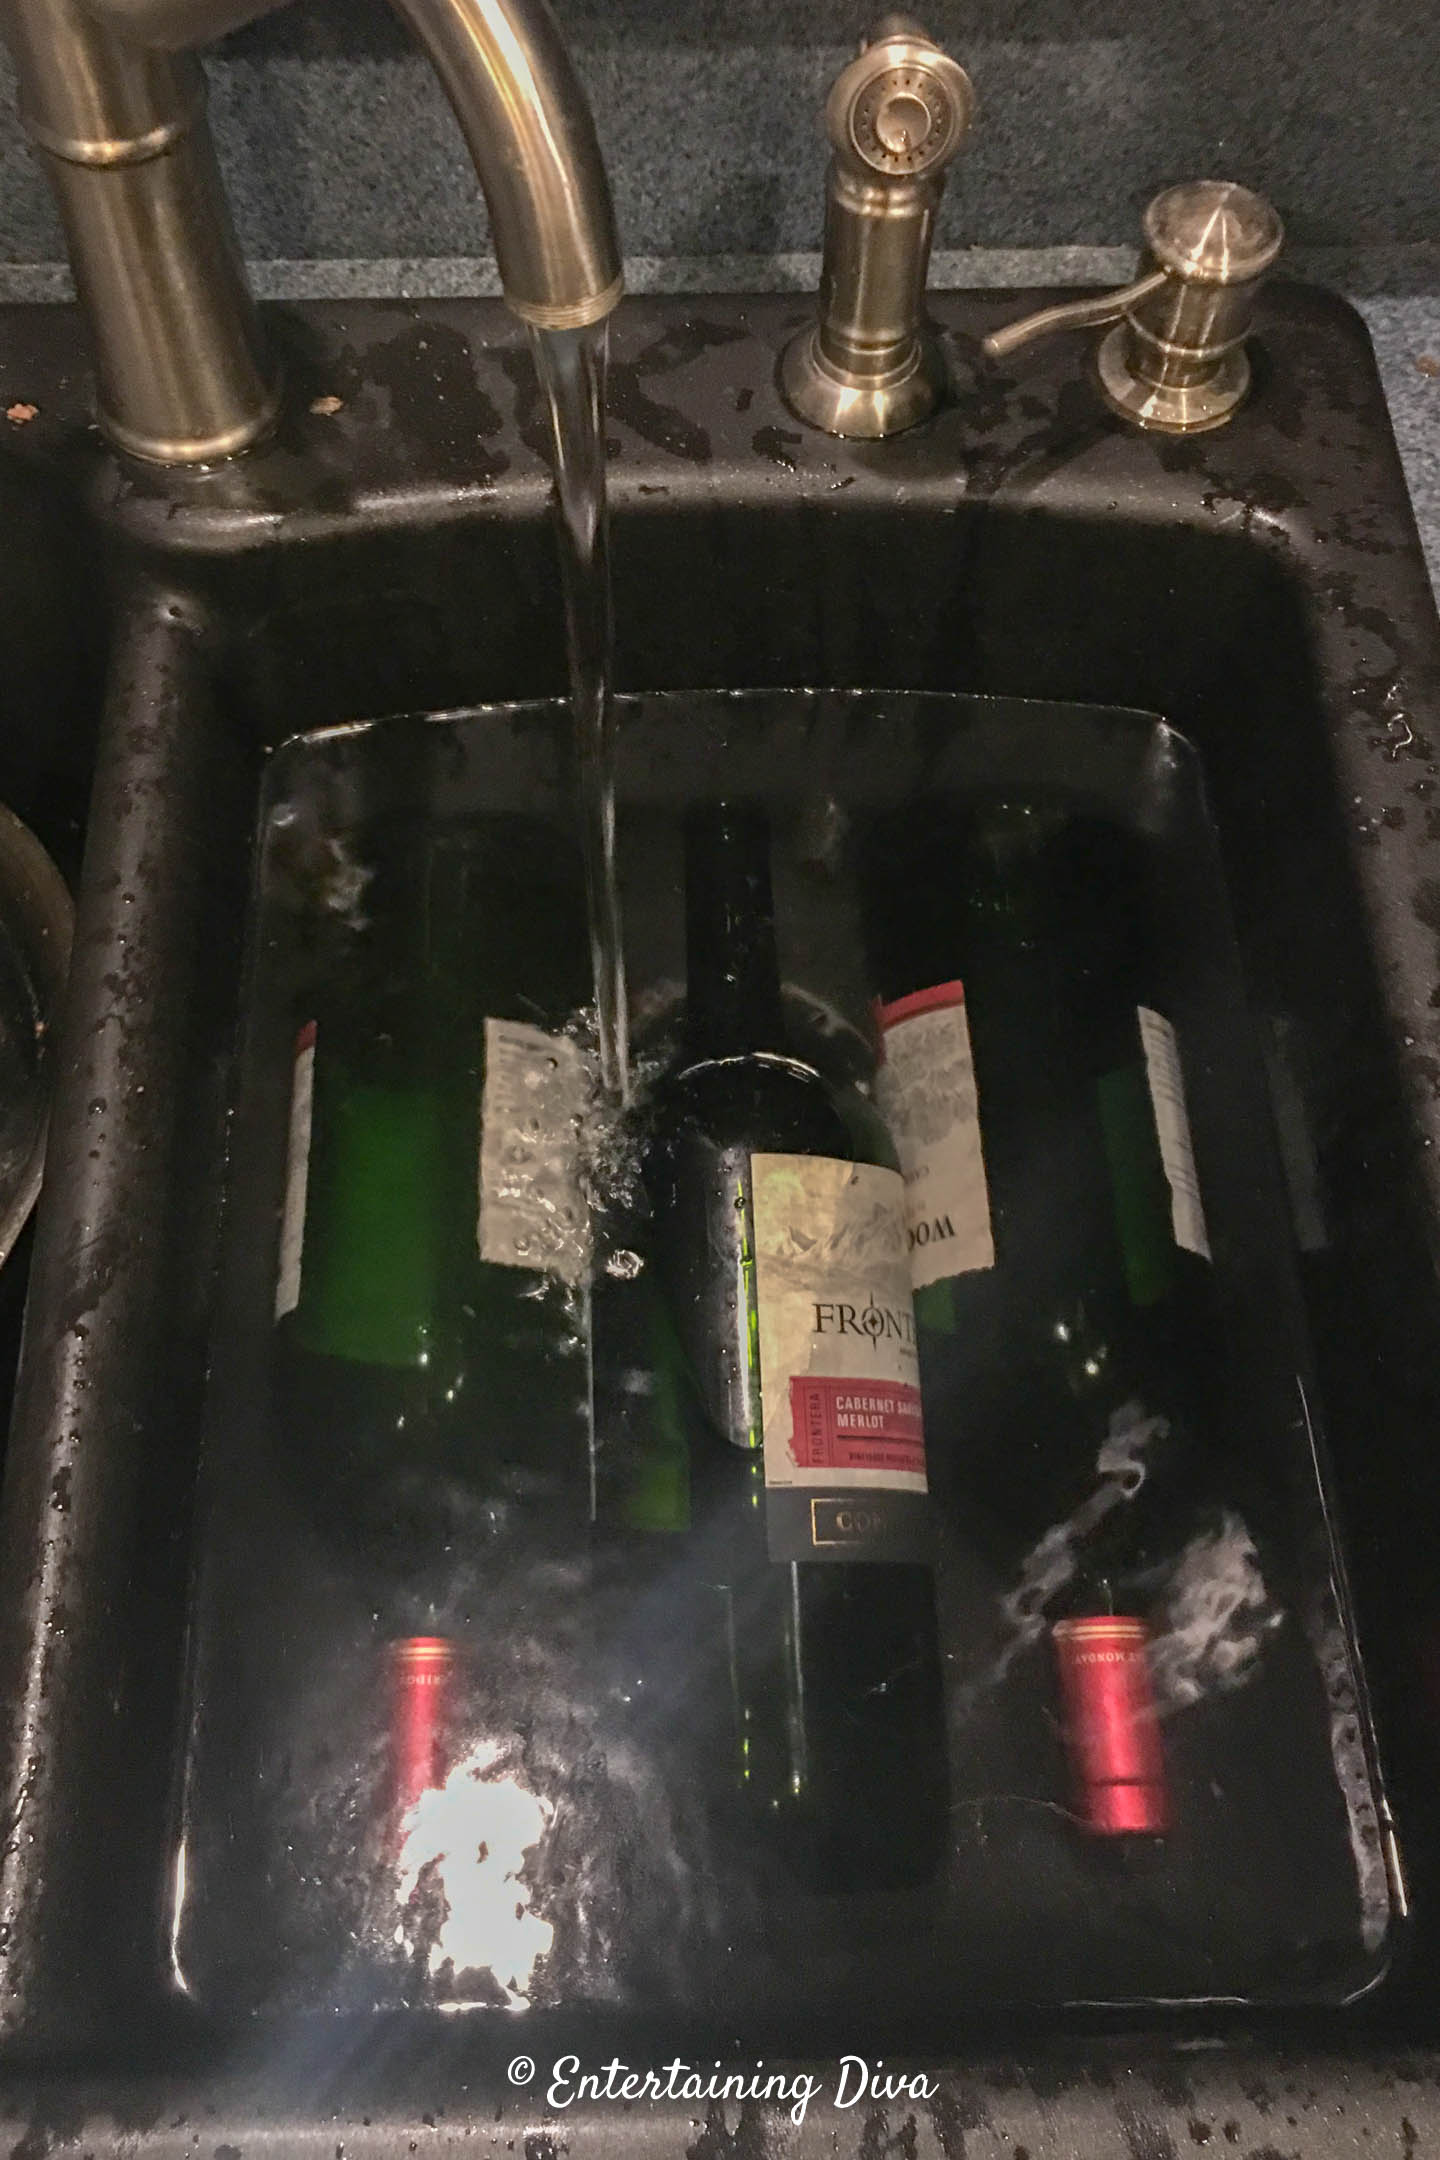
The first step is to remove the labels.
To do this, I soaked the bottles in water for a few hours.
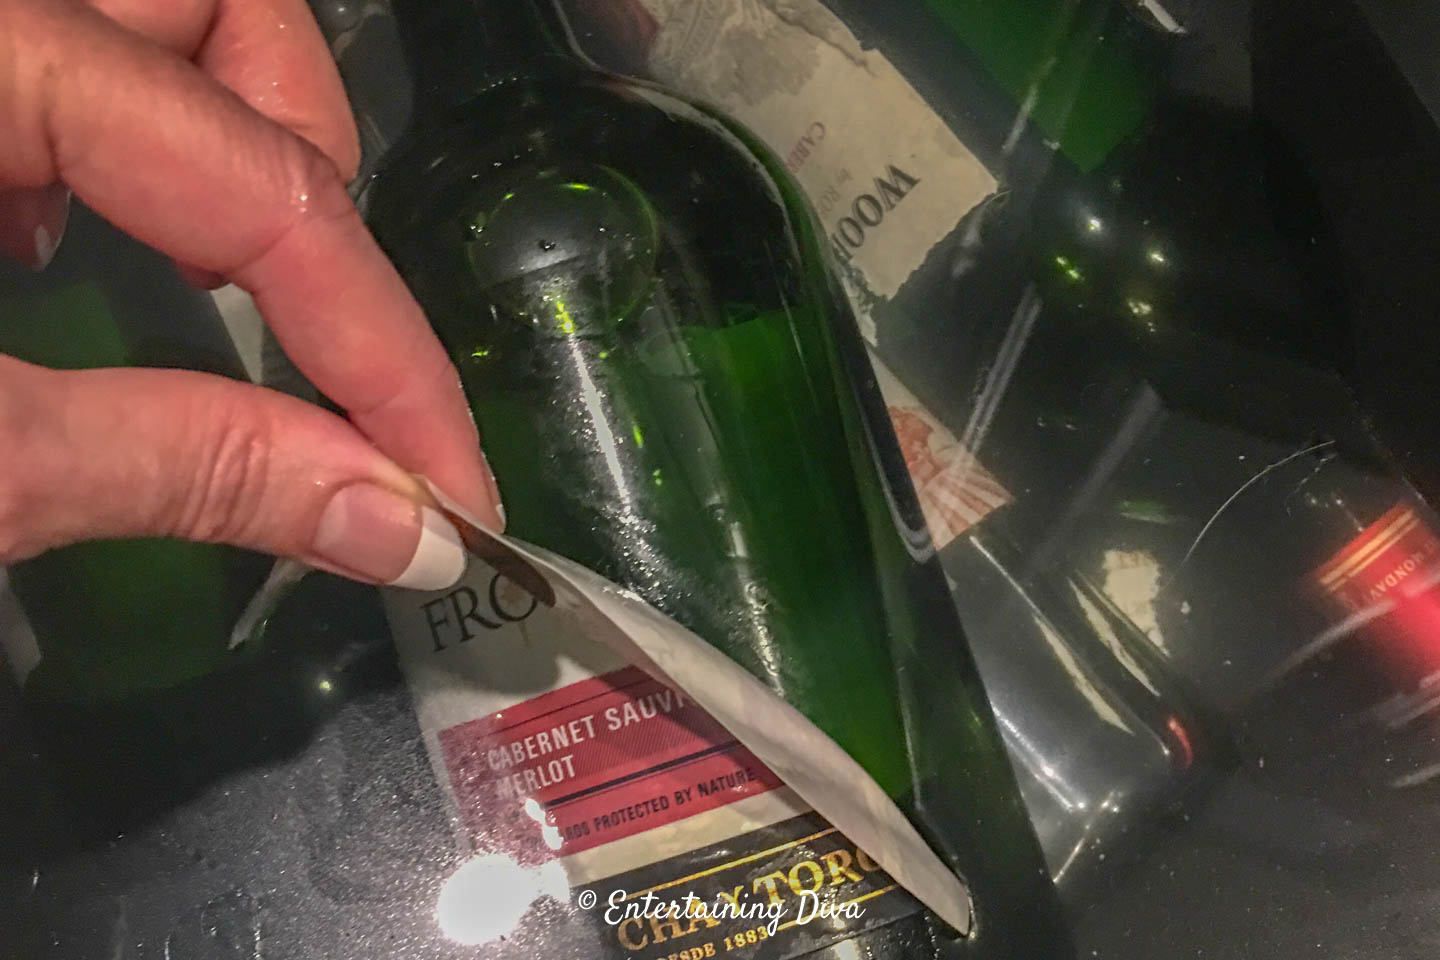
After that, most of the labels peeled right off.
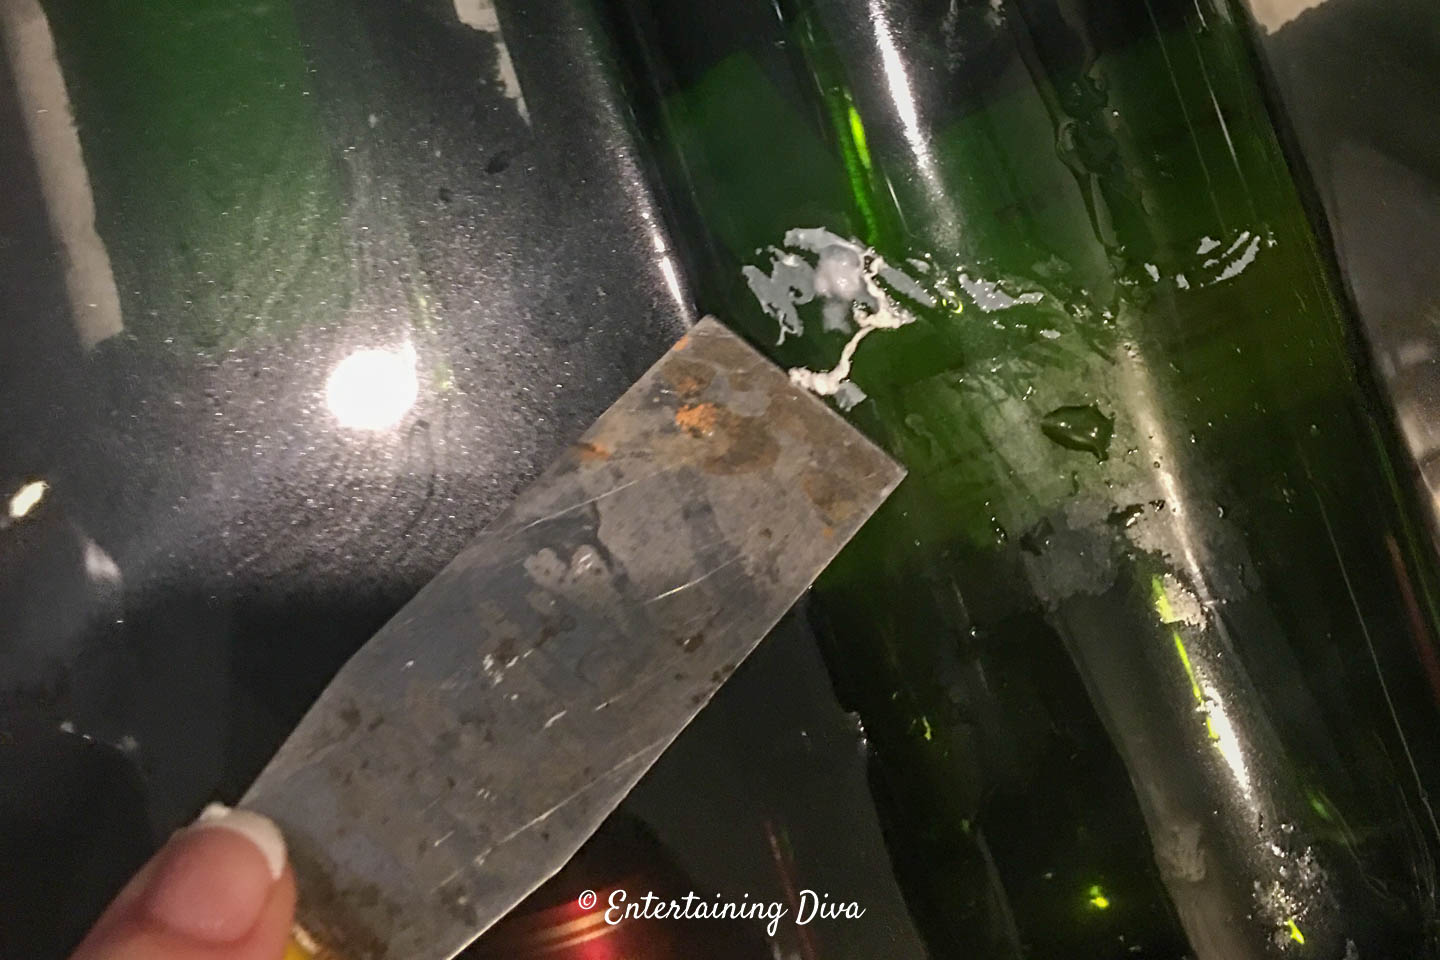
For the ones that didn’t, I used a paint scraper to get the extra sticky stuff off.
You could probably also use Goo Gone, Krud Kutter or another type of adhesive remover. The labels on my bottles came off pretty easily so I didn’t have to resort to that.
Then I washed them with dish soap to make sure the outsides were clean.
And dried them thoroughly before continuing.
2 | Spray paint the bottles matte black
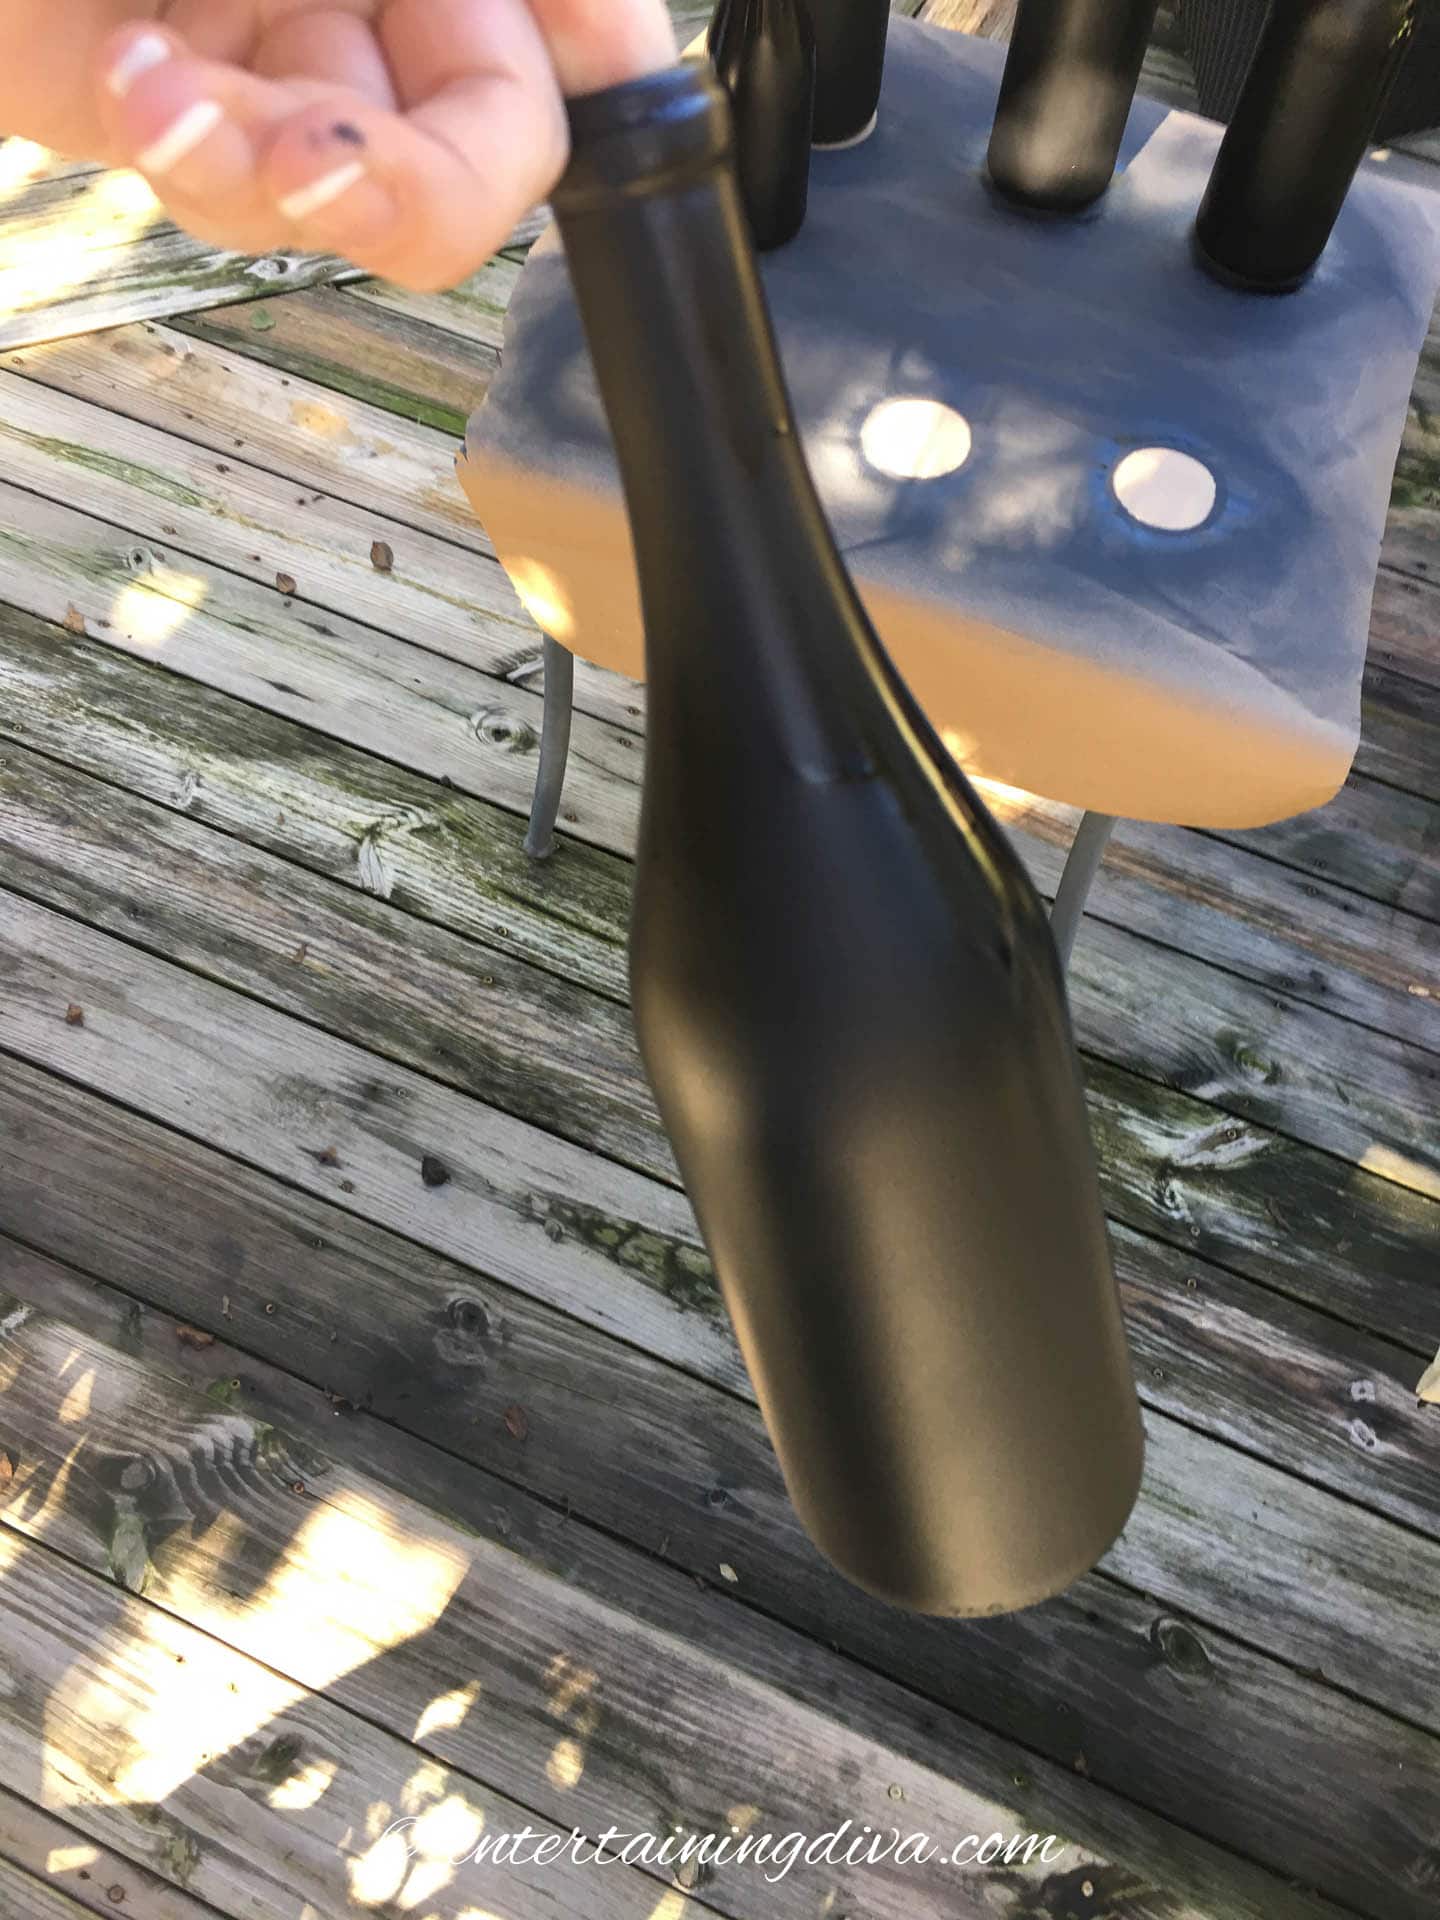
Next, I spray painted the bottles flat black.
If your wine bottles are already black, you can skip this step.
But I really like the contrast of the matte black surface with the sparkly ribbon. So you might want to paint them anyway.
For more spray painting pointers, read how to spray paint wine bottles.
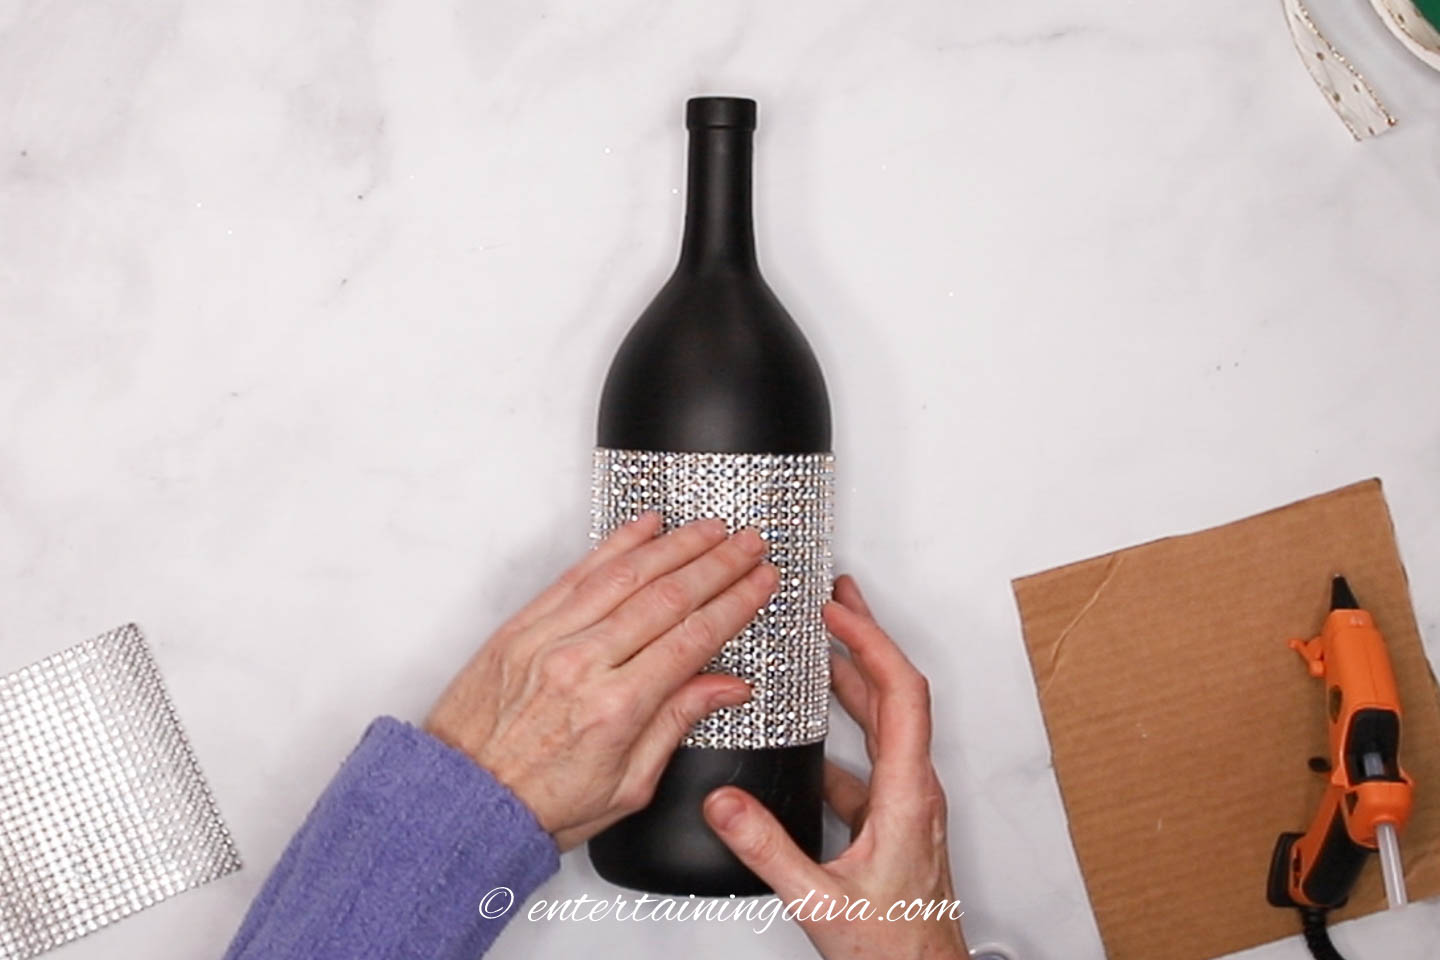
3 | Add the rhinestone ribbon
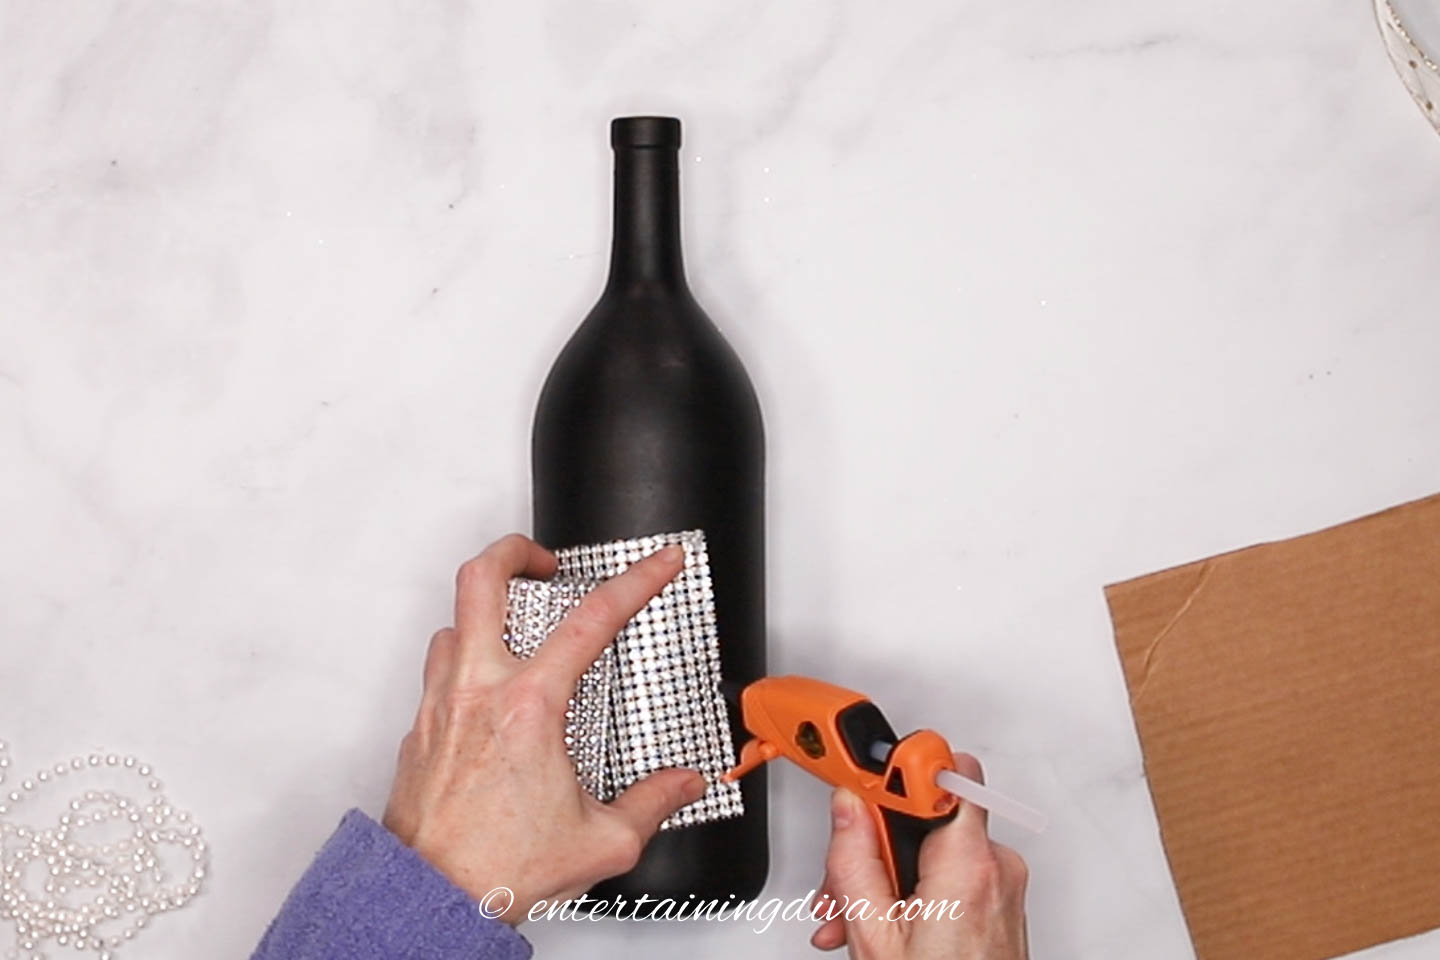
To start, add a line of hot glue down one side of the rhinestone ribbon.
Stick that end of the ribbon onto the middle of the bottle, making sure it is straight.
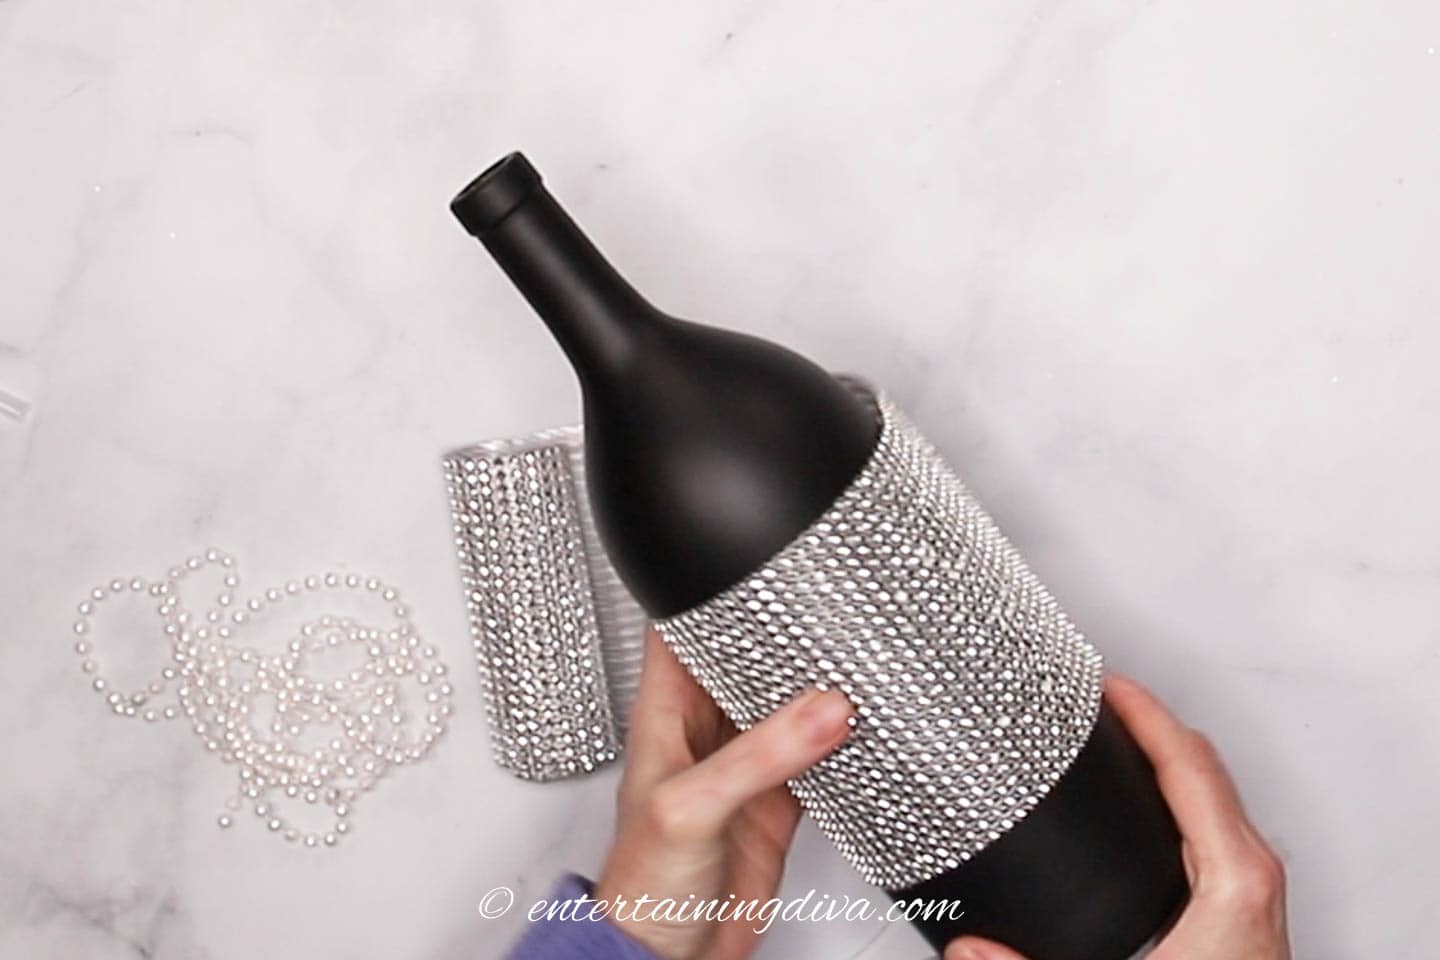
Then wrap the ribbon around the bottle to get back to the starting point.
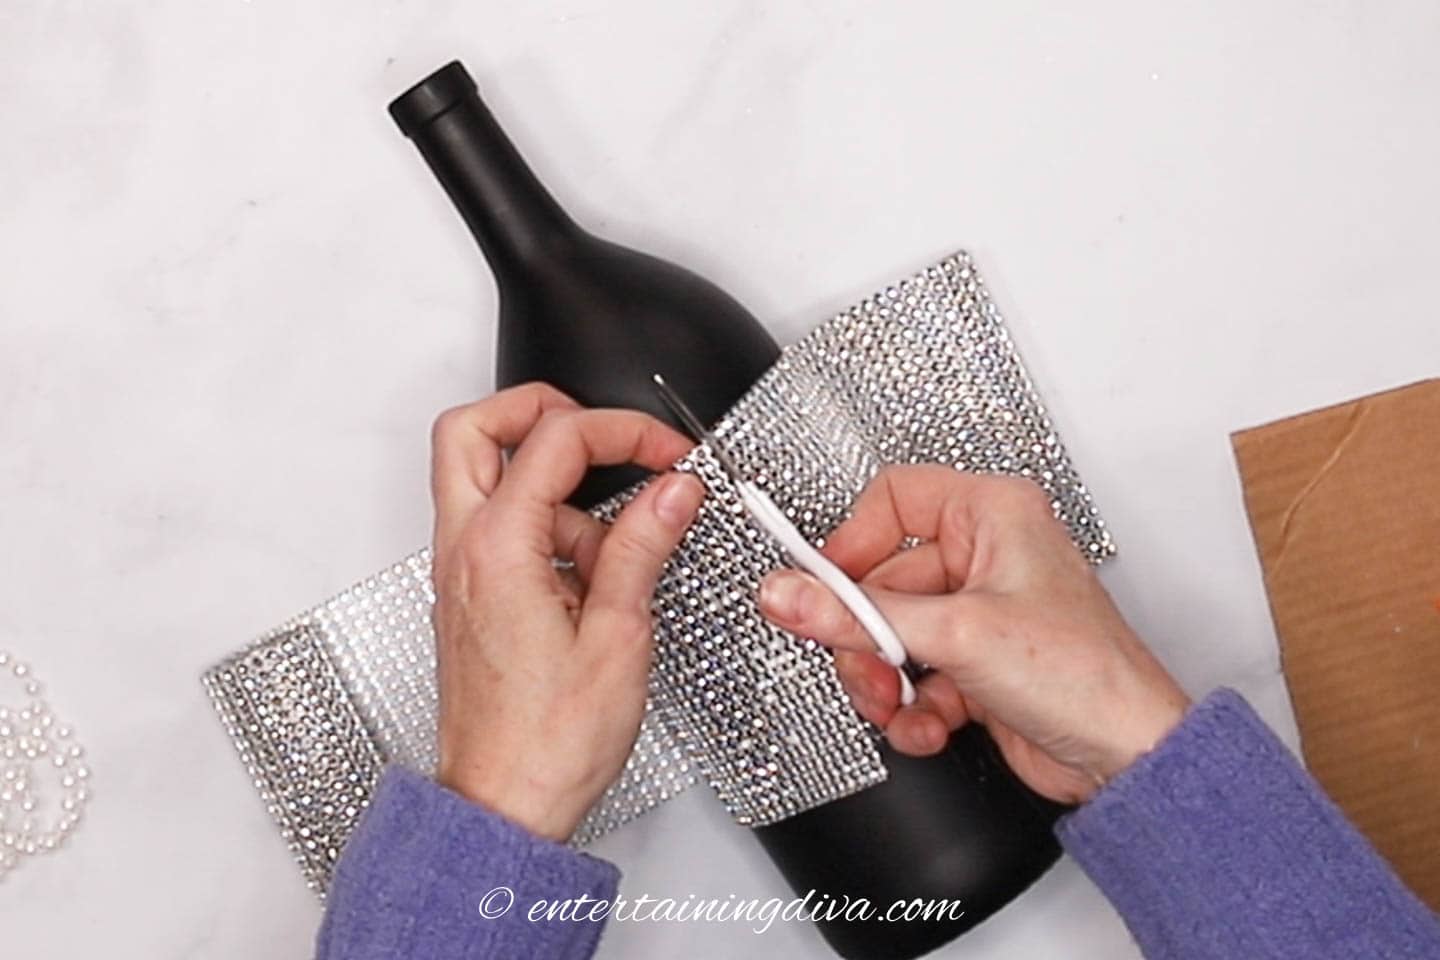
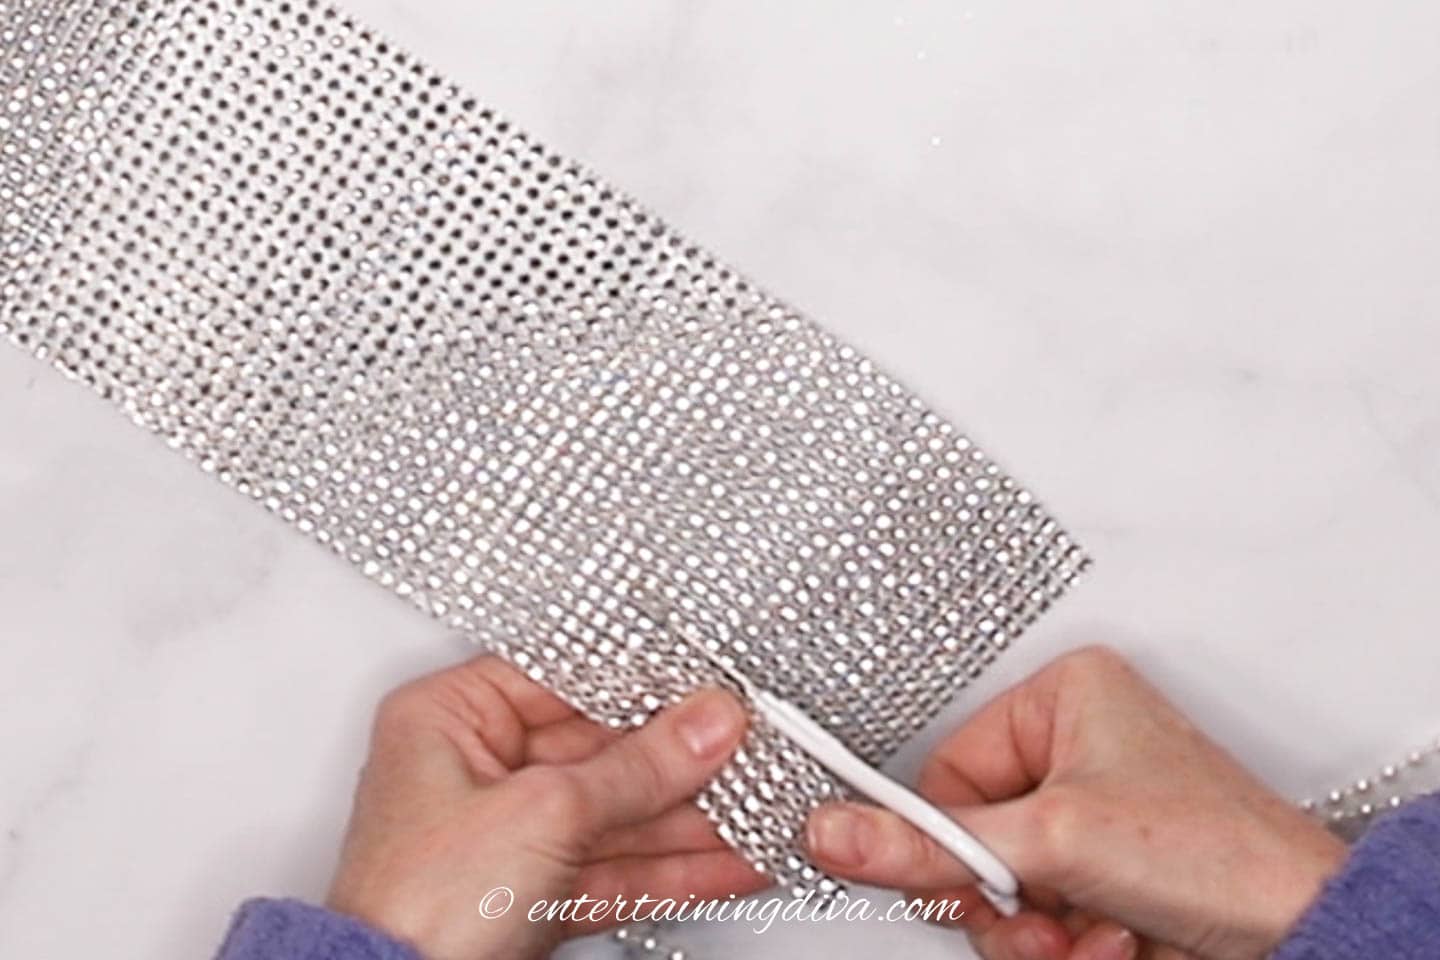
Cut off the extra ribbon.
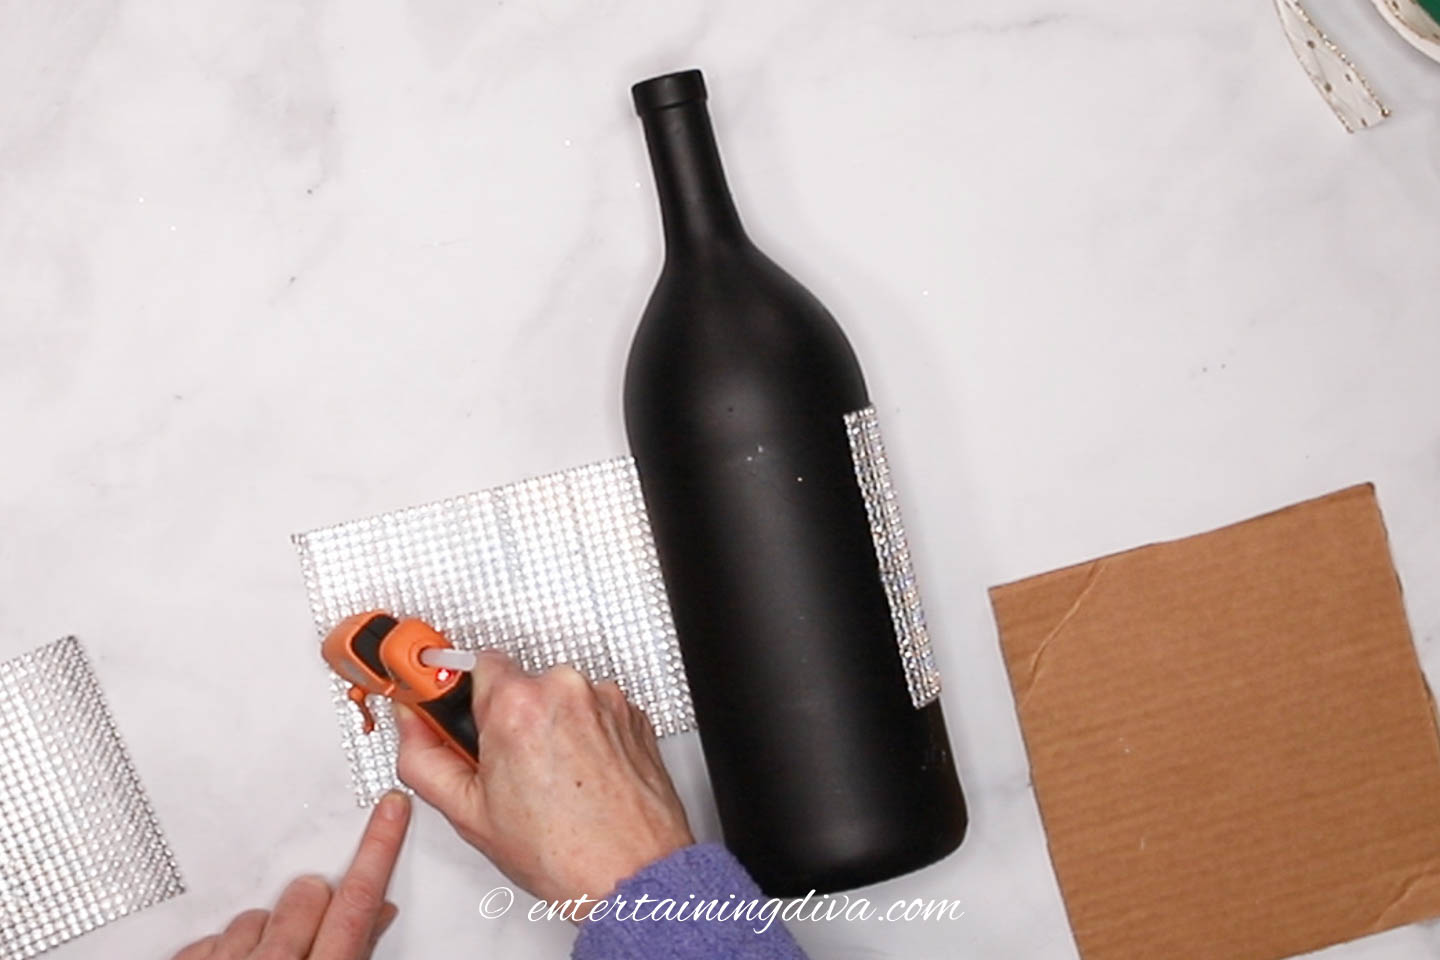
Put a line of hot glue down the side of the other end of the rhinestone ribbon.
Stick it onto the side of the bottle.
4 | Glue the pearls around the edges
Now we’re going to add a line of pearls around the top of the rhinestone ribbon.
Add a line of hot glue along the top of the ribbon.
Stick the pearl string on to the hot glue.
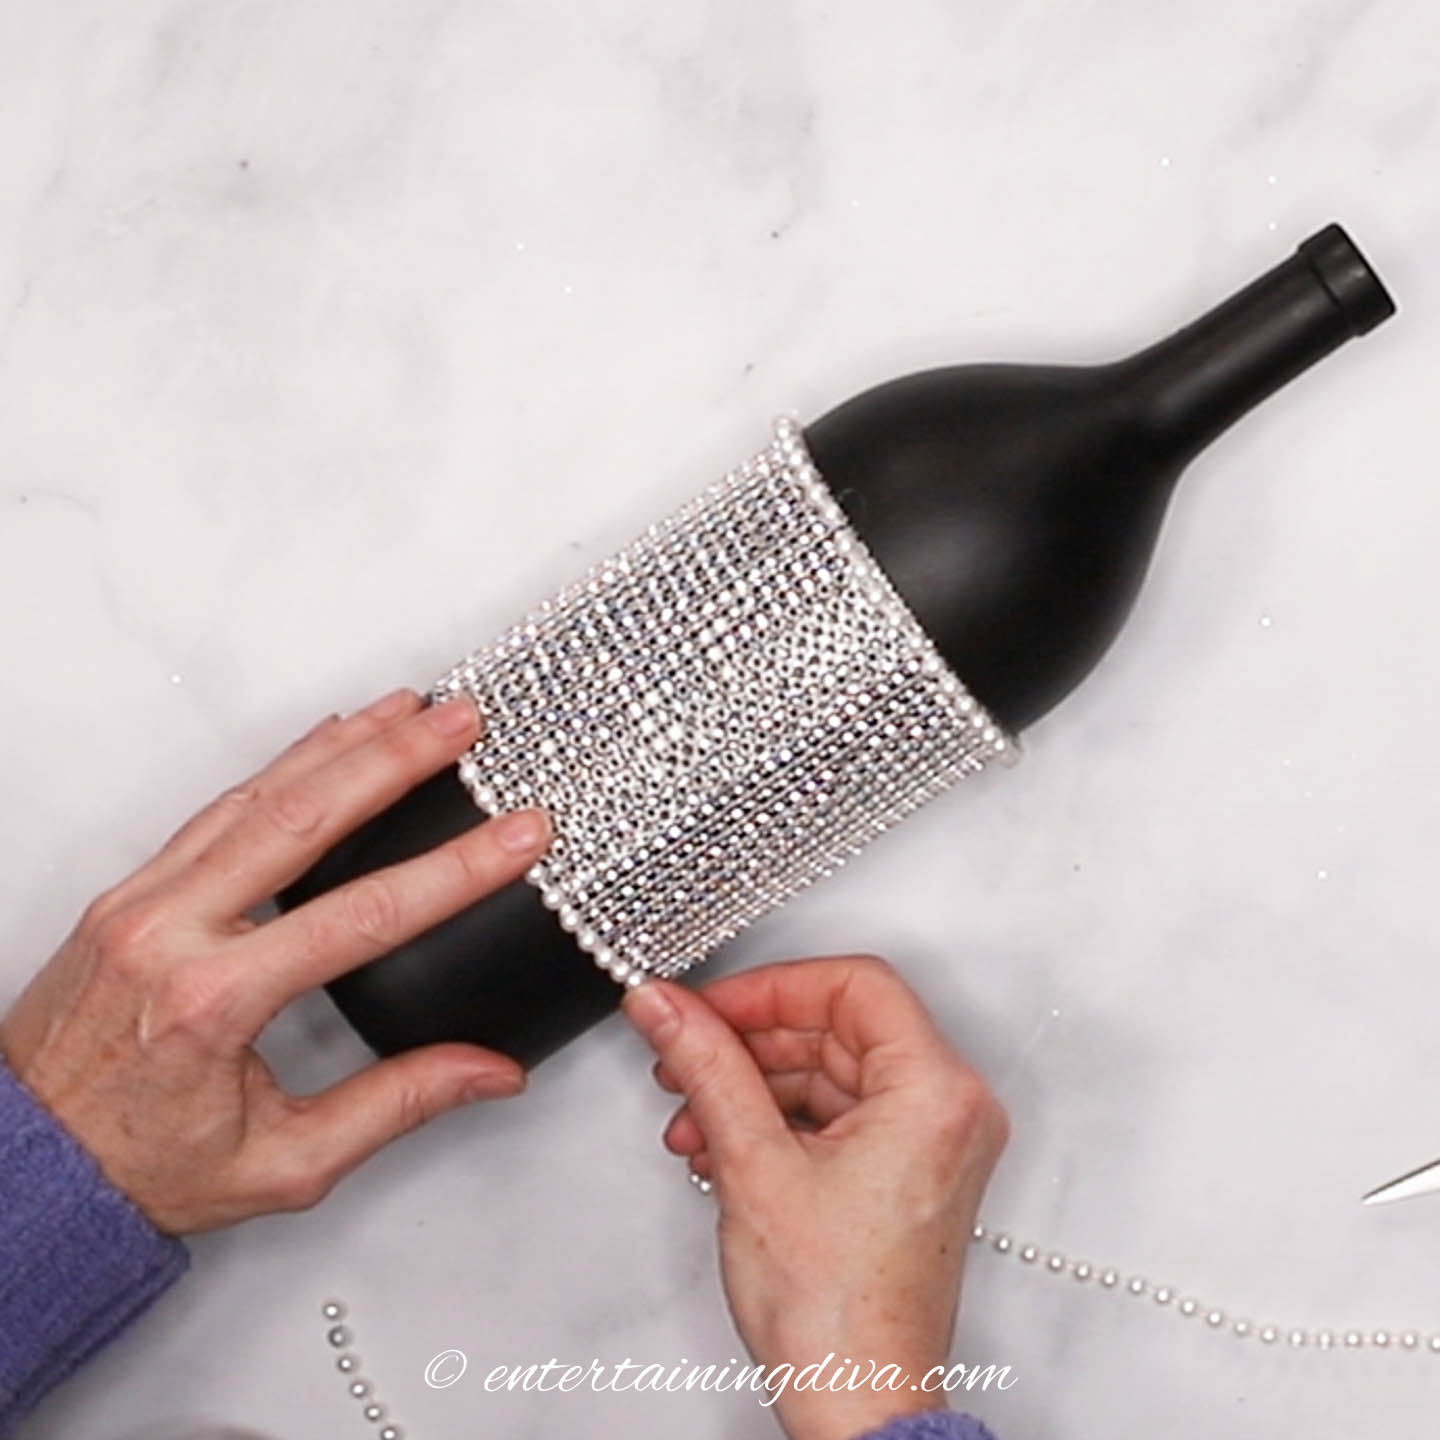
Repeat the same steps to stick the pearl string along the bottom of the rhinestone ribbon.
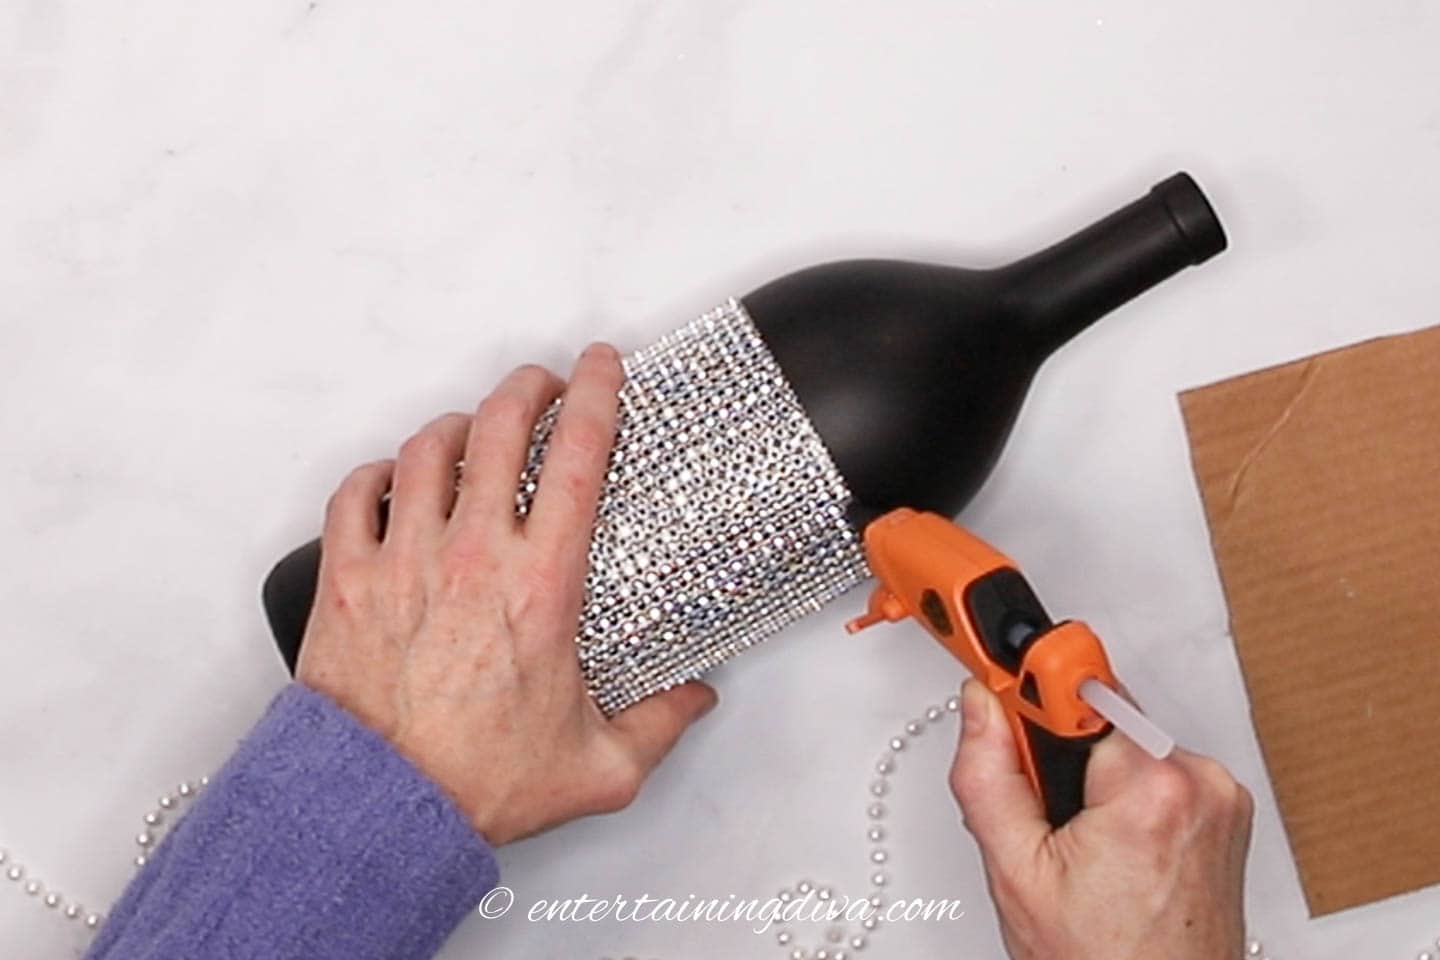
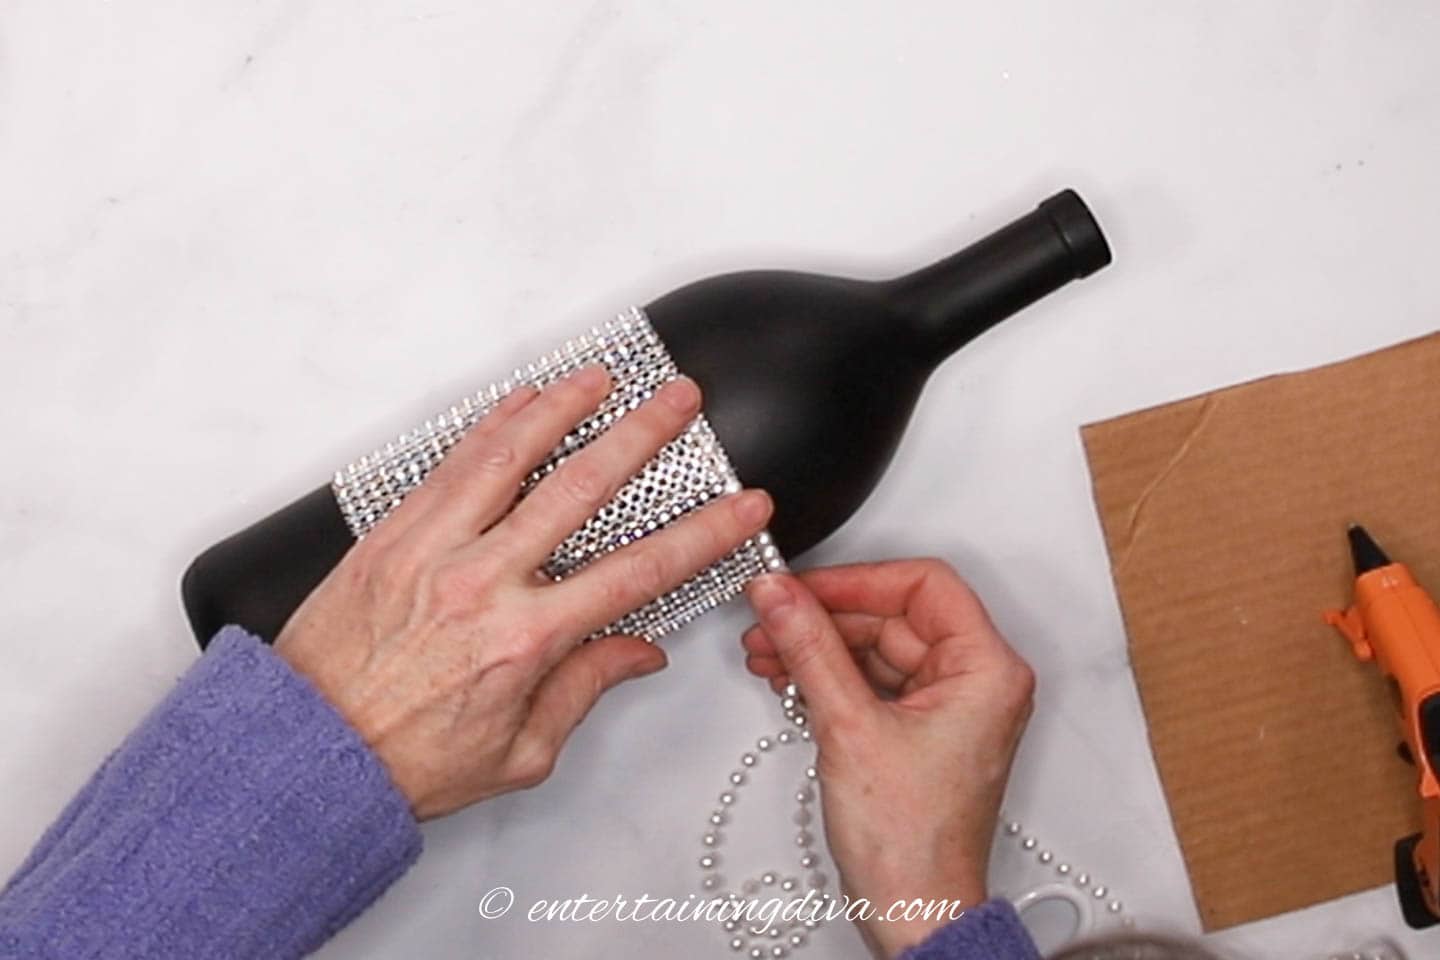
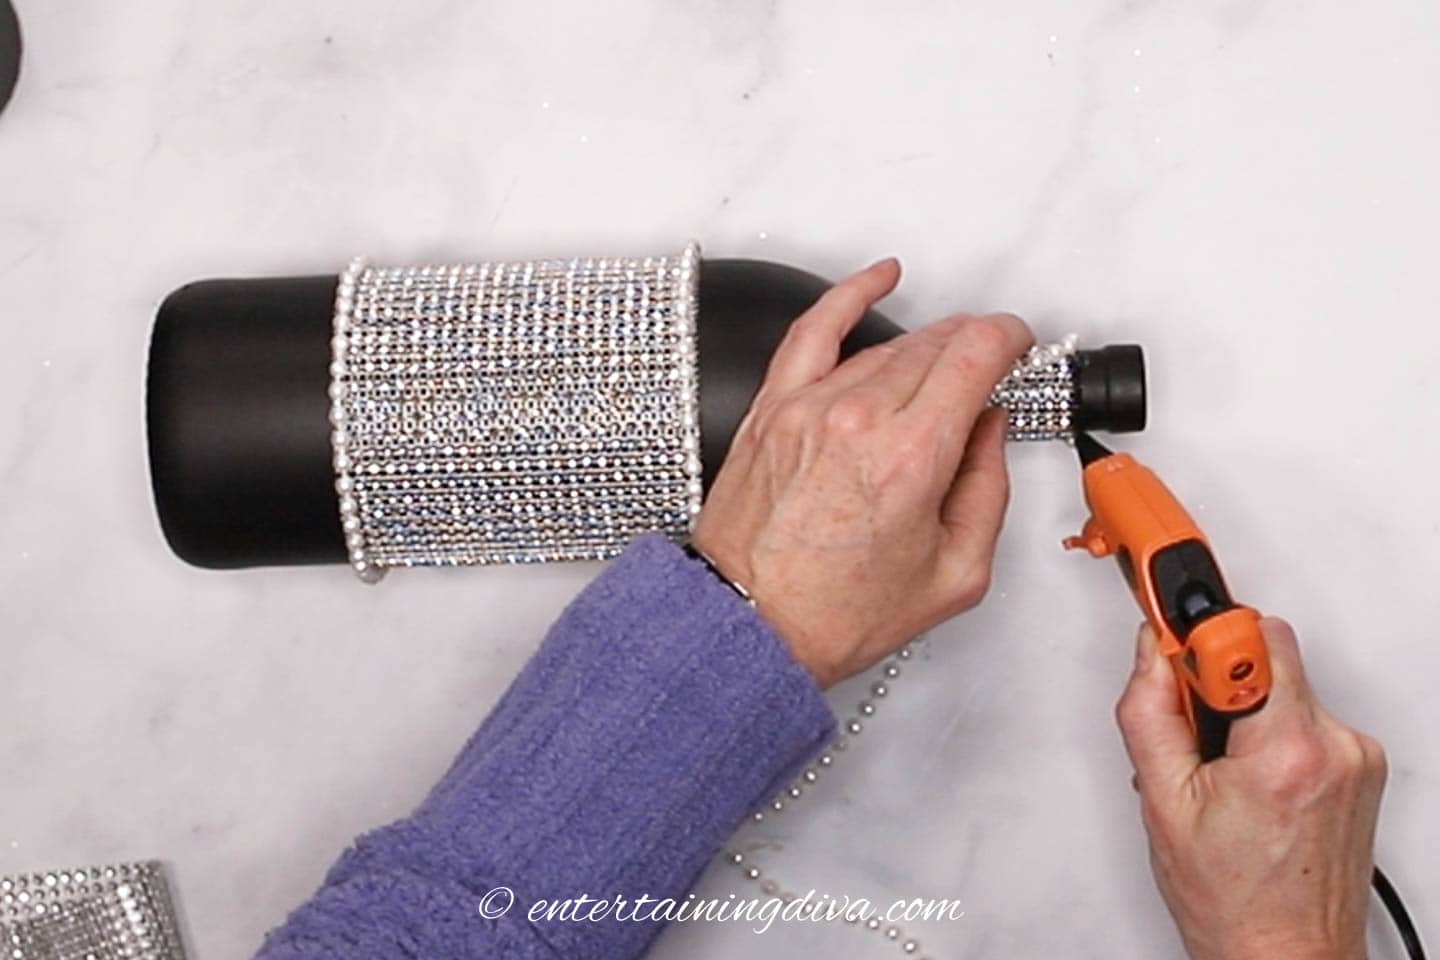
5 | Stick rhinestones to the neck of the bottle
Cut a piece of the rhinestone ribbon that is just wide enough to fit on the neck of the bottle. For my wine bottle, it was 6 rhinestones wide.
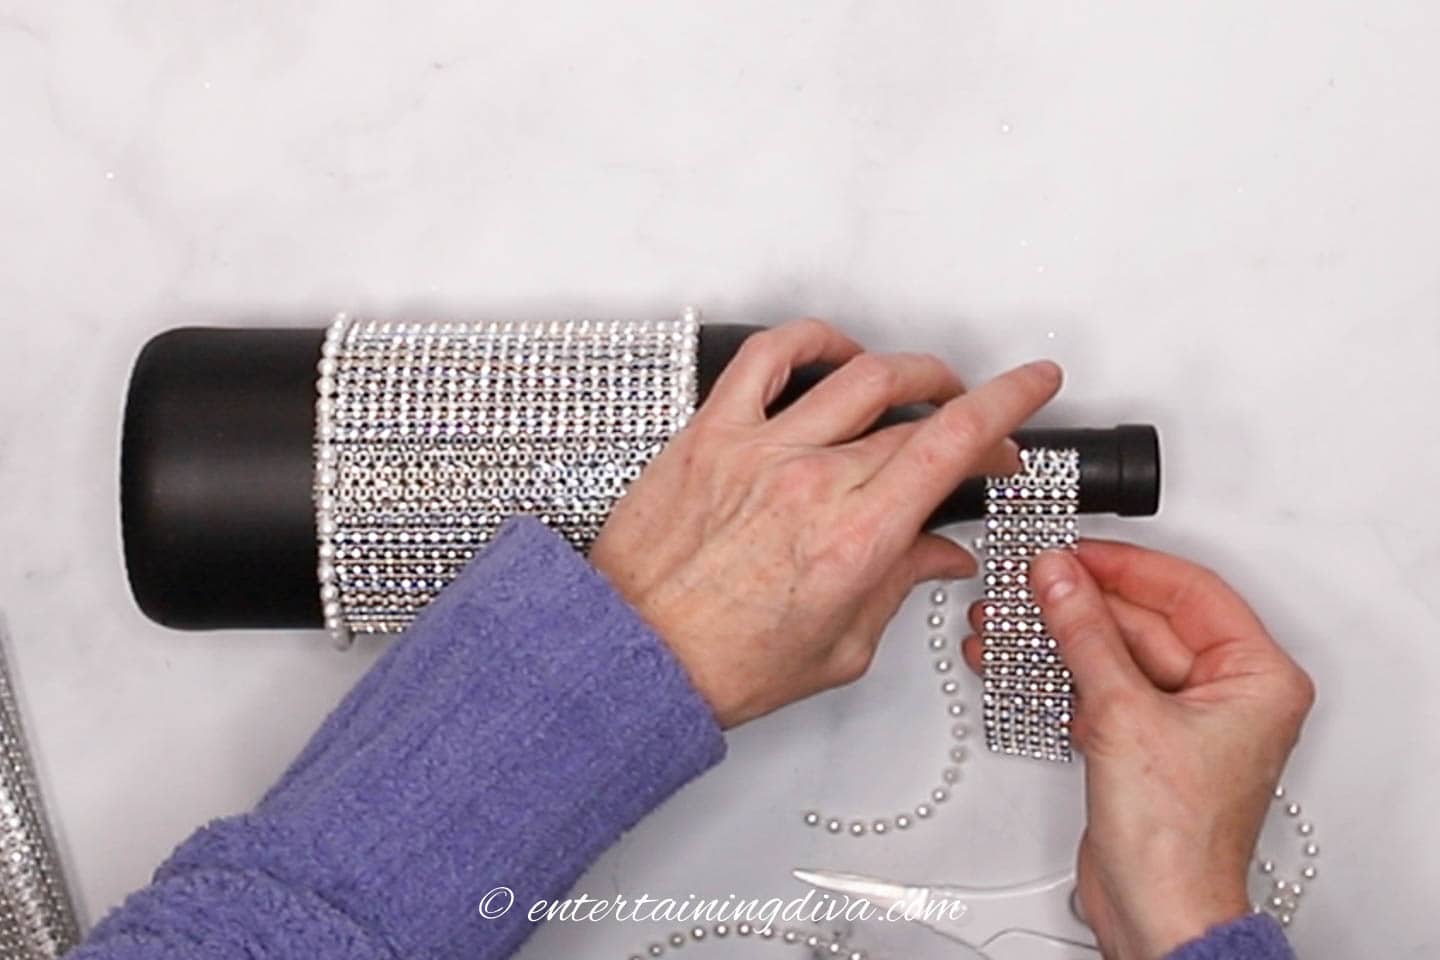
Use hot glue to stick the end of the ribbon to the bottle.
If you do this on the same side where you started the other ribbon, it’s easier to place the bottle so you can’t see any joins.

Wrap the ribbon around the neck of the bottle and glue it down with the hot glue.
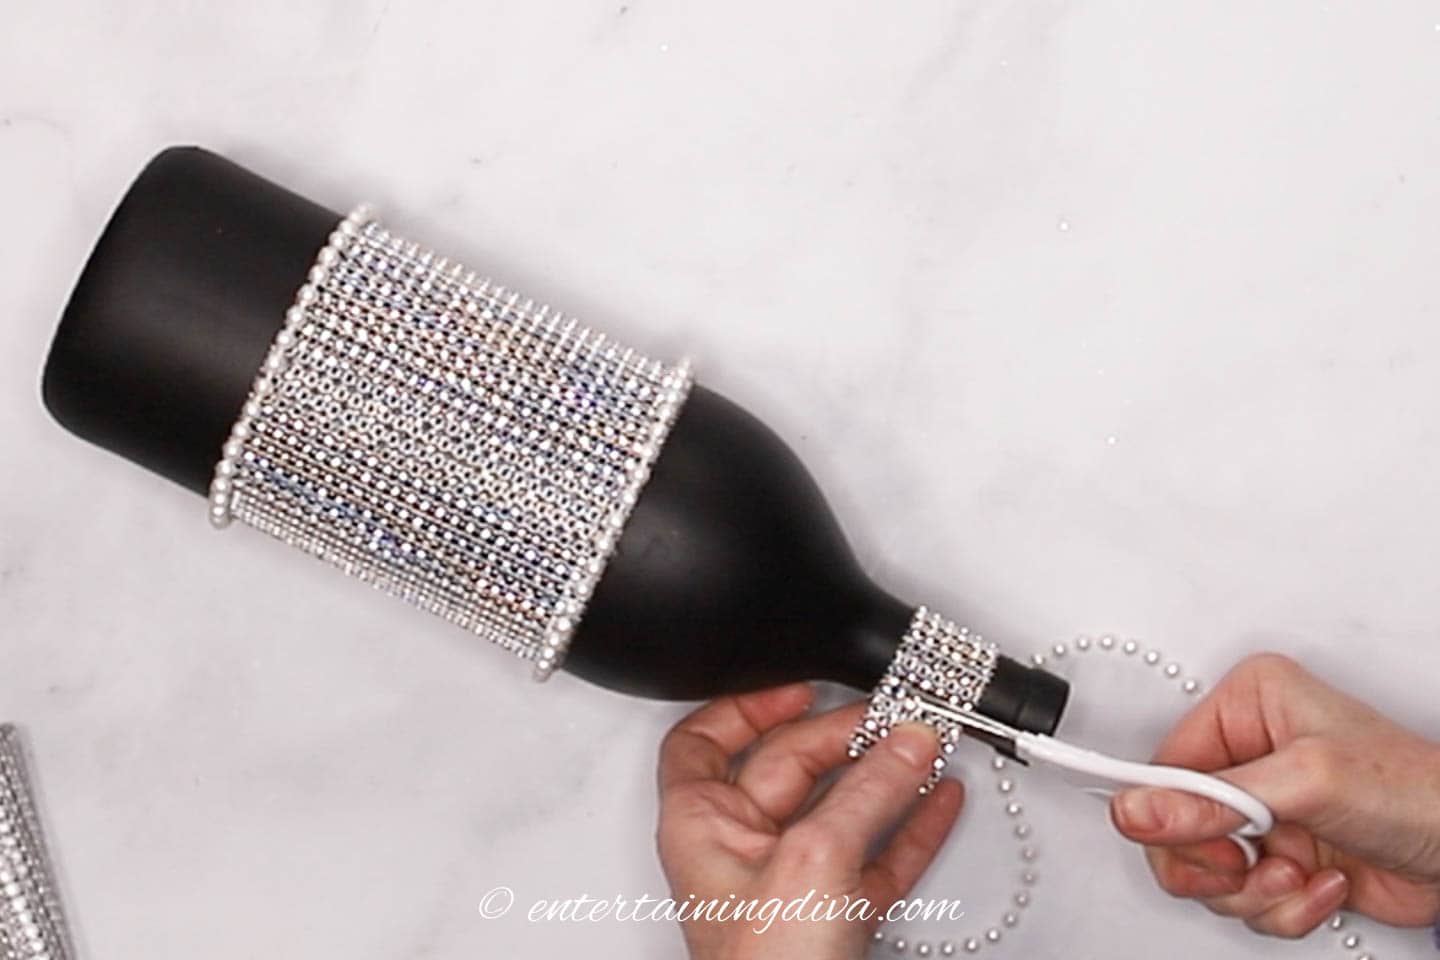
Cut off the excess ribbon.
6 | Add pearls around the edges
Add a line of hot glue around the top of the ribbon.
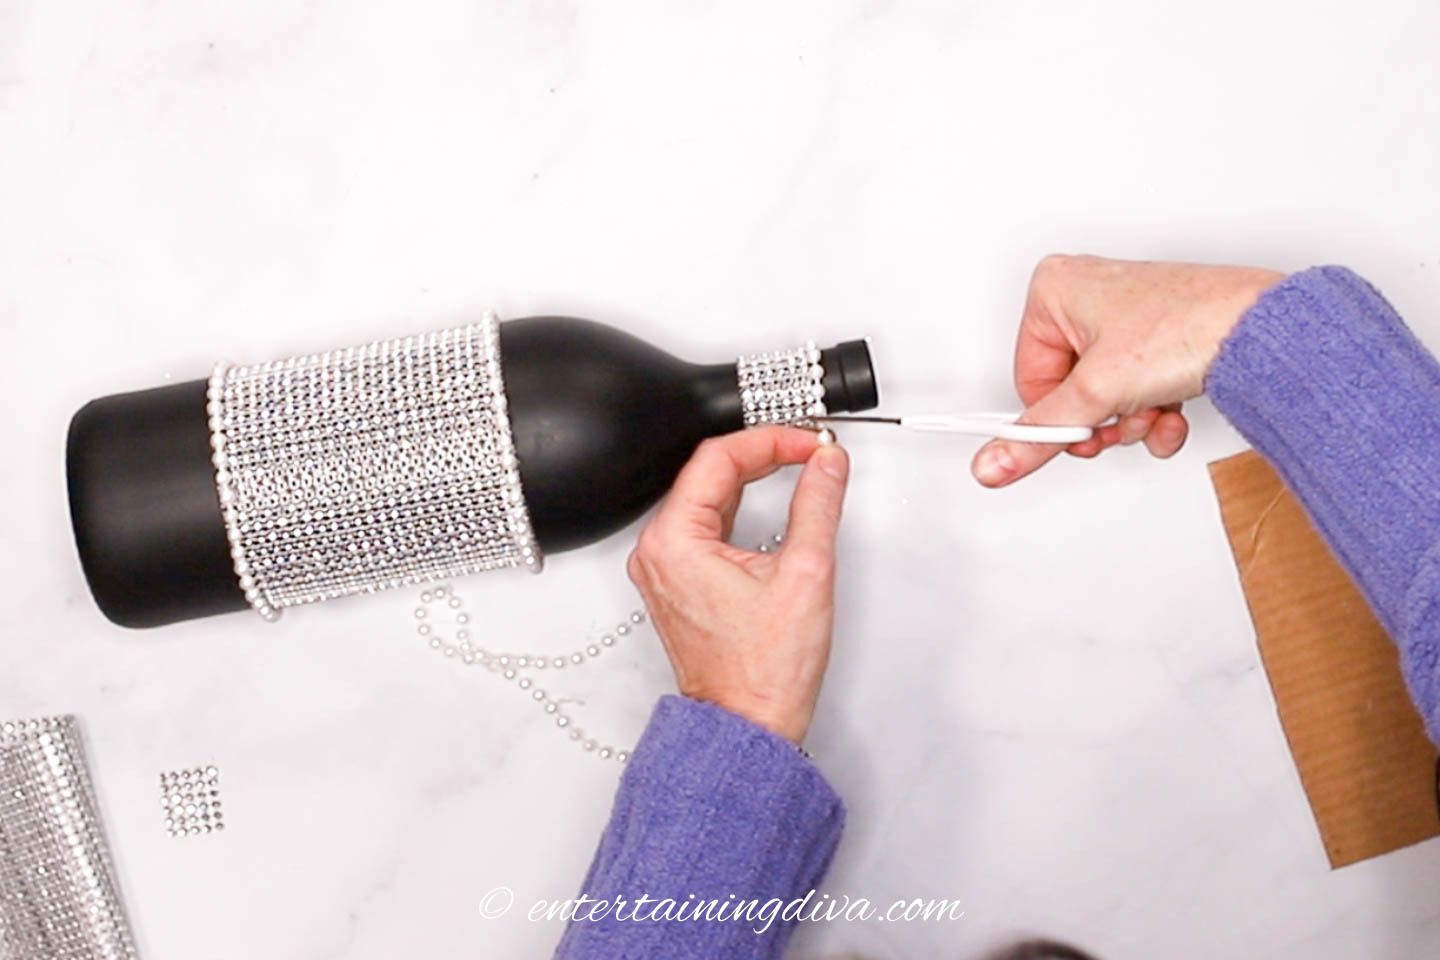
Glue down the pearl string and cut it off when you get back to the beginning.
Repeat the steps to glue the pearl string around the bottom of the rhinestone ribbon.
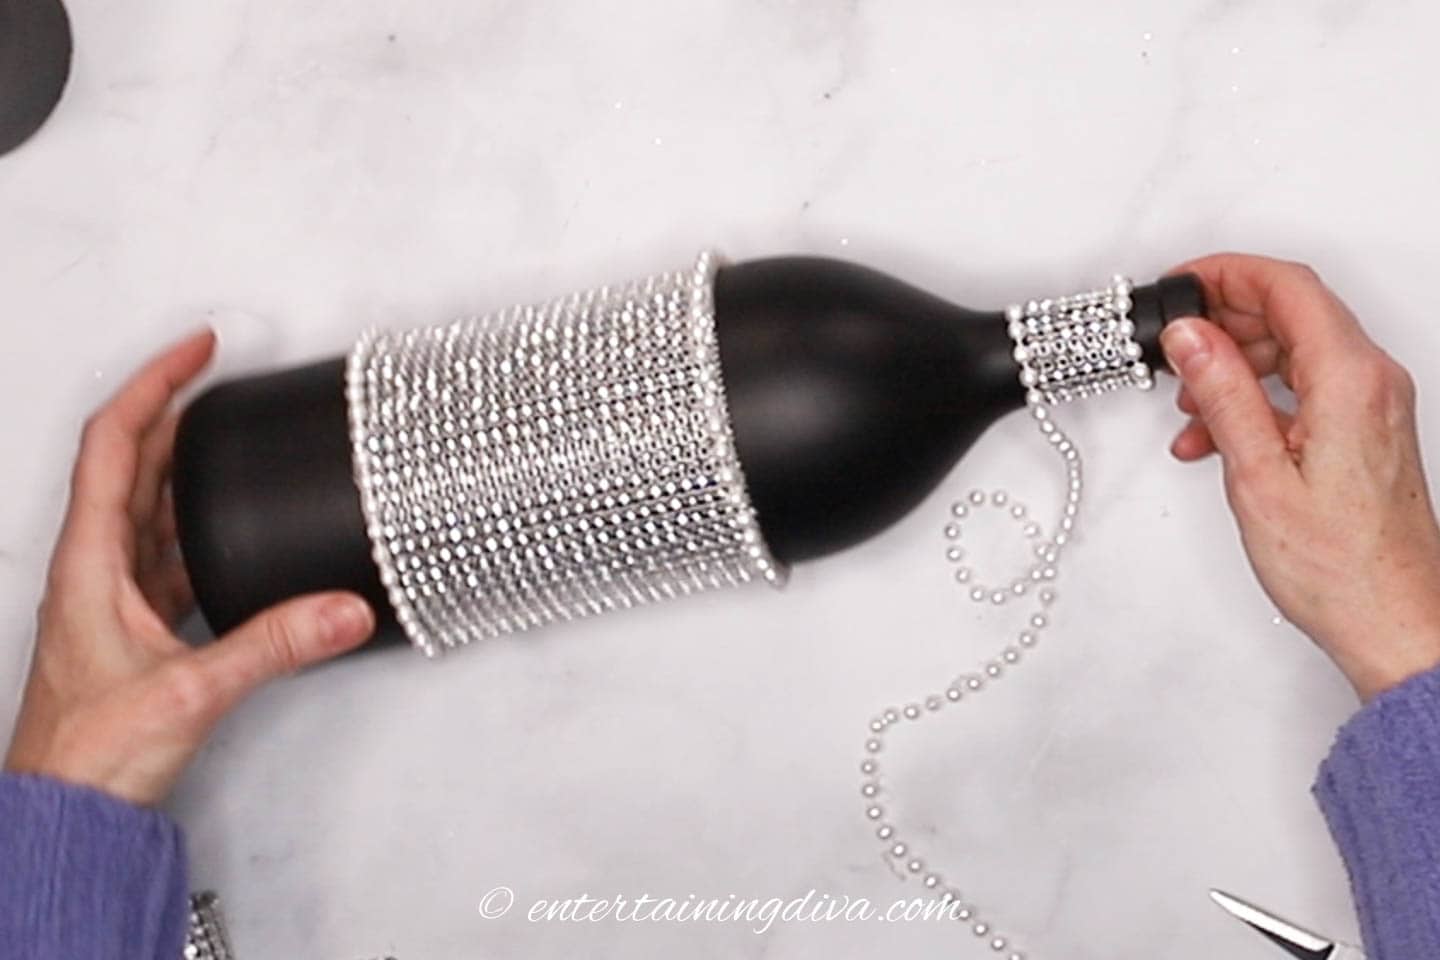
The finished rhinestone wine bottle
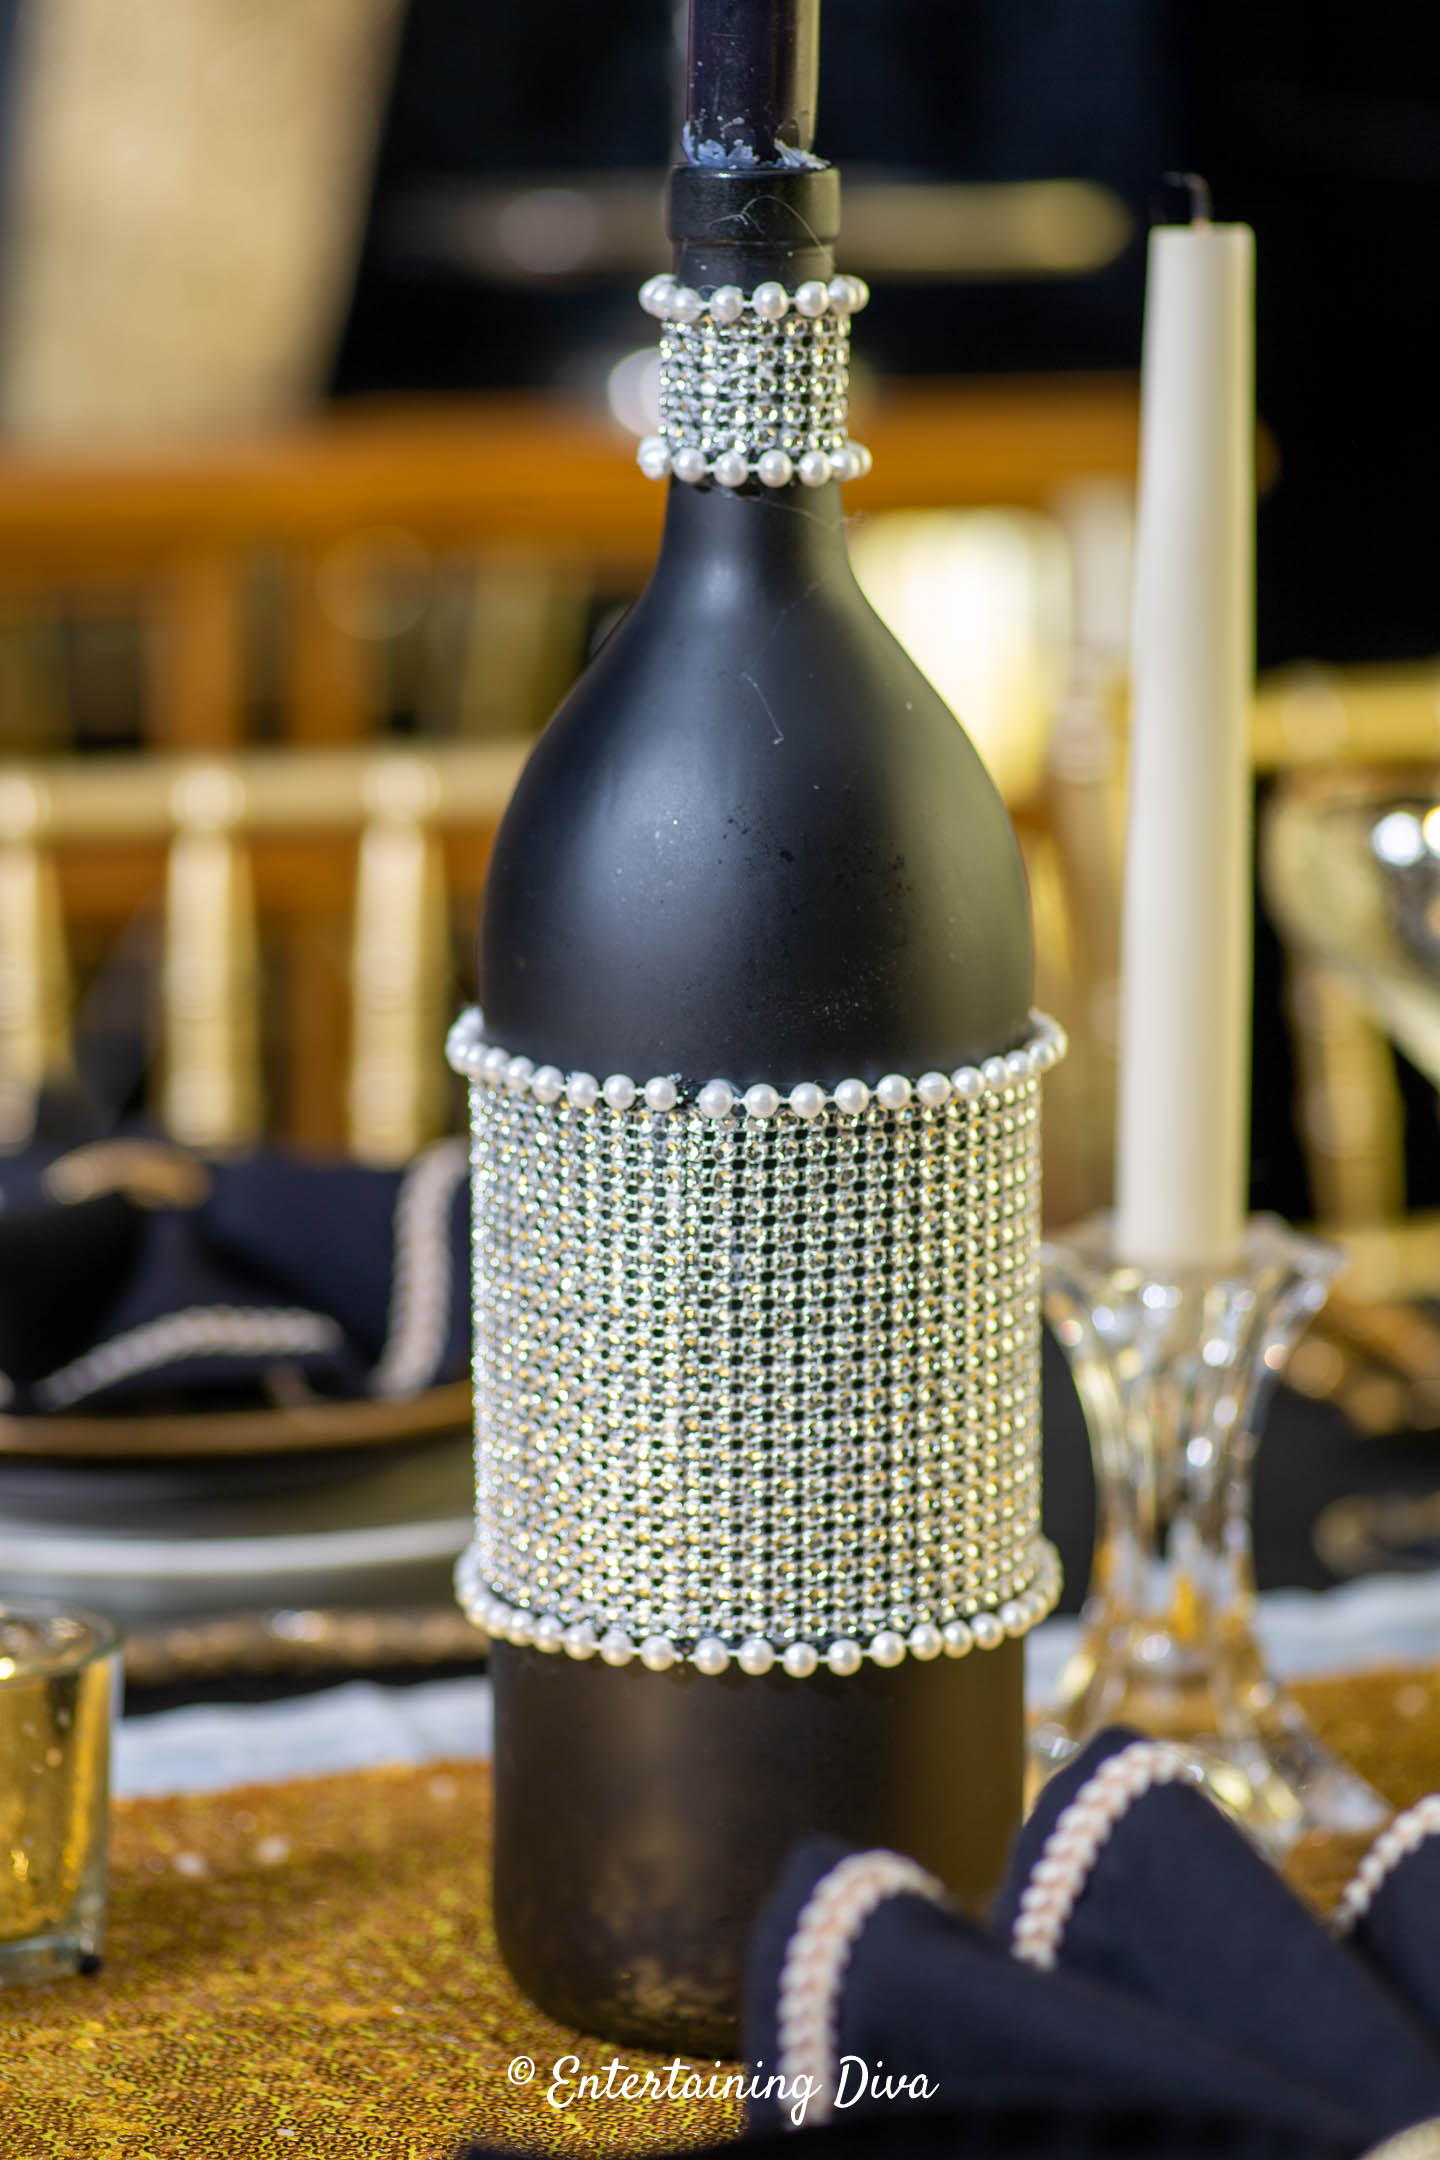
I love how elegant this decorated wine bottle is.
The rhinestone ribbon and pearls are like jewelry on a black party dress.
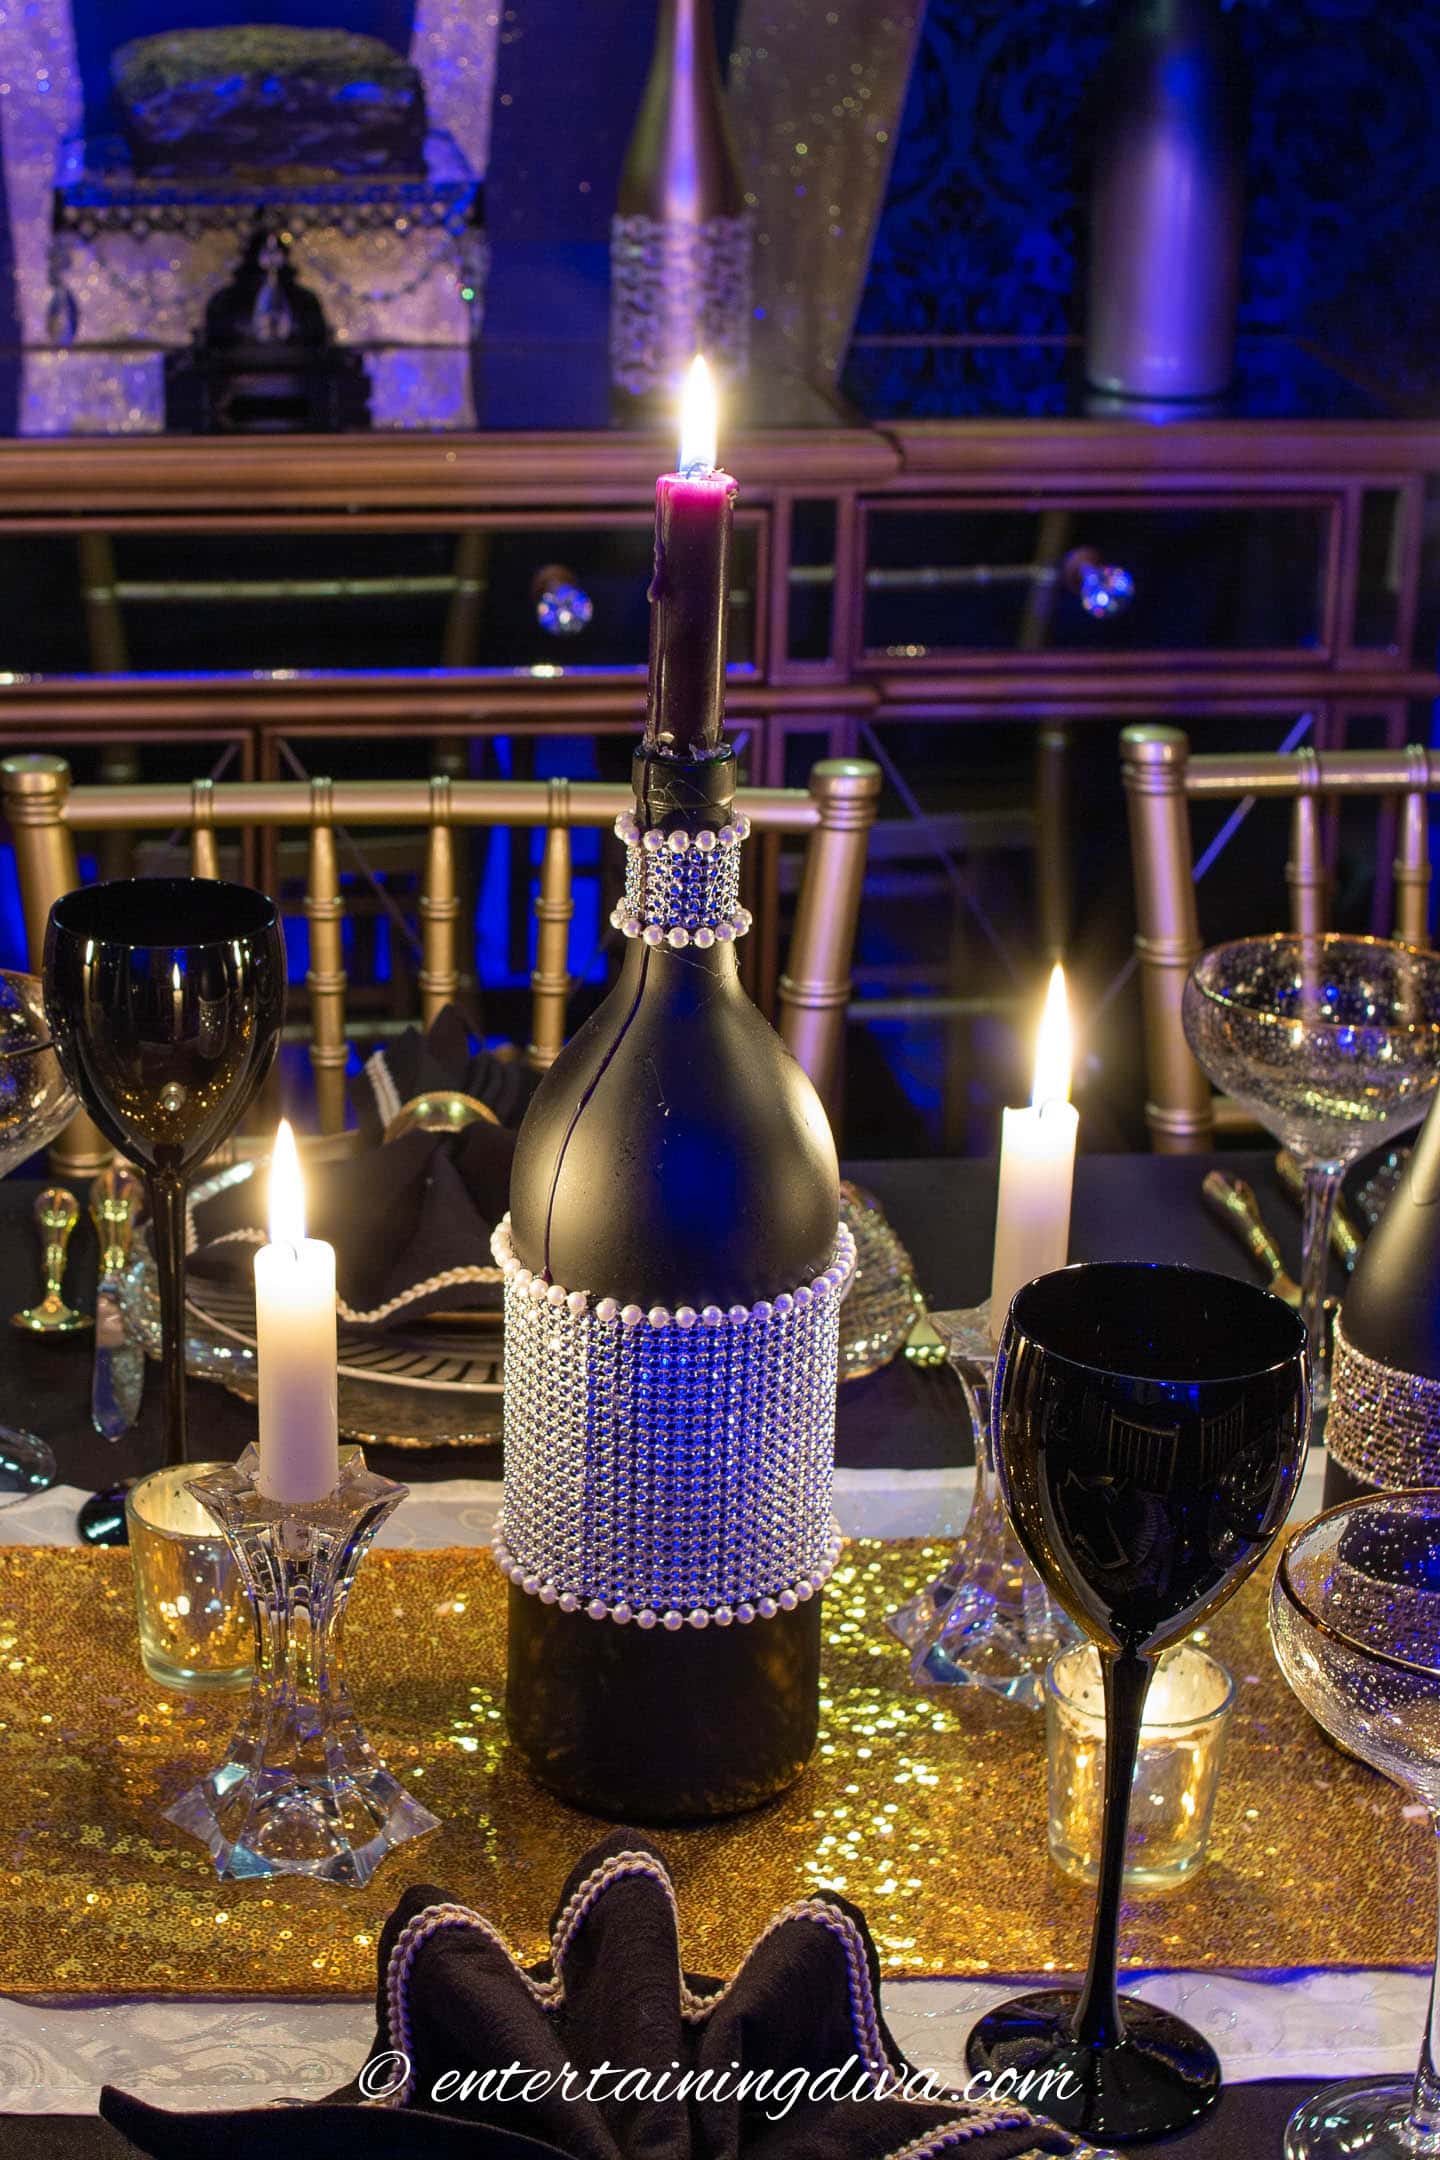
And it looks beautiful as part of a centerpiece for a glam table setting.
Other decorated wine bottles you might like
Have comments or questions on our DIY rhinestone black wine bottle with pearls? Tell us in the section below.
This post was originally published on March 26, 2023 but was updated with new content on December 13, 2023.