
How To Make Bunny Folded Napkins

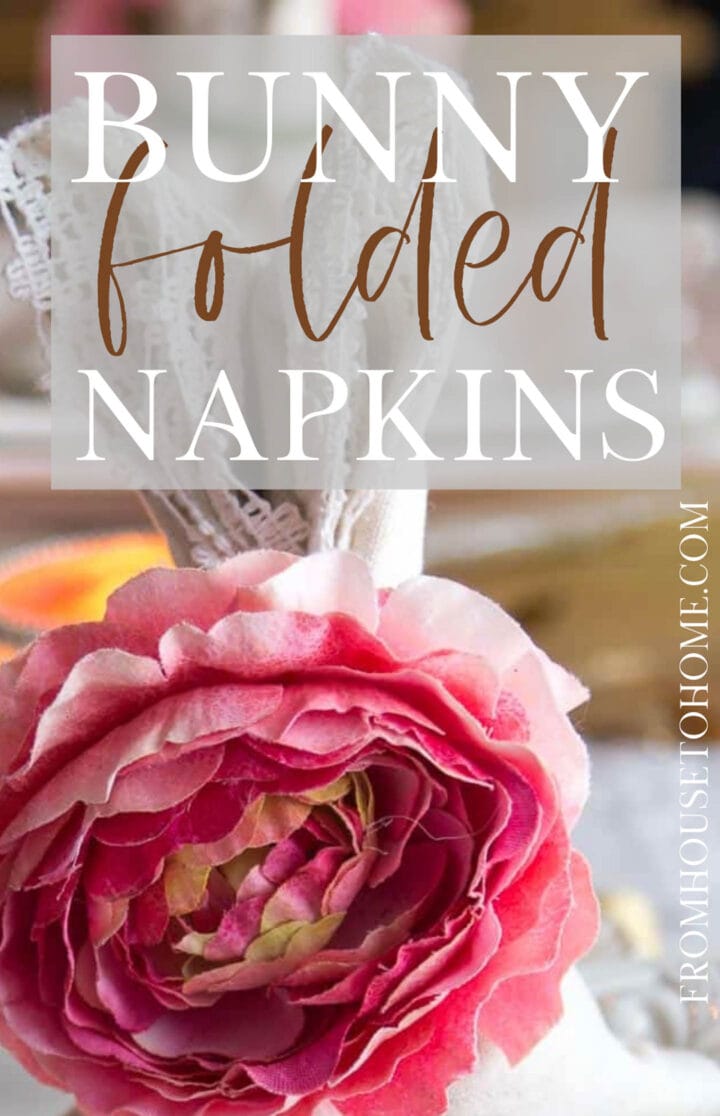
This tutorial provides step-by-step instructions on creating bunny folded napkins. They’re an easy and inexpensive way to add a whimsical touch to your Easter table setting.

I am not really a “go all-out” decorating for Easter person.
In the spring, I am always so busy yanking out weeds in the garden, that I don’t have much time to spend on holiday decorating.
However, I do usually have an Easter dinner and I like to have something on the table that makes it feel like Easter.
Which means that I’m usually hunting around for good Easter table setting ideas at the last minute.

And these folded bunny napkins are the perfect solution!
What You Need
This post may contain affiliate links. We make a small commission if you buy the products from these links (at no extra cost to you). As an Amazon Associate, I earn from qualifying purchases. But we only recommend products we would use ourselves. For more information, click here to see our disclosures
There really aren’t many supplies required for this project…just some napkins and napkin rings! These are the ones I used:
How to fold the napkin
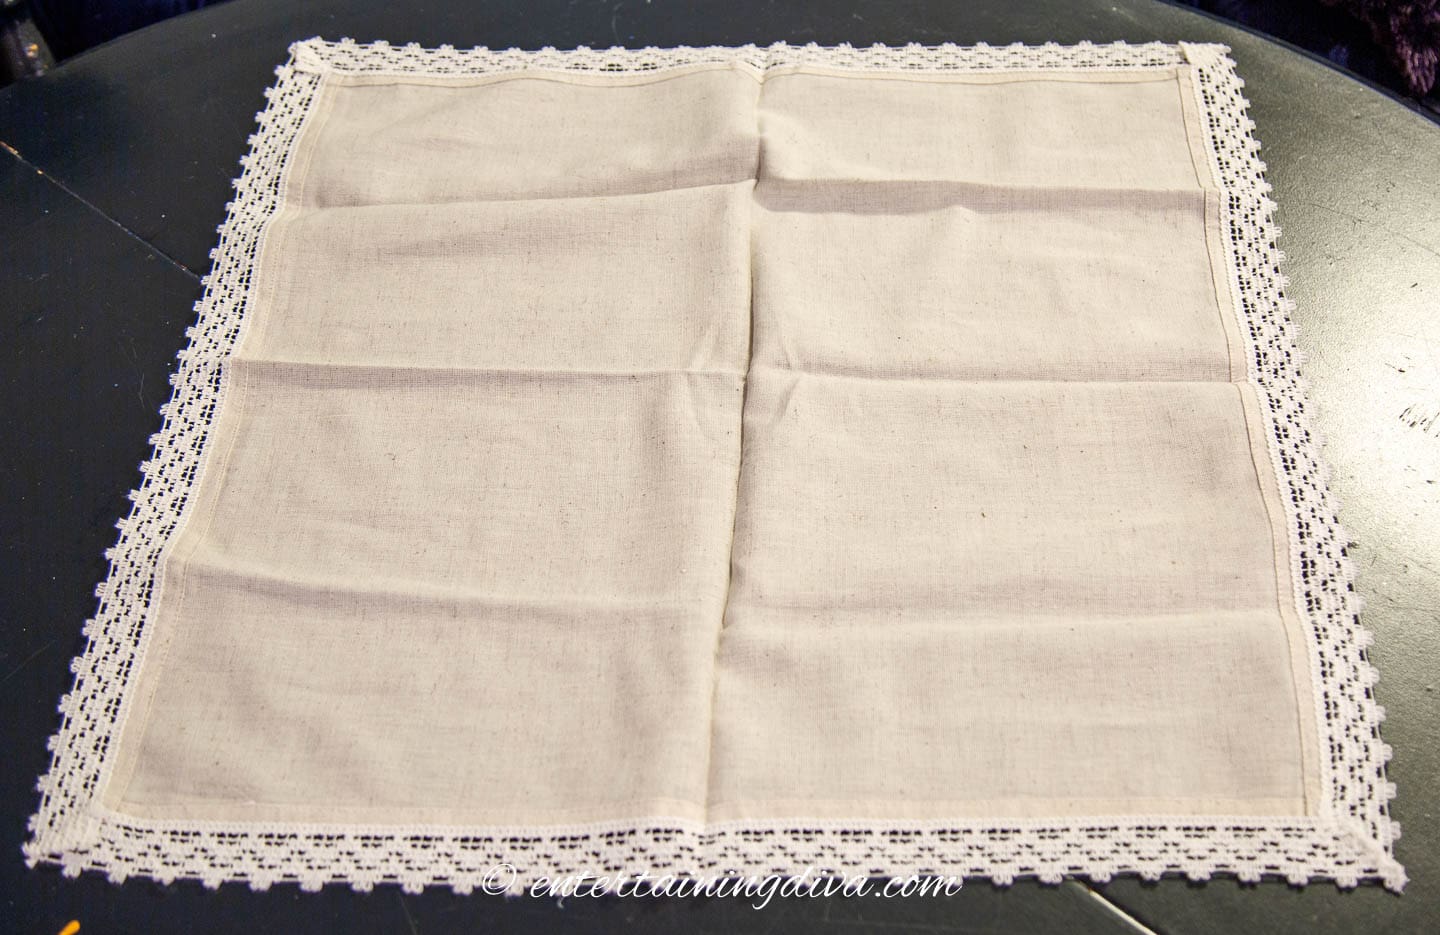
Lay the napkin out flat.
Because of all the folds we’ll be doing, ironing isn’t all that important (but if you like to use ironed napkins, they’ll work, too!)
Fold the napkin in thirds, by first folding up the bottom third.
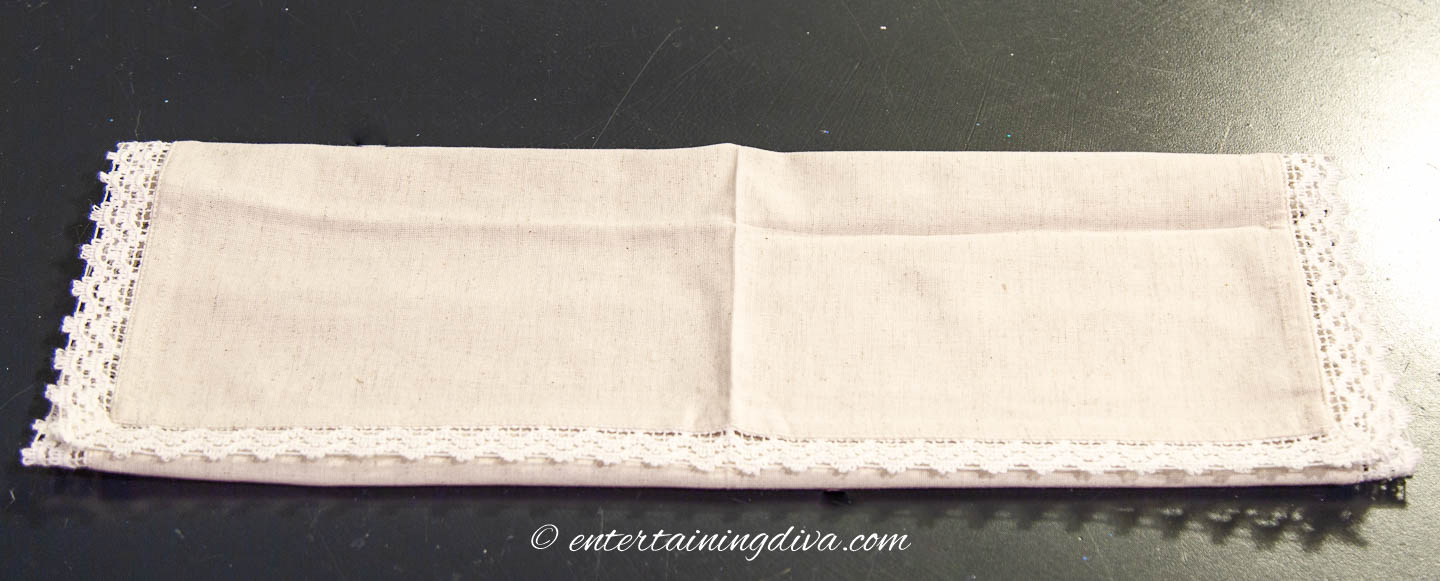
Then fold down the top third.
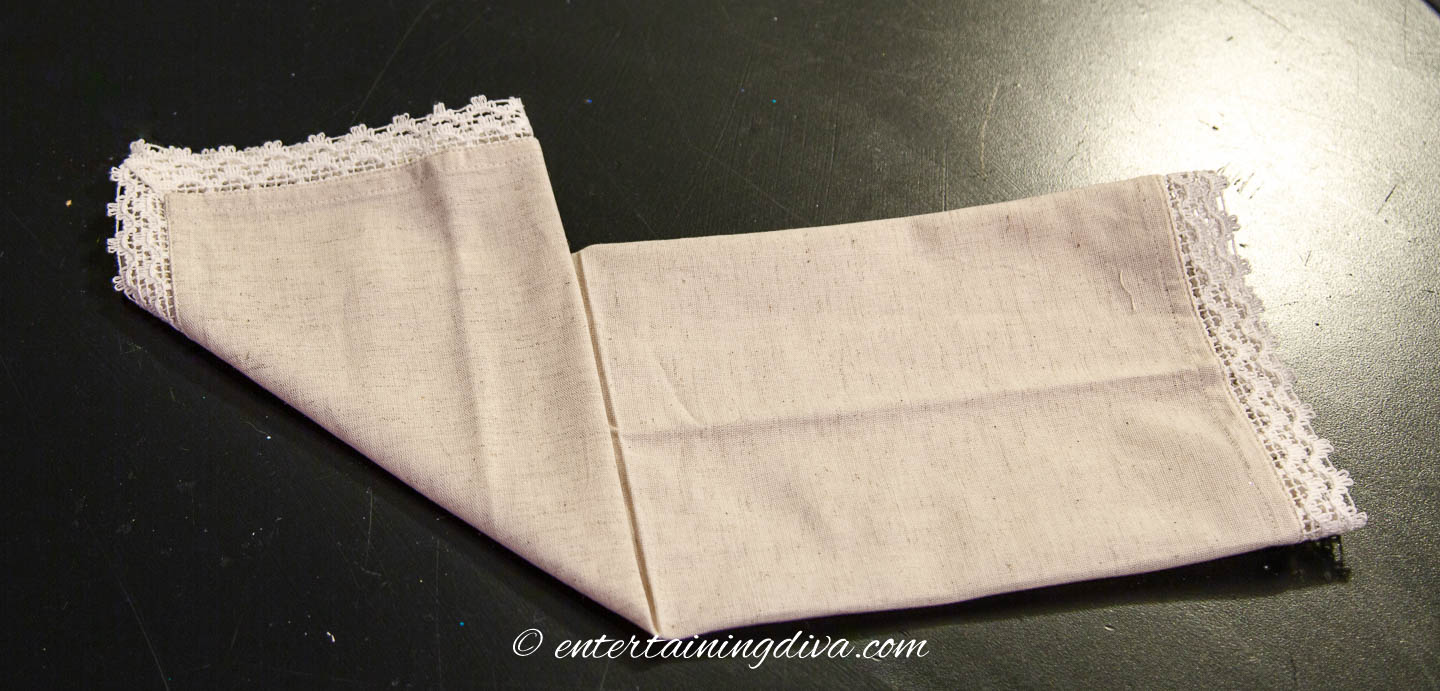
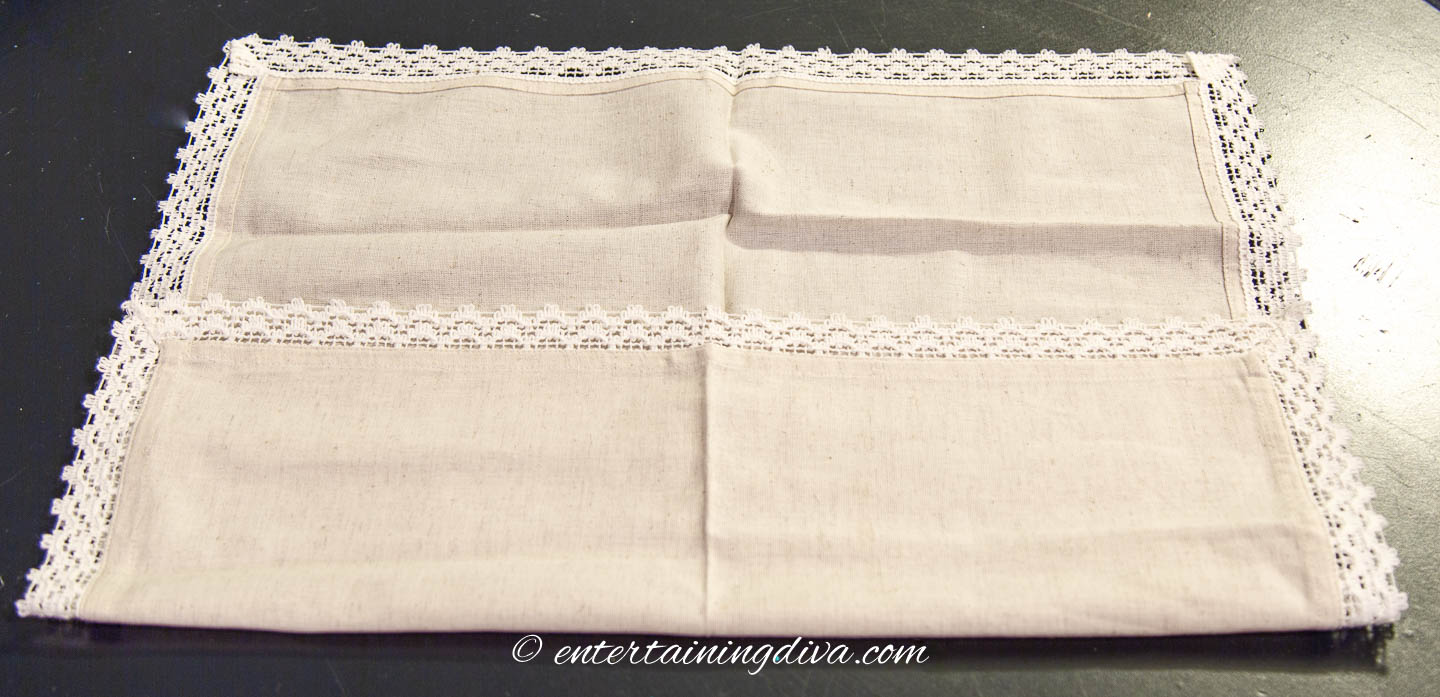
Flip the napkin over, making sure that the loose edges are at the top.
Then fold up the bottom left corner so that the napkin is folded half way across the length.
Fold up the bottom right corner so that it meets in the middle.
It should look like a V shape.
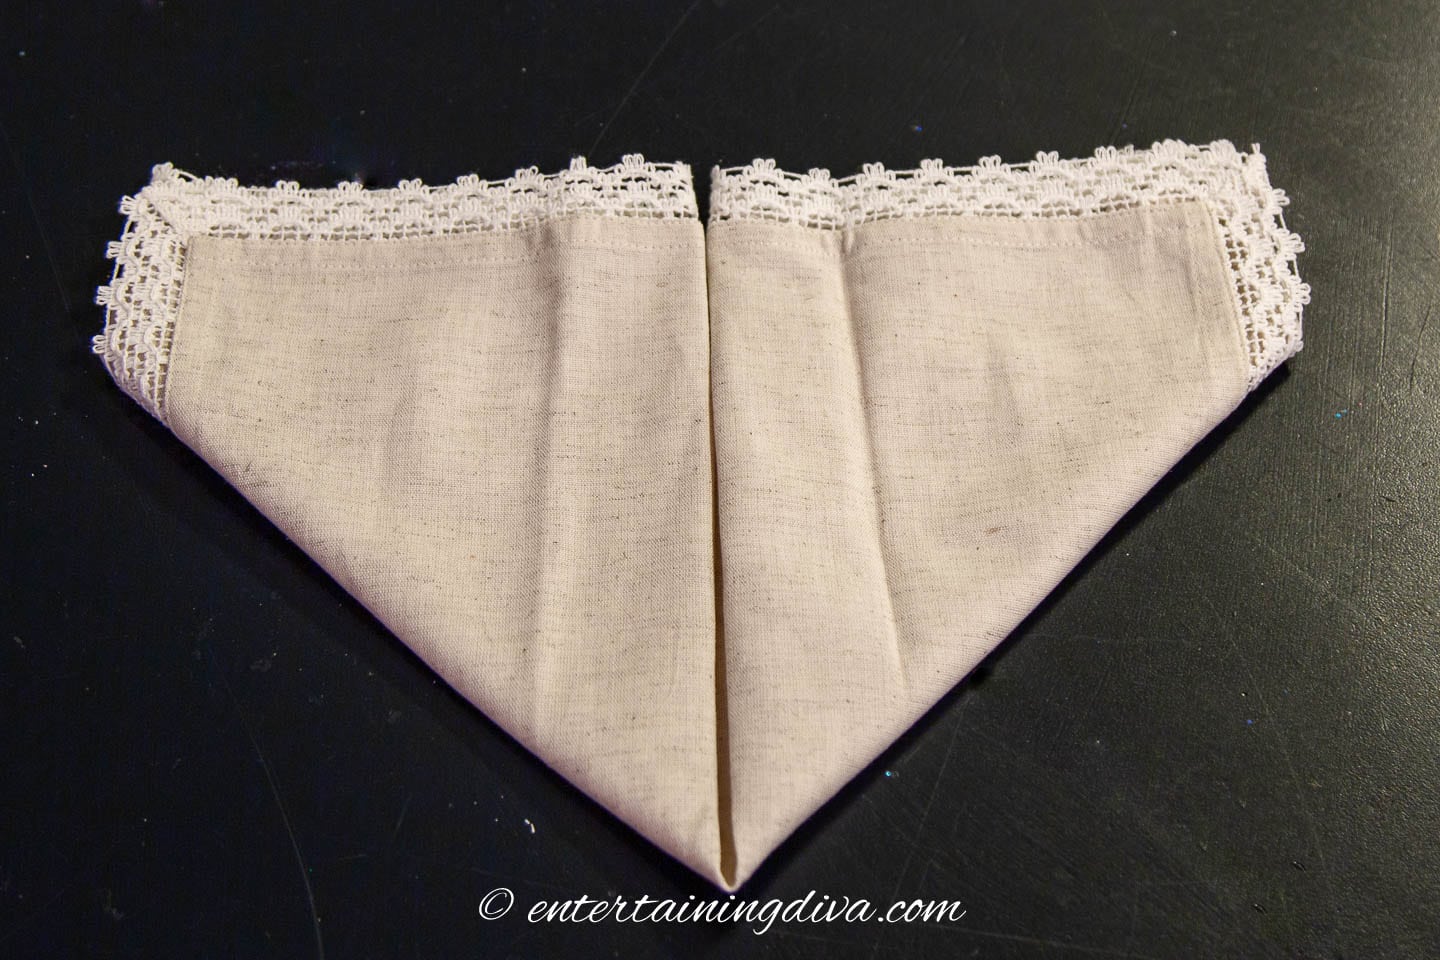
Fold down the top left corner so the straight edge meets along the center line.
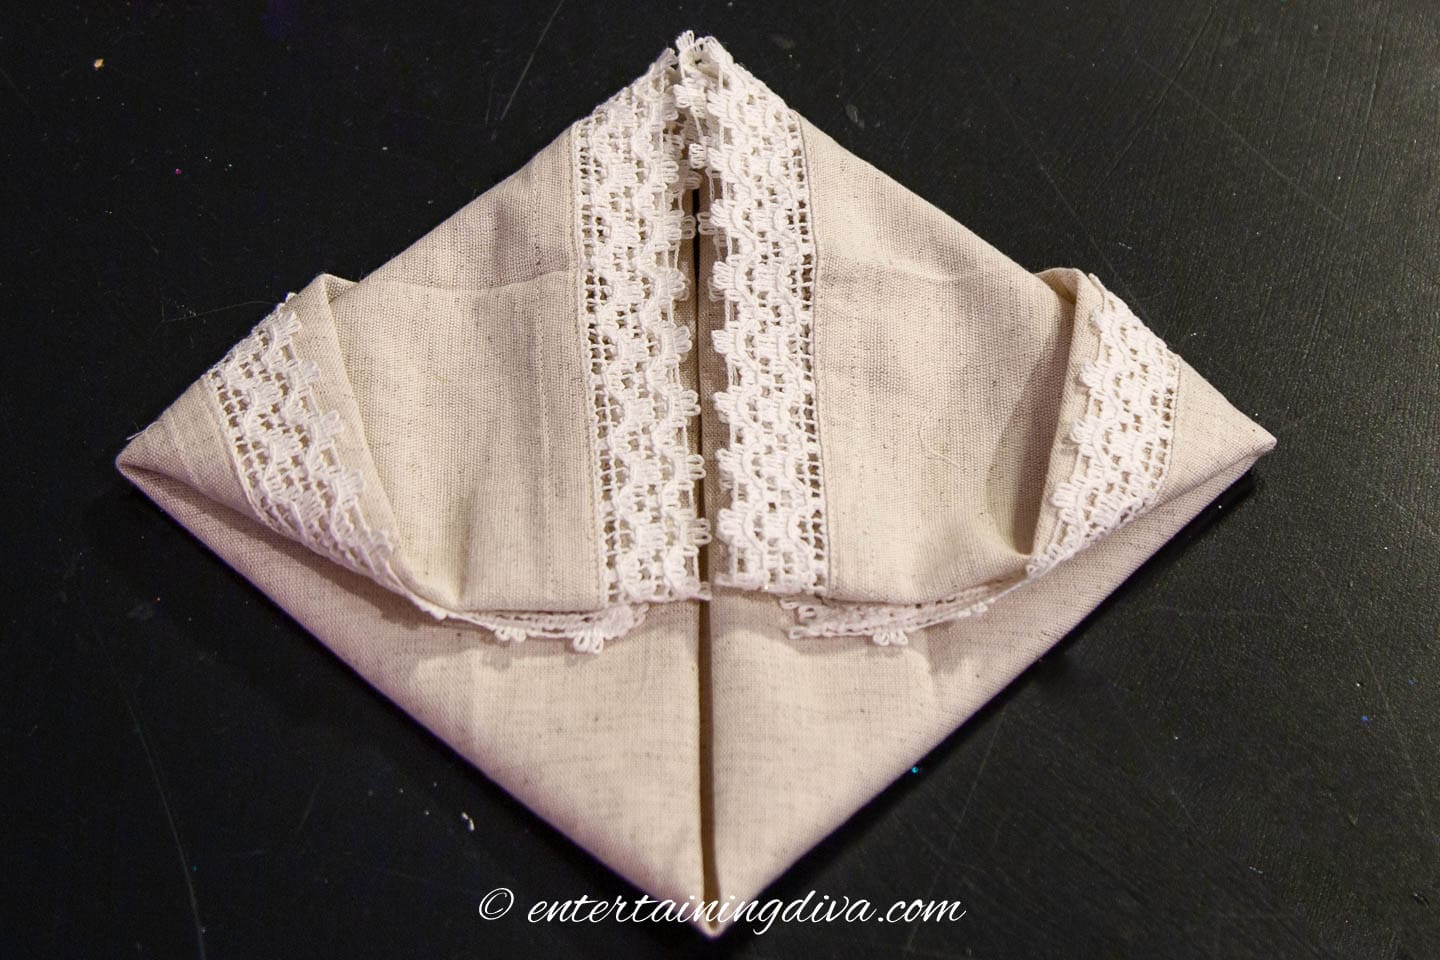
Bring the top right corner down to meet it.
Fold down both top corners again so that they meet at the center line.
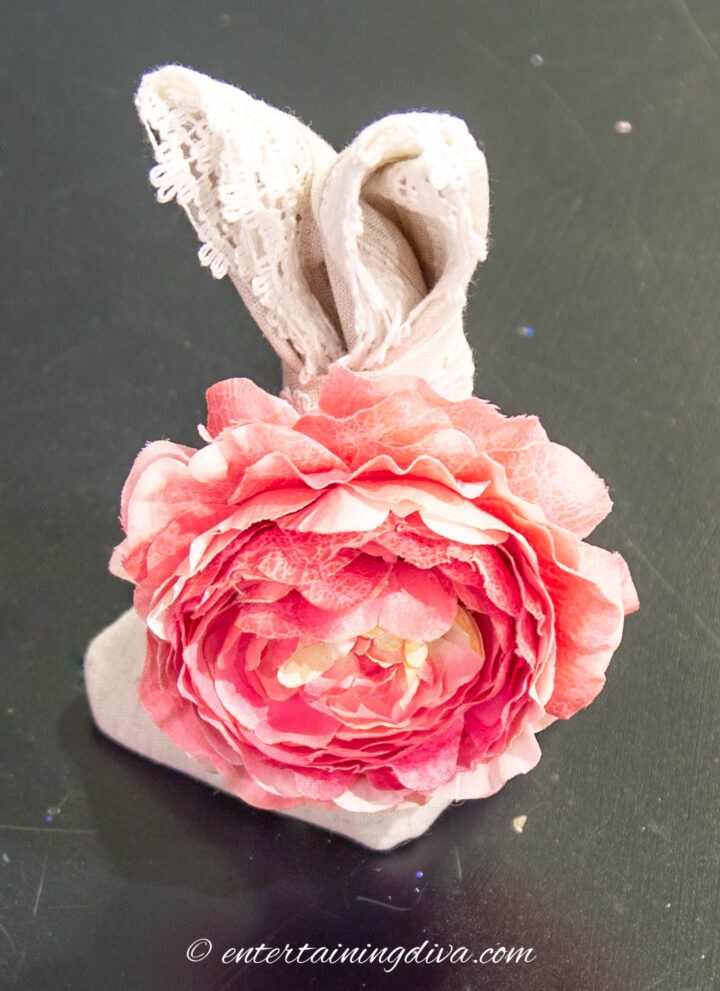
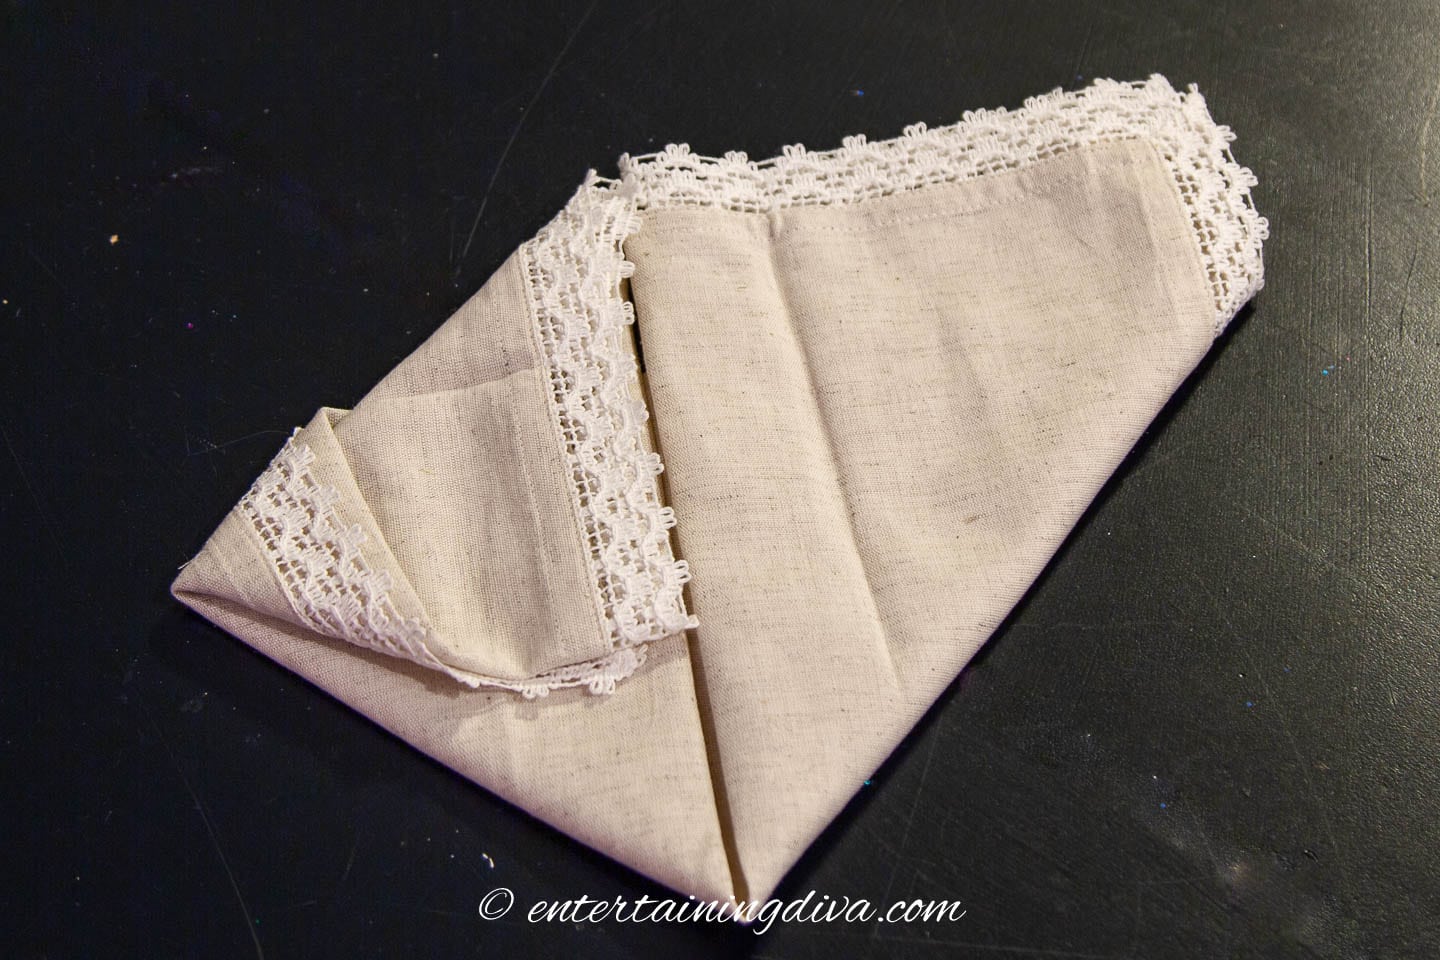
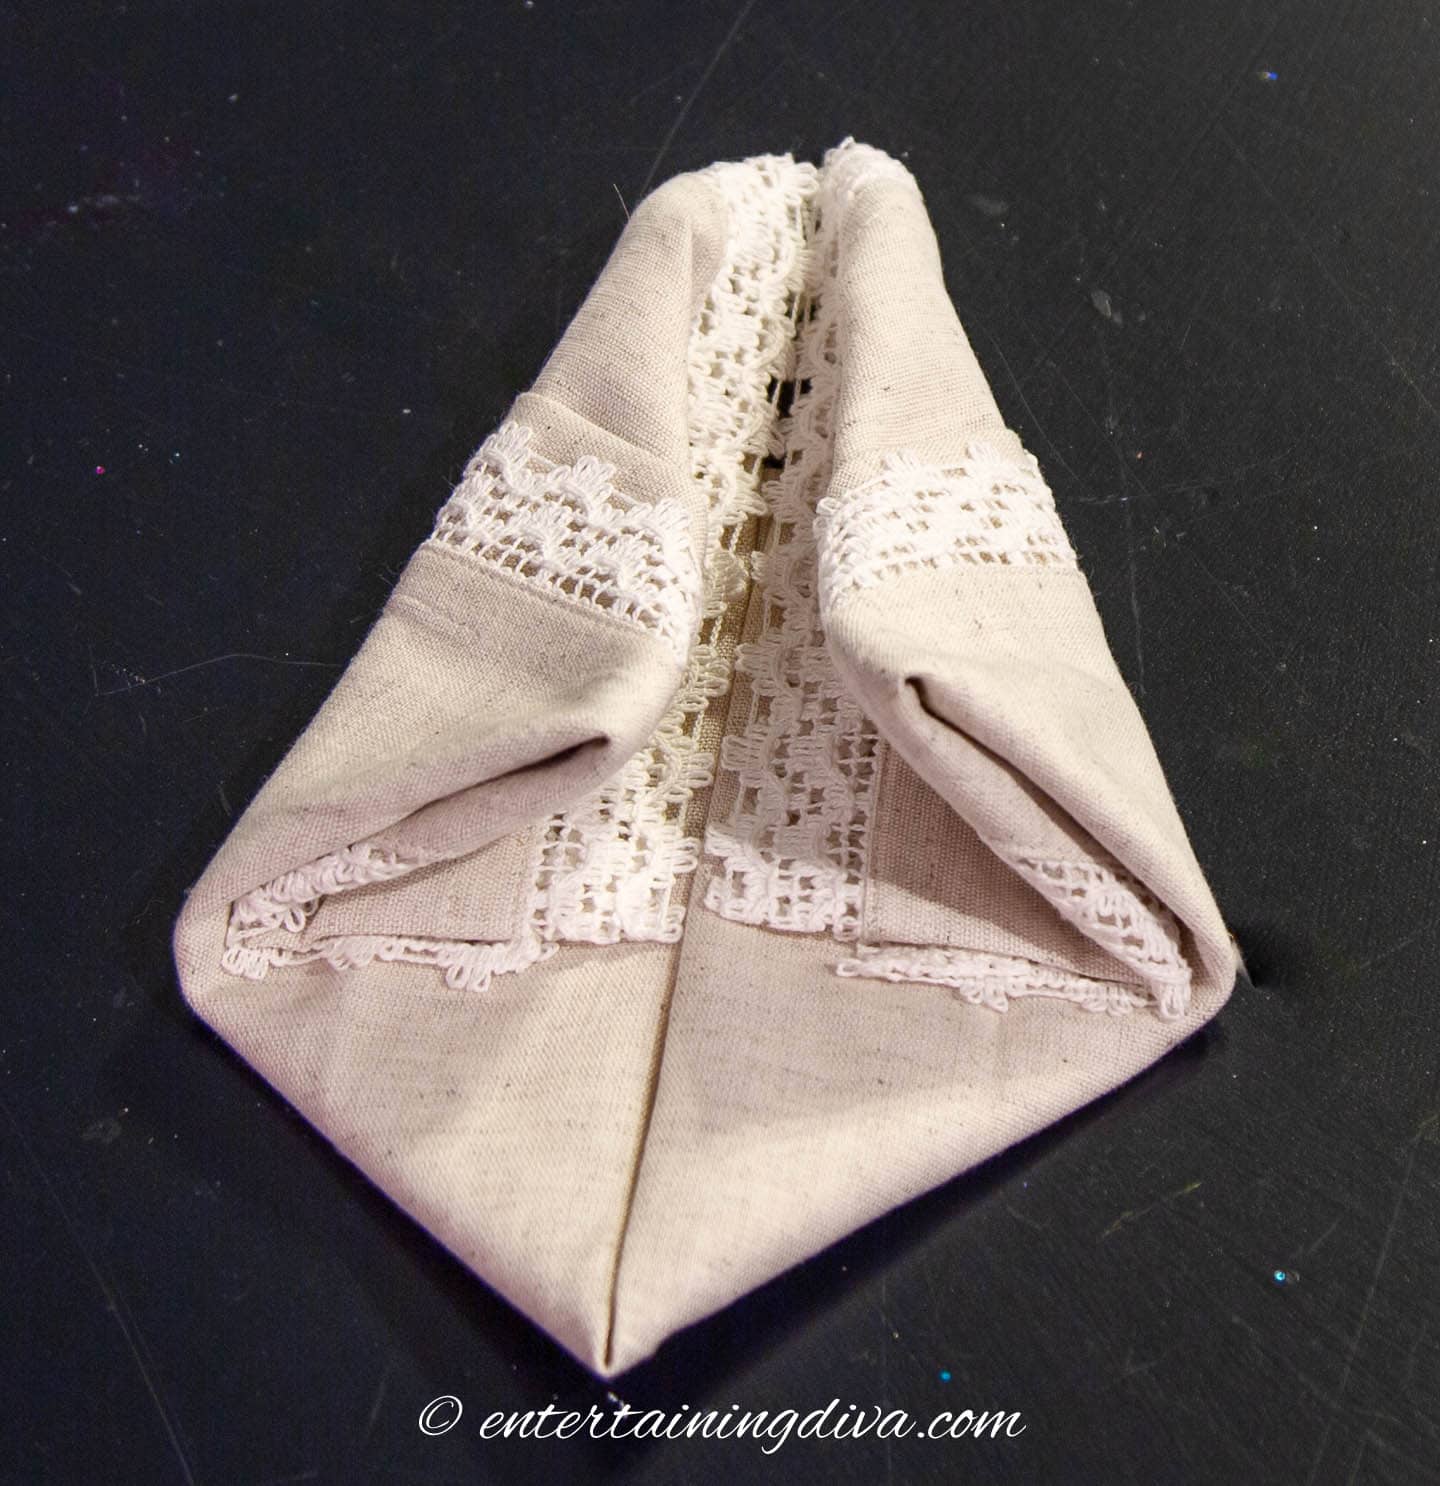
Bend up the bottom corner of the napkin so that it creates a triangle.
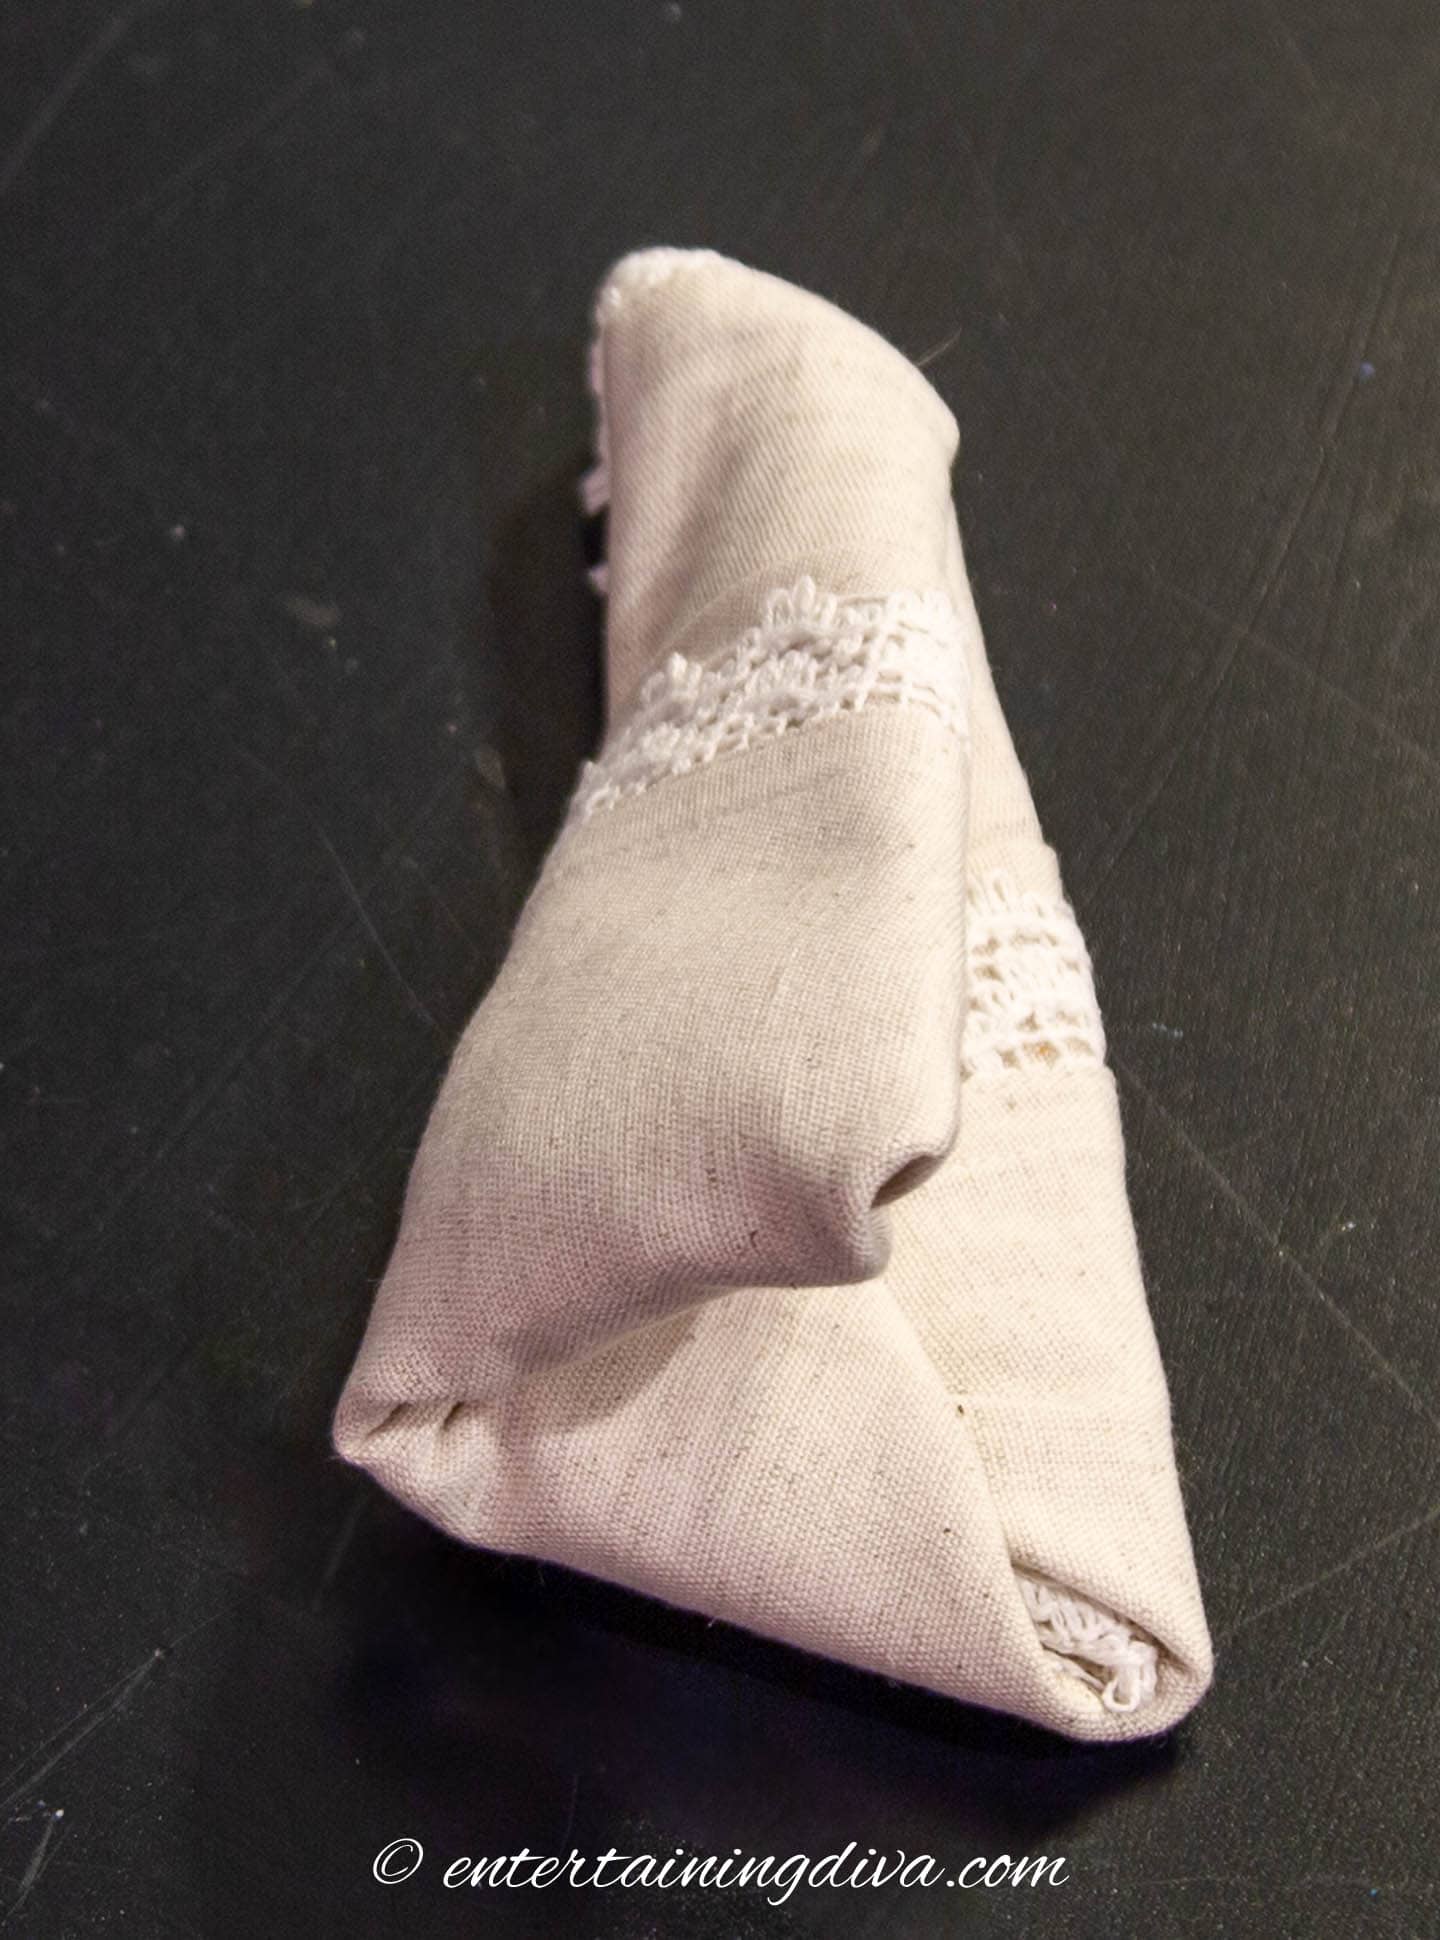
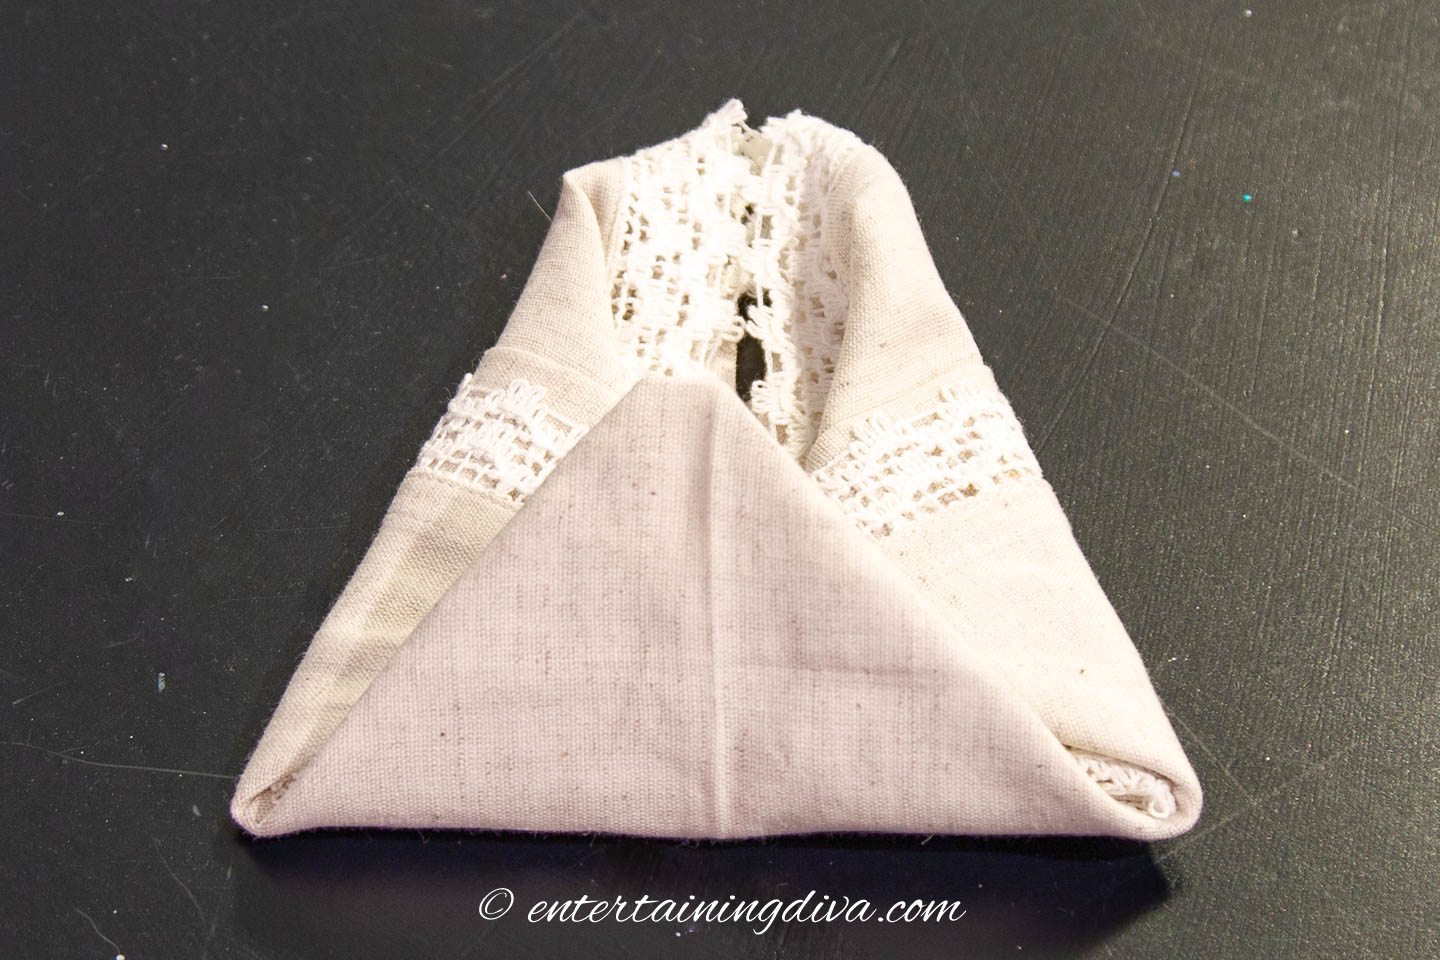
Fold the napkin in half along the center line.
At this point, you are probably thinking there is no way this is going to end up being a rabbit! It just looks like a scrunched up napkin. Don’t worry, it will turn out 🙂
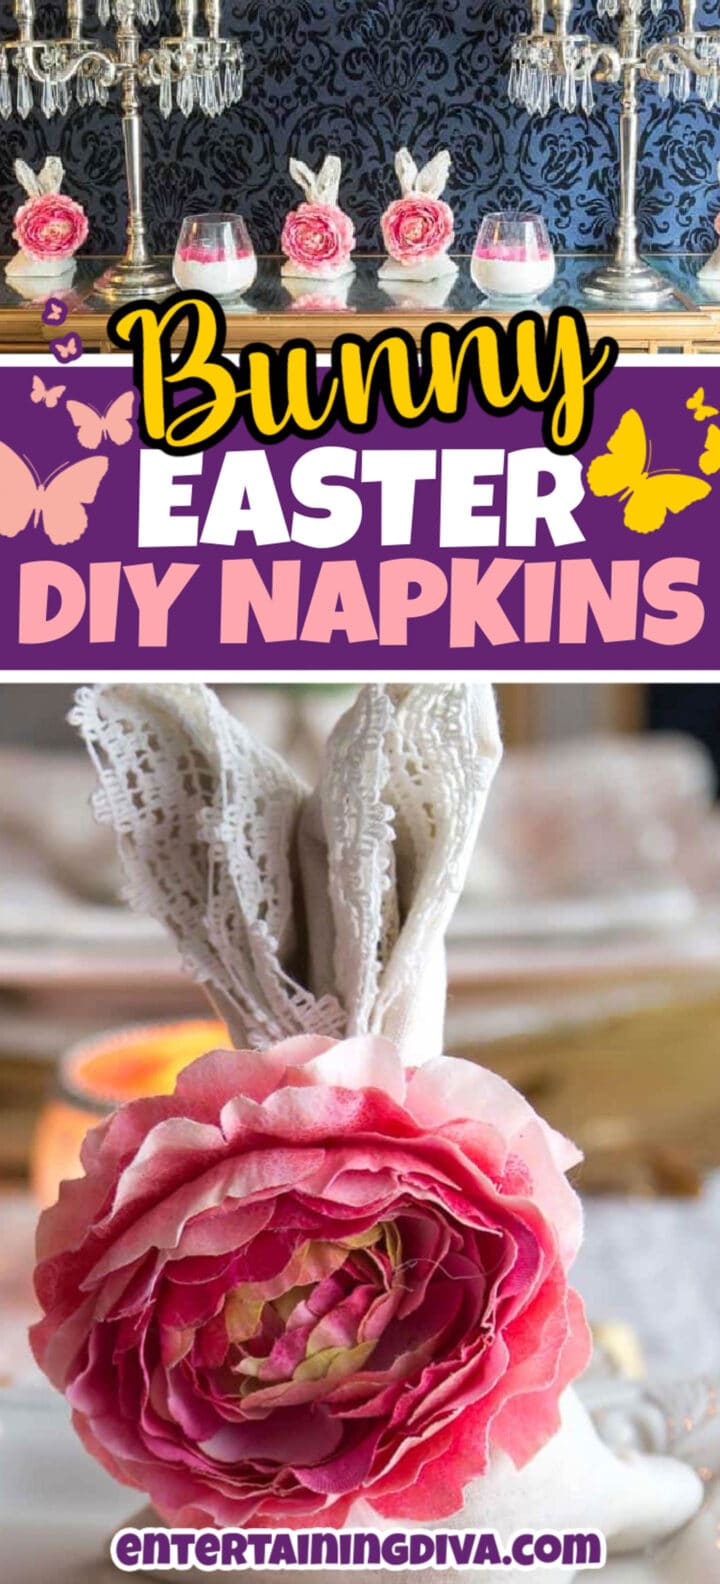
Add the napkin ring
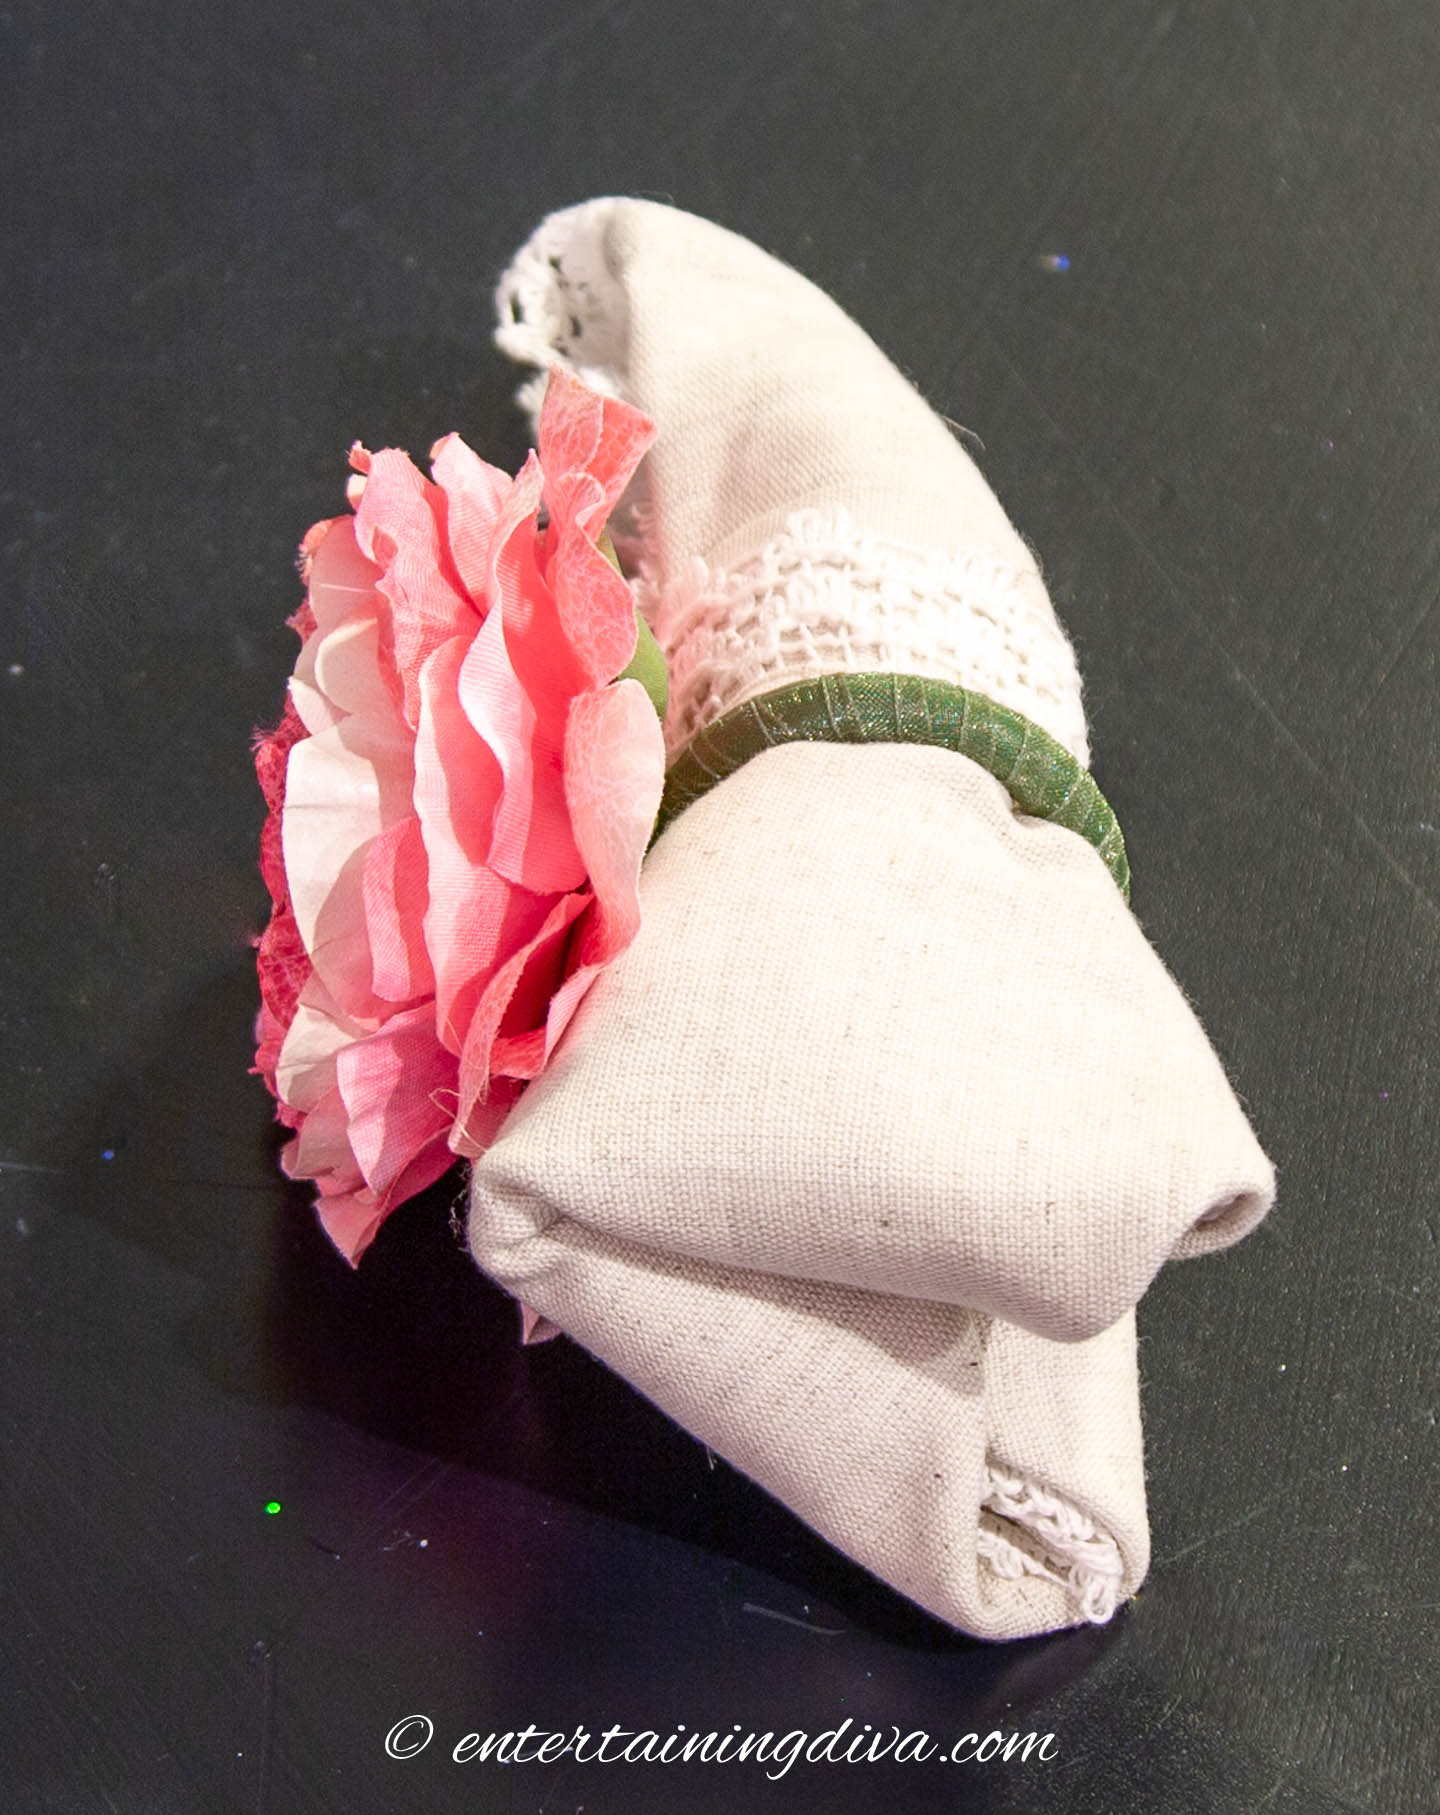
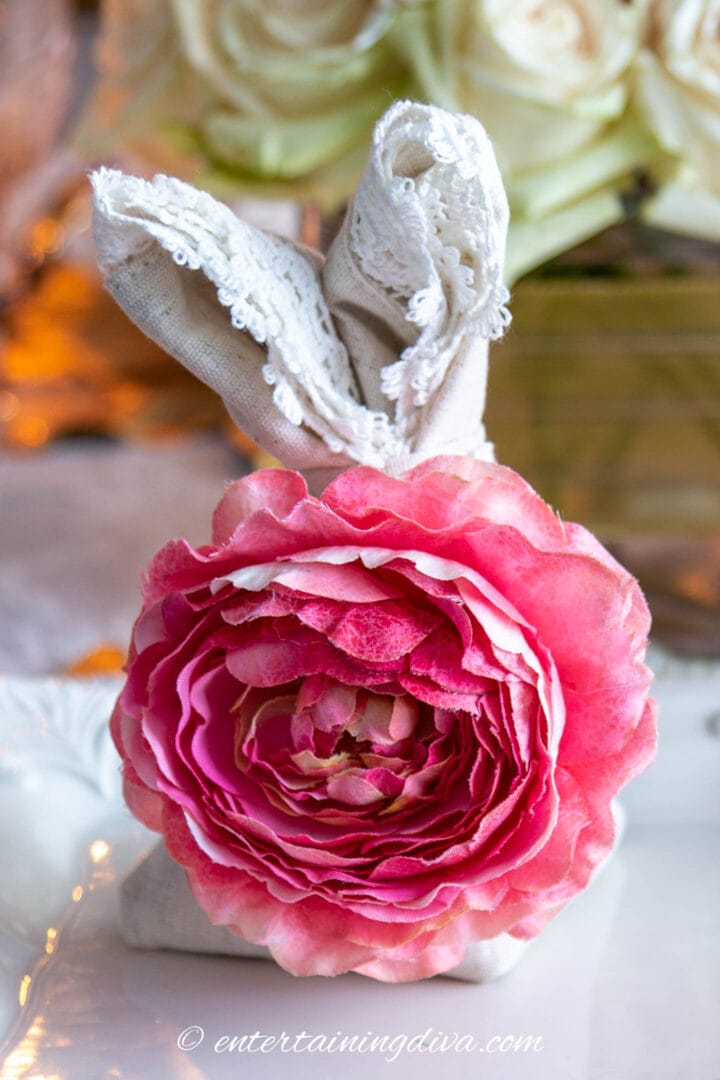
Slide a round napkin ring over the top of the napkin.
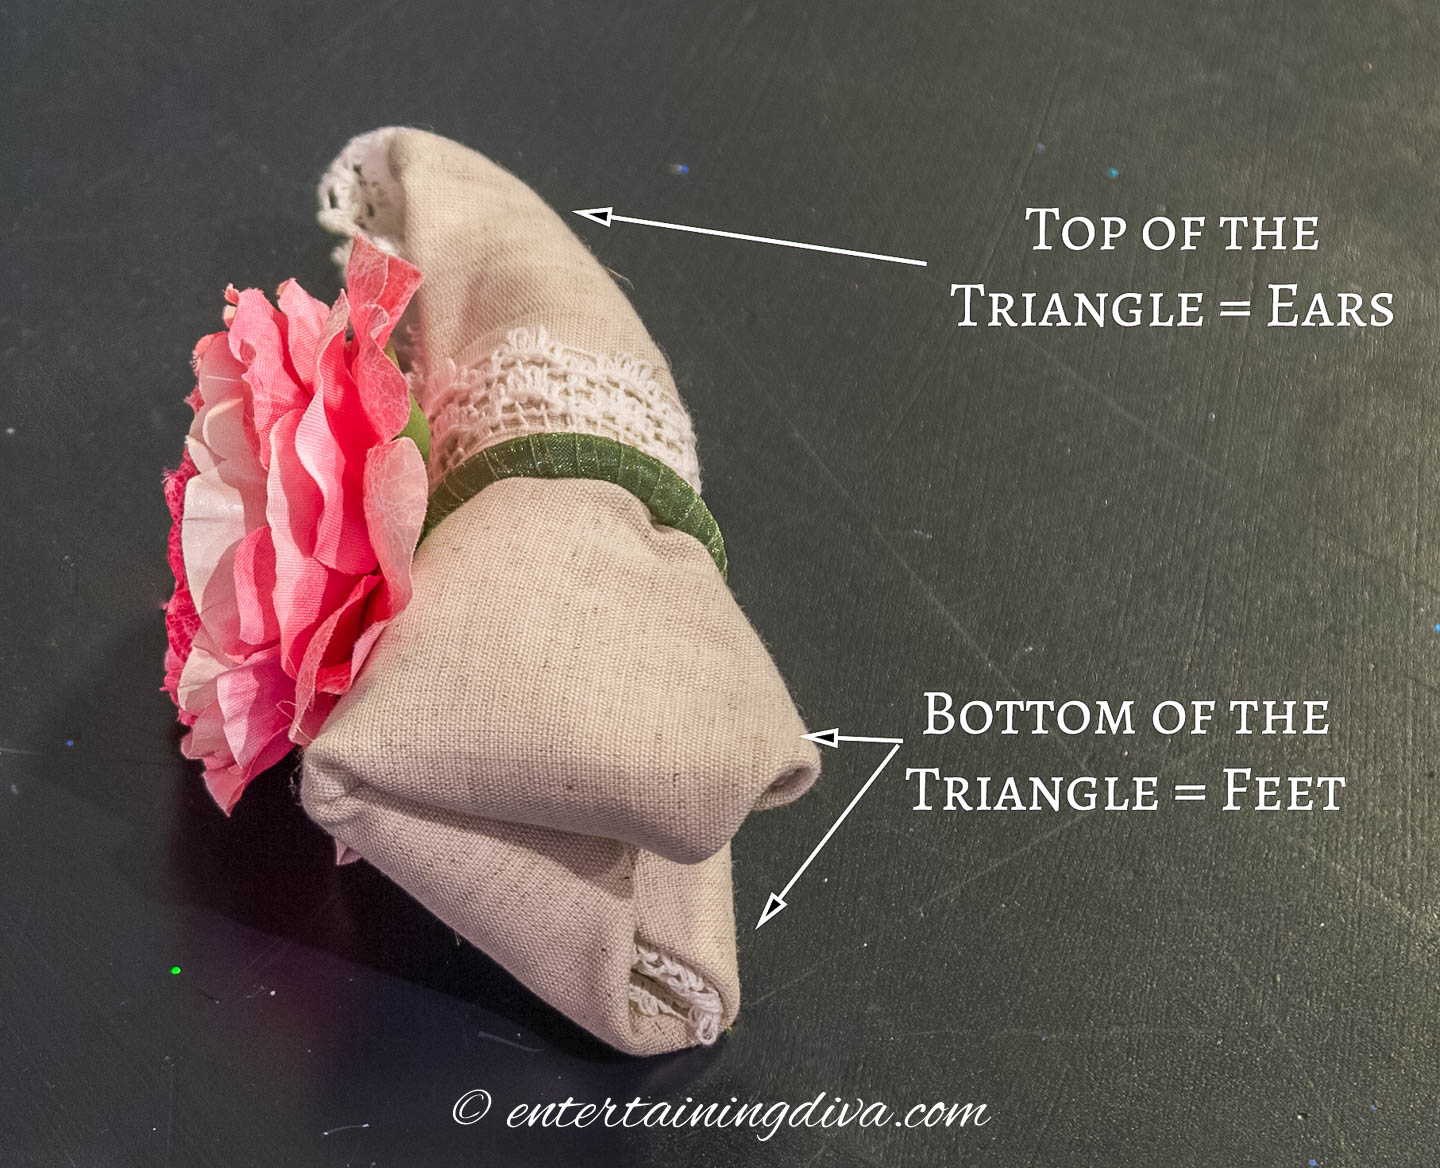
Spread the bottom of the triangle apart to become the feet.
Then “fluff” the ears a bit by pulling them out a bit and spreading them apart.
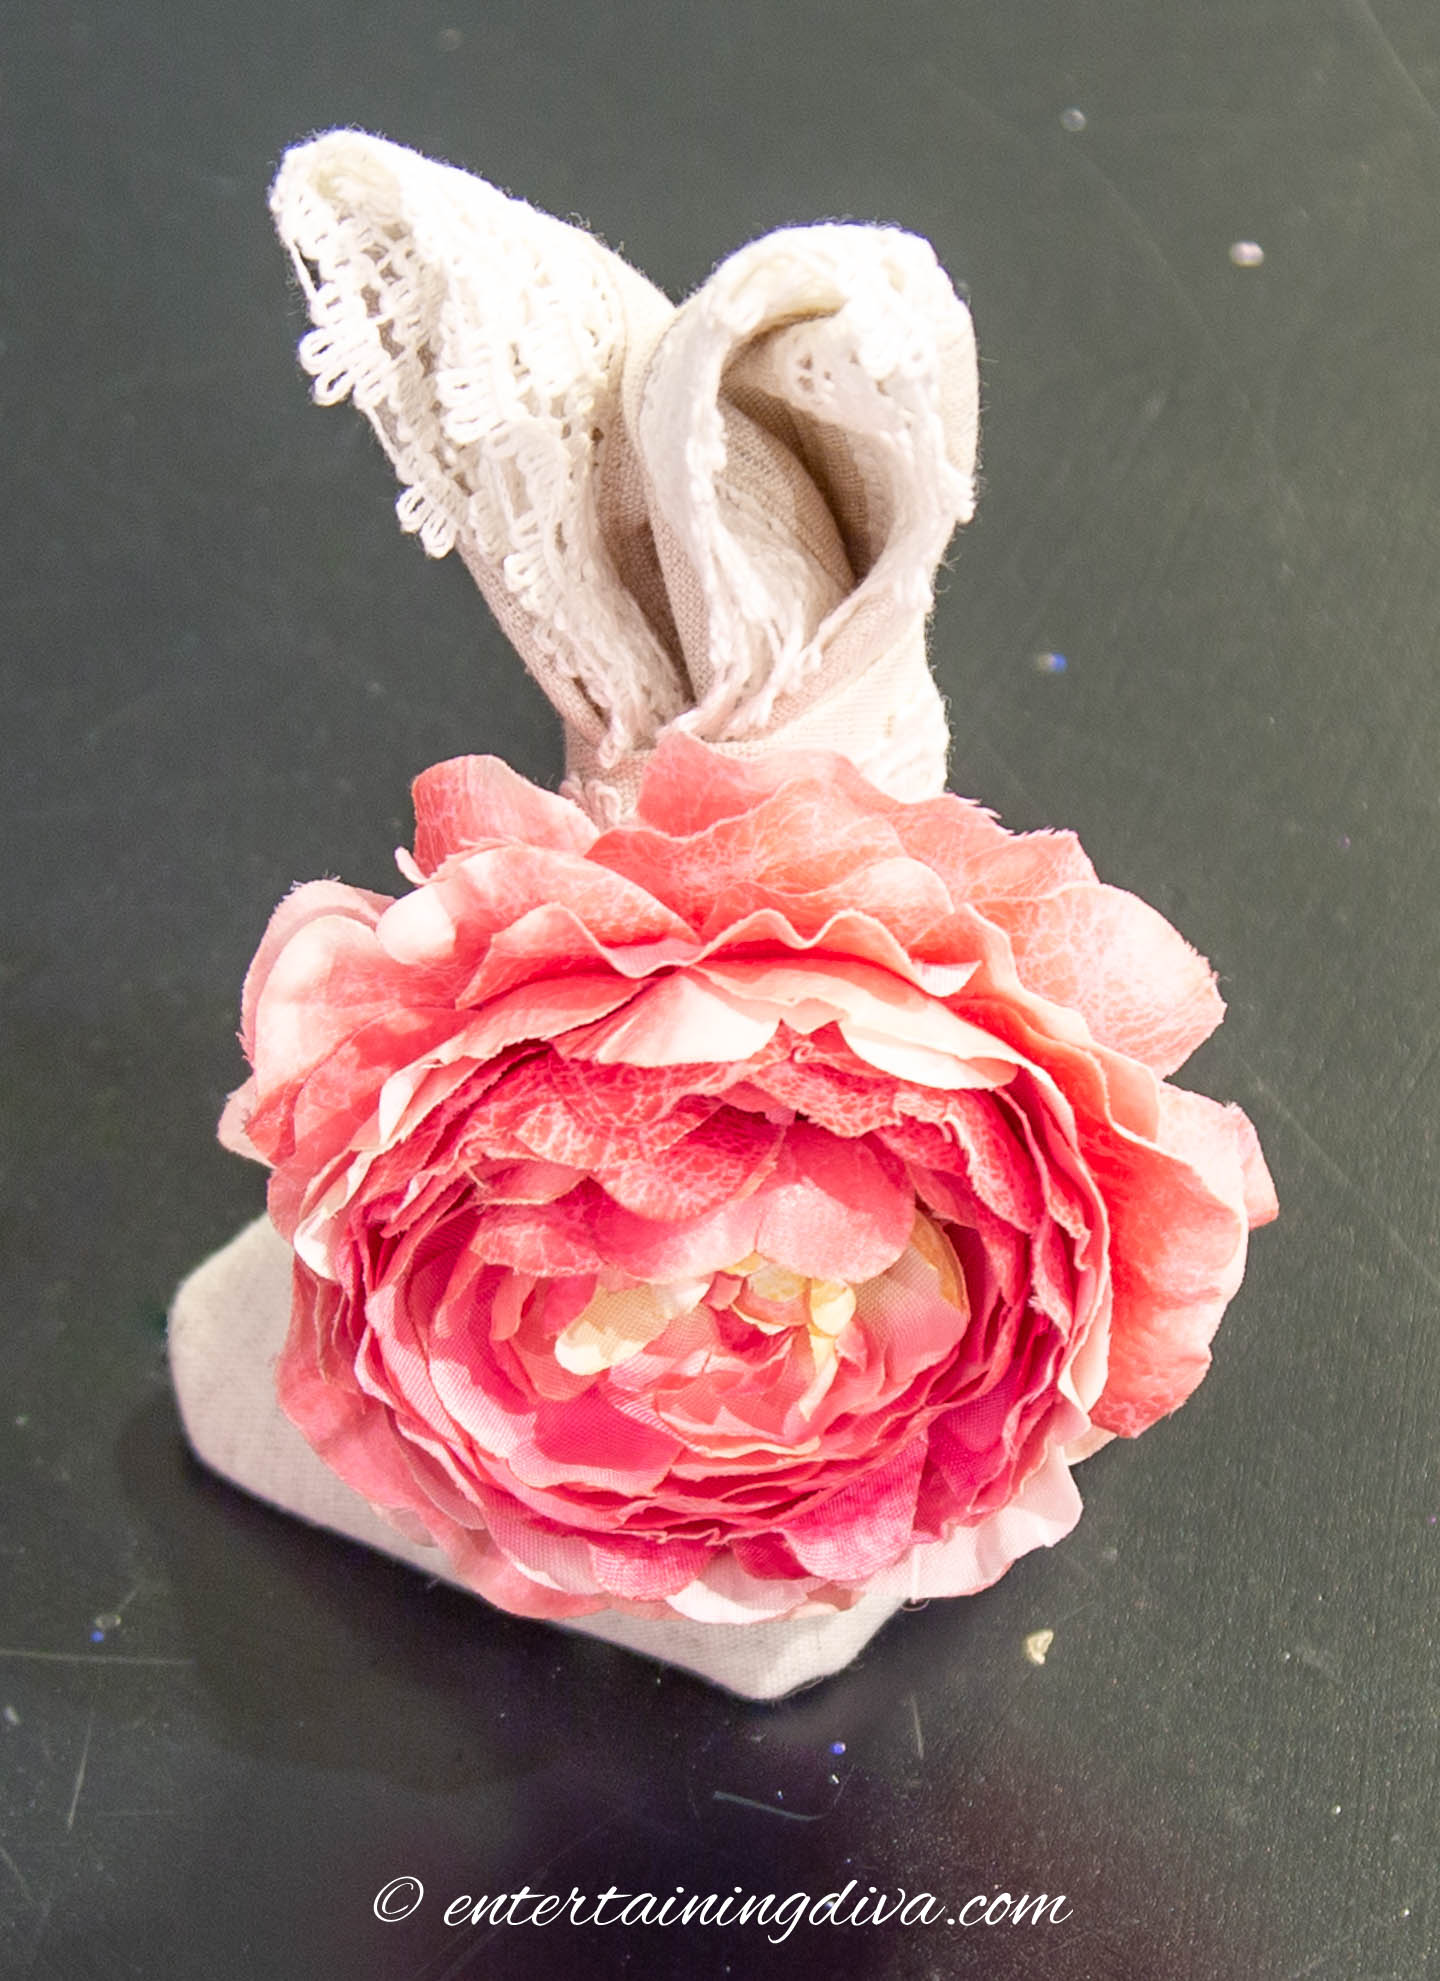
Now you should be able to stand up your bunny!
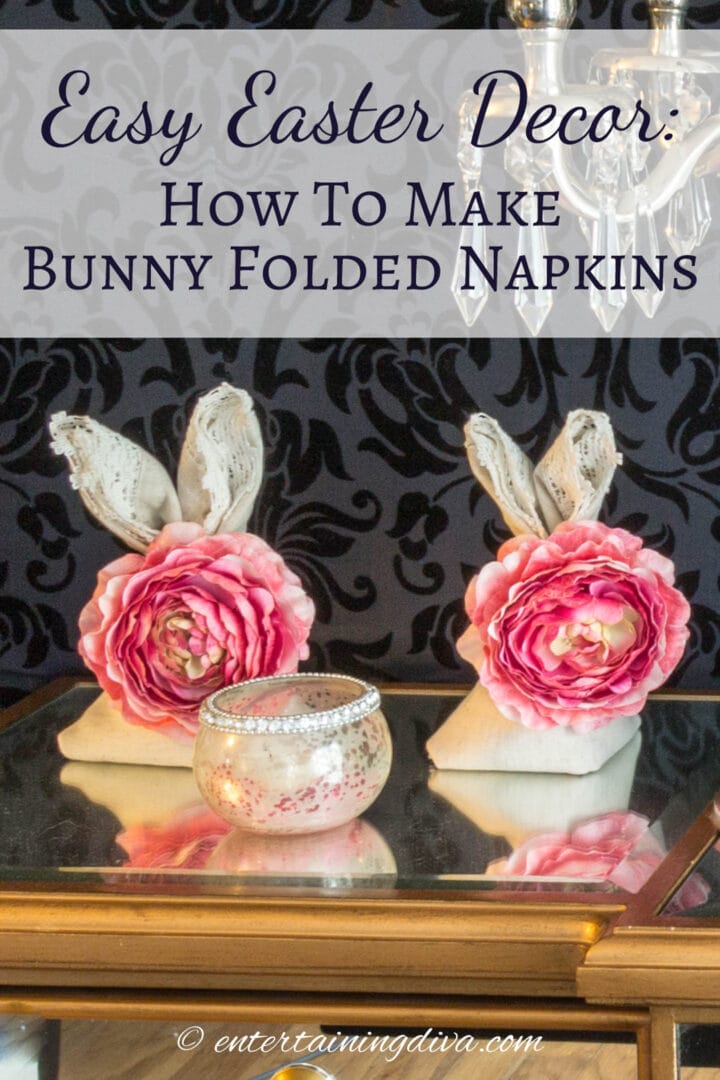
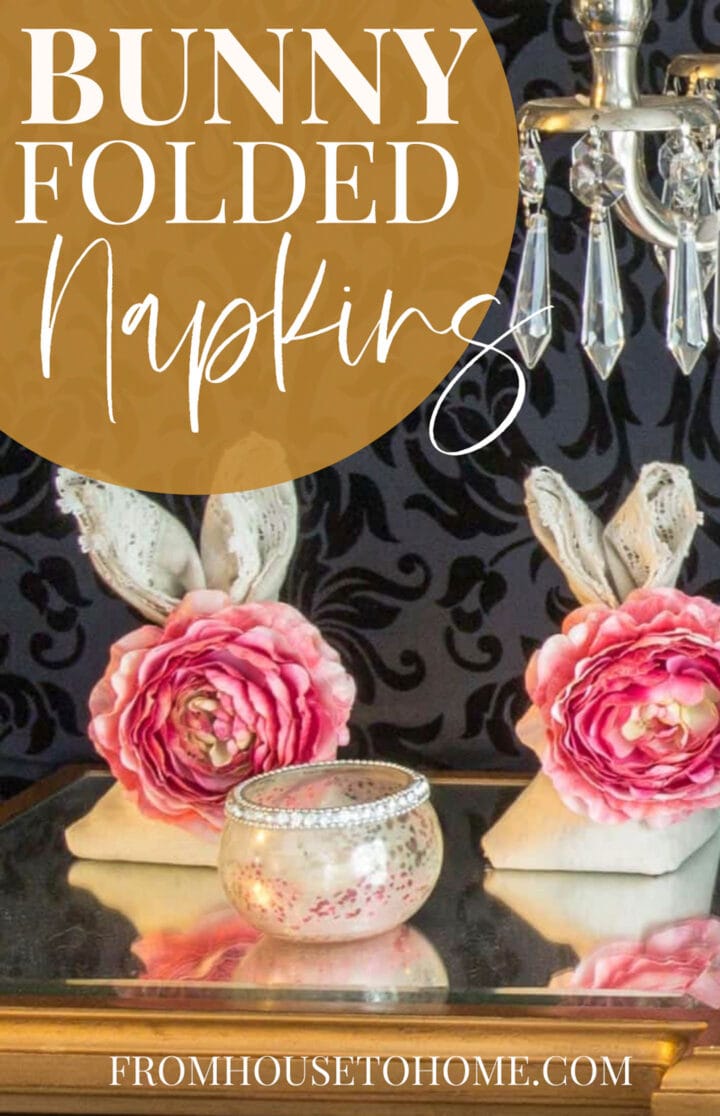
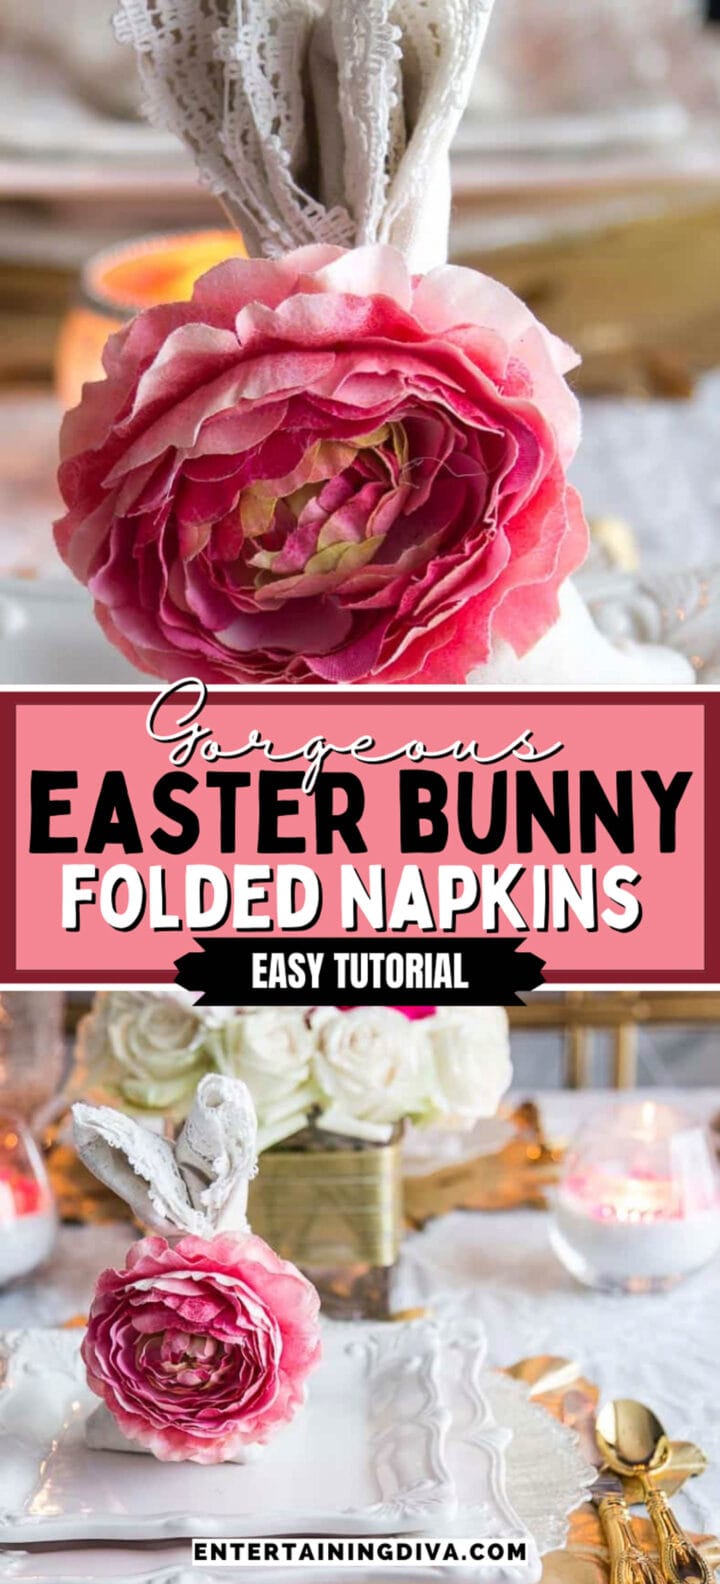
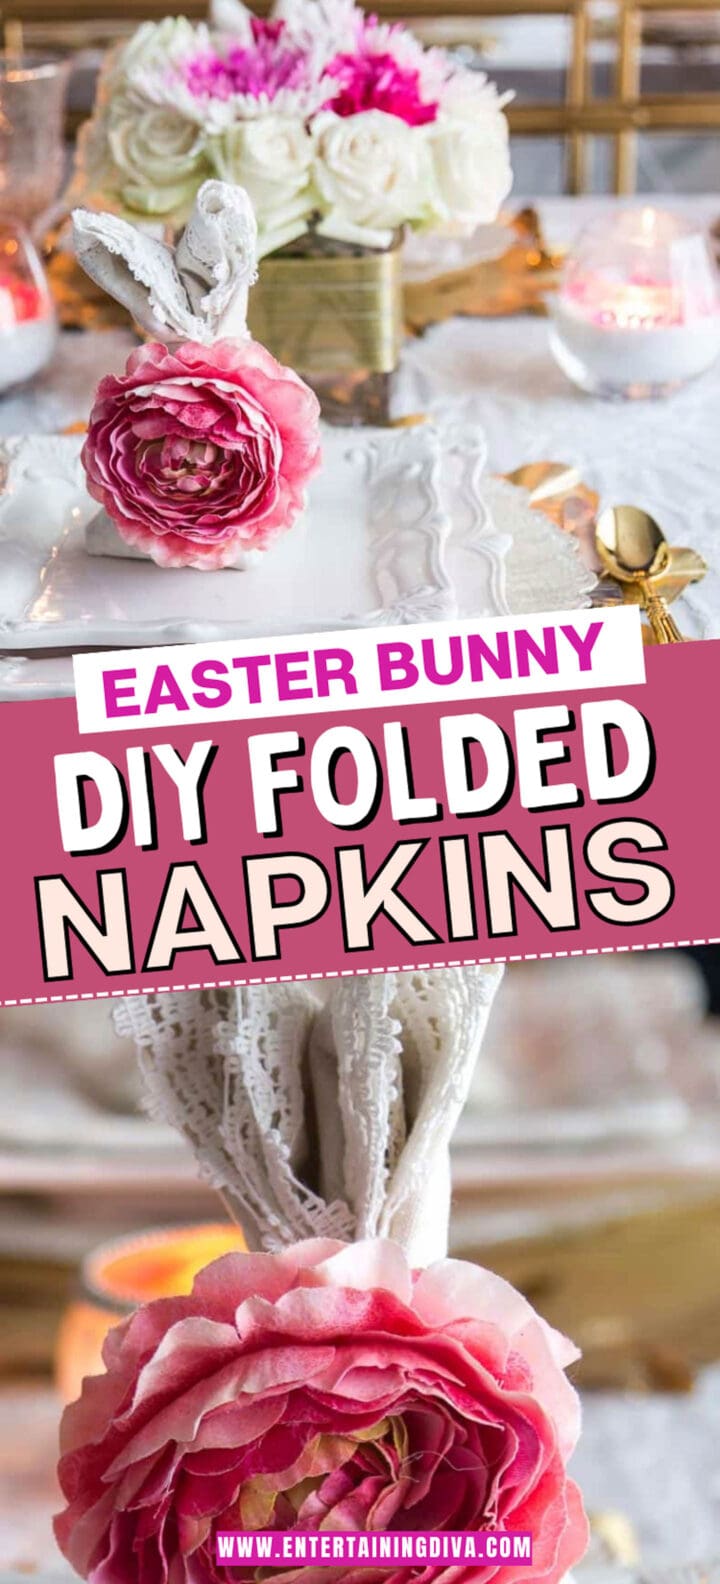
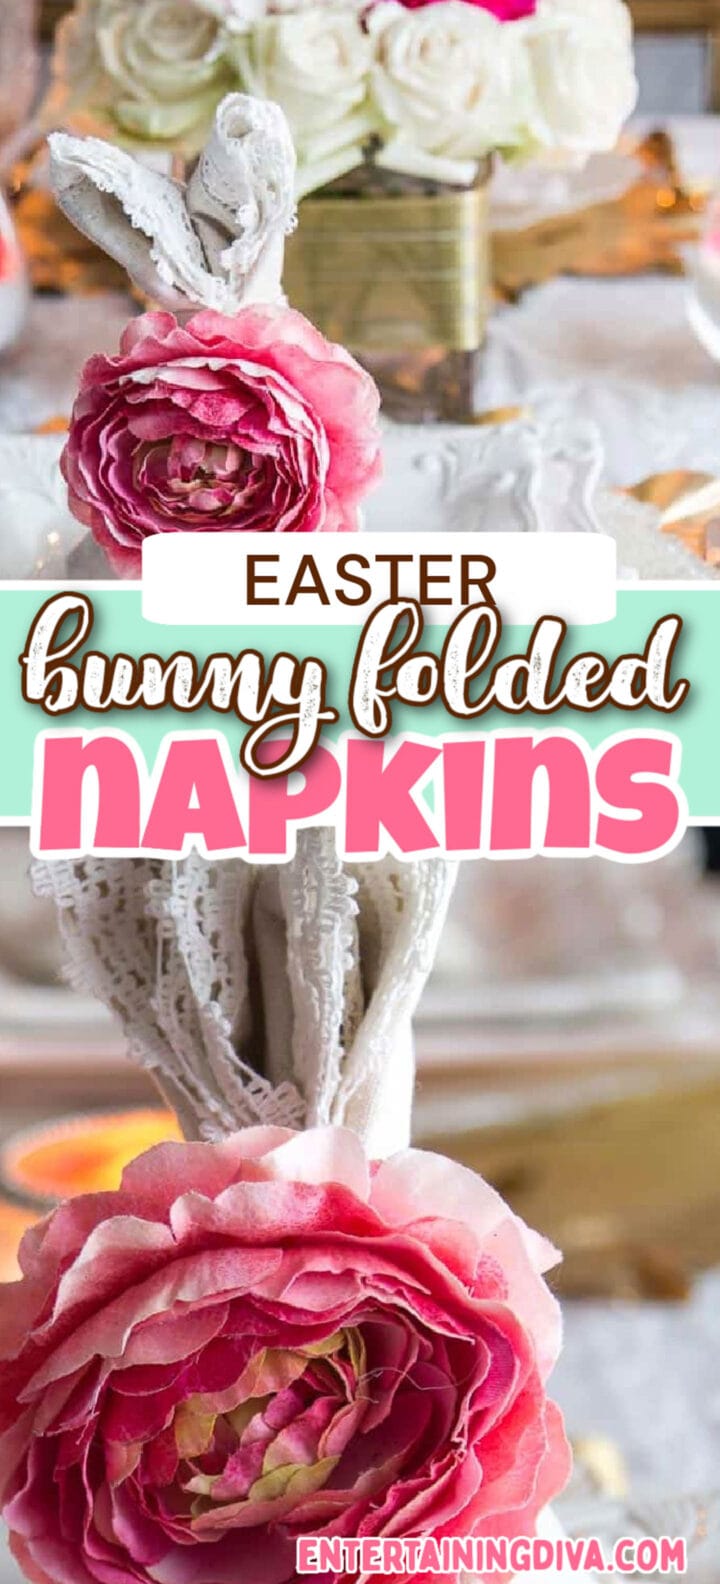
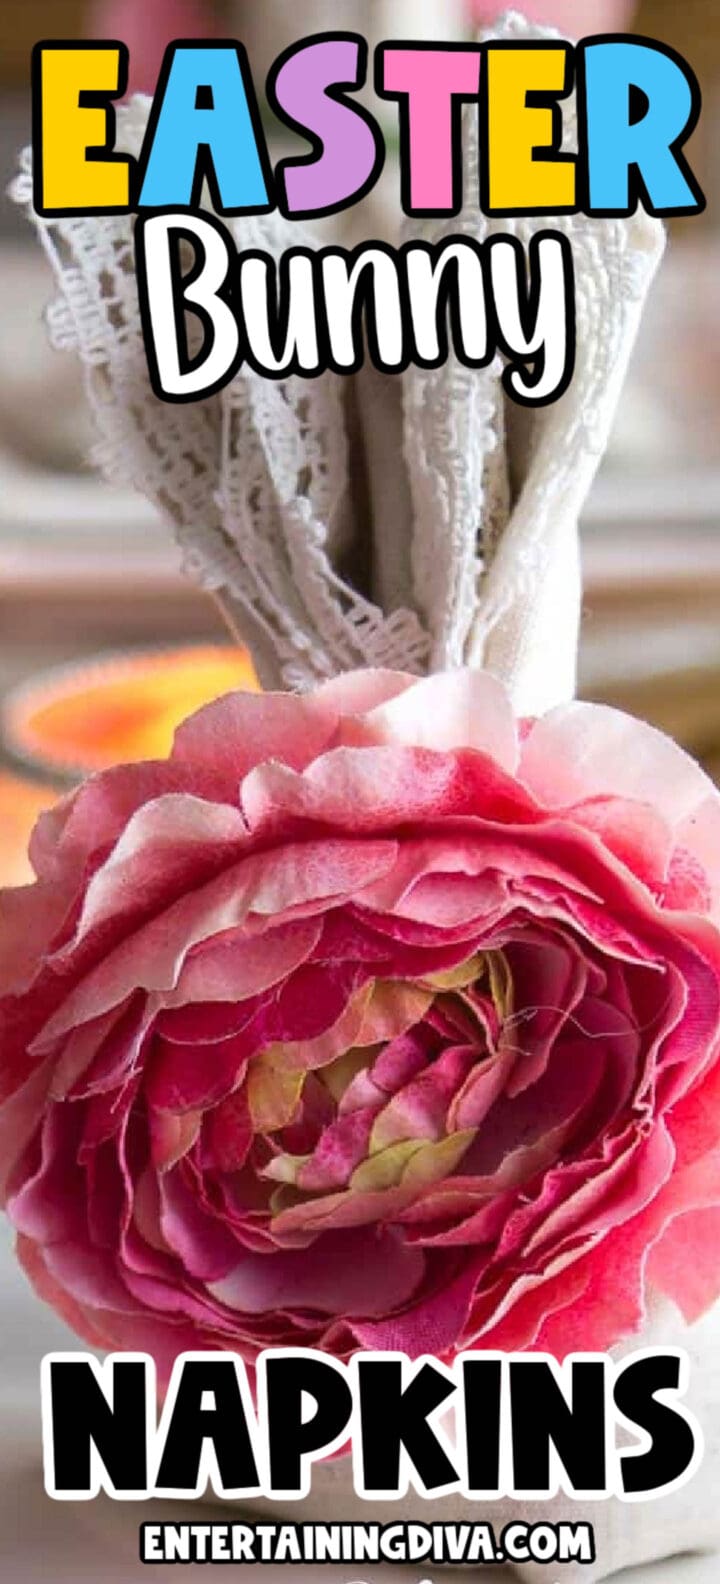
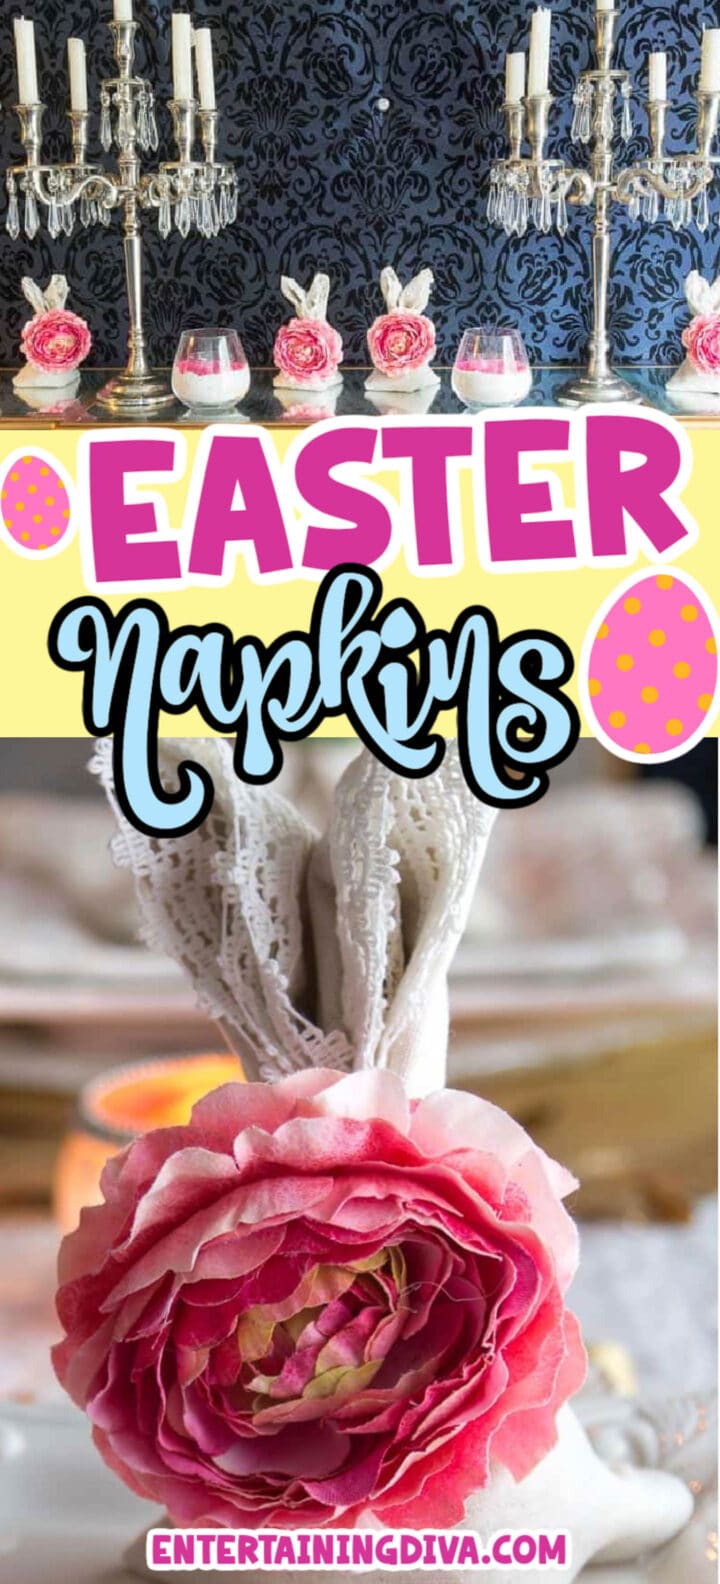
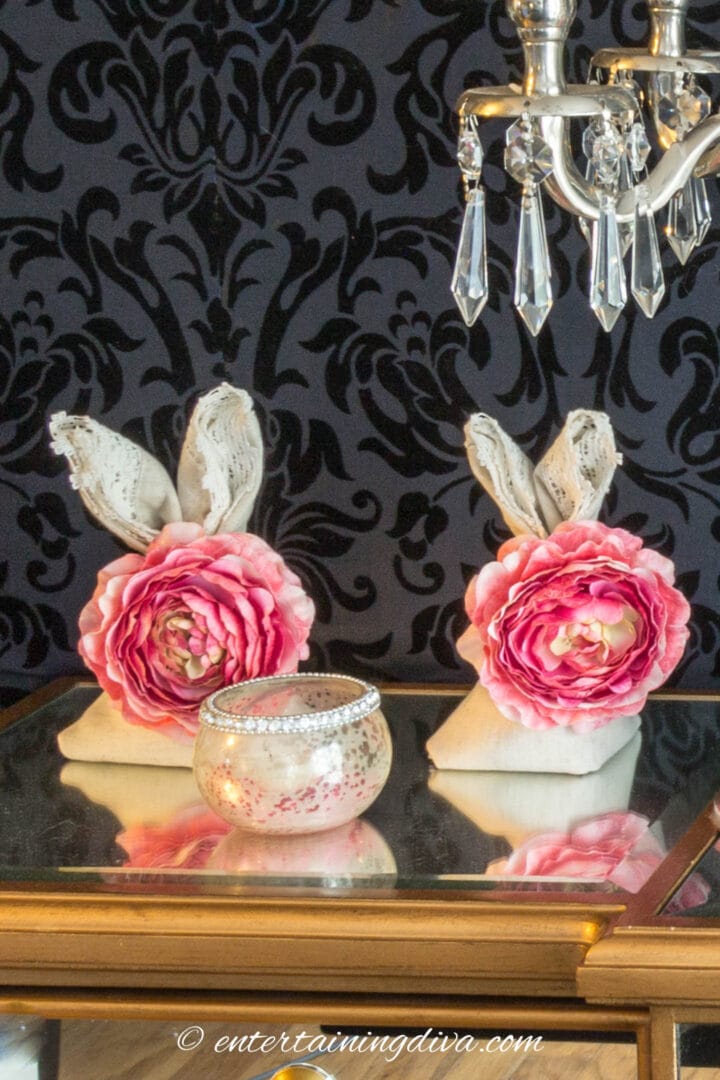
The Finished Napkin Bunnies
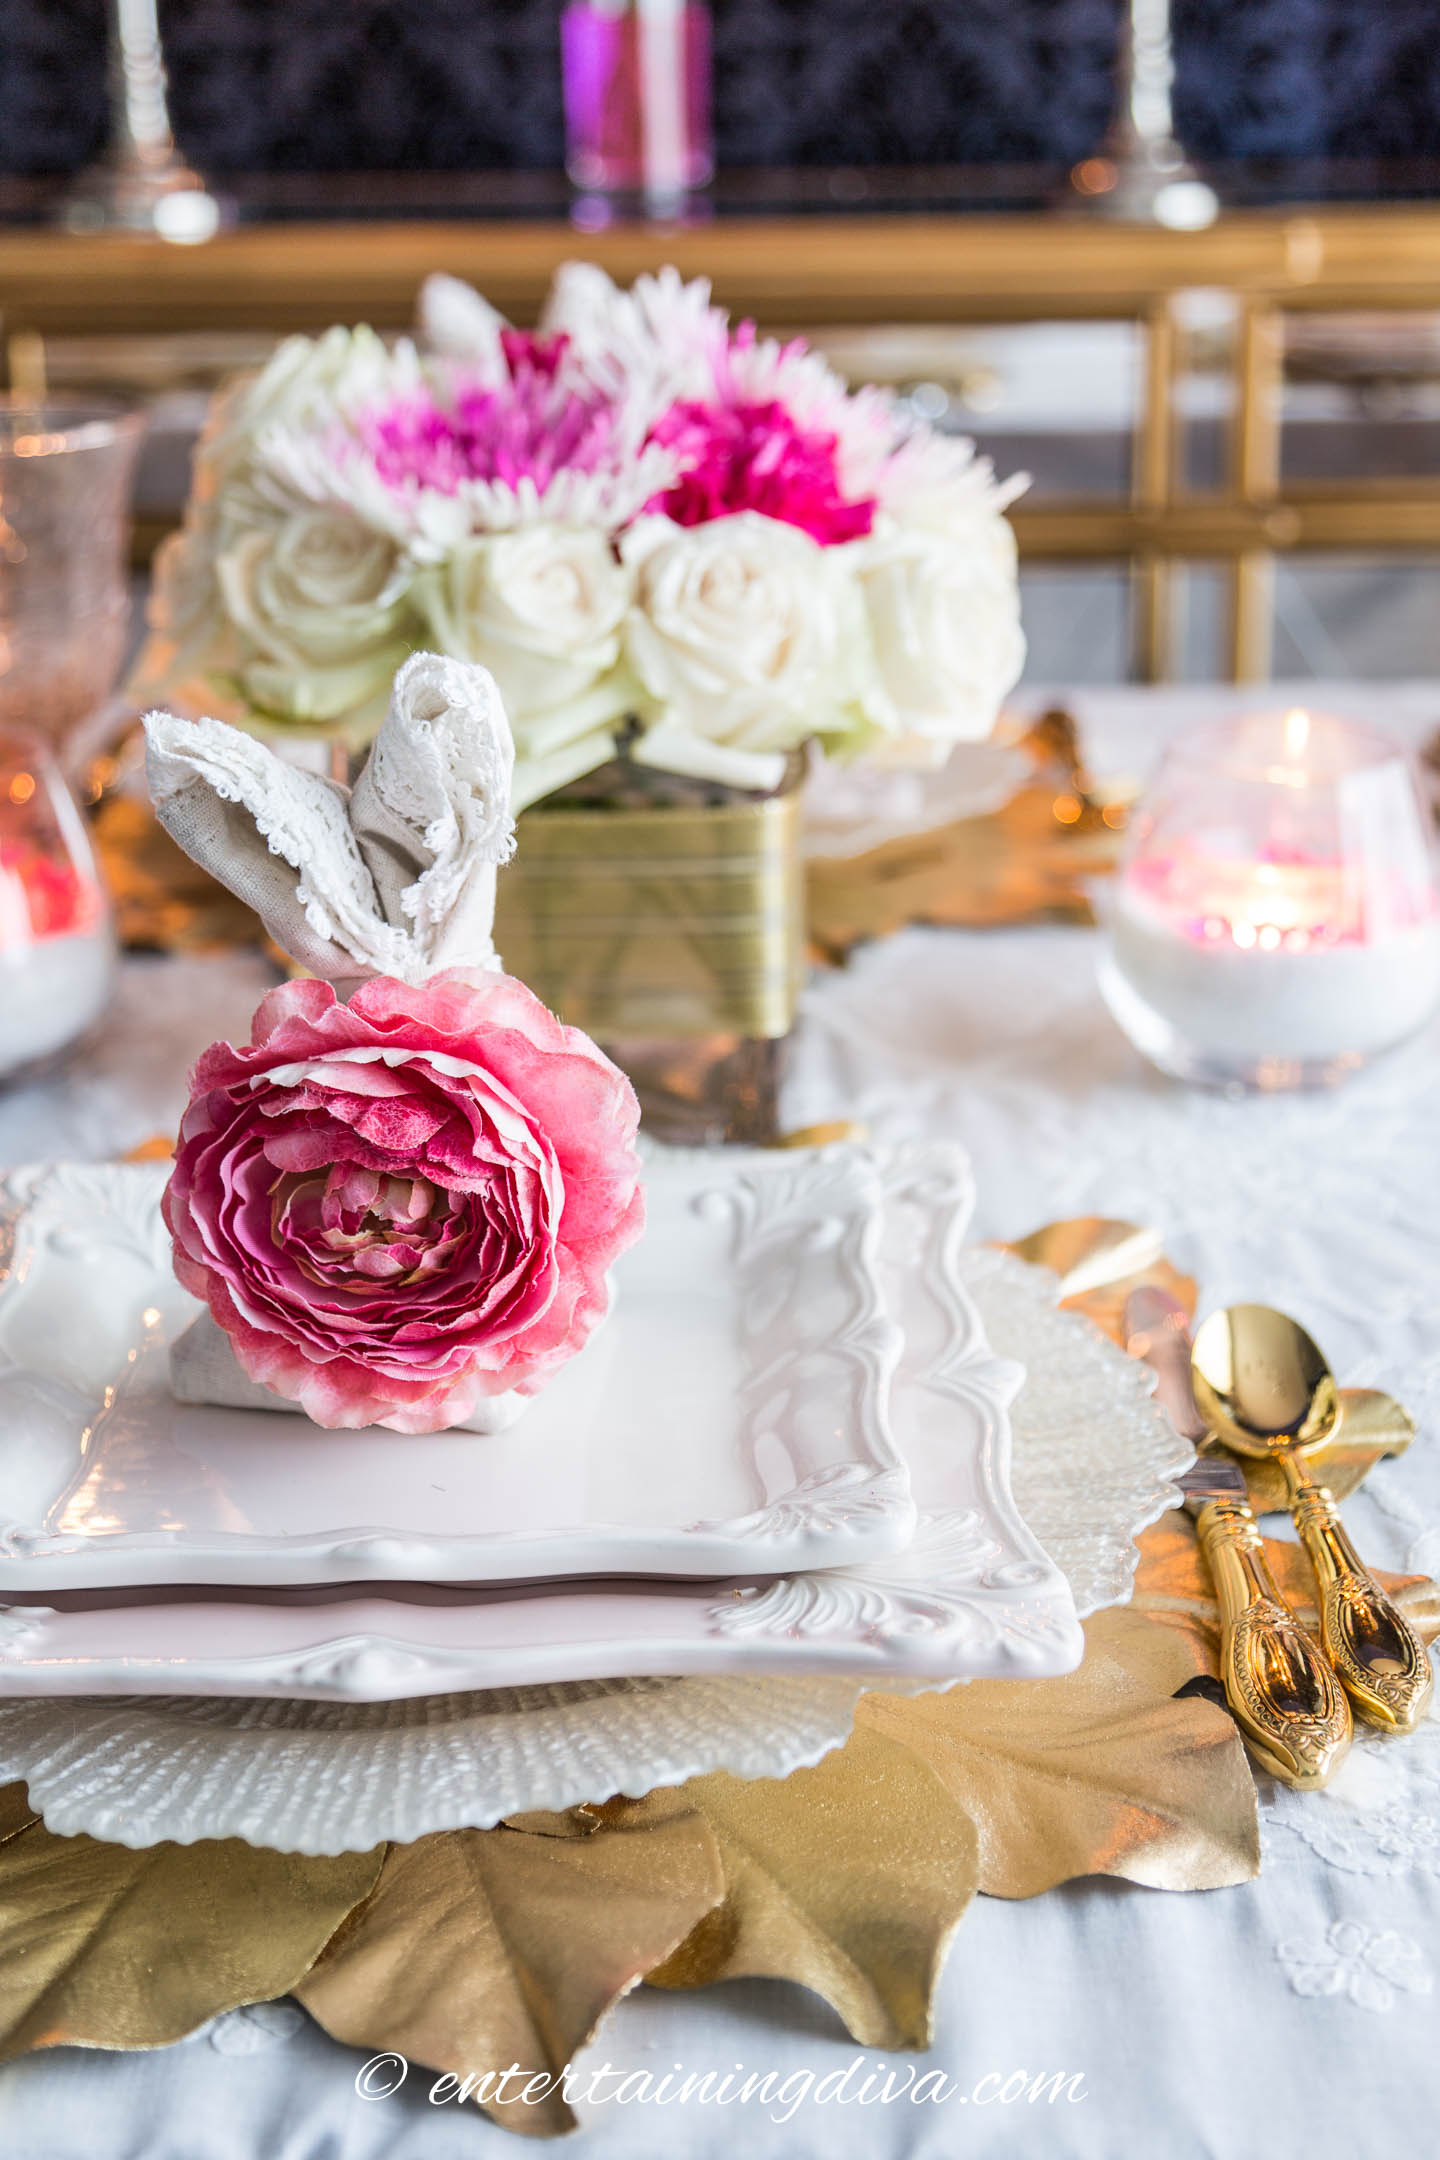
The finished bunny folded napkins look great on the table. I used them for my Easter table setting (which you can see HERE).

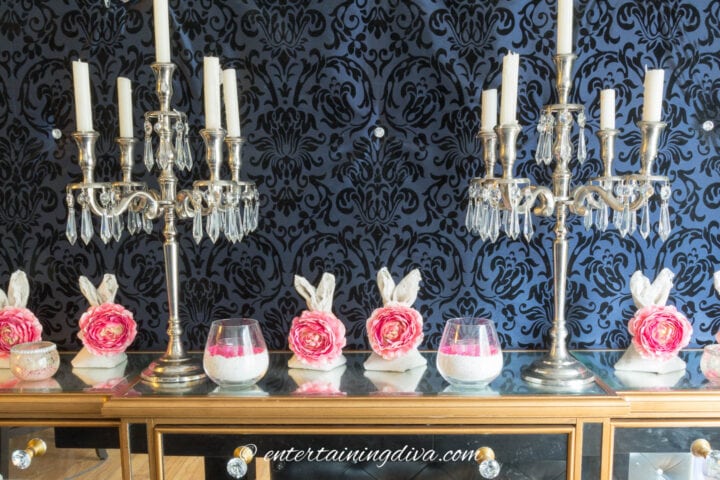
They also look good as a decoration even when they’re not on on the table.

I added a line of them on the buffet, and they really brighten up the space!
Other Easter table decor you might like
- Flowers and butterflies tablescape
- Pink and green Easter table setting
- Pink and gold Easter tablescape
Or browse all of our Easter ideas.
Have comments or questions on the bunny folded napkins? Tell us in the section below.
This post was originally published on March 31, 2017 but was updated with new content on January 23, 2024.