
How To Make A Simple Charcuterie Board
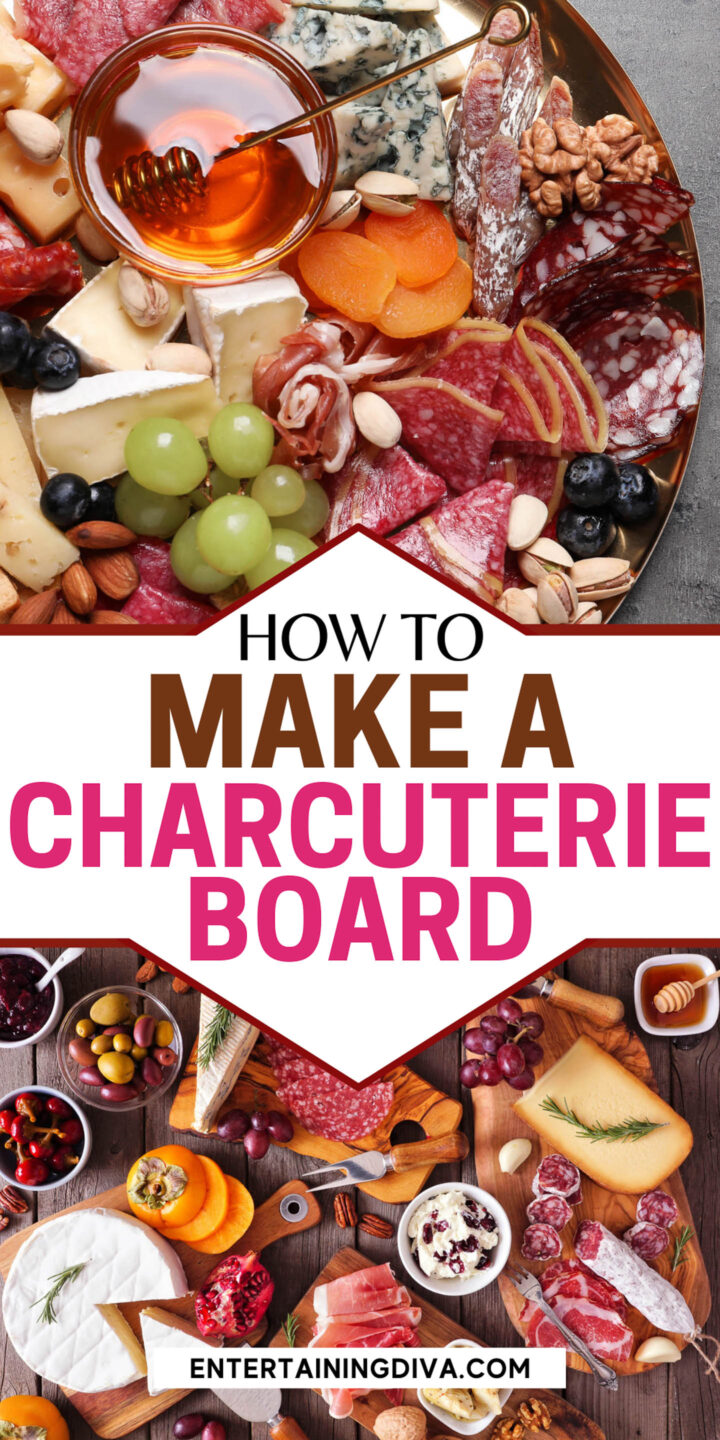
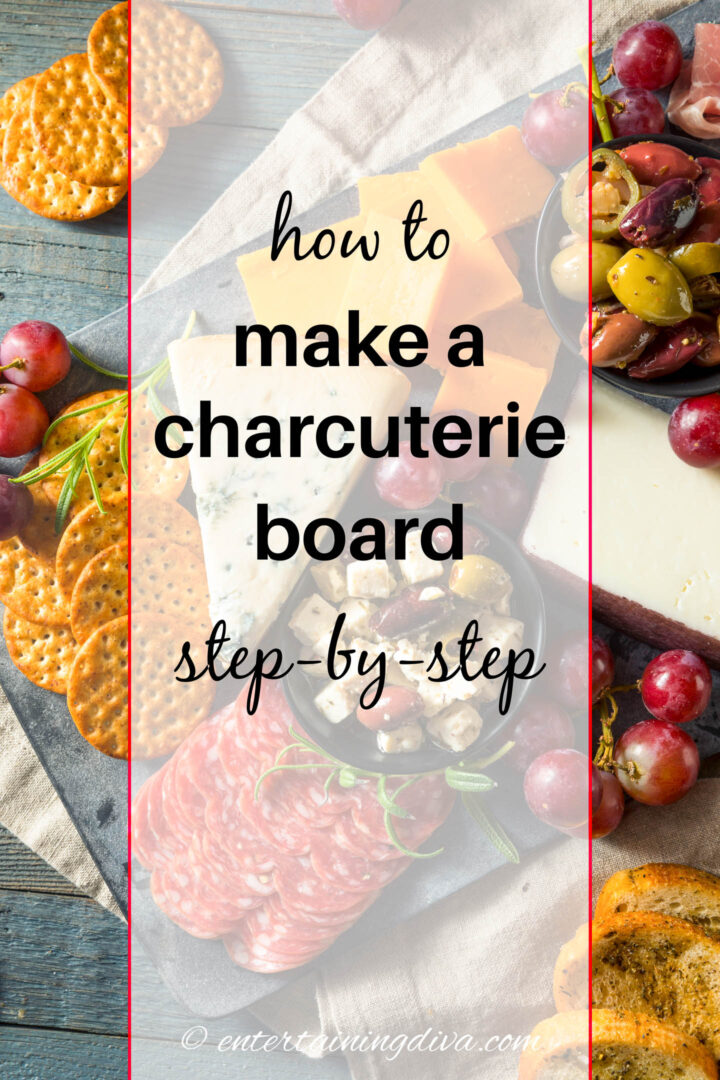


A charcuterie board makes a great appetizer for any party. However, it can be hard to know what to put on the board, how much of each type of meat you need for an event and how to arrange it. We’ve compiled some helpful tips so that when the time comes, you’ll know how to make a simple charcuterie board that looks beautiful and tastes delicious!

I have always loved Charcuterie boards.
I think they look beautiful.
They’re a great way to serve a lot of different food options in a small space. (So there’s something for everyone.)
And you can prepare them ahead of time. A perfect party appetizer!
But I have to admit that it took me a long time to actually try to make one myself.
They just look so intimidating.
How do you decide what to put on it? How much of everything do you need? And how do you arrange everything so that it looks good?
Well, now that I’ve made a few of them, I can honestly say they’re not as hard as they look. They really only take a few minutes to put together.
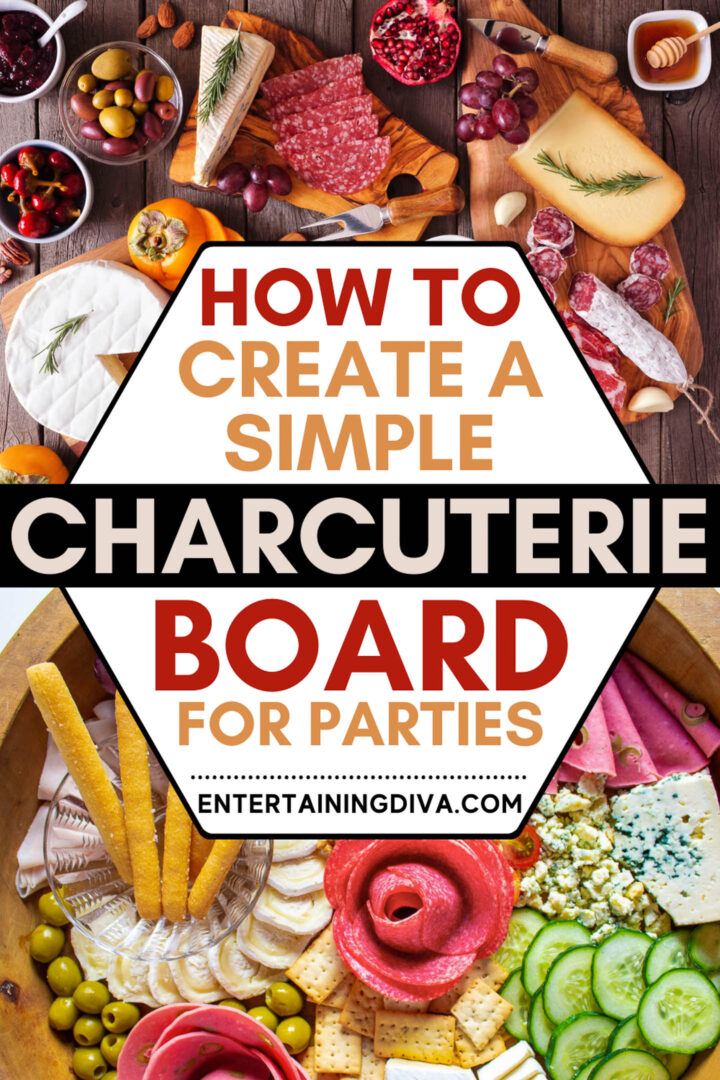
So I’m sharing all of my tips and tricks on how to make a simple charcuterie board.
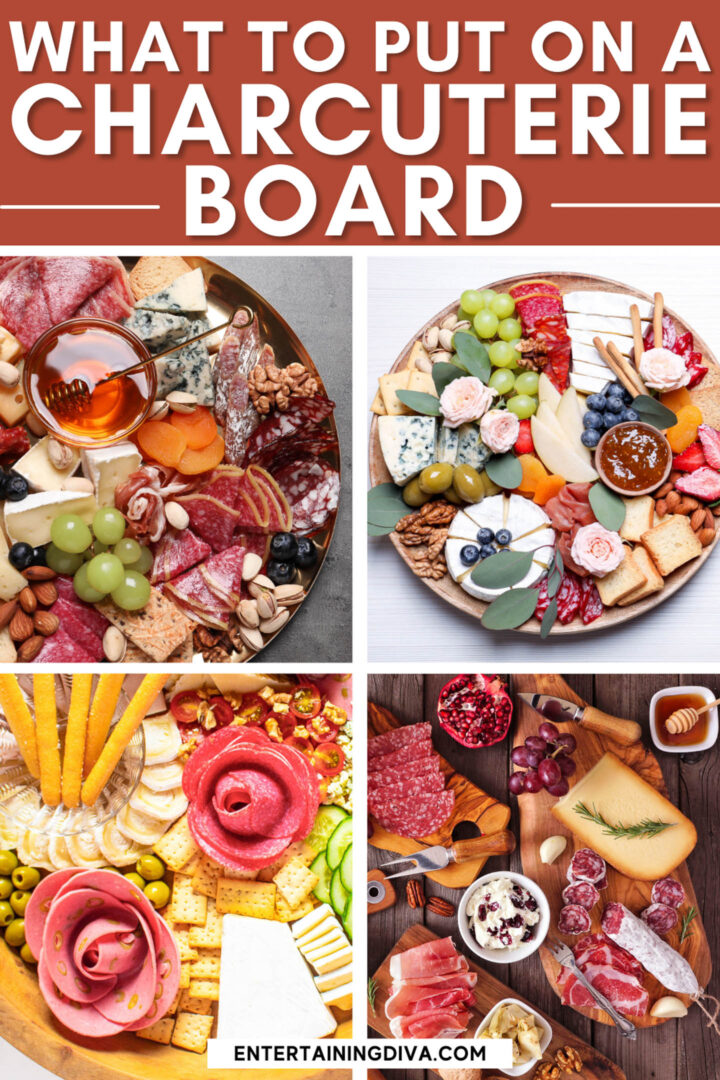
What to put on a charcuterie board
This post may contain affiliate links. We make a small commission if you buy the products from these links (at no extra cost to you). As an Amazon Associate, I earn from qualifying purchases. But we only recommend products we would use ourselves. For more information, click here to see our disclosures
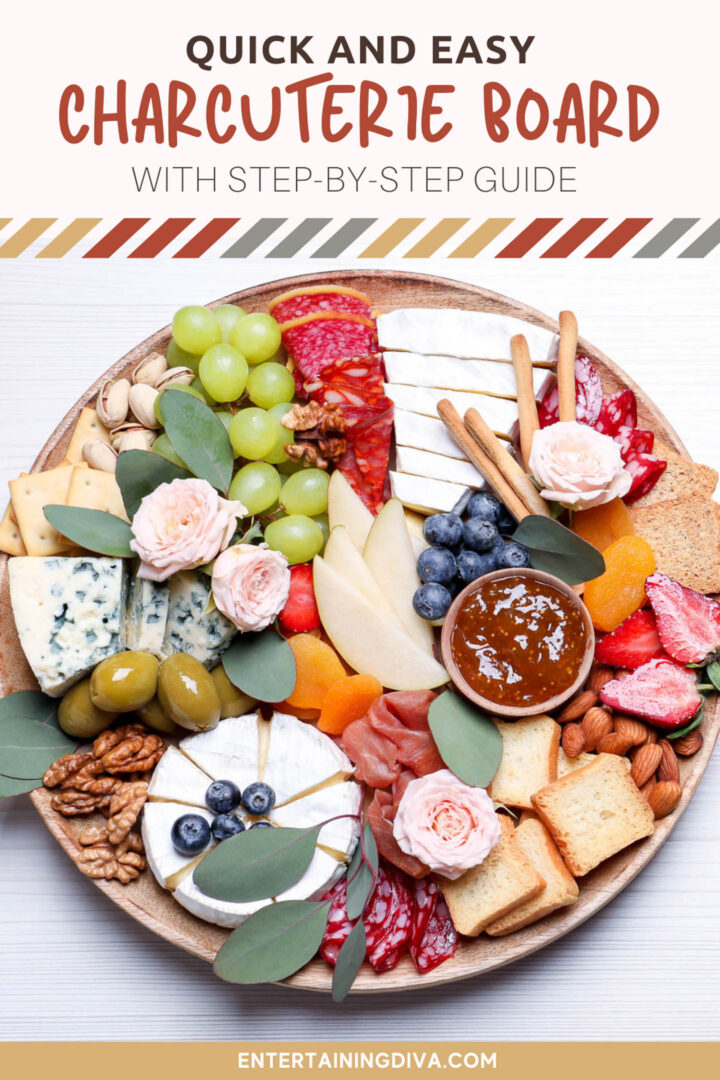
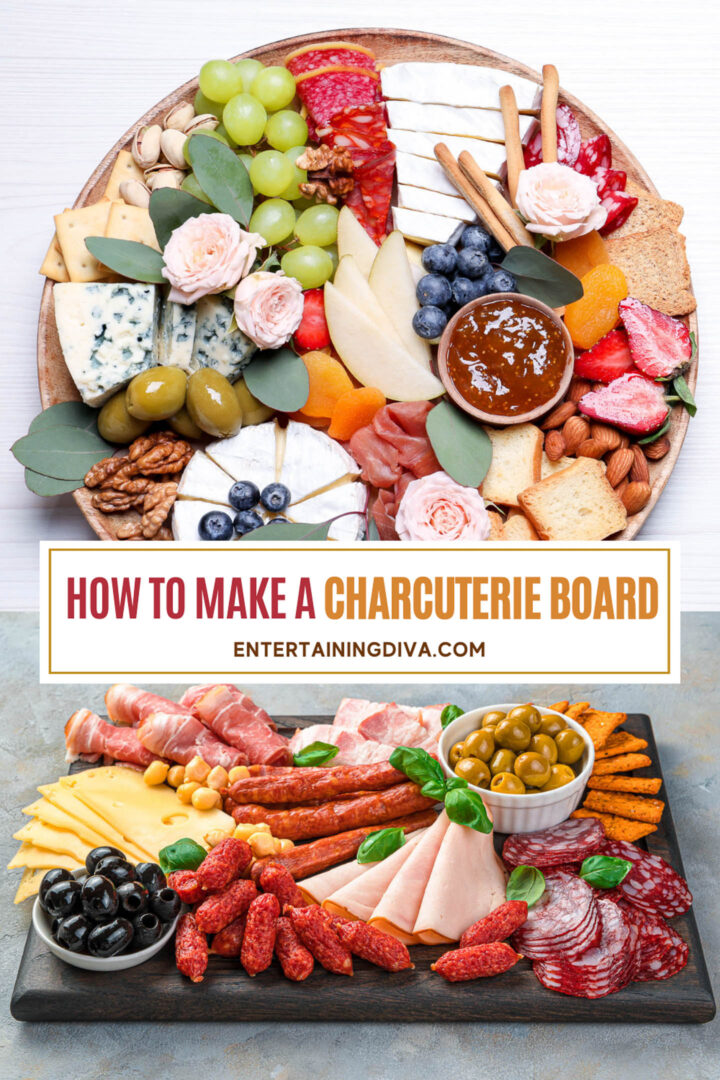
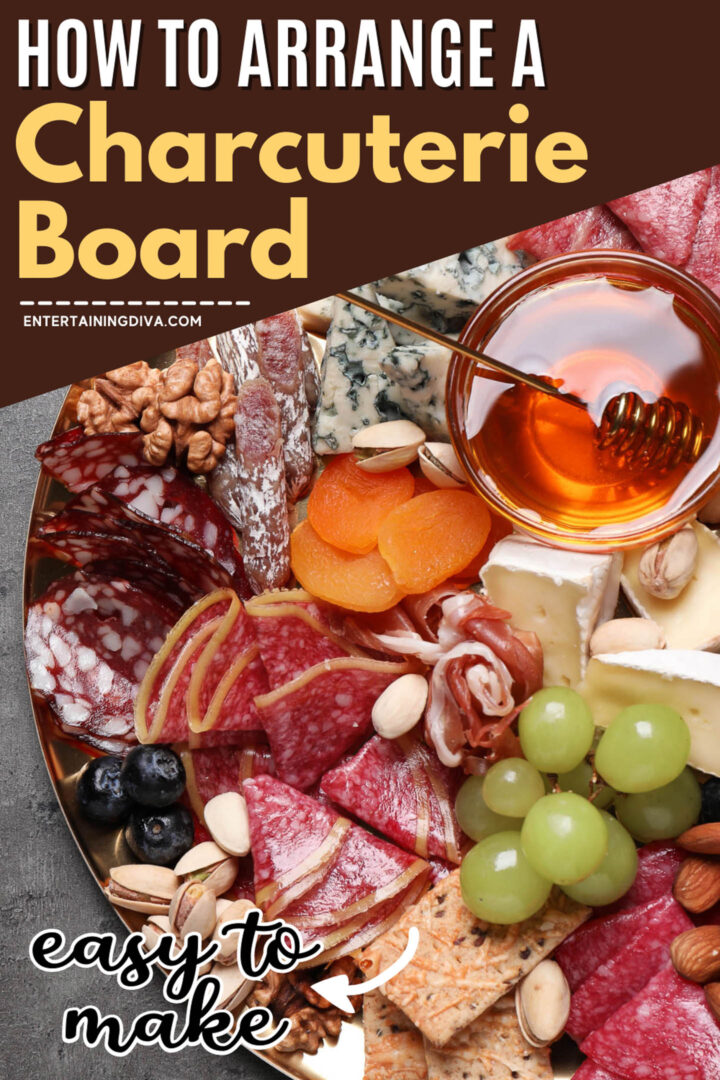
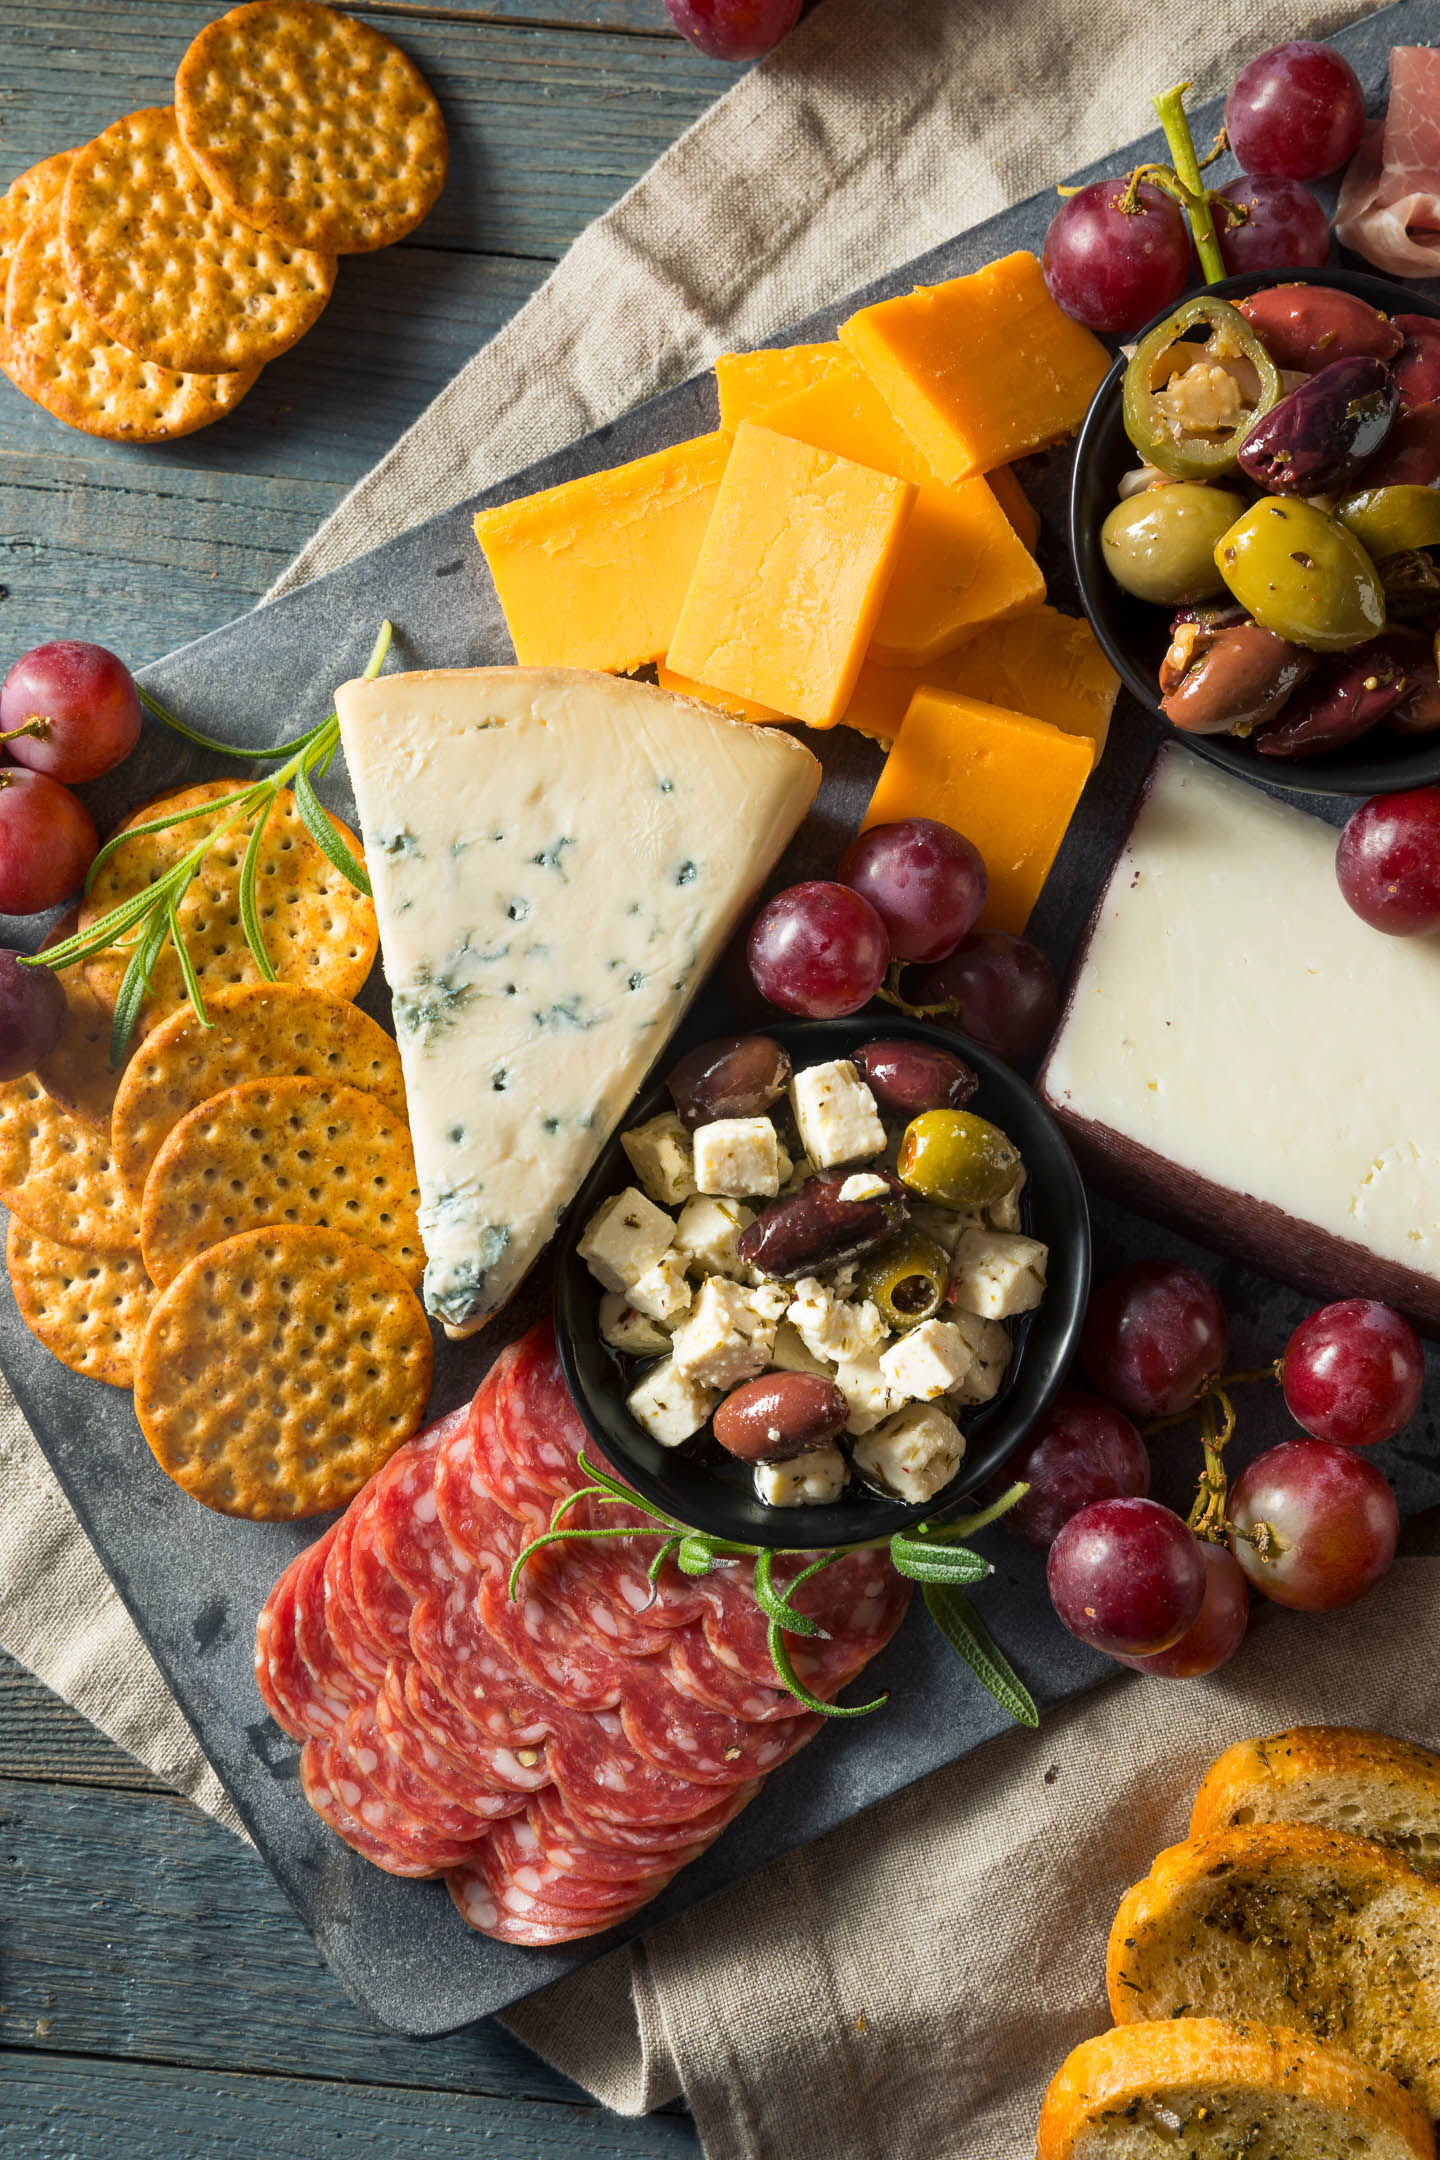
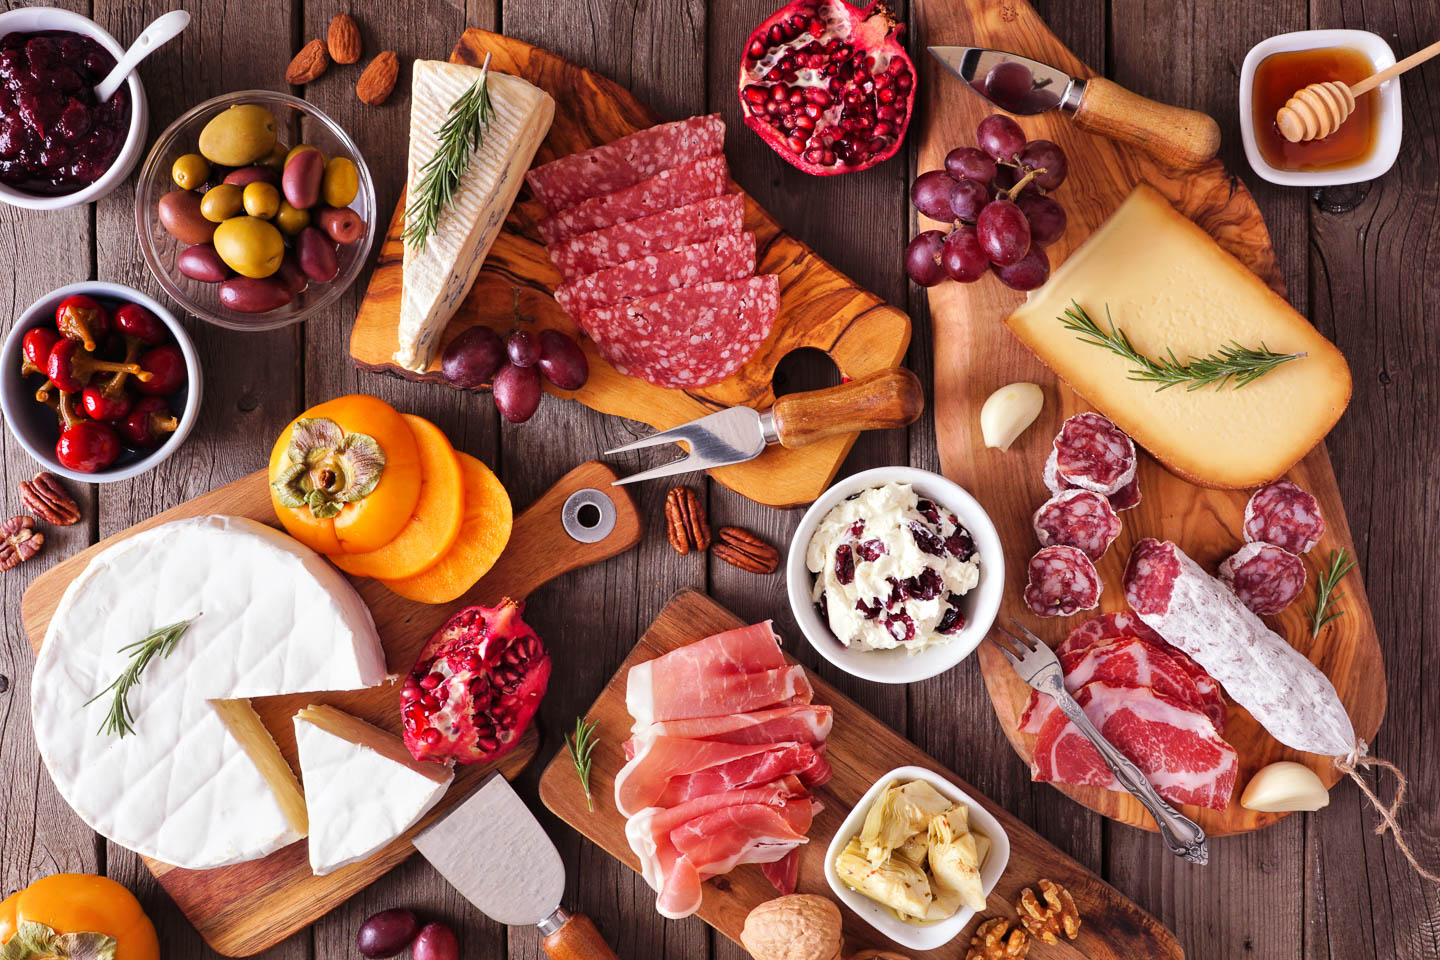
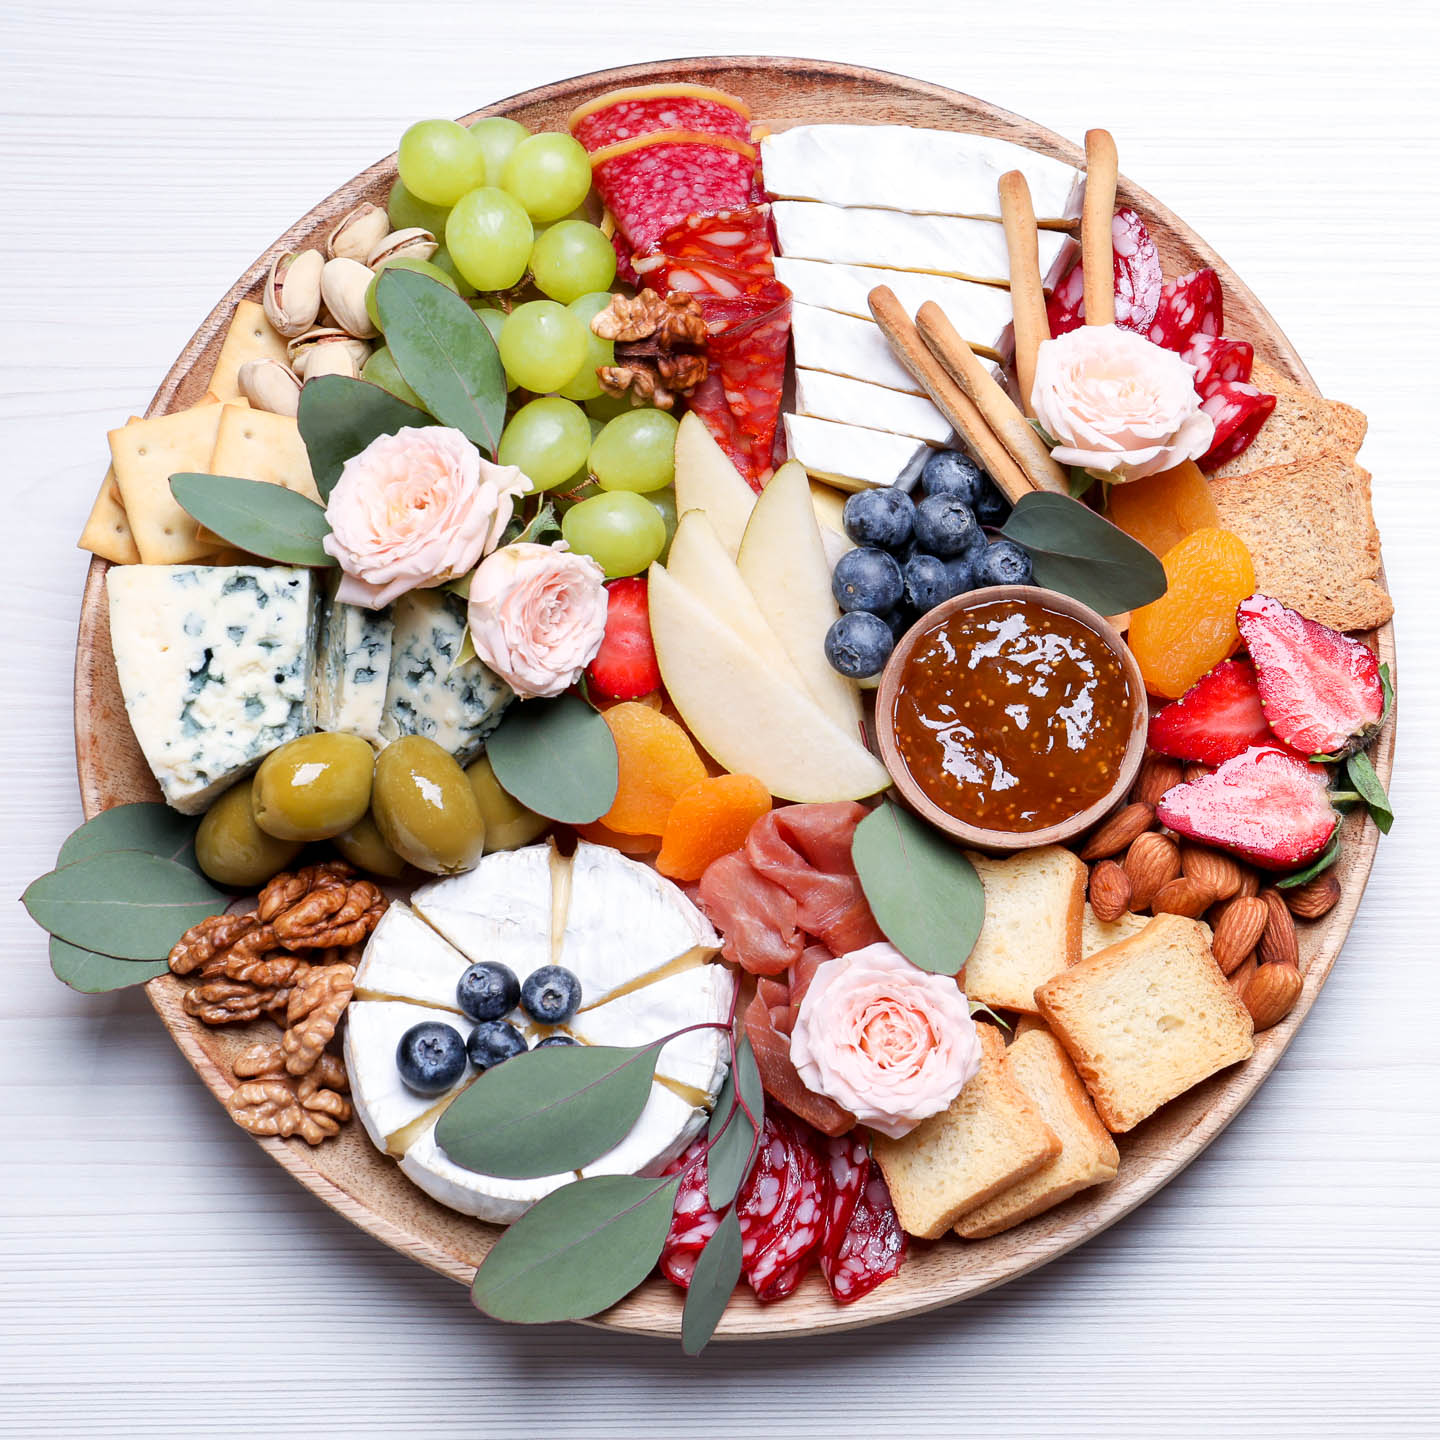
Charcuterie boards normally contain a combination of cheeses and meats, fresh and dried fruits and vegetables, nuts, and bread or crackers along with some spreads or dips.
Of course, there is no hard and fast rule about this. So you can pretty much mix and match whatever you would like to serve.
But it’s important to get high quality ingredients since they’re going to be the star of the show.
To keep the board interesting, I usually select at least 3 items from each category.
And buy 8 to 12 ounces of each item so there’s enough for everyone to try everything if they want to.
If the board is an appetizer for a meal, plan to have a total of 2 to 3 ounces for each person. That’s across all of the items on the board, not per ingredient :).
If you are serving it at a cocktail party where there won’t be a dinner, increase the serving size to 4 to 6 ounces per person.
Cheeses
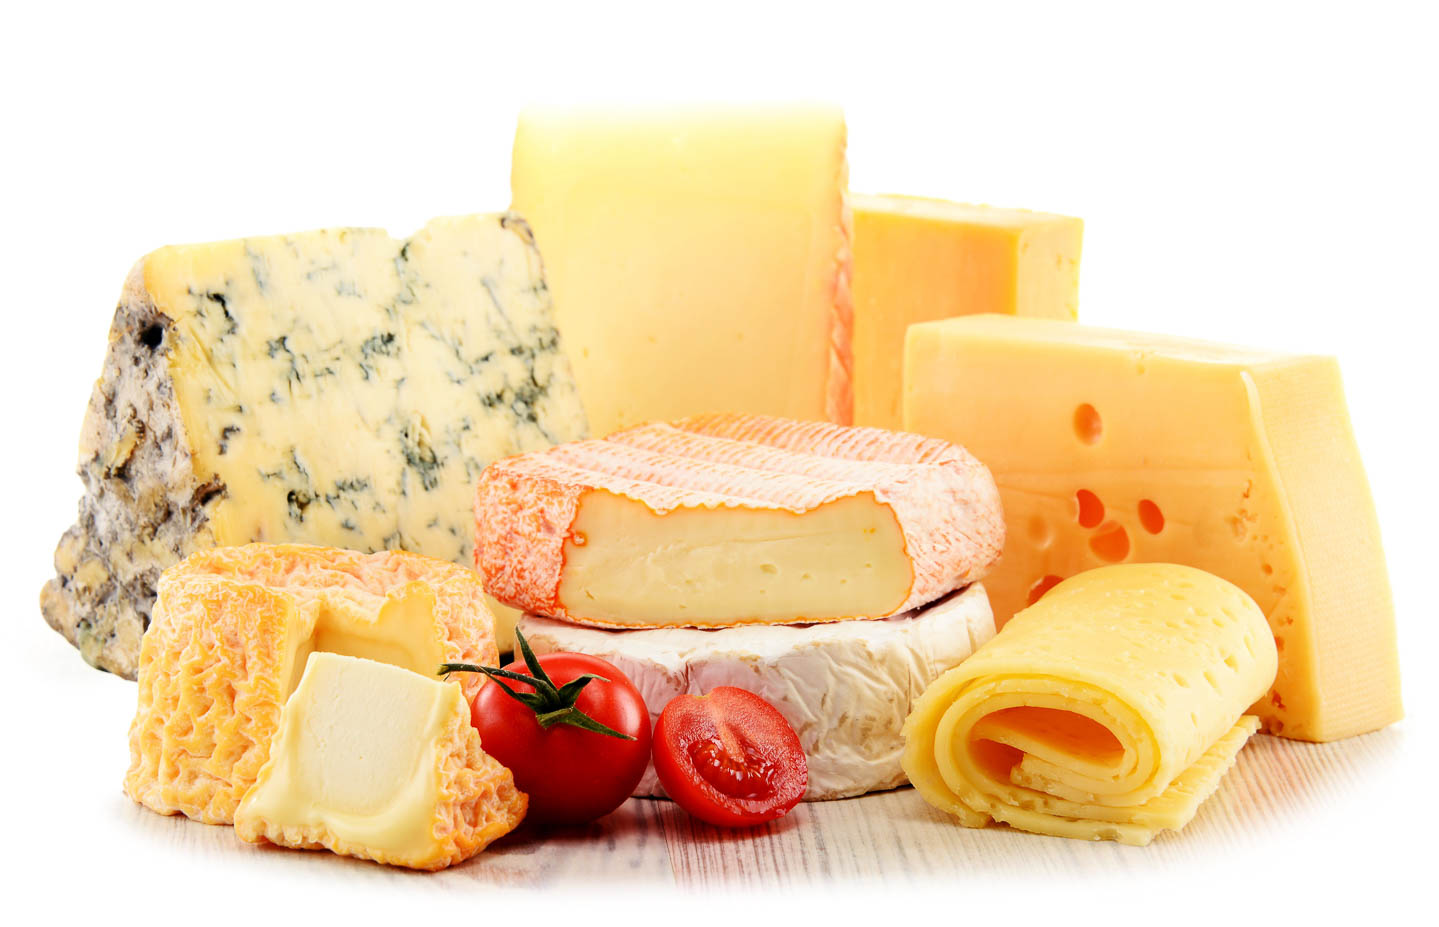
There are three kinds of cheeses I like to include on my board.
For the best variety, try to pick at least one cheese from each of these categories:
- Spreadable or soft cheese such as Brie or Goat cheese.
- Medium density cheese like Gorgonzola, blue cheese, cheddar or gouda.
- Hard cheese such as Parmigiano Reggiano.
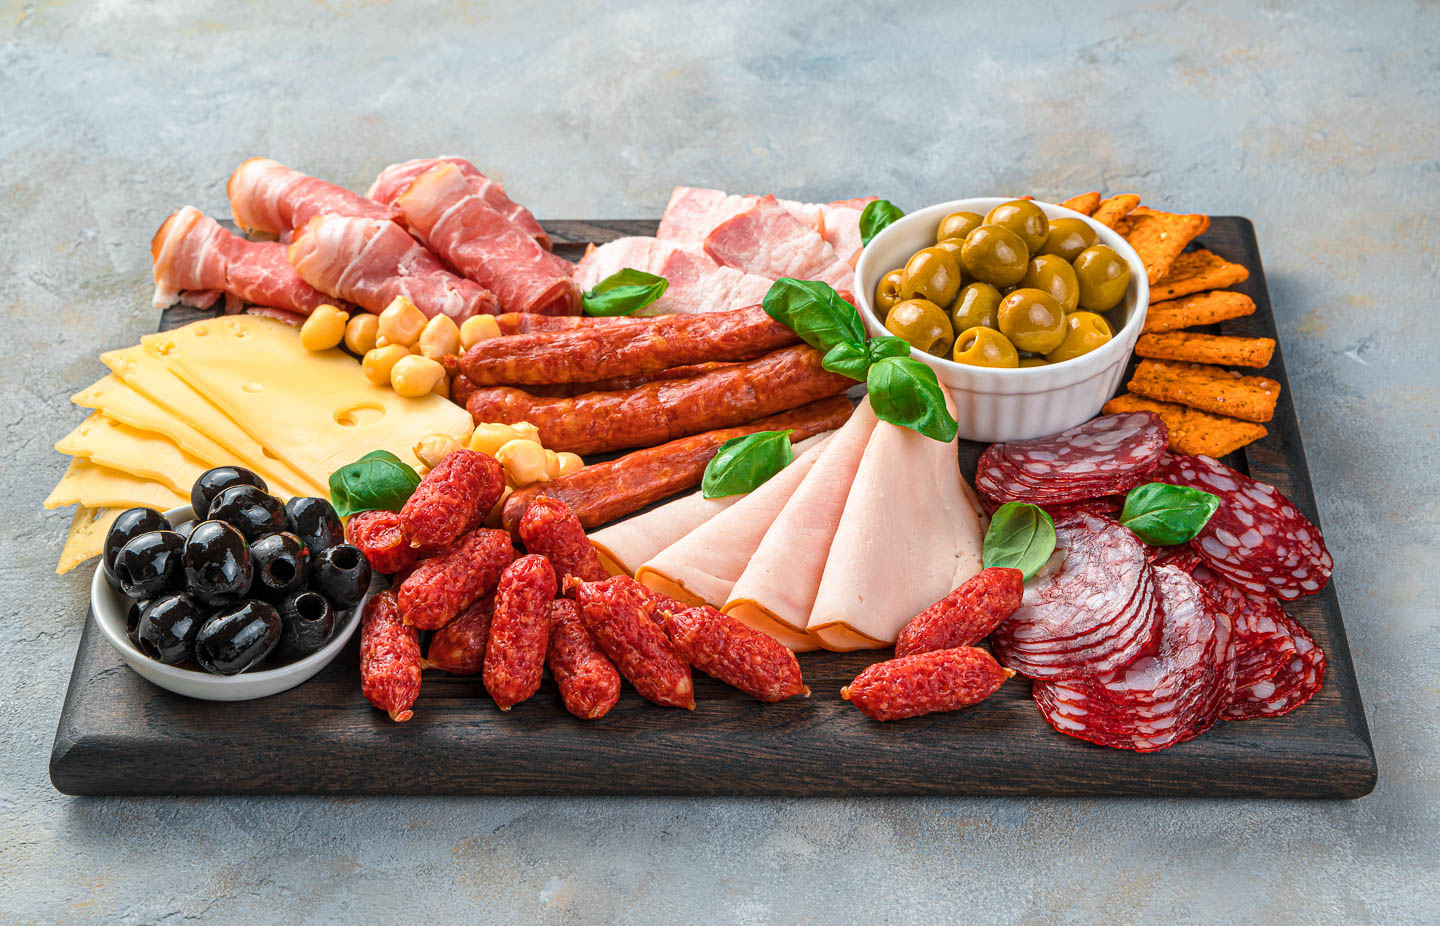
Cured meats
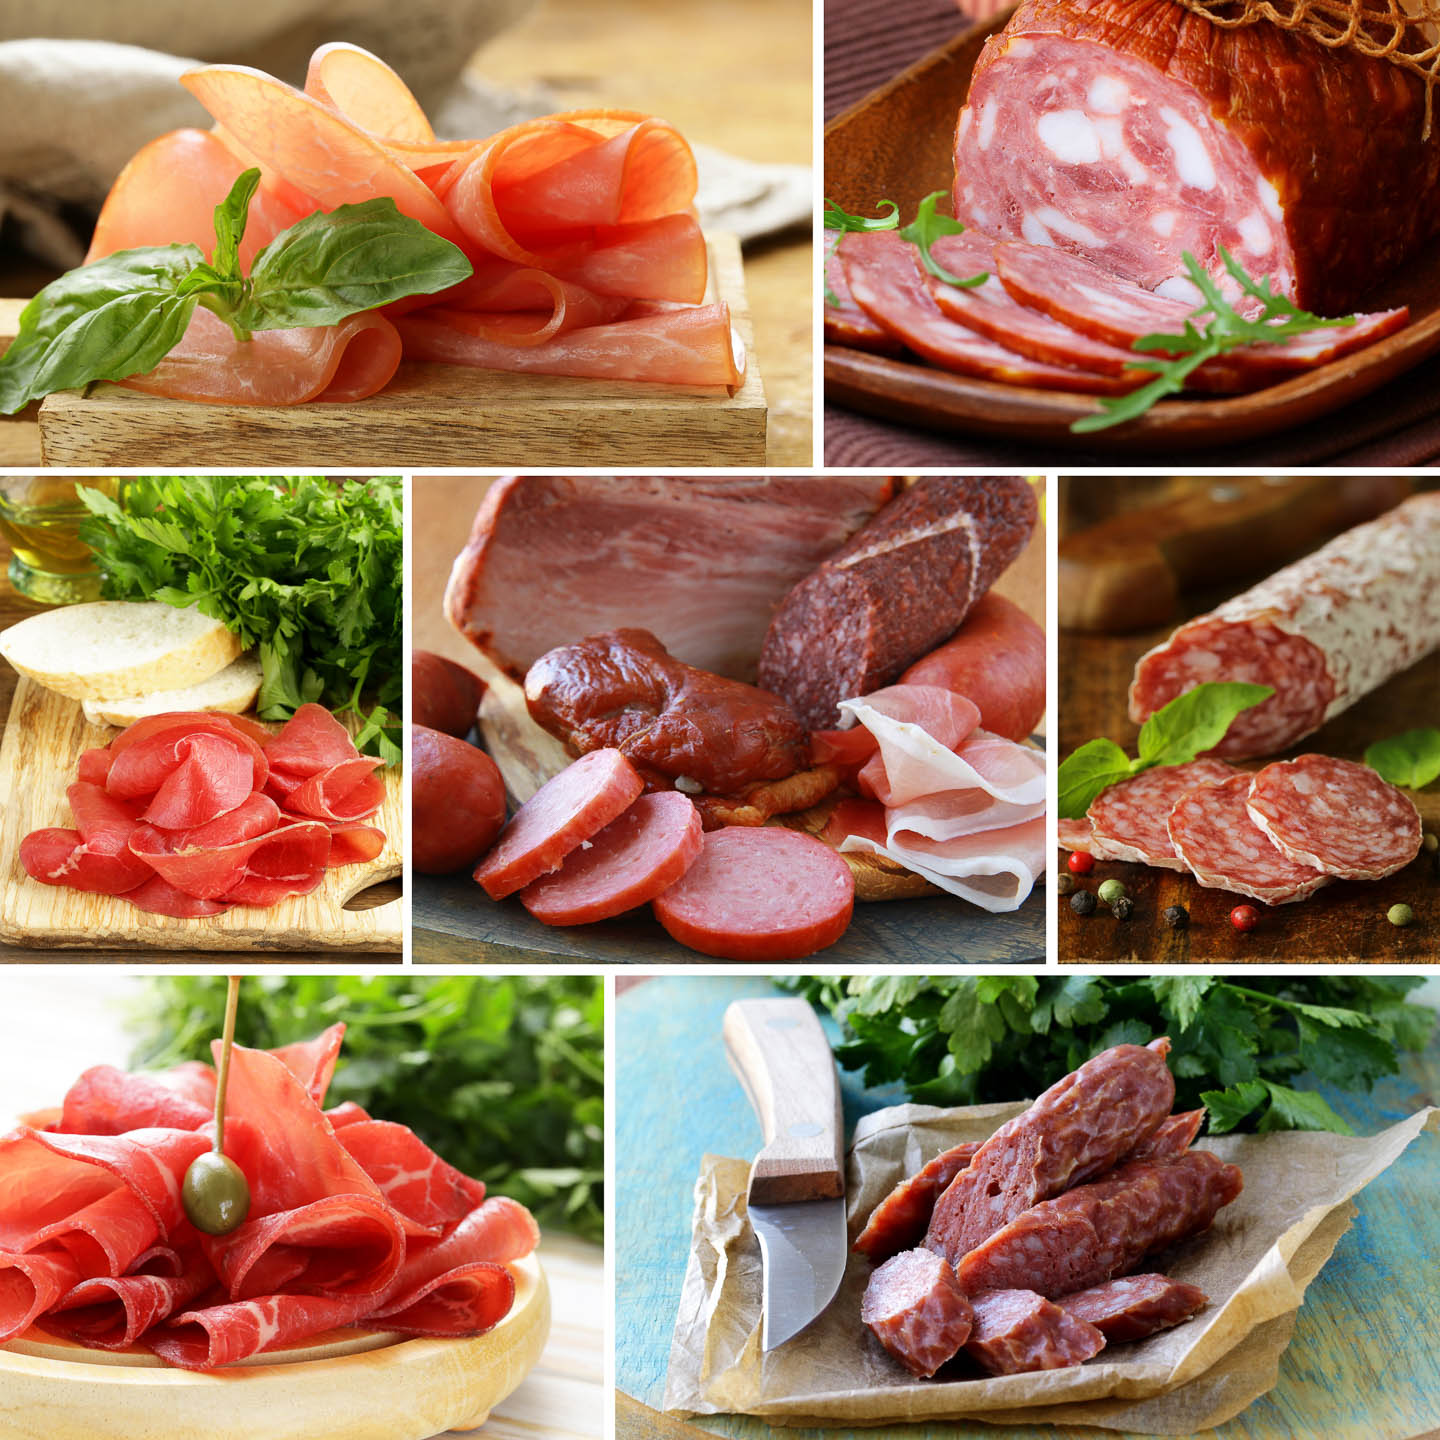
Here are some of the best meats for your Charcuterie board:
- Salami
- Sliced ham
- Mortadella
- Pepperoni
- Prosciutto
Fruits & vegetables
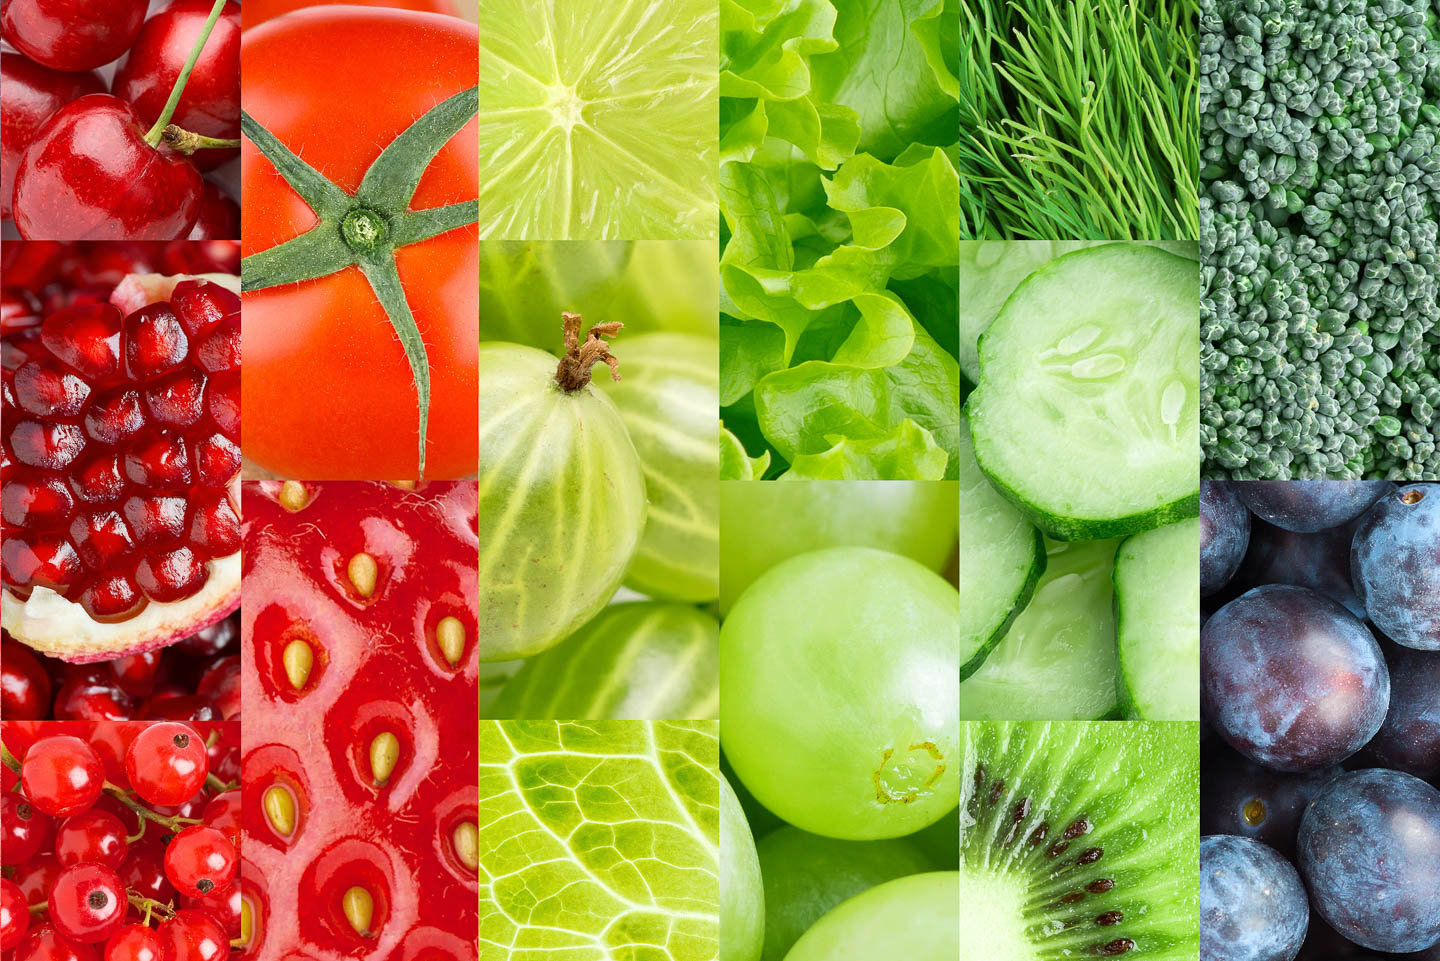
The following types of produce works well:
- Small fruits and vegetables, such as grapes, berries, cherry tomatoes and baby carrots.
- Larger fruits and vegetables that can be cut into easy-to-eat slices, like cucumbers and apples.
- Olives
- Dried fruit such as apricots, dates or raisins
Breads and crackers
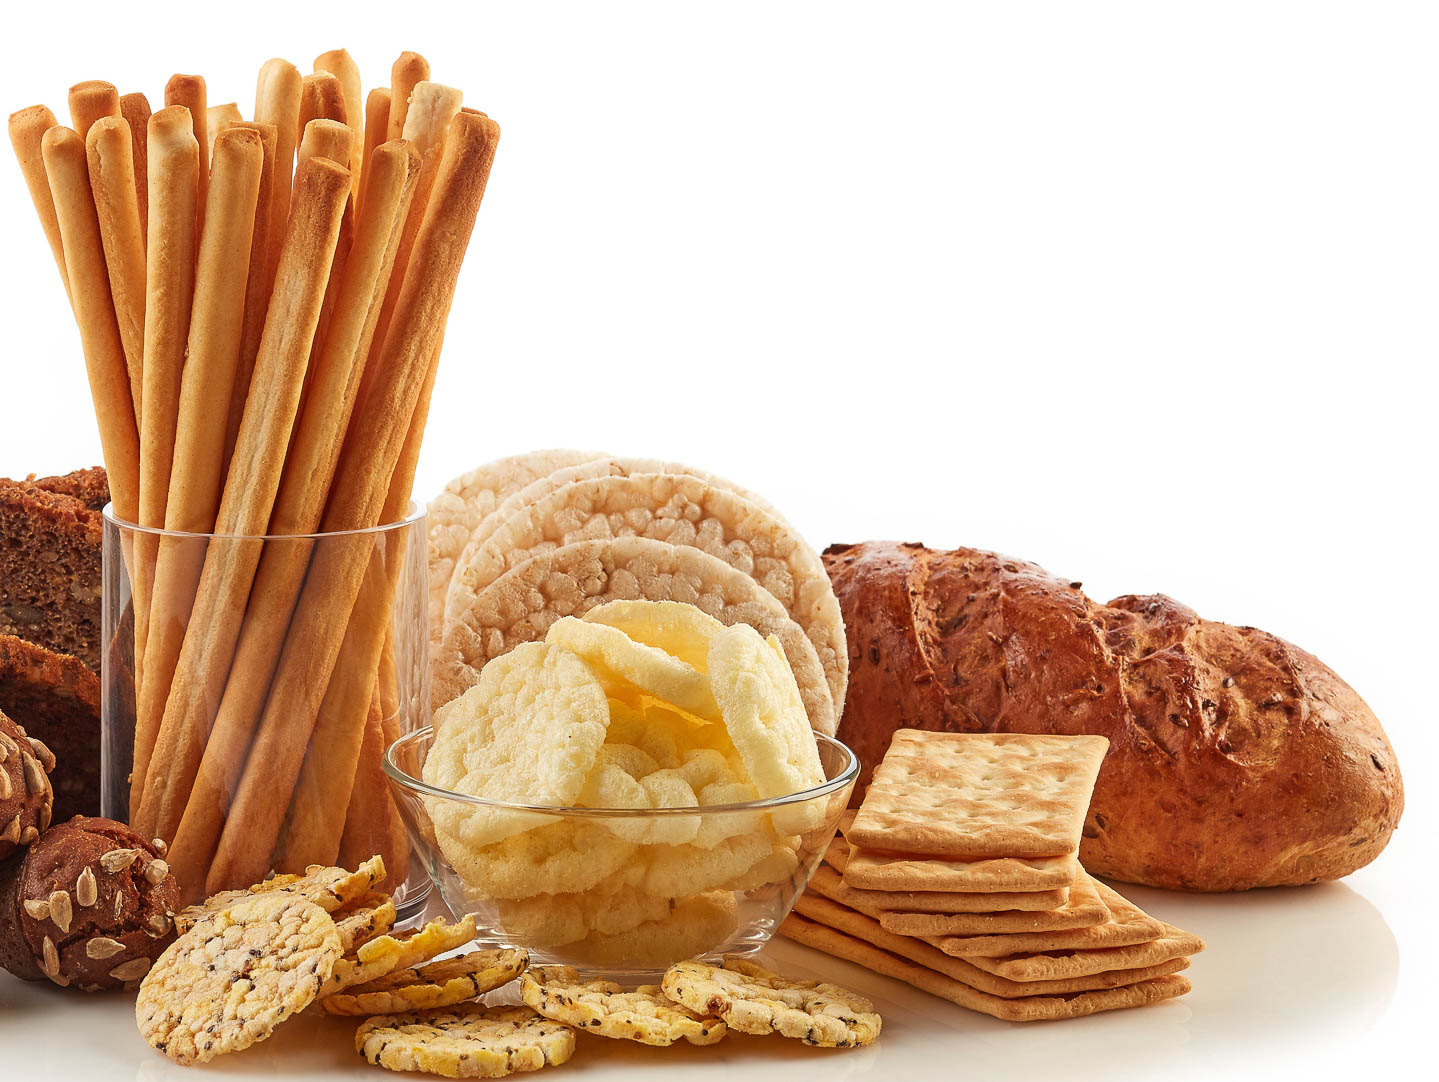
These are what you’ll eat with the meats, cheeses and dips, such as crackers, breadsticks, baguette slices or even chips.
You may want to include some gluten-free options (such as rice cakes) if you have friends with dietary restrictions.
They should be served in small-sized pieces to make them easy to grab.
If your board is small, you may want to put larger bread slices or crackers on a separate plate so you have more room for the main attractions on your Charcuterie board.
Other complements
The remainder of the ingredients will be used as fillers in your bowls or around your meat and cheese board as necessary.
These add texture and complementary flavors to the rest of the food you are serving:
- Nuts such as walnuts, almonds, pistachios or candied pecans. I stay away from peanuts since they don’t seem to go very well with cured meats and cheeses.
- Jams or jellies
- Dips such as hummus
The best boards (and other equipment)
Charcuterie board ideas
Most charcuterie boards are wood cutting boards or cheese boards.
But if you don’t have one of those (or the ones you have are not nice enough to serve with), there are some other options:
- cookie sheet or pie plate. The rim makes them easier to transport from the kitchen to the serving location since the food is less likely to fall of the edge.
- serving tray (as long as it is rated for food consumption).
- marble bakers slab.
- serving plate or large shallow bowl.
Other supplies
Once you have your board picked out, there are a few other things you might need:
- sharp knife and/or cheese slicer – For preparing the food.
- small bowls or ramekins – These add another dimension to the board (so it’s not all flat) and can hold dips or jams, small items such as olives, or even crackers and breadsticks.
- small glass (optional) – You’ll need this if you want to make flowers out of your meat slices.
- cheese knife (optional) – If you have any cheeses that need to be spread, make sure to provide a cheese knife for each one when you serve it.
- toothpicks – These make it easy for people to take things off the board without requiring cutlery that may already have been used.
How to arrange a charcuterie board
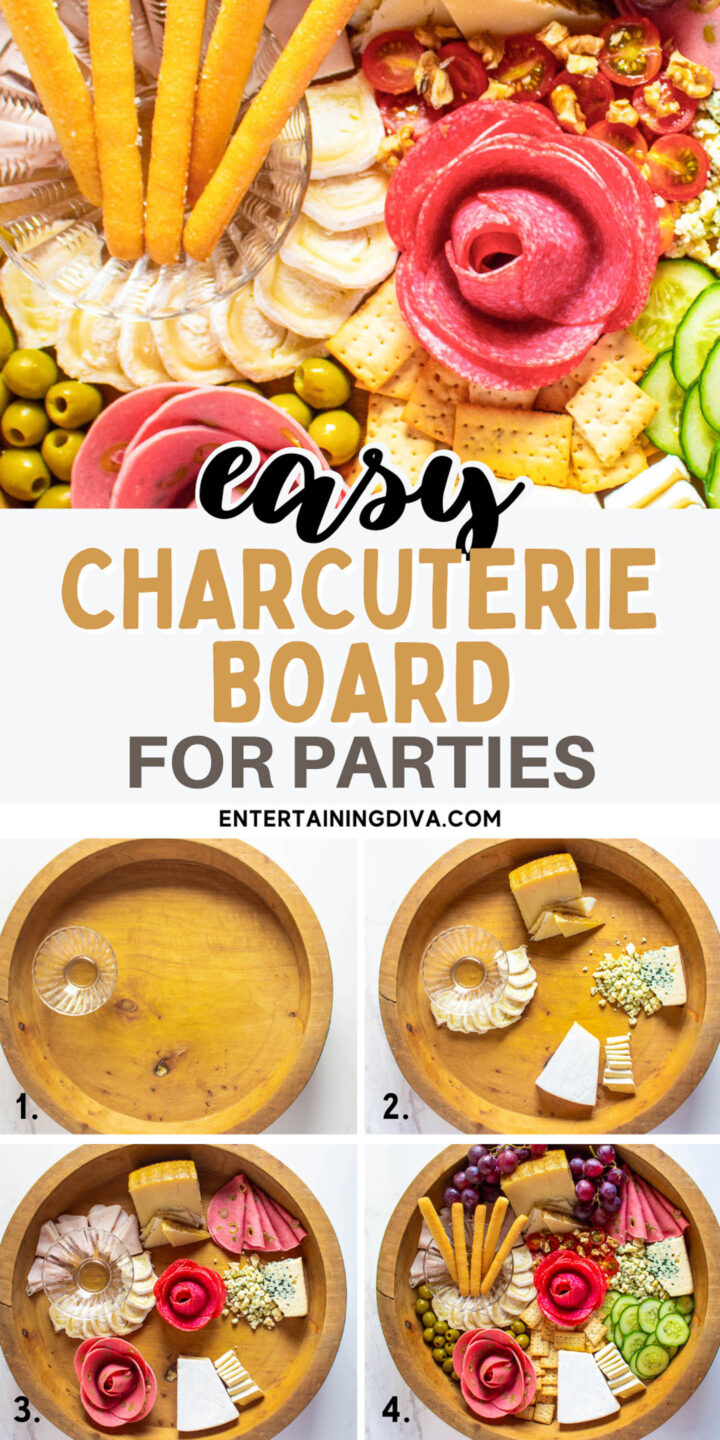
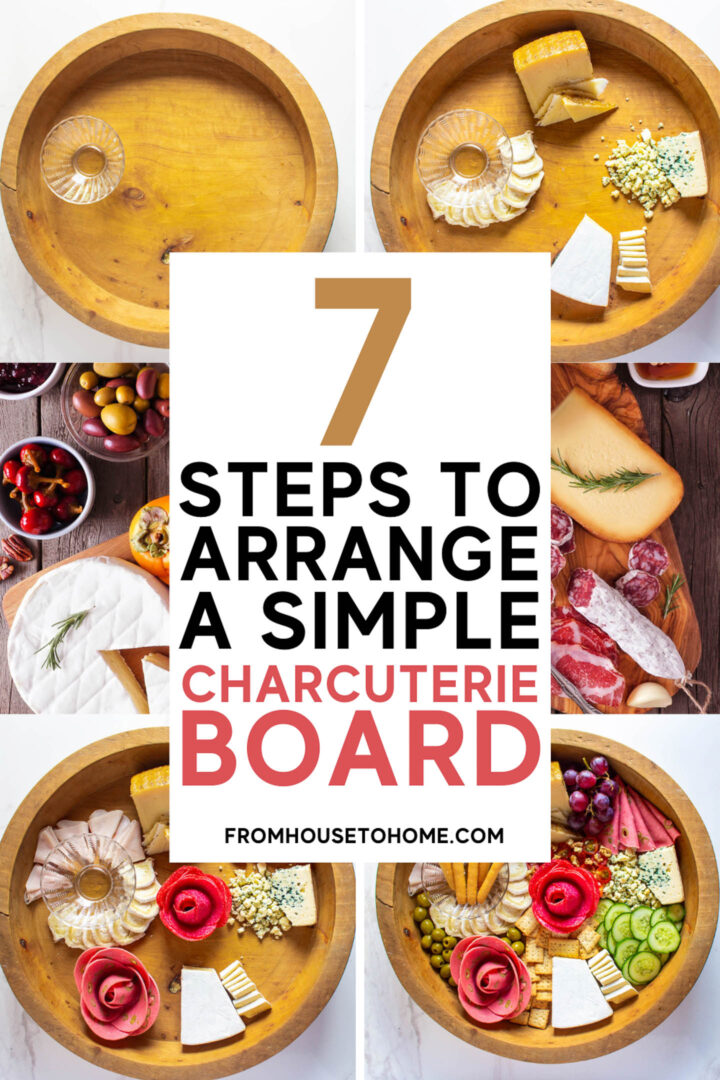
Now we’re on to the fun part…building the Charcuterie board with these step by step instructions!
Before we get the board started, here are a few tips for arranging the food on your board:
- Just like in decorating, an odd number of total items usually looks better and is easier to place than an even number. I used 15 on my board.
- Be aware of color combinations. Try to space out food with similar colors so they are not right beside each other. Do not put all of the same color food on the same side of the board (unless you are deliberately creating a striped color scheme). Use fillers with contrasting colors to separate ingredients that look similar.
- Place things on the board so that it is easy for your guests to figure out what goes with what. For example:
- Put cheese and crackers together.
- Serve grapes and hard cheese next to each other.
- Combine cherry tomatoes and brie.
- Position the bowl of jam next to the goat cheese and baguette slices.
- Serve everything in bite-sized pieces. Many people won’t cut things on a shared appetizer plate so you’ll end up with a lot of leftovers if you don’t.
- Choose smaller fruits and vegetables (such as berries, grapes and cherry tomatoes).
- Cut cheese and large vegetables into chunks or slices.
- Serve meats in individual servings.
- You don’t need to put out all of the ingredients at one time. I usually like to chop some extras while I’m doing the prep work. Then I can easily refill the board as things start to run out.
- When you are laying out the board, put the largest items on first. Then work your way down to the smaller ones. This will make it easier to create a board that looks balanced and ensure you can fit everything in.
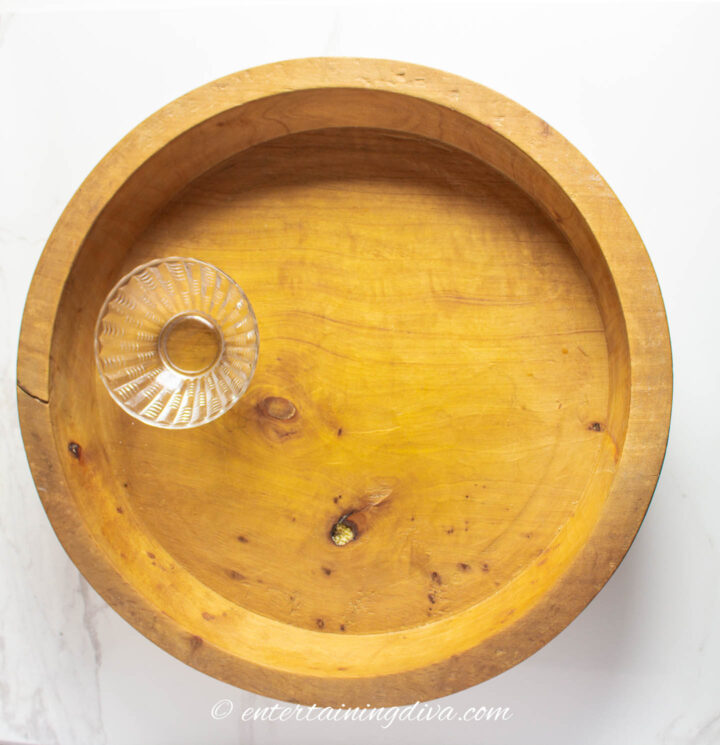
1 | Place the bowl(s)
We’re going to start by placing the small bowls in their final position before starting with the food.
If you do not do this now, you might not have enough space to add them later.
There is no hard and fast rule about where the bowl(s) should go on your board. But I have some suggestions that have worked for me.
My main rule of thumb is not to place the bowl(s) directly in the middle. I find it easier to make the board look interesting when they are off-center.
One bowl

For one bowl, that means putting it off to one side.
Having said that, putting the bowl in the center can work. I have an example of that below.
Two bowls
With two bowls, placing them in opposite corners of the board works well.
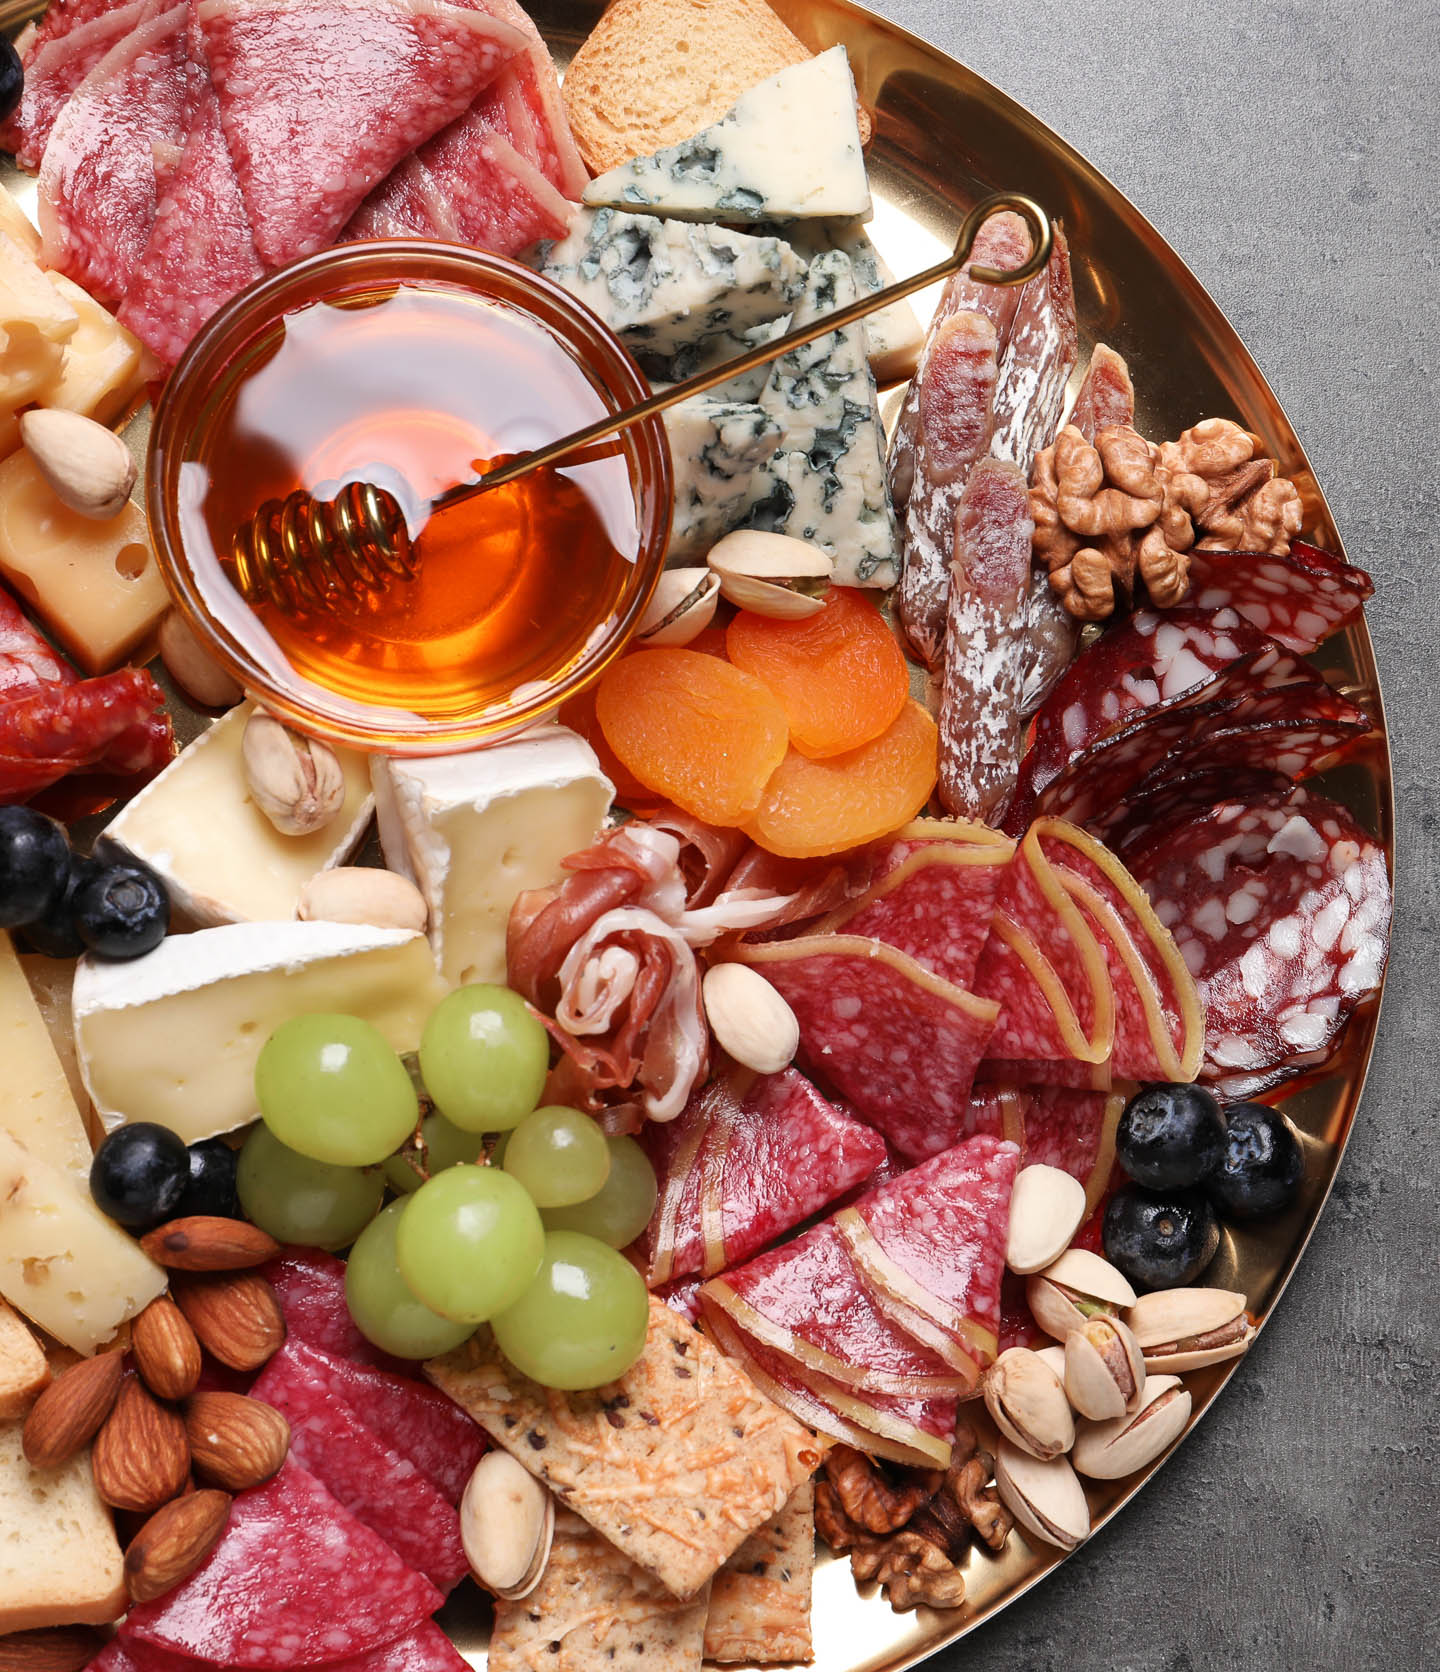
Three bowls
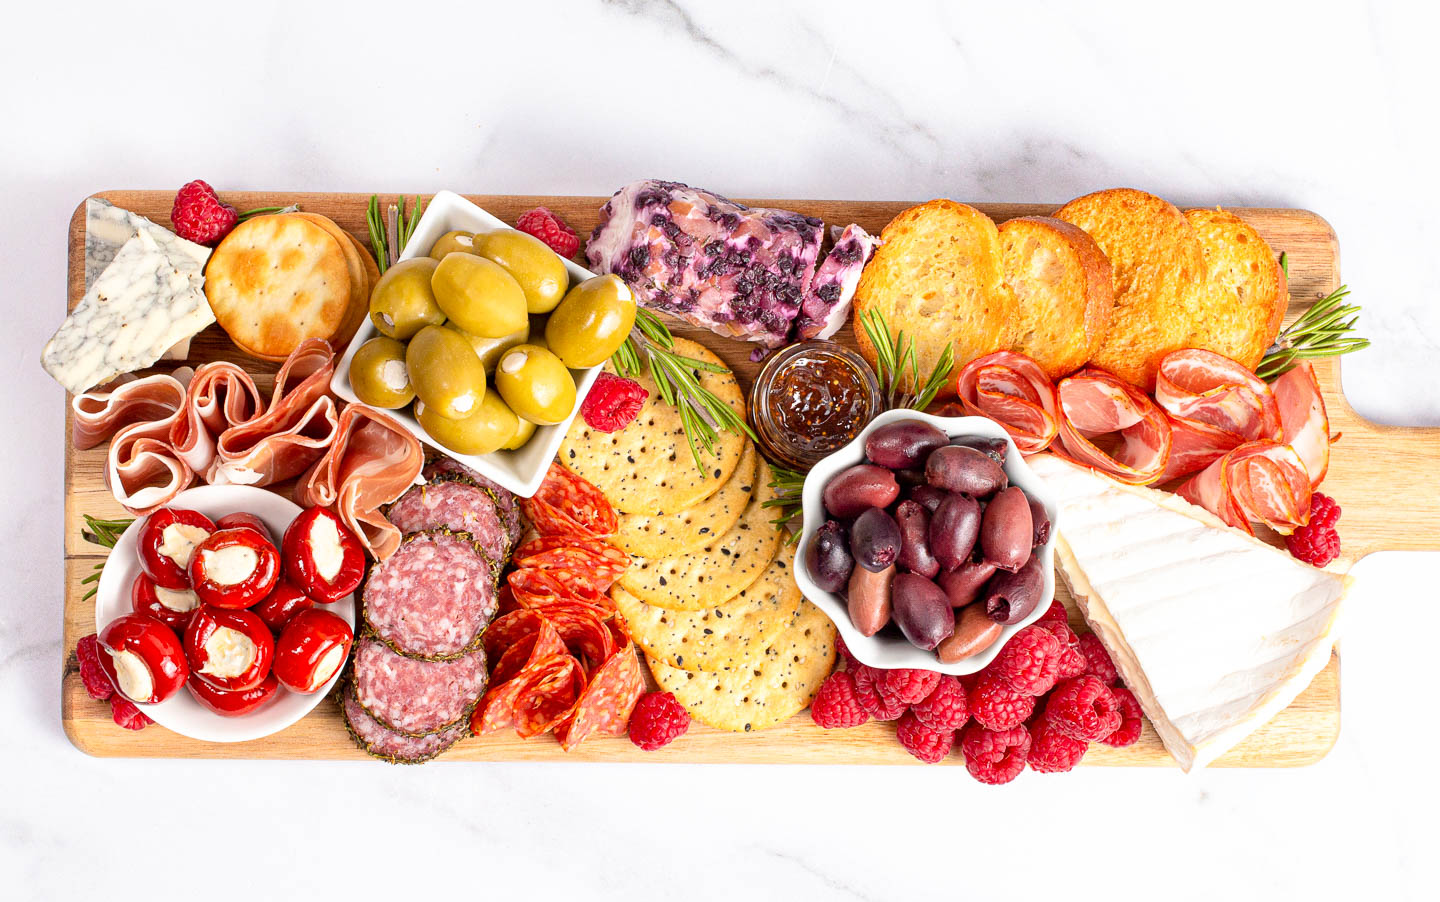
For three bowls, making a triangle shape out of them looks good.
In the picture above, there are actually 4 bowls. But because the jam is tucked in under the bowl with the dark olives and the color is similar, it reads as one.
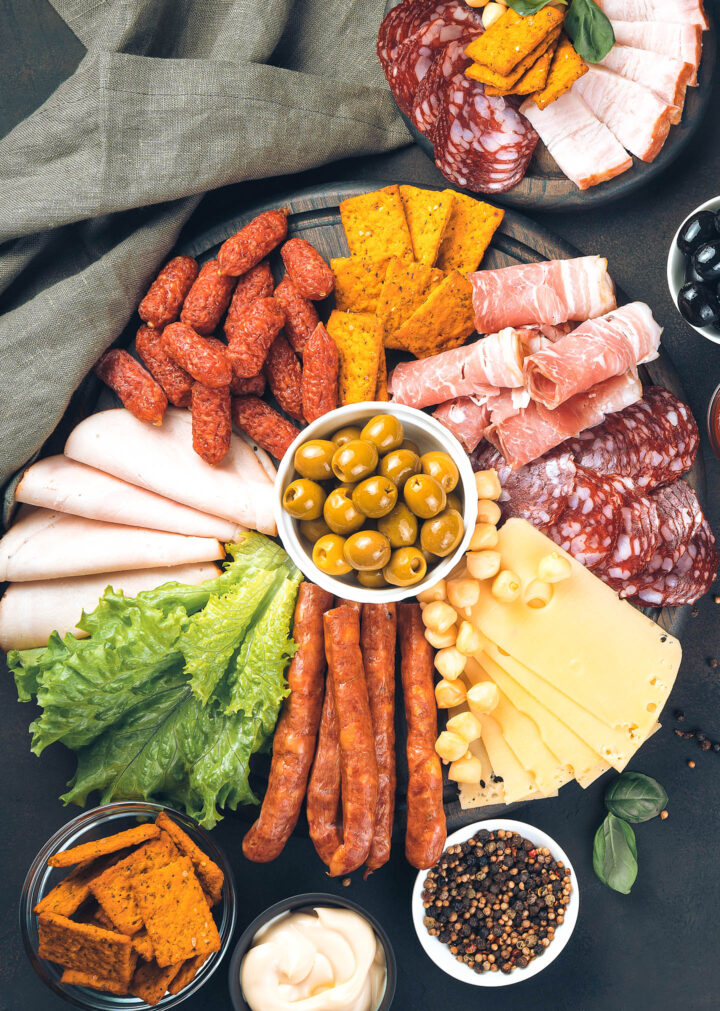
Lots of bowls
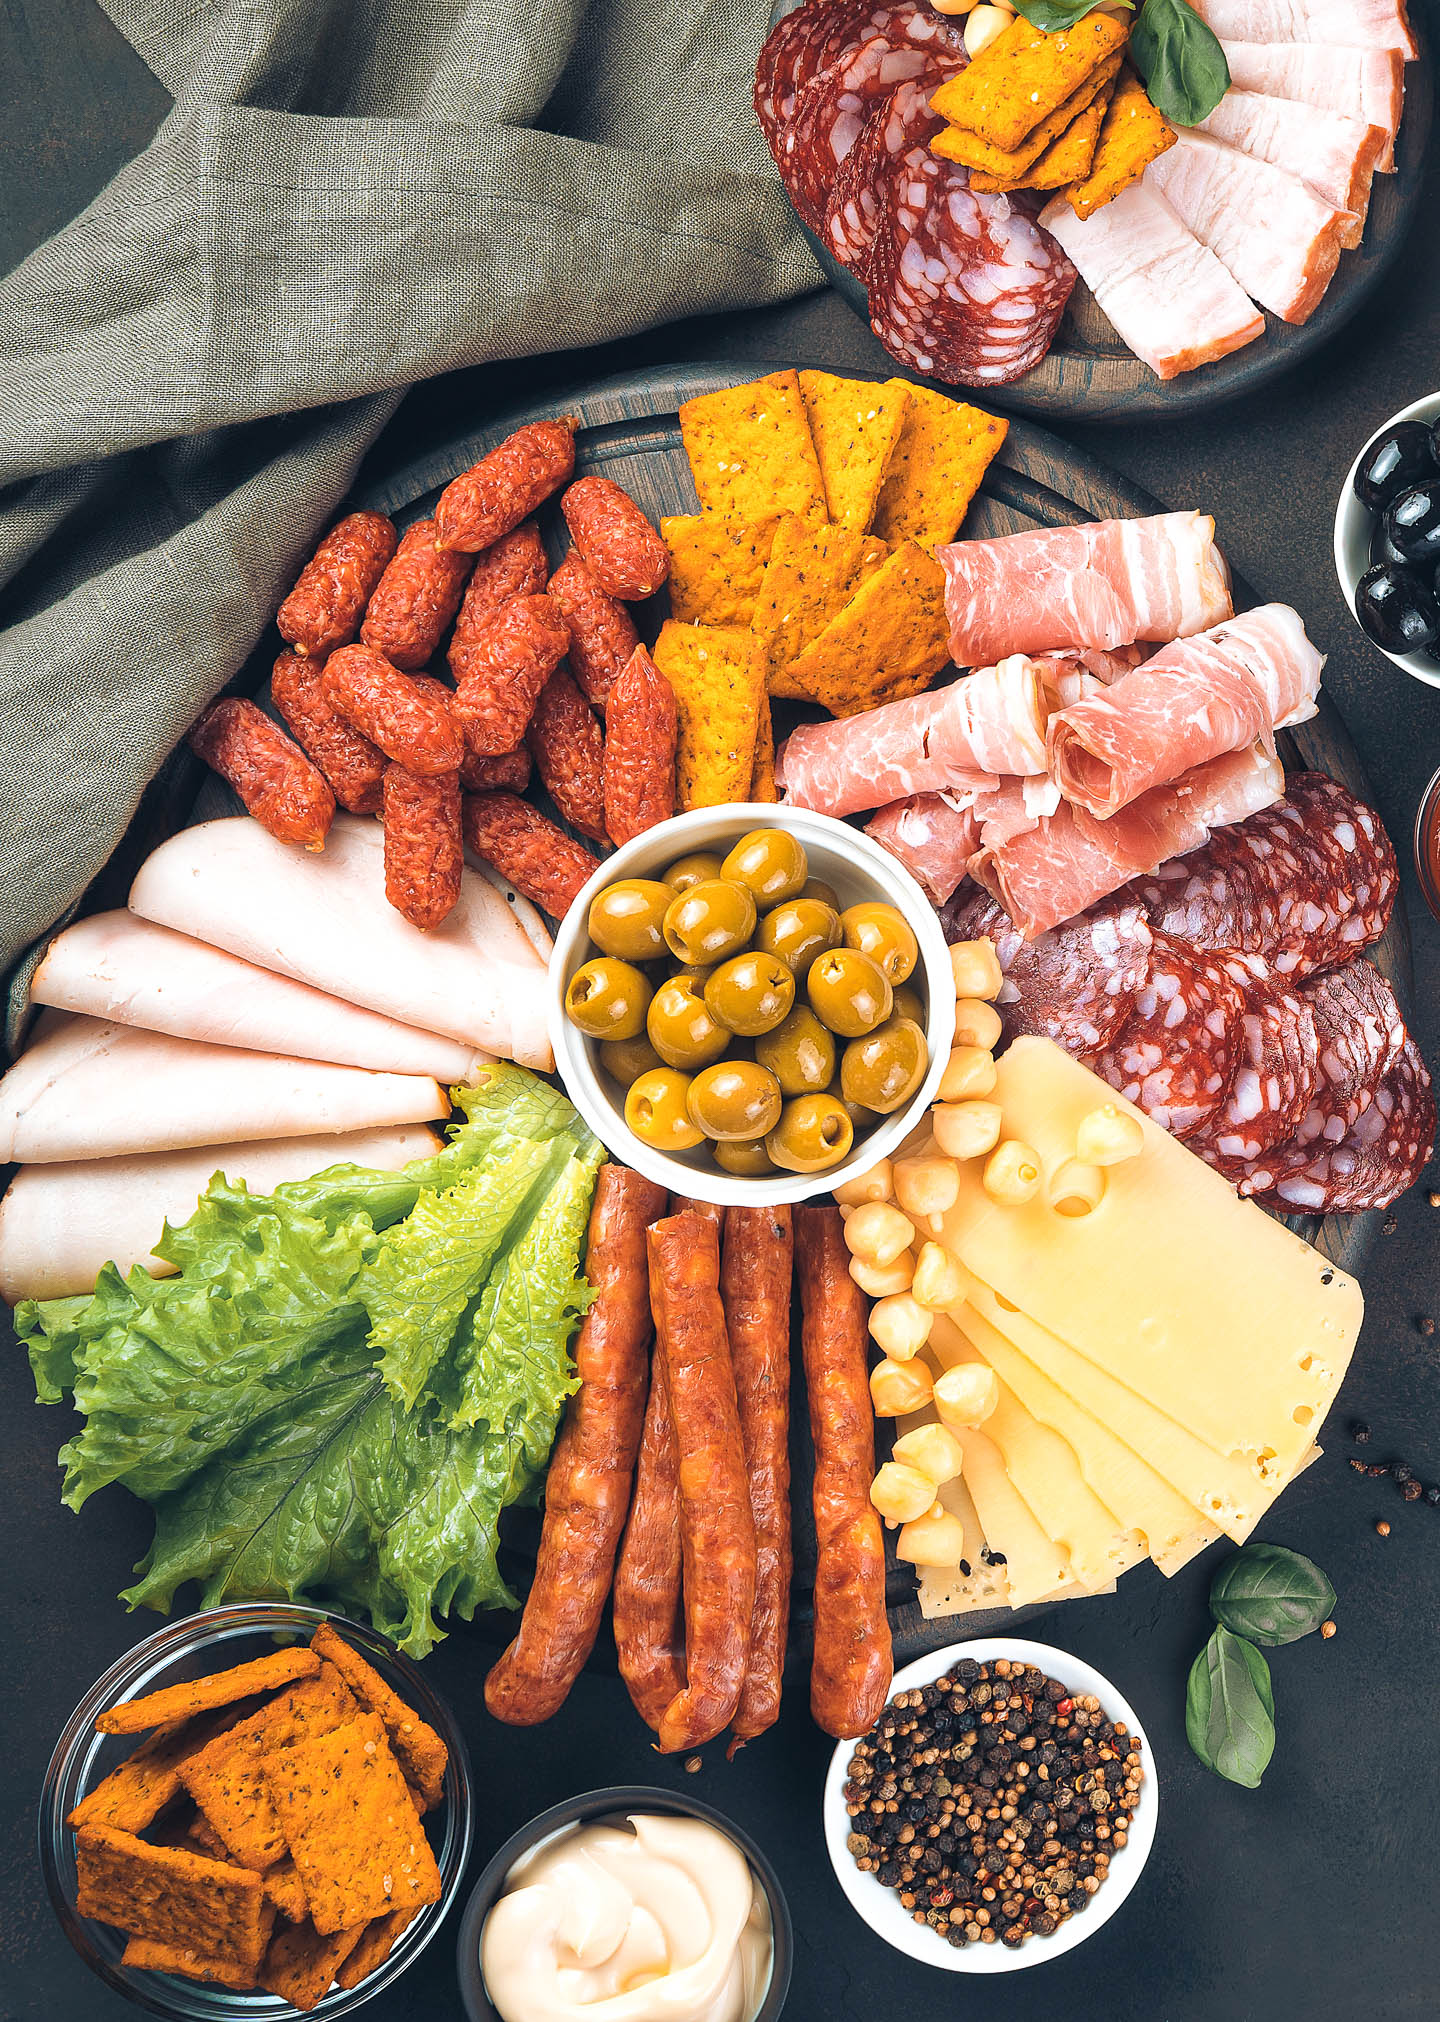
If you have a lot of bowls (or a small board), you can place some of them around the outside of the board.
You’ll also notice in this picture that the bowl on the Charcuterie board is in the middle. This is probably the easiest way to layout a Charcuterie board. Just have all of the ingredients expanding out from that center point.
Deconstructed charcuterie board
The final option is to create a deconstructed charcuterie board.
You might need to do this if you’re serving a lot of people and need to create a really large appetizer.
Or if you just don’t have any serving pieces that are large enough to work as a charcuterie board.
In this case, you’ll create an imaginary round, rectangular or square shape on your table and then use multiple bowls and boards within that space to put your food on.
I like to layout the boards and bowls first with nothing on them.
And then add all of the ingredients onto those boards using the same process (in the steps below) that I would for a single board.
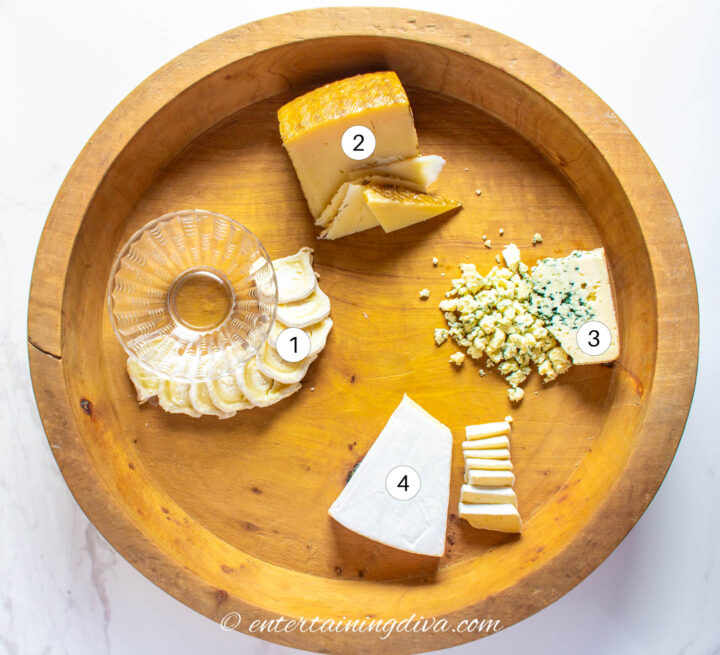
2 | Place the cheese
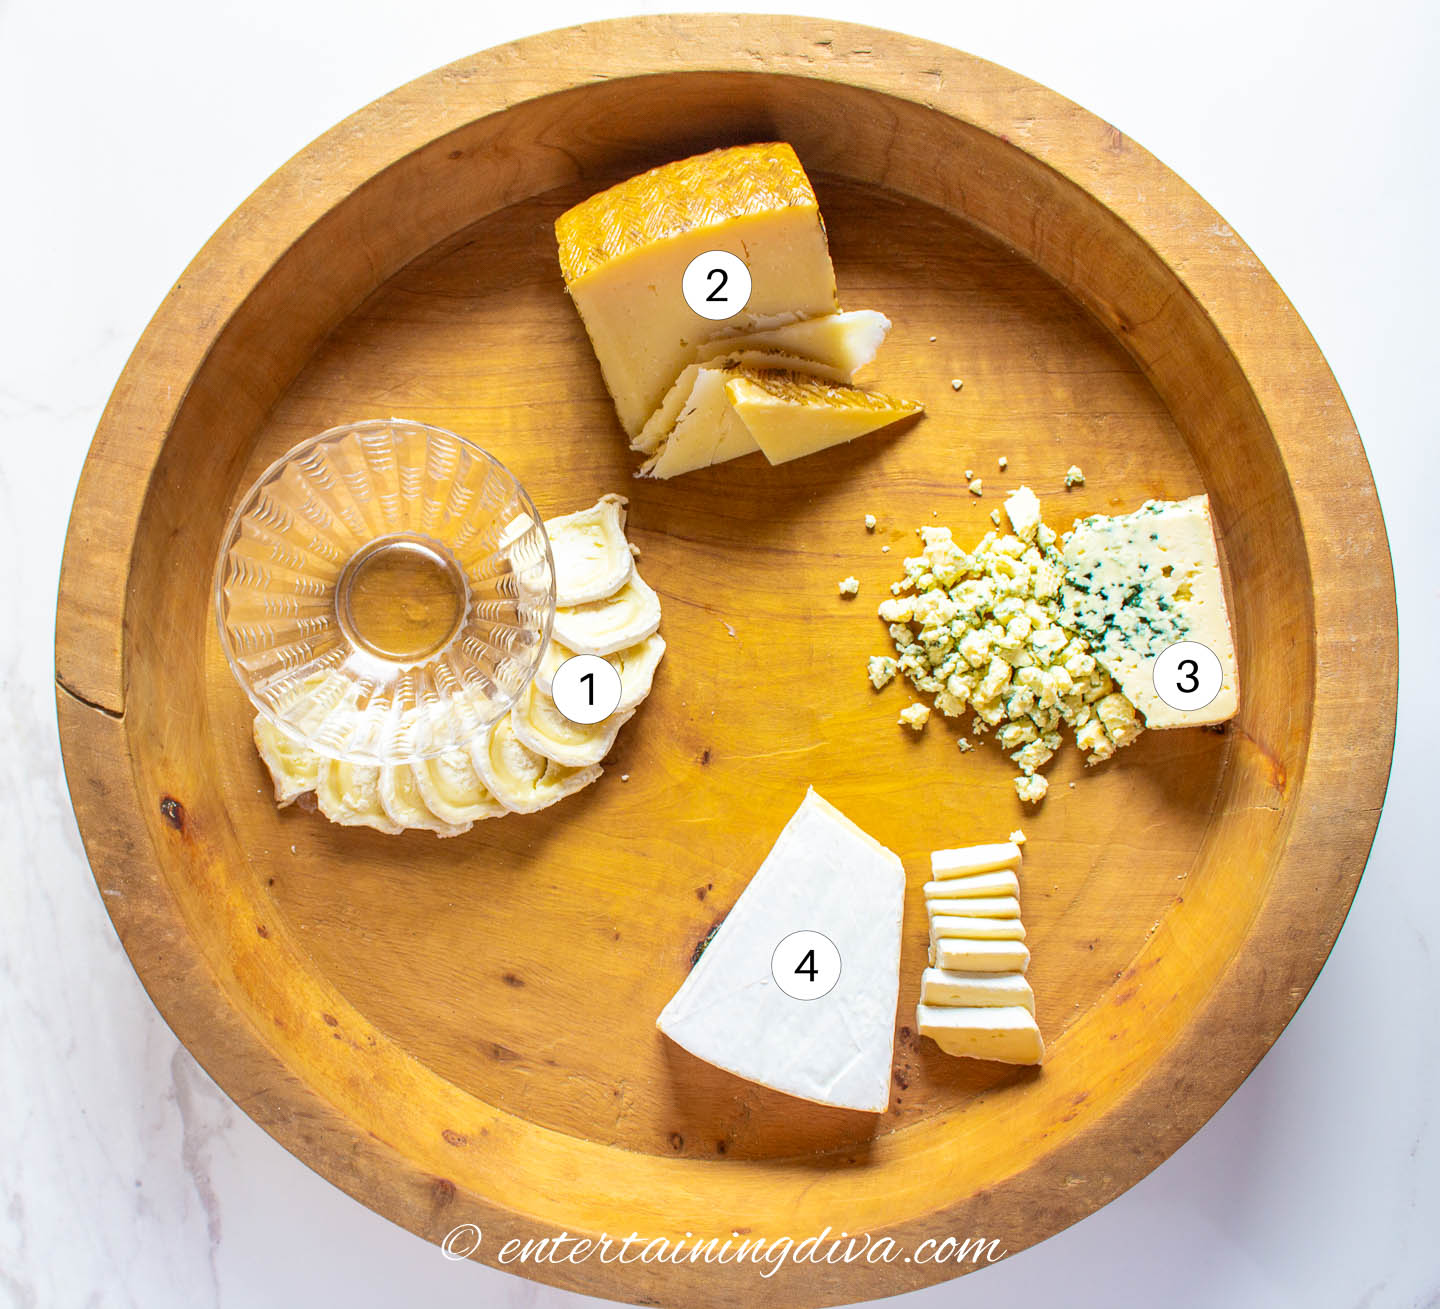
Cheese is the first ingredient to place on the charcuterie board.
To make the board feel balanced, try to space the different options fairly evenly around the board.
Placing slices of cheese around the outside edge of the bowl makes it blend into the board better. But rather than surrounding the whole bowl, only covering half of it will leave the other side open for another type of ingredient. Which makes the arrangement more interesting.
As I mentioned before, the cheeses should always be cut, sliced, or crumbled to make them easy to eat.
3 | Add the meat

The second type of food to place on the charcuterie board is meat.
Fill in the main gaps between cheeses with the different types of meat, again trying to space them somewhat evenly around the board.
To make it look more interesting, you can fold the meat in various ways:
1. The first and easiest way is to place round slices of meat directly from the package, one over the other. This works well for smaller slices such as pepperoni.
2. The second method involves folding the meat which often lets you fit more slices in a smaller space. You can fold a round slice in half to get a half-moon, and fold it twice to get a triangular shape.
3. Thirdly, you can roll each slice of meat into a tube and stack them on the board. This works well for square or rectangular cuts.

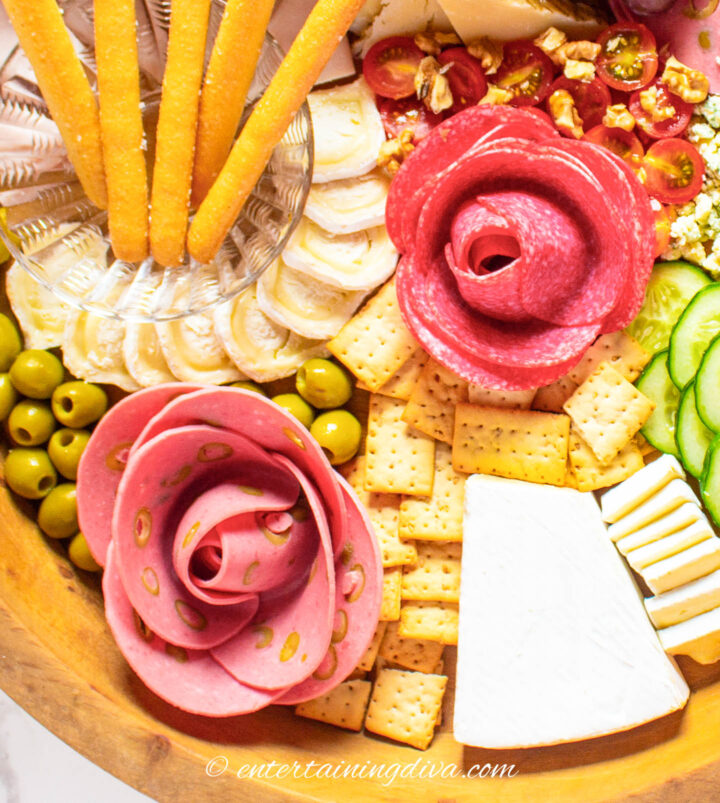
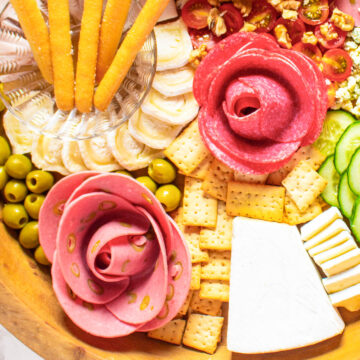
4. The last method is to create a rose. And don’t worry. It looks a lot more complicated than it actually is.
This works best for thinly sliced meats that come in larger round pieces, such as mortadella or salami.
How to make a rose from meat slices
- Find a glass that has a diameter which is smaller than the diameter of your meat slices. I used a 1.5 inch wide shot glass for slices that were 4 inches wide.
- Place a meat slice over the rim of the glass. Push one side of the meat slice down into the glass and the other side down over the outside of the glass.
- Repeat with another slice of meat but move it about 1/3 of the way around the rim so that it is overlapping the first slice but not completely covering it.
- Keep repeating this until there is no more room left in the middle of the glass. It usually takes about 8 slices.
- Then turn the glass over and carefully pull out your rose.
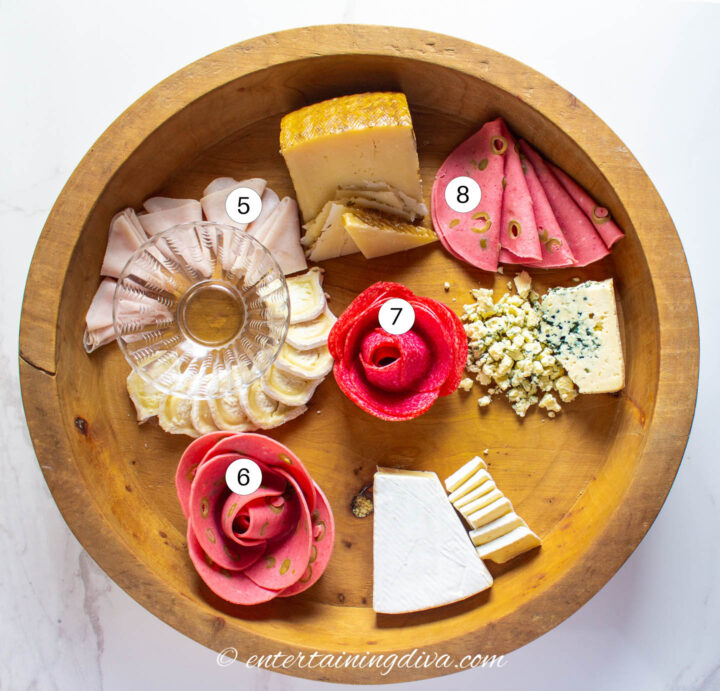
4 | Position the fruit and vegetables
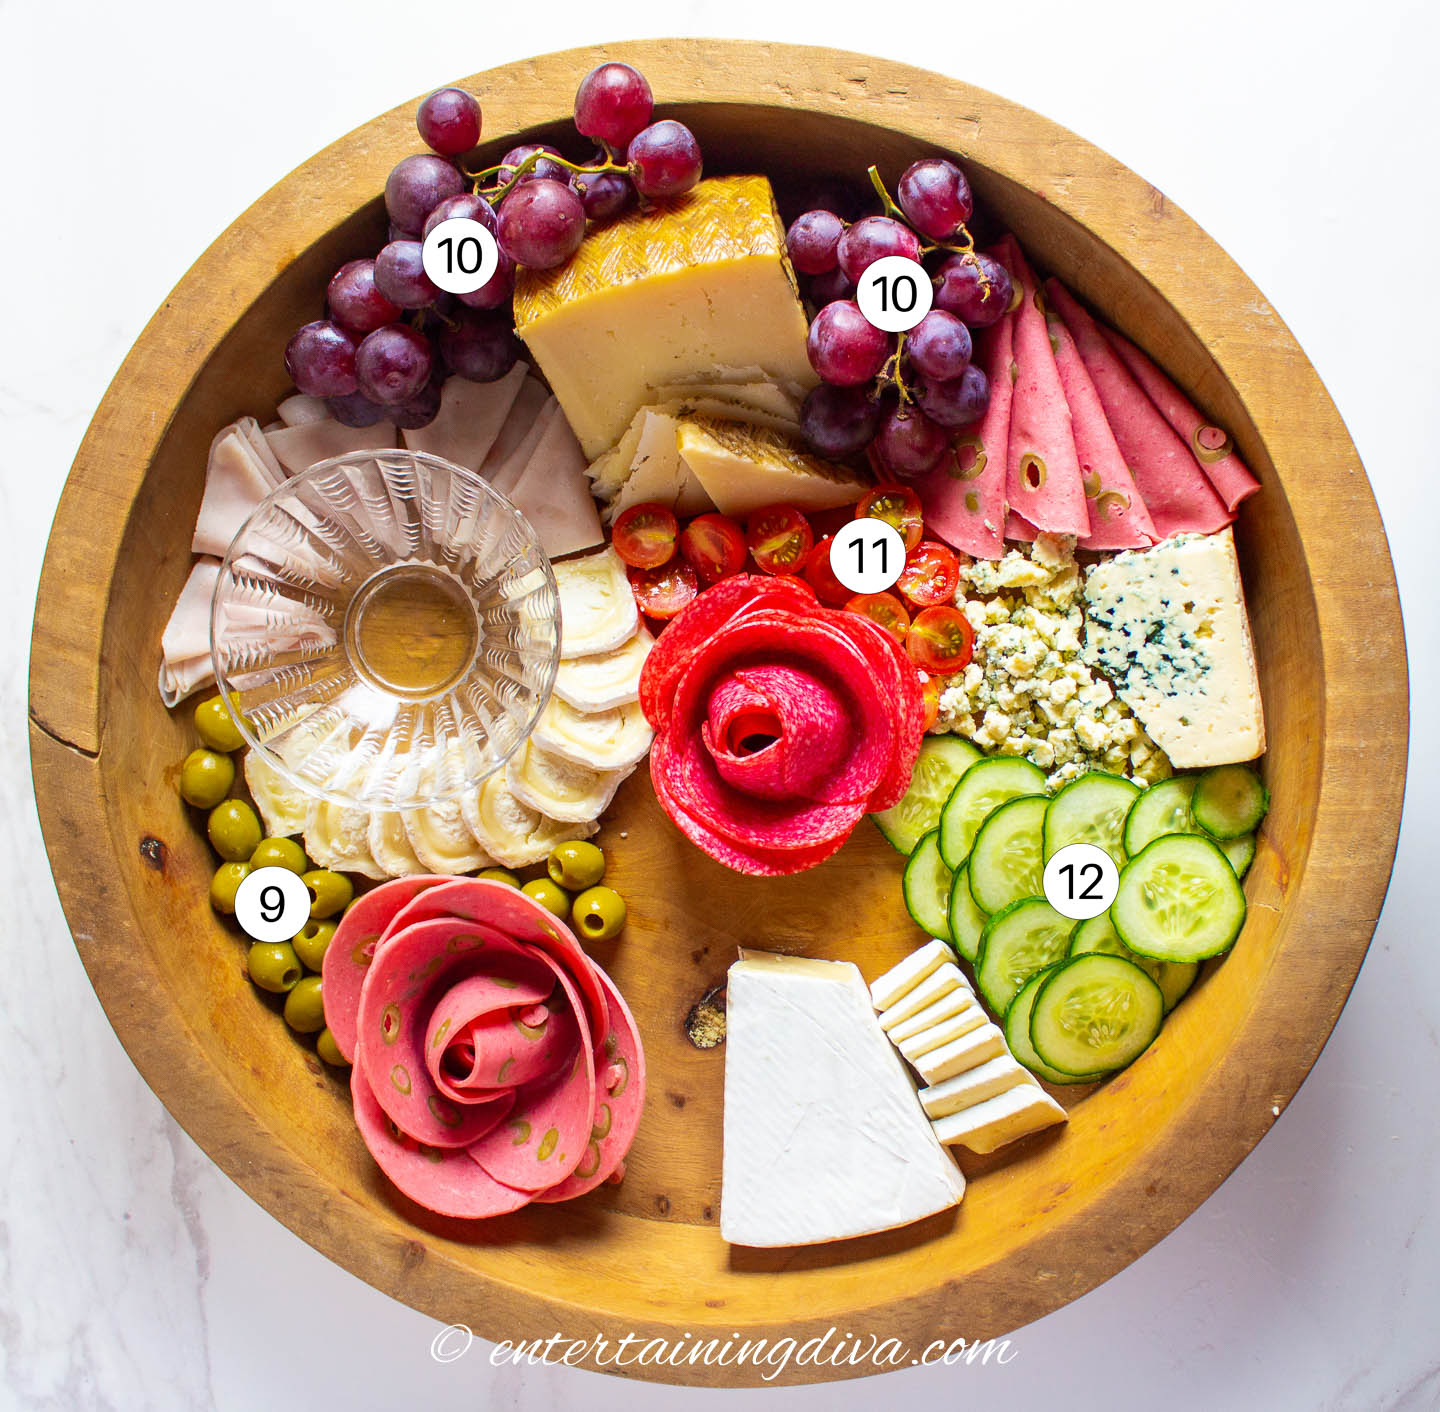
Next, fill in most of the gaps with fresh fruit and vegetables.
Since they tend to have more variations in color, this is a good time to create separation between other ingredients with similar colors.
If you are going to be adding crackers or bread to the board, don’t forget to leave some space for them.
5 | Add crackers or bread
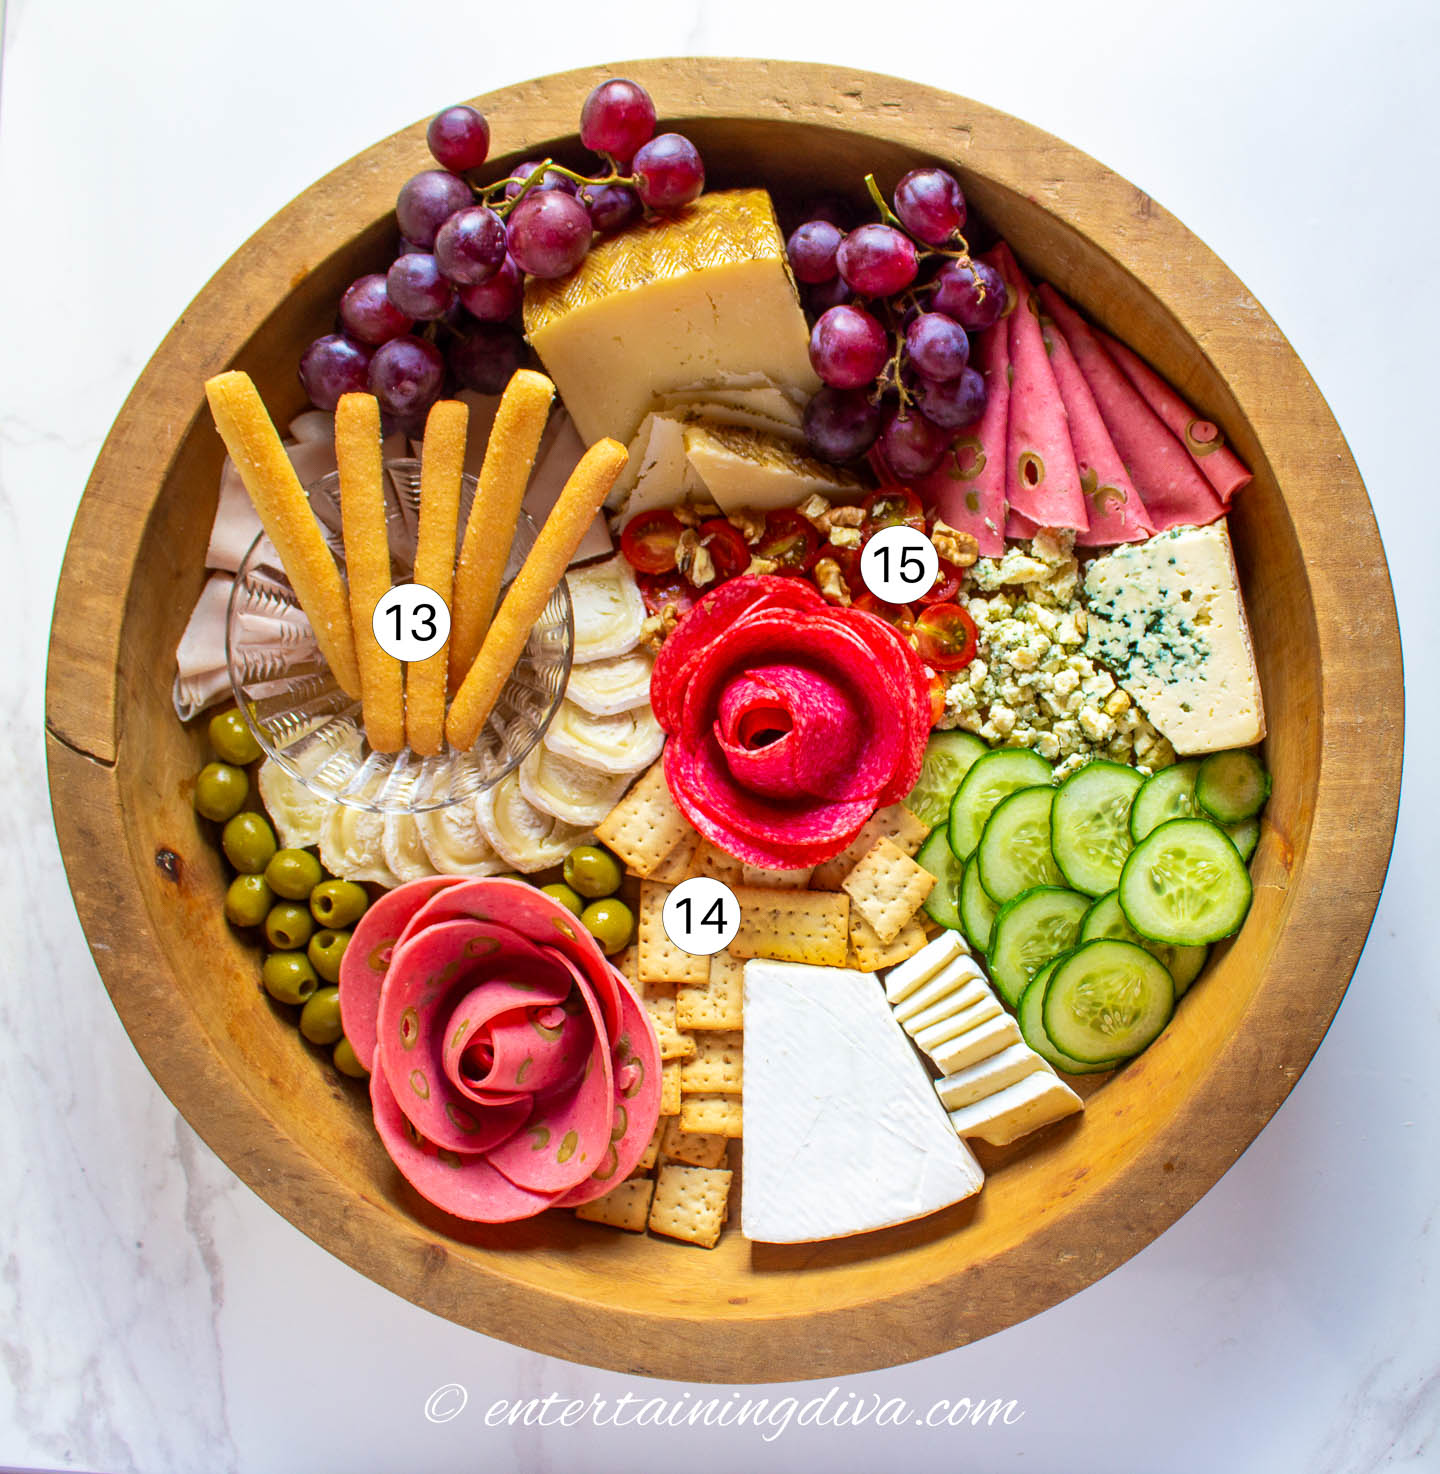
I like to add the bread and crackers close to the end of the process because they usually need to be combined with other things on the board.
So you don’t want them to be buried under other ingredients, making it hard for people to pick them up.
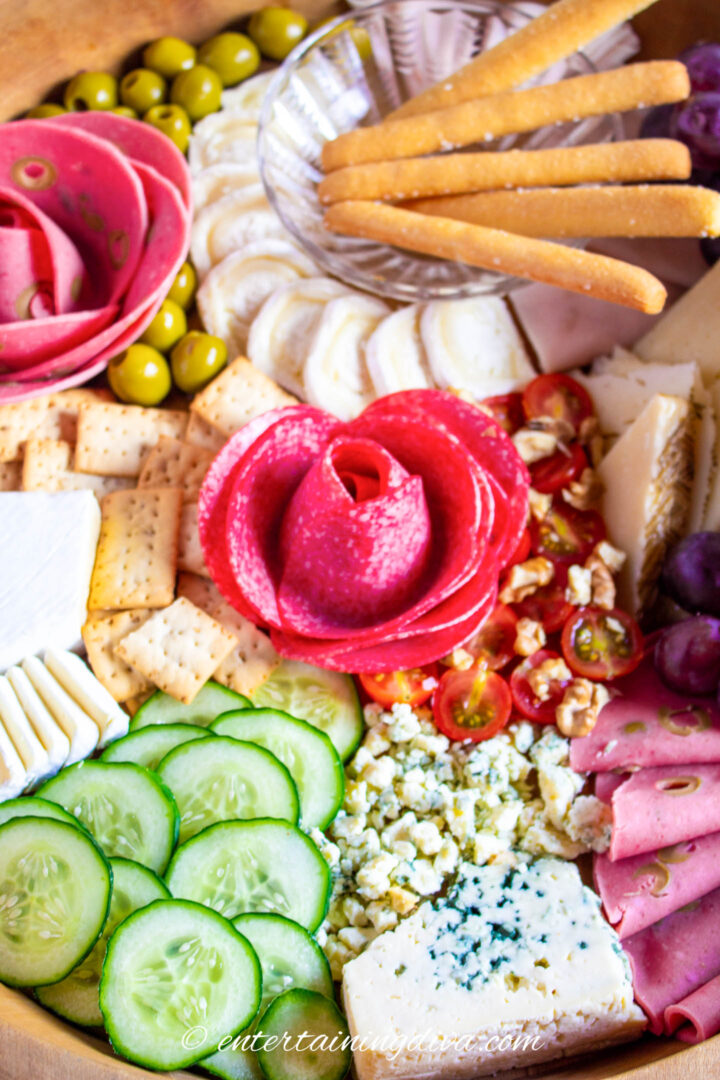
6 | Fill in any gaps
Because I was using a small plate for my Charcuterie board, I didn’t really have any gaps.
But you often will with larger boards.
The easiest way to fill in the spaces is by adding smaller items such as olives, small fruits and nuts. Try to find things that will add different textures and colors which will make your board stand out.
You can even go with more decorative items such as flowers or fresh herbs.
7 | Add the dips

The last step is to fill up any bowls that are still empty with jam, dip, breadsticks, or whatever you had in mind at the start of the process.
Serving and storing
Serve with toothpicks and cheese knives. Small appetizer forks can also work.
If you are making the charcuterie board ahead of time, I would not add the crackers and bread yet since they get stale quickly.
Cover it loosely with plastic wrap or foil and store it in the refrigerator.
About 30 minutes before you’re ready to serve, take the board out of the refrigerator so the ingredients have time to warm to room temperature.
Then add the bread and crackers.
Frequently Asked Questions
What is a Charcuterie board?
Traditionally, a charcuterie board is a French appetizer that contains a collection of cured pork. However, nowadays it has been expanded to include other meats, cheeses, fruits or vegetables, nuts, bread or crackers and dips or spreads.
How do you pronounce Charcuterie?
Most English-speakers pronounce it SHAR-coo-tuh-ree. But the proper French pronunciation is actually more like SHAR-coo-tree.
Homemade dip recipes you might like for your board
Other charcuterie boards you might like
How To Make A Simple Charcuterie Board
Ingredients
Cheeses
- 8 ounces goat cheese sliced
- 8 ounces parmesan cheese sliced
- 8 ounces gorgonzola or blue cheese crumbled or cubed
- 8 ounces brie sliced
Meats
- 8 ounces sliced ham
- 16 ounces mortadella
- 8 ounces salami
- 1 8-ounce jar olives
Fruits and Vegetables
- ½ pound red grapes
- 1 pint cherry tomatoes
- 1 English cucumber sliced
Other Complements
- 1 package small breadsticks
- 1 box crackers
- 8 ounces walnuts or candied pecans
Equipment
- cutting board, cookie sheet, tray or cheese board
- small bowl or ramekin
- Small glass (optional) – for making meat flowers
- cheese knives
- toothpicks
Instructions
- Put the small bowl on the board to the side of the center position.
- Fan goat cheese slices around the outside of half of the bowl. Put each of the other types of cheese in their own section, spread evenly around the board.8 ounces goat cheese, 8 ounces parmesan cheese, 8 ounces gorgonzola or blue cheese
- Fold the ham slices in quarters. Fold half of the mortadella slices in half. Make flowers out of the rest of the mortadella and the salami (see instructions in the notes below). Spread the folded ham around the other half of the bowl. Put the rest of the meats in their own sections, spread out between the cheeses.8 ounces brie, 16 ounces mortadella, 8 ounces salami
- Position the fruits and vegetables in their own sections between the meats and cheeses so they provide some color contrast. Leave one area of the board empty so you will have space for the crackers.1 8-ounce jar olives, 1/2 pound red grapes, 1 pint cherry tomatoes, 1 English cucumber
- Place the crackers in the last empty space. Add the breadsticks to the bowl.1 package small breadsticks, 1 box crackers
- Use walnuts or candied pecans to fill in any gaps.8 ounces walnuts or candied pecans
- Serve with toothpicks and cheese knives.
Notes
- Depending on the size of your charcuterie board, you may not have space for 8 ounces of each ingredient. Keep the leftovers in plastic bags and use them to refill the board as needed.
- Although the ingredients specified in the recipe are the ones that I used, feel free to swap them out if you prefer different varieties.
- If you want to serve jam, hummus or some other kind of dip, you could put the breadsticks in a dish on the side of the board and use the bowl for the dip.
- To store the charcuterie board, cover it loosely with plastic wrap or foil and put it in the refrigerator. Take it out about 30 minutes before serving to let the ingredients warm to room temperature.
How to make meat slice flowers
- Find a glass that has a diameter which is smaller than the diameter of your meat slices. I used a 1.5 inch wide shot glass for slices that were 4 inches wide.
- Place a meat slice over the rim of the glass. Push one side of the meat slice down into the glass and the other side down over the outside of the glass.
- Repeat with another slice of meat but move it about 1/3 of the way around the rim so that it is overlapping the first slice but not completely covering it.
- Keep repeating this process until there is no more room left in the middle of the glass. It usually takes about 8 slices.
- Then turn the glass over and carefully pull out your flower.
Nutrition values are estimates only, using online calculators. Please verify using your own data.
Have comments or questions on how to make a simple charcuterie board? Tell us in the section below.
This post was originally published on August 21, 2021 but was updated with new content on March 30, 2024.