
Easy Conversation Heart Cookies


These simple conversation heart cookies don’t require icing (unless you really want to), so they’re faster and easier to make than a lot of other sugar cookie recipes. But the colored dough and conversation heart sayings still make them a pretty Valentine’s Day treat.

Valentine’s Day heart cookies make a great treat for this romantic holiday.
But sometimes I don’t feel like spending a lot of time decorating the cookies.
So I came up with this conversation heart cookies recipe that uses colored cookie dough and edible ink instead of icing.
The edible ink pens are so much easier to write with!
And there’s no messing with royal icing (unless you really want to).
Ingredients
This post may contain affiliate links. We make a small commission if you buy the products from these links (at no extra cost to you). As an Amazon Associate, I earn from qualifying purchases. But we only recommend products we would use ourselves. For more information, click here to see our disclosures
Here is your shopping list:
- baking supplies: 2½ cups regular all-purpose flour, ¾ teaspoon salt, ¼ teaspoon baking powder, ¼ teaspoon baking soda
- sugar: 1 cup granulated sugar
- flavoring: 1 teaspoon vanilla extract, ¼ teaspoon almond extract
- eggs: 1 large
- dairy: 1 cup (or 2 sticks) cold unsalted butter
- gel food coloring – 4 different colors for the hearts (I used red, green, blue and pink).
- red edible ink marker* – this is the easiest way to write on the cookies.
Substitutions
- To make gluten-free cookies, substitute measure-for-measure gluten-free flour for the all-purpose flour.
- Salted butter will work instead of unsalted butter. Reduce the added salt to ½ teaspoon.
- You can use writing icing or red royal icing for decorating the cookies if you prefer.
How To Make Conversation Heart Cookies

Prep work
Cover cookie sheet(s) with parchment paper. This helps to prevent the bottom of the cookies from burning and keeps them from spreading.
Move the oven rack to the center position.
Preheat the oven to 300℉.
Make the dough
You can find all of our tips and tricks for making sugar cookies HERE.
In a bowl, mix 2½ cups of flour, ¼ teaspoon baking soda and ¼ teaspoon baking powder. Set aside.
In another bowl, combine an egg, 1 teaspoon vanilla extract, ¼ teaspoon almond extract and ¾ teaspoon salt. Set aside.
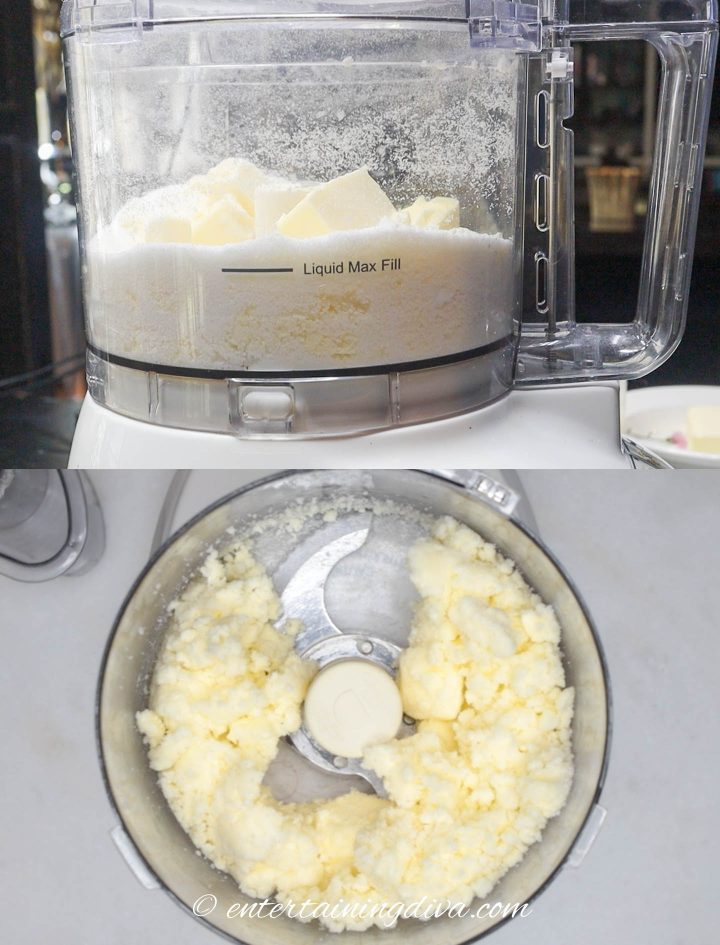
In the food processor, combine 2 sticks (1 cup) of cold straight-from-the-refrigerator butter cut into ½-inch chunks with 1 cup of sugar.
Process until combined and the mixture is sticking together, about 30 seconds.
Add in the egg mixture and process until combined, another 30 seconds.
Then add the flour mixture and process until all of the flour is mixed in, about 30 seconds.
Don’t over-process as it can make the cookies tough or cause them to have air bubbles.
Roll the dough
Divide the dough into 4 equal parts.
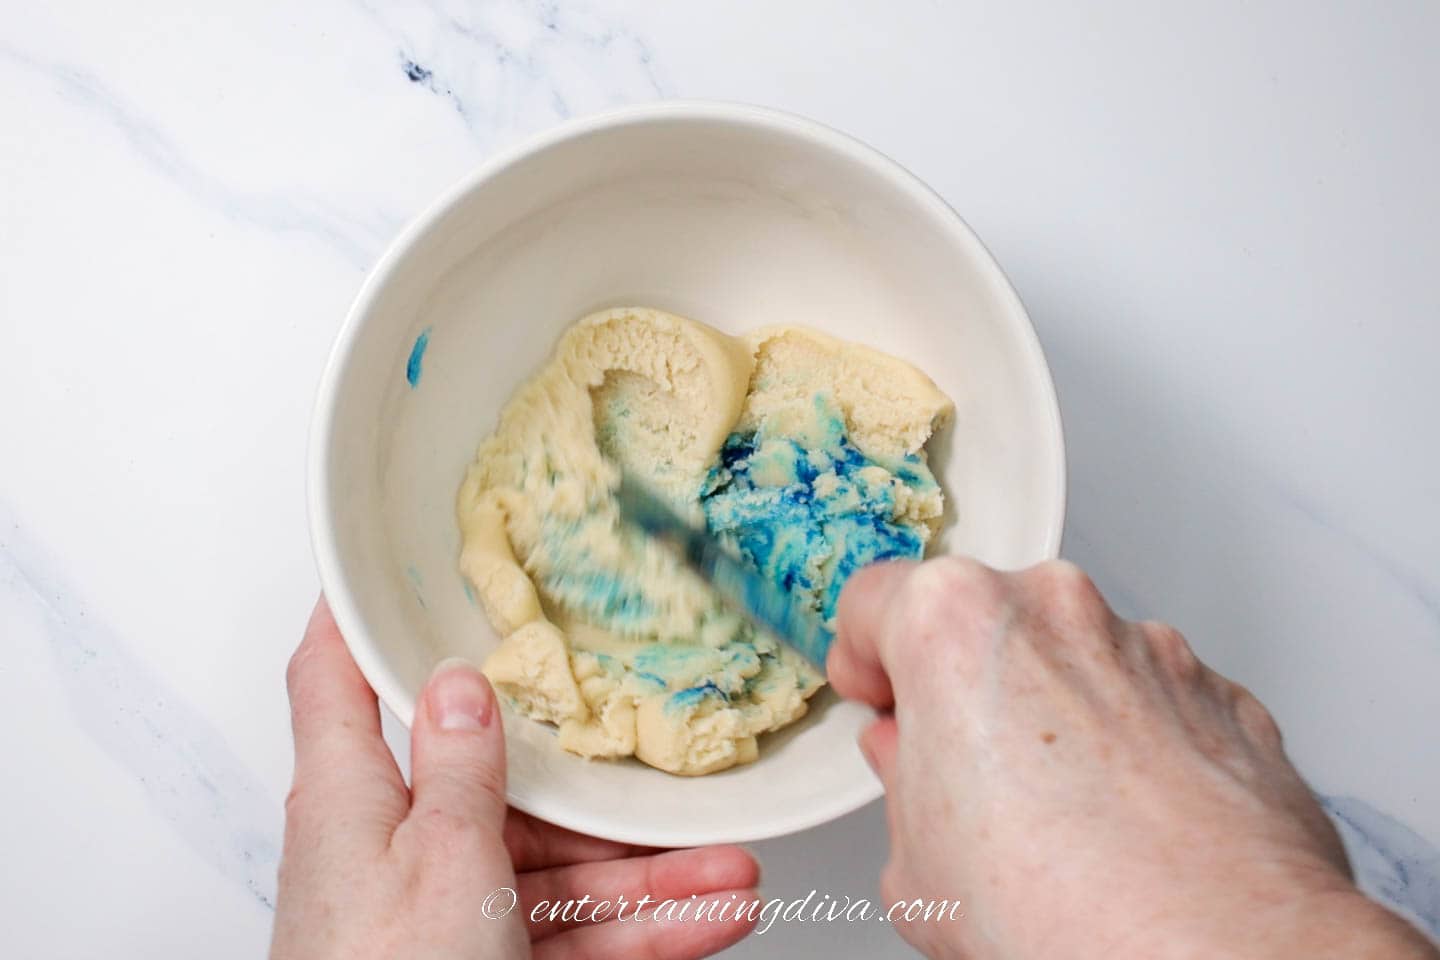
Put one of the balls of dough into a bowl.
Add a couple of drops of food coloring to the dough.
Fold the colored part of the dough into the middle.
Then knead the dough gently until the color is distributed throughout.
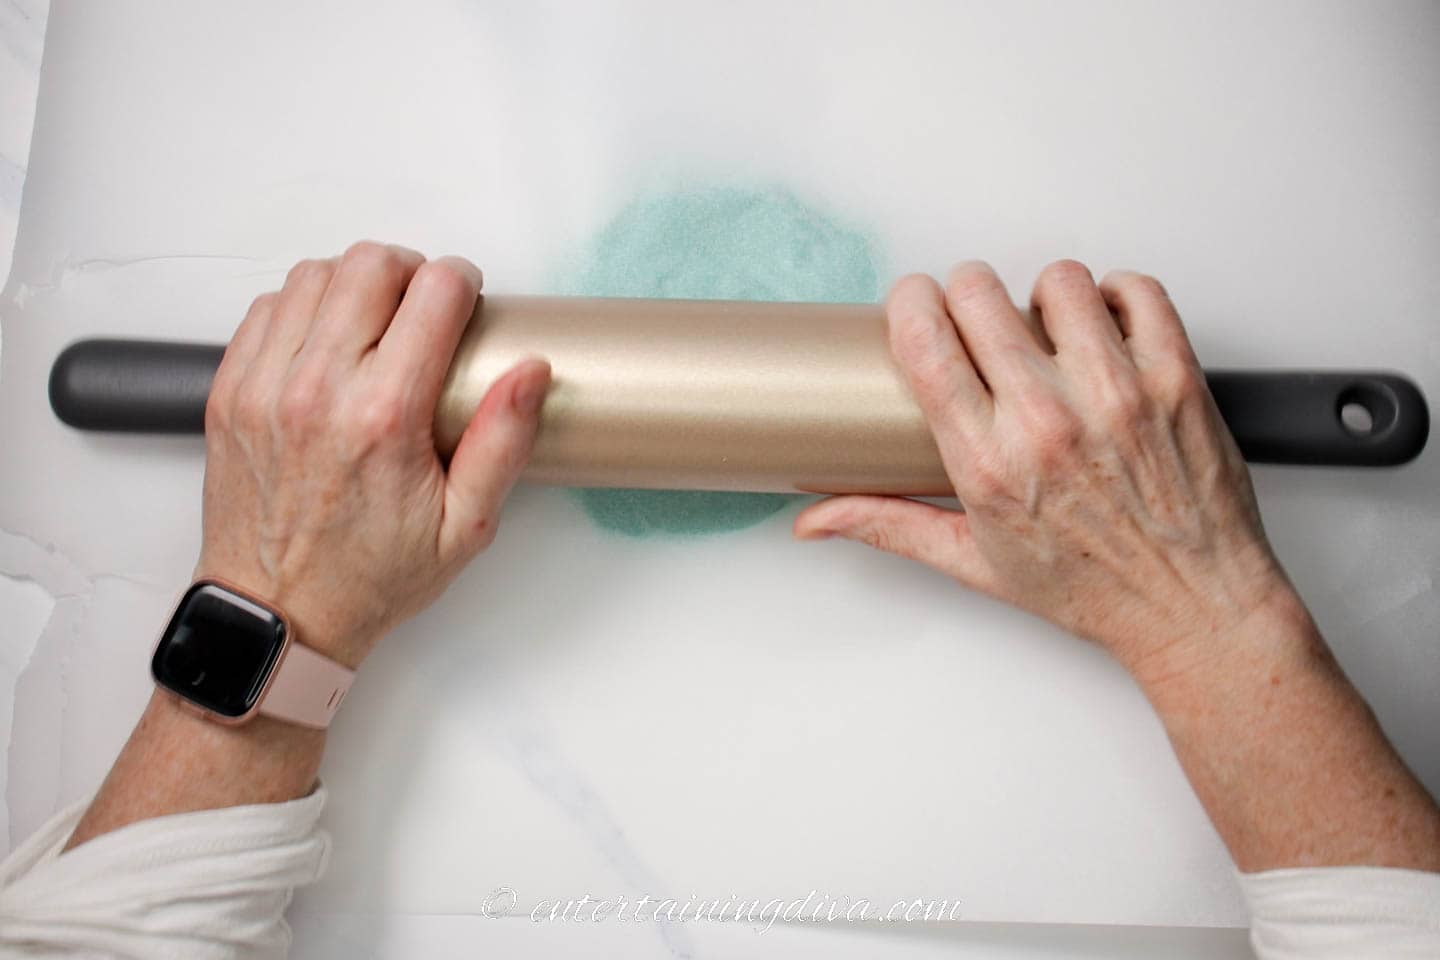
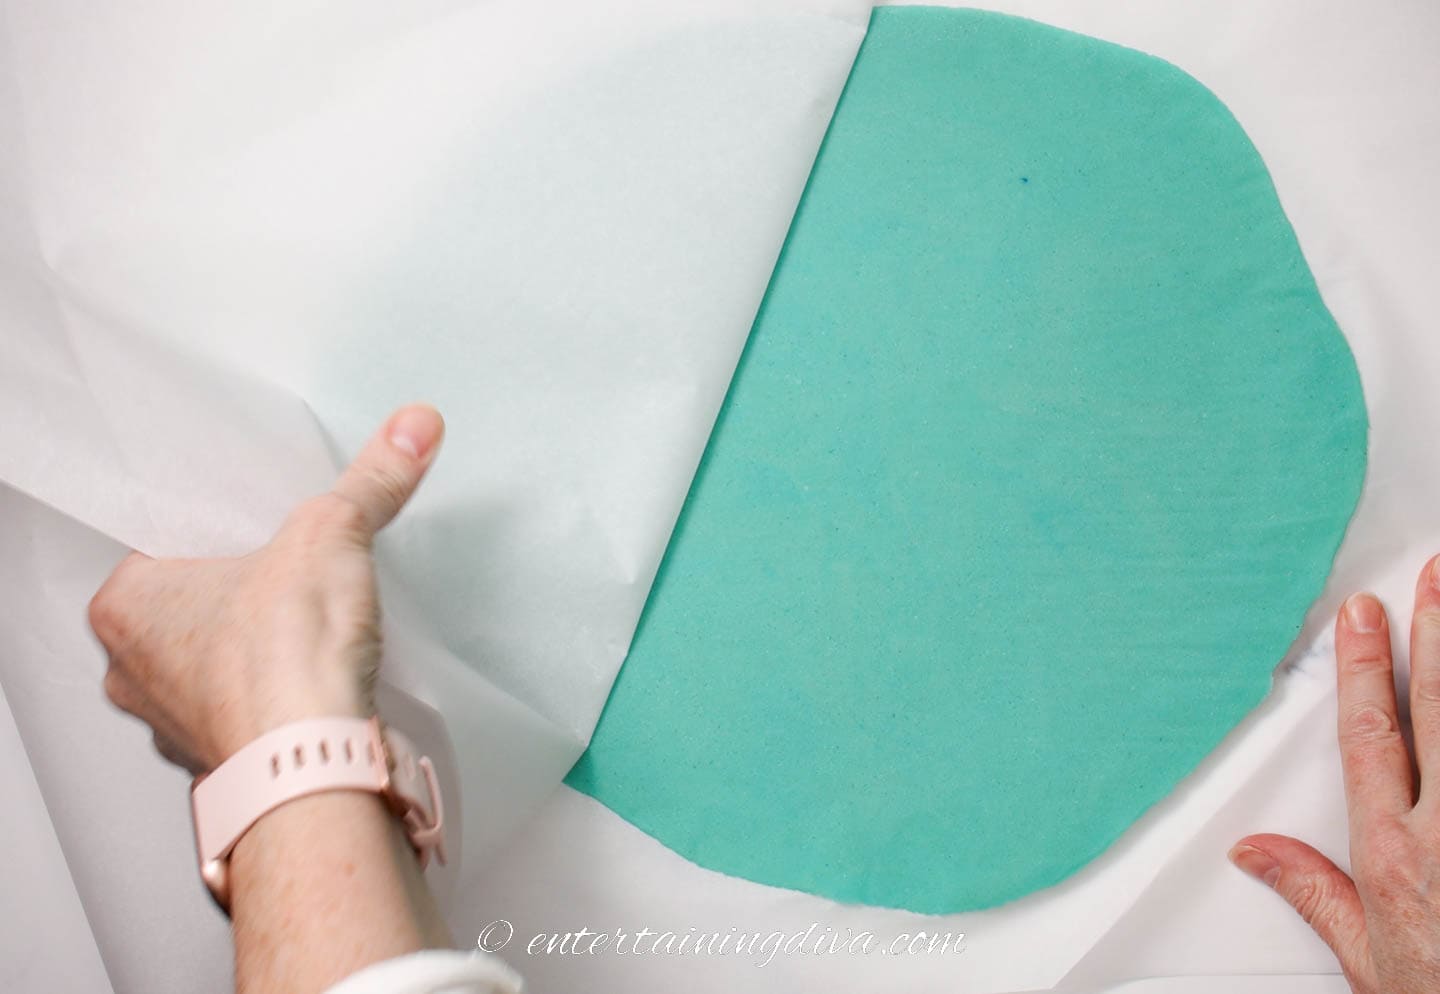
Place the colored dough between two large sheets of parchment paper.
Through the parchment paper, push the dough flat with your hands.
Then use the rolling pin to roll the dough out to about 1/8″ thick.
Move the rolled-out dough onto a cookie sheet or tray, keeping the parchment paper on both sides.
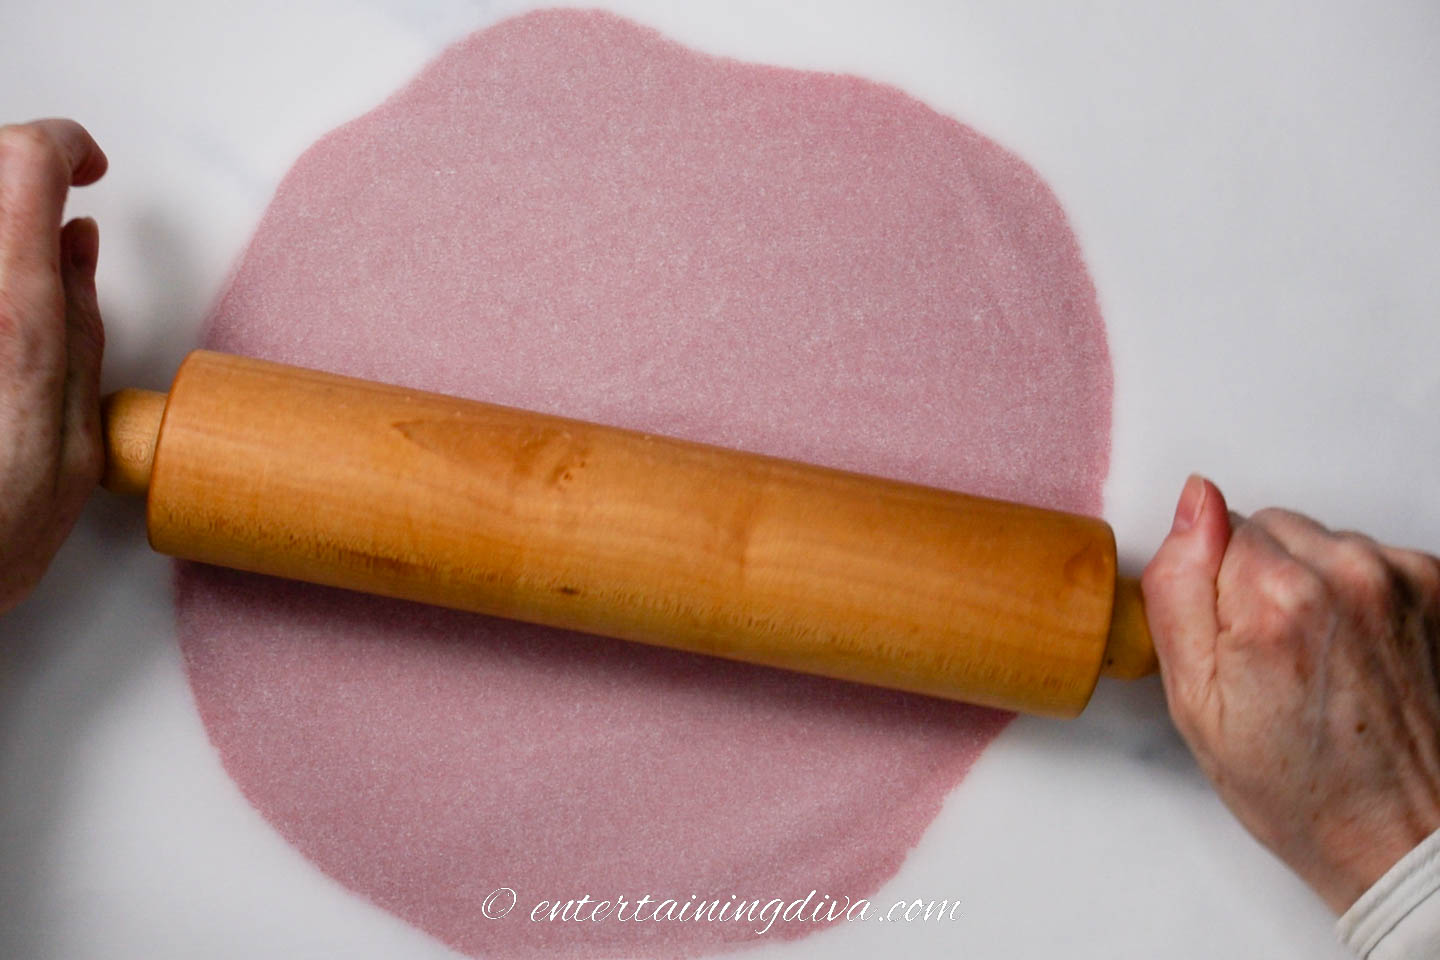
Repeat the process with the other 3 balls of dough, using a different color for each, and stack them on the tray as well.
Refrigerate the dough for at least 1½ hours, or freeze for 30 minutes. The dough can remain in the refrigerator for up to 3 days.
Don’t skip the refrigeration step as this is what keeps the cookies from losing their shape when baking.
Cut out the hearts
Take the first sheet of cookie dough out of the refrigerator. (Leave the others in for now.)
Peel off the top layer of parchment paper. (Leave the bottom sheet where it is).
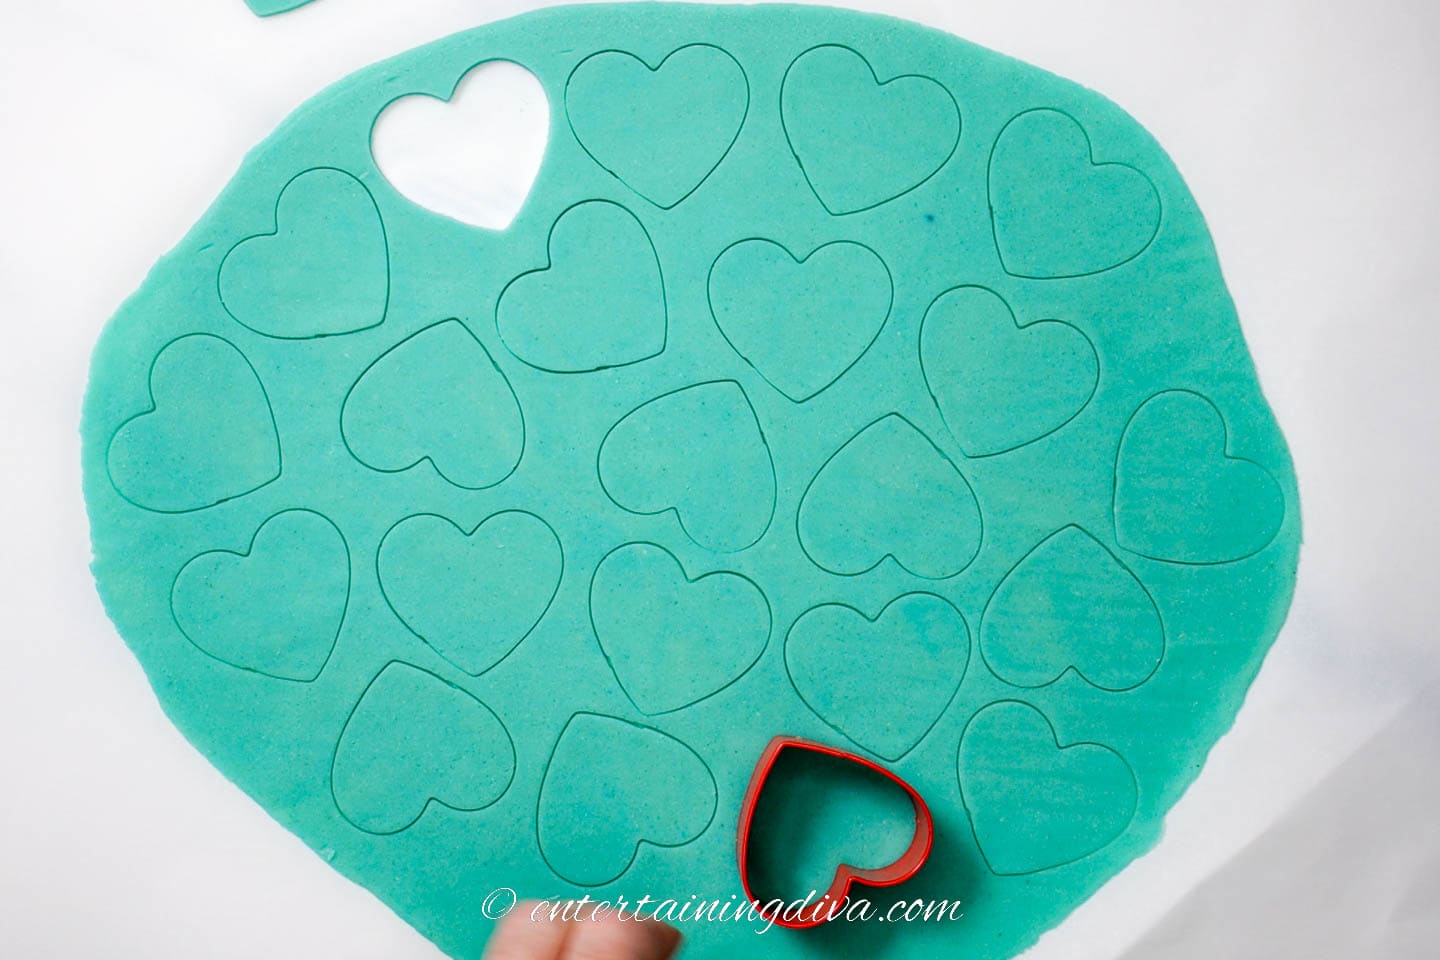
Use the heart cookie cutter to cut the shapes in the dough.
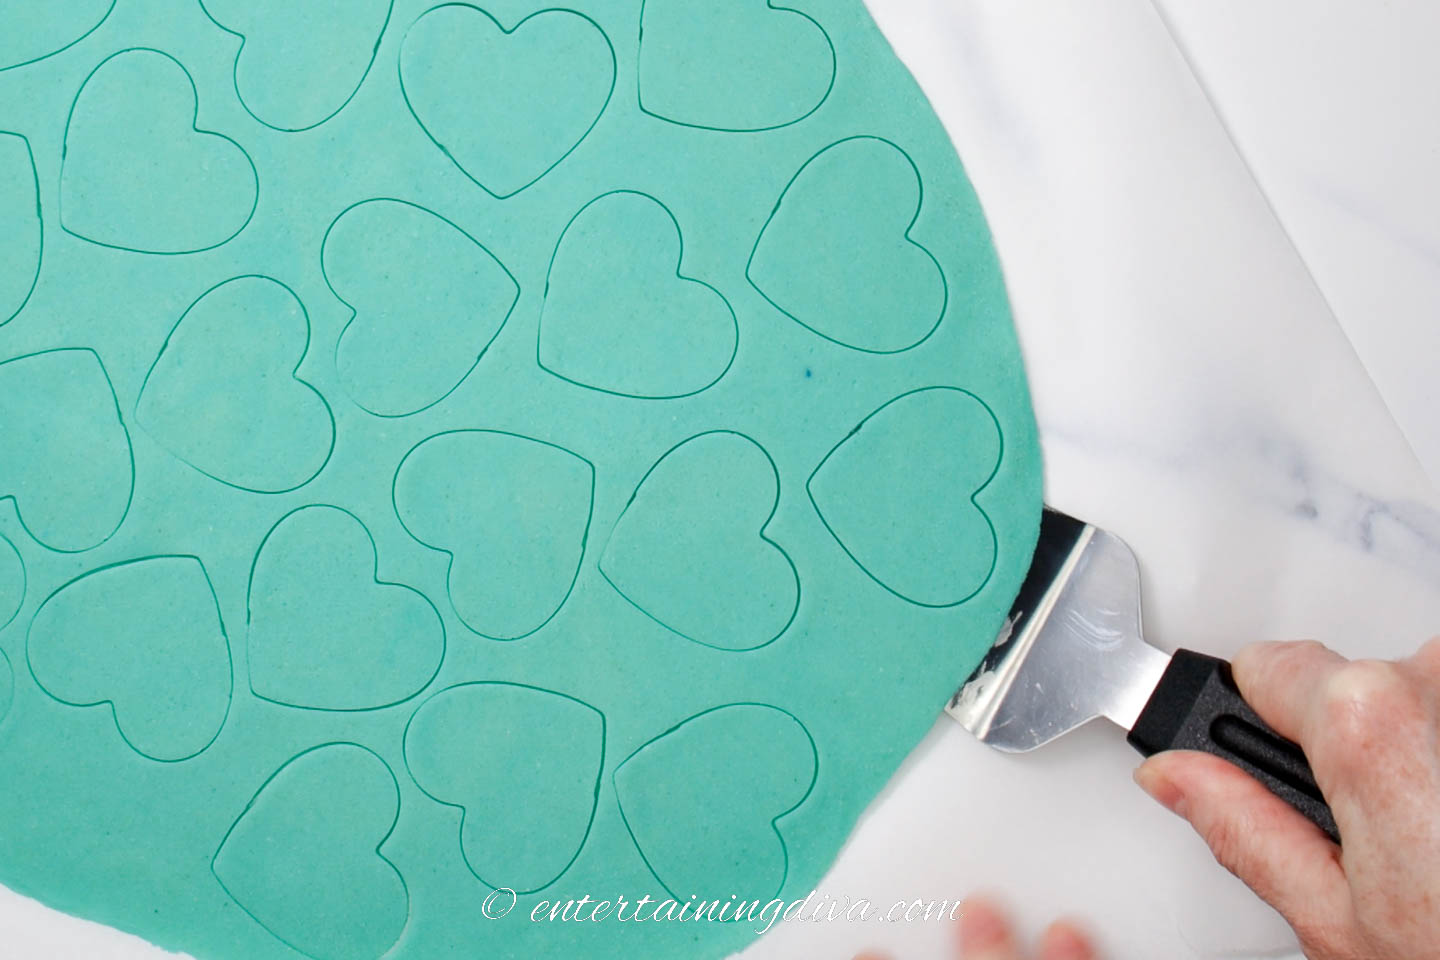
Run a thin spatula under the cookie dough to separate it from the bottom layer of parchment paper.
If the dough is soft and loses its shape when you try to do this, put the cut-out cookie dough back in the refrigerator for 15 or 20 minutes until it gets stiff again.
This will make the cookies easier to move to the cookie sheet without wrecking their shape.
Repeat with the other three sheets of cookie dough.
Bake the cookies

Then lay out the heart-shaped cookies on the parchment paper about ½ inch apart.
Only put one cookie sheet into the oven at a time to ensure even baking.
Bake at 300℉ for 12 to 16 minutes, until the cookies have an even color all the way across, but are not brown.

Let cool for 5 minutes on the cookie sheet.
Move the cookies to a wire rack to let them cool completely.
Ball up the extra dough and roll it out to make another batch of cookies for each color.
Decorate the cookies

Wait until the cookies are completely cool before decorating.
Then use the edible ink marker to write sayings on the front of the cookies.
Here are some conversation heart sayings you can use:
- BFF
- LOVE
- XO XO
- I ♡ U
- KISS ME
- HUG
- BE MINE
- CUTIE PIE
- SWEETIE

If you want to make your cookies a little fancier, you can flood them with royal icing and then write on the icing after it has hardened.
The edible ink does go on a little smoother (but of course, you have to do more work to ice the cookies).
How to store the cookies
Conversation heart cookies can be stored in an airtight container at room temperature for about 3 days or in the refrigerator for about a week.
They can also be stored in the freezer for up to 3 months.
To keep them looking their best, place a layer of parchment paper between each layer of cookies.

These cookies also make great additions to Valentine treat bags or boxes. I like to include real conversation heart candies with them.
Other cookies you might like
- The best Valentine cookie recipes
- How To Decorate Valentine Cookies
- How To Make The Best Sugar Cookies

Easy Conversation Heart Cookies
Ingredients
Sugar Cookies
- 1 large egg
- 1 teaspoon vanilla extract
- ¼ teaspoon almond extract
- 2½ cups all-purpose flour or measure-for-measure gluten-free flour
- ¼ teaspoon baking powder
- ¼ teaspoon baking soda
- ¾ teaspoon salt
- 1 cup granulated sugar
- 1 cup 2 sticks cold unsalted butter
- 4 colors gel food coloring eg blue, red, green, pink
- 1 red edible ink marker or red writing icing or red royal icing
Equipment
- two mixing bowls
- food processor
- Small bowl
- rimless cookie sheet
- parchment paper
- rolling pin
- 2" heart cookie cutters
- thin spatula
- wire cooling rack
- edible ink marker
Instructions
- In a small bowl, beat an egg. Add in 1 teaspoon vanilla extract, ¼ teaspoon almond extract and ¾ teaspoon salt. Set aside.
- In another bowl, mix together 2½ cups of flour, ¼ teaspoon baking soda and ¼ teaspoon baking powder. Set aside.
- Cut up 2 sticks (1 cup) of cold (straight from the refrigerator) butter into ½ inch chunks.
- Process the butter and 1 cup of granulated sugar in the food processor until combined, about 30 seconds.
- Blend in the egg mixture until combined, another 30 seconds.
- Add the flour mixture and process until all of the flour is combined, about 30 seconds.
- Divide the dough into four parts.
- Put one ball of dough into a small bowl.
- Add a few drops of food coloring to the dough.
- Fold the dough around the color. Then knead it until the color is distributed throughout the dough.
- Put the ball of dough in between 2 large sheets of parchment paper.
- Use the rolling pin to roll the dough out to about 1/8" thick.
- Put the rolled out dough on a cookie sheet or tray, still keeping the parchment paper on both sides.
- Repeat with the other balls of dough, using a different color of food coloring for each one.
- Refrigerate the rolled out dough for 1½ hours, or freeze for 30 minutes.
- When the cookie dough is stiff, take the first sheet of cookie dough out of the refrigerator (leaving the other ones in).
- Peel off the top layer of parchment paper.
- Cut hearts in the cookie dough with the cookie cutter.
- Use a thin spatula (or a cake knife) to separate the cookies from the bottom layer of parchment paper. If the dough has become soft and is losing its shape, put it back in the refrigerator for 15 to 20 minutes until it is stiff again.
- Repeat the process with the other three sheets of cookie dough.
- Put a piece of parchment paper down on the cookie sheet.
- Then lay out the cookies about ½ inch apart.
- Bake at 300℉ for 12 to 16 minutes, until the cookies have an even color across the top but are not brown.
- Let cool for 5 minutes on the cookie sheet. Then move to a wire rack and let them cool completely.
- Roll out the extra dough to create another batch of cookies.
- Once the cookies are completely cool, write conversation heart sayings (like BFF, HUG, and KISS) on the front of the cookies with the edible ink marker.
Notes
- Using parchment paper on both sides of the cookie dough while rolling will keep the dough from sticking to the rolling pin.
- Refrigerating the cookie dough prevents the cookies from losing their shape while they are baking
- Parchment paper on the cookie sheet keeps the cookies from spreading and maintains the heart shape.
- Only bake one cookie sheet at a time since stacking them in the oven will cause uneven heating
- The conversation heart cookies can be stored in an airtight container at room temperature for about 3 days, in the refrigerator for about a week or in the freezer for up to 3 months. To keep your cookies looking their best, place a layer of parchment paper between each layer of cookies.
Nutrition values are estimates only, using online calculators. Please verify using your own data.
Have comments or questions about our conversation heart cookies recipe? Tell us in the section below.
This post was originally published on February 4, 2023 but was updated with new content on March 19, 2024.