
How To Make A DIY Paper Lantern Arch


This DIY paper lantern arch makes the perfect entry for a party or backdrop for a photo op or candy buffet. And unlike balloon arches, it can be made days or weeks ahead of time.
I think all parties should have a dramatic entry.
And one of my favorite ways to do that is by putting up an arch that everyone has to walk through to get in.
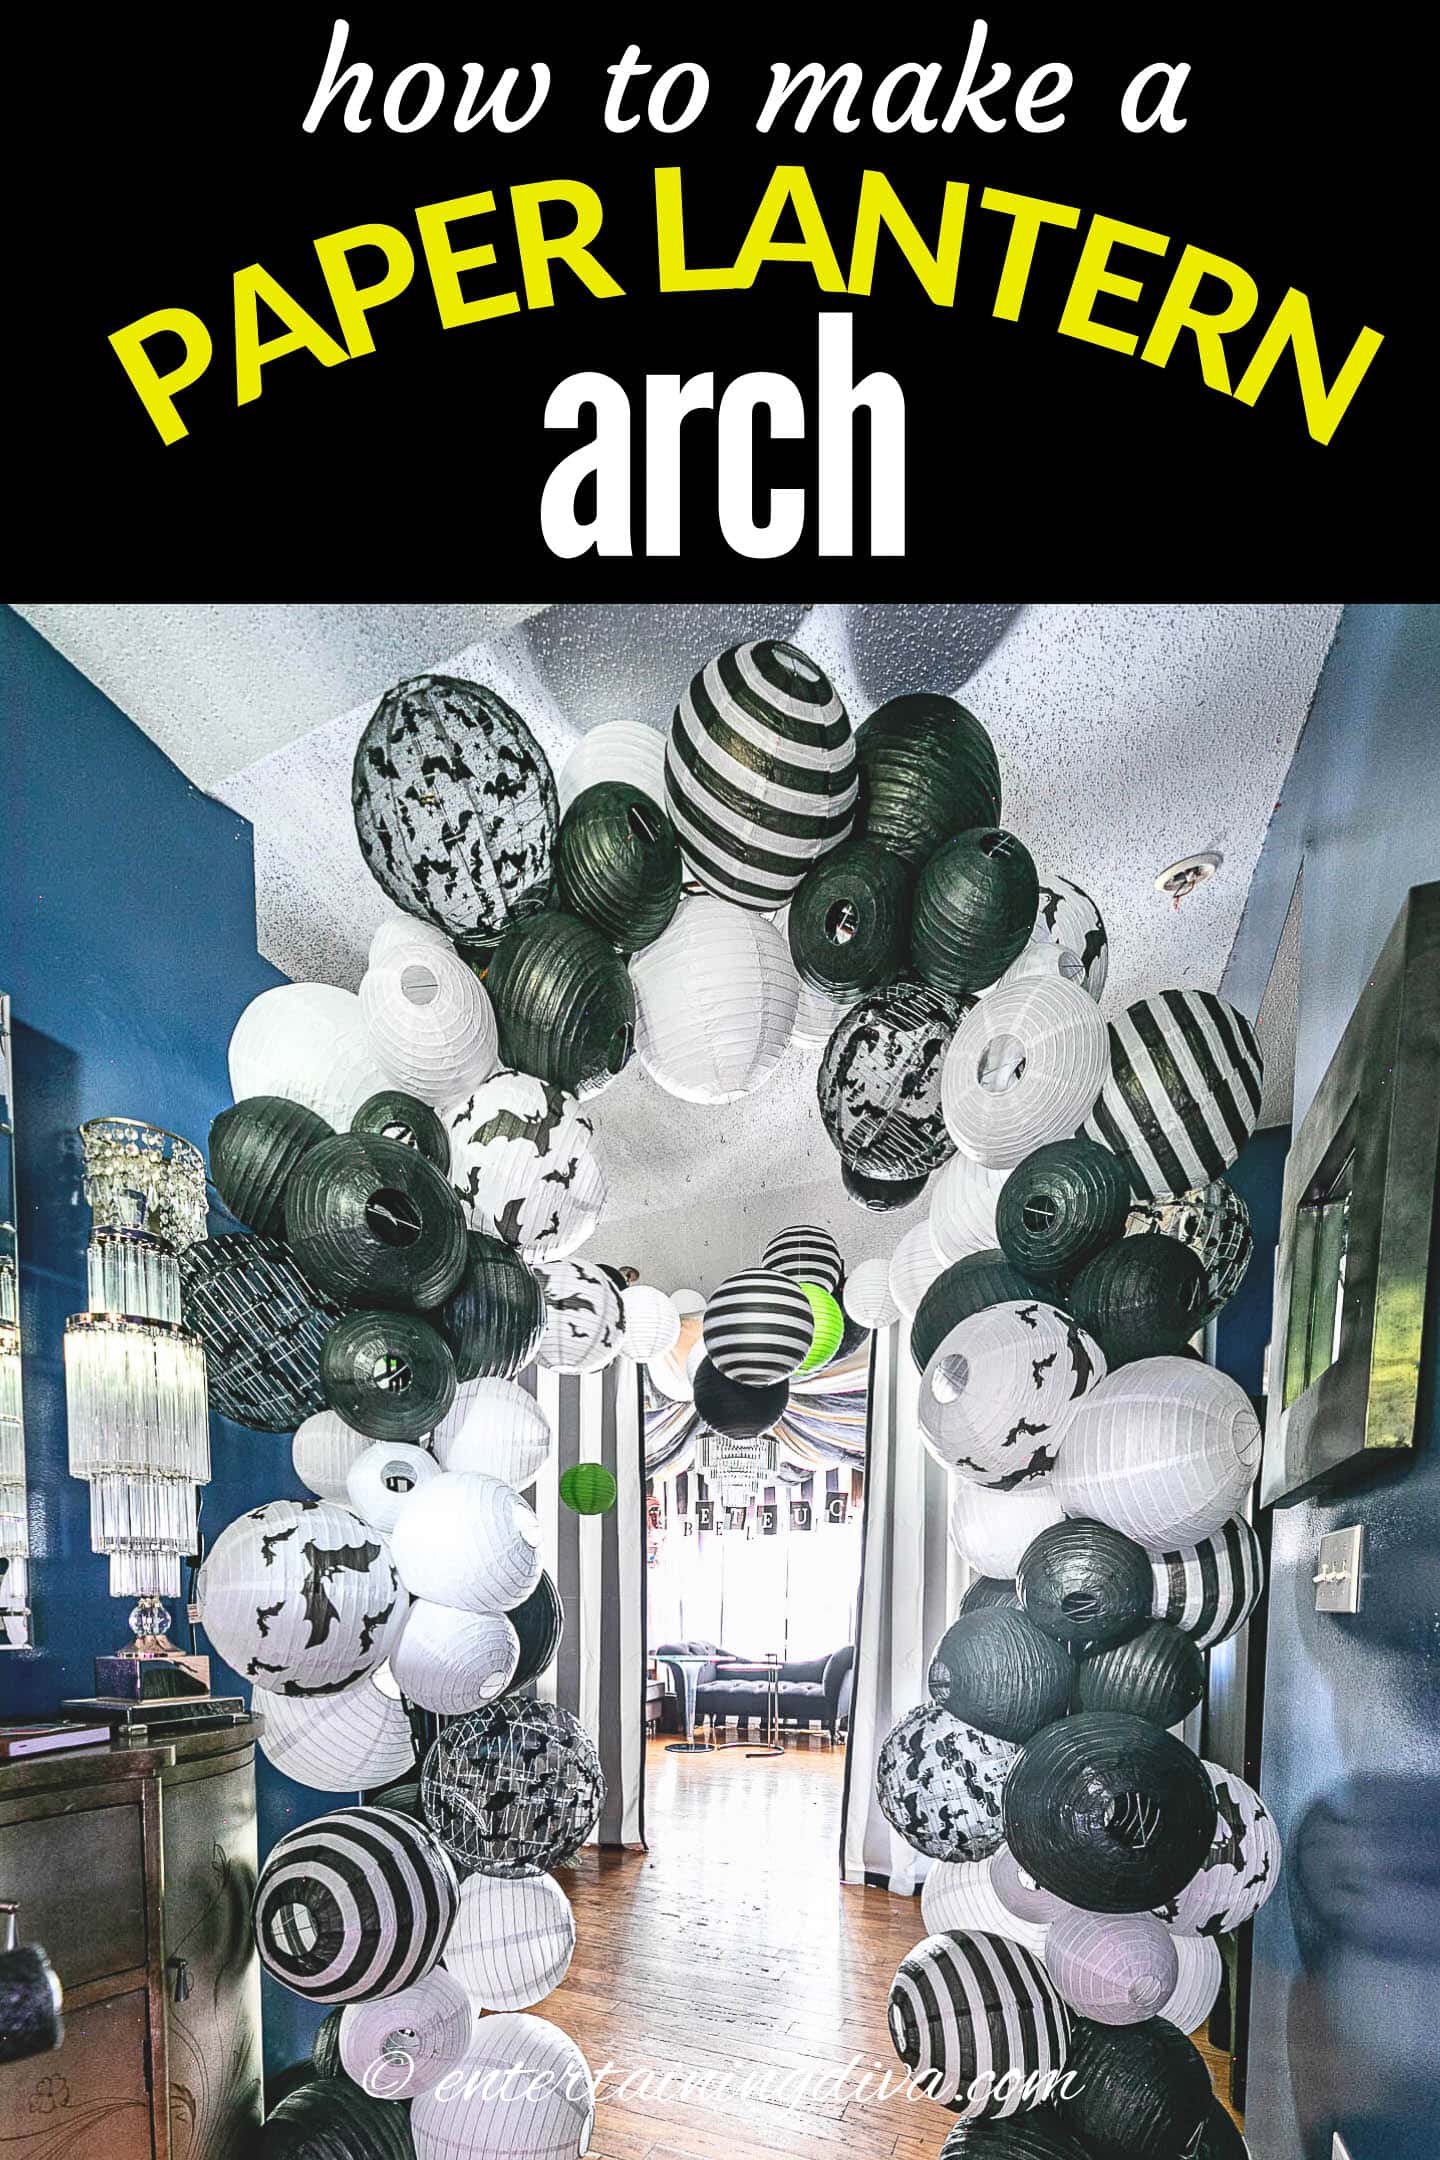
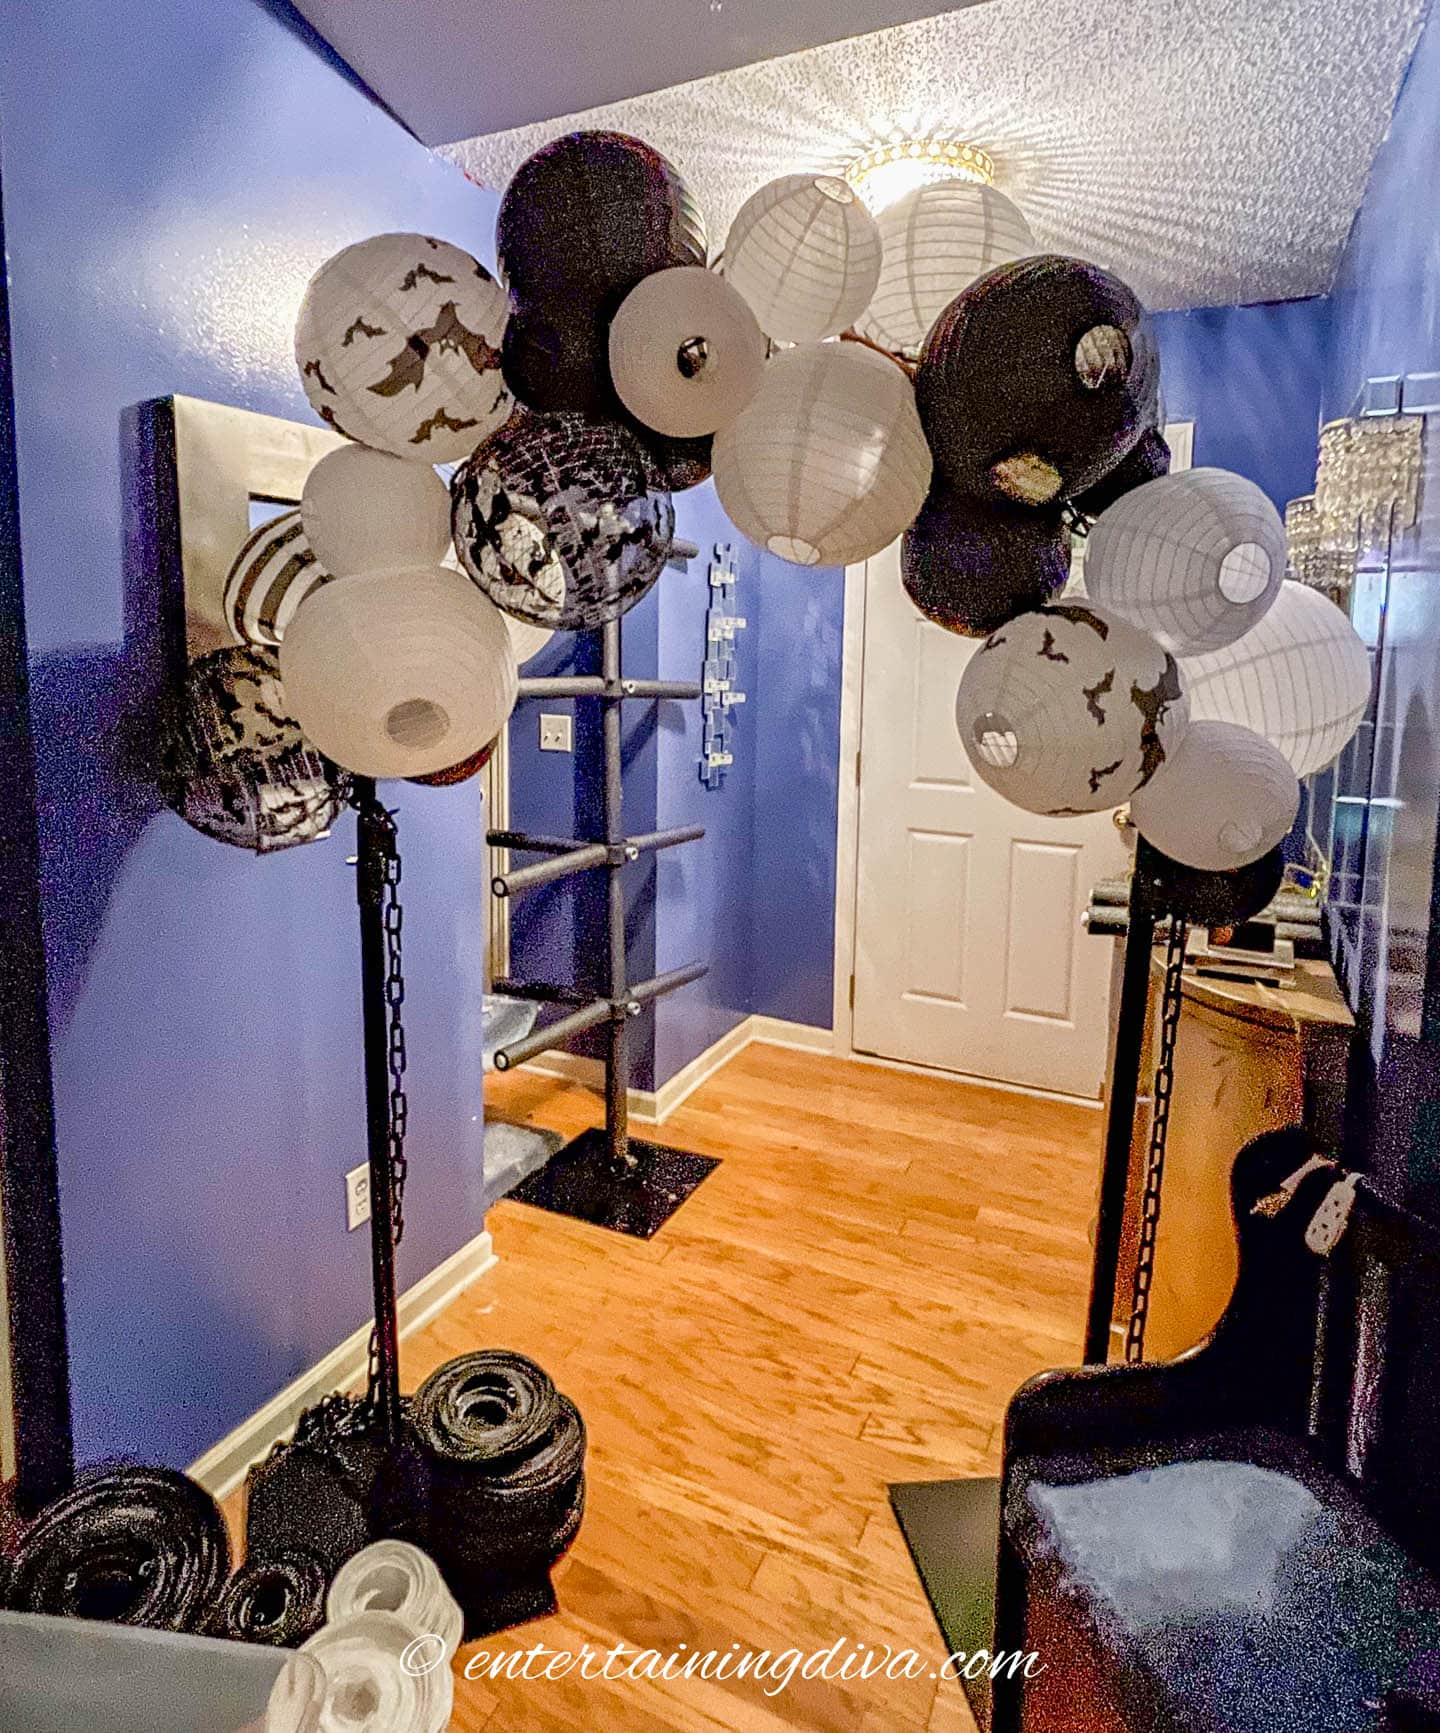
When I was decorating for my Beetlejuice party, I wanted one that was black and white stripes to go with theme.
But didn’t want to use balloons because they can’t be put up much before party time. (And I never have time the day of the party to be fiddling with this kind of stuff).
So I decided to make an entry arch out of paper lanterns.
Like balloons, you can buy them in whatever color you need to go with your decor.
But they’re easier to assemble than balloons, stay up as long as you want them to, and they’re re-usable.
And the finished paper lantern arch looked just as good as I was hoping it would!
Supplies
Materials
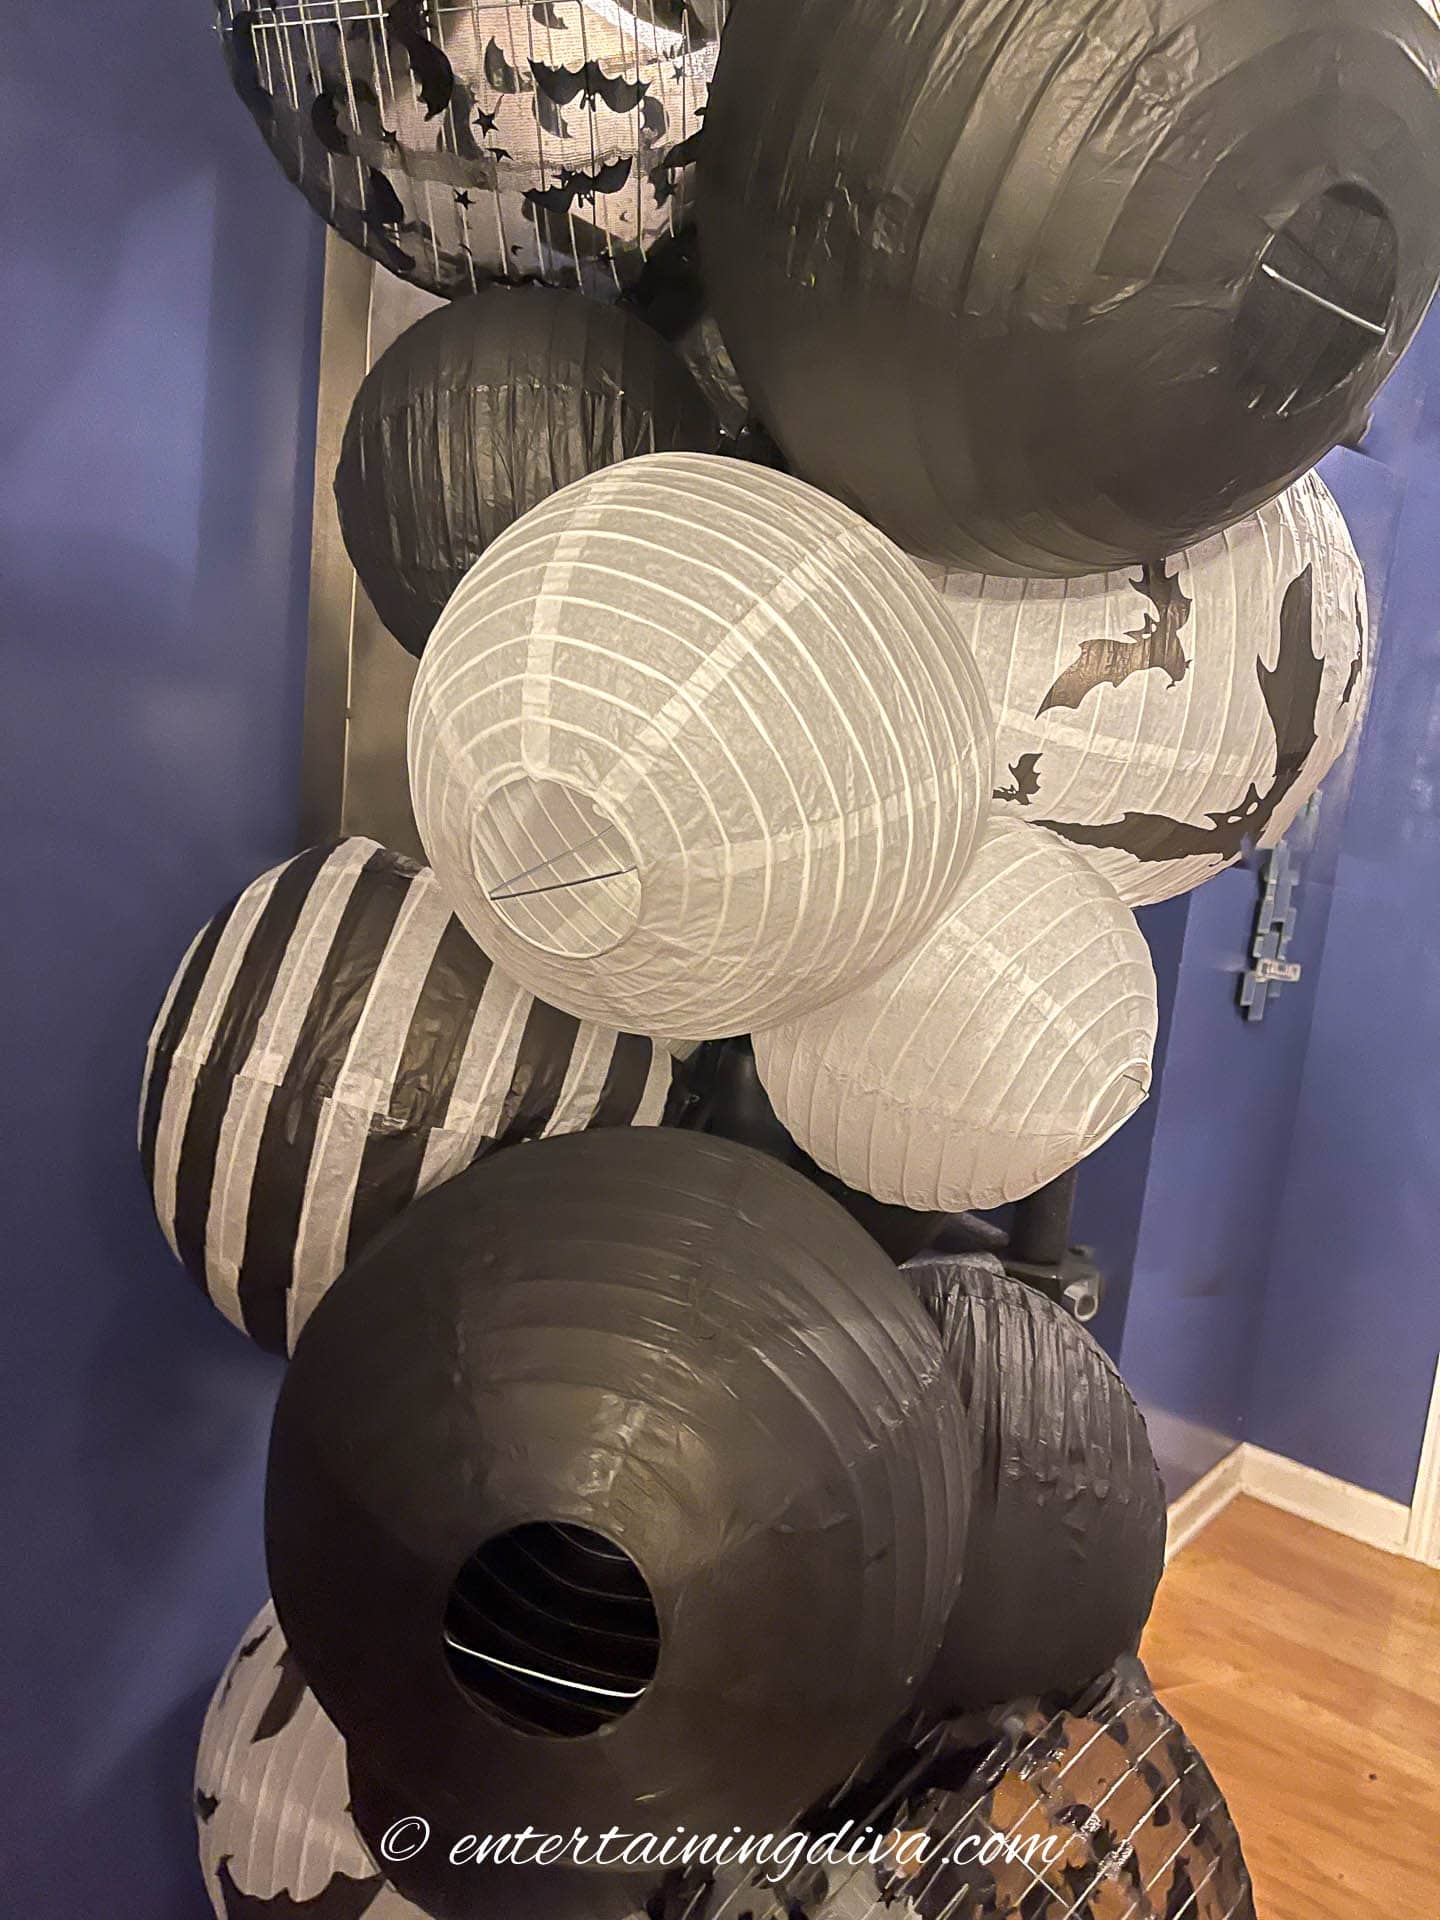
- Paper lanterns in various sizes in the colors you want to use. I usually buy them in packages of assorted sizes which makes this easier. You’ll need quite a few to completely cover the arch. For my black and white striped arch, I used:
- 3 packages of 24 black paper lanterns* in assorted sizes
- 3 packages of 24 white paper lanterns* in different sizes
- To make the arch more interesting, I like to add a few that have stripes or different patterns on them to break up all the solid colors. (If you don’t do this, you’ll need to get another 2 packages of the solid colors to make sure you have enough.) For my Halloween arch, I used:
- 2 packages of 12 assorted Halloween paper decorations* (I only used the paper lanterns for the arch)
- 2 packages of 12 black and white large paper lanterns*
- A backdrop stand (preferably with adjustable height poles) – You’ll need the two side posts but not the top of a backdrop stand for this project. I like to use this heavy duty one* because the base is flat and heavy so people won’t trip over it and it’s very sturdy. If yours isn’t that heavy, you may need to add sandbags or some other weight on the base to keep them from moving. It’s also easier to assemble the arch if the posts are an adjustable height.
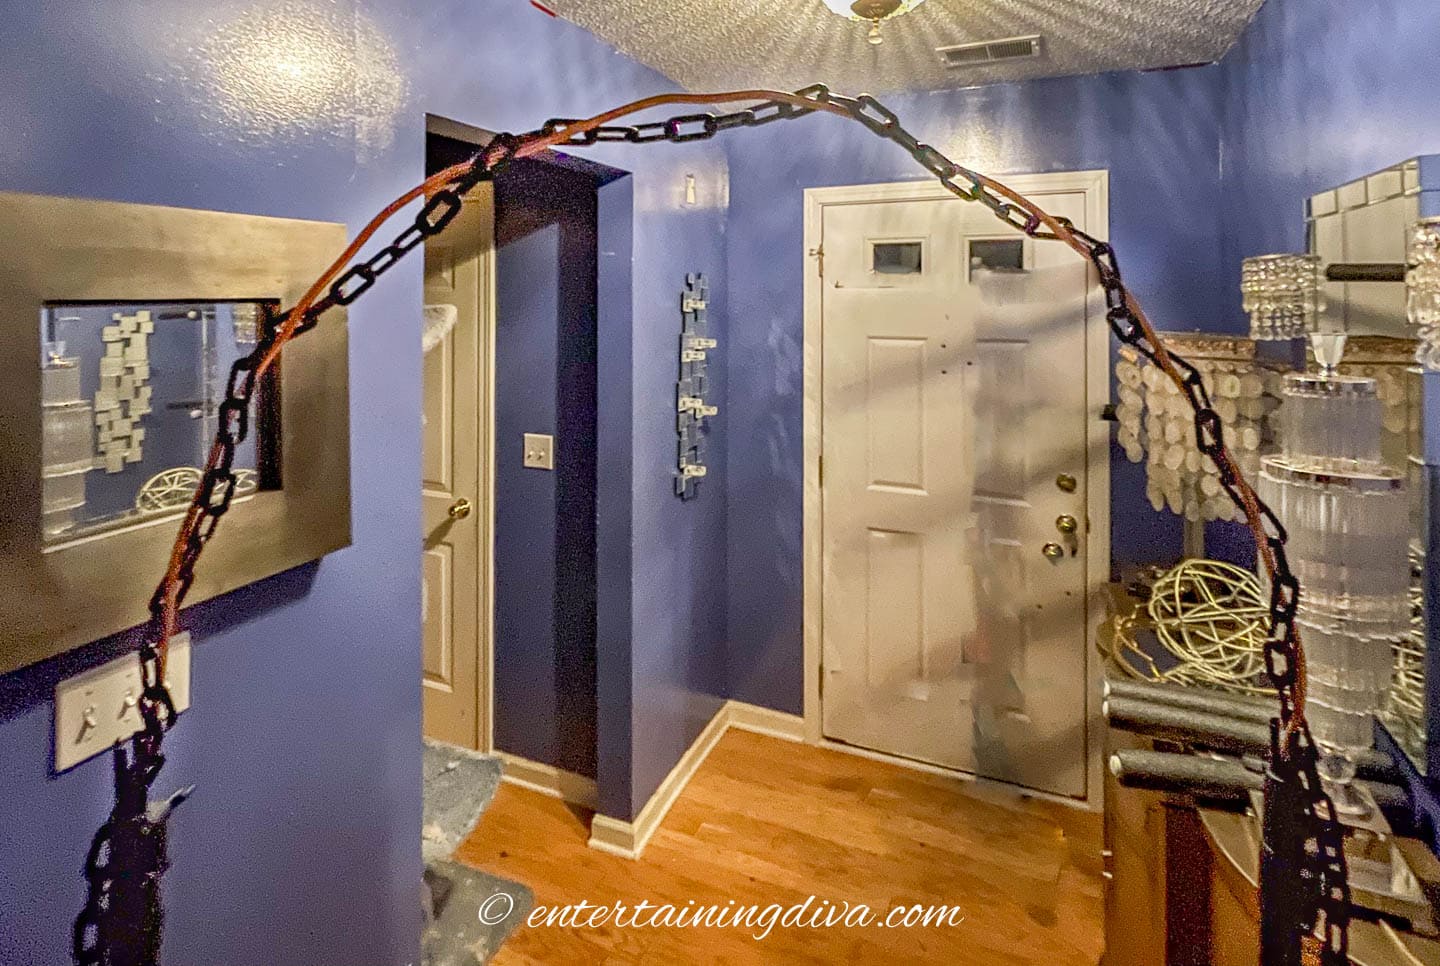
- 8′ of flexible copper pipe* – We’ll bend this into the top part of the arch. It’s very easy to bend but maintains its shape so it’s perfect for this kind of project.
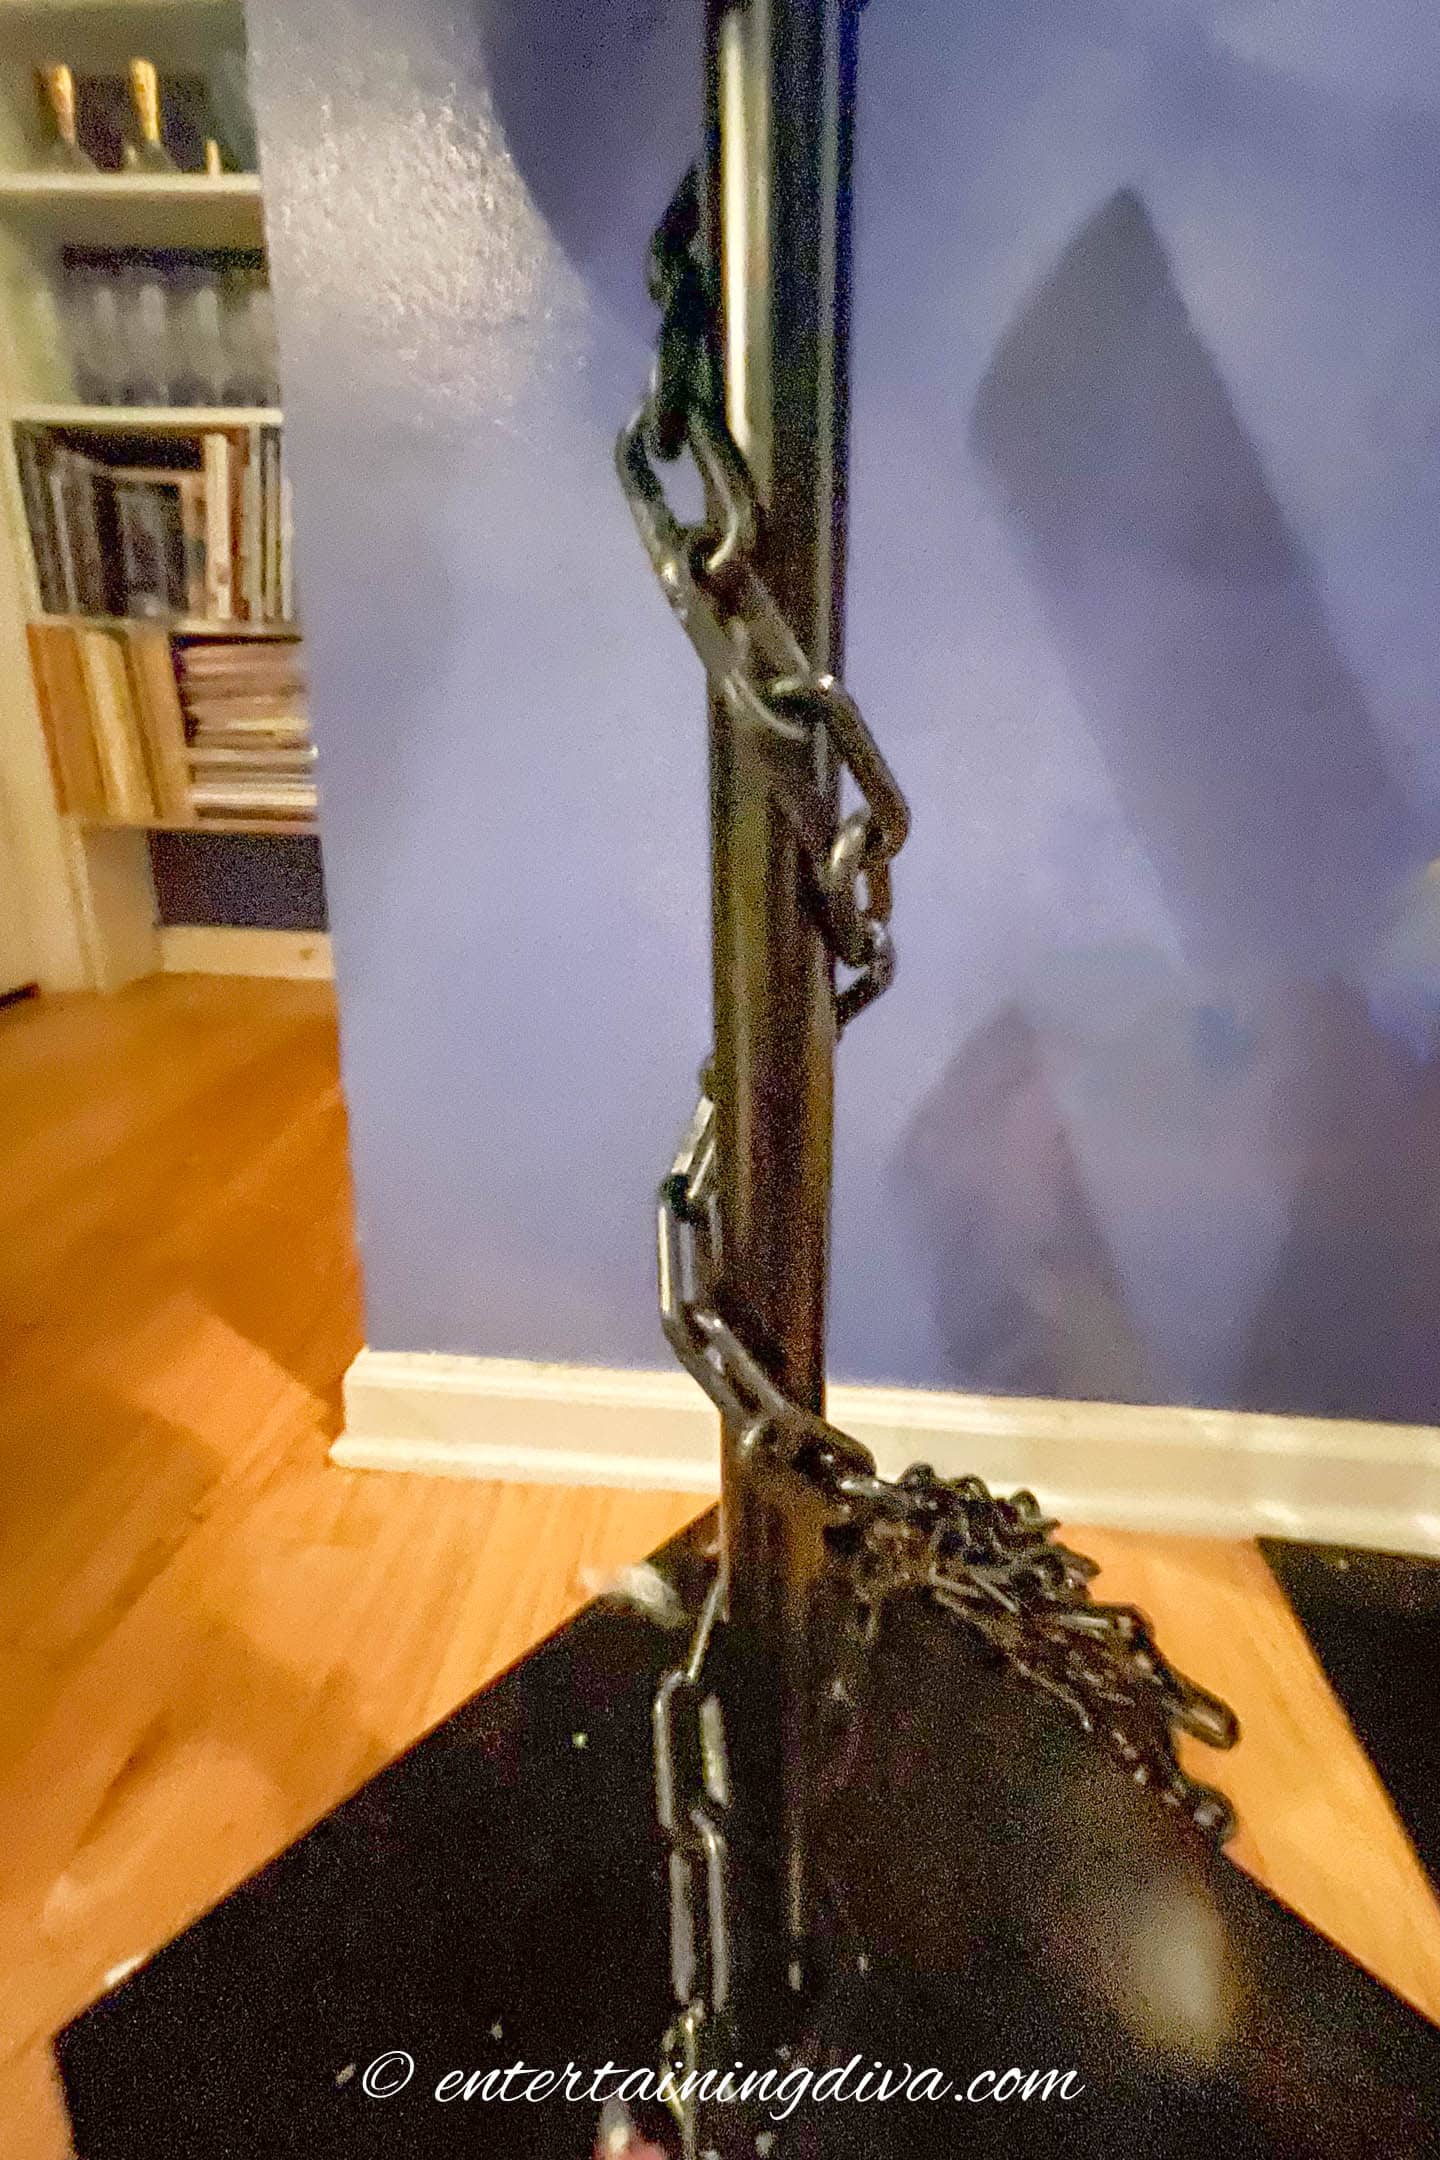
- 20′ of plastic chain* – I attach the paper lanterns to this chain instead of directly to the arch because it keeps them from sliding down. You can use any type of chain, but I like the plastic because it is lighter than metal.
- 2 zip ties*
Tools
- Wire snips – to cut the chain and flexible pipe to length
How to make a paper lantern arch
1 | Assemble the arch frame
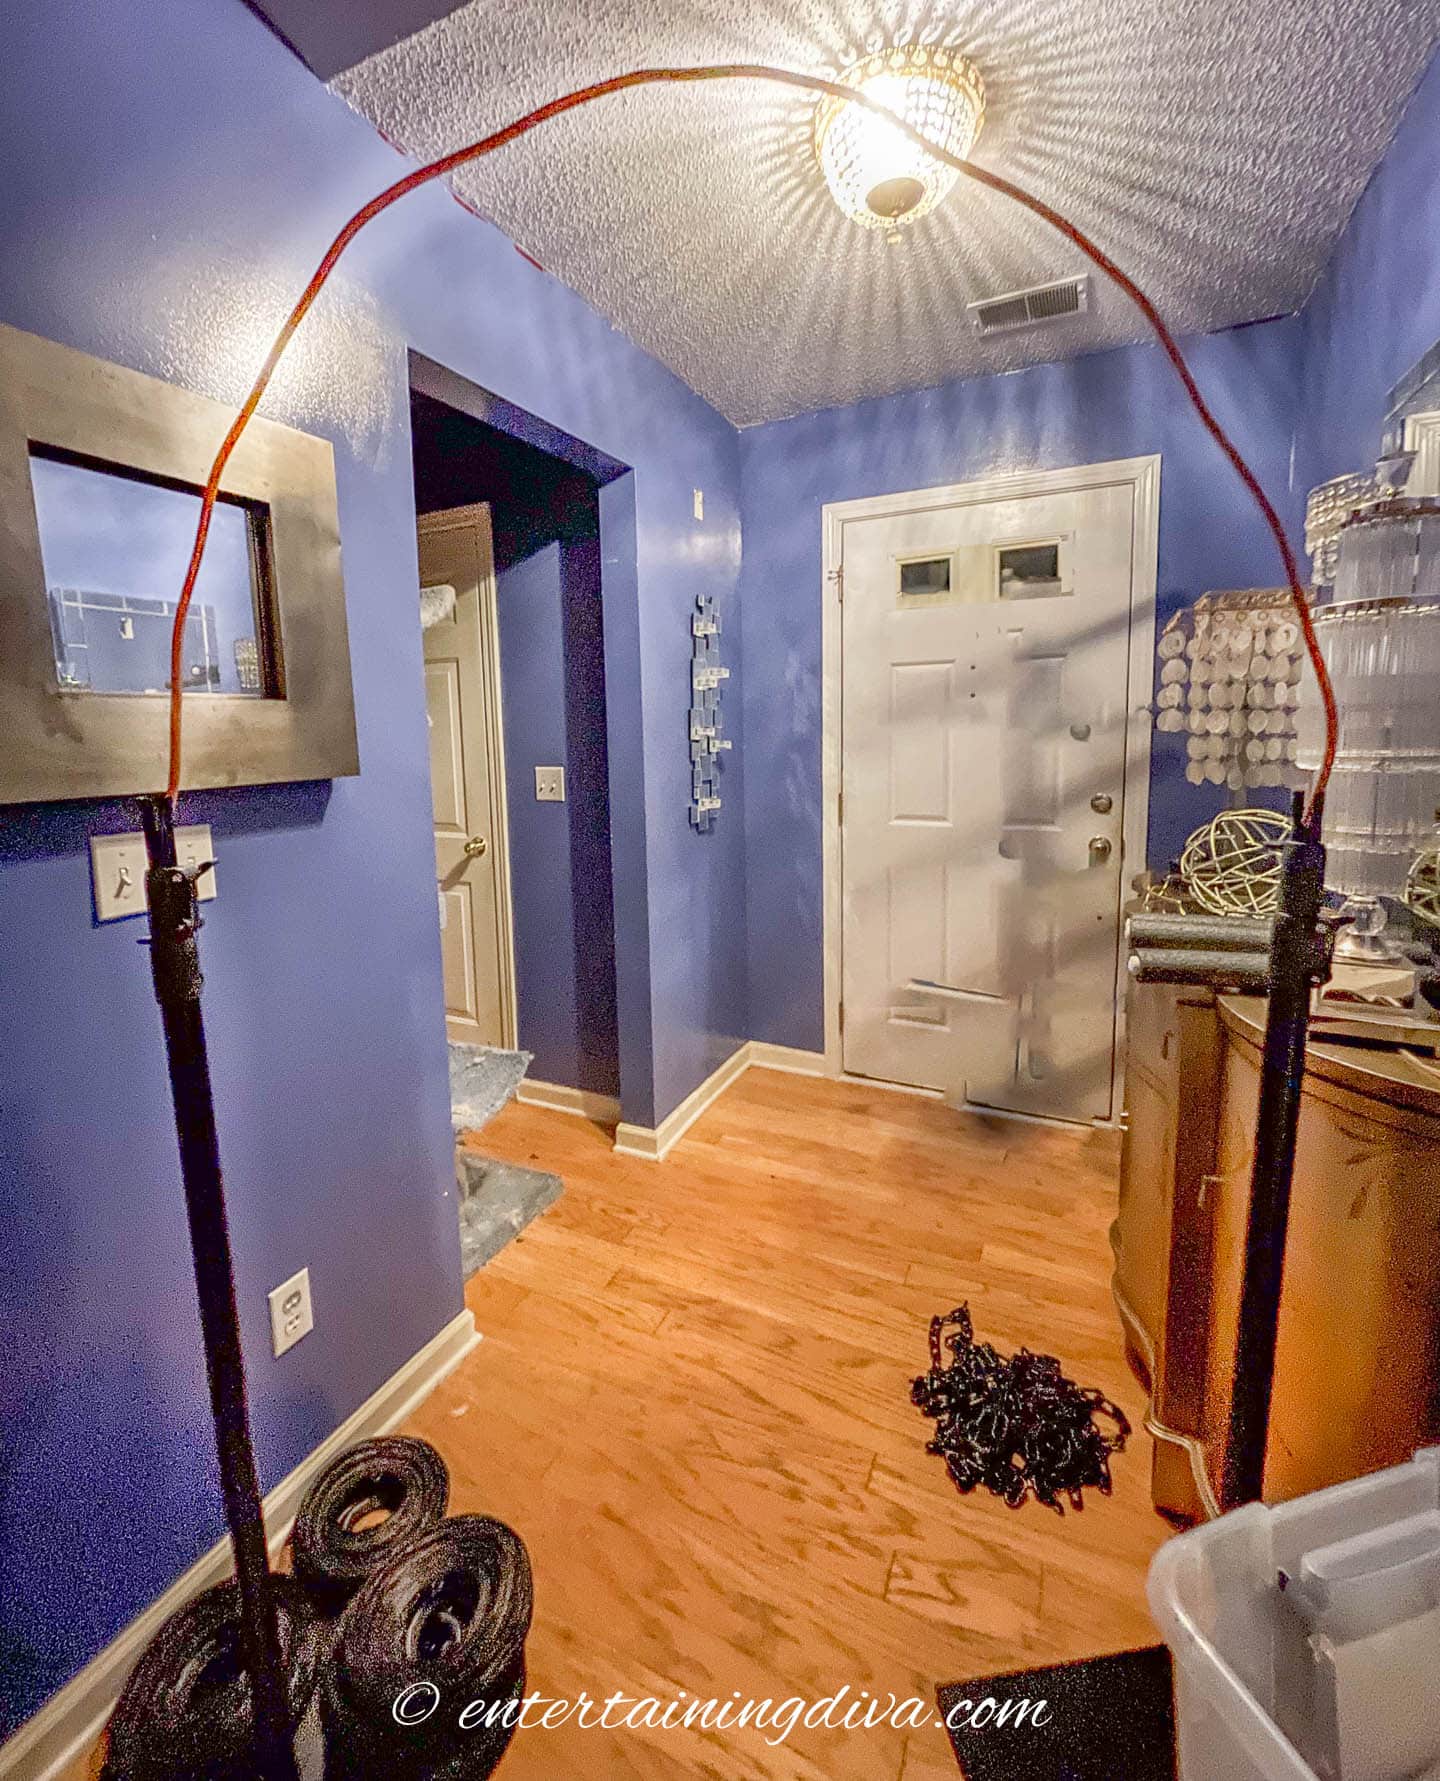
Cut a 6 to 8 foot section (depending on how high you want the arch to be) of the flexible copper pipe using wire cutters, pipe cutters or a hack saw.
Use your hands to bend it into a half circle shape.
Don’t worry if it’s not perfectly round. You won’t notice the wiggles after the paper lanterns have been attached.
Position your backdrop stand poles wide enough apart for the arch to reach both of them. This should be at least 3½ feet if you want people to walk through it.
Make sure that posts are lowered so you can easily reach the top of them. This will make adding the lanterns to the top of the arch much easier.
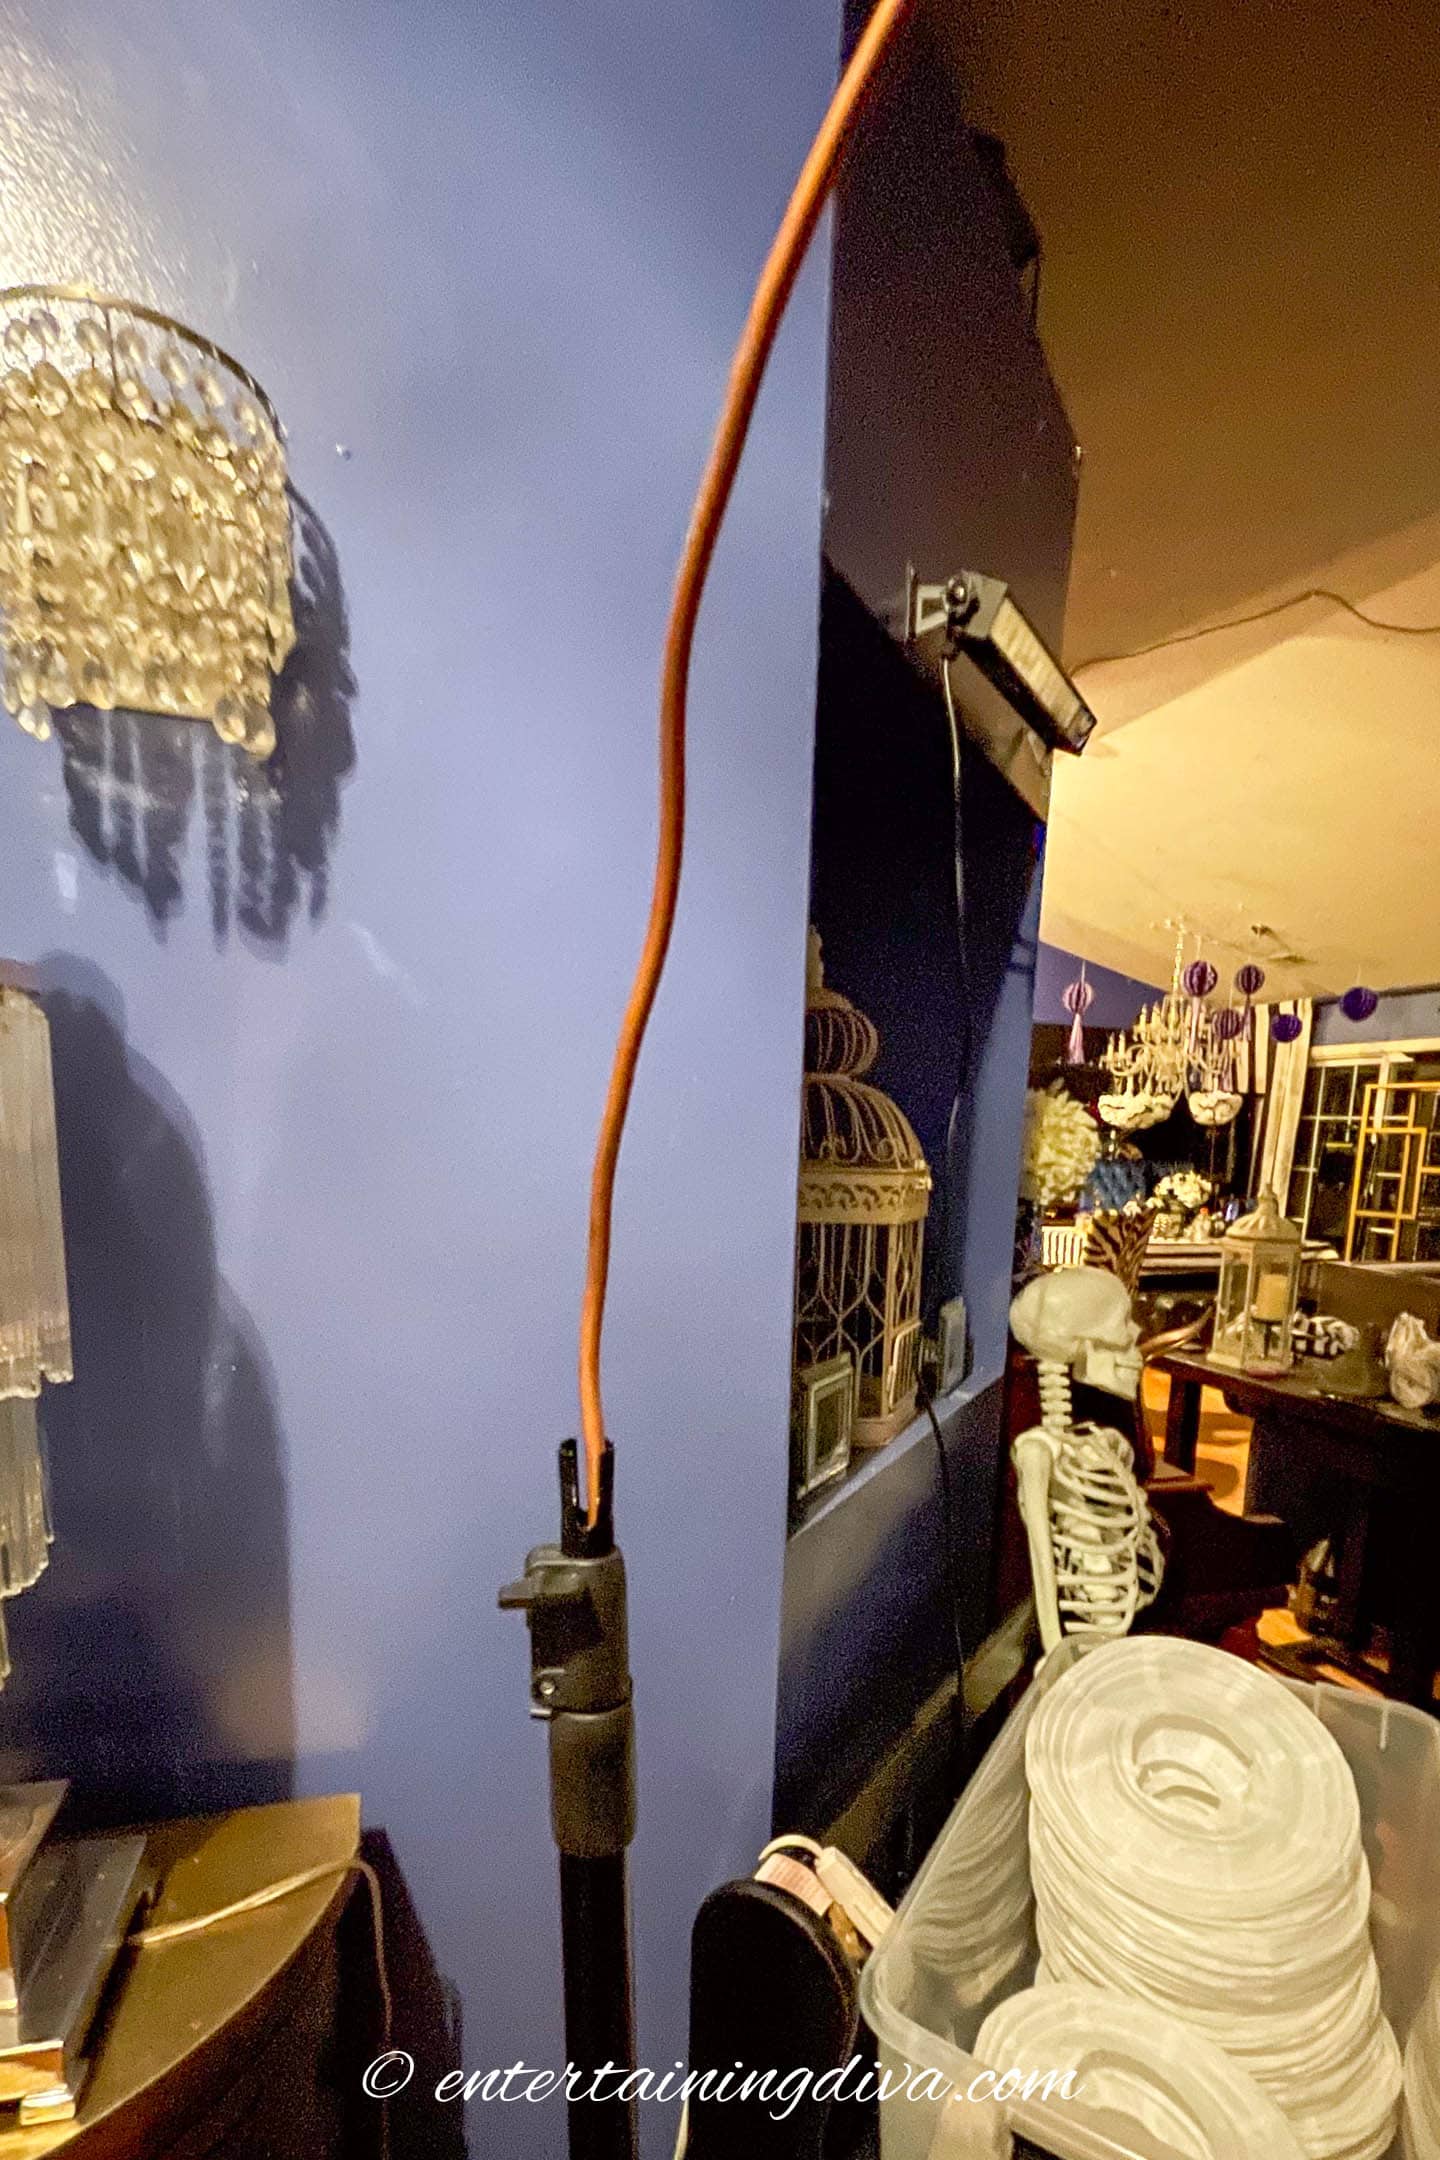
Stick each end of the arched pipe into the top of the backdrop pole.
If your poles are not open at the end, you can either pop off the plastic piece on the top. Or bend the copper tubing so it fits through the hole on the side where the horizontal bar usually goes.
2 | Add the chain
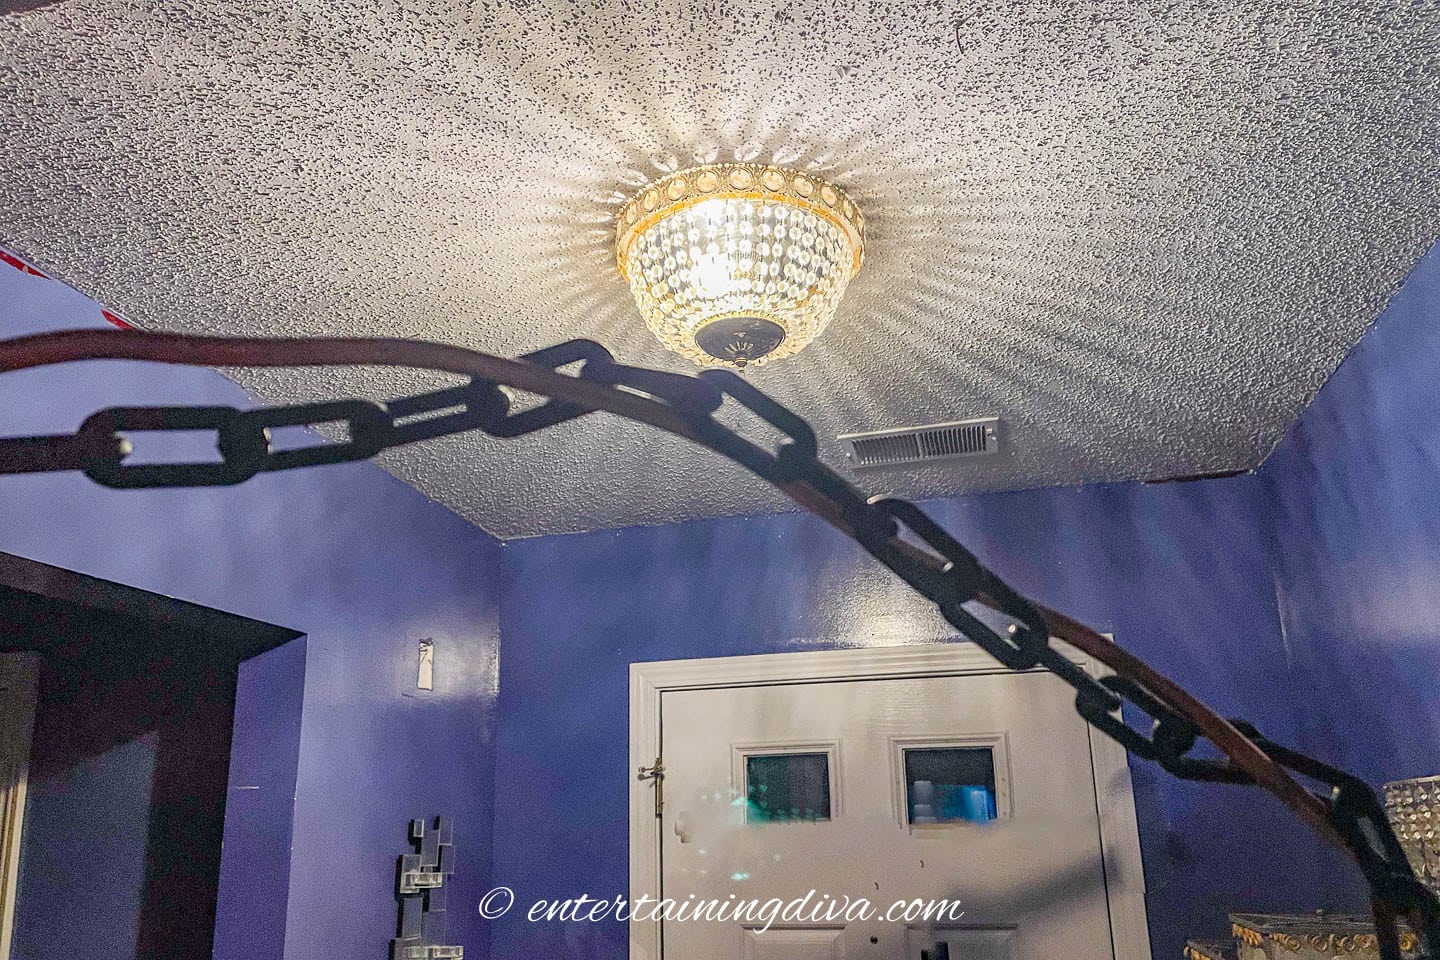
Starting from the top of the arch, loop the chain around the copper pipe and down the poles in both directions.
You’ll need to start about 10 feet from the end of the chain so you have enough.
Make sure you have enough extra chain on both sides to cover the length of the poles when it is extended all the way up. (It’s better to have too much chain than not enough since you can always cut it off later).
I usually don’t cut it until after I have attached all of the balloons so I know it will be long enough.
3 | Assemble the paper lanterns
Put together a bunch of paper lanterns.
To do this:
- open the paper lantern
- insert the flat side of the metal frame into the round metal loop at the bottom of the lantern.
- bend the frame slightly and insert the two bumps at the top of it into the loops at the top of the paper lantern.
It’s hard to know exactly how many paper lanterns you will need since it depends on what sizes you use and how tightly you pack them in.
So you don’t need to assemble them all up front if you think you’re going to have some left over. You can always make more later if necessary.
4 | Attach lanterns to the top of the arch
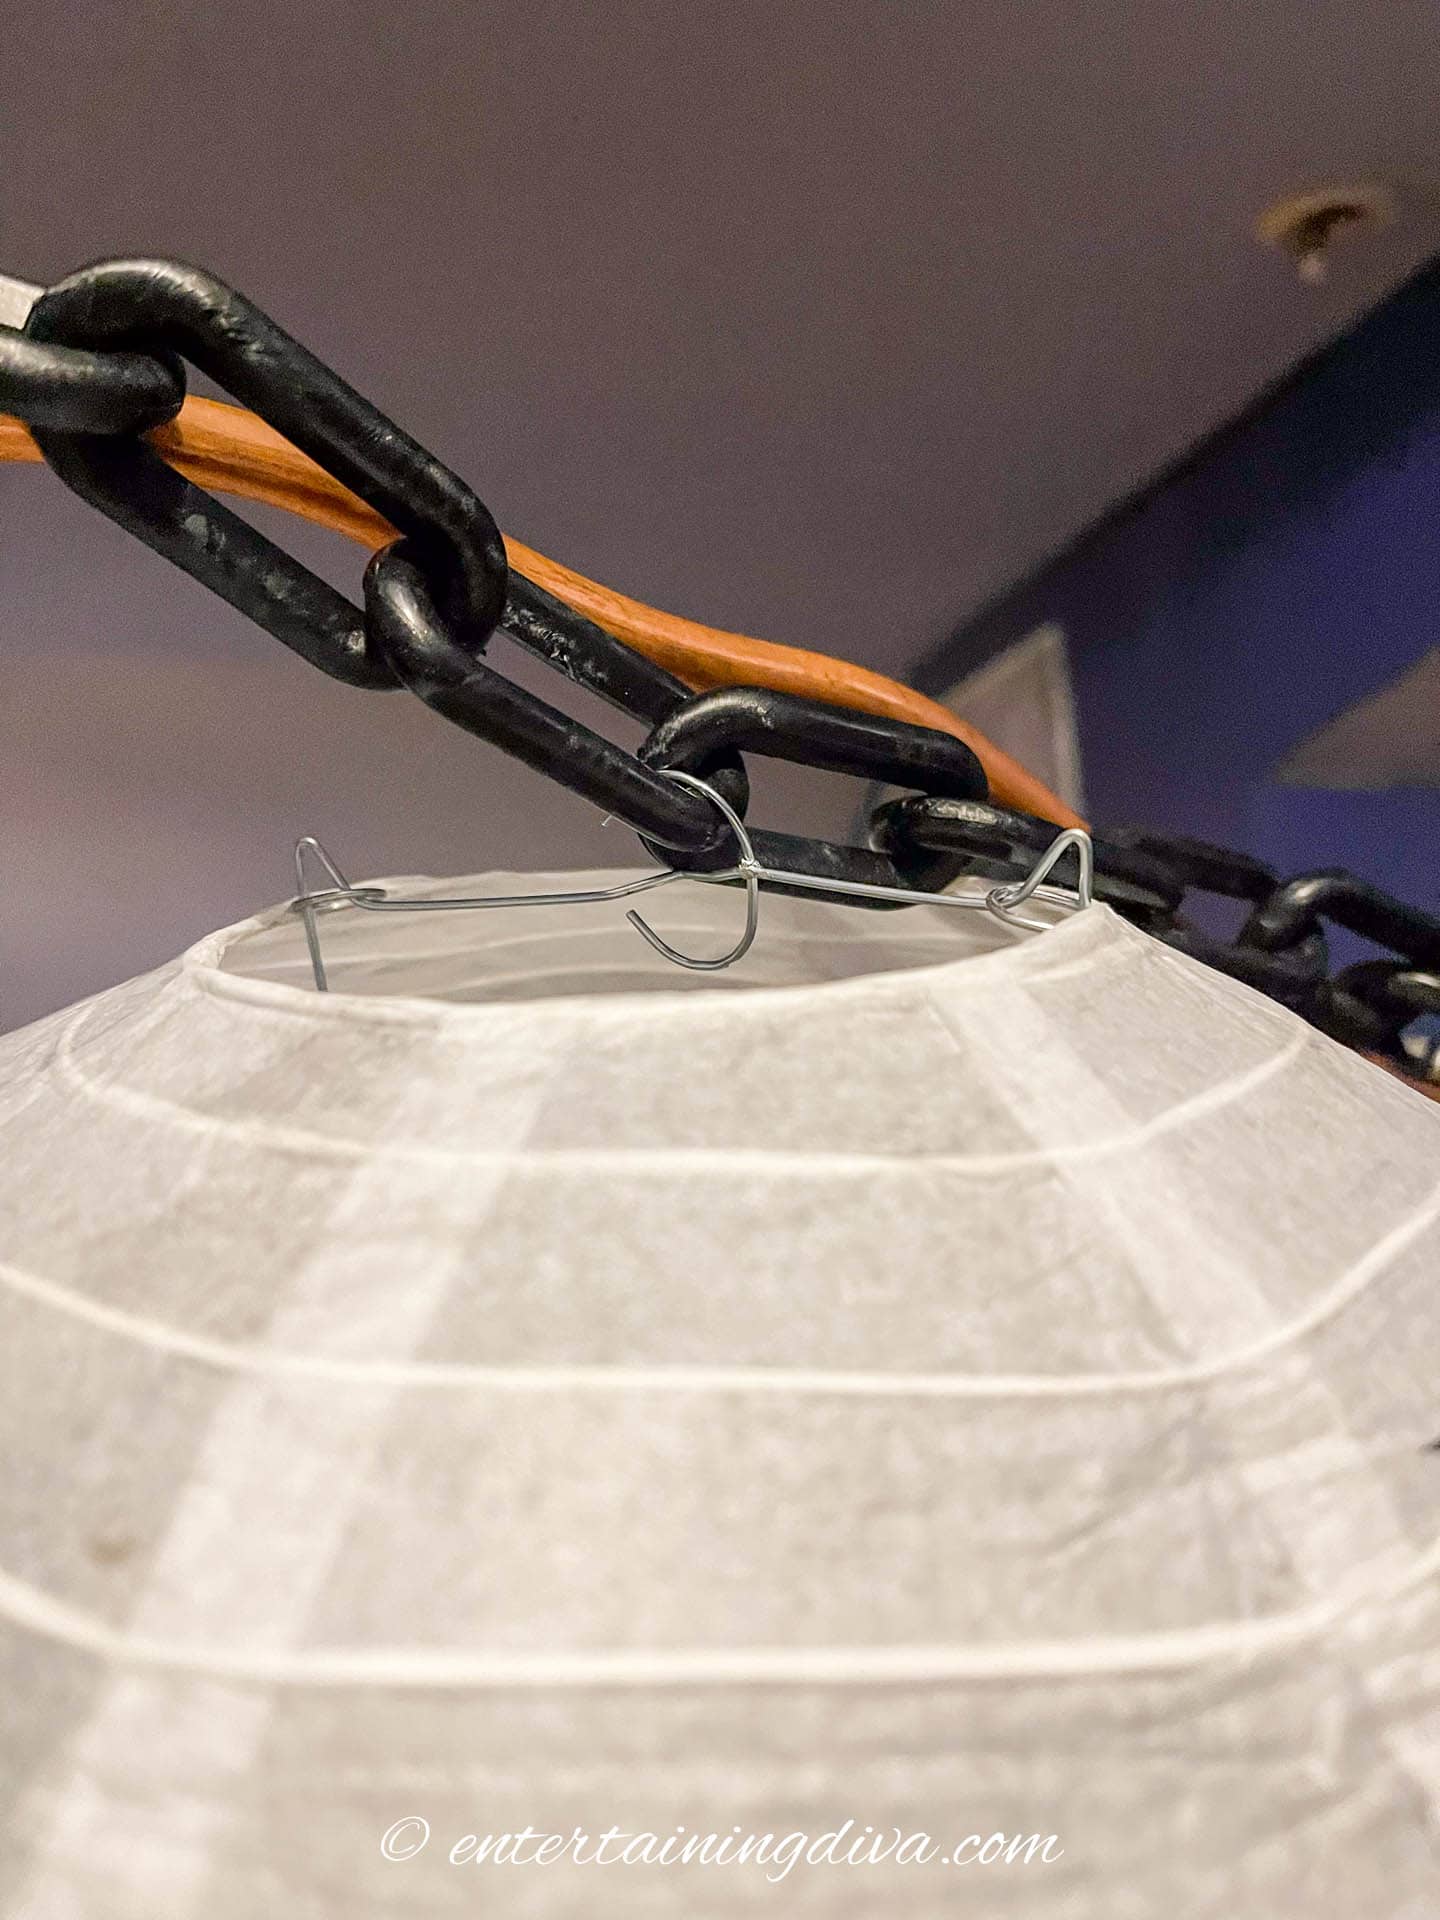
Starting from the middle of the arch again, use the hook at the top of the paper lantern to hook them onto a link in the plastic chain.
I find starting from the top of the arch makes it easier to have a symmetrical look when you’re finished.
And if you have poles with adjustable height, you can decorate the arch at a lower level where you can reach it easily. Then lift it up to the correct height when you’re ready to do the sides.
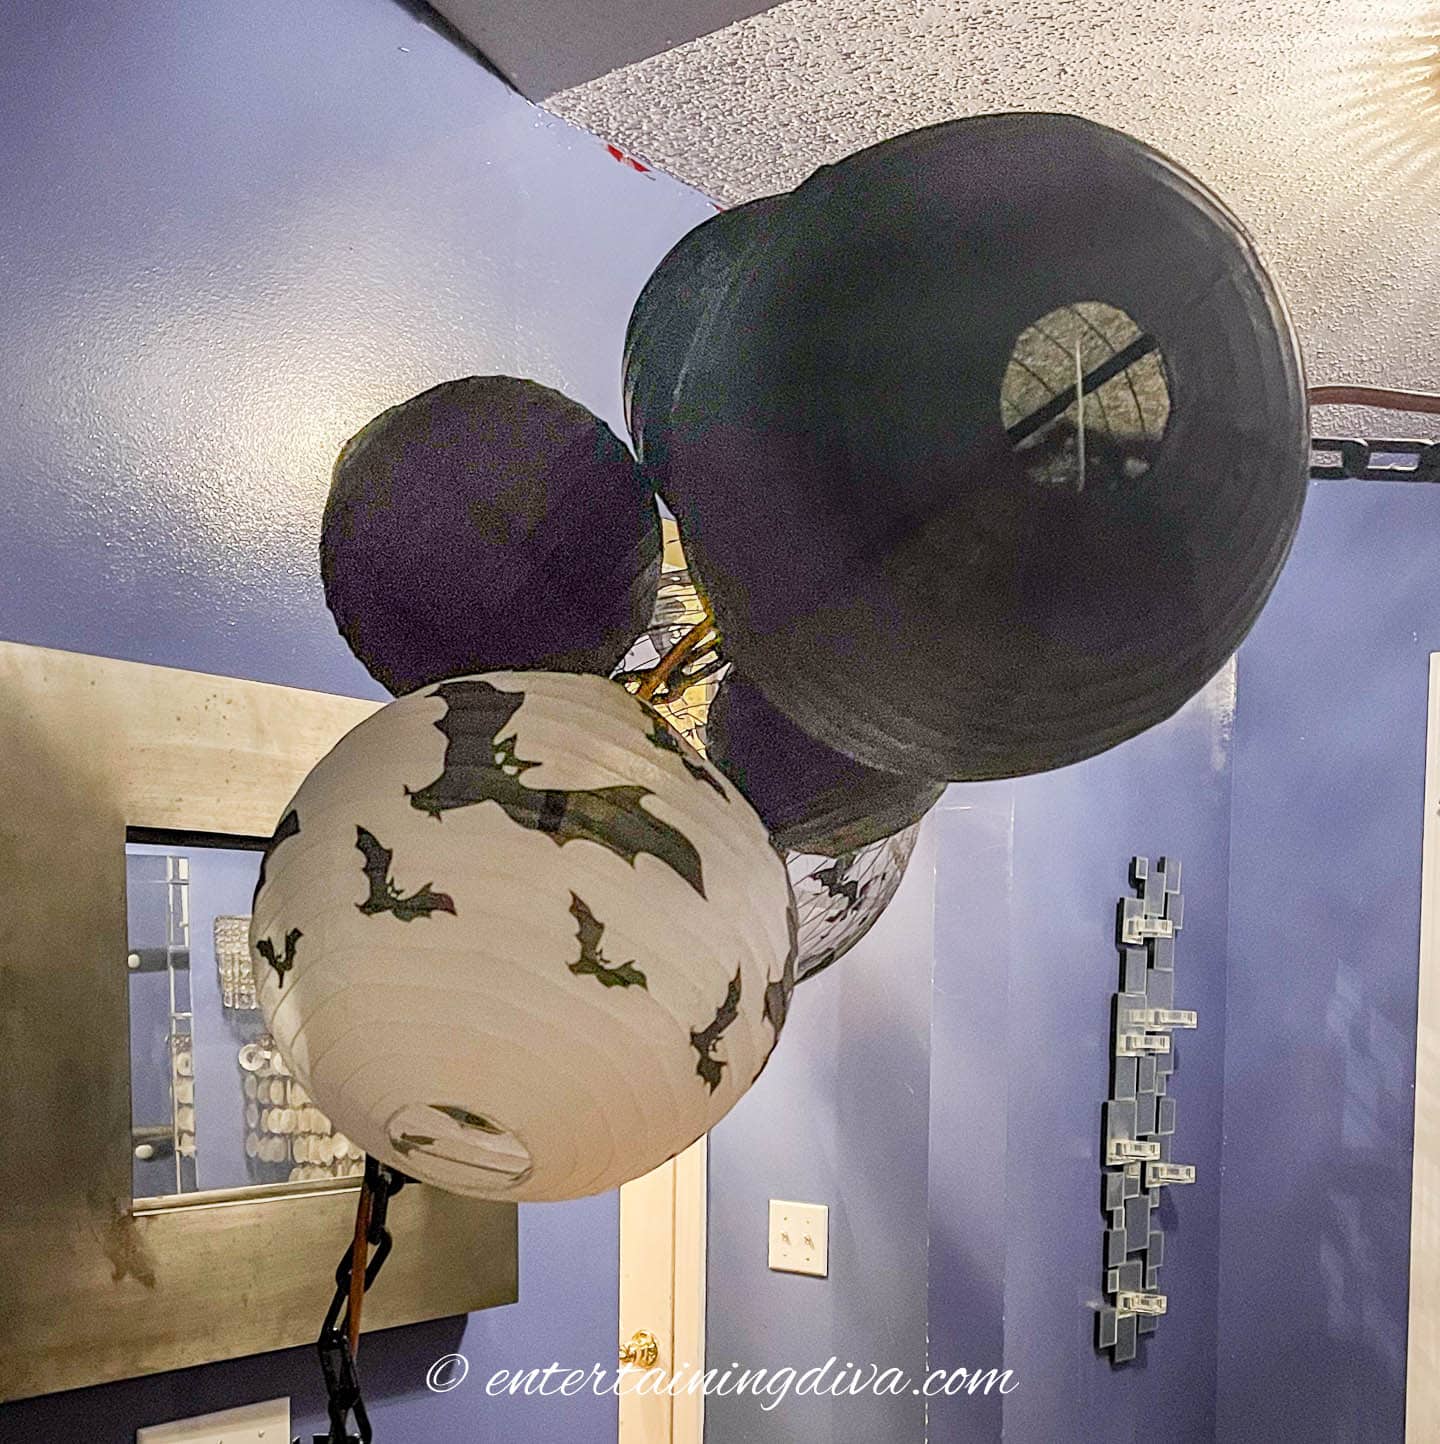
To make it look like a balloon garland, attach 5 to 7 paper lanterns in a group with the hooks close together on the chain.
Using different-sized paper lanterns in the group helps to make it more interesting.
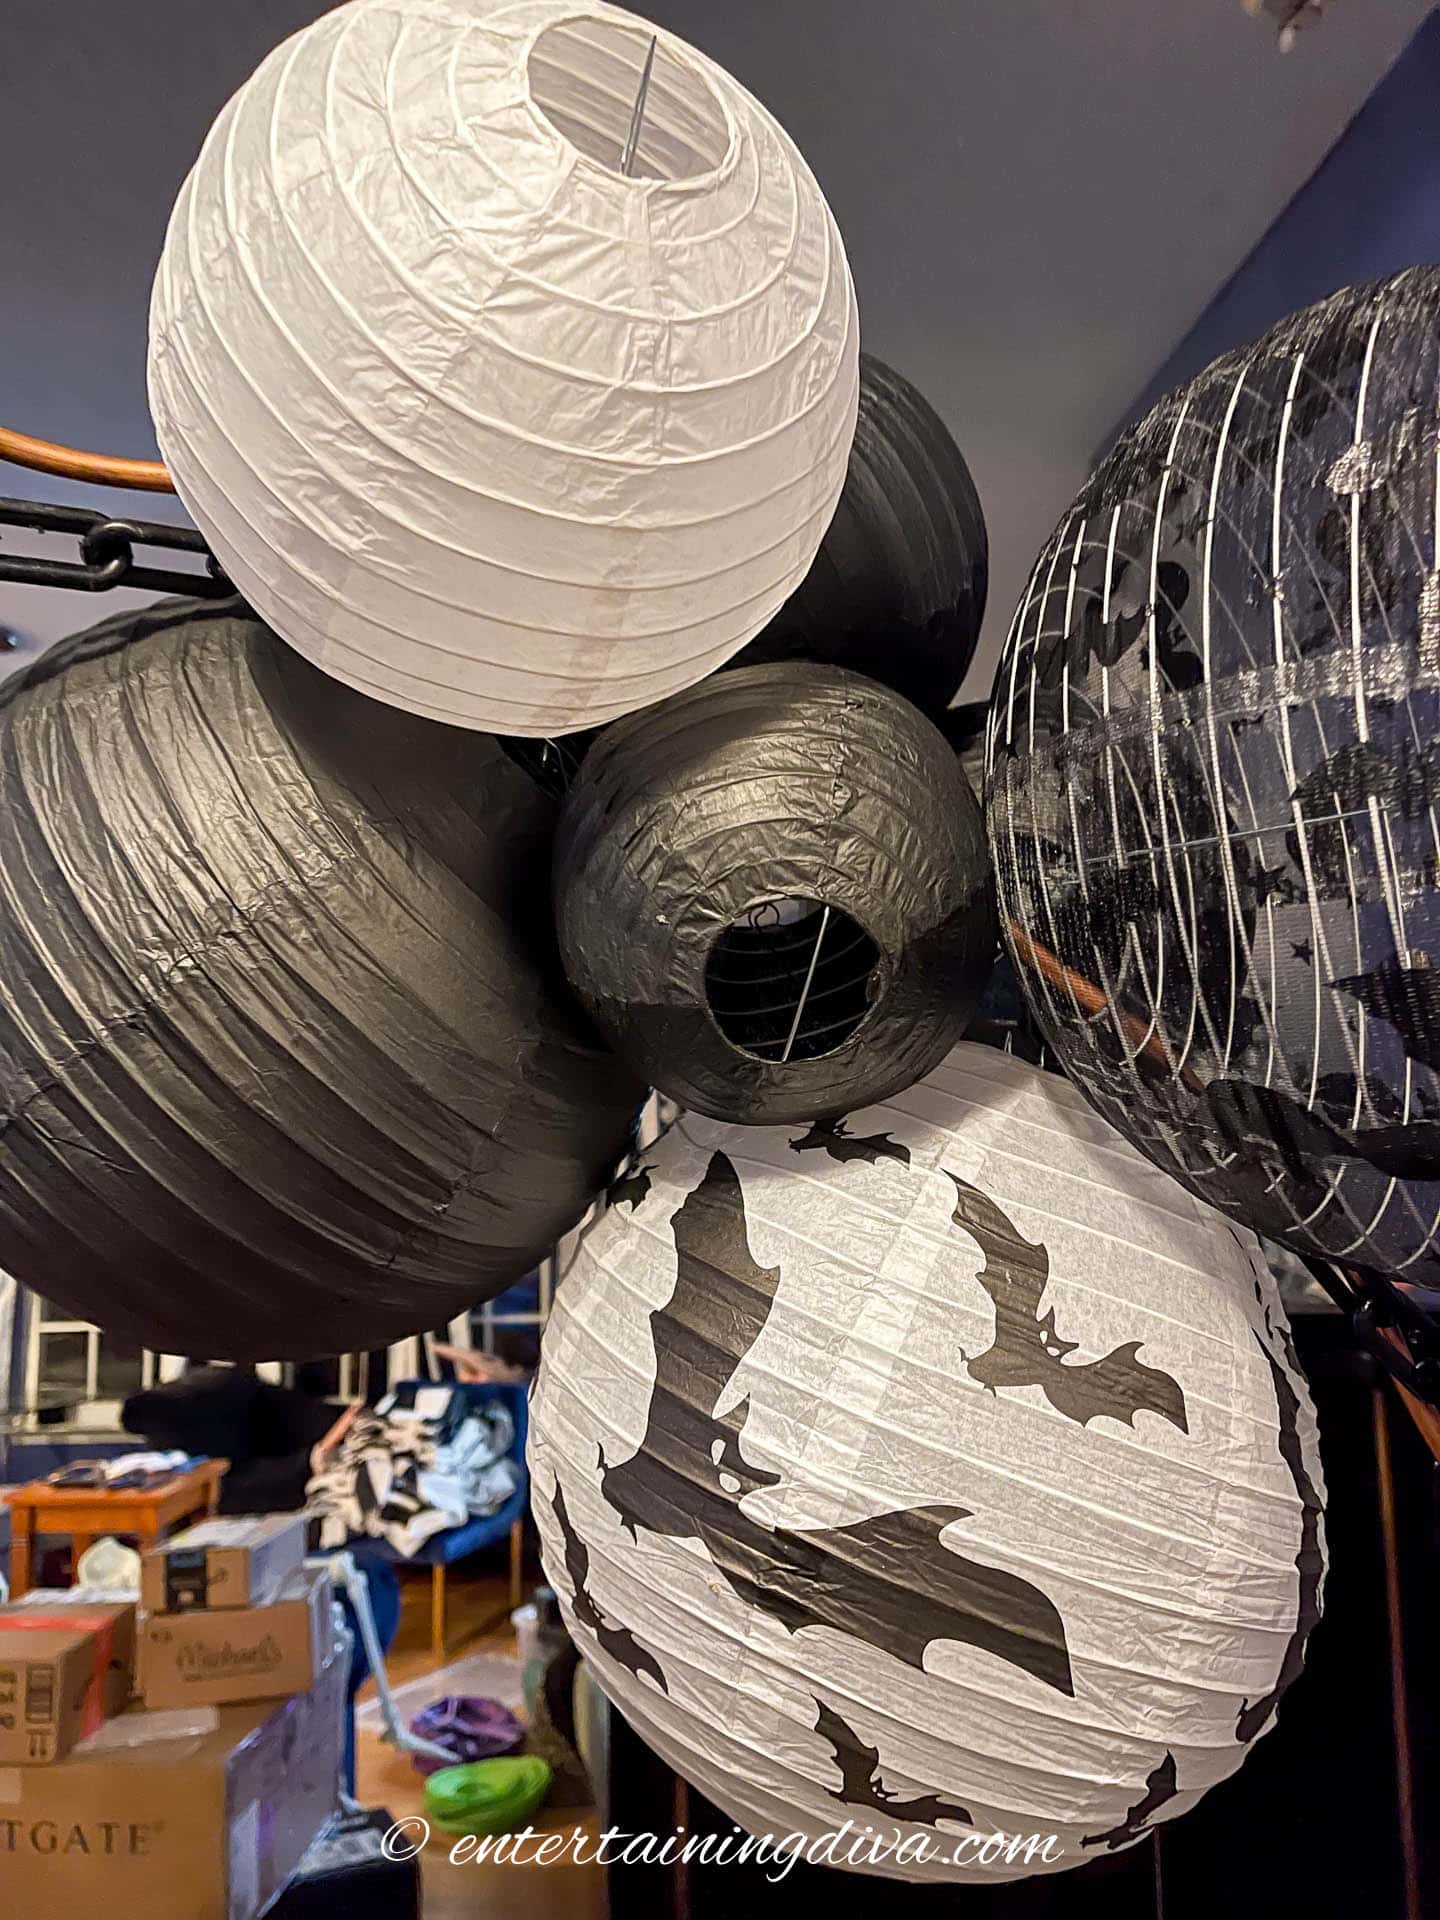
I usually start with one large one, 2 medium ones and 2 to 3 small ones.
Then add 1 or 2 other lanterns to vary the grouping size.
From there you can add another group of the same color or switch to a different color depending on how you want it to look.
For my Beetlejuice theme, I was trying to make black and white stripes so I alternated the colors.
For more of a color block effect, you’ll want to put at least 3 groups of the same color together.
Follow these hints to create a natural looking arch:
- Each time you put up a large paper lantern, try to change the side of the arch it is on.
- Save the smaller lanterns for last and use them to fill in the gaps.
- Striped or patterned lanterns are useful for transitioning from one color to the next, and for adding texture to large monochromatic sections.
6 | Add lanterns to the sides
After you have attached the lanterns across the top of the arch and part way down the sides, raise the backdrop poles so that the arch is as high as you want it.
Wrap the remaining chain around the bottom of the poles.
Finish covering the sides of the arch with more lanterns.
5 | The finishing details
Cut off the chain at the bottom of the arch.
Zip tie the last link on each side to the pole so it doesn’t move around.
Fill in any gaps in the arch with small paper lanterns.
If any parts of the arch look a little lopsided, try swapping some of the larger lanterns for smaller ones and vice versa until it looks more even.
The finished arch

The finished arch makes a great entrance to a party (like the black and white one I made for my Beetlejuice party.)
It creates a statement that sets the tone for the rest of your decor.
Hanging more of the paper lanterns from the ceiling draws your eyes into the room.
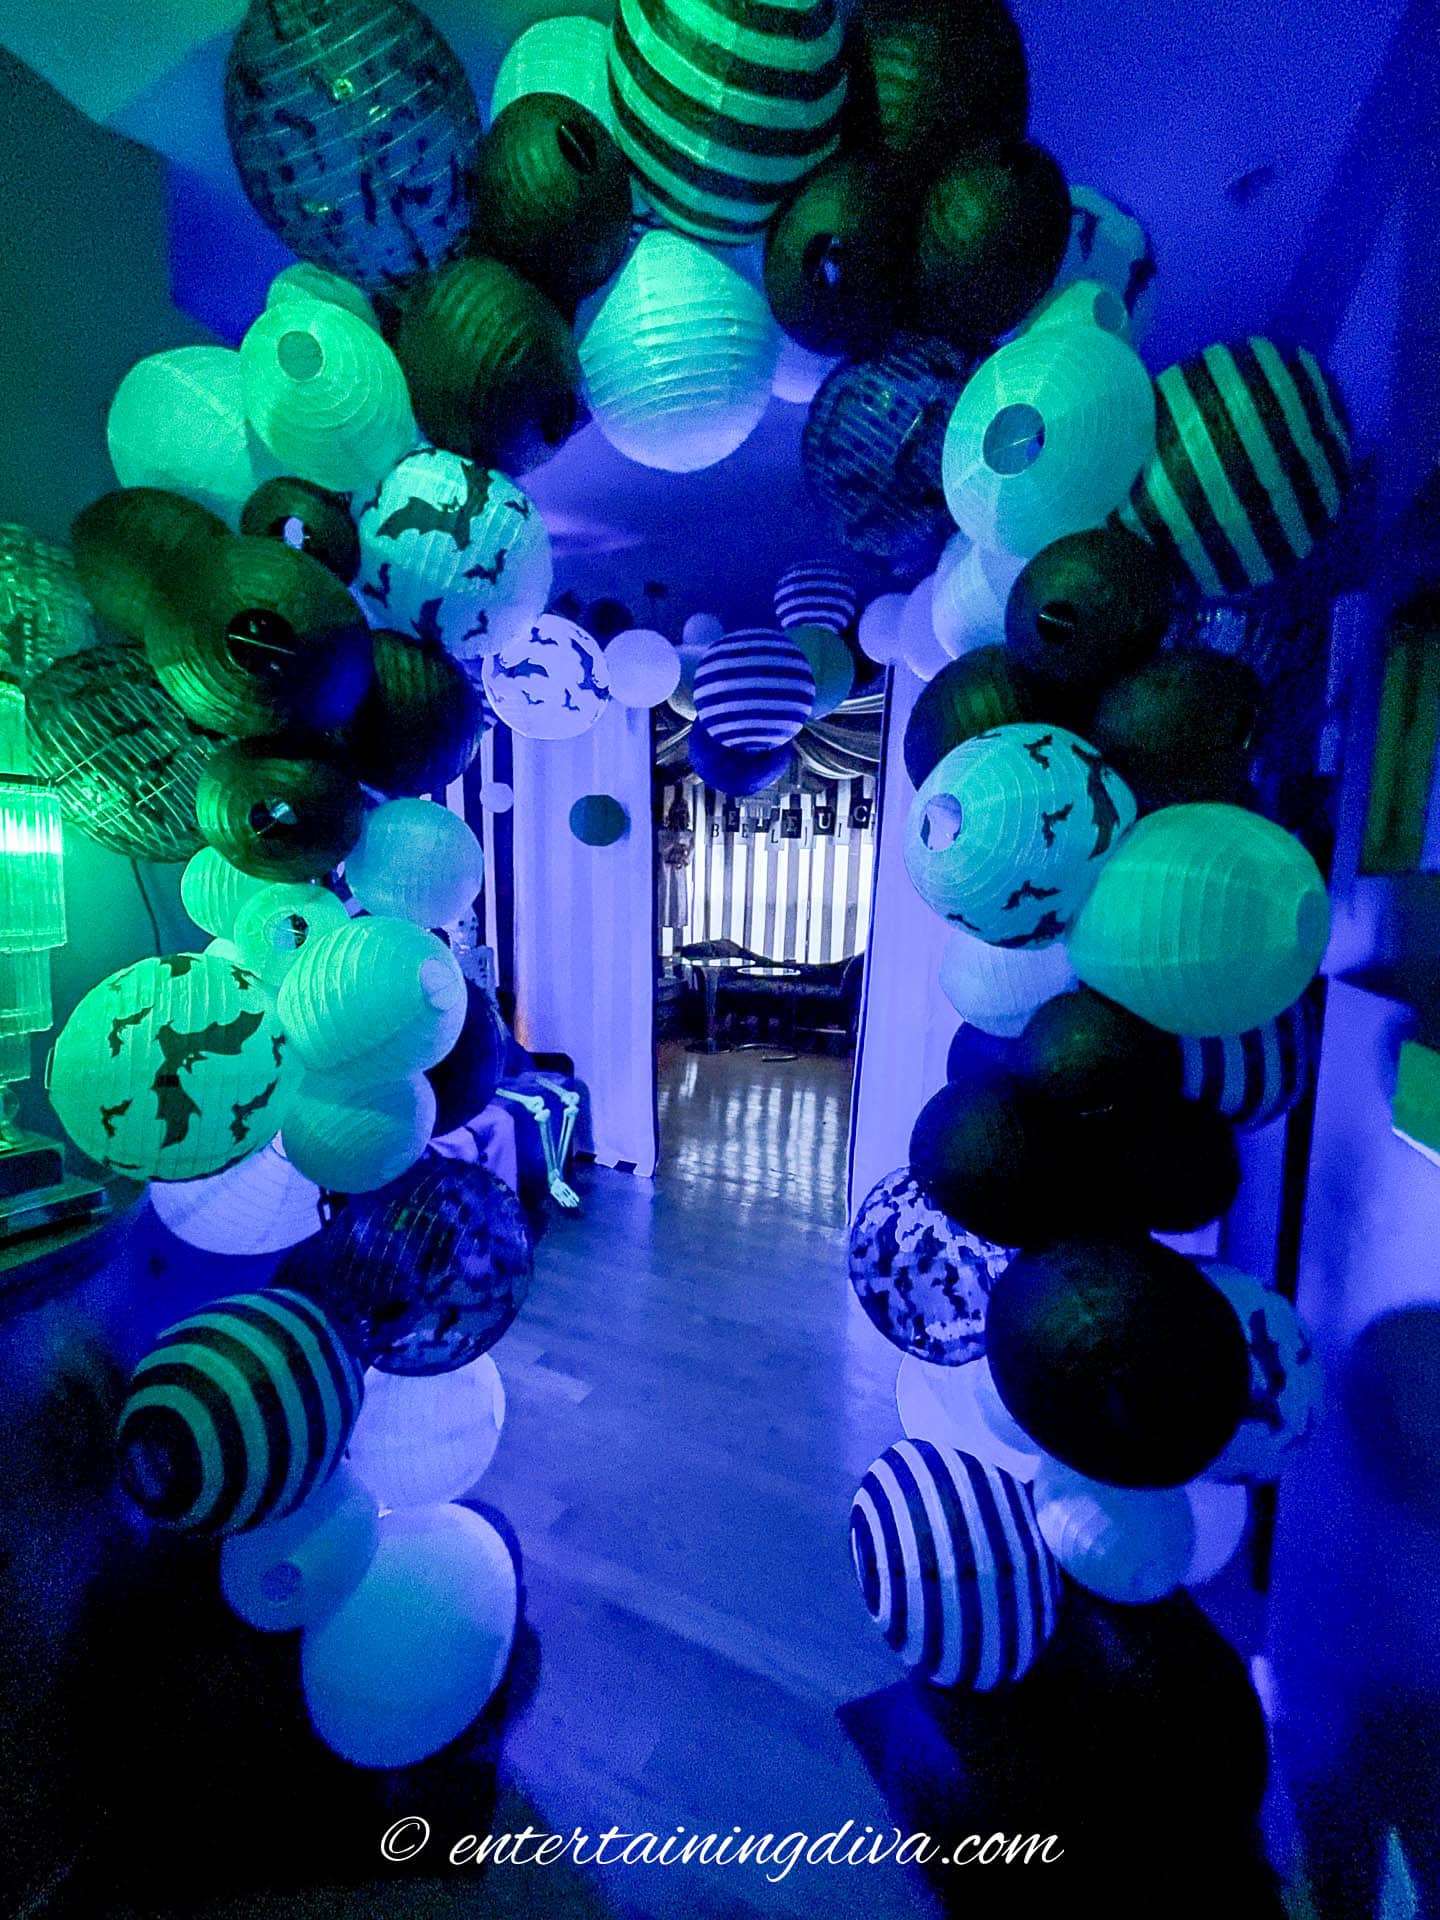
Adding lights around the arch makes it stand out even more.
Thank you so much!!!