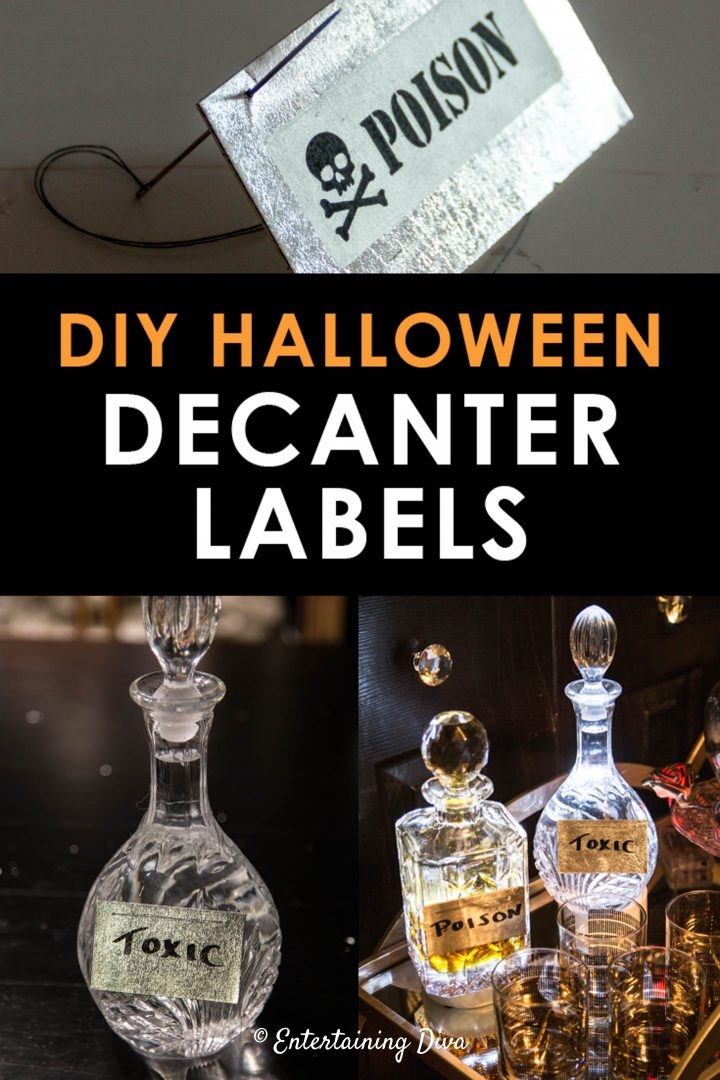
How To Make Elegant DIY Halloween Bottle Labels

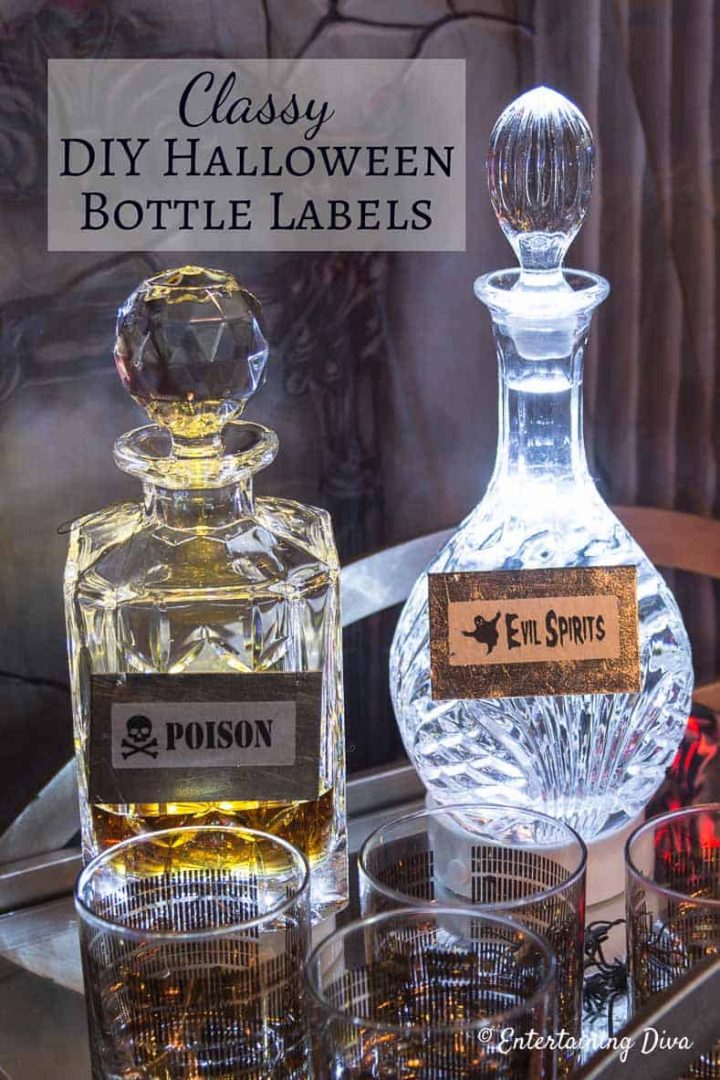
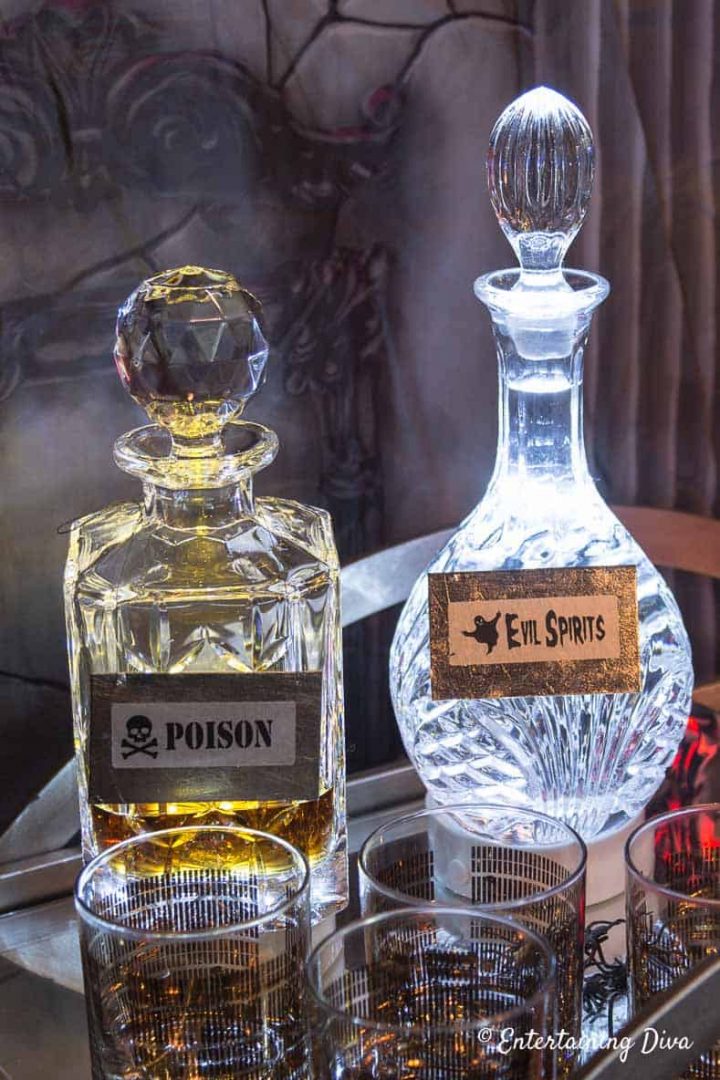
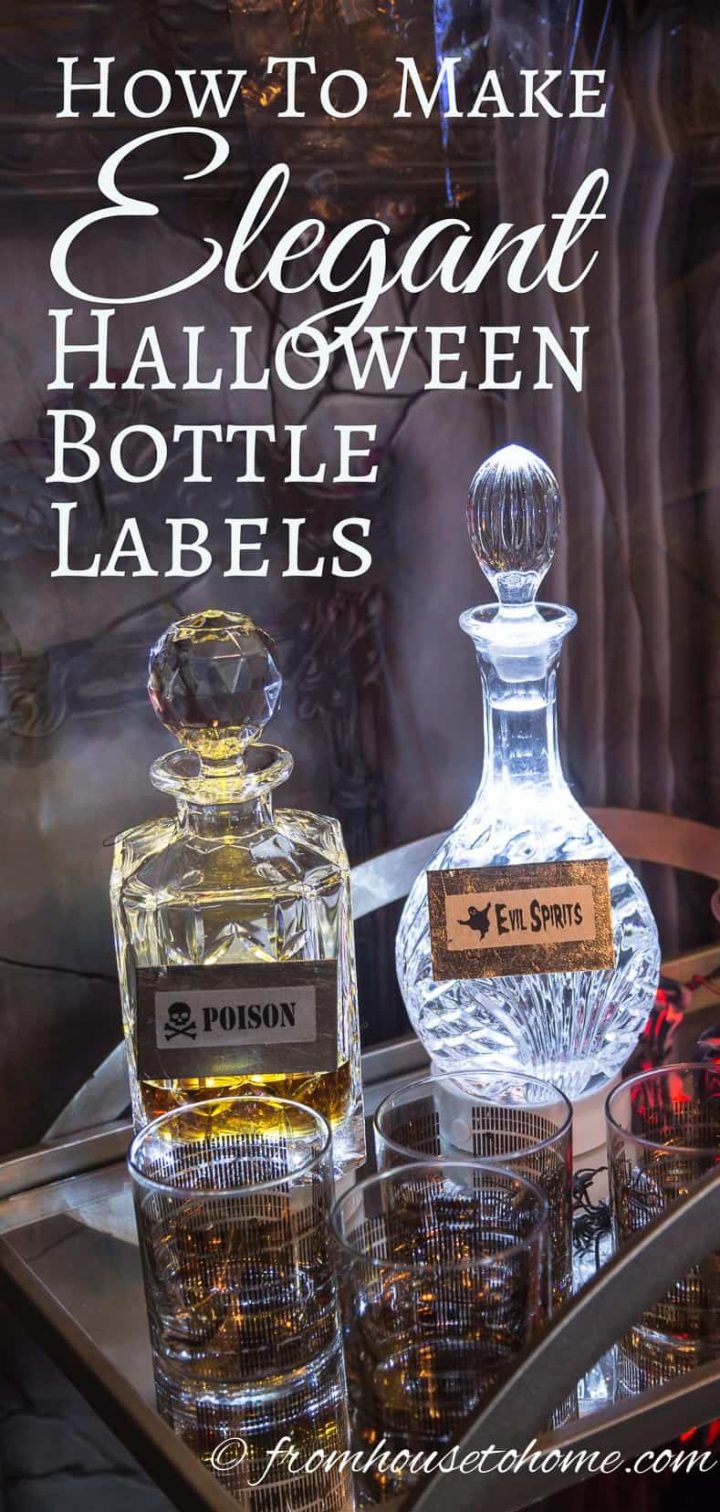


Looking for some Halloween decor that is elegant but still spooky? Learn how to add these easy silver leaf DIY Halloween bottle labels to the decanters on your bar cart.
DIY Halloween Bottle Labels
I know…”elegant” and “Halloween” sometimes sound like they don’t go together.
But it is possible to have the Halloween spirit and not go too over the top…just like these DIY Halloween bottle labels. Other than the wording, you could easily use them any time.
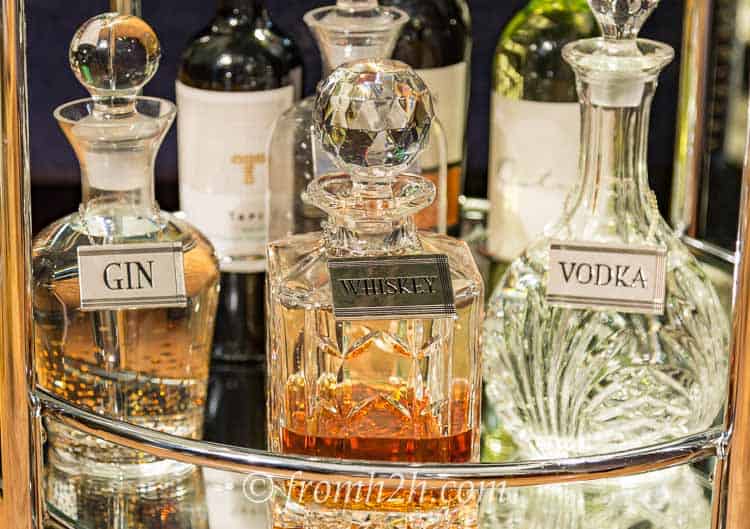
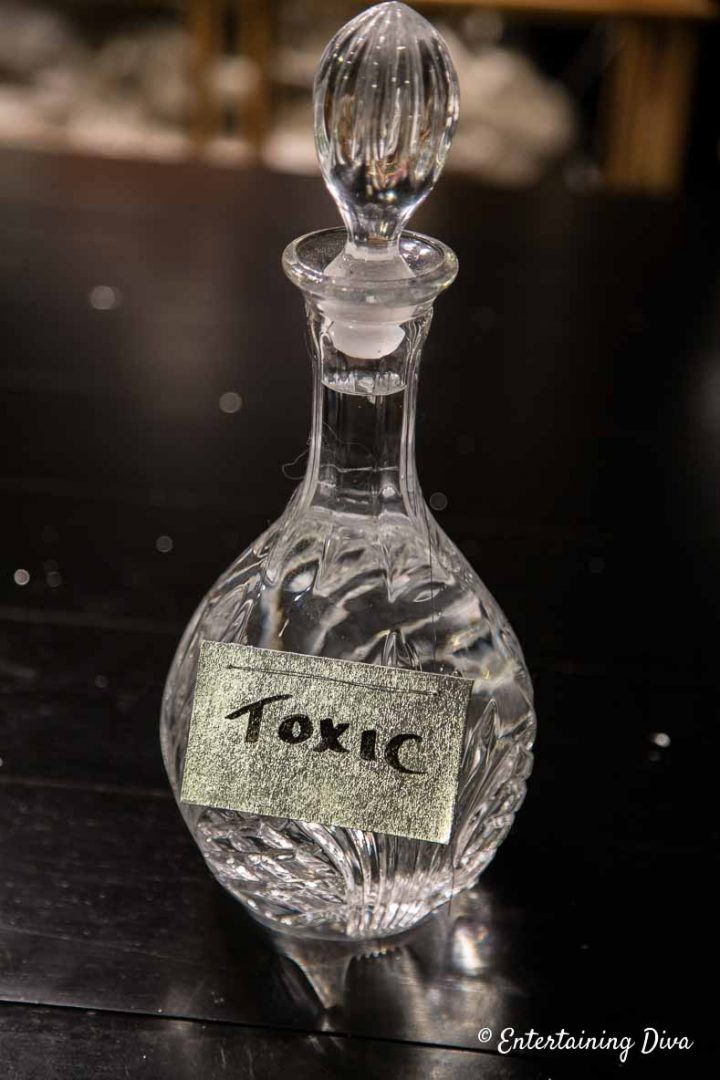
I like to use decanters for pouring drinks, even at my non-Halloween parties. And when you use decanters, you definitely need some labels! My vodka-drinking friends would not be at all happy if I picked up the wrong bottle and poured them gin instead.
For my Halloween party, I wanted to do something that would make the bottles look like they were ready for Halloween, but still keep them looking elegant.
And I didn’t want to stick adhesive labels to the bottles (too much work to get them off).
So I decided to make some really inexpensive and fast but still elegant DIY Halloween bottle labels. Keep reading to find out how.
What You Need
Materials
- Decanters* or Bottles
- Mat Board*
- Faux Silver Leaf*
- Metal Leaf Adhesive*
- Sharpie Marker
- Letter Stencil Set* or Rub-on Transfer Letters* (optional – if you don’t want to write the letters yourself)
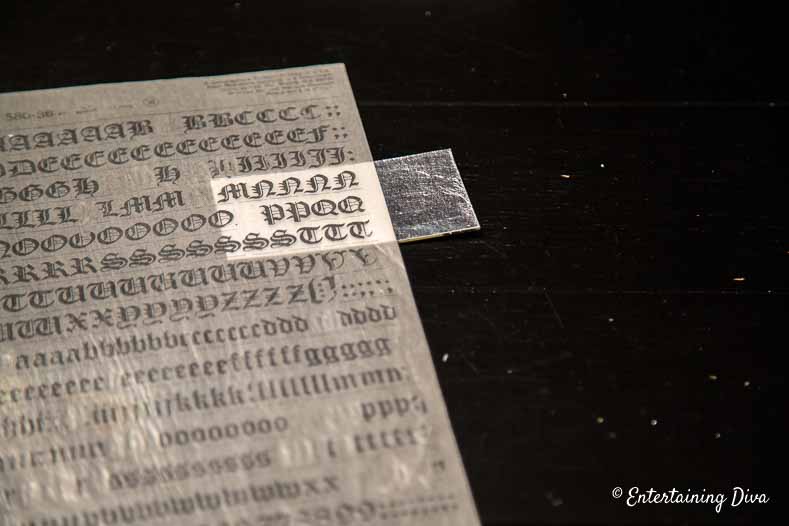
- Clear Address Labels*
- Black Thread
Tools
- Scissors
- Small Craft Paint Brush*
- Sewing Needle
Make The Tag
If you have read any of my recent posts, you know that I have recently found out how easy it is to add metal leaf to things (like my bar and silver-leaf Halloween skull).
Having said that, this is by far the fastest and easiest metal leaf project I have done.
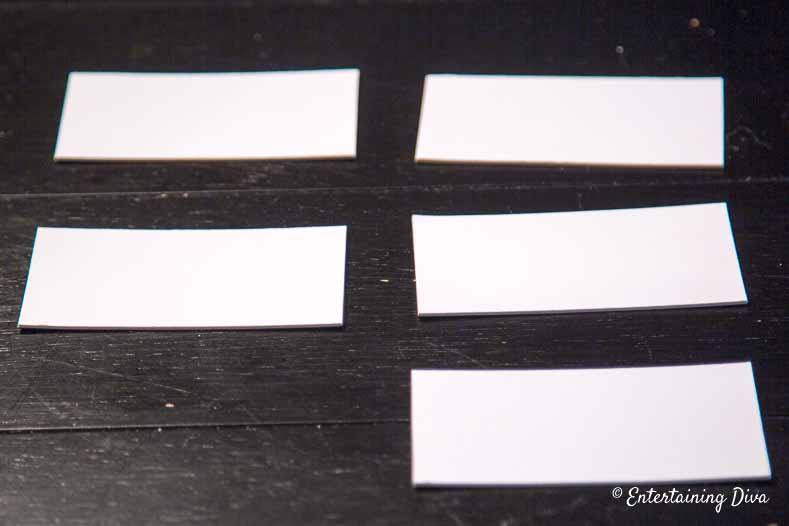
1. Cut the card stock to the size you want (Mine are 2″ x 3½”). You can also use left over business cards.
2. Brush on a thin layer of leaf adhesive.
3. Let it sit for about 10 minutes.
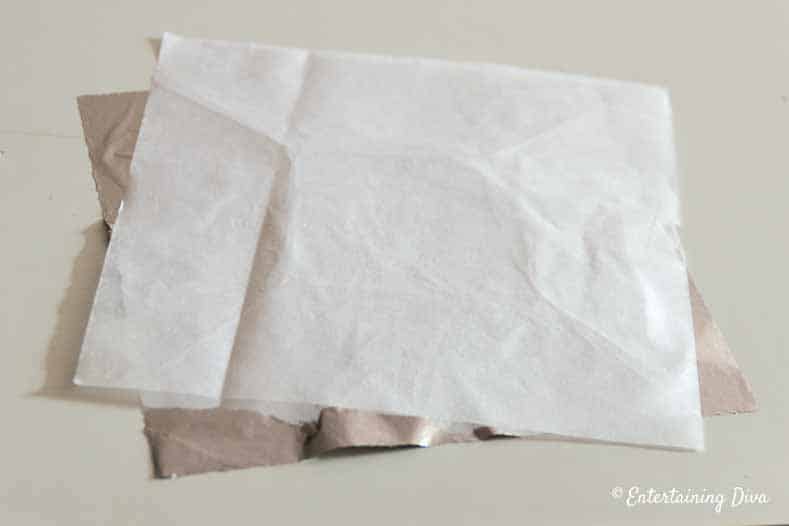
4. Use the tissue paper sheets that come with the silver leaf to lift up one sheet and place it over the adhesive.
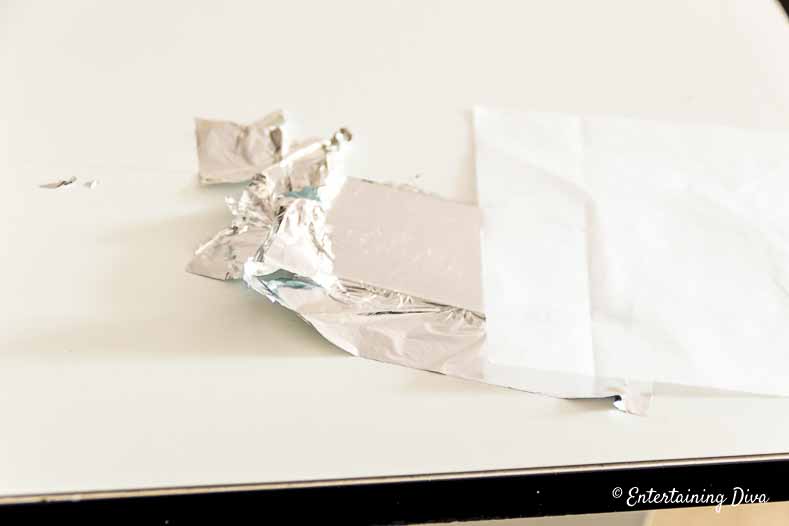
5. Use the tissue paper to gently rub the leaf on to the card. If you press too hard and accidentally remove some of the metal leaf, you can fix it by putting on another layer of adhesive and applying another sheet.
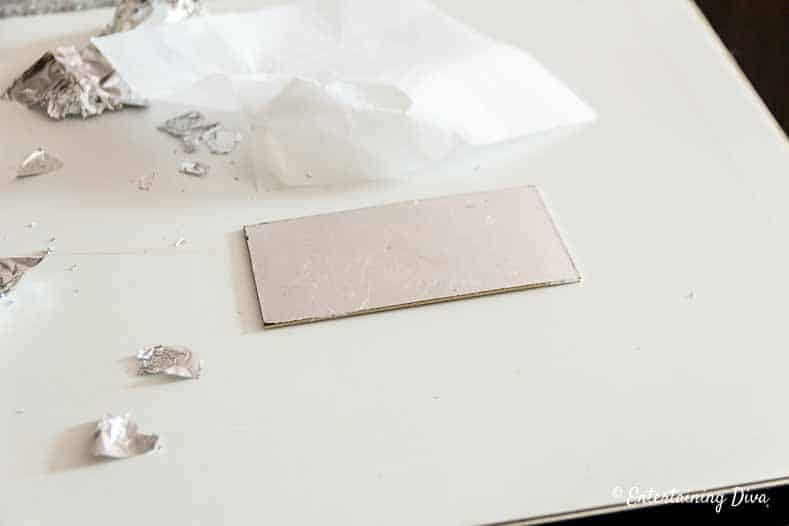
6. Rub or tear off the extra metal leaf from the edges of the card.
Add The Label
There are a lot of options for putting the text on your card. Pick whichever one suits you best.
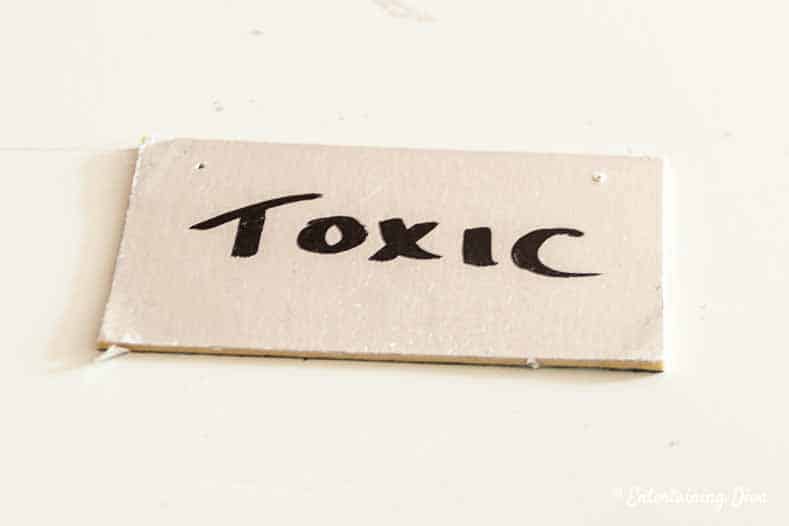
Option 1. Use a Sharpie marker to print free-hand.
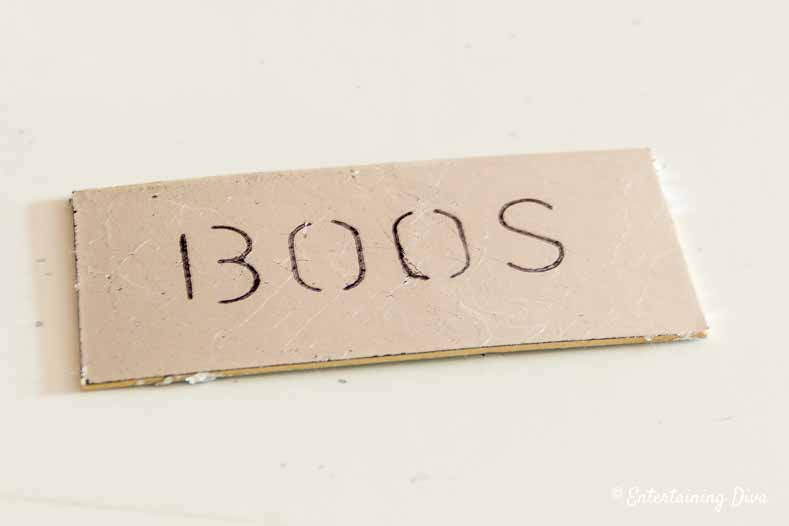
Option 2. Use a letter stencil to trace letters on to the tag with a sharpie. Make sure to get a stencil that is large enough for the sharpie to fit through.
Option 3. Transfer letters from a rub on lettering sheet.
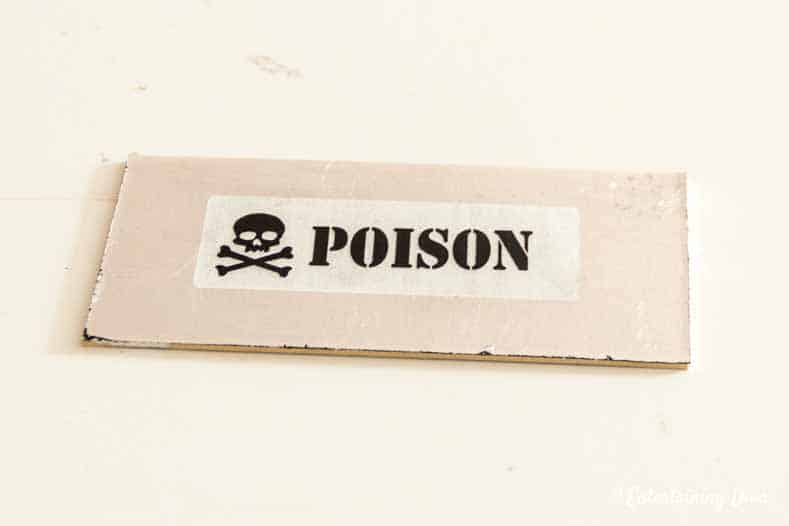
Option 4. Print the text onto a clear adhesive address label and stick it on to the card (this is the one that I went with in the end)…it was the easiest
The great thing is, regardless of which way you do it, if you don’t like the label, you can just glue another sheet of metal leaf over your mistake and start over!
Hang The Tag On The Bottle

1. Cut the thread so that it is long enough to hang around the bottle. I cut mine about 15″ long. It’s better to be too long than too short…you can always make it shorter!
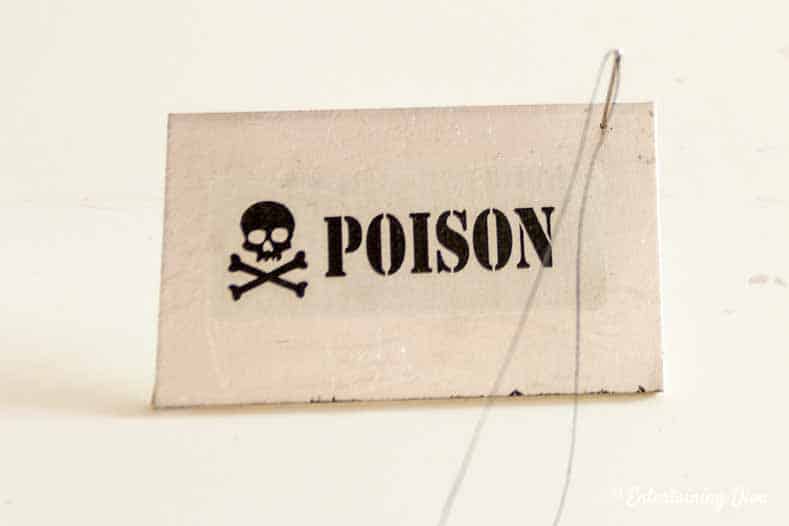
2. Use a needle to pull the thread through the card from the front to the back in one of the top corners. Although you can use any kind of needle, I found that Upholstery Needles were the easiest to use.
3. Push the needle through the card in the other top corner going from the back to the front. This will make the line of thread run across the back of the tag.
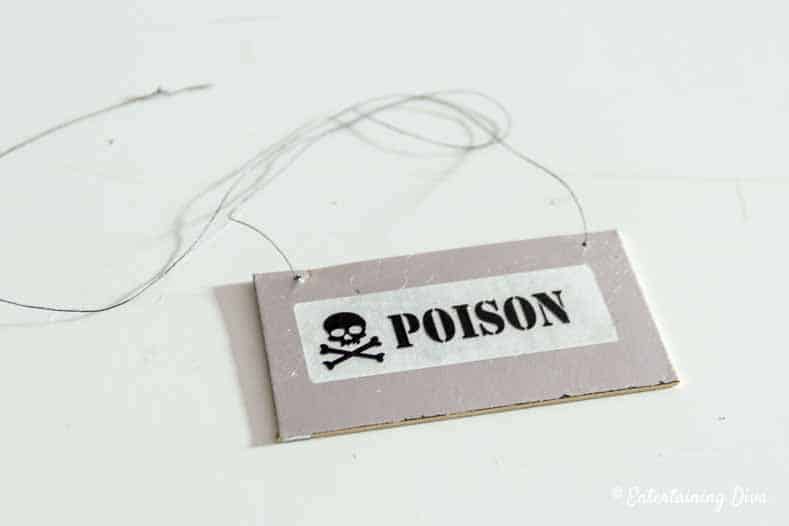
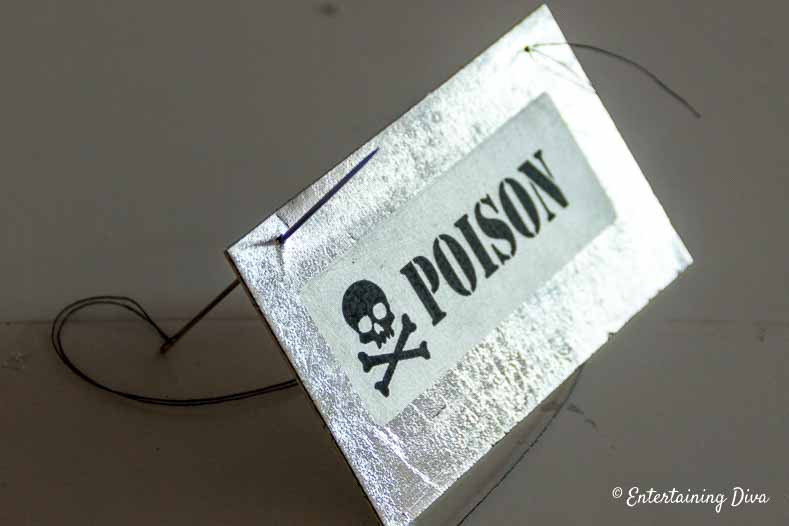
4. Tie the free ends together. Make sure that the loop is large enough to fit over the top of the bottle and have the tag hang down.
5. Hang the tag around the bottle.
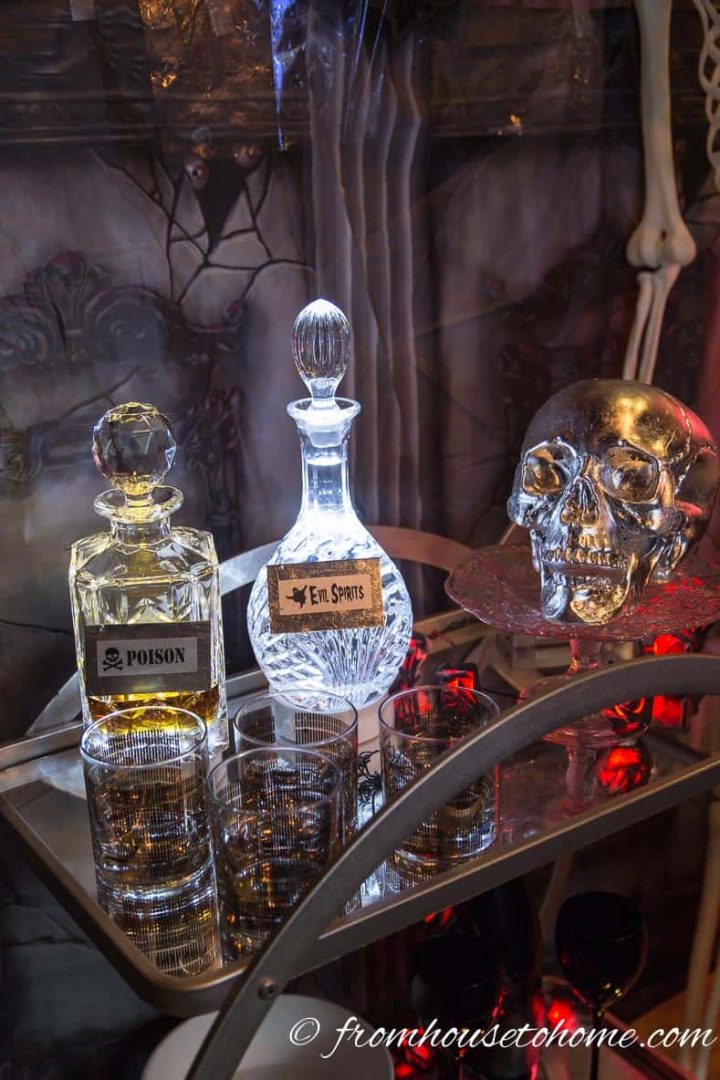
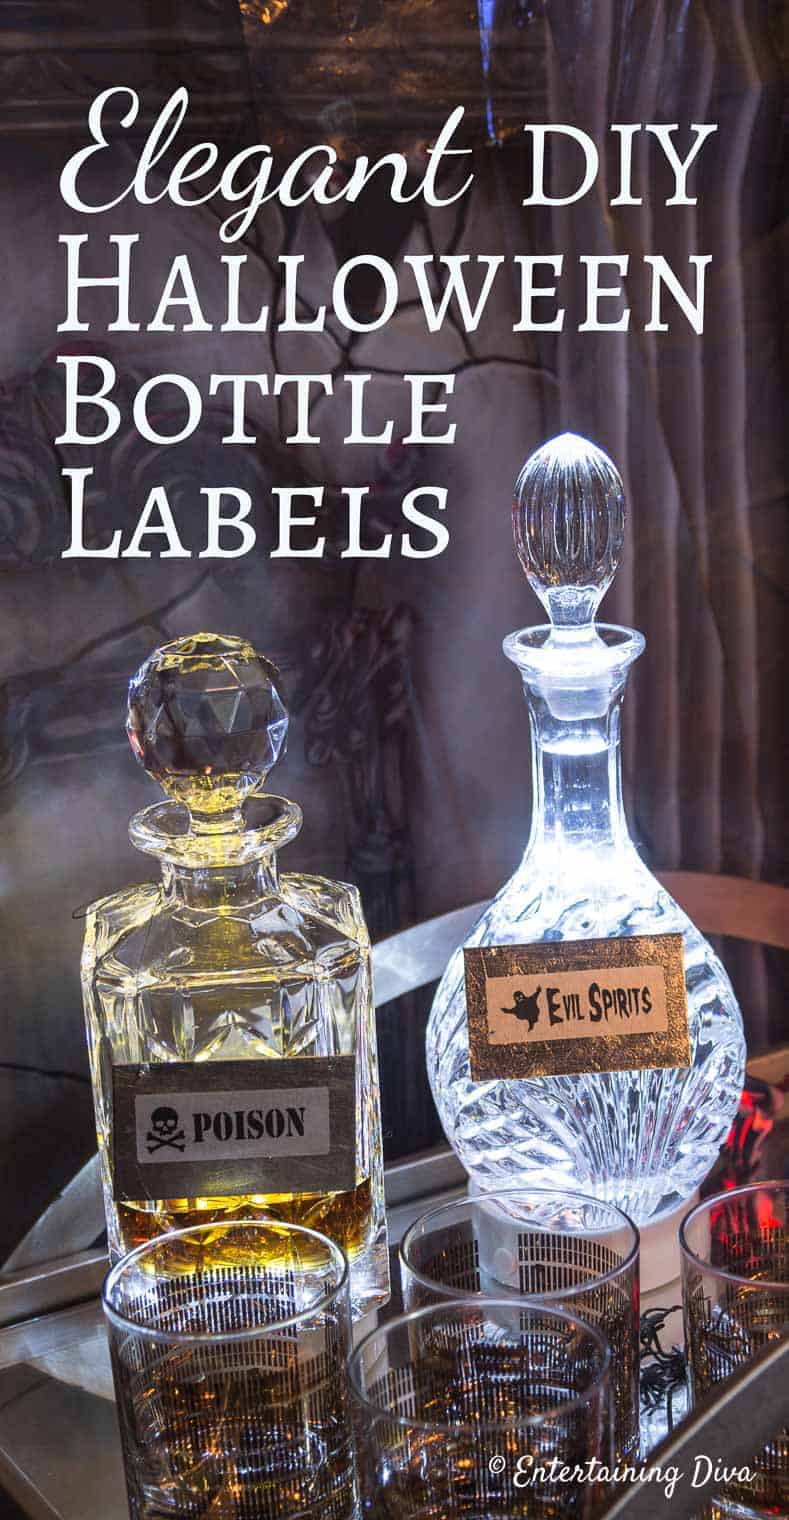
Add The Bottles To Your Bar
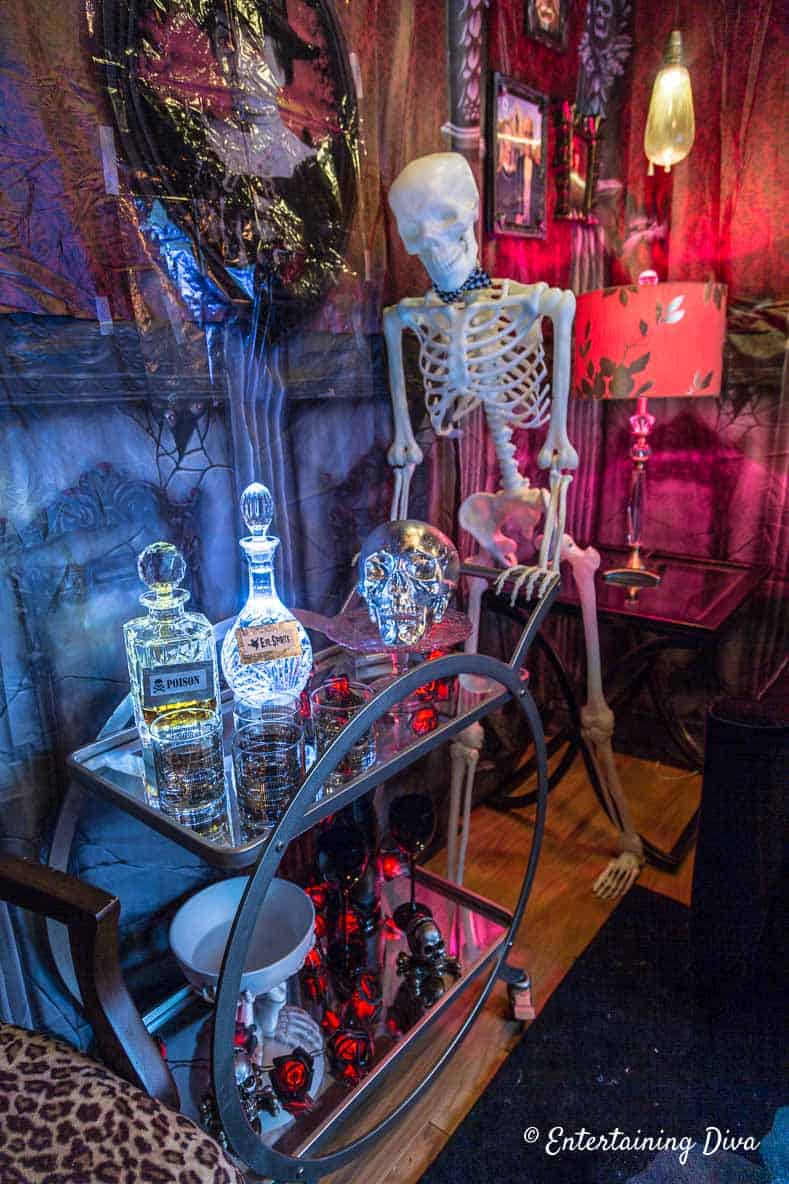
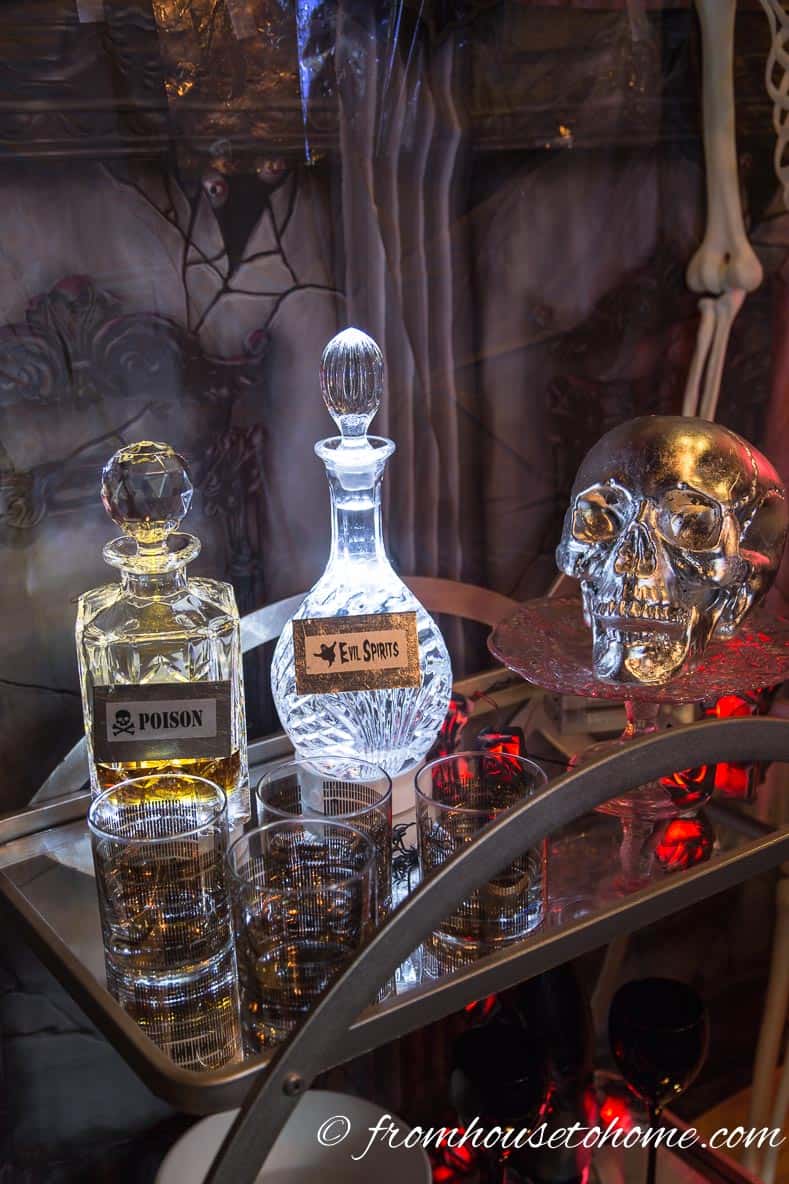
I put mine out on a bar cart with the silver leaf skull I made a couple of weeks ago.

Lighting always adds more drama. To make your bottles really shine, sit them on top of a battery operated up light.
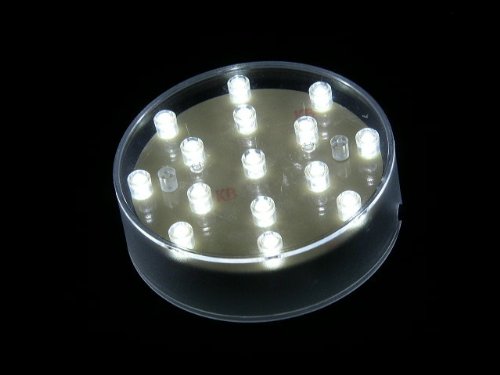
Uplight* from Amazon
These are the kind of uplights that are often used under vases at weddings (like these feather centerpieces), but I like to use them for all kinds of party decor. They’re inexpensive and can be used over and over again.

You might need to make a note of what type of alcohol you have in each bottle since the labels aren’t very descriptive. This gets back to pouring gin in a vodka drinkers glass 🙂
I made a note of what was in each bottle on the back of the label card. That way I just had to turn the card over to double-check.
Now you should have what you need to up your Halloween decor game by creating your own elegant but spooky decanter labels.
Have comments or questions on these DIY Halloween bottle labels? Tell us in the section below.
Pin It So You Don't Forget It!

This post was originally published on October 27, 2016 but was updated with new content on November 1, 2023.