
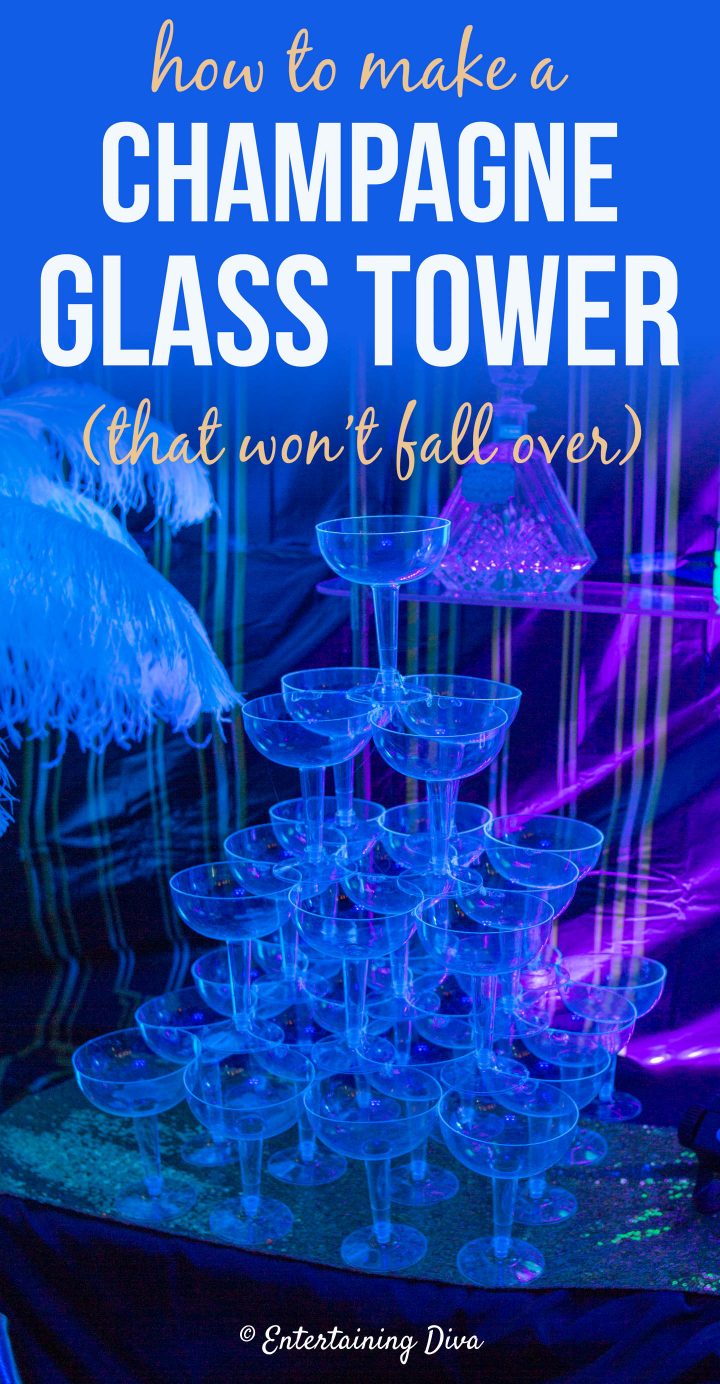
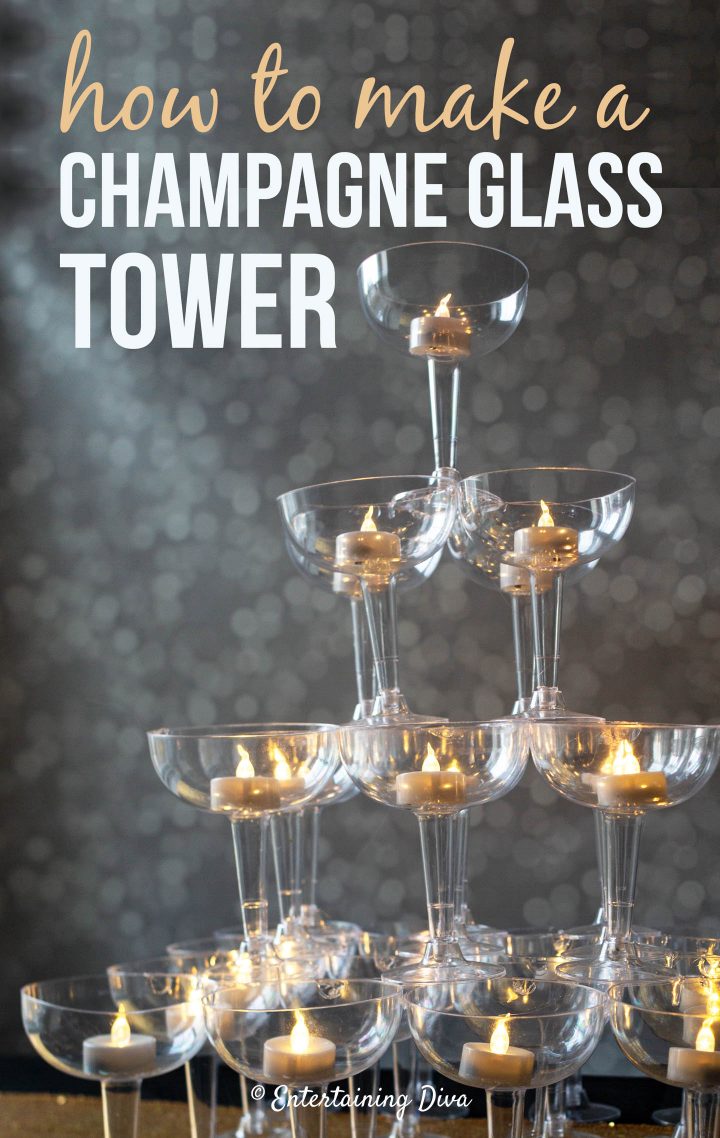
How To Make A Champagne Glass Tower With Plastic Glasses
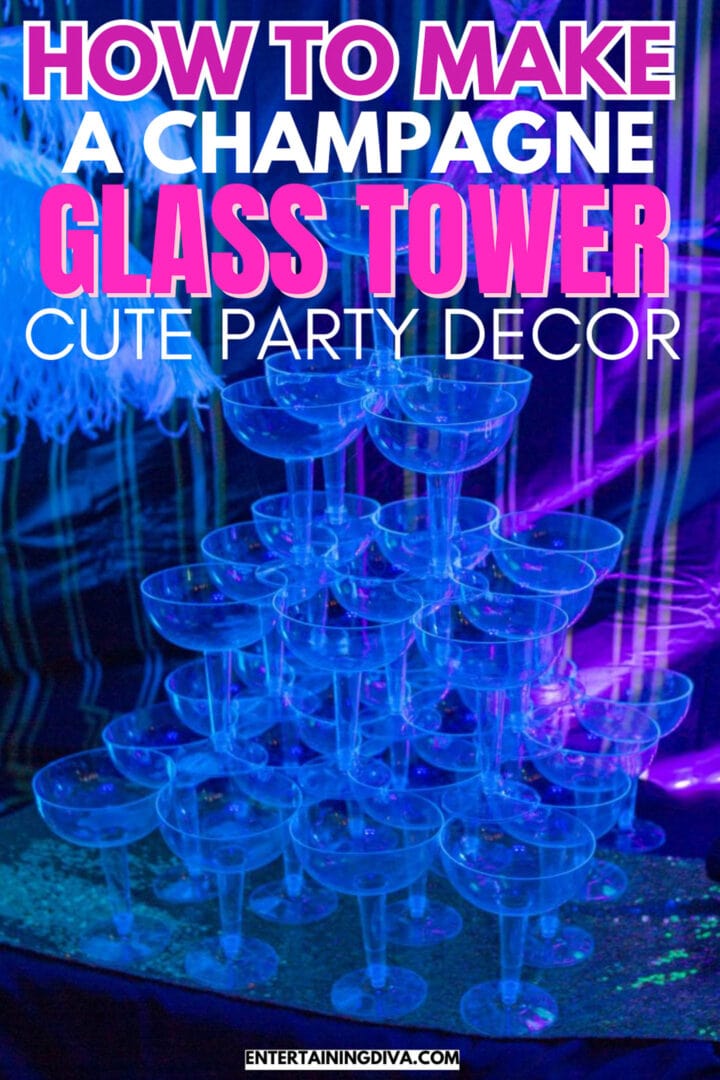
This DIY Champagne glass tower is a centerpiece that makes a statement as part of your Great Gatsby party or roaring 20’s event. It’s made from plastic coupe glasses so you don’t have to worry about someone knocking it over and breaking all of the glasses.
When I was putting together my Great Gatsby party decor, I loved the idea of making a champagne glass tower.
Ideally, I would actually serve the champagne that way…pour it in the top glass and have it trickle down to all the other glasses.
But I didn’t think there was any possible way that would actually work. I had images of bumping into the table and knocking all the coupe glasses over with a crash. Not to mention champagne all over the place.
So I decided instead to make the tower of coupe glasses using plastic ones and use it as a centerpiece instead of a serving station.
Which turned out to be quite easy to make and no possibility of a big mess.
You can watch the video for how to make a DIY Champagne glass tower:
Or read all of the details below.
Supplies
- 30 plastic champagne glasses* – this makes a 4-tier tower. If you want to go to 5 tiers, you would need 55 glasses. And 6 tiers would require 91 glasses.
- Low-heat glue gun
- (optional) Flame-less tealight candles*
How To Make A Champagne Glass Tower
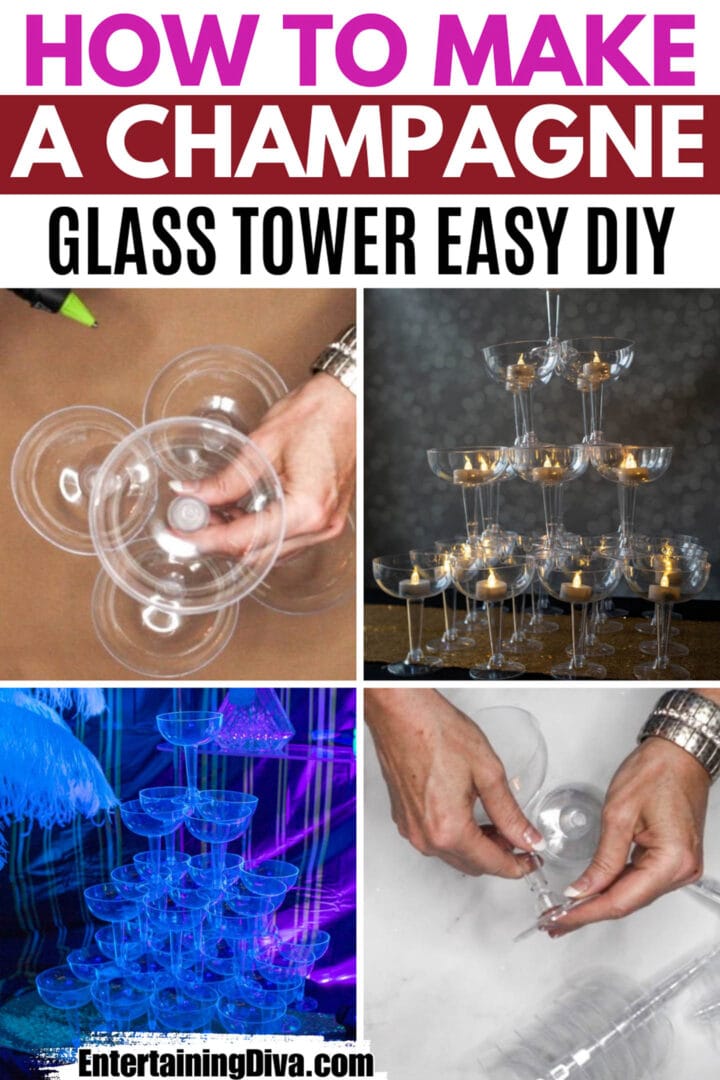
1 | Put The Glasses Together
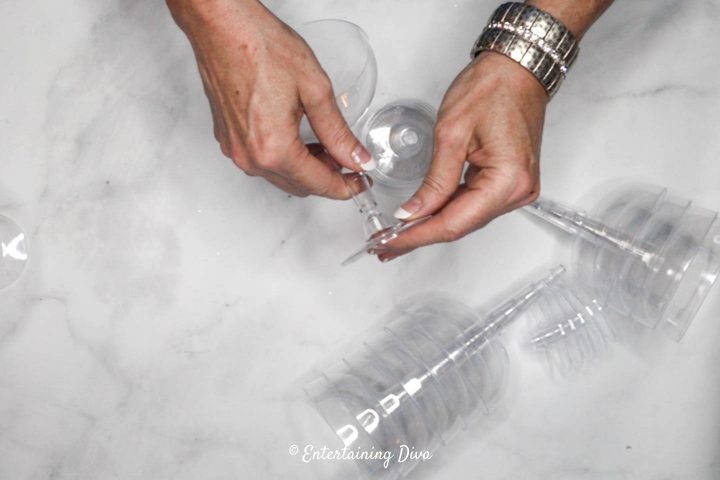
The first step to making your champagne glass tower is to put the plastic coupe glasses together.
You might want to use a drop of hot glue to keep them together, since the bases tend to fall off pretty easily.
Then we’re going to put the tower together in layers.
2 | Make The Top Layer
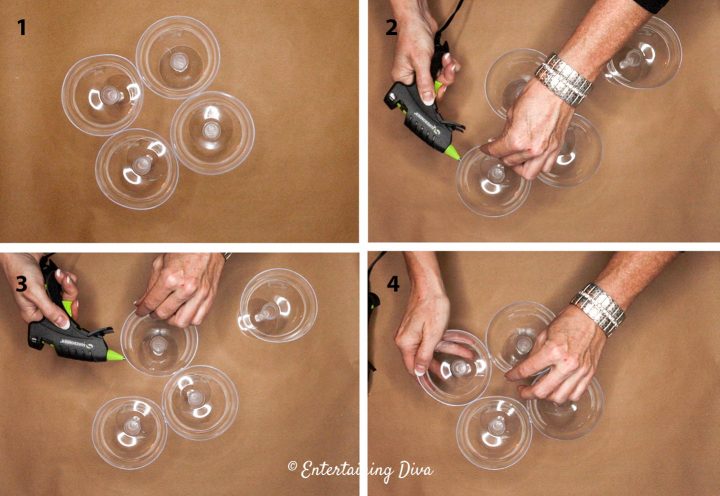
Start by grouping 4 champagne glasses together into a square.
Use hot glue to join the top edges of the glasses together.
Add hot glue around the top edges of the martini glasses where the top glass will go.

Add one glass on top of those 4 glasses so that it’s centered in the middle of them.
Put this layer aside.
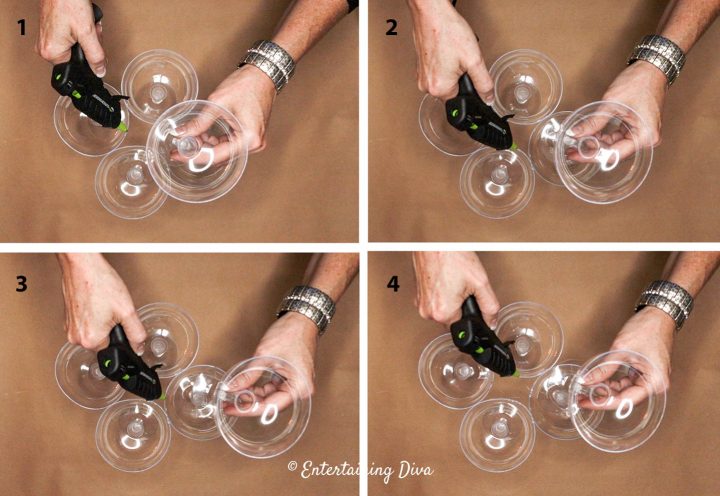
3 | Make The Second Layer
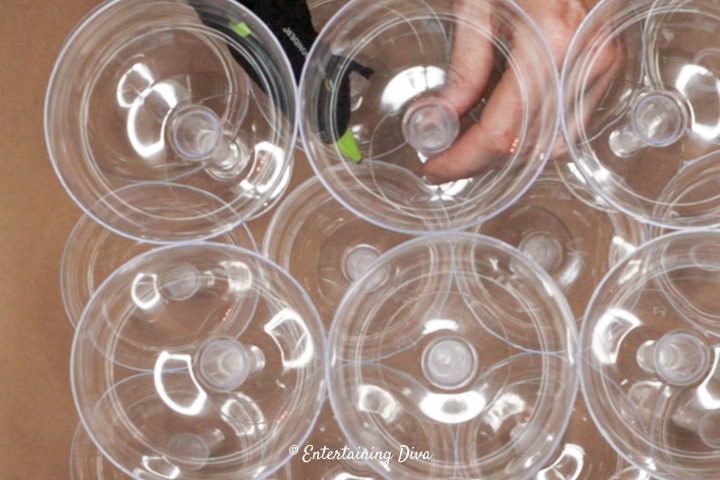
For the next layer, we’re going to join nine champagne glasses together.
Group them into a square with 3 glasses on each side.
Once again, use some hot glue to join each of the sides together.
Put this layer aside.
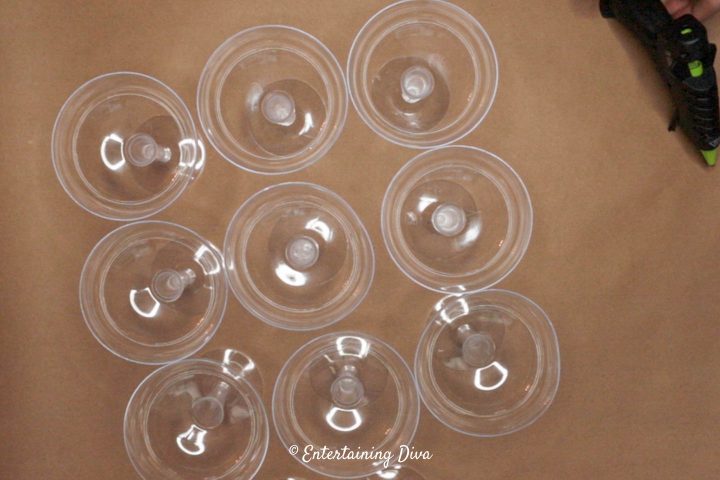
4 | Make Additional Layers
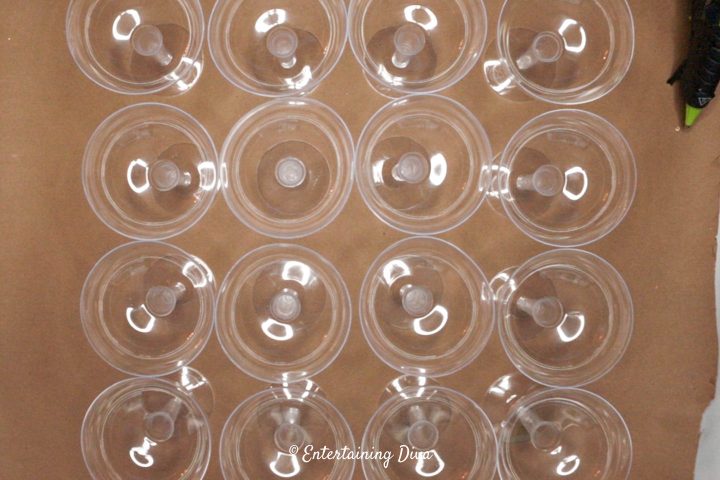
The third layer will need 16 glasses.
Make them into a square with 4 glasses on each side.
Use the hot glue to join the top sides of the glasses together.
I stopped my DIY champagne glass tower here because my table only had room for one this size.
But you can continue to create more layers if you want a bigger one. Just make each square bigger by one more glass on each side. (ie. the next layer would be 5 x 5 or 25 glasses, and the following one would be 6 x 6 requiring 36 glasses, etc.)
5 | Put The Layers Together
Stack each layer on top of the previous layer.
Then glue the top of the glasses in one layer to the bottom of the glasses on the next layer.

If you have a large champagne glass tower, you may want to put it on a large board or tray to make it easier to move.
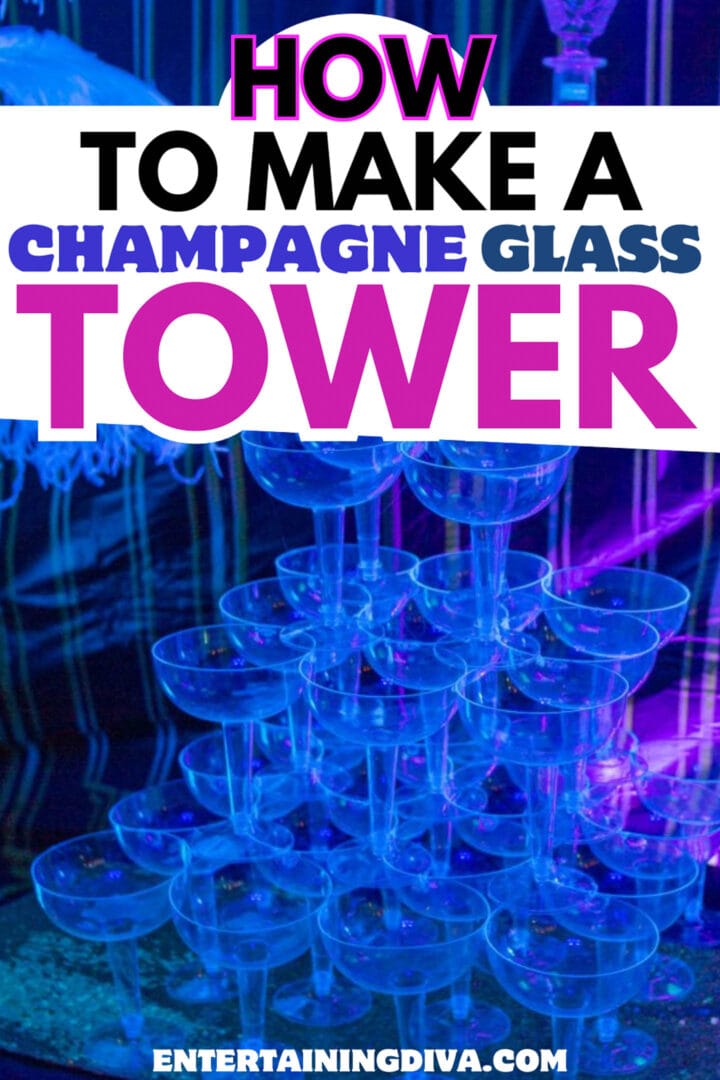
The Finished Champagne Glass Tower
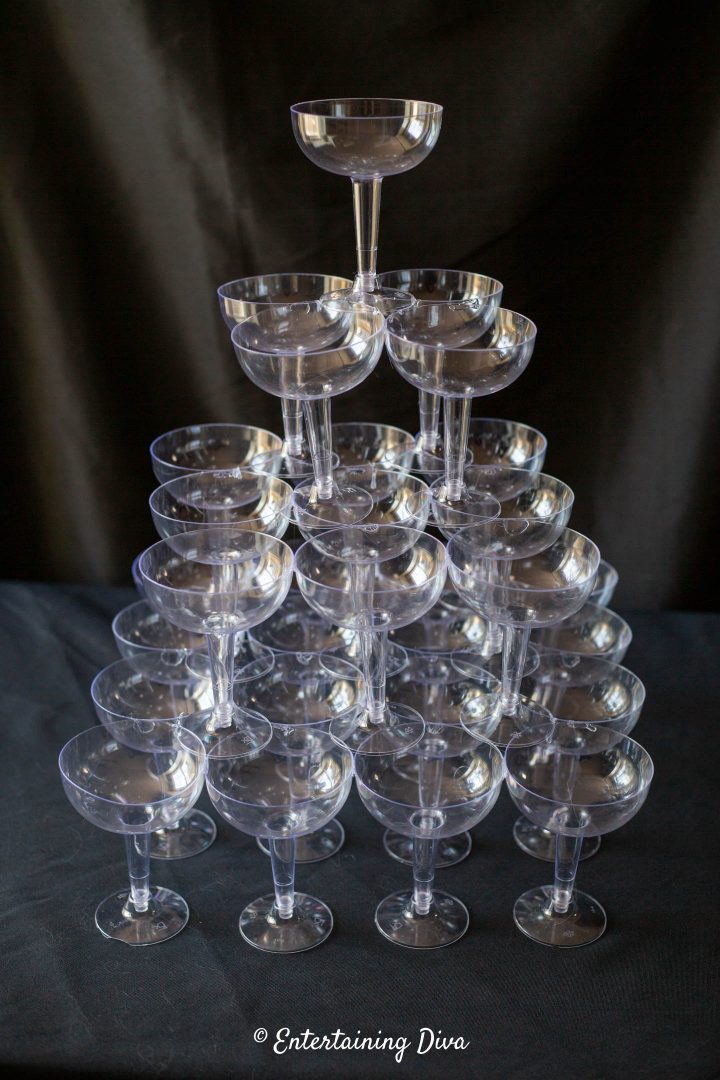
And that’s it! You’re finished.
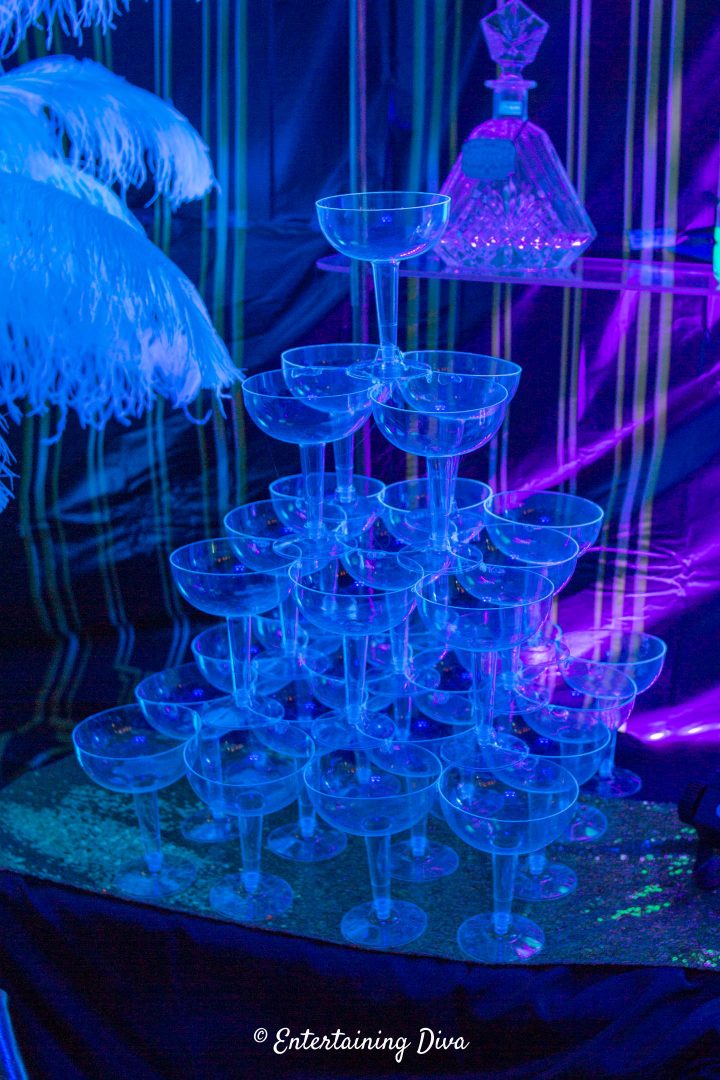
The glasses look really pretty cool under black light (like I had at my Great Gatsby party).
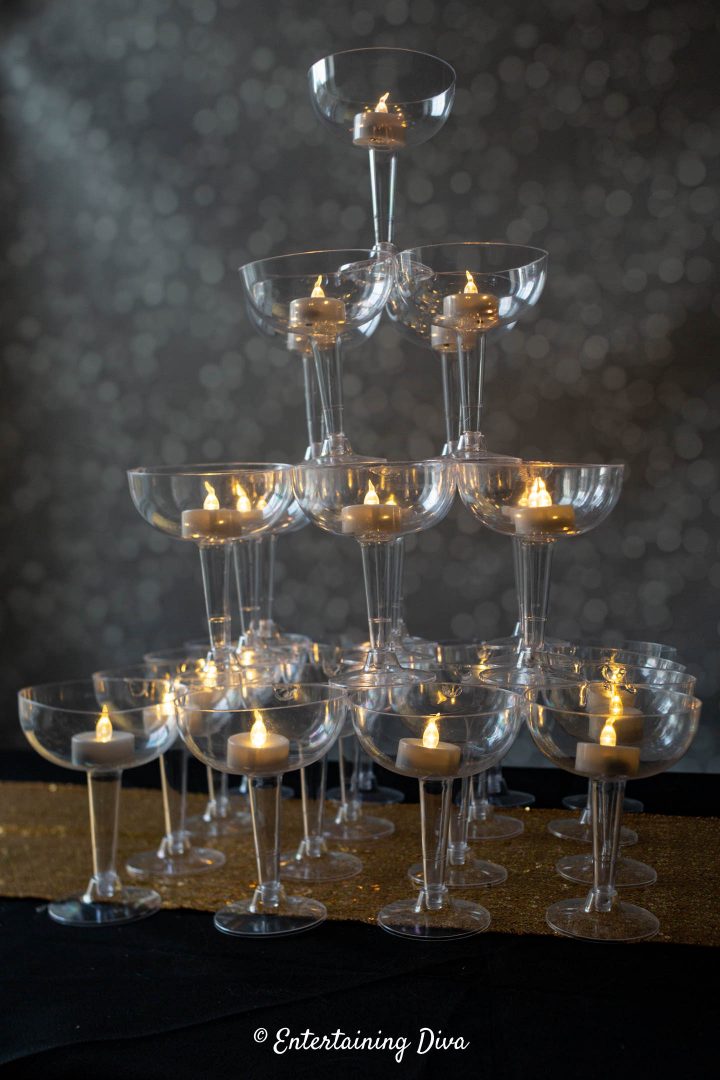
You could also use it as candle holder by filling the glasses with flame-less tealights.
However you use it, a DIY champagne glass tower centerpiece will make a statement for your party decor.
Other Party Centerpieces You Might Like
- How To Make A Glam Gatsby DIY Feather Centerpiece
- 8 Elegant DIY Great Gatsby Centerpieces
- DIY Wine Bottle Centerpieces
Have comments or questions about our DIY champagne glass tower? Tell us in the section below.
Pin It So You Don't Forget It!
This post was originally published on February 1, 2020 but was updated with new content on December 19, 2023.