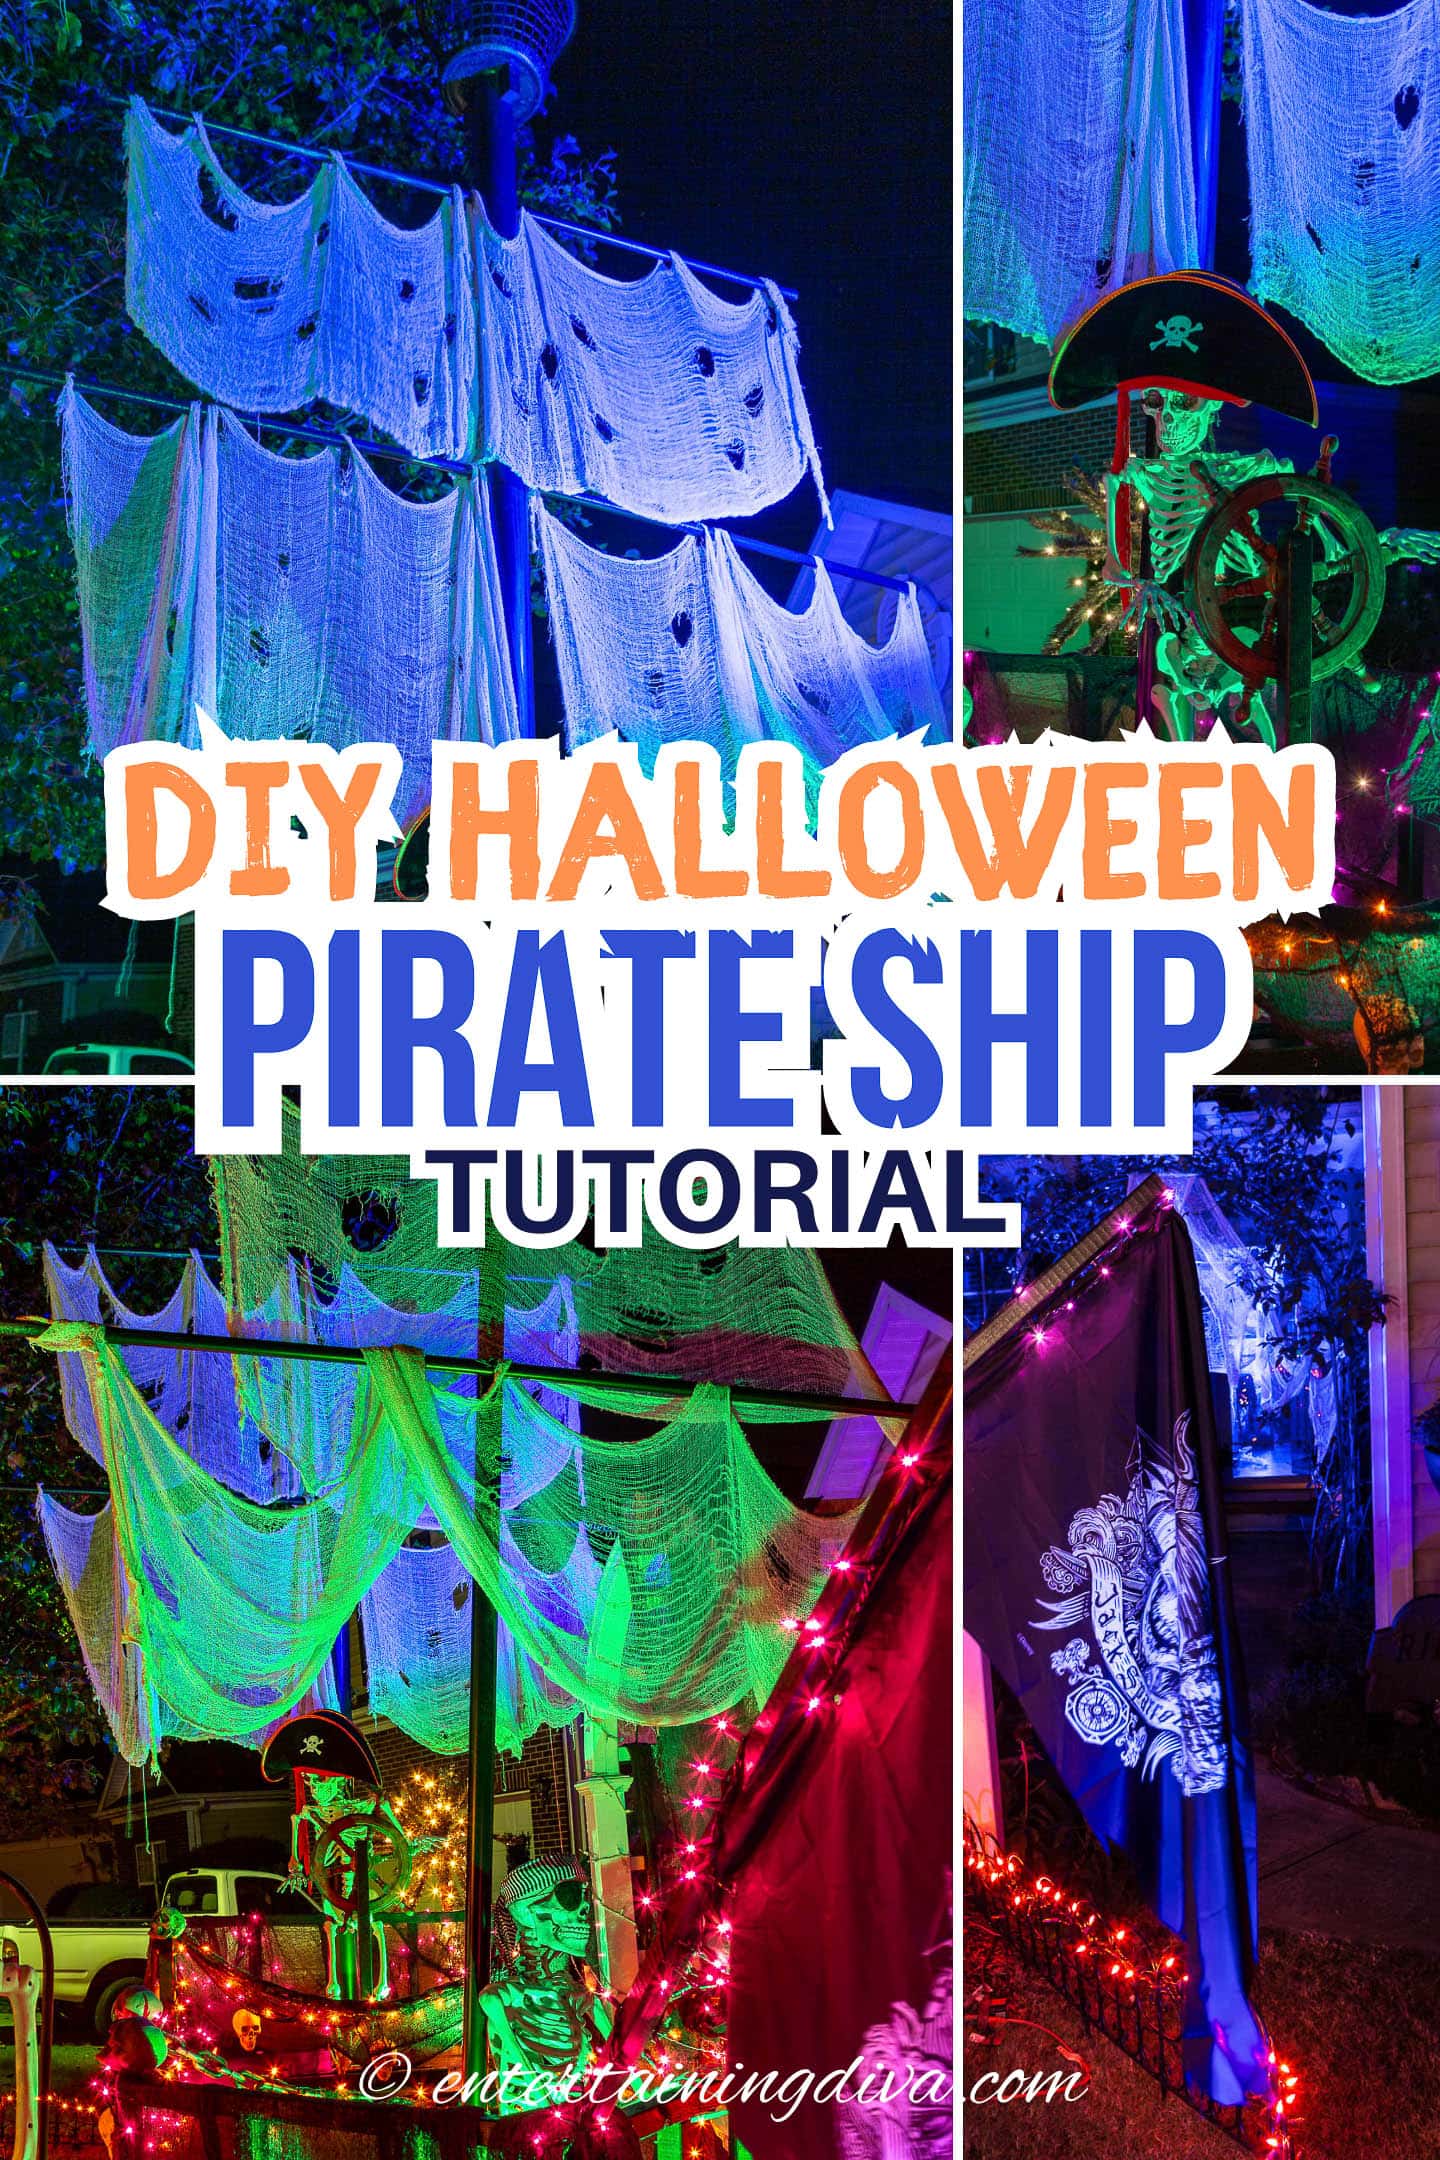
Transform your yard into a spooky seafaring adventure with this DIY pirate ship Halloween decor tutorial, featuring step-by-step instructions for creating eerie sails, weathered wood effects, and ghostly pirate accents. Perfect for adding a touch of haunted maritime flair to your Halloween festivities.

Every Halloween, I transform my yard into a spooky display to go with my annual Halloween party.
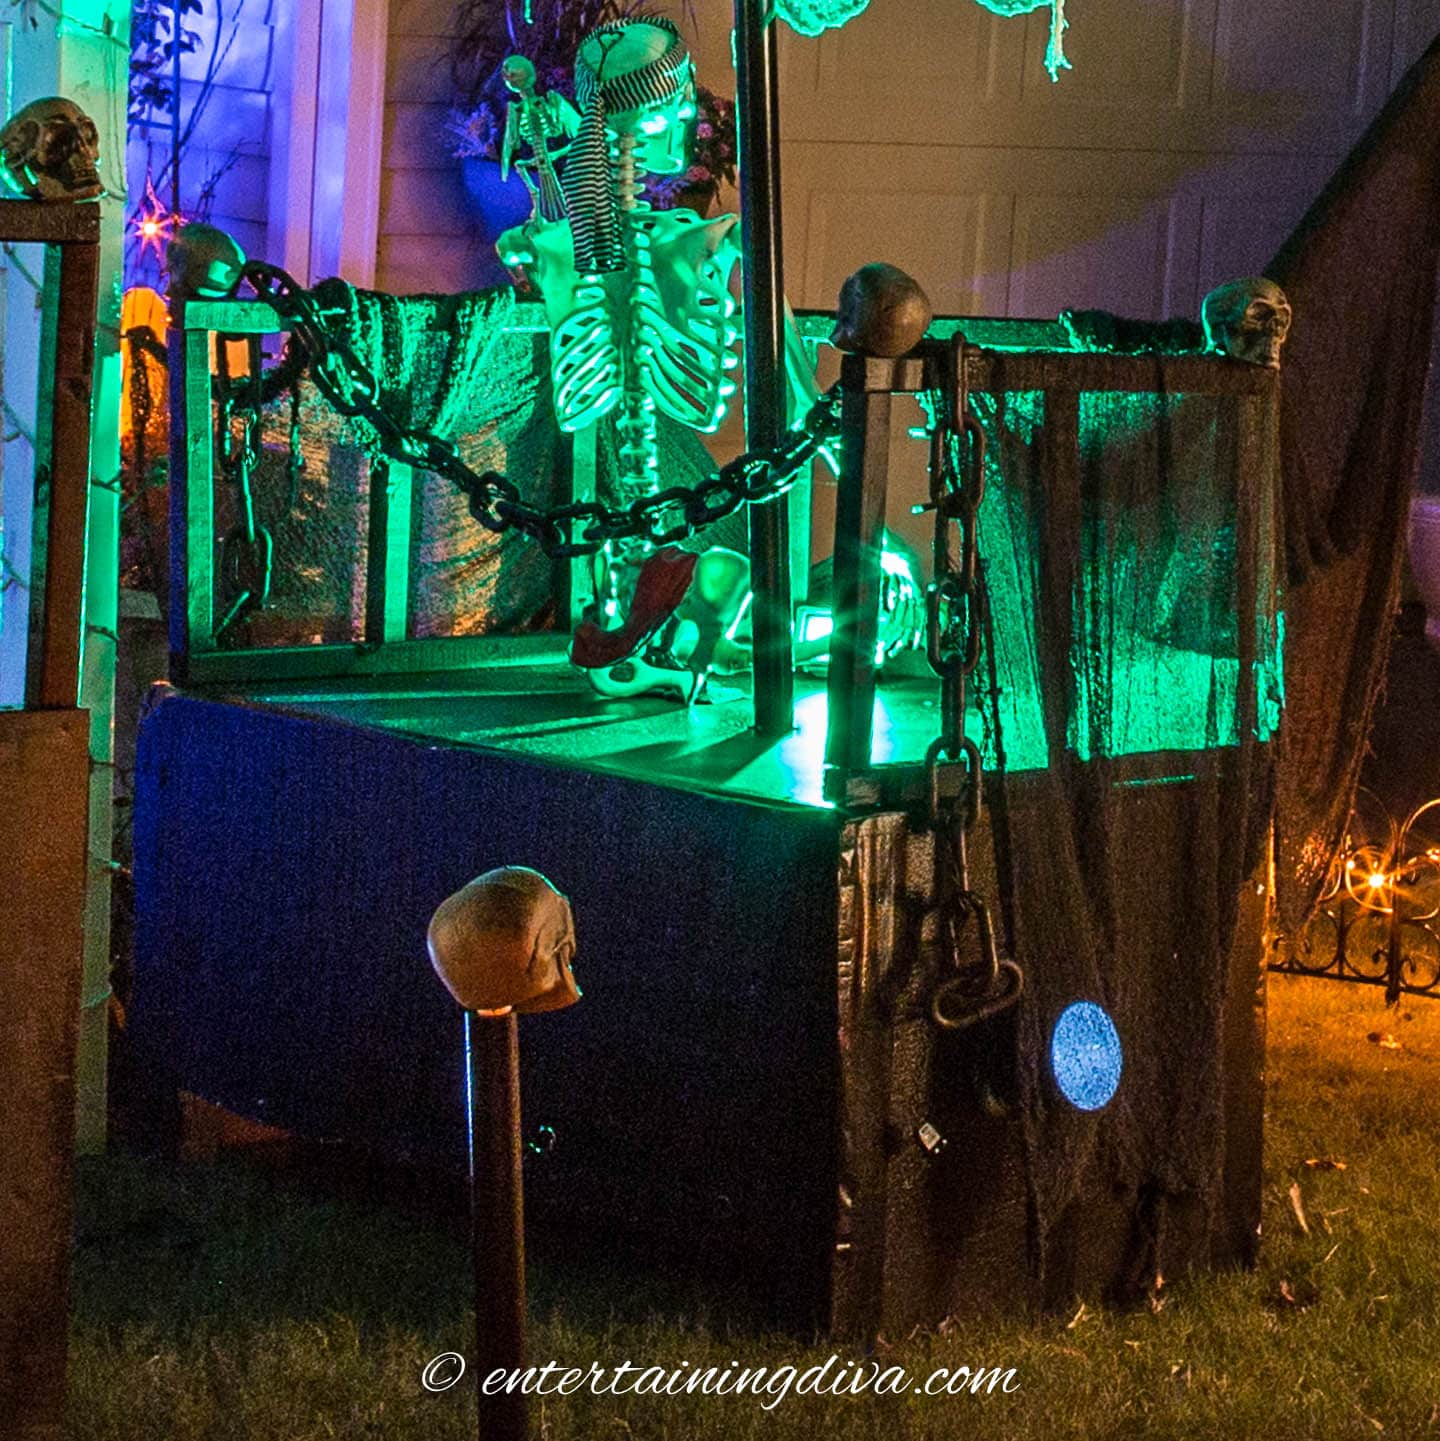
So when I decided to do a Pirates of the Caribbean theme, I figured my thrilling pirate adventure wouldn’t be complete without a massive DIY pirate ship that the kids could walk through.
You can buy pirate ships (like this one*) but I wanted it to be even bigger, so I decided to make my own.
Putting this pirate ship Halloween decor together does take a bit of work, but I think it was worth it.
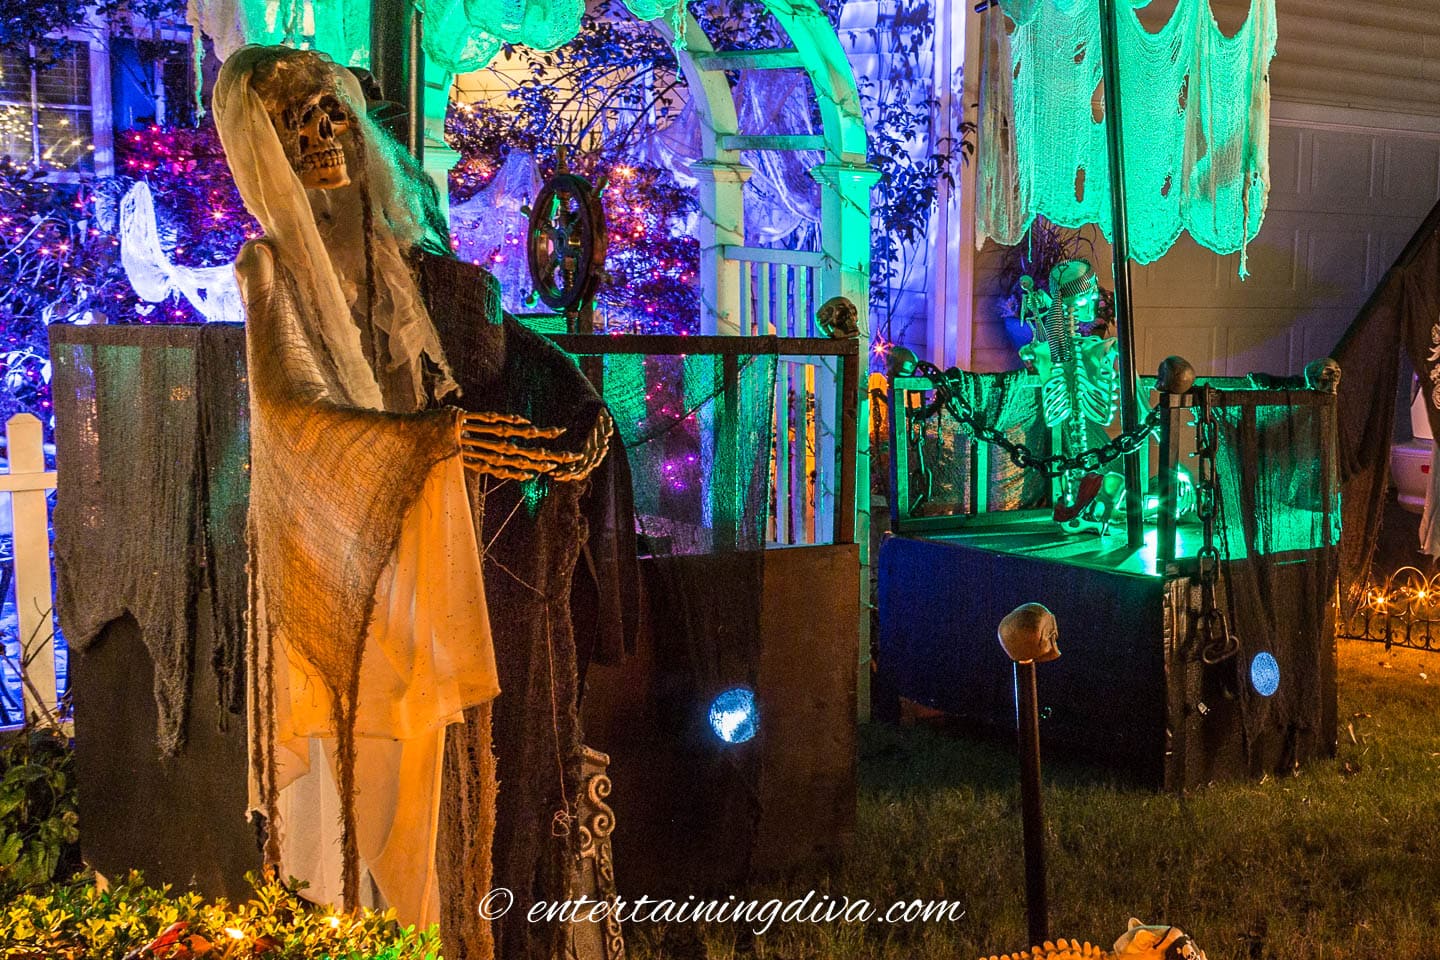
You could see the mast with its ghostly sails from all the way down the street.
And the kids loved it! (It’s been a few years now since I created this and I still get asked if I’m going to be bringing the pirate ship back).
So in case you’re looking to create a pirate ship statement for your own outdoor Halloween display, here’s the step-by-step tutorial.
Supplies
Materials:
- 1 sheet 4′ x 8′ plywood – I used regular indoor plywood for this. But if you’re going to be re-using this prop for multiple years or keeping it outside for a long period of time, outdoor plywood would be a better choice.
- 4 sheets of 4′ x 8′ x 1″ styrofoam foam board insulation – If you don’t mind piecing the styrofoam together to cover the frame of the ship, you can get away with 1 less sheet.
- 28 – 2″ x 2″ x 8′ boards
- 2-inch wood screws
- 2-inch duct tape – We’ll be using this to tape over the seams. So you can use any type of wide tape as long as it’s really sticky.
- black latex paint – Do not use spray paint since it will eat into the styrofoam. If you want to do more of a ghost pirate ship, you might want to use a light grey or white which will show up better at night.
- 2 large PVC pipes – 4-inch x 12-foot
- 4 thinner PVC pipes – 3/4-inch x 8-foot
- picture wire
- Round laundry hamper
- heavy-duty umbrella base or 2 pieces of 1/2-inch x 4′ rebar – We will be using this to keep the bottom of the mast from moving. I used the umbrella base which worked really well, but if you don’t already have one, the rebar is cheaper.
- 4 sheets of white creepy cloth
- 2 flood lights – I use these LED flood lights that you can change the color on with a remote. That way you can re-use them every year for different displays.
- Steering wheel
- 4″ PVC pipe and a strobe light
- Jack Sparrow flag
Tools:
- measuring tape
- 4-foot ruler or straight edge
- pencil
- Circular saw or table saw – For cutting the plywood
- Circular saw, miter saw or hand saw – For cutting 2″ x 2″s
- screwdriver
- miter saw – For cutting angled corners on the 2″ x 2″s
- paint sprayer or paint brush and roller
- drill
- 1-inch drill bit or hole saw
- 3/8″ drill bit
- 4 1/4″ hole saw
- drywall knife
How to build the pirate ship

1 | Cut the plywood
Start by cutting a large sheet of plywood in half to create two 4′ x 4′ sections.
Next, take one of these sections and mark the center of three of its sides. To do this, measure halfway along each of the three sides and make a small pencil mark.
Now, grab a straight edge or a long ruler. Place it so that it connects the mark on the middle side to the mark on one of the other sides.
Draw a line along the ruler.
Repeat on the other side. This should create a triangular point, which will form the front of your pirate ship.
Carefully cut along the lines you drew to shape the front of the ship.
2 | Cut the 2″ x 2″ boards
To cut the wood for the frame and railings for your pirate ship, follow these steps:
- Begin by cutting 8 of the 2″ x 2″ boards in half. This will give you 16 sections, each 4 feet long.
- Next, take 4 of the 2″ x 2″ boards and cut them into 45-inch sections. You should have 8 pieces when you’re done.
- Then, cut 12 of the 2″ x 2″ boards into 18-inch and 30-inch lengths. For each board, make two 18-inch cuts and two 30-inch cuts. This will result in 24 pieces that are 18 inches long and 24 pieces that are 30 inches long.
- From 2 more of the 2″ x 2″ boards, cut three 30-inch sections each. This will give you 6 additional 30-inch pieces, making a total of 30 when combined with the previous cuts.
- Finally, cut 8 sections that are 24 inches long from the last 2 of the 2″ x 2″ boards.
3 | Build the back section of the ship

Since I wanted the kids to walk through the pirate ship, I built it in two parts. A square back section, and a front section with a point on it. That way I could position them a few feet apart and the kids could walk through the middle.
So we’ll start by constructing the frame for the square, back section of the ship.
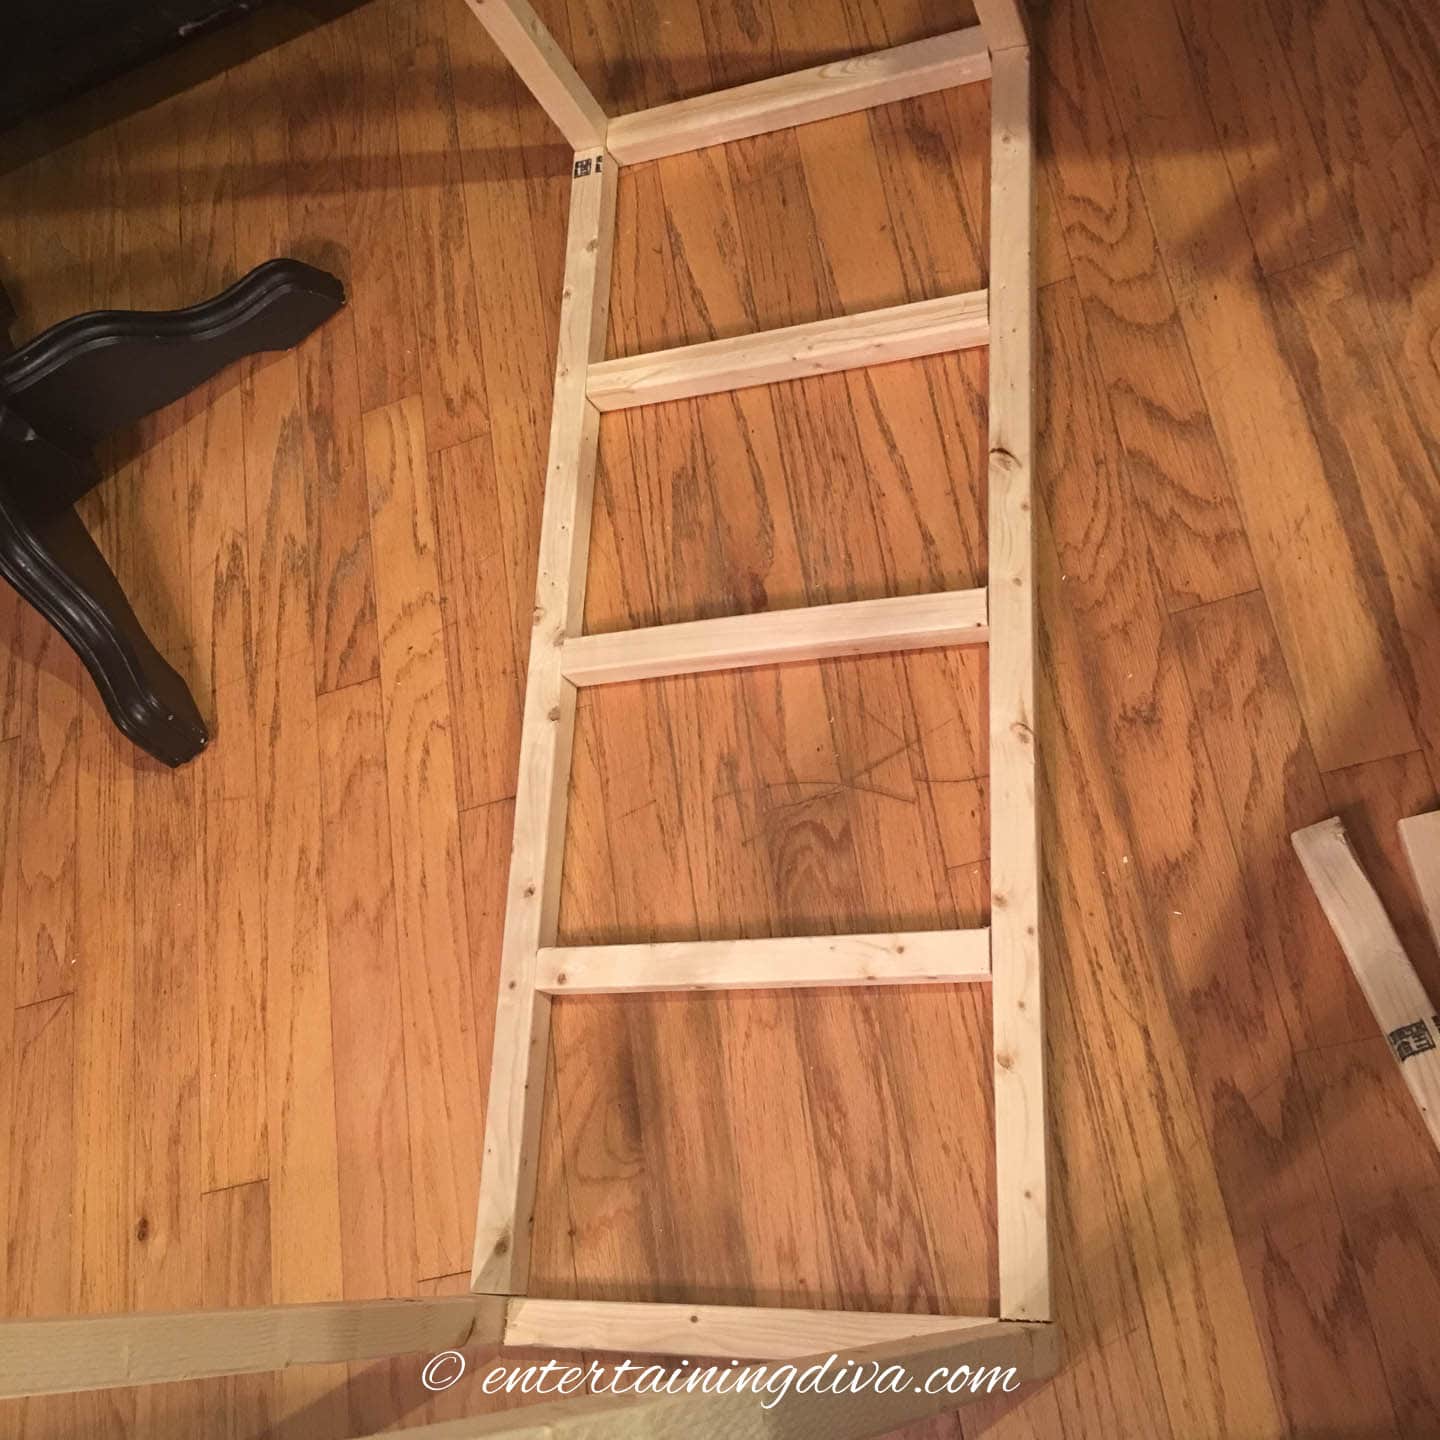
You’ll make two rectangles using the 48-inch and 30-inch boards. Take two of the 48-inch boards and two of the 30-inch boards. Position the 30-inch boards inside the 48-inch boards to form a rectangle. Screw through the ends of the 48-inch boards into the ends of the 30-inch boards to secure them together.
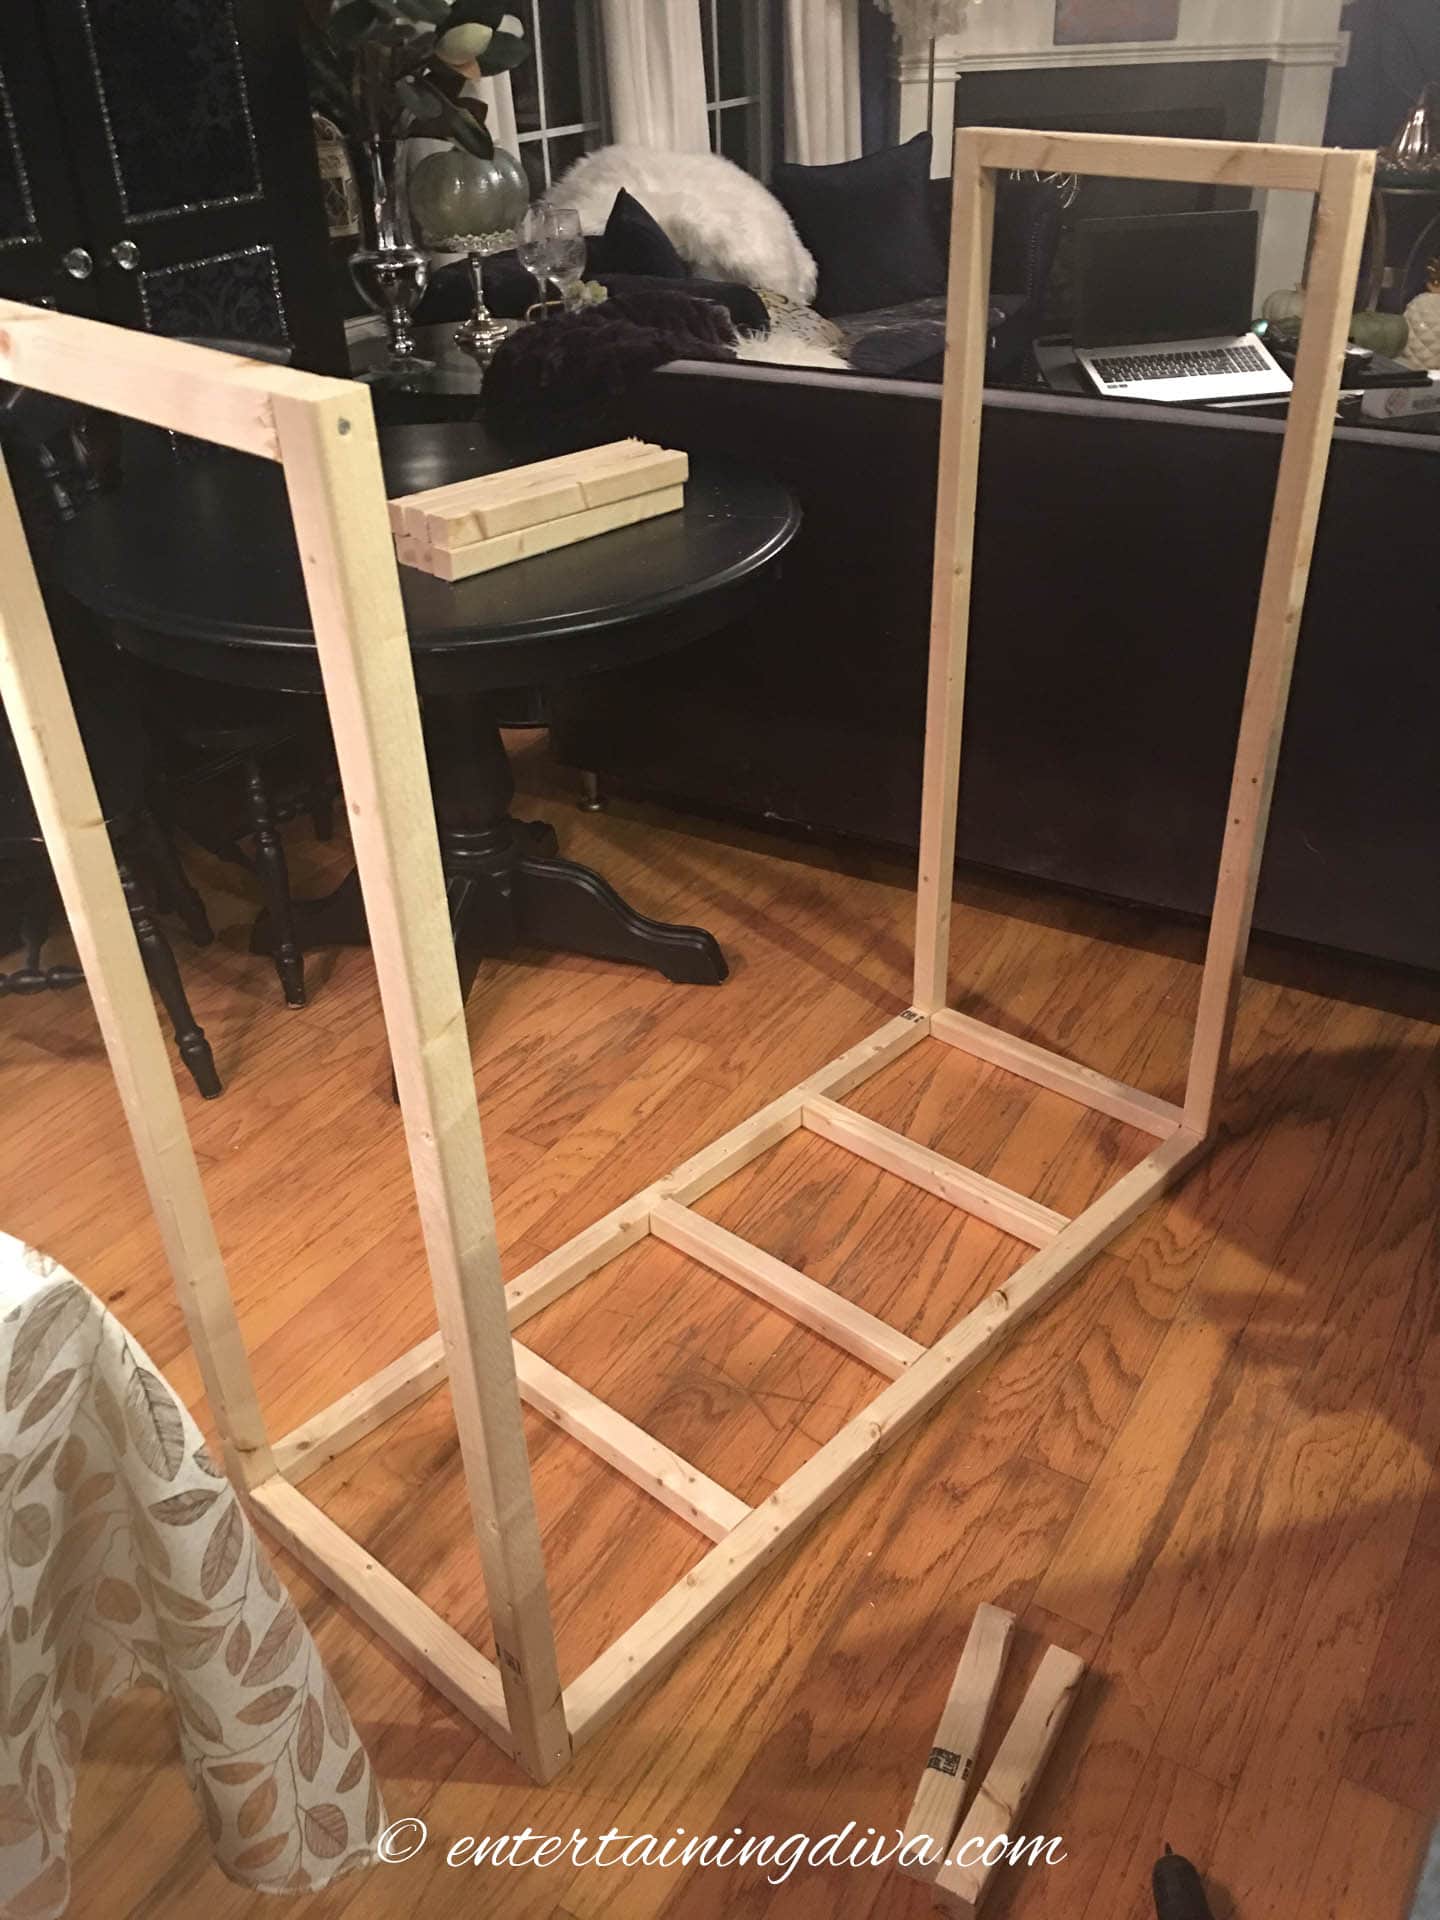
Next, connect these two rectangles. Use the 45-inch boards to join them. Attach one 45-inch board at the top and one at the bottom on each side of the rectangles. This will create a sturdy frame.
To further reinforce the structure and prevent warping, add three more 30-inch boards to each side of the frame. Space these boards about 1 foot apart and screw them in place.
Finally, take a square piece of plywood and screw it onto the top of your frame. This will give the back section of your ship a solid surface.
4 | Build the frame for the front of the boat
Now we’ll create the frame for the front of the boat.
Begin by making two rectangles. To do this, take two 24-inch boards and join them with two 30-inch boards. Make sure the 30-inch boards are on the inside. Use screws or nails to secure them tightly.
Next, connect the two rectangles together on one side using two 45-inch boards. This will add stability to your frame.
Now, place the second piece of plywood on top of the rectangle. Ensure it lines up perfectly around the square edge. You might need a helper to hold the free end so it doesn’t tip over while you secure it.
To form the point of the boat, join two 48-inch 2×2 boards together at a 90-degree angle. Place this V-shaped piece on top of the plywood, aligning it with the angled edge. Mark where the free ends of the boards meet the rectangular portion of your frame, and cut them off at those points.
Create another angled section using the same measurements and angle cuts. Keep track of these measurements because you’ll need them later for the railing.
Join the two V-shaped sections together with a 30-inch 2×2 board. Then, attach the free ends of the V-shaped sections to the rectangular frame you built earlier.
Finally, fill in the sides of the frame with more 30-inch braces. Space these braces about 12 inches apart to ensure the structure is sturdy and secure.
5 | Build the railings

To build the railings, we’ll use a similar process as we did for the frame.
But since the railings will only be on the outside of the ship, there will be 3 sides instead of 4.
And we’ll use the 18-inch sections instead of the 30-inch ones used earlier. This size will make the railings look proportionate to the rest of the ship.
For the square part of the ship:
- Create two rectangles by joining the 48 inch boards with the 18 inches boards.
- Join these rectangles together using two 45-inch boards, one at the top and bottom to create a U-shaped frame.
- Add additional 18-inch boards between the two rectangles, spacing them about 12 inches apart to form the slats of the railing.
For the angled part of the shape:
- Make two rectangles with 24 inch and 18 inch sections.
- Then, create two V-shaped sections using using the same measurements and angle cut as you did for the frame of the boat (step 4) above.
- Join the 2 V-shapes together at the point with an 18-inch board.
- Attach the free ends of each V-shape to a rectangle.
- Fill in the spaces between the top and bottom railing with additional 18″ boards spaced about 12 inches apart.
6 | Attach the sides
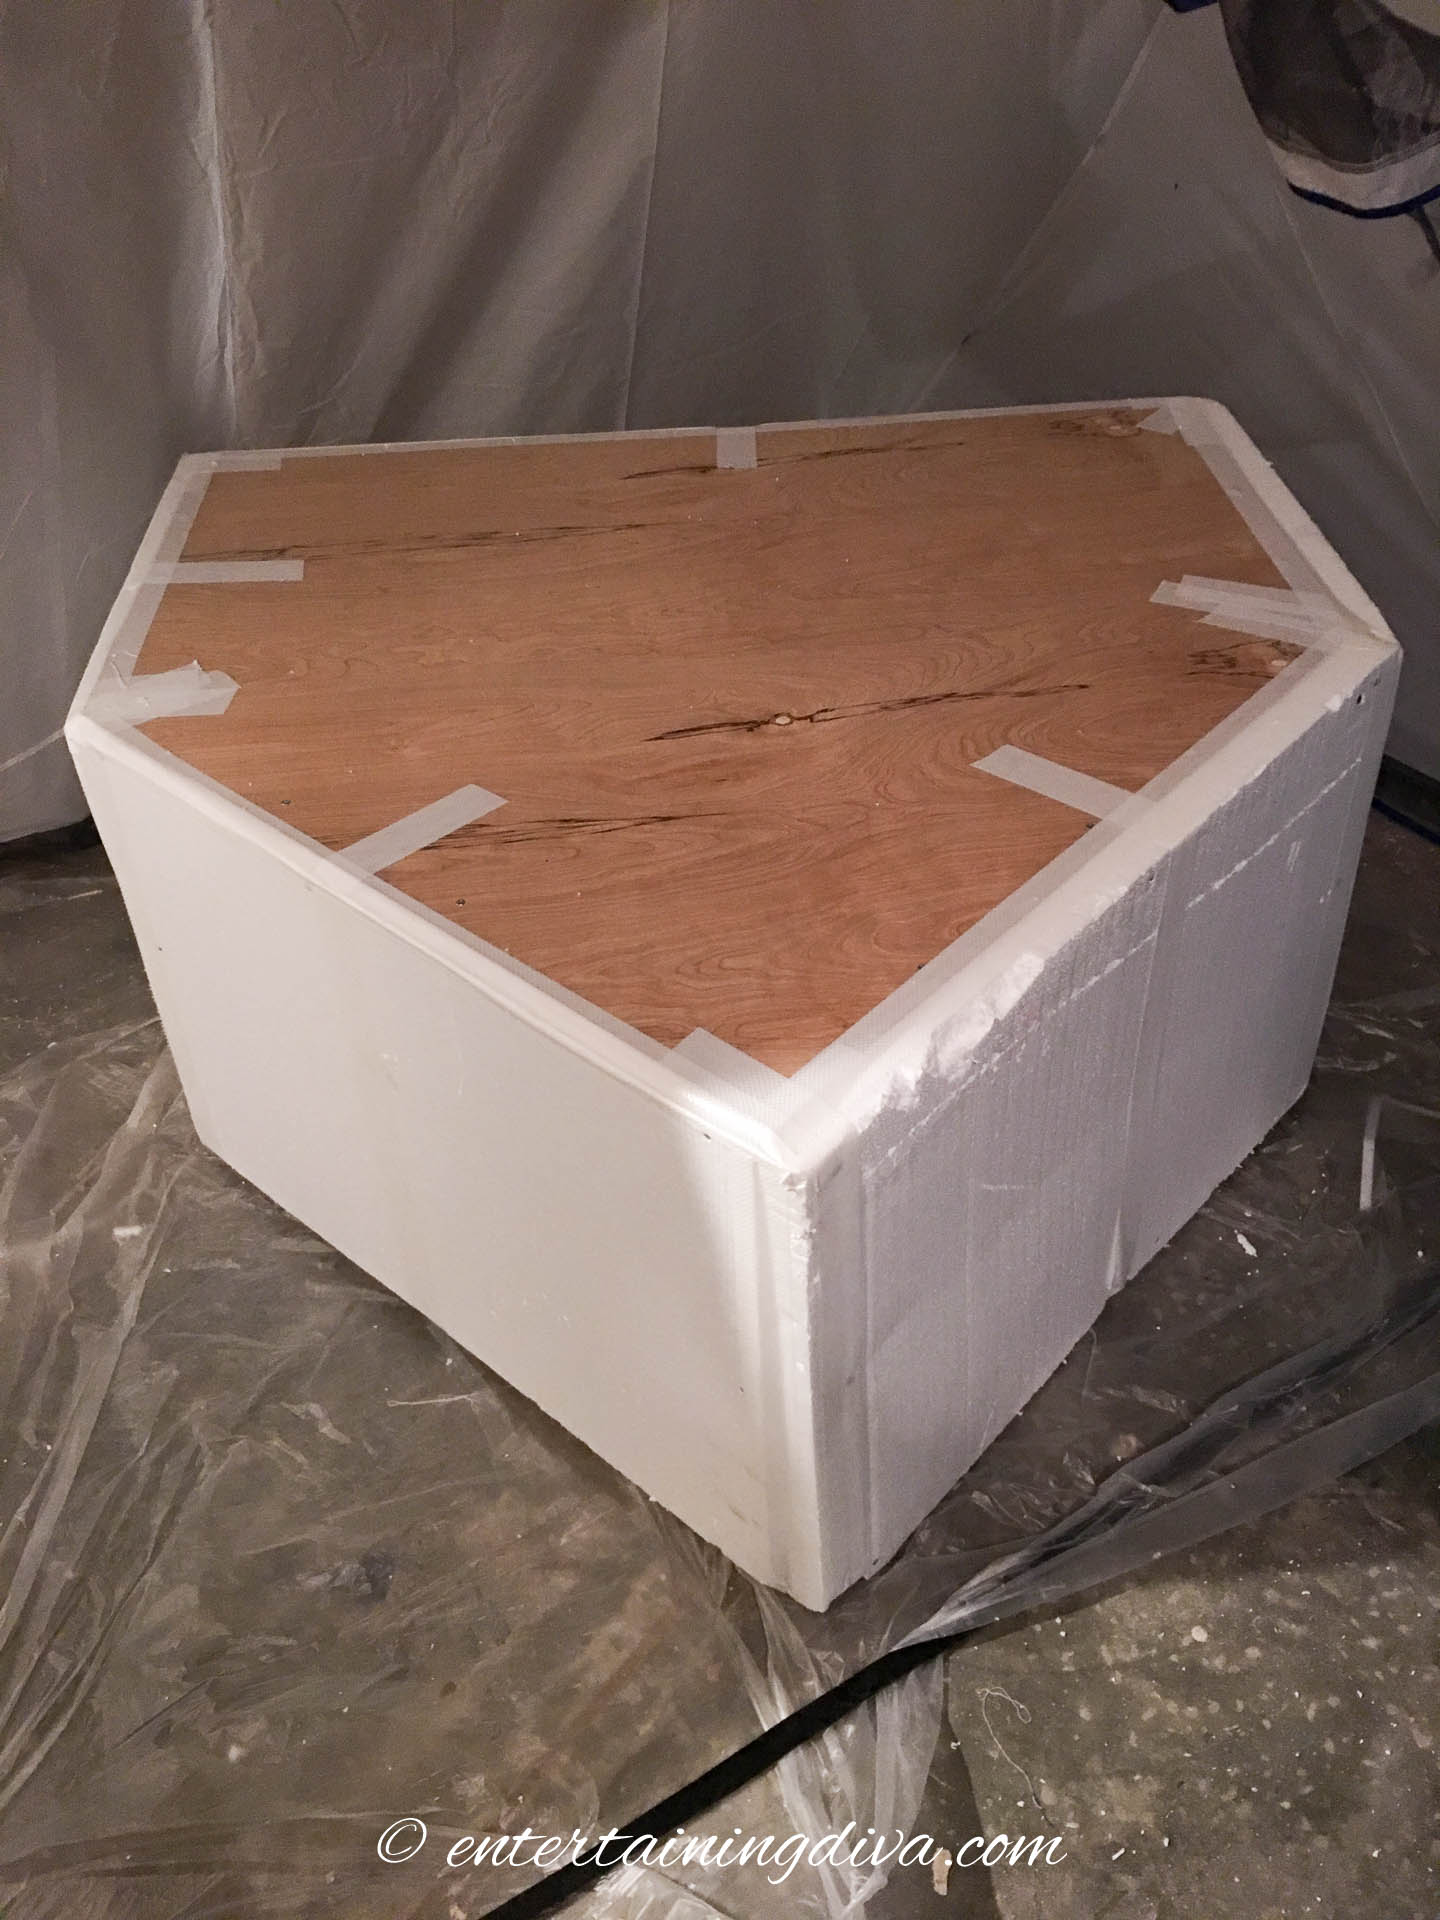
Begin by cutting pieces of styrofoam to fit the outside of the frame.
You should need five pieces that are 48 inches wide by 33 inches tall, two pieces that are 24 inches wide by 33 inches tall, and two pieces that are about 36 inches wide by 33 inches tall. However, for the best fit, measure the actual height and width of each section of your frame before cutting.

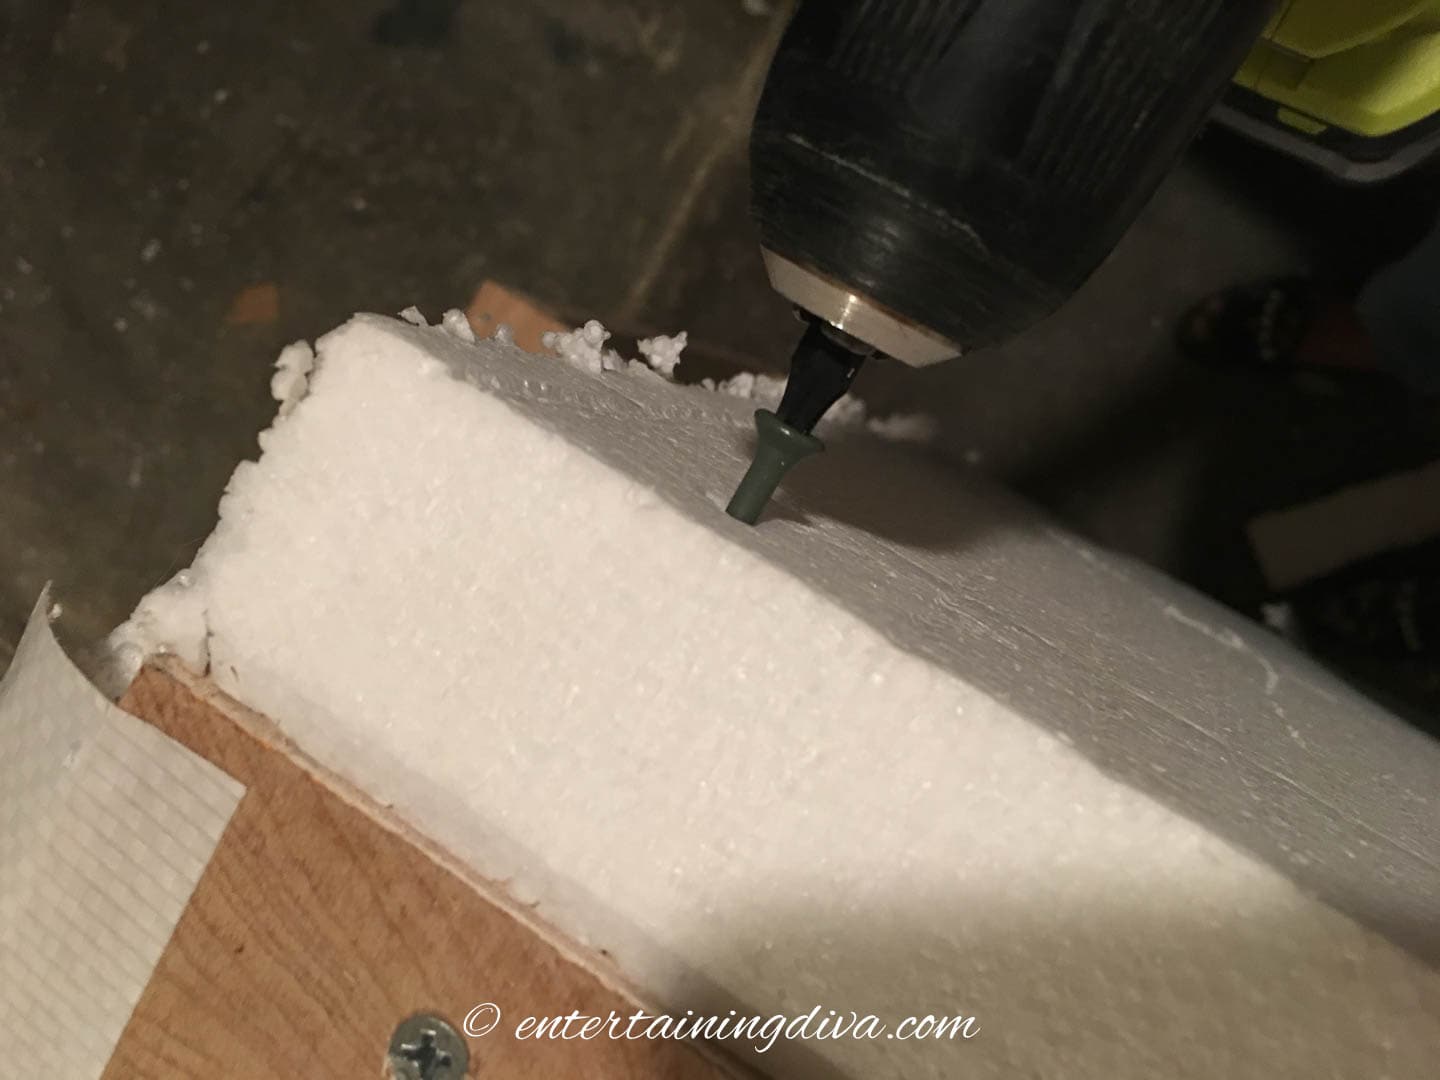
Next, align the styrofoam pieces with the top edge of the plywood on your frame. Use screws to attach the styrofoam securely to the sides of your frame. Make sure the screws are evenly spaced to keep the styrofoam firmly in place.
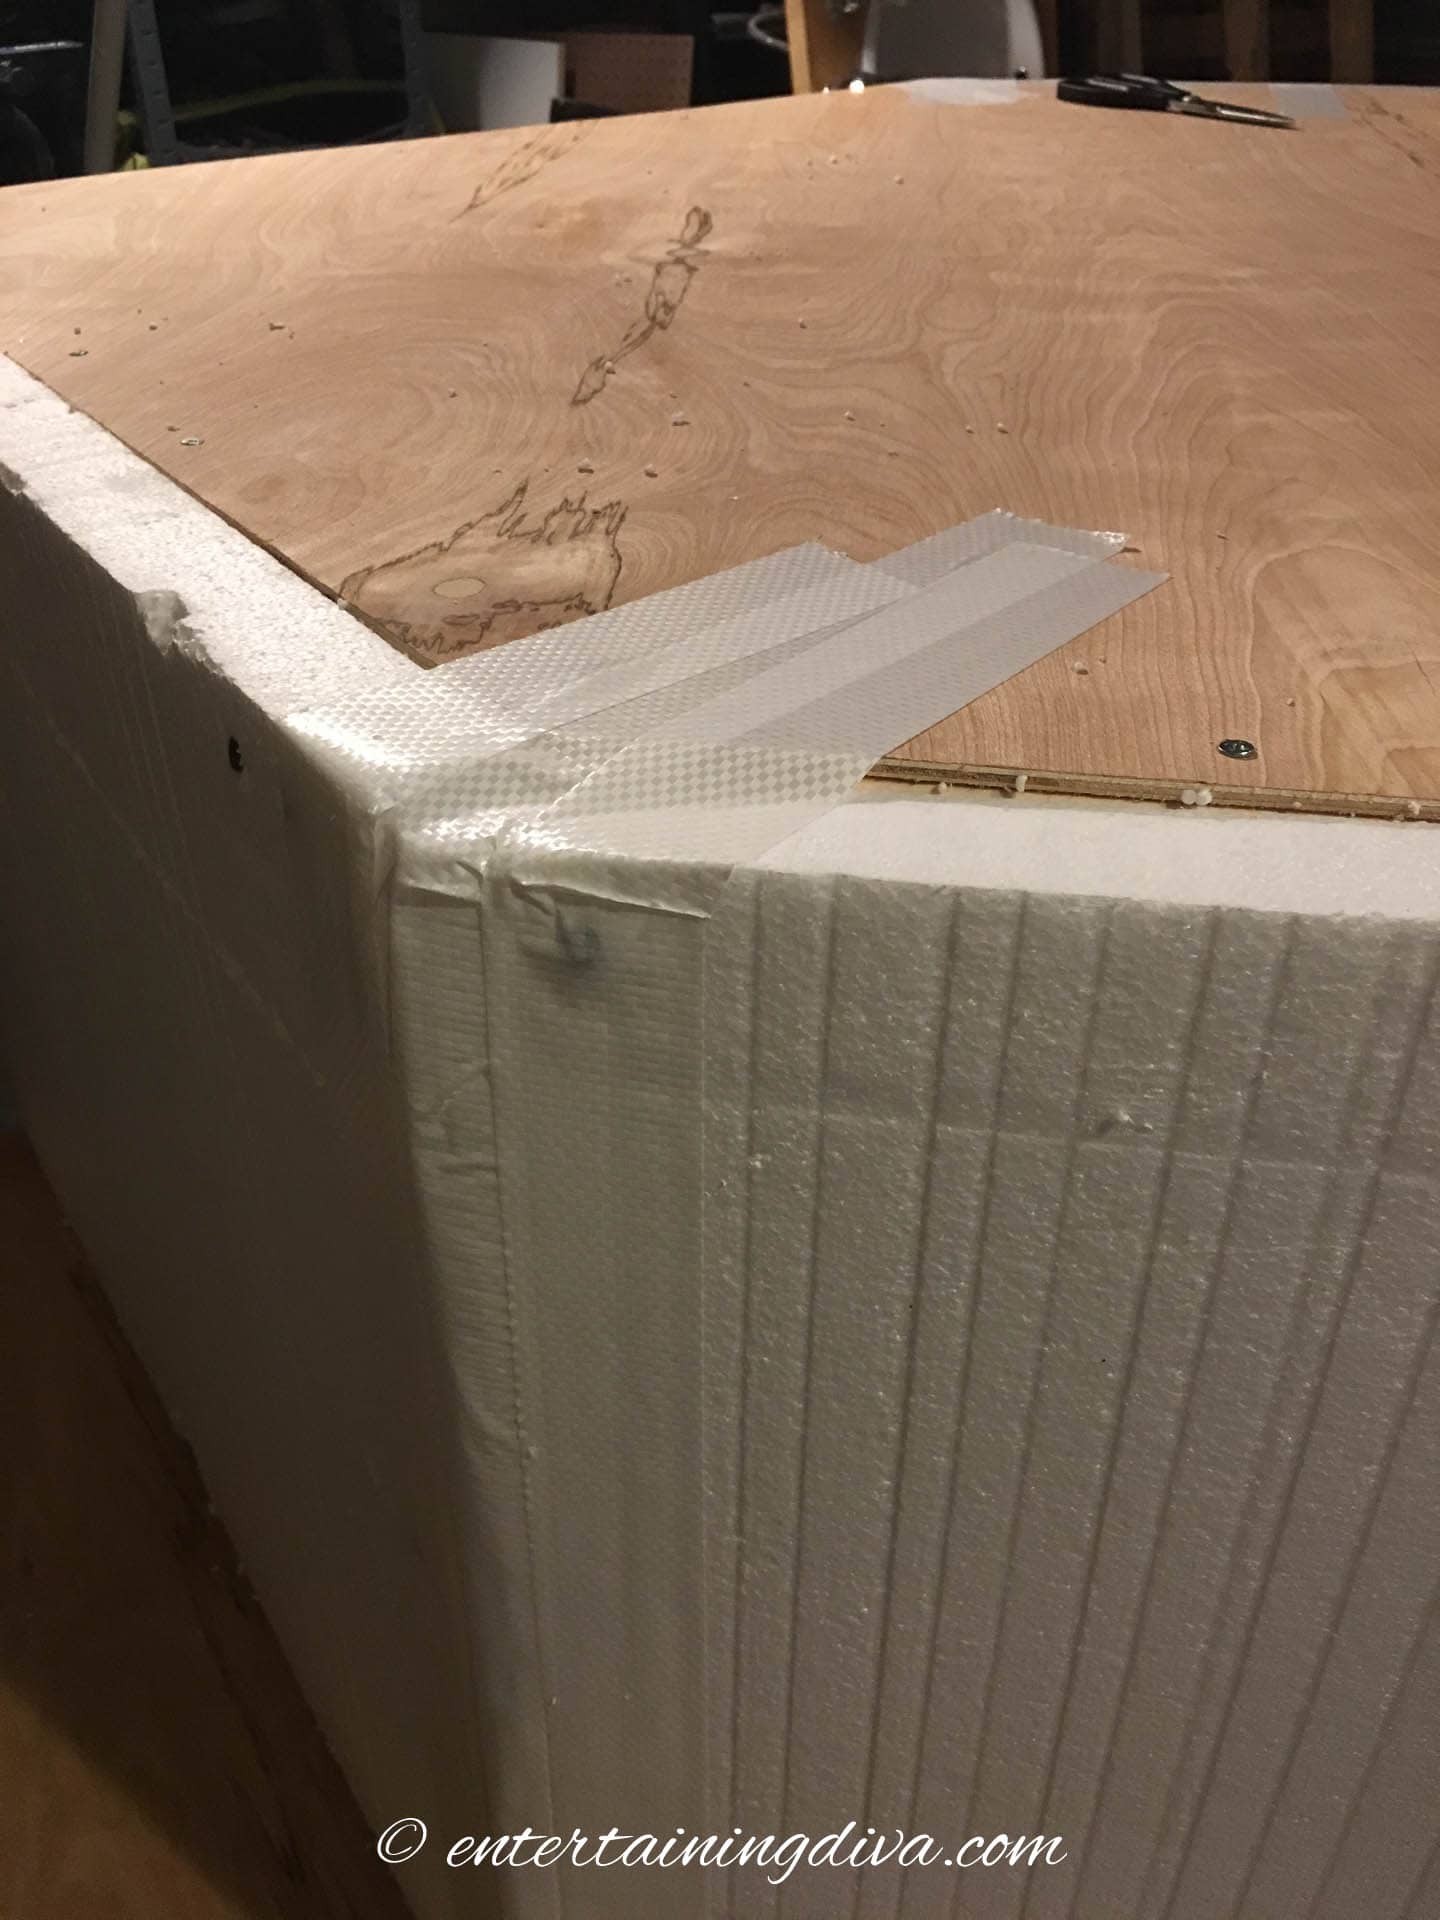
Once the styrofoam is attached, use wide tape to cover all the edges and cover any gaps. This will help to smooth out the seams and provide a more polished look. Make sure the tape is applied tightly and smoothly to avoid any wrinkles.
7 | Put on the railings

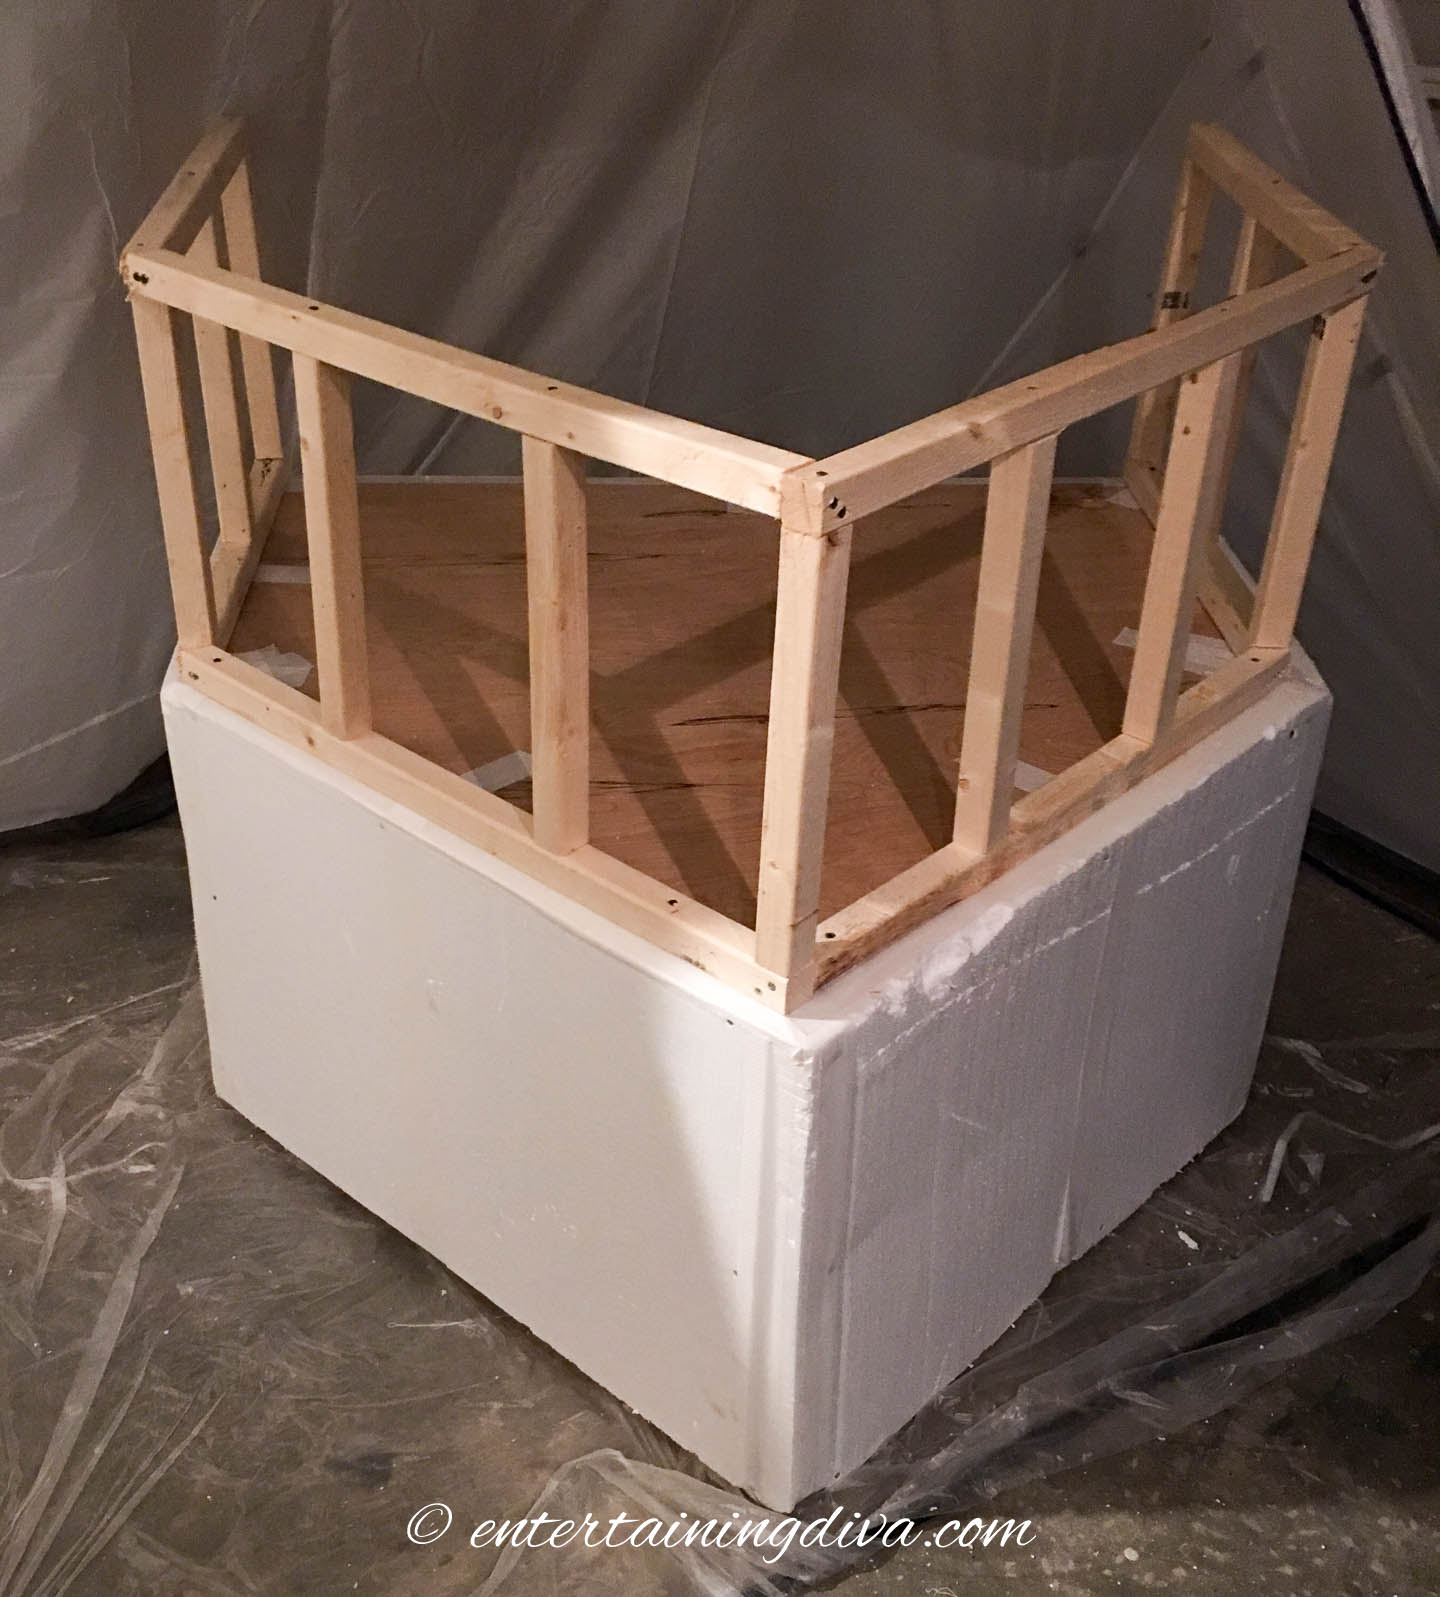
Begin by positioning the railings on the top side of the plywood, ensuring they extend right to the edge of the plywood but not over the styrofoam. The styrofoam isn’t strong enough to support the railings.
Secure the railings in place by screwing them into the plywood. Use a drill and screws for this task. Make sure to hold the railing steady and straight while you drill to ensure a firm and level attachment.

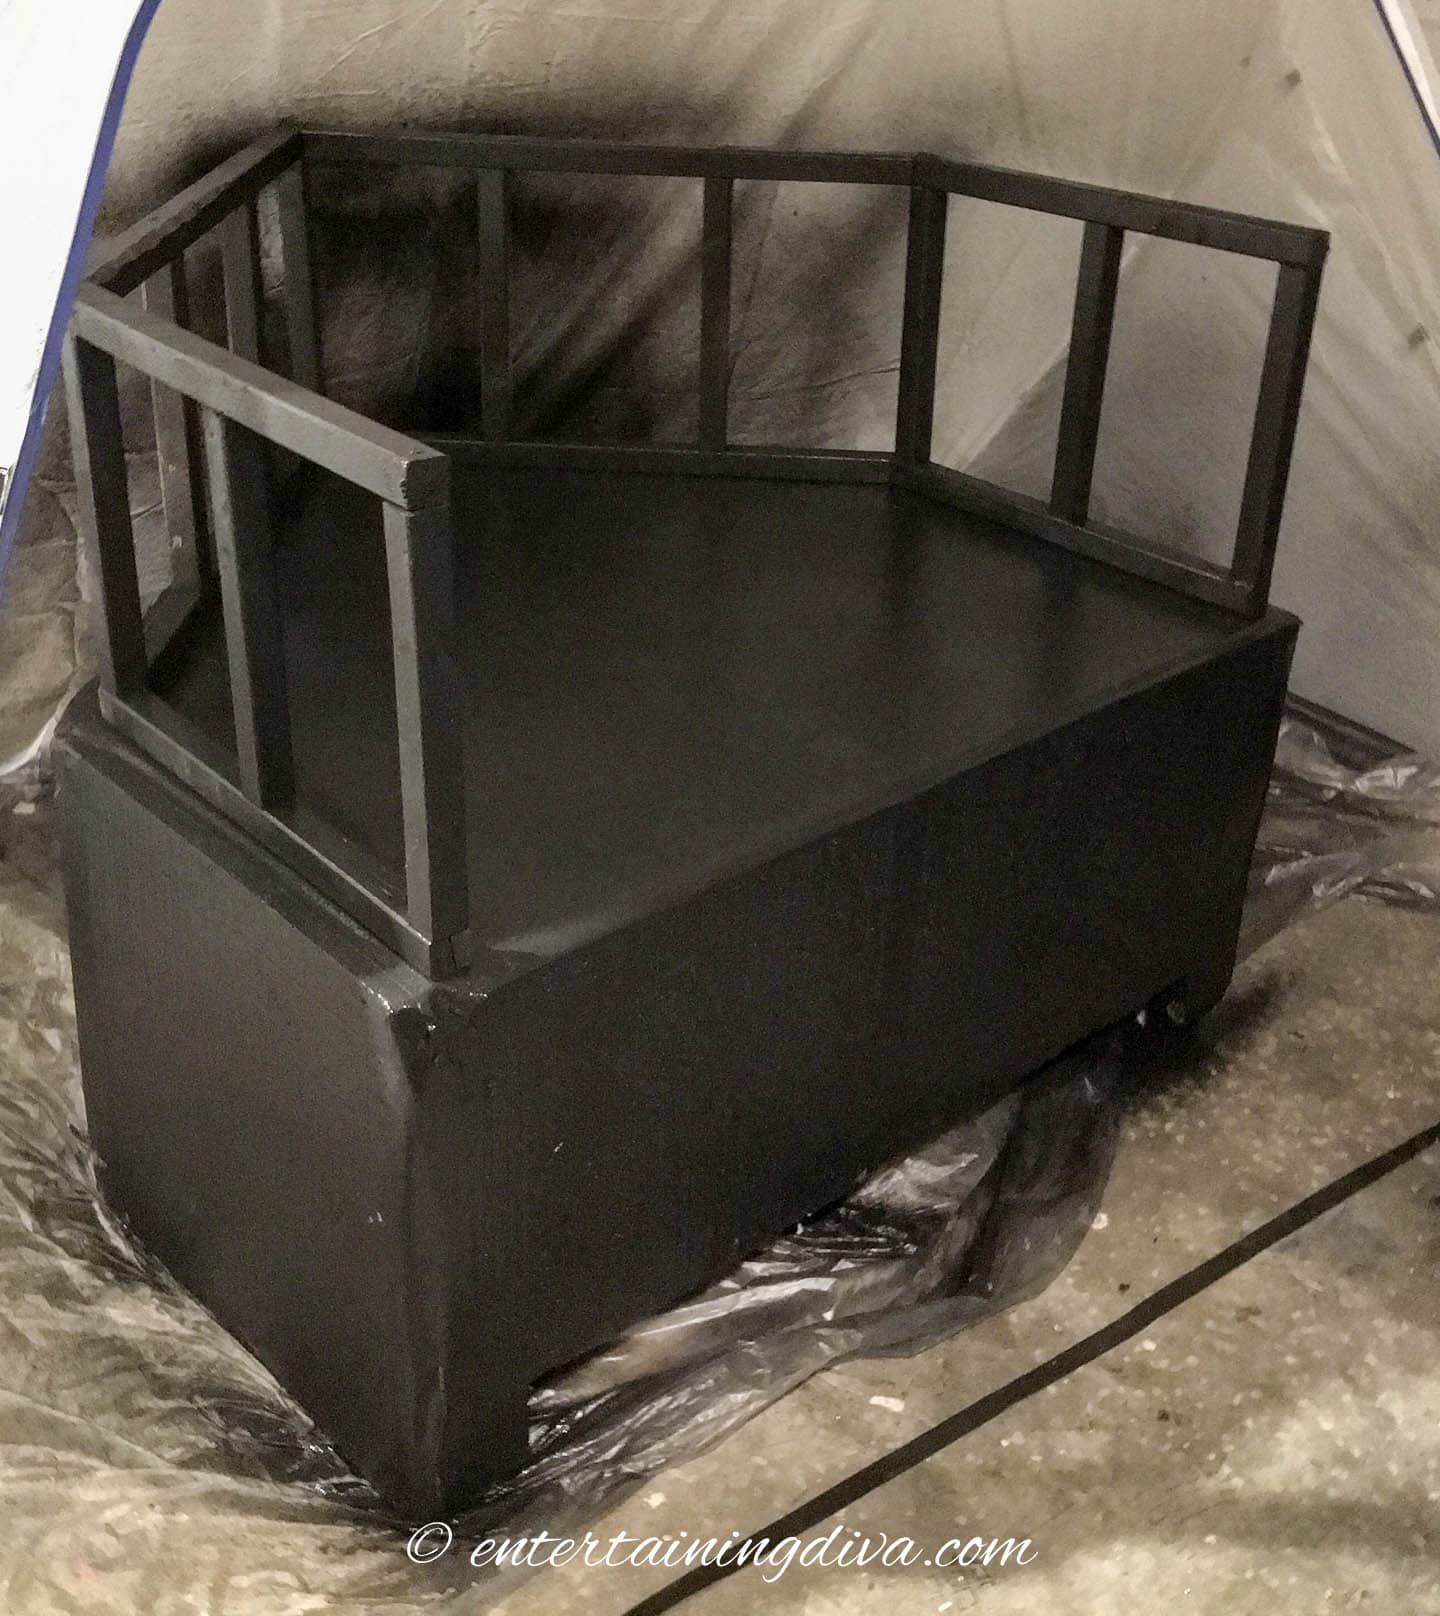
8 | Paint the ship

Now you’re ready to paint. I used black for mine, but for better visibility at night, you might want to use a lighter color such as grey or white.
Before you start painting, make sure your surface is clean and dry. If there’s any dust or dirt, wipe it down with a damp cloth and let it dry completely.
If you really want to do a good job (or if you are planning on using your ship for a few years), start by applying a primer. (I was in a hurry so I skipped this step). Wait until it has dried before continuing.
I used a paint sprayer to apply my paint (it’s very fast!) But you can do it by hand with a brush or roller.
Just don’t use spray paint since it will eat into the styrofoam.
Once you’ve finished painting, allow the ship to dry completely. This could take several hours or even overnight, depending on the weather and the type of paint you used.
9 | Make the mast
Let’s make the mast for your pirate ship.
I made 2 for my ship. One with a crow’s nest and one without. But you can choose to only make one of them if you prefer.
For the mast without the crow’s nest:
1. Cut a piece of ¾” PVC pipe to 6 feet long.
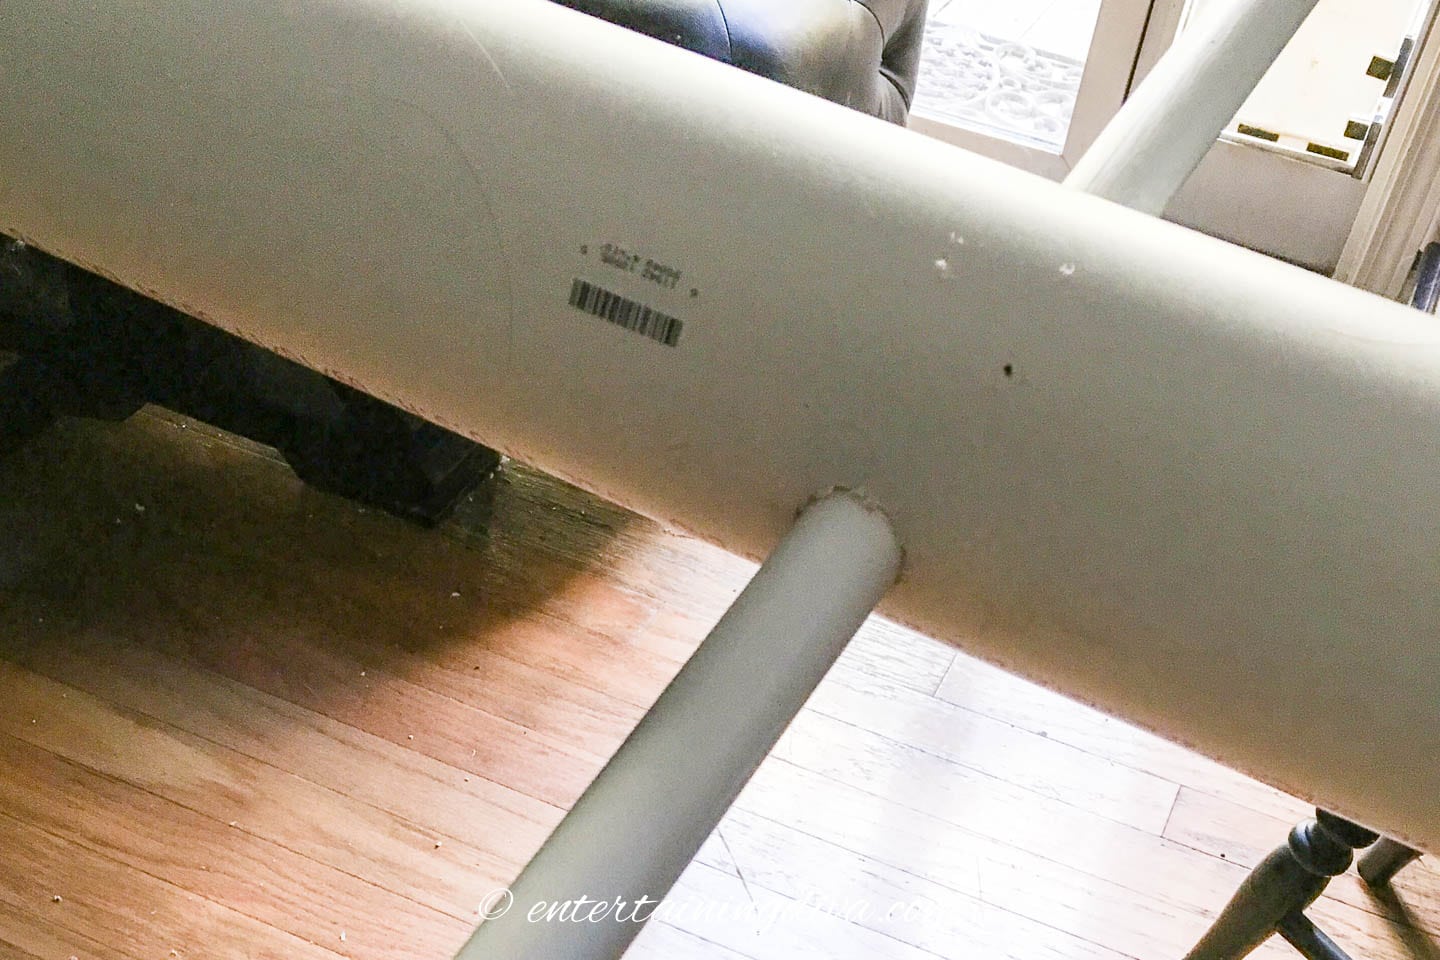
2. Take a 12-foot long 4-inch wide drain pipe and drill two 1-inch holes straight through from one side to the other. The first hole should be about 1 foot down from the top, and the second hole should be about 3 feet down.
3. Push the 6-foot PVC pipe through the top hole, making sure it is centered.
4. Push an 8-foot PVC pipe through the lower hole, centering it as well.
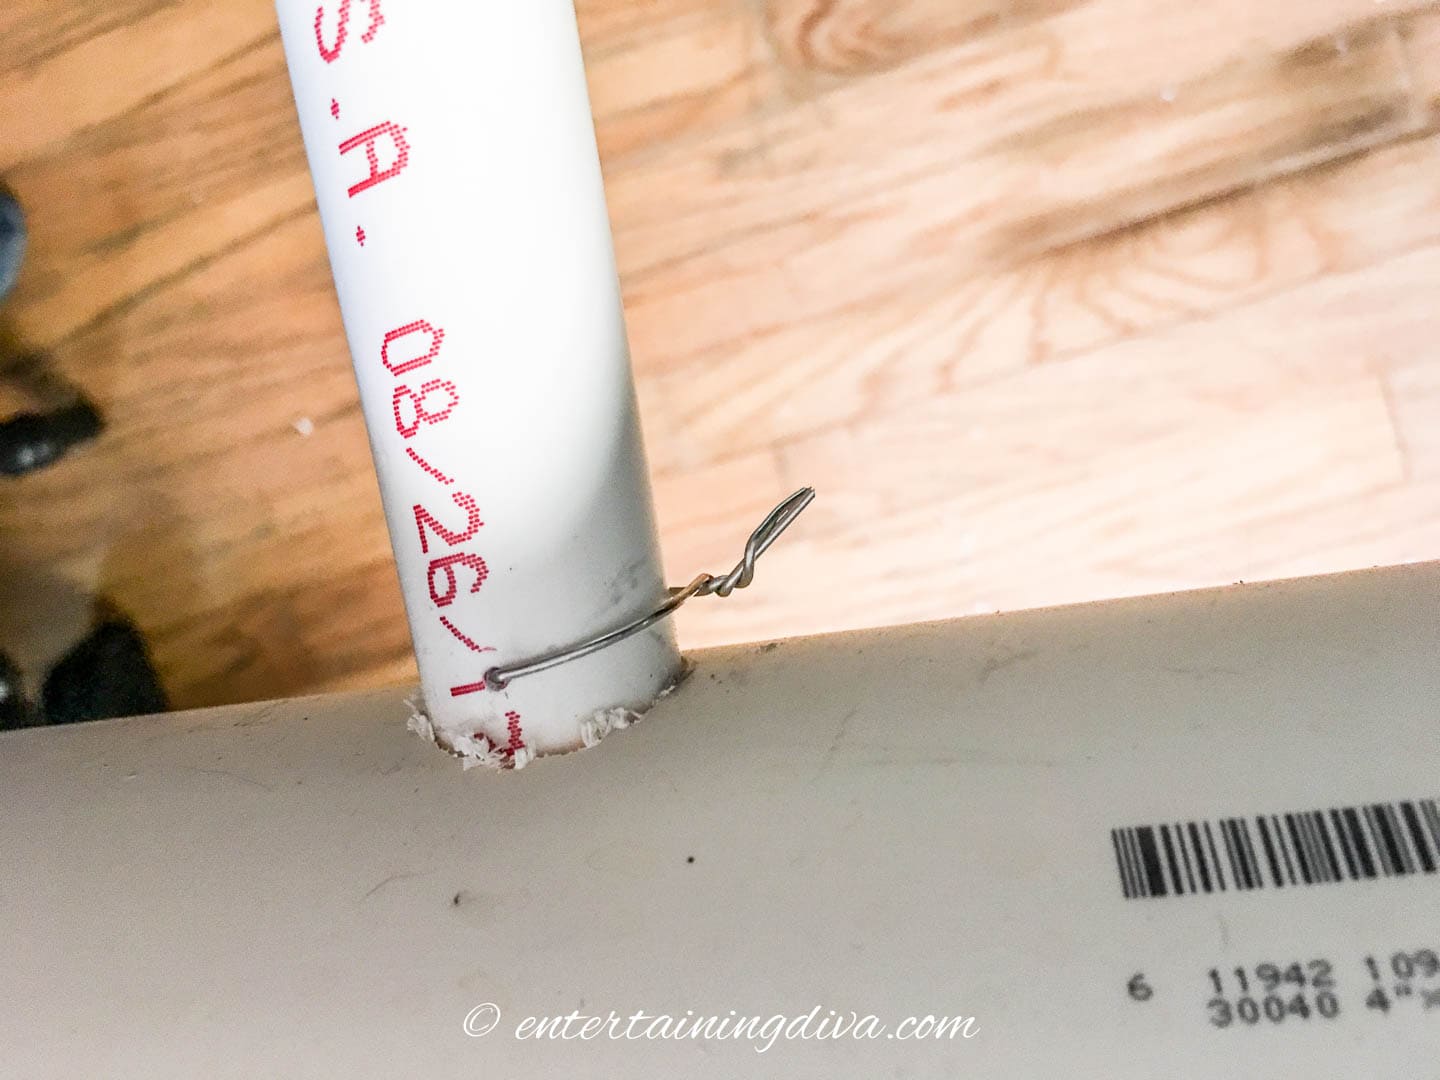
5. Drill 1/8″ holes through the PVC pipes on either side of the drain pipe.
6. Thread a piece of picture wire through these holes and twist it tightly around the pipe to keep the PVC pipes from shifting.For the mast with the crow’s nest:
(Sorry, I forgot to take pictures when I was making this, so here’s the finished version).

1. Cut a hole in the bottom of a round laundry basket just big enough to fit over the drain pipe.
2. Push the drain pipe into the hole in the laundry basket, leaving about 1 foot of the pipe showing above the basket’s top edge.
3. Attach 2 or 3 scrap pieces of wood to the drain pipe where the bottom of the laundry basket will rest. Secure the basket to these wood pieces using screws, nails, or staples.
4. Drill two 1-inch holes through the drain pipe for the cross poles. The first hole should be about 1 foot lower than the bottom of the laundry basket, and the second hole should be 2 feet lower.
5. Follow the same steps as above to push the PVC pipes through these holes and secure them with picture wire.Finally, paint the mast the same color as your ship to complete the look.
10 | Assemble the ship
To assemble the ship, start by positioning the front and back parts of it with 3 to 4 feet of space between them. This will allow enough room for people to walk through.
Next, cut holes in the center of the plywood using a 4¾” hole saw. These holes are for the masts. If you only want one mast, you just need one hole. Attach it to your drill, and carefully drill through the plywood where you want the mast to go.
Once the holes are ready, place an umbrella stand directly under each hole. Alternatively, you can hammer two pieces of rebar into the ground a couple of inches apart. Make sure the rebar is close enough together so that the end of the pipe can fit over them securely.
Now, slide the mast through the hole in the plywood and onto the top of the umbrella stand or over the rebar. Ensure the mast is stable and upright.
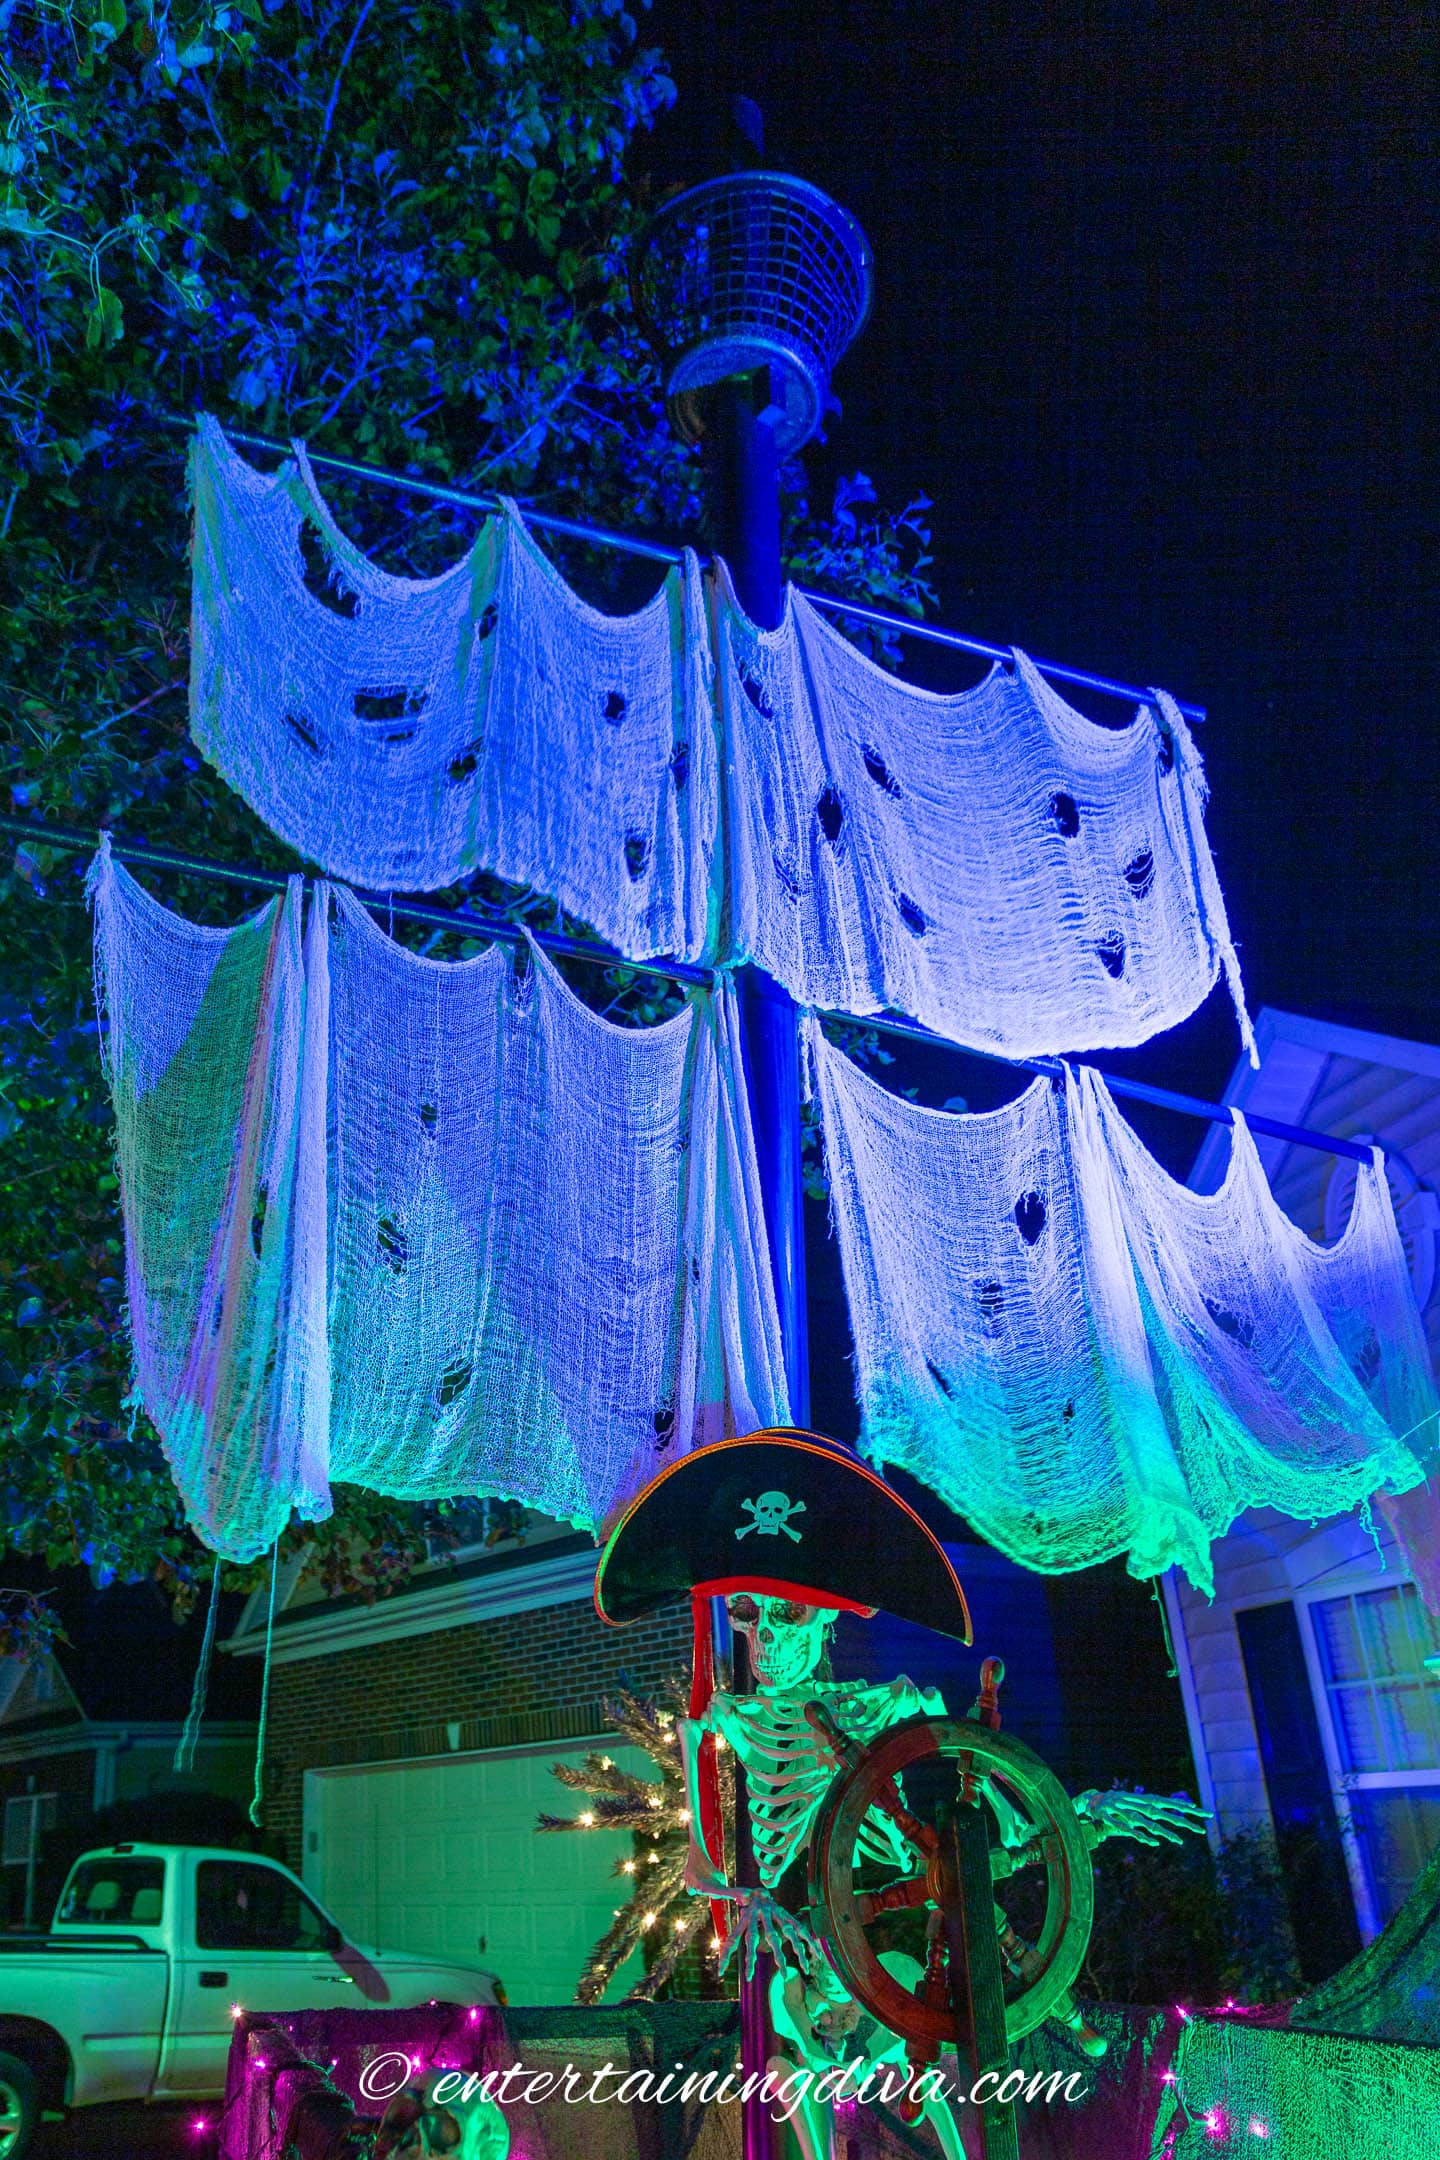
To create the look of sails, drape creepy cloth over the poles on the mast. If the cloth keeps sliding off, you can tie it on with some picture wire.
11 | Add lighting

To really make your pirate ship stand out, you’ll need to add lighting.
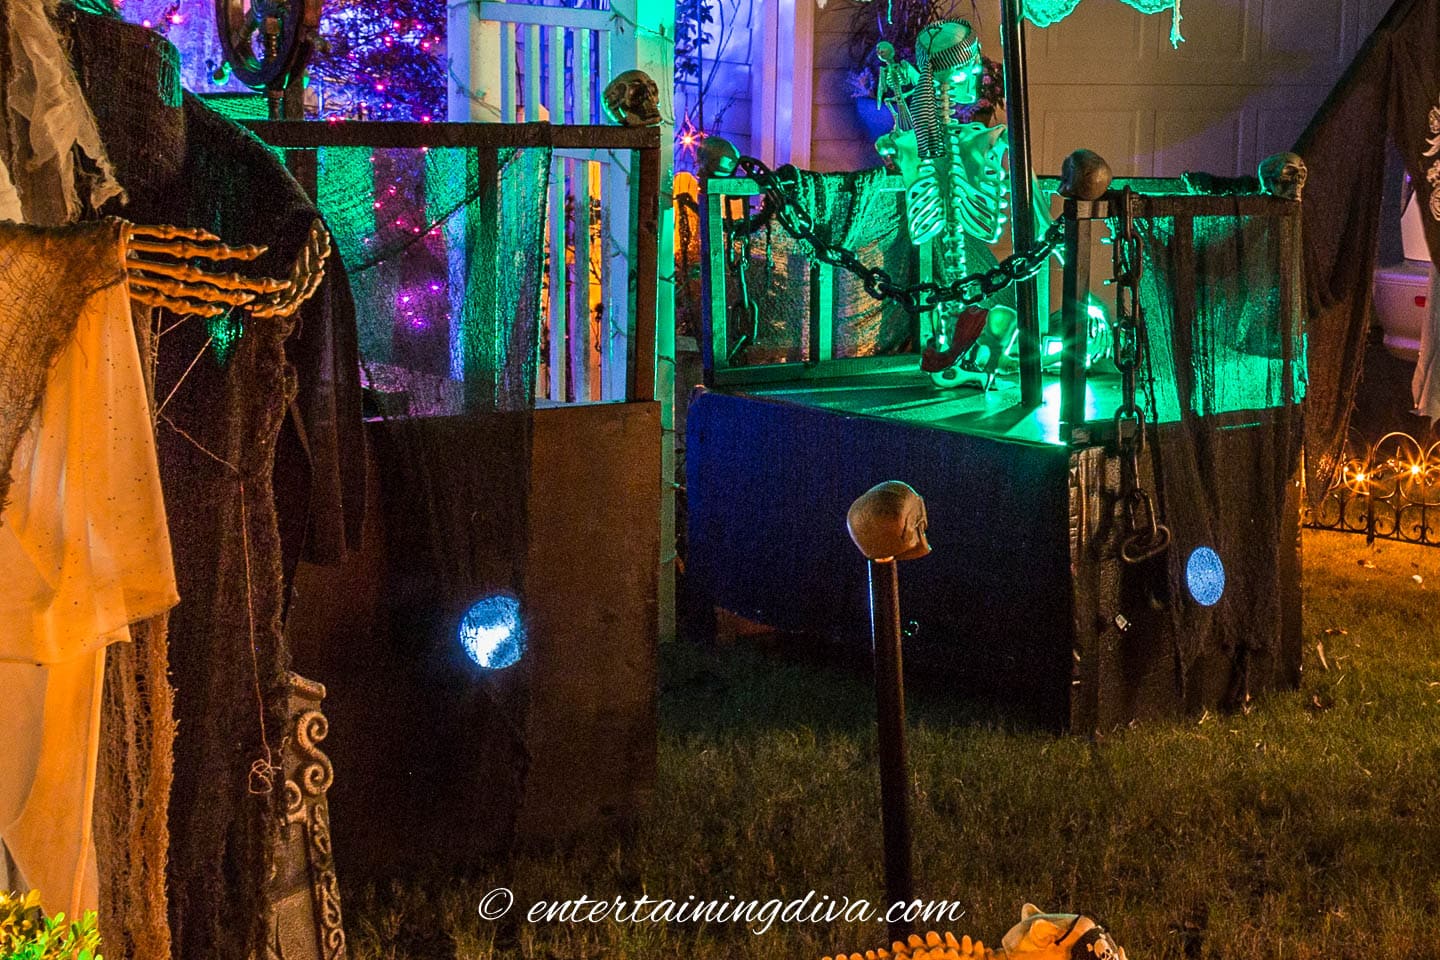
Use green and/or blue floodlights to illuminate the sails, creating a spooky and dramatic effect. I used blue on one sail and green on the other to give them more depth.
You can place the floodlights at the bottom of the mast and point them upwards. This will light up the sails effectively.
But for an even better result, position the lights higher up, such as on the roof or in a nearby tree. This higher angle allows the light to spread more evenly across the sails, enhancing the overall look.
If you have an arbor or another elevated structure, it can also be a great spot to place your lights. Secure the lights firmly and ensure they are angled correctly to maximize the illumination.
12 | Put up a steering wheel
The next few steps are optional, but I’ll mention them just in case you’re interested.
I added a steering wheel with a pirate captain to the back of the ship.
Mine was a stationary wheel, but now you can get this automated one that I think would be really cool.
13 | Add cannons
To create the look of cannons, cut 4-inch holes in the side of the ship where you want the cannons to be.
Use a drywall knife to make the holes.
Next, take pieces of 4-inch PVC pipe and paint them black. You can use spray paint for an even coat. Let the paint dry completely before moving on.
Insert the painted PVC pipes into the holes you made in the ship. Make sure they fit snugly and stick out just a bit to resemble cannon barrels.
Place a strobe light set on low speed at the bottom of each PVC pipe. This will create a flashing effect that looks like the cannons are firing.
On Halloween night, I also added add a fog machine at the bottom of each of the canons. Position the fog machine so the fog flows through the PVC pipe, and it looks like smoke coming from the cannons.
14 | Hang a flag

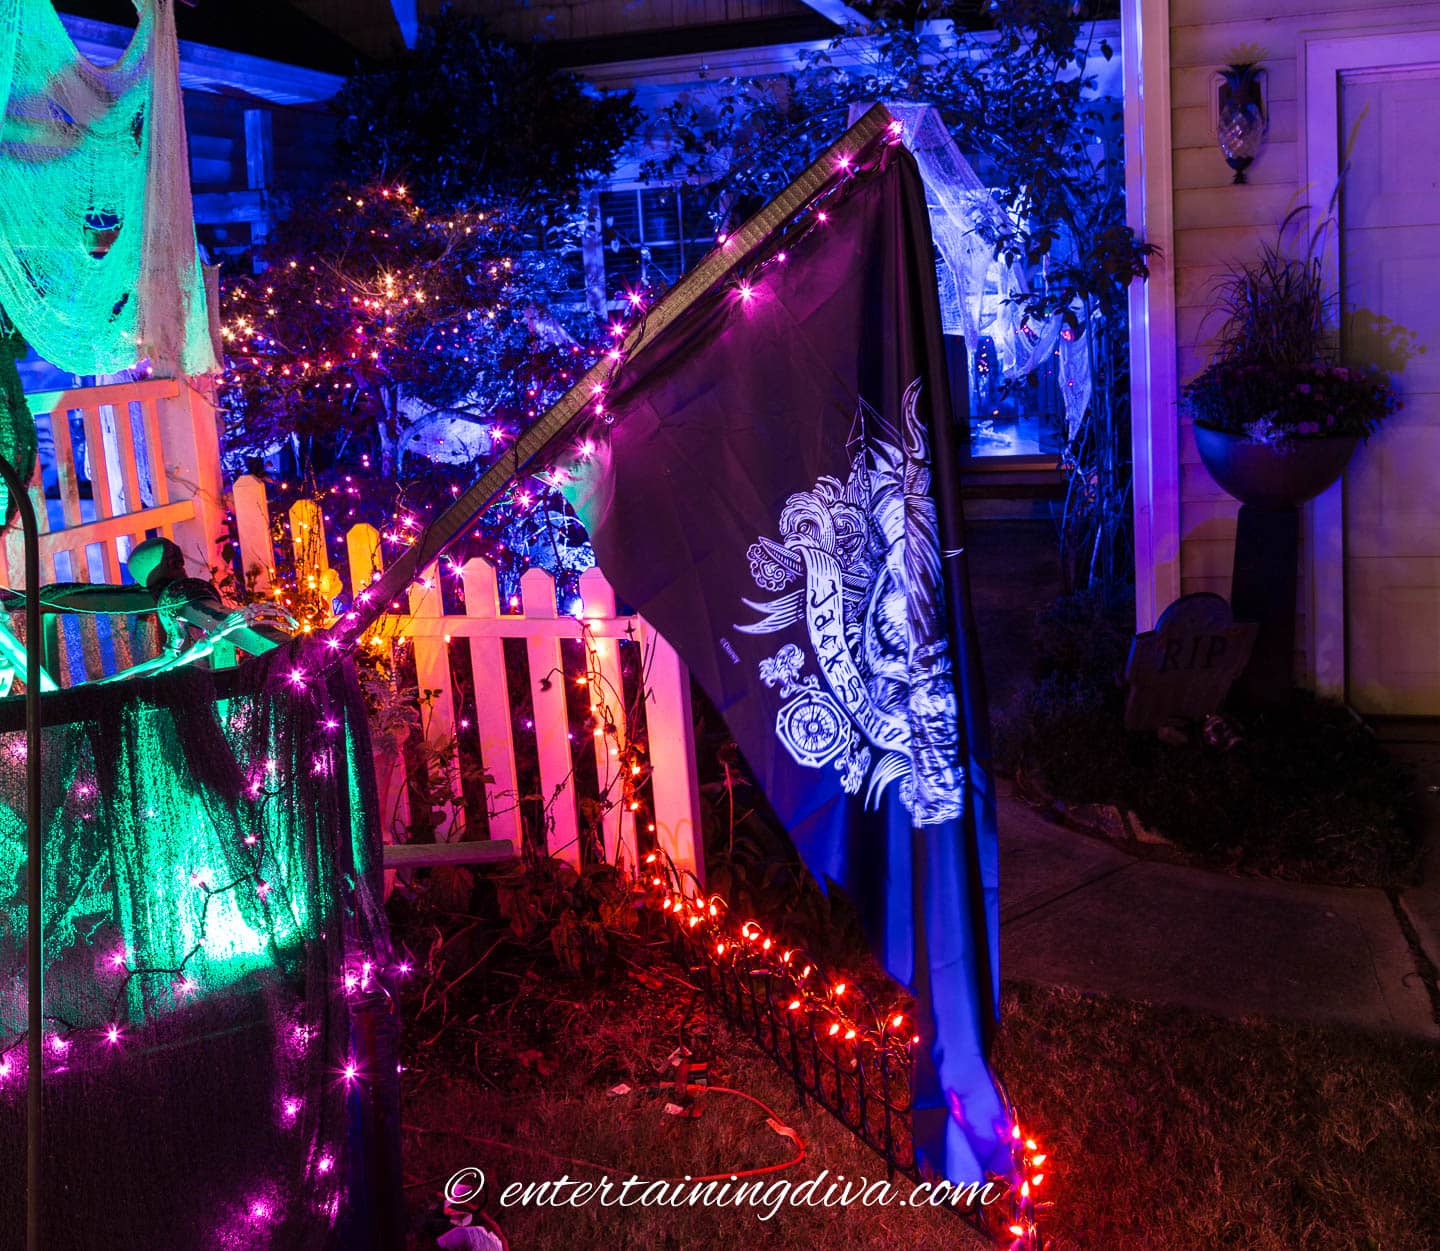
You can add a final touch by hanging a Jack Sparrow flag at the front of your pirate ship.
First, attach an extra piece of 2″ x 2″ wood to the ship’s railing at the desired point.
Use a staple gun to attach the flag at multiple points along the wood piece.



DIY Pirate Ship Halloween Decor
Equipment
- measuring tape
- 4-foot ruler or straight edge
- pencil
- Circular saw or table saw
- Circular saw, miter saw or hand saw
- screwdriver
- miter saw
- paint sprayer or paint brush and roller
- drill
- 1-inch drill bit or hole saw
- 3/8″ drill bit
- 4 1/4″ hole saw
- drywall knife
Ingredients
- 1 sheet 4′ x 8′ plywood
- 4 sheets of 4′ x 8′ x 1″ styrofoam foam board insulation
- 28 – 2" x 2" x 8' boards
- 2-inch wood screws
- 2-inch wide duct tape
- black latex paint
- 2 4-inch wide x 12-foot long PVC pipes
- 4 ¾-inch wide x 8-foot long PVC pipes
- picture wire
- Round laundry hamper
- heavy-duty umbrella base or 2 pieces of ½-inch x 4-inch rebar
- 4 sheets of white creepy cloth
- 2 flood lights
- 1 Boat steering wheel (optional)
- 4-inch PVC pipe and a strobe light (optional)
- Jack Sparrow flag
(optional)
Instructions
- Start by cutting the plywood in half to create two 4′ x 4′ sections. Mark the center of three sides on one section. Use a straight edge to draw lines connecting the marks to form a point for the front of the ship. Cut along the lines.
- Cut 8 of the 2″ x 2″ boards in half to get 16 4′ sections. Cut 4 of the 2″ x 2″ boards into 45″ sections, resulting in 8 pieces. Cut 12 of the 2″ x 2″ boards into 24 pieces of 18″ and 24 pieces of 30″. Cut 6 30″ sections from 2 more boards. Cut 8 24″ sections from the last 2 boards.
- Begin building the frame for the back section of the boat. Gather 4 48″ boards, 4 45″ boards, and 16 30″ boards. Construct 2 rectangles by joining 2 of the 48″ boards with 2 of the 30″ boards, screwing through the 48″ boards into the ends of the 30″ boards. Join the rectangles by attaching 4 of the 45″ boards to the top and bottom of each side. Add 3 more 30″ boards to each side of the square, spacing them about 1 foot apart. Screw the square piece of plywood onto one side of the frame.
- Repeat the process to create the frame for the front of the boat. Make 2 rectangles by joining 2 24″ boards with 2 30″ boards, keeping the 30″ boards on the inside. Join the 2 rectangles together on one side with 2 of the 45″ boards. Place the second piece of plywood on top of this rectangle, aligning it around the square edge. For the point, join 2 of the 48″ 2″ x 2″ boards together to form a 90-degree angle. Place it on top of the plywood, align with the angled edge, and draw lines where they meet the rectangular frame to mark where to cut. Make another angled section using the same measurements and angle cut. Join 2 of these V’s together with a 30″ 2″ x 2″. Attach the free ends to the rectangular frame. Fill in the sides with more 30″ braces, spaced about 12″ apart.
- Use 18″ boards to build the railings. Construct two 48″ x 18″ rectangles and join them with two 48″ boards on one end. Add additional 18″ boards between them, spaced 12 inches apart. For the angled railing, make two 24″ x 18″ rectangles and two V-shaped sections. Join them together and fill in with 18″ boards spaced 12 inches apart.
- Cut styrofoam pieces to fit the outside of the frame: five pieces at 48″ wide x 33″ tall, two pieces at 24″ wide x 33″ tall, and two pieces at 36″ wide x 33″ tall. Screw the styrofoam onto the frame, aligning it with the top of the plywood. Tape around all the edges with wide tape.
- Screw the railings onto the top side of the plywood, ensuring they reach the edge of the plywood but not the styrofoam. Hang rope across the side without railings to prevent kids from climbing on it.
- Paint the ship. Use black, light grey, or white for better visibility at night.
- Make the mast by cutting a 6-foot piece of 3/4″ PVC pipe. Drill two 1-inch holes in a 4″ drain pipe, one about 1 foot from the top and the other 3 feet down. Insert the 6-foot PVC pipe through the top hole and an 8-foot PVC pipe through the lower hole. Secure them with picture wire threaded through 1/8″ holes drilled on either side of the drain pipe.
- For the mast with a crow’s nest, cut a hole in the bottom of a round laundry basket to fit over the drain pipe. Push the pipe through the hole, leaving 1 foot above the basket’s edge. Attach scrap wood pieces to the drain pipe to support the basket, then secure the basket to the wood. Drill holes for the cross poles 1 foot below the basket and 2 feet lower. Paint the mast to match the ship.
- Position the front and back parts of the ship 3 to 4 feet apart. Cut holes in the center of the plywood using a 4 3/4″ hole saw for the masts. Place an umbrella stand under the hole or hammer two pieces of rebar into the ground. Slide the mast through the hole onto the umbrella stand or over the rebar. Drape creepy cloth over the poles on the mast to create sails, securing with picture wire if needed.
- Attach a steering wheel with a pirate captain figure to the back of the ship.
- Cut 4-inch holes in the side of the ship and insert painted black 4″ PVC pipes. Place a strobe light set on low speed at the bottom of each pipe to simulate firing. Use a fog machine for each cannon to create smoke effects.
- Hang a Jack Sparrow flag from the front of the ship by attaching an extra piece of 2″ x 2″ wood to the railing and stapling the flag to it.
- Point green and/or blue flood lights at the sails to make them light up. Place them at the bottom of the mast pointing up or higher up, like on the roof or in a tree.
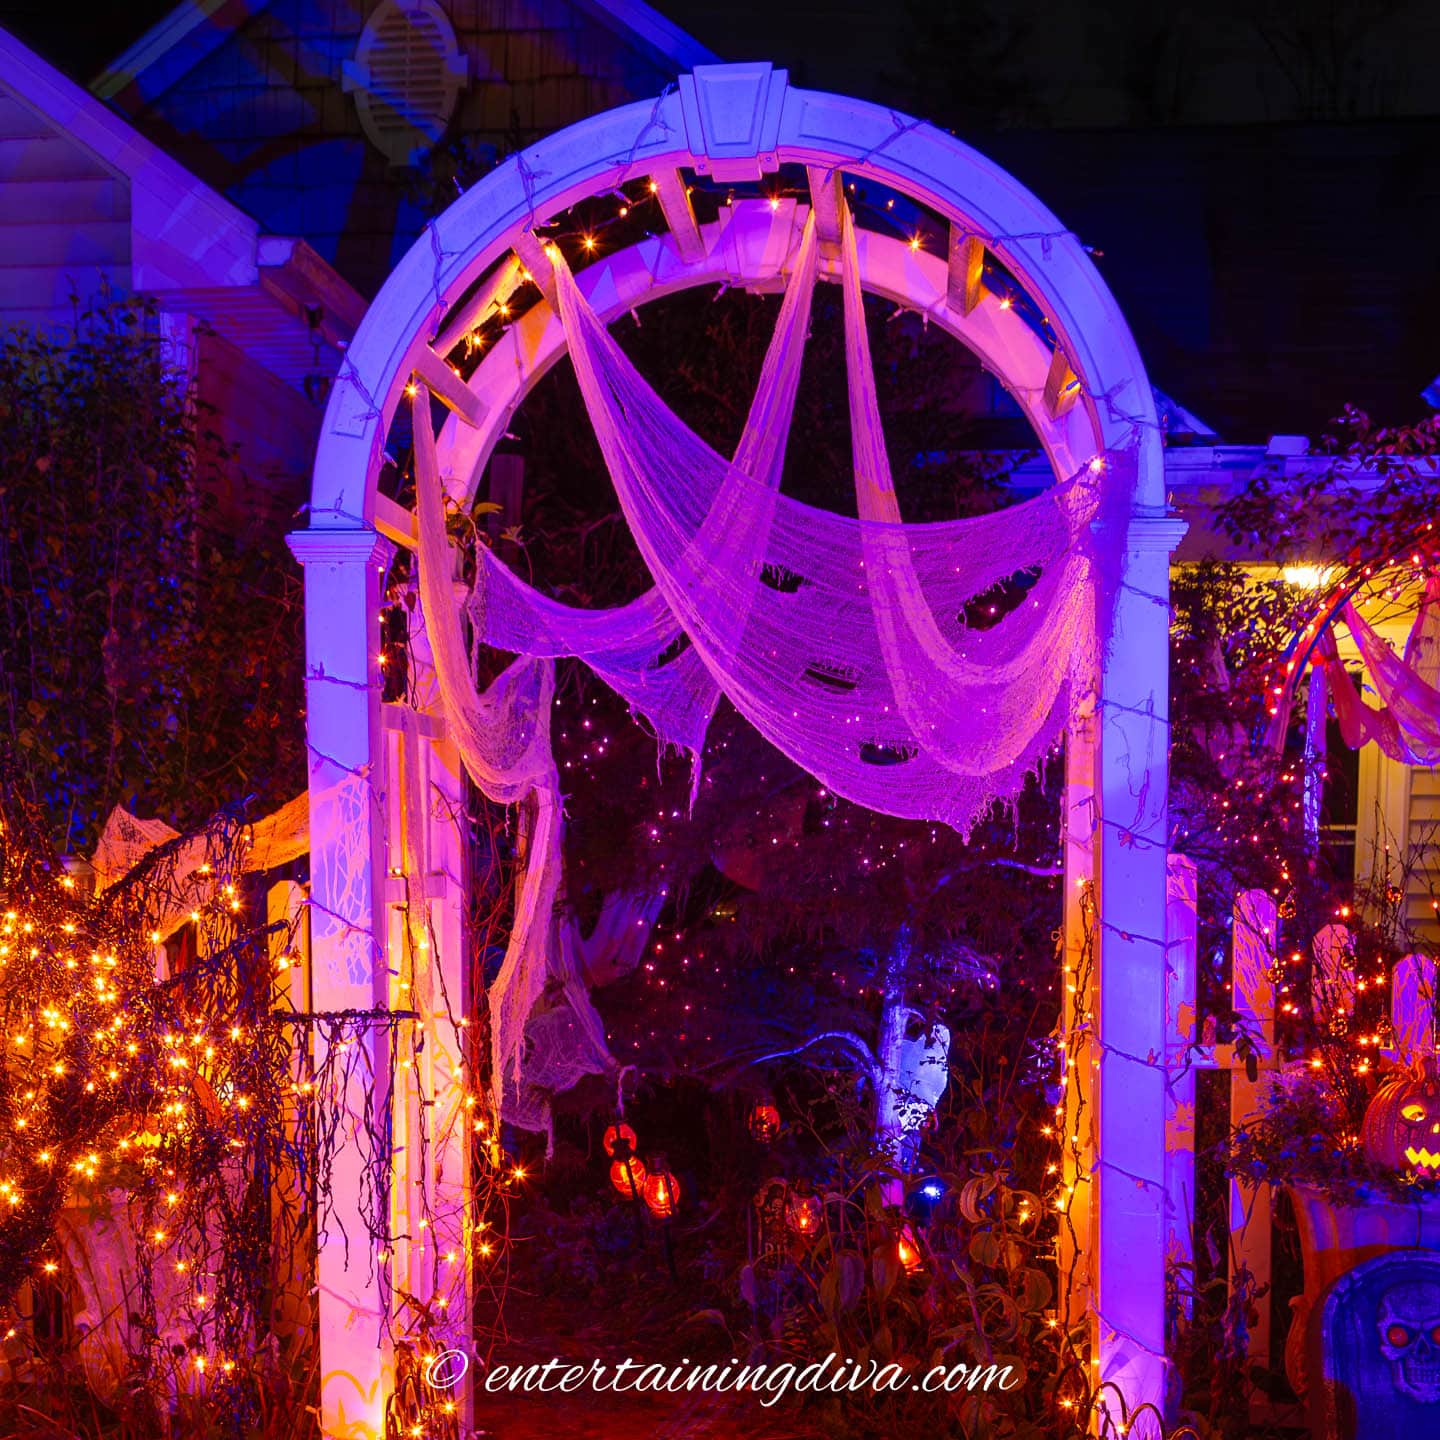
Have comments or questions about our DIY pirate ship Halloween decor tutorial? Tell us in the section below.
Pin It So You Don't Forget It!