
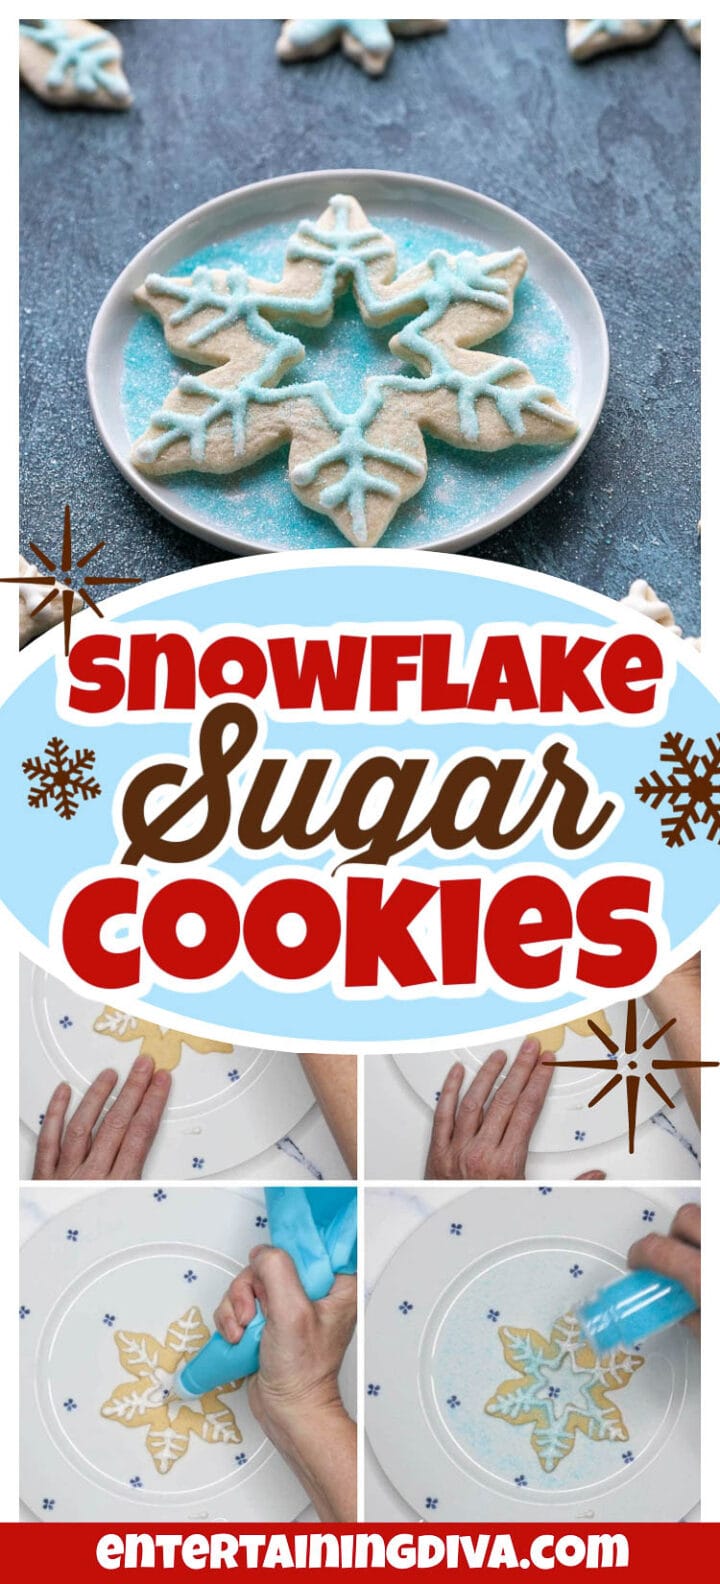
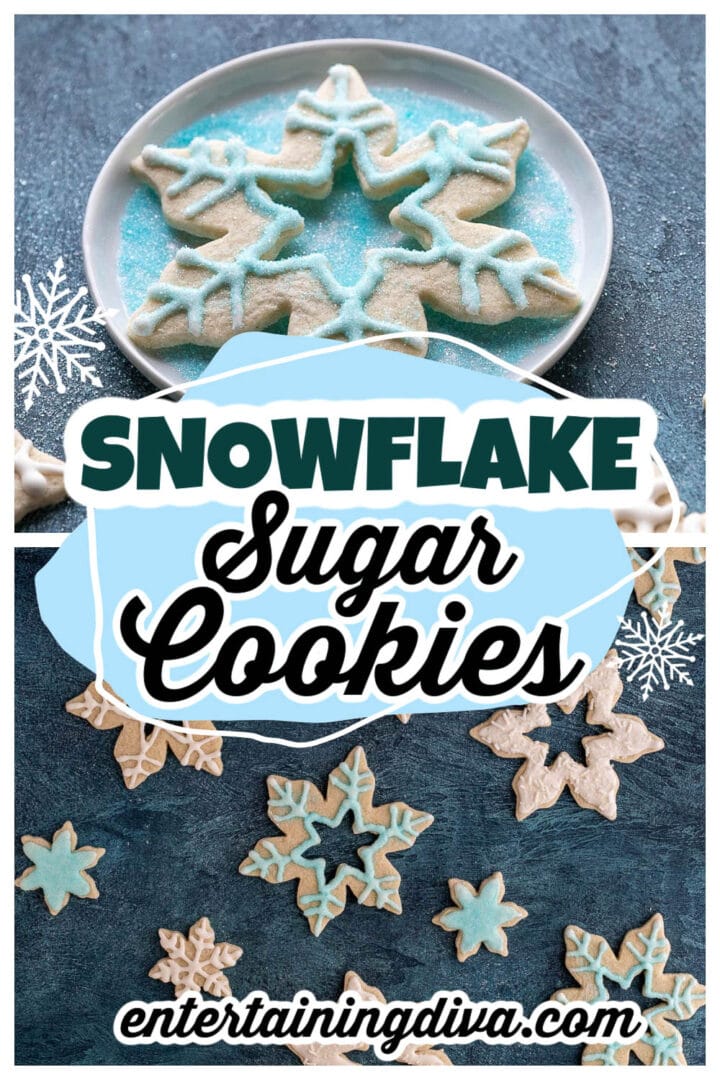


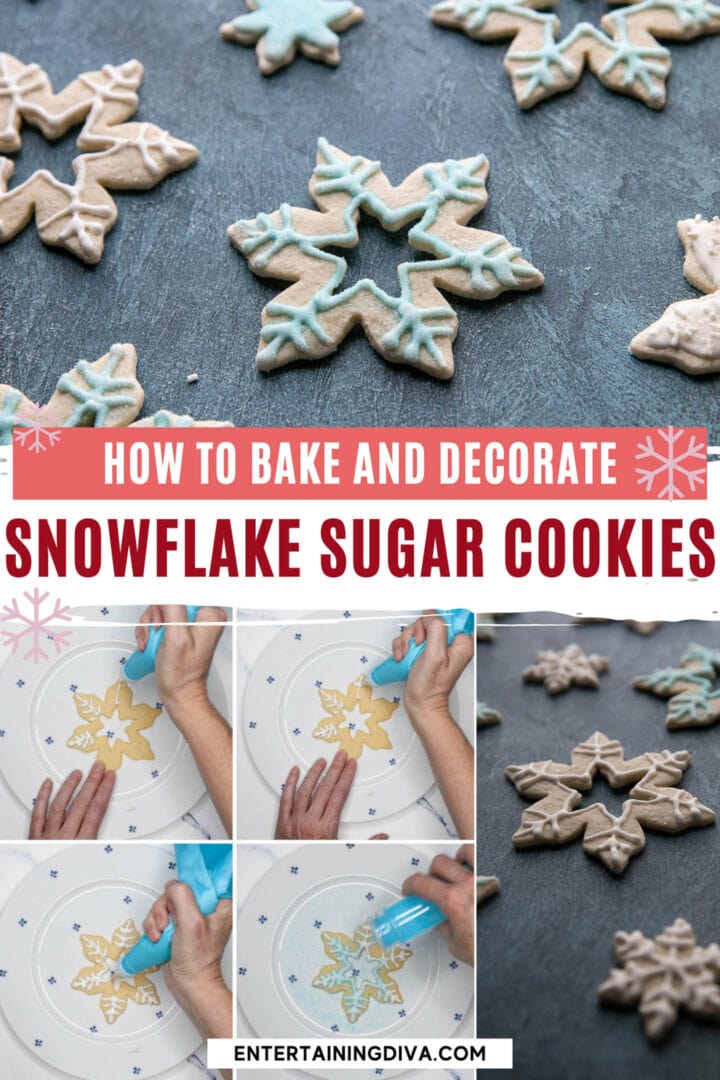
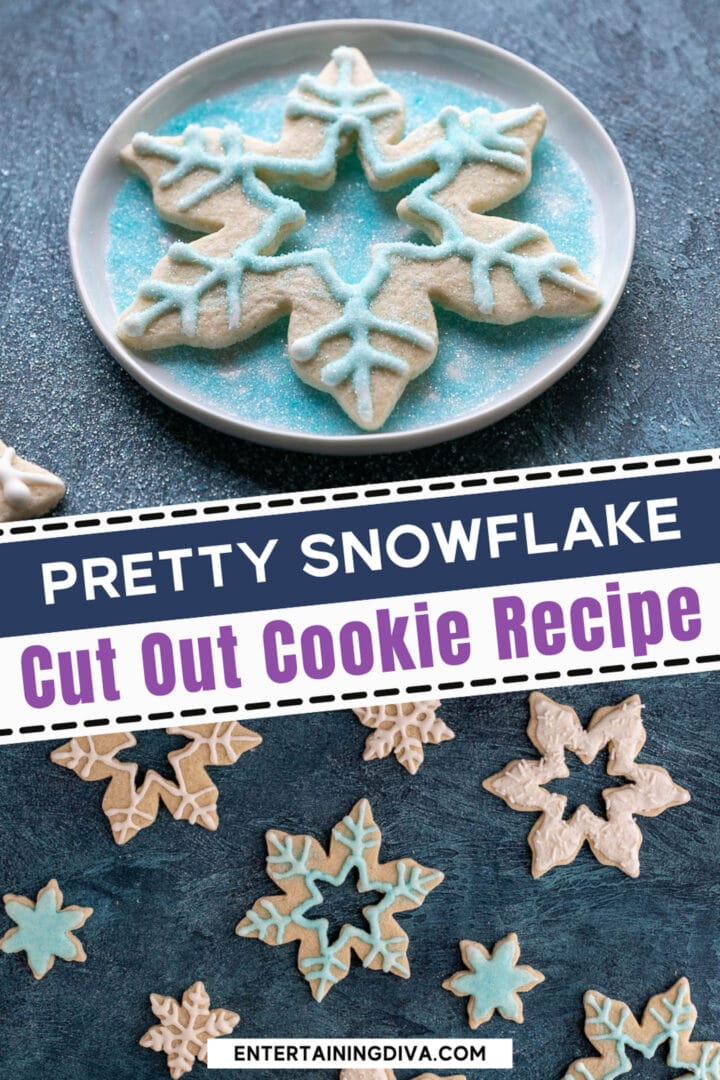


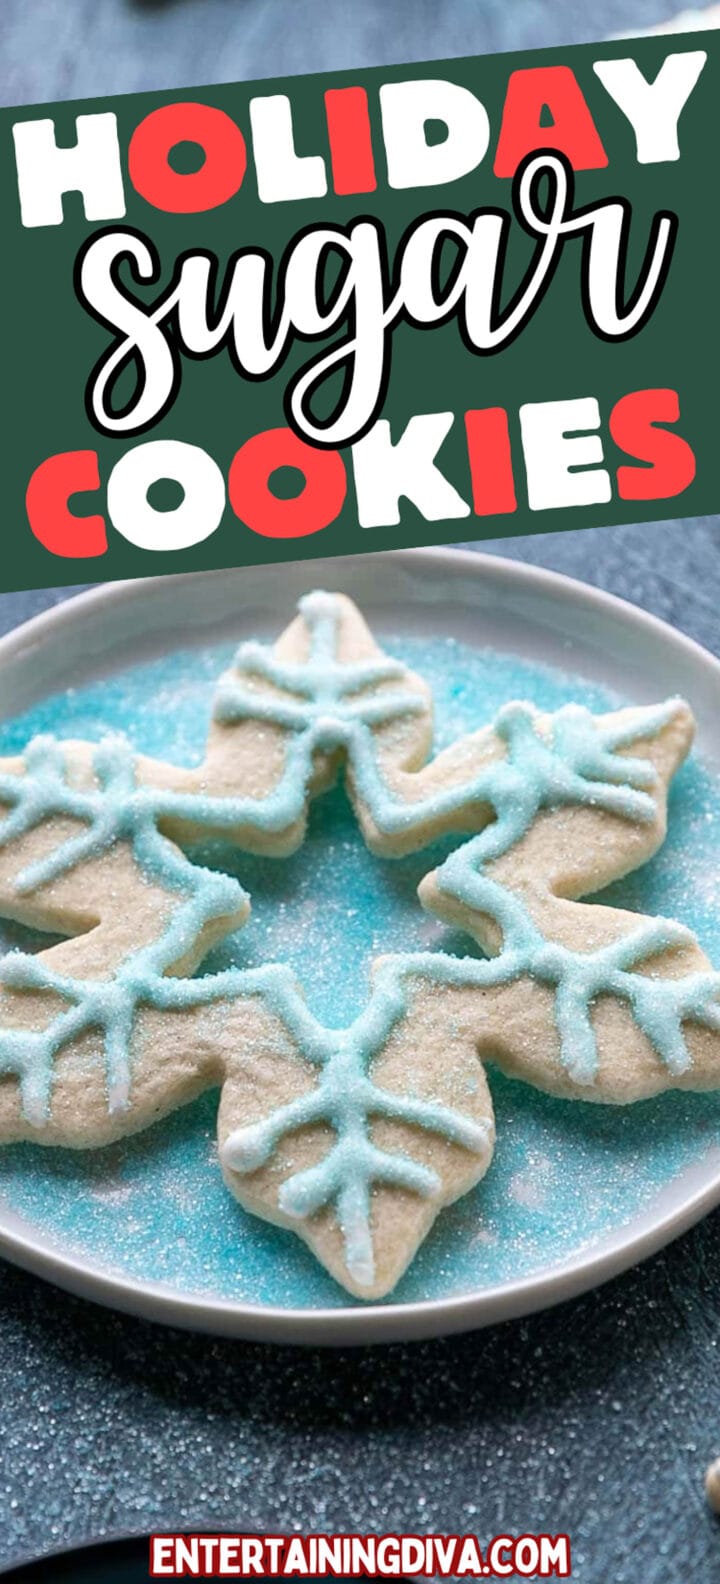
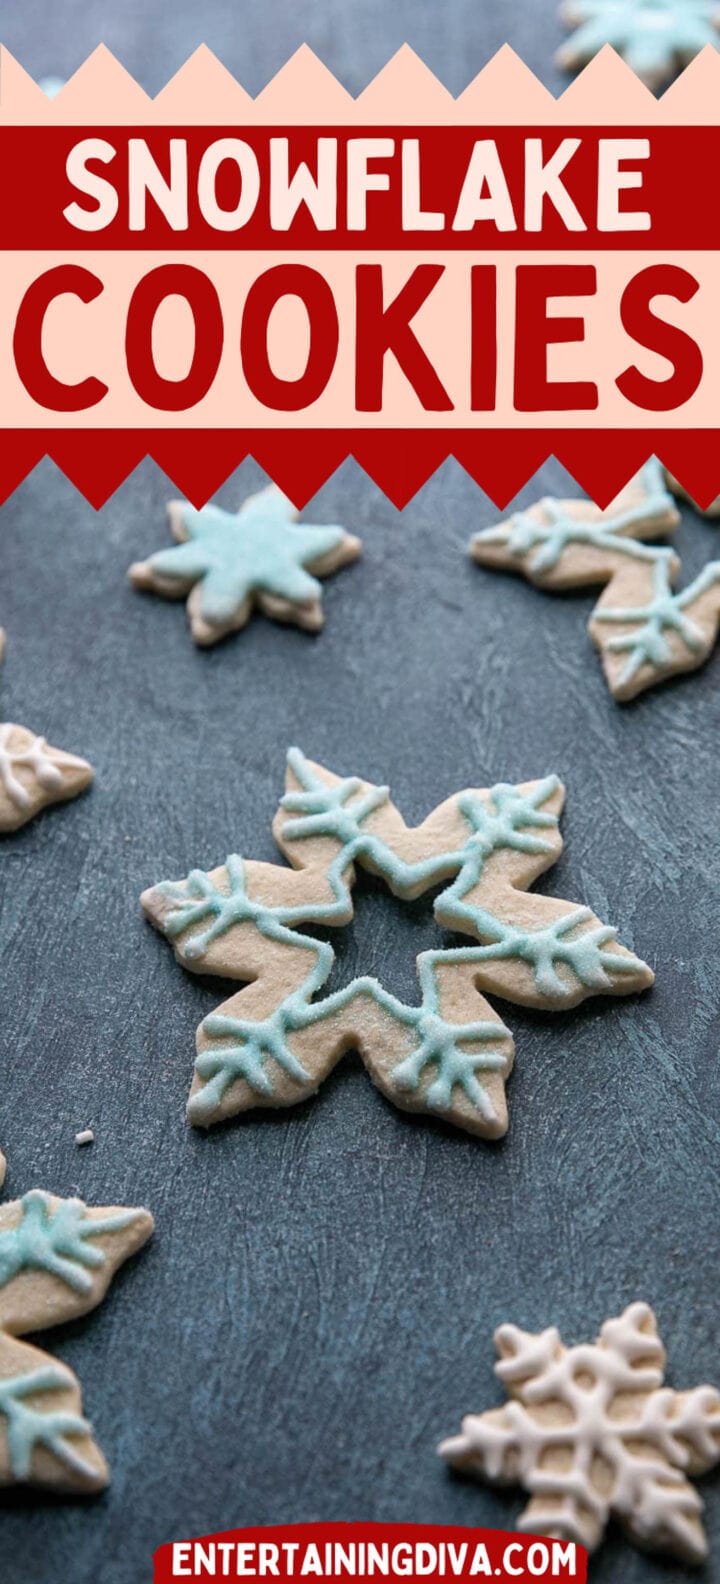
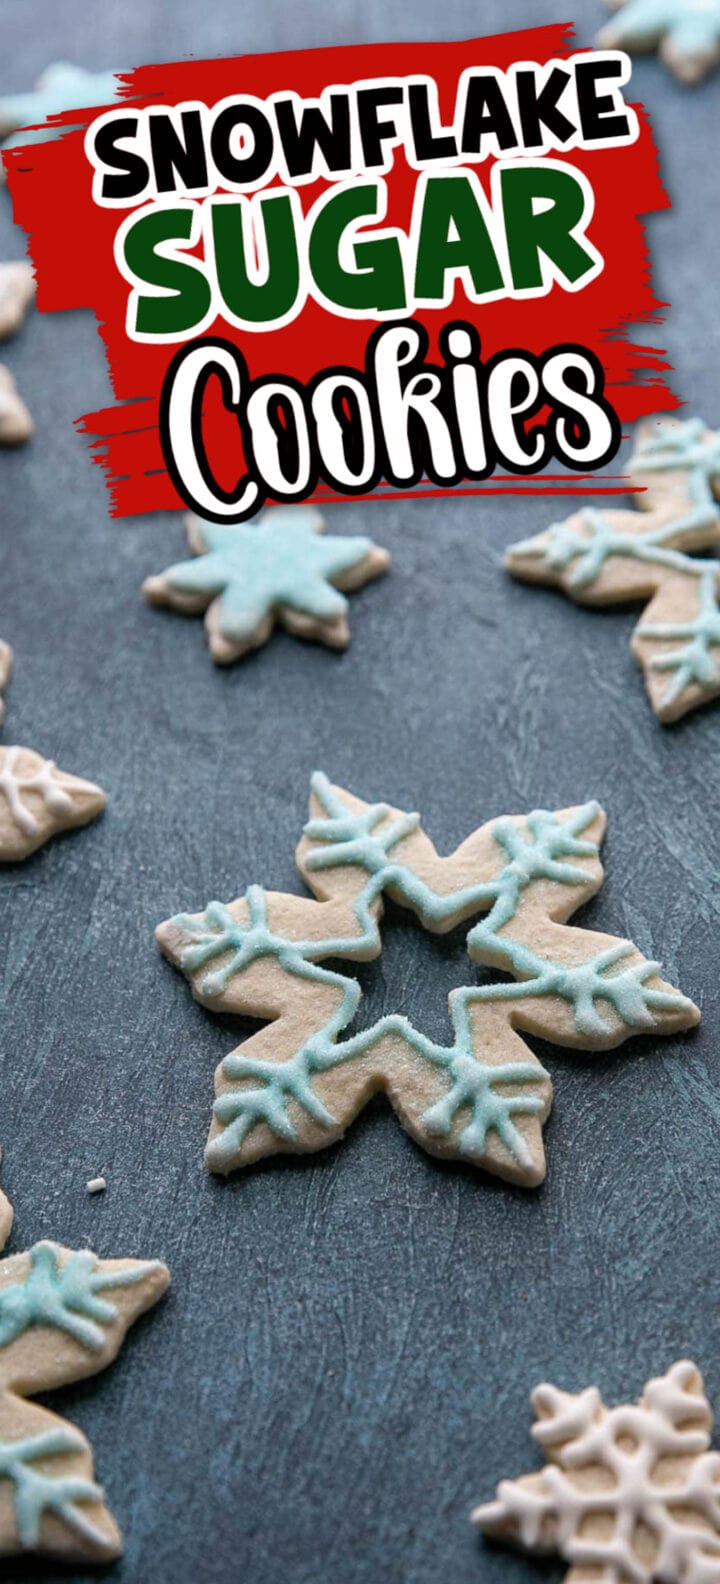

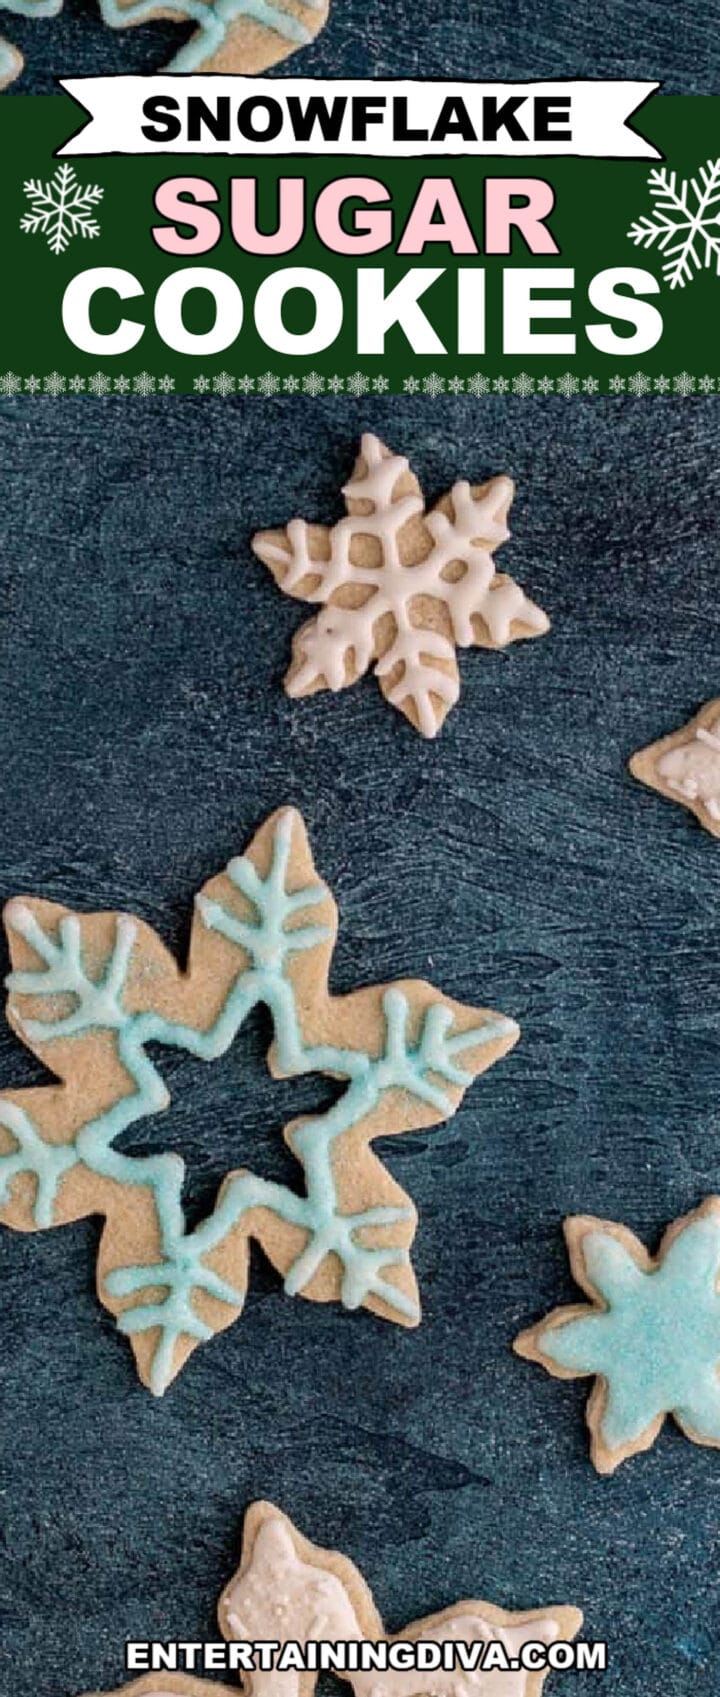


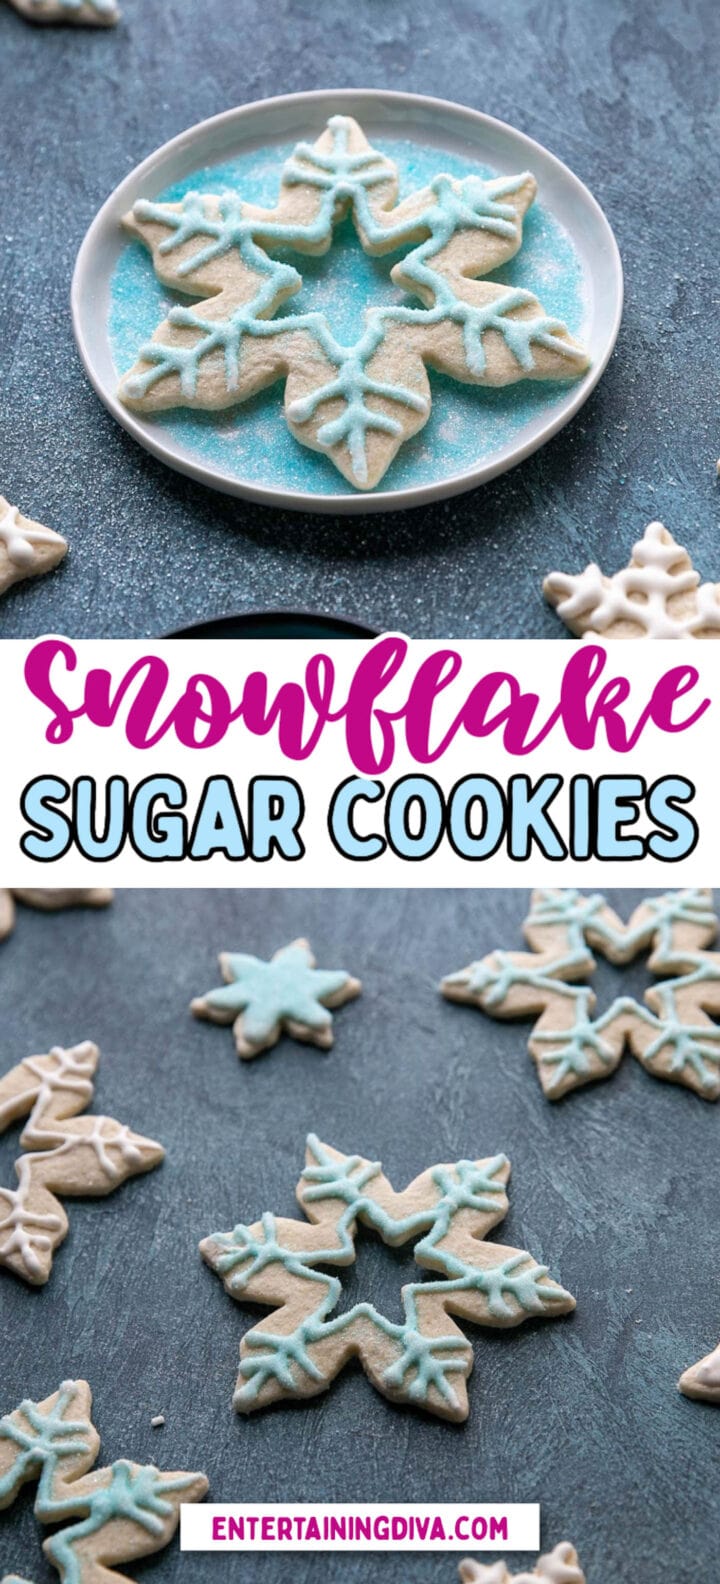
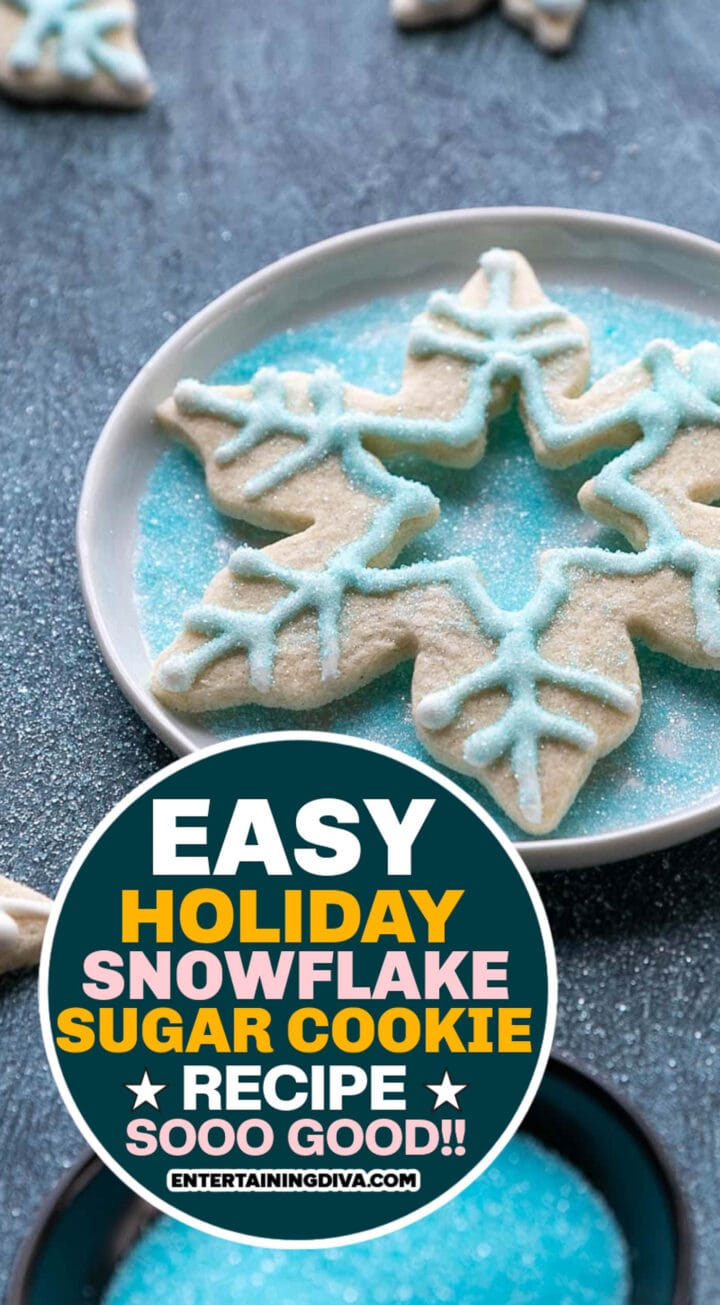
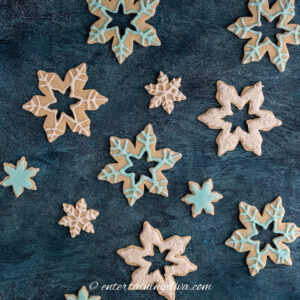
Cut out cookies are a staple of Christmas baking and this snowflake sugar cookies recipe is the prettiest! Decorated with royal icing in a lacy design and sparkling sugar, they look very wintry on a cookie tray.
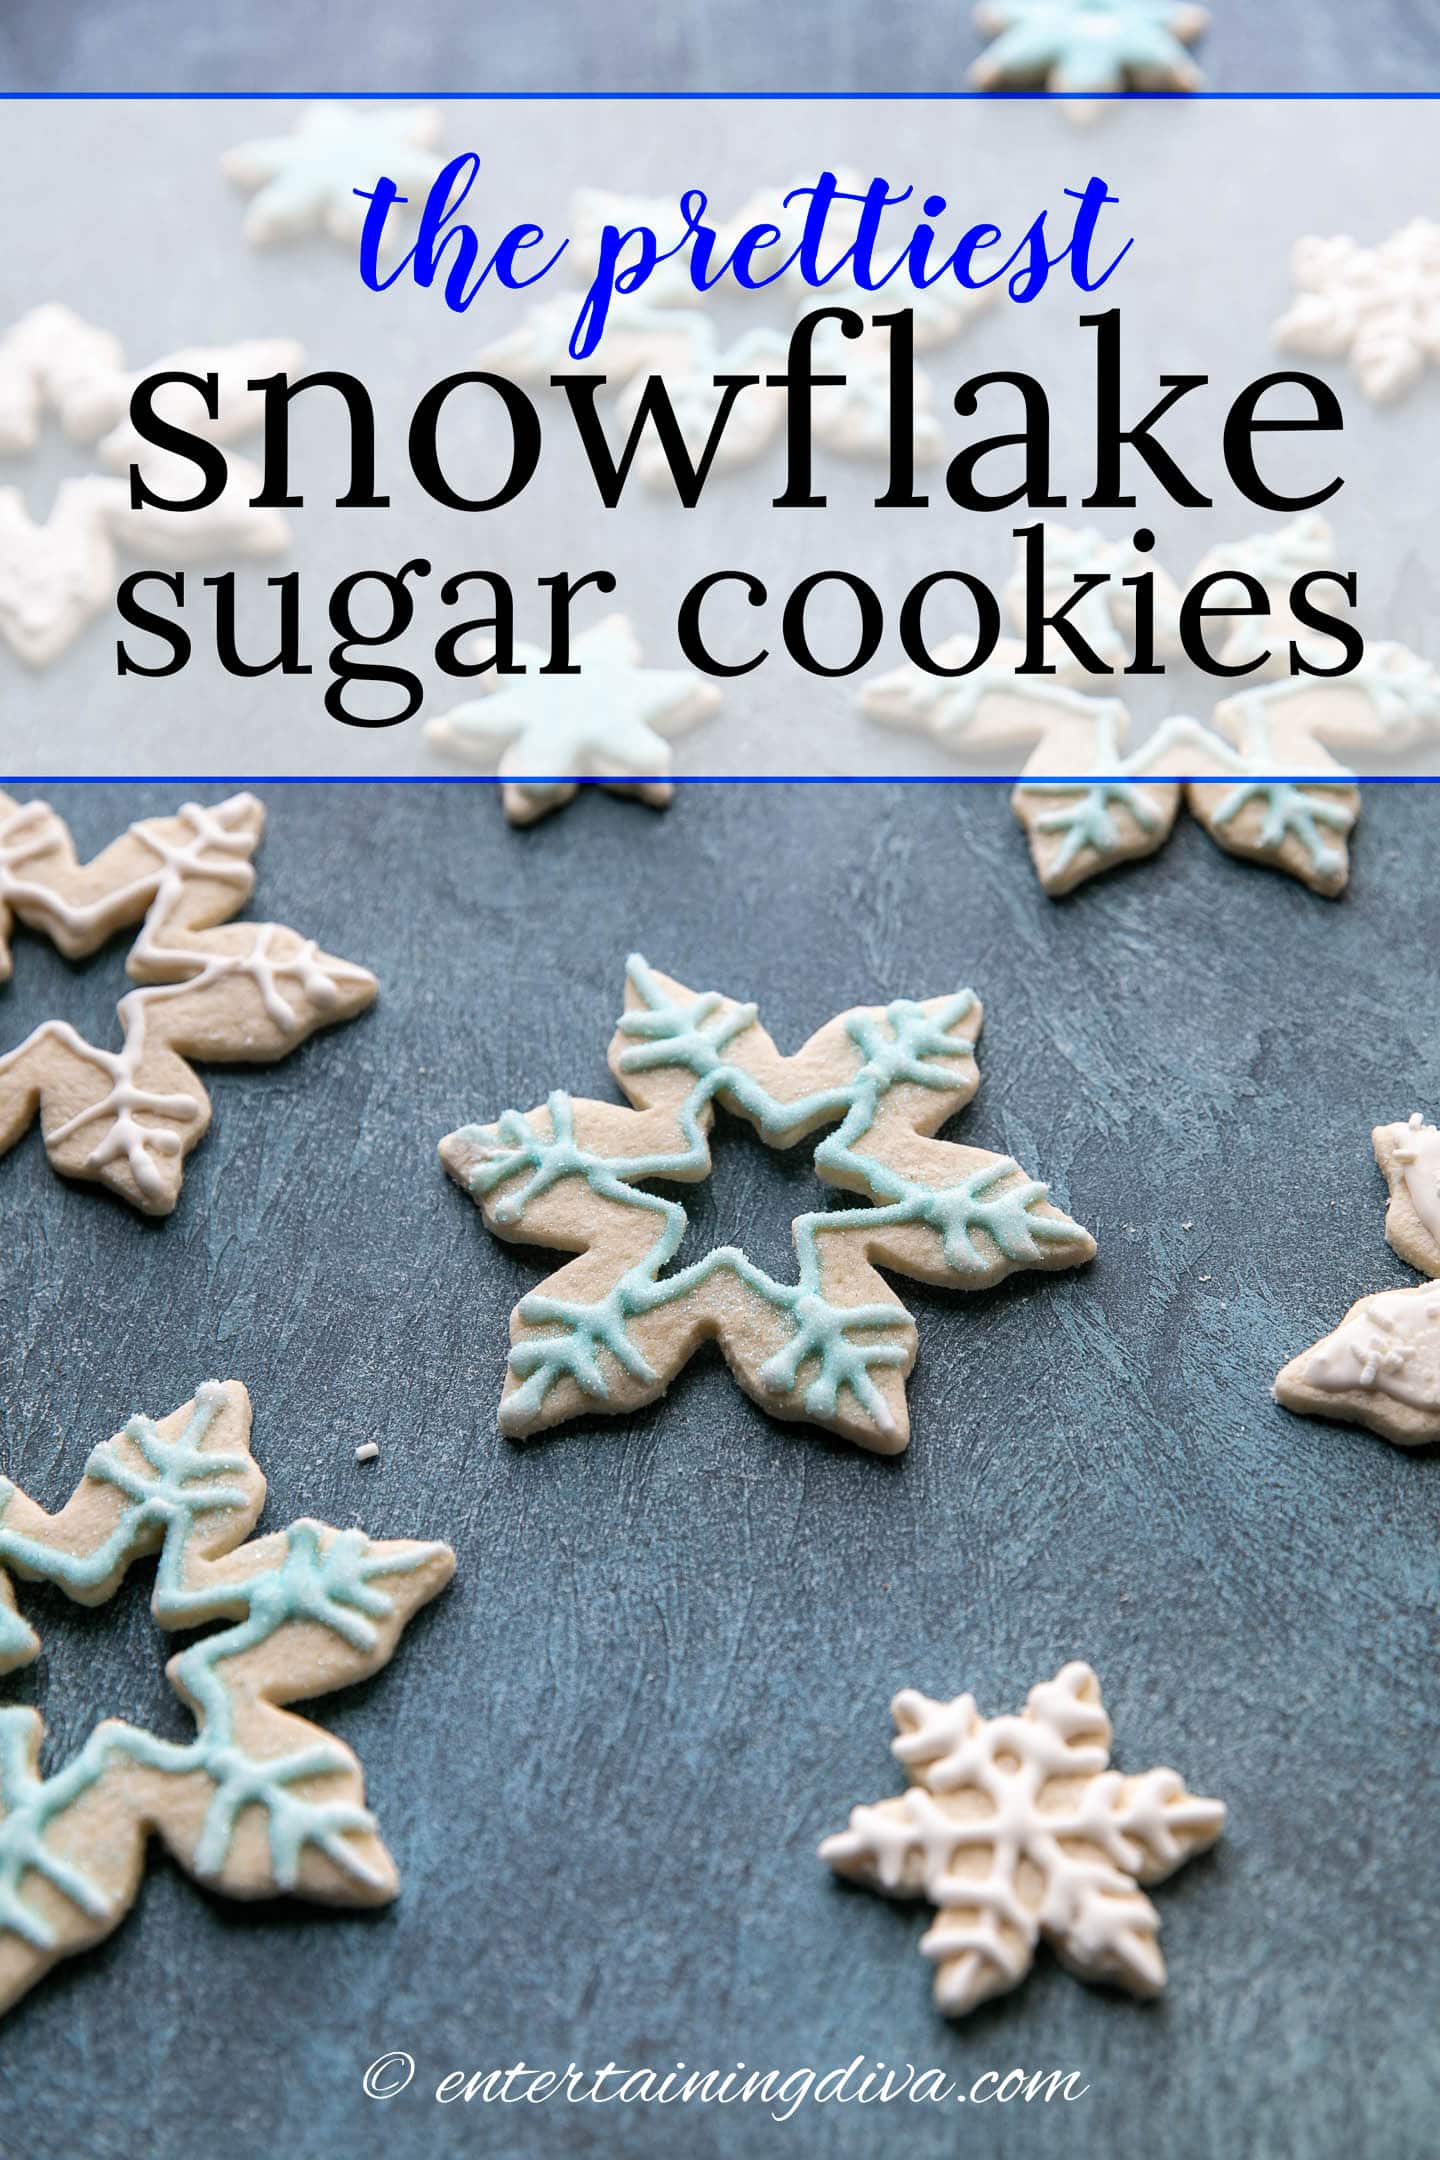
Made with a double cut-out, these snowflake sugar cookies have a delicate shape that looks even prettier with a lacy icing design.
Keeping that shape means it’s super important to have a cut out cookie recipe that won’t stretch while moving the cookies to the baking sheet. Or spread too much in the oven.
And our no-fail sugar cookie dough is perfect for that!
It uses a food processor instead of a mixer and you don’t have to remember to take the ingredients out of the refrigerator early.
Not to mention that the cookies are so easy to cut out from the dough, they never lose their shape.
And since we’re using colored sugar on top of white royal icing, you don’t need to add any food coloring to the frosting. (Although you totally could if you want to).
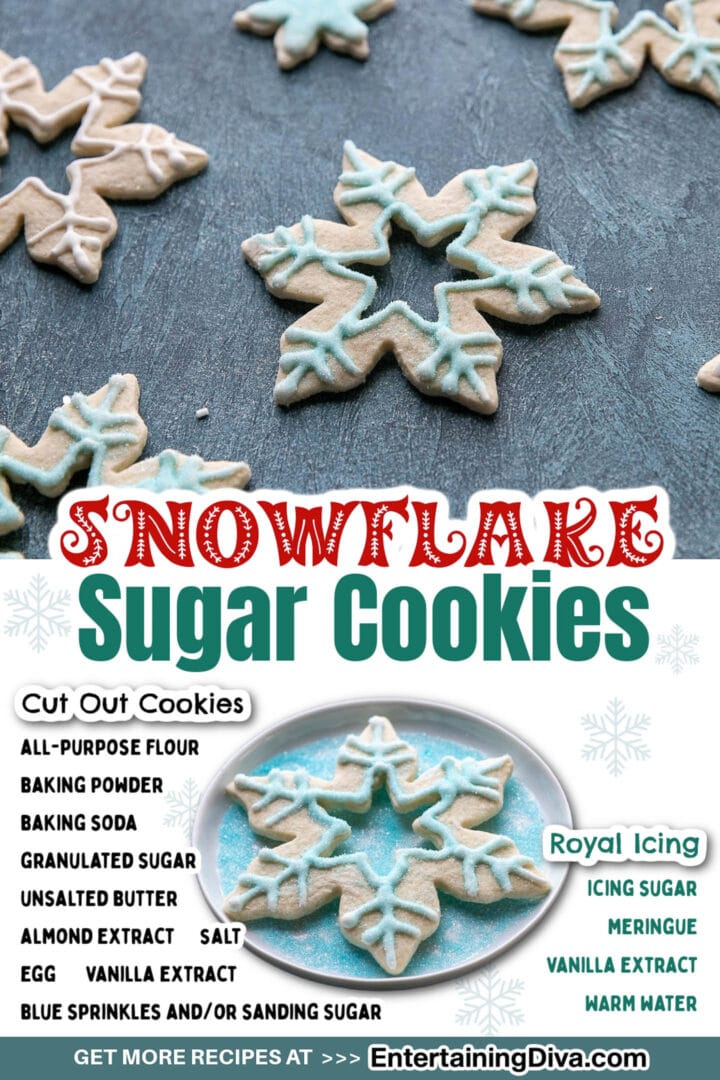
Ingredients
Makes: about 24 cookies. The exact number will vary depending on how thick you make your cookies and how big your cookie cutter is.
Here is your shopping list.
For the cookies:
- baking supplies: 2½ cups all-purpose flour, ¼ teaspoon baking powder, ¼ teaspoon baking soda, ¾ teaspoon salt
- sugar: 1 cup granulated sugar
- dairy: 2 sticks (1 cup) cold unsalted butter
- eggs: 1 large
- flavoring: 1 teaspoon vanilla extract, ¼ teaspoon almond extract
For the icing & decorations:
- sugar: 1 pound (4 cups) icing sugar
- baking supplies: 3 Tablespoons meringue powder
- flavoring: 1 teaspoon vanilla extract
- sprinkles: (optional) blue or white sprinkles or sanding sugar
Substitutions
- For gluten-free cookies, use measure-for-measure gluten-free flour instead of regular all-purpose flour (this gluten-free brand* is my favorite).
- Salted butter will work instead of unsalted if that’s what you have
Decorating supplies
- a large (about 5″) and a small (about 2″) snowflake cookie cutter – I used the smallest and largest cookie cutter in this set*.
- piping bag – I like to use these re-usable piping bags*.
- piping tip #4* – You can use a smaller (#3) or larger (#5) tip if you prefer. (the smaller the number the smaller the hole so the less icing will come out)
- piping coupler* (optional) – this holds the piping tip steady in the piping bag and makes it easy to change tips if you need to.
How to make snowflake sugar cookies
Make the dough
Get all the details on how to make sugar cookies that hold their shape HERE.
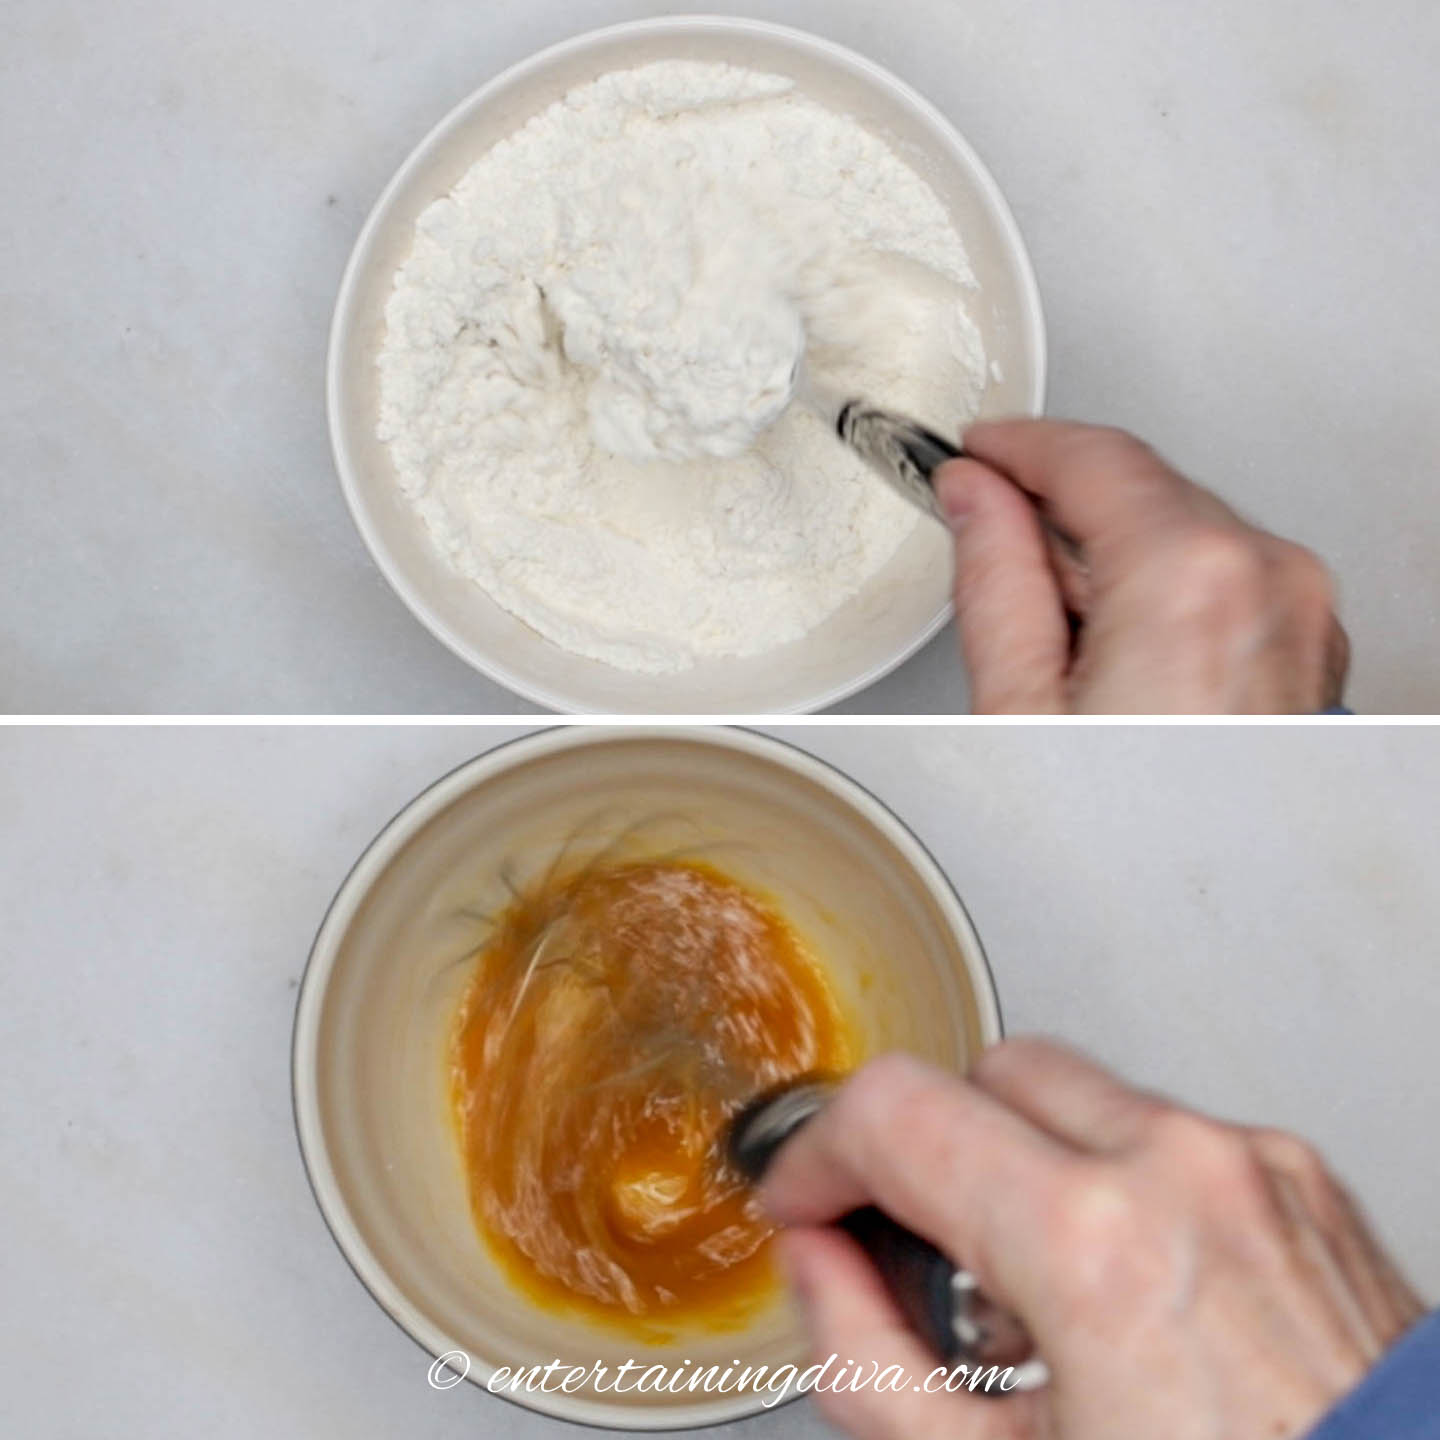
In a small bowl, mix together 2½ cups of flour, ¼ teaspoon baking soda and ¼ teaspoon baking powder. Set aside.
In another small bowl, combine the egg, 1 teaspoon vanilla extract, ¼ teaspoon almond extract and ¾ teaspoon salt. I usually do this with a fork or hand whisk. An electric mixer isn’t necessary. Set aside.
Cut up 2 sticks (1 cup) of cold butter into ½ inch chunks.

Blend the butter and sugar in the food processor and process until combined, about 30 seconds.
Add the egg and vanilla mixture and process until combined, about 10 seconds.
Then add the flour mixture and process until all of the flour is combined, about 30 seconds.
Roll out the cookie dough
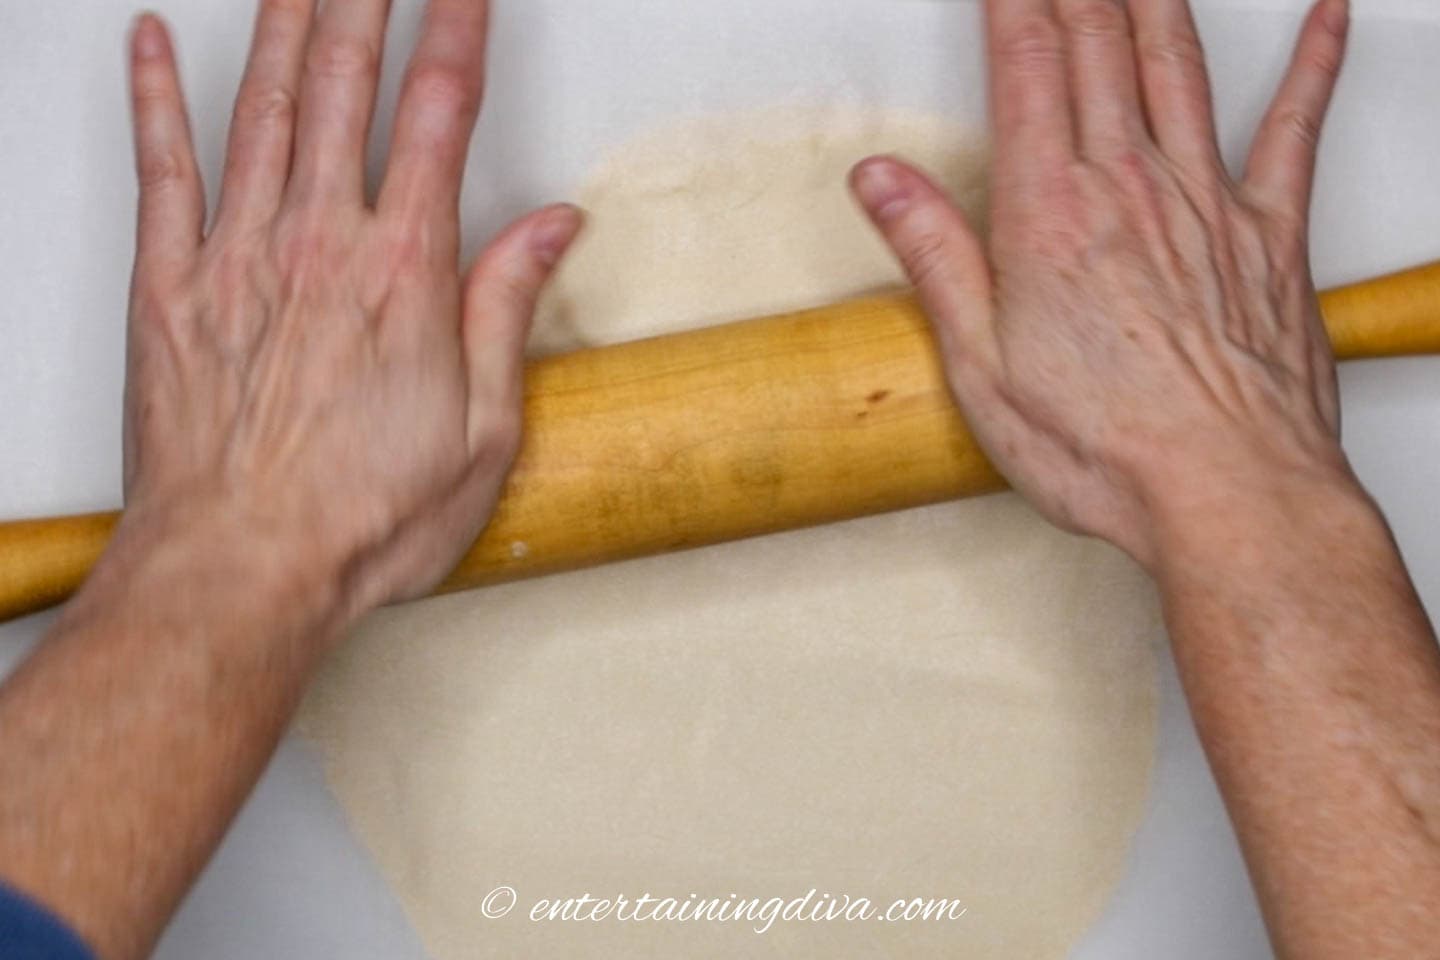
Divide the dough in half to make it easier to roll.
Cover the top and bottom of the first roll with two sheets of parchment paper or waxed paper.
To make the parchment easier to remove, you can lightly flour the sheets on the sides that are touching the cookie dough.
With a rolling pin, roll the cut out sugar cookie dough out until it is about 1/8 of an inch thick. Layering it with parchment paper on both sides prevents the dough from sticking.
Put the rolled out dough on a cookie sheet or tray, still keeping the parchment paper on both sides.
Repeat with the other ball of dough.
Refrigerate the rolled out dough for 1½ hours, or freeze for 30 minutes.
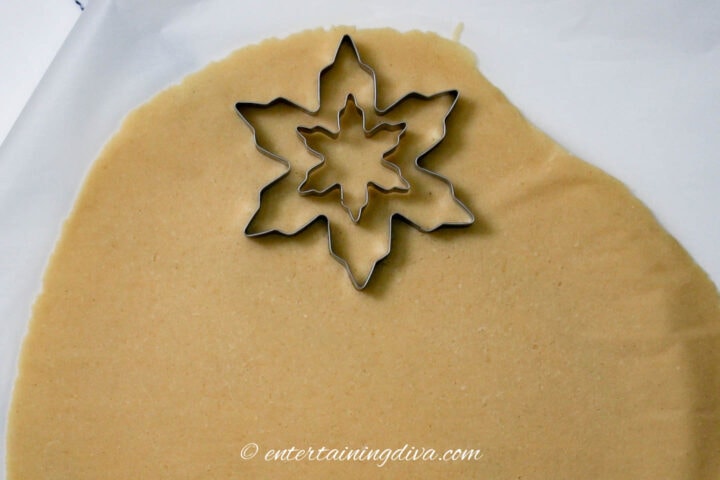
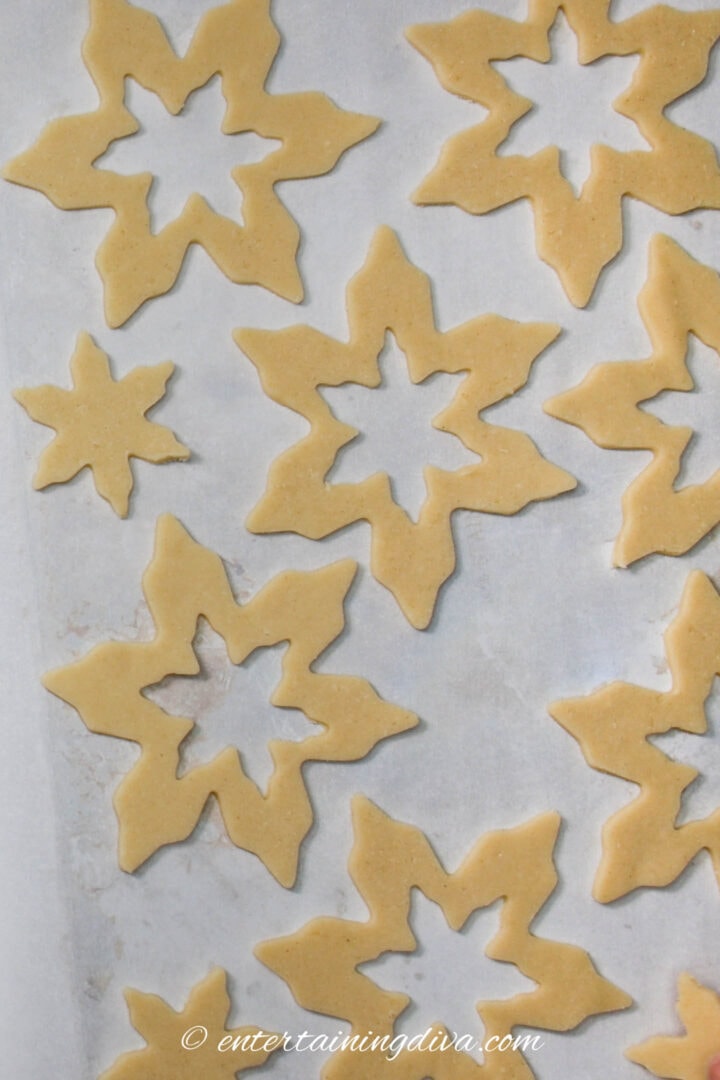
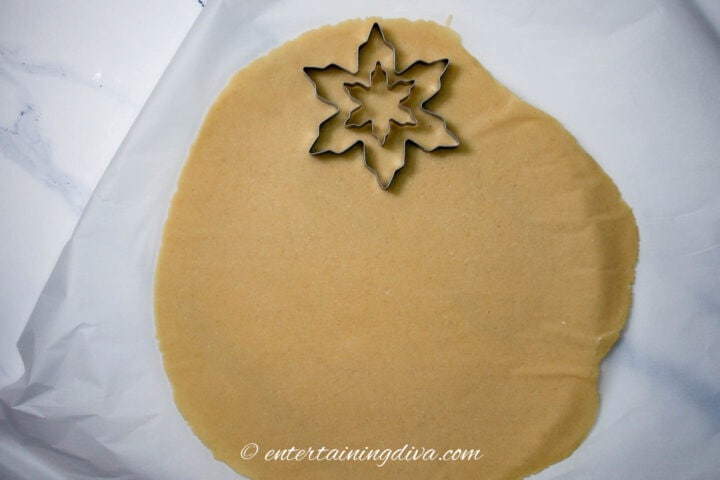
Cut out the snowflake cookies
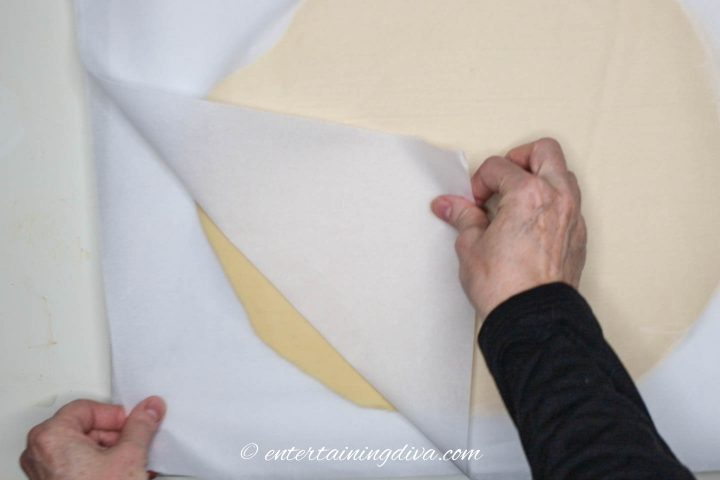
Take the first sheet of cookie dough out of the refrigerator and peel off the top layer of parchment paper.

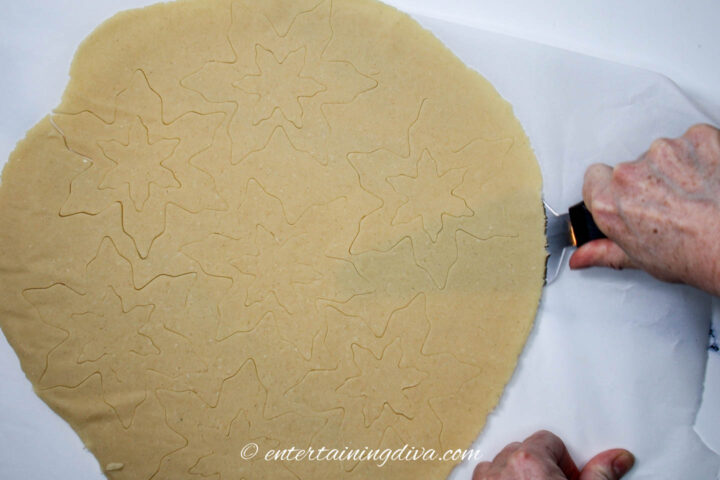
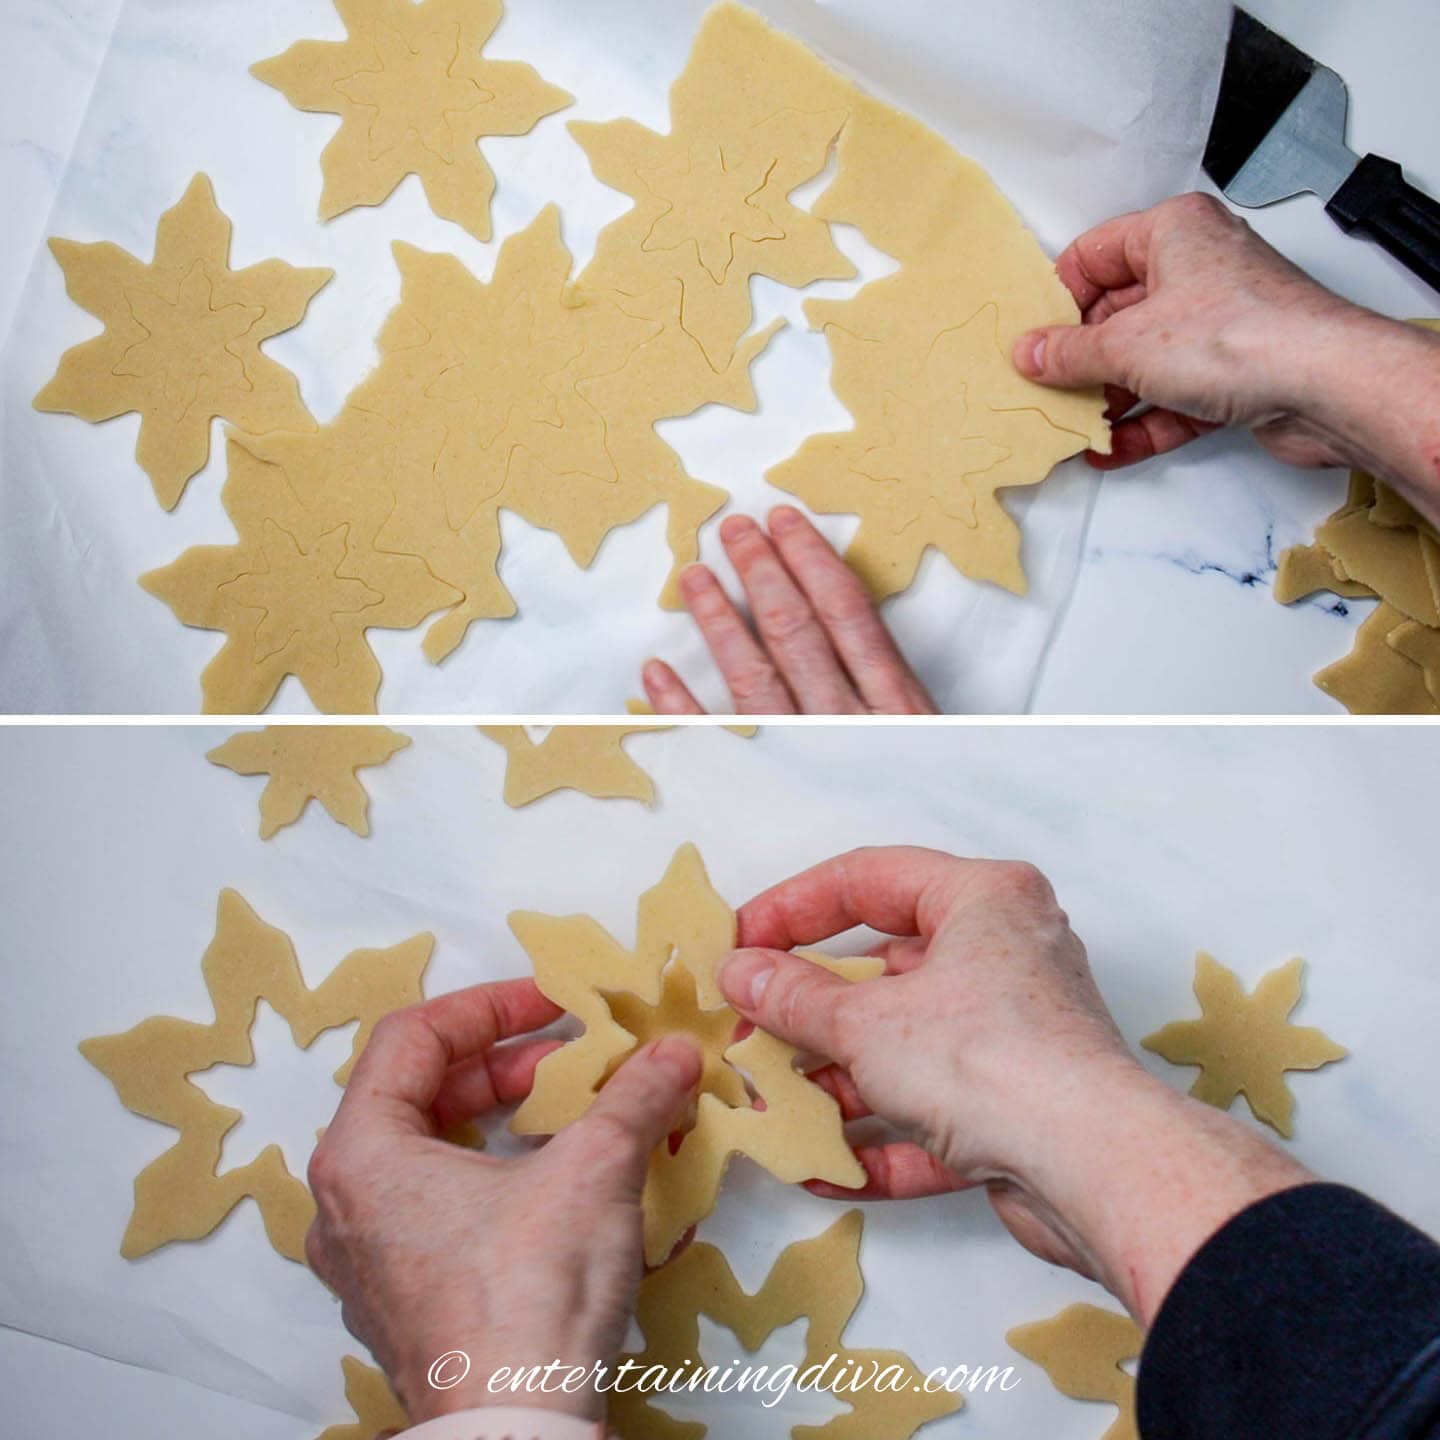
Position the large snowflake cookie cutter on the cookie dough.
Then place the small snowflake cookie cutter inside, making sure to center it.
Push down on both cookie cutters to make the cut outs in the cookie dough. Don’t remove the cookies from the dough just yet.
Repeat the cutting process to make more snowflake cookie shapes.
Put the cookie dough back in the refrigerator with the bottom piece of parchment paper still attached.
Do the same the process with the second sheet of cookie dough.
To make sure the cookies will keep their shape when you move them and prevent them from spreading, refrigerate the cookie dough for another 30 minutes or until the dough is stiff.
Separate the cutout cookies
Pre-heat the oven to 300℉.

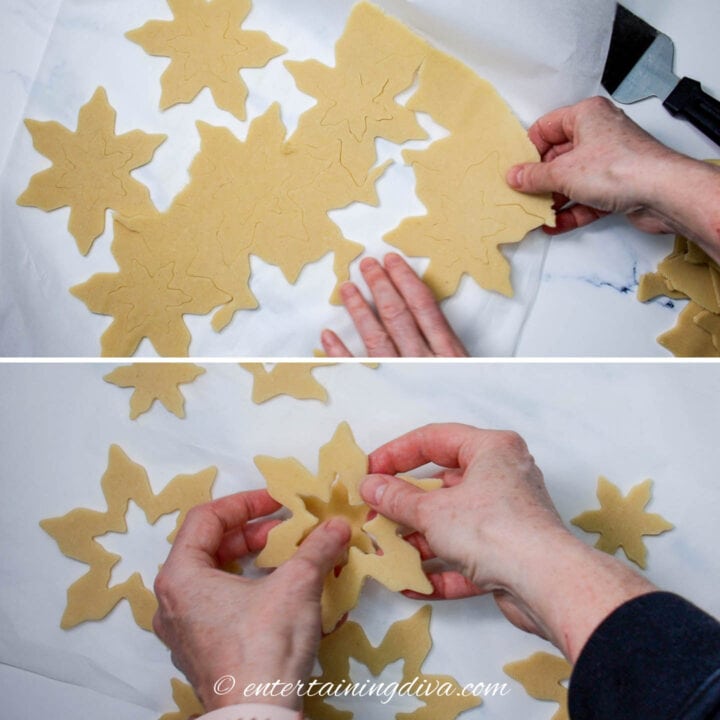
Use a metal spatula (or a cake knife) to separate the bottom layer of parchment paper from the cookie dough.
Remove the excess cookie dough.
Then separate the smaller snowflake shape from the larger one. This will be easy as long as the dough is still cold.
We’ll bake both the larger cookies with the cut-out in the middle as well as the smaller cookies that came out of the middle.
Put another piece of parchment paper down on a baking sheet. This prevents the cookies from spreading too much and losing their shape while they’re baking.
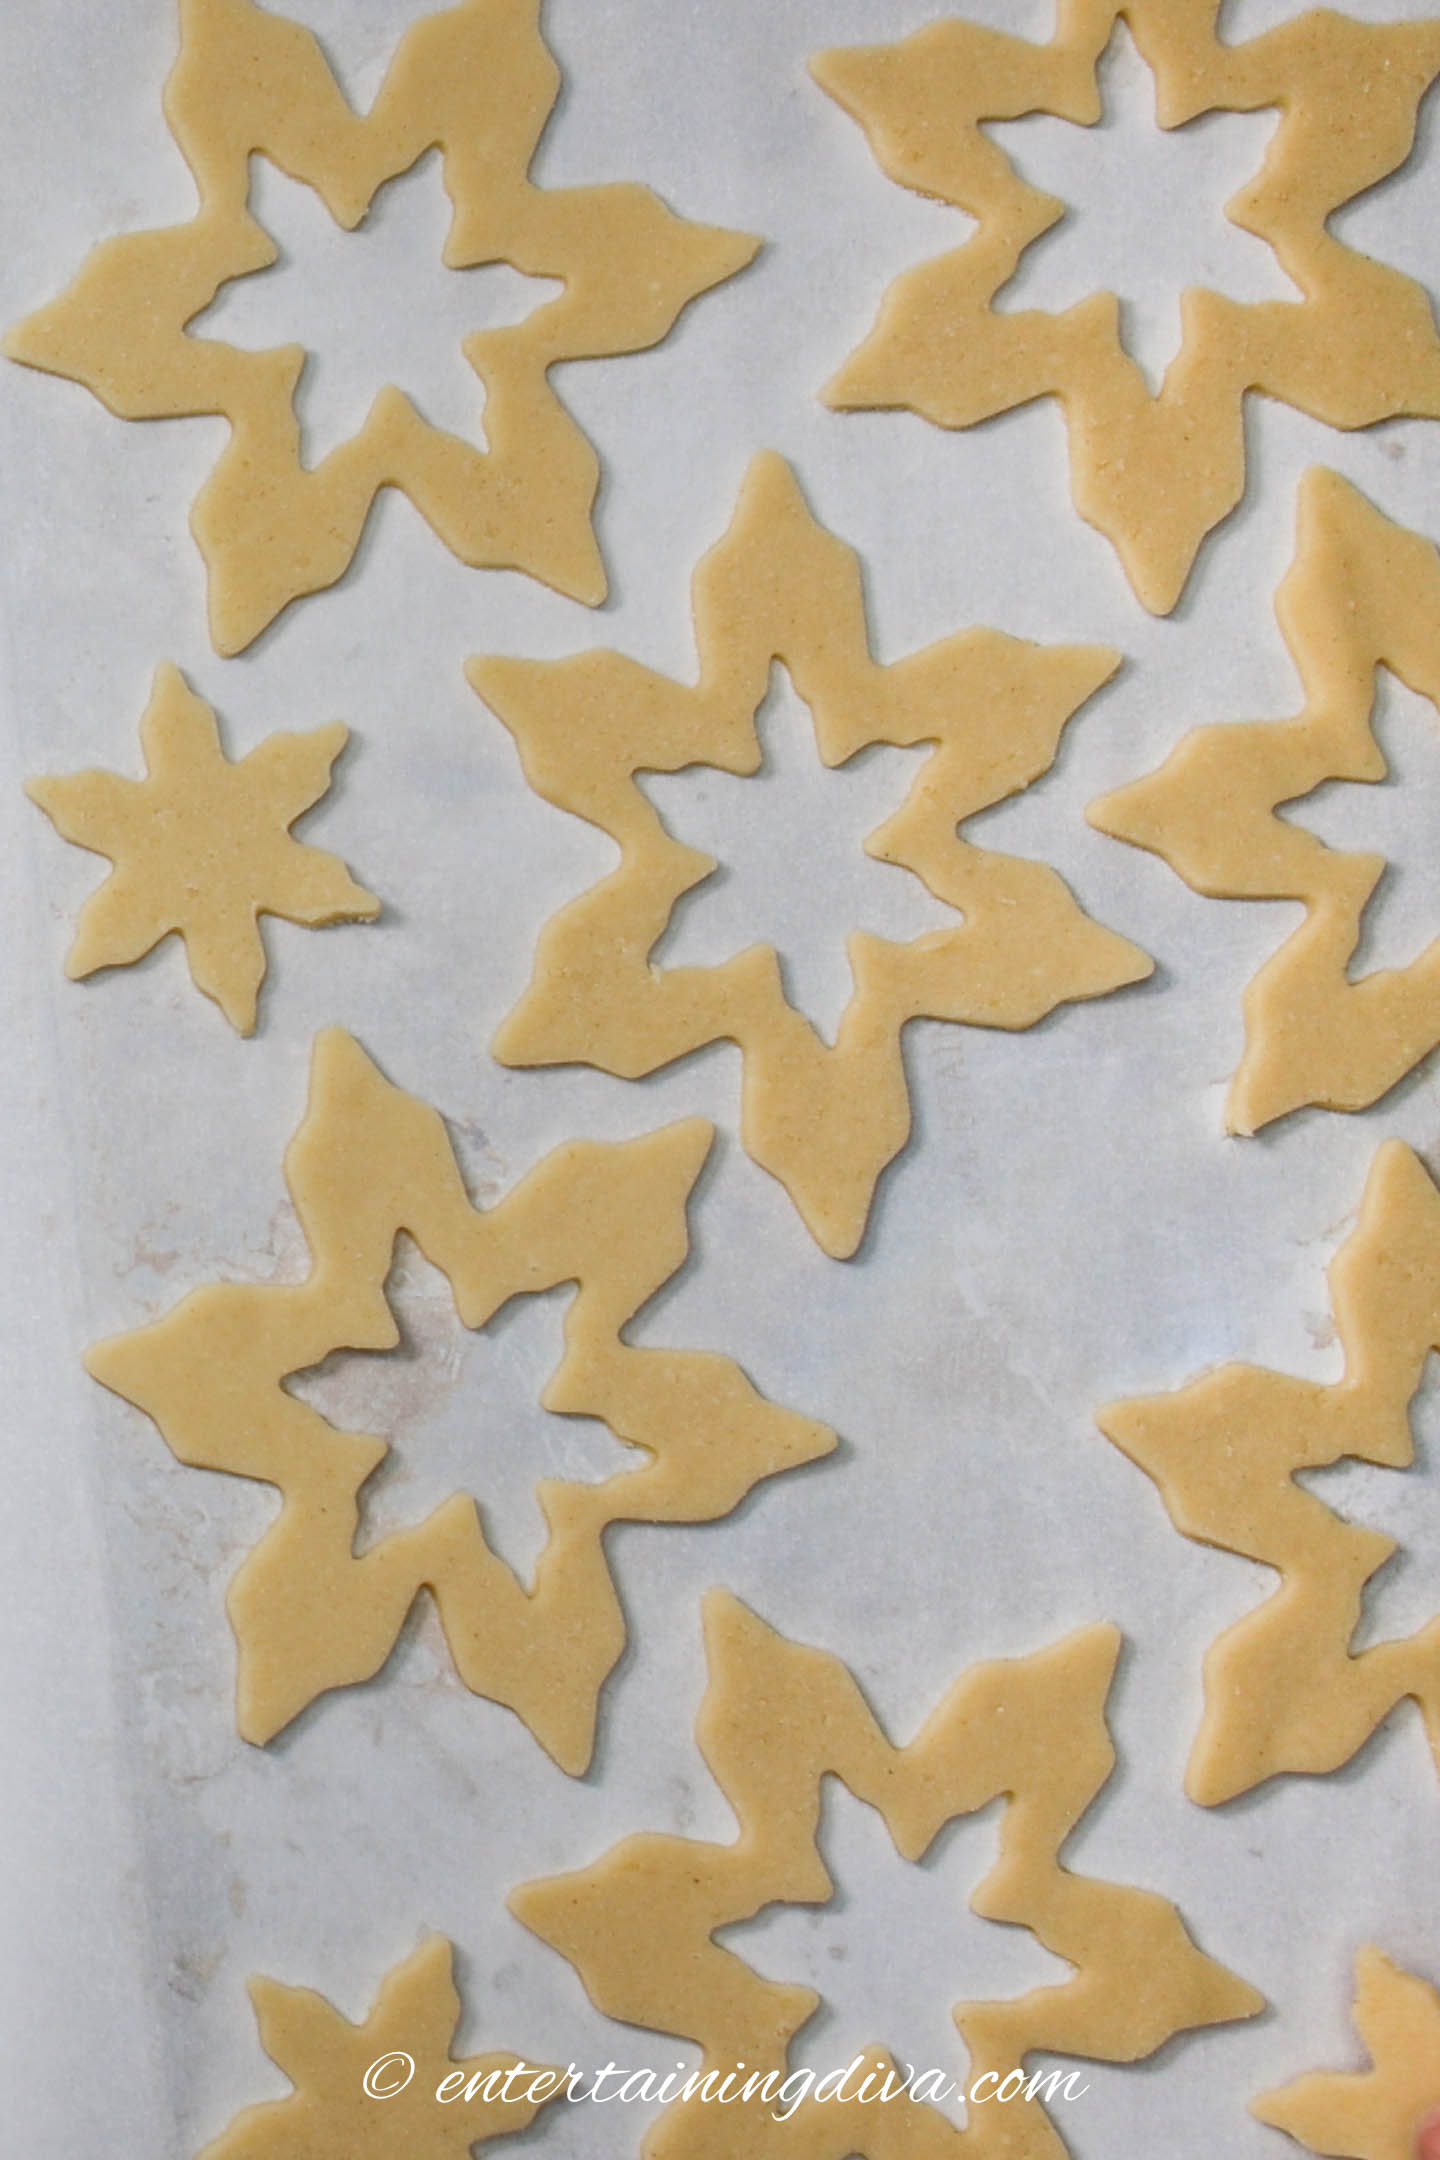
Then lay out the cookies about ½ inch apart. Since they won’t spread much, they don’t need a lot of space.
Bake the cookies
Bake at 300℉ for 10 to 15 minutes, or until the bottom of the cookies are slightly brown.
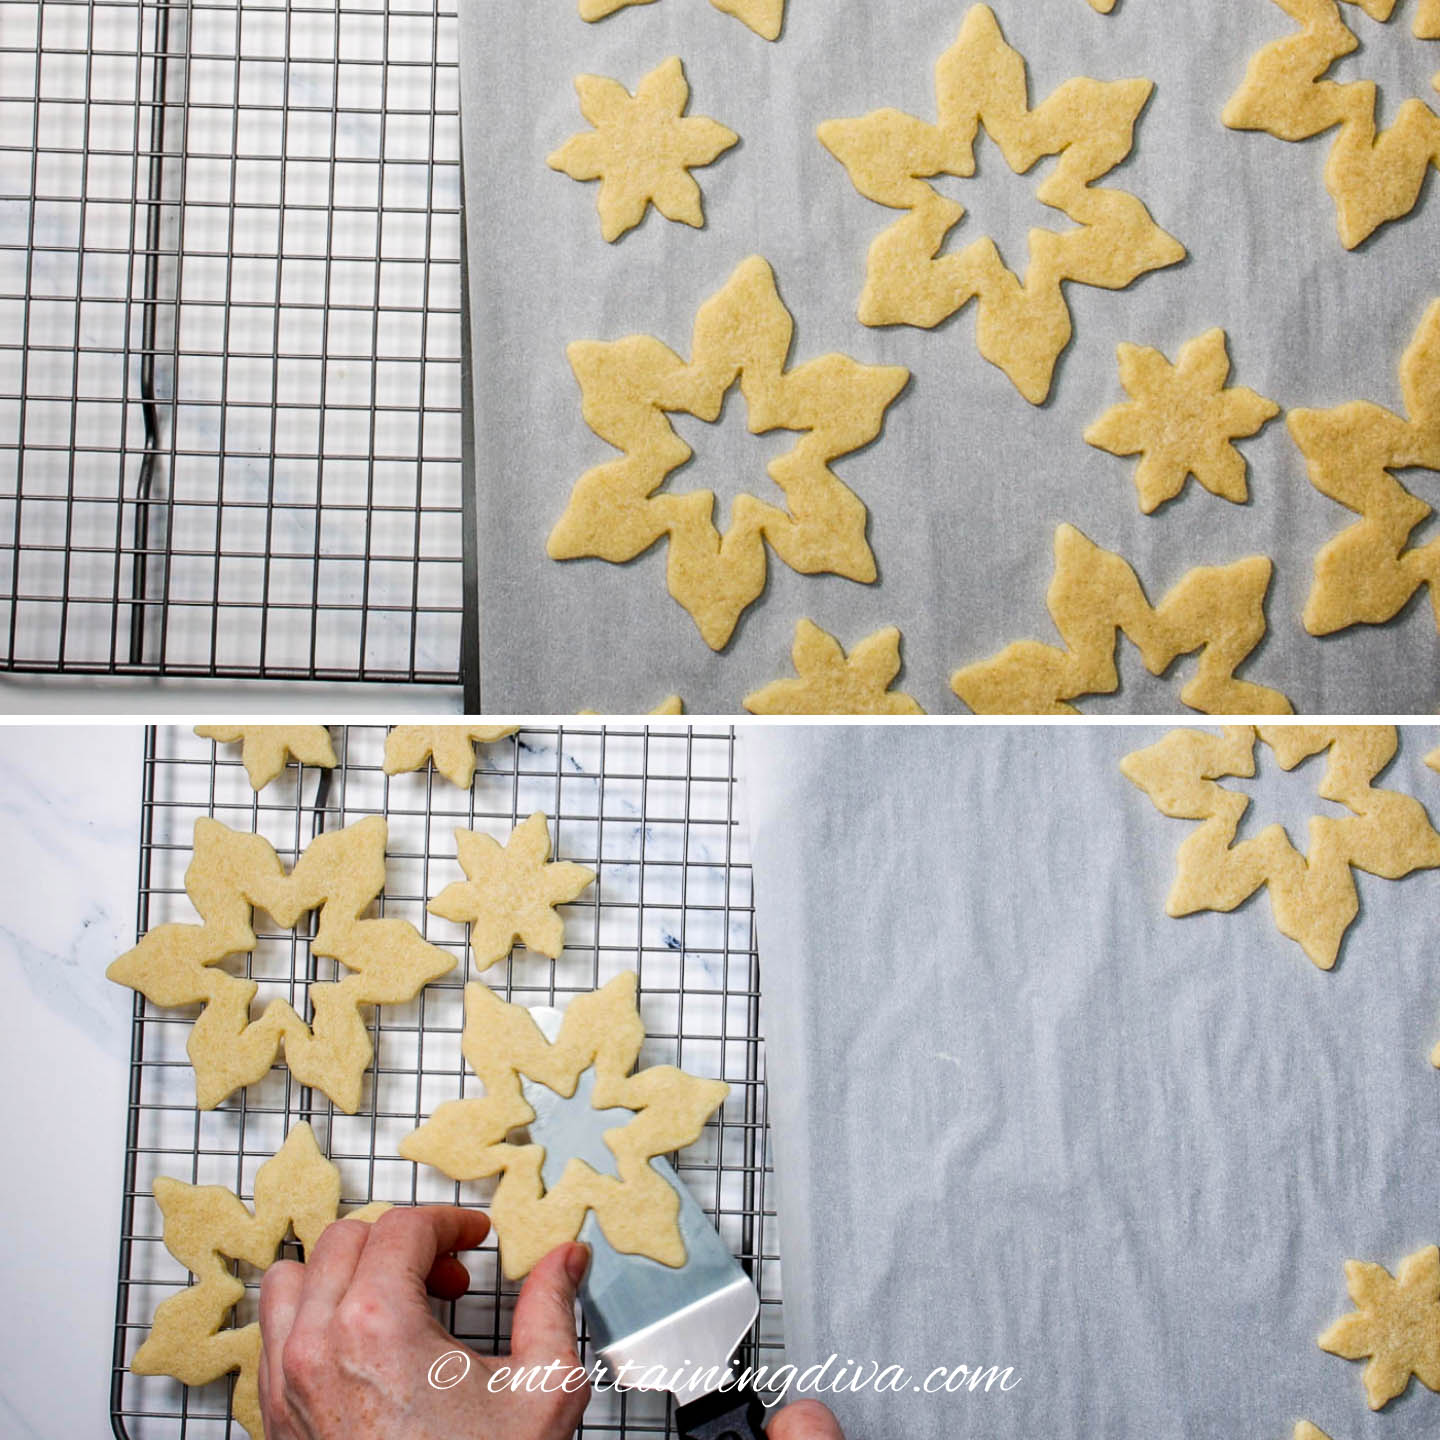
When they are done, move the baking sheet to a wire rack and let cool for 5 minutes before moving the individual cookies to the cooling rack.
The cookies will be very soft at this point and break easily, so be careful when you are moving them.
Repeat with the other sheet of cut-out cookies.
Roll out the remaining dough to create another batch of cookies.
How to make White Royal Icing
You can find all of our tips and tricks for making royal icing HERE.
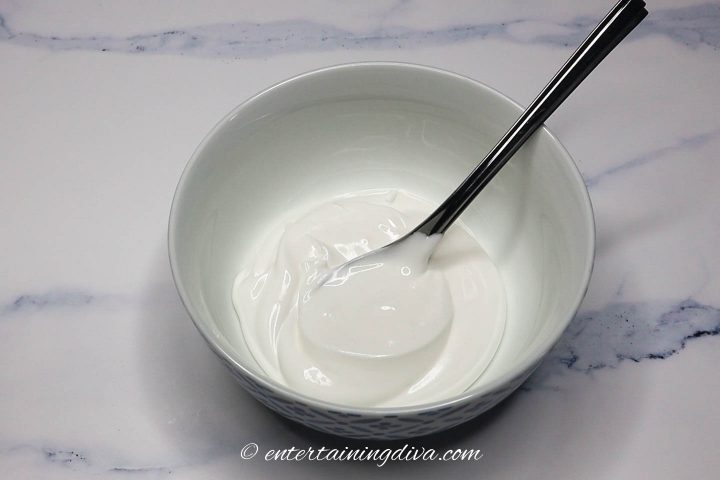
Mix 4 cups confectioners sugar, 3 Tablespoons meringue powder, 1 teaspoon vanilla and ½ cup of WARM water in a stand mixer on low speed.
Once the ingredients are combined, increase to the mixer speed to medium.
Mix for 5 to 8 minutes until the icing forms soft peaks. (When you remove the whisk, the icing should create a hill with a tip that leans over.)
Next test that the icing is the right consistency. To do this:
- Run a knife through the middle of your icing and count how many seconds it takes for the cut to close.
- If it takes longer than 15 to 20 seconds (or it doesn’t close at all), the icing is too stiff. Add in a few drops of water and mix again. Don’t add too much at one time since it doesn’t take a lot of water to make the icing too runny.
- If the icing closes faster than 15 seconds, the icing is too runny. So continue mixing it for a little while longer until it gets stiffer.
Repeat the test until the cut in the icing closes in about 15 to 20 seconds.
How to decorate snowflake sugar cookies
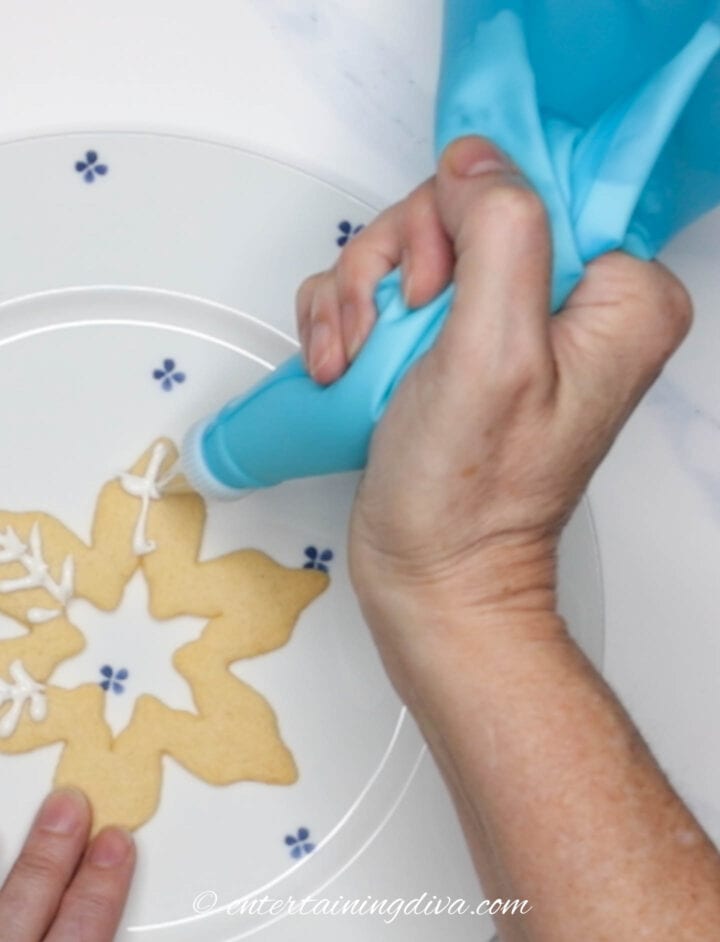
Put the white icing in a piping bag with your piping tip attached.
I like to fold the top edges of the piping bag over a tall glass so that it keeps it open. This makes getting the icing all the way down to the bottom of the bag easier.
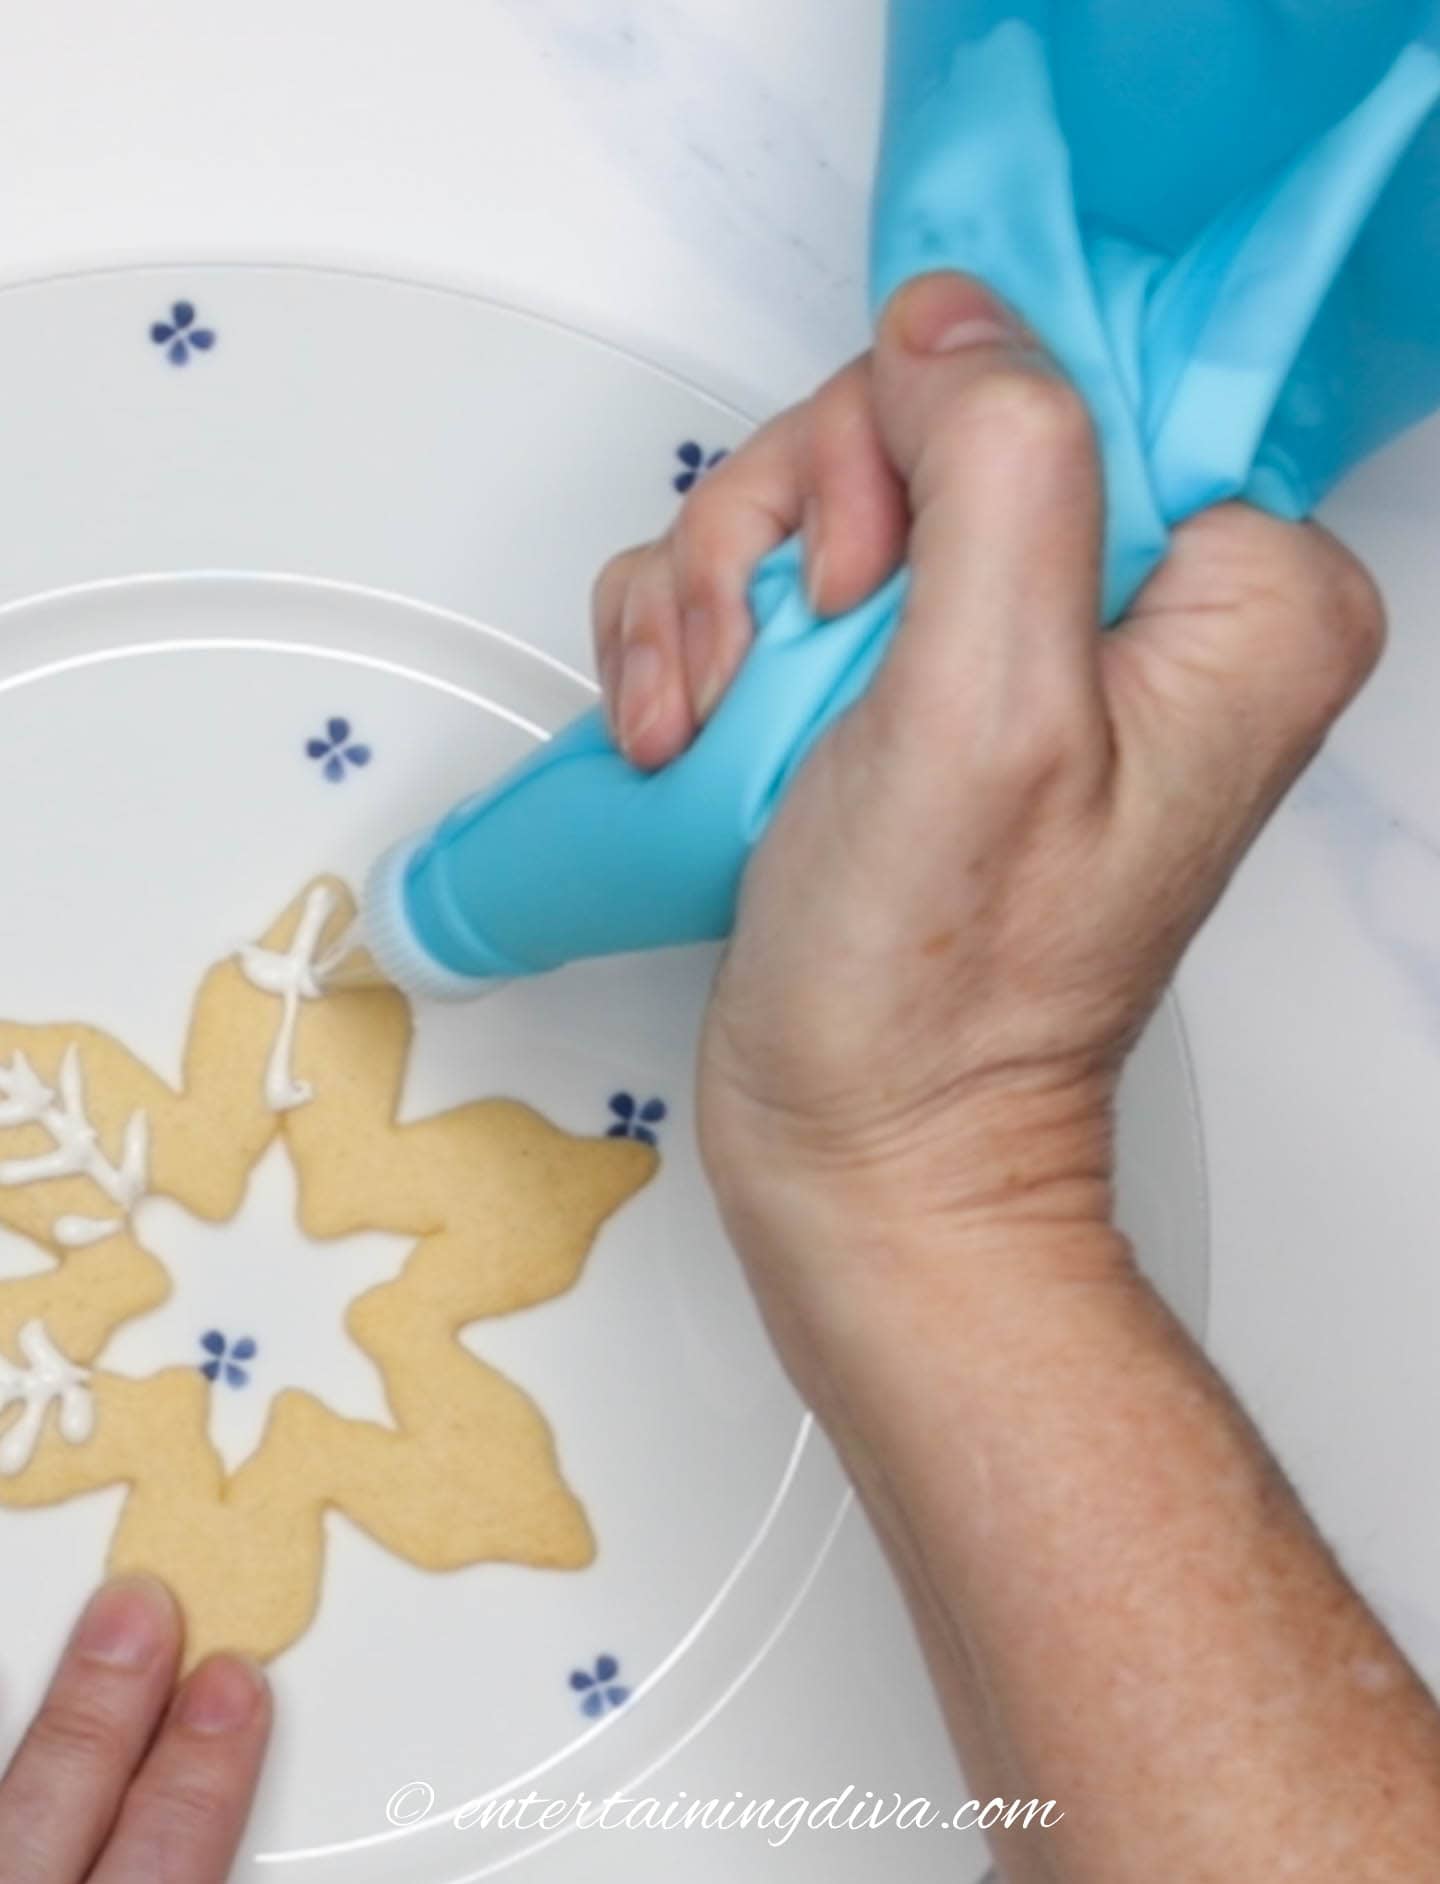
To get the icing to come out evenly, hold the piping bag closed by wrapping your thumb and forefinger around the top. Then squeeze gently with your other fingers to push the icing out.
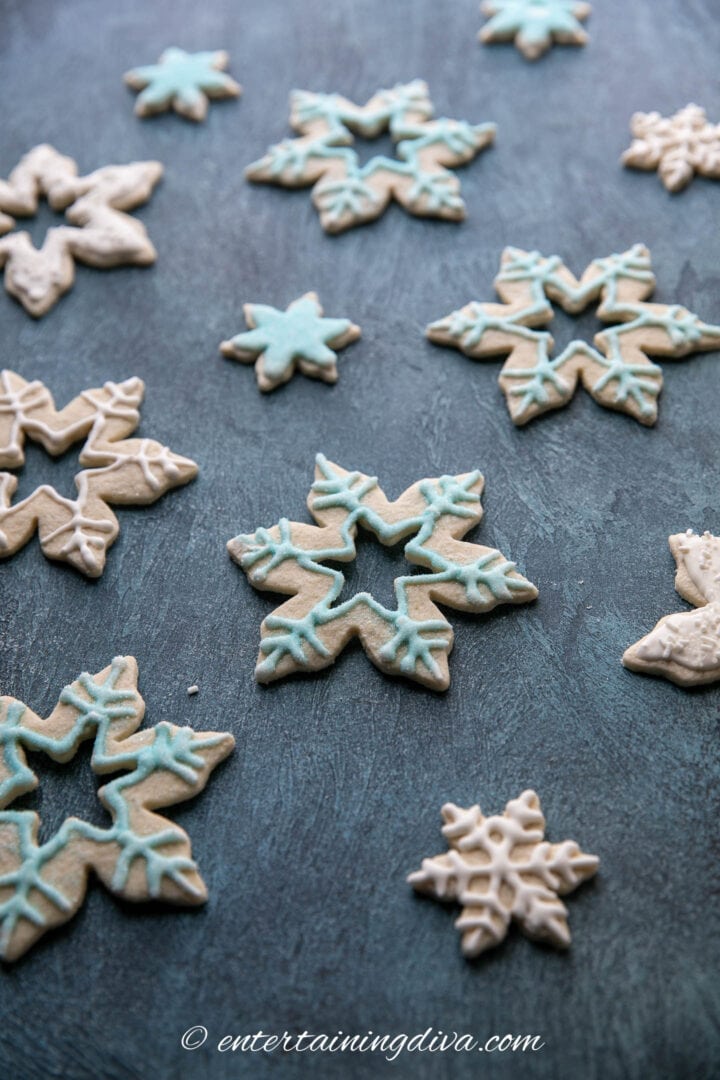
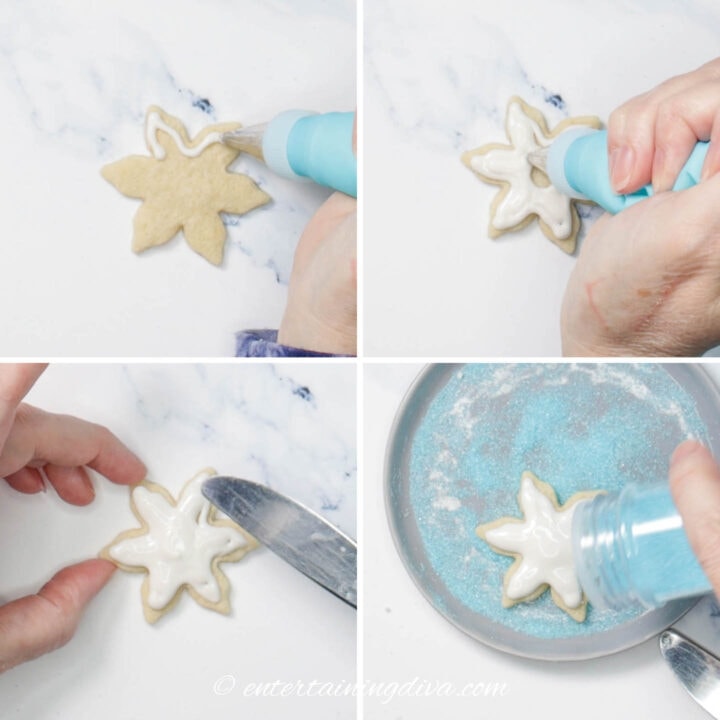
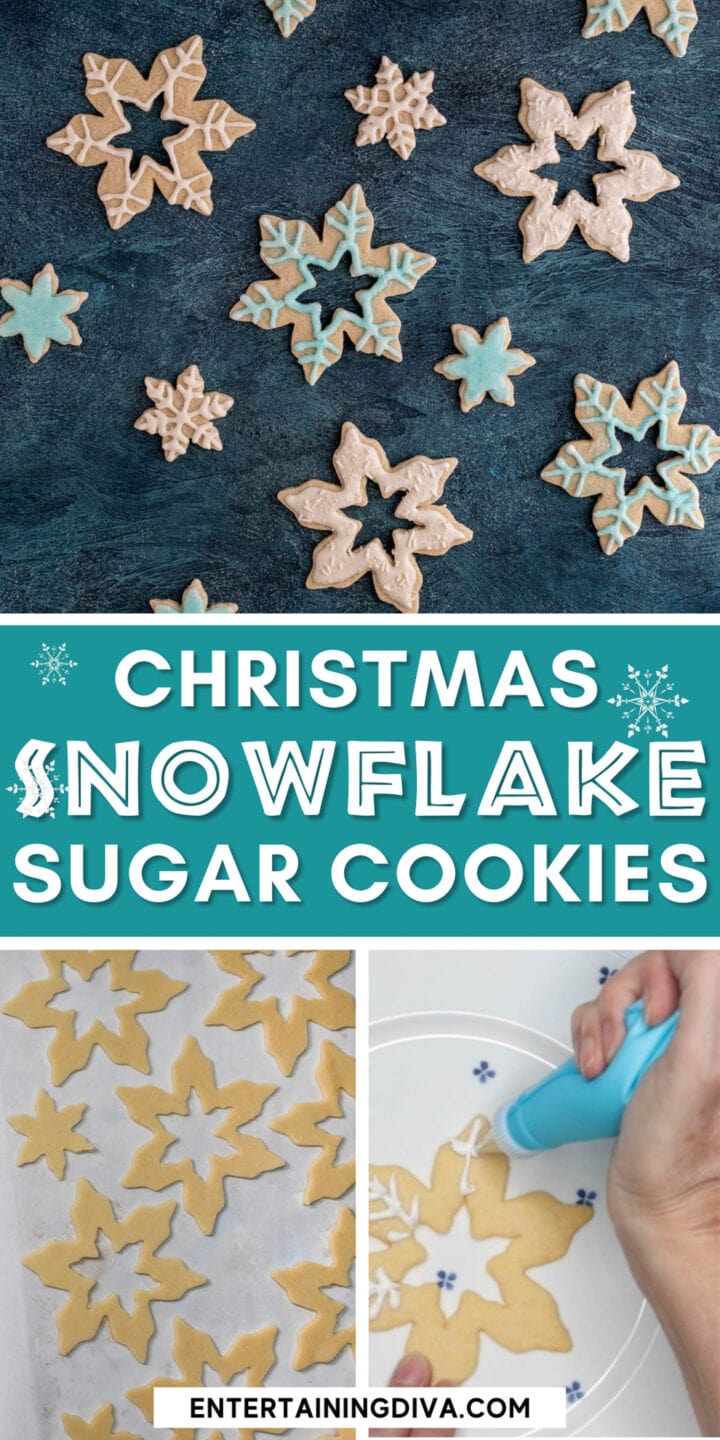
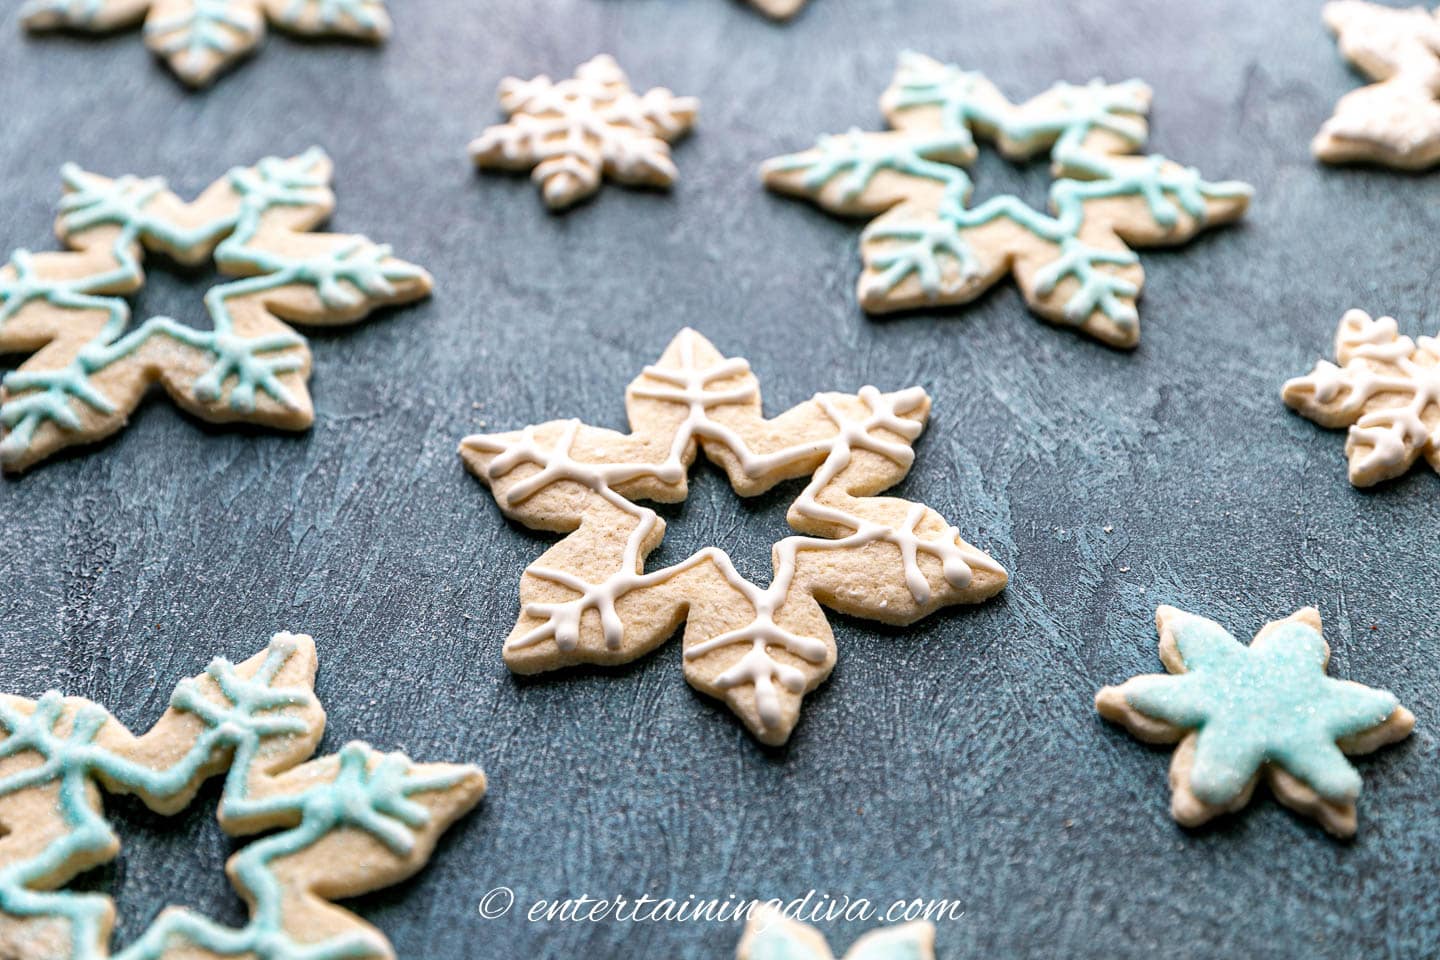
Design 1 – Lacy white icing on a cutout cookie
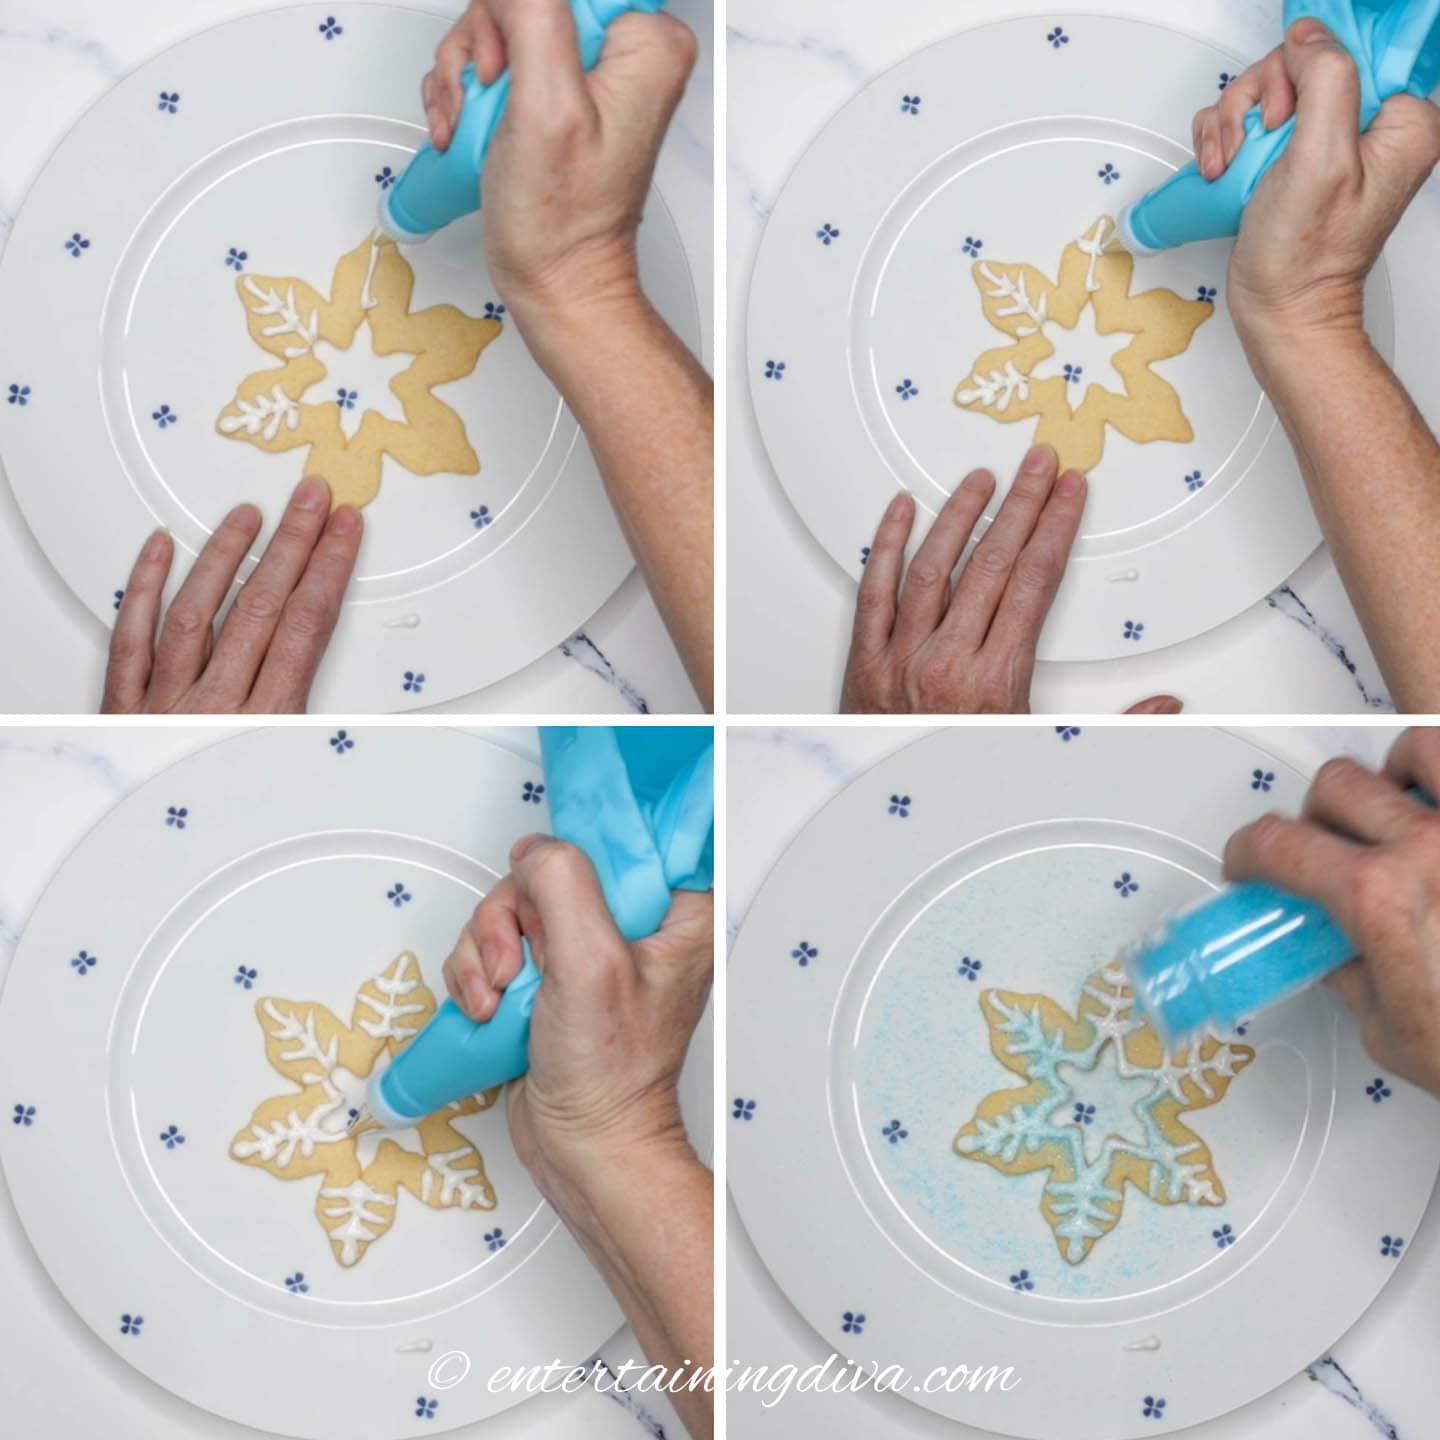
For each of the points of the snowflake:
- First, draw an icing line between the inside and outside point of the snowflake cookie.
- Then draw 3 V-shaped lines from one side of the snowflake point to the other side, crossing the straight line in the middle.
Outline the inside of the snowflake with icing.
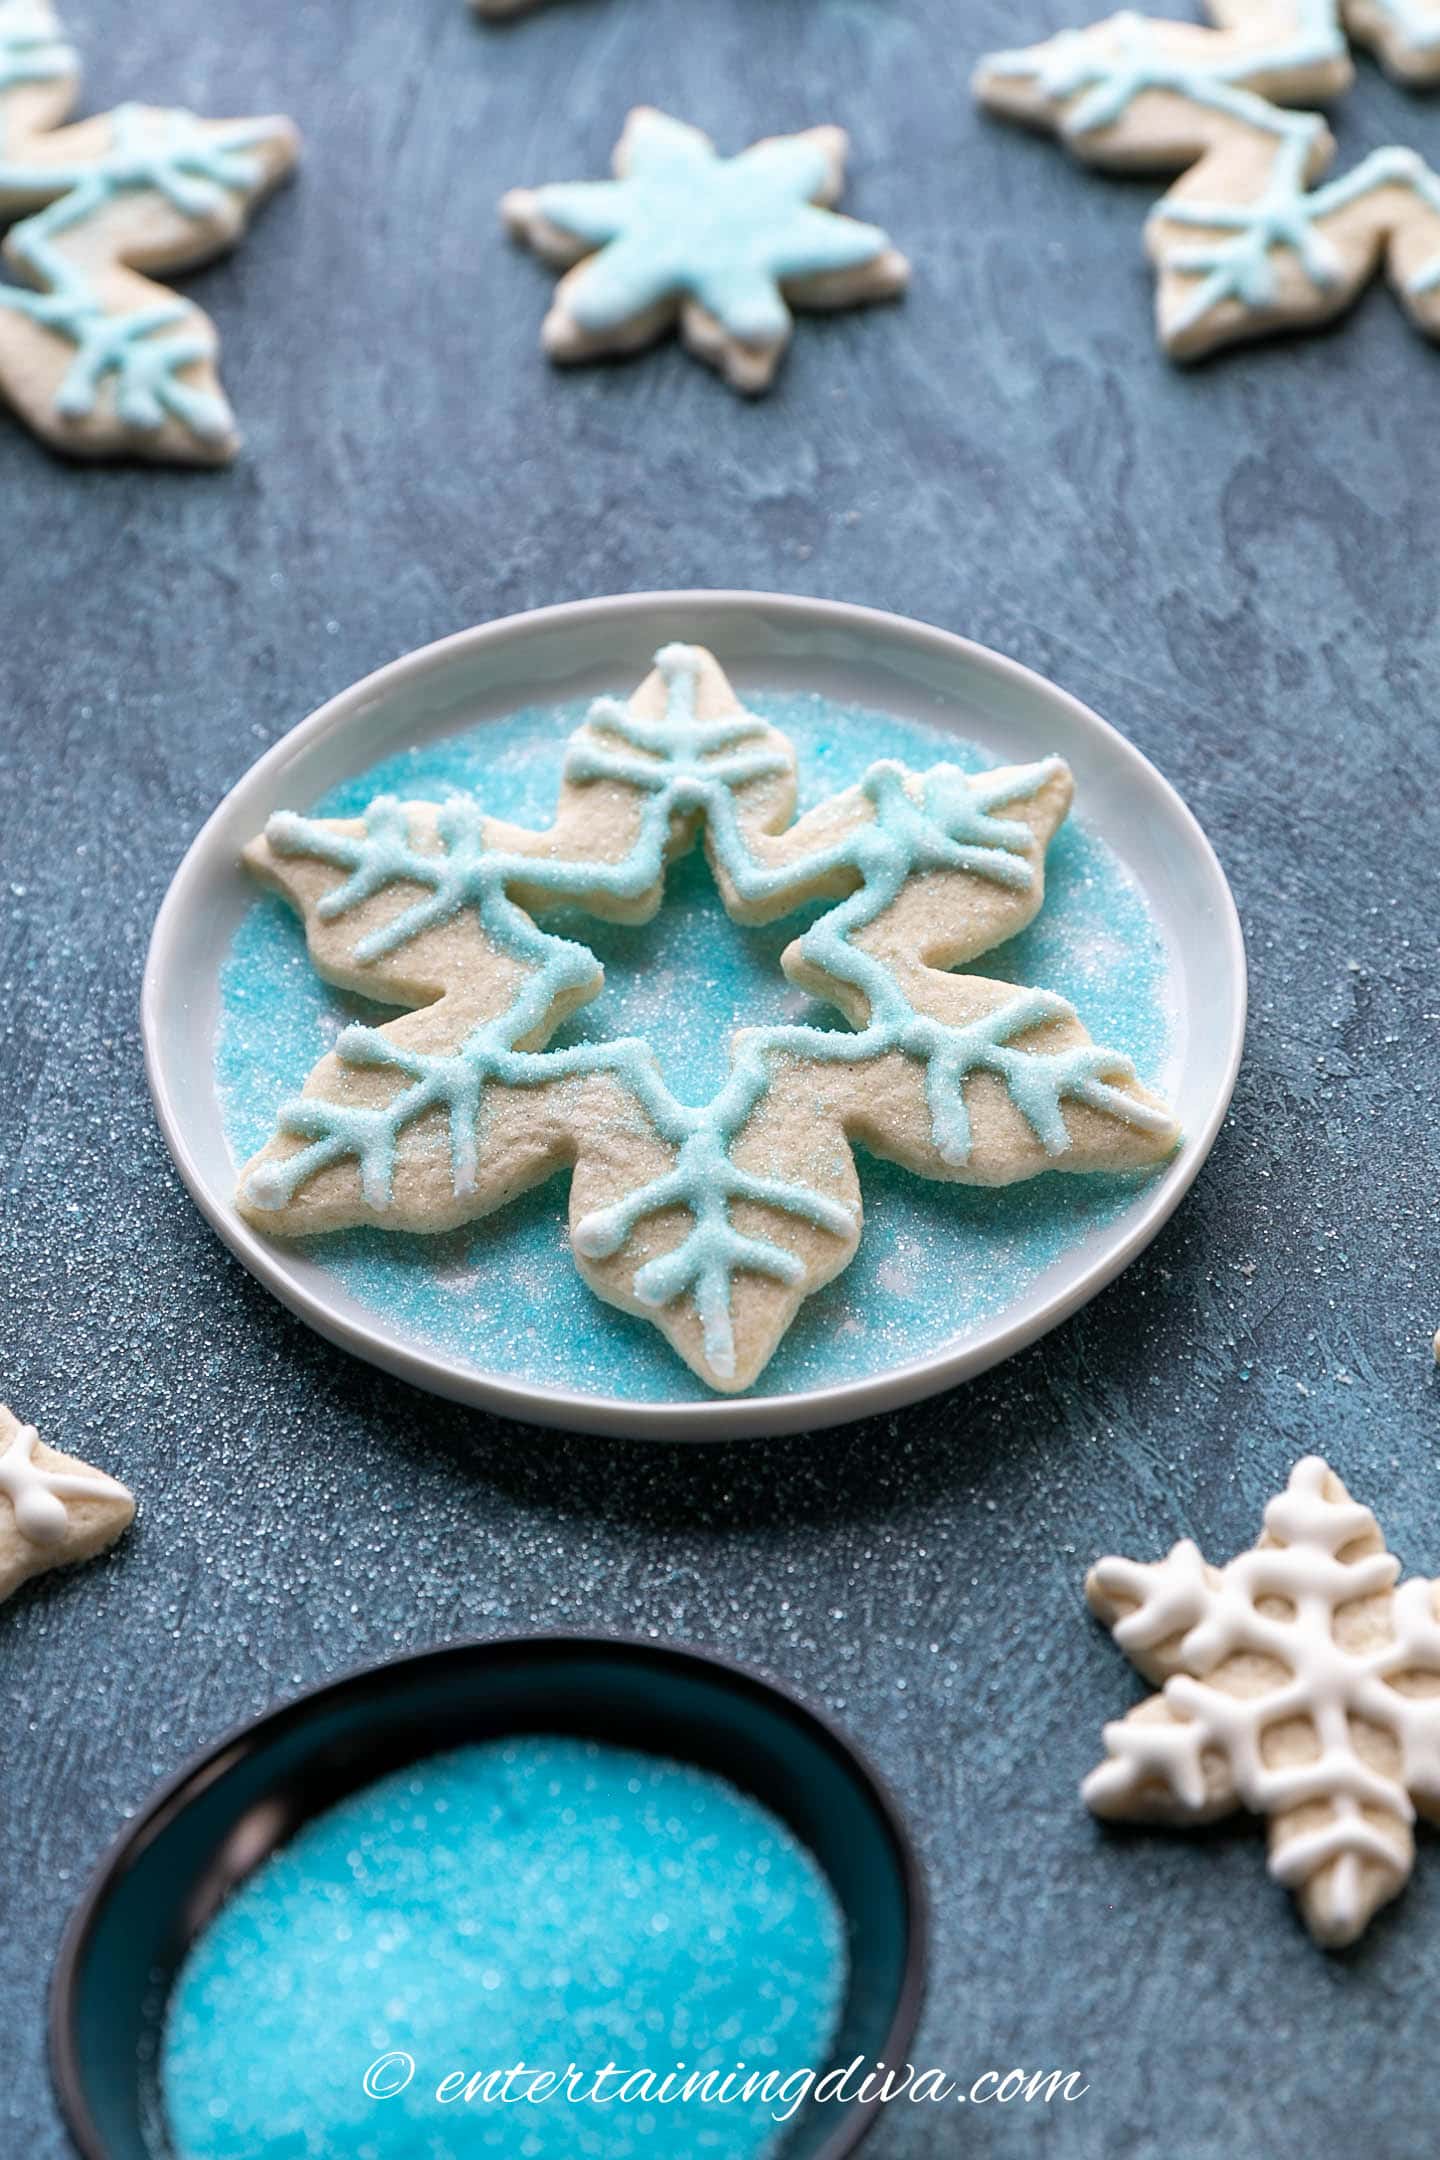
(Optional) Shake some of the sanding sugar over the top of the icing while it is still wet. I like to do this on a plate so that the excess sugar is easy to collect and reuse.
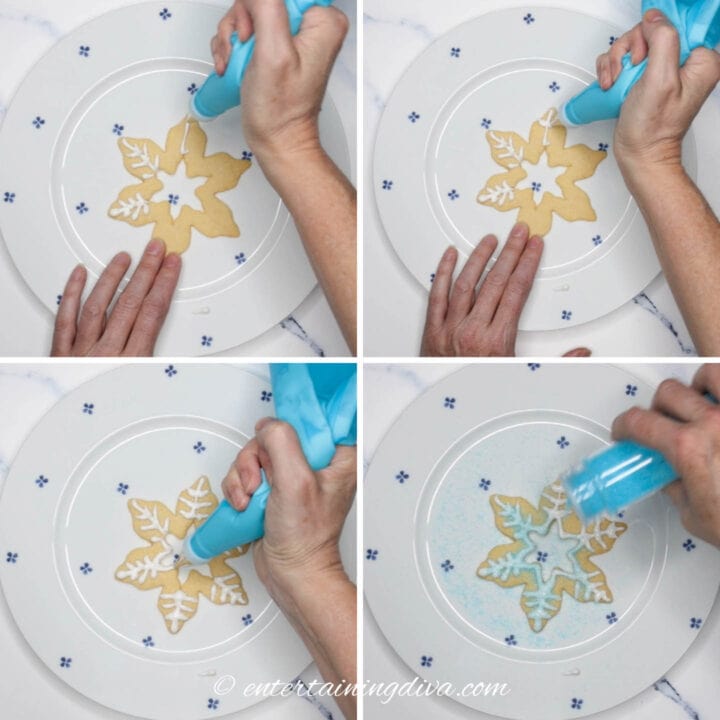
Design 2 – Lacy icing on a solid cookie
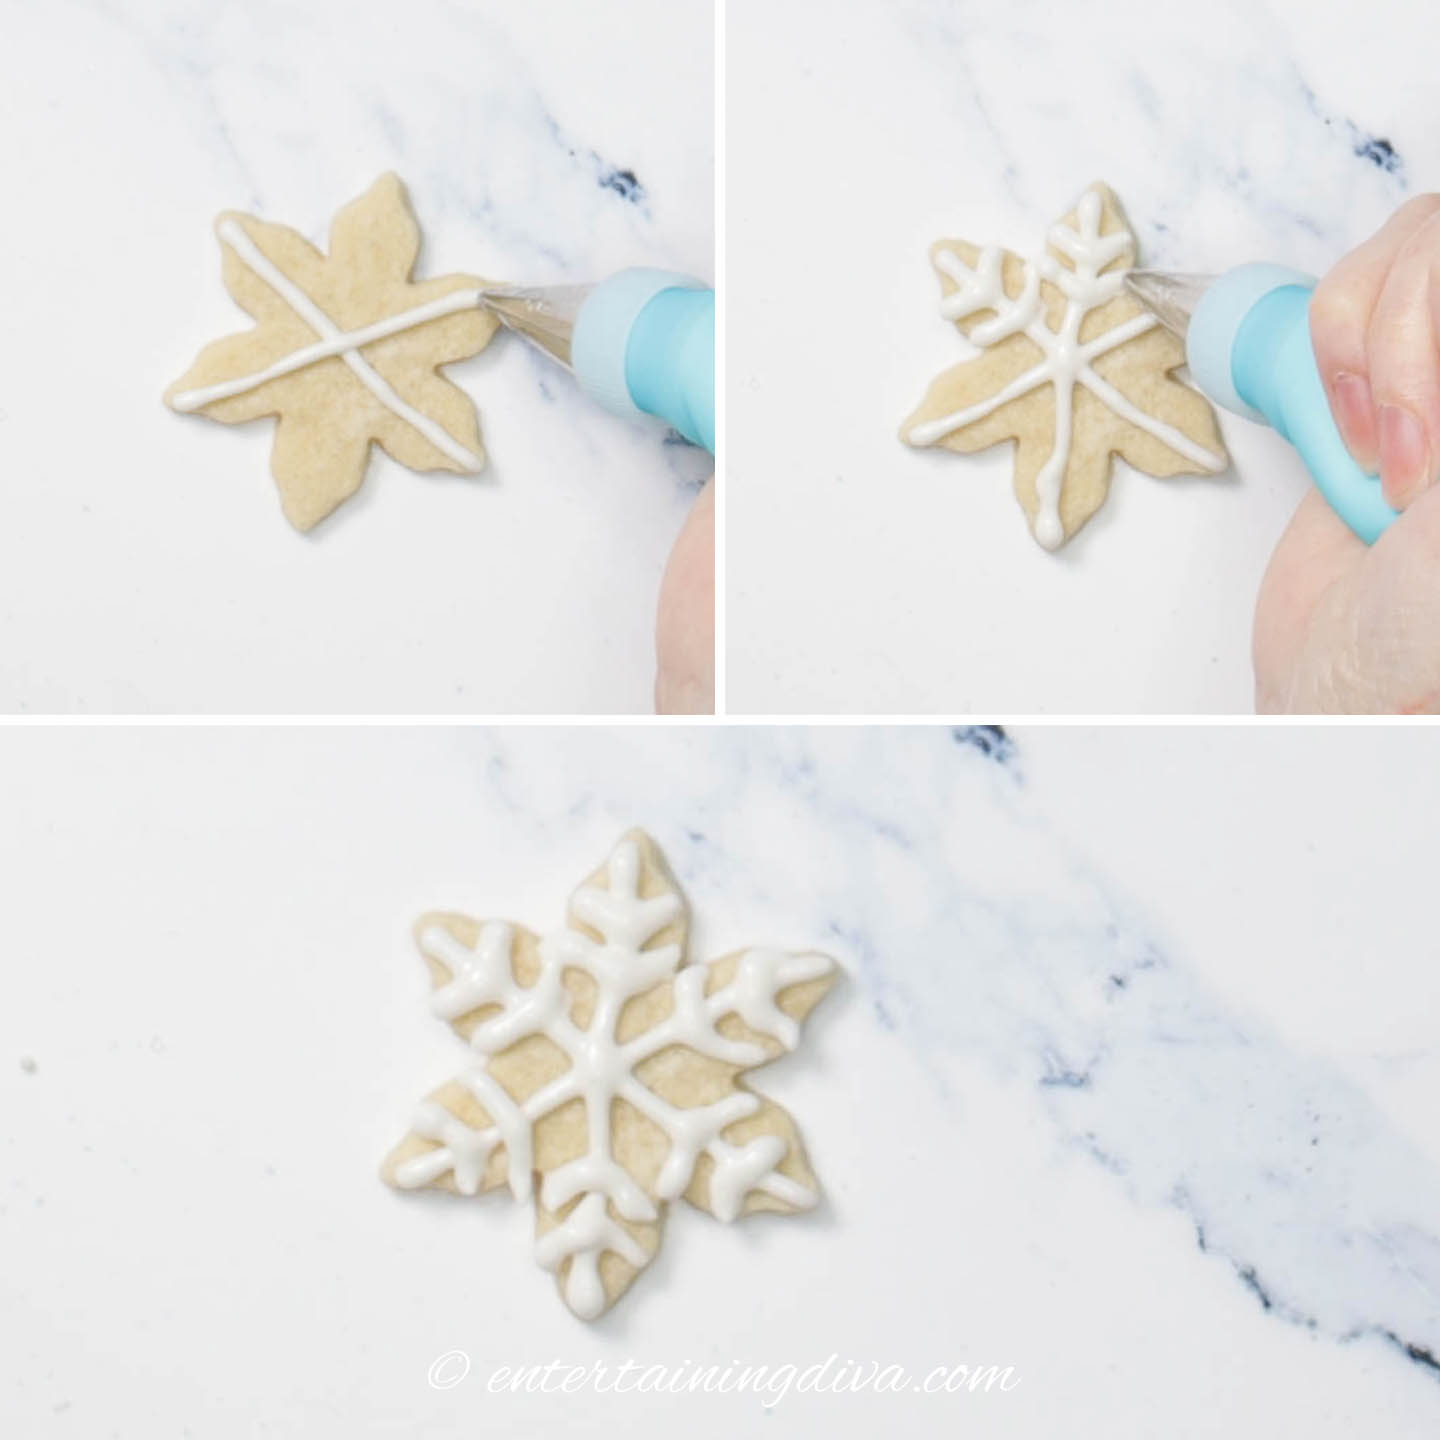
You can do something similar with the snowflake cookies that do not have a cut out in the middle.
In this case, draw straight lines from one side of the cookie to the other crossing in the middle.
Then add V-shaped lines across the snowflake points. Since I was doing this on a small cookie, I only used 2 lines. But on larger cookies, you may want to do three.
I left these ones plain, but you could also add sprinkles to the icing while it is still wet.
Design 3 – Outline and flood the cookies

You can also outline and flood the cookies. I did this with the small cookies but you could also do it with the larger cookies.
First use the white royal icing to draw an outline all the way around the edge of the cookie.
If you’re decorating one of the larger snowflakes with the cutout in the middle, you’ll want to draw an outline around the inner edge as well.
This will prevent the icing from running over.
Then fill in (flood) the rest of the cookie with the white icing.
Now use a knife or toothpick to spread the icing around so it fills in any gaps.
Tapping the cookie gently on the counter can also help level out the icing. Just be careful not to hit it too hard or the cookie may break.
While the icing is still wet, sprinkle sanding sugar or sprinkles over the top of the cookie. Putting the cookie on a plate before you do this will catch the extra sugar.

How to store sugar cookies
Let the snowflake cookies sit for a few hours so the icing has a chance to dry before storing them.
They won’t go stale that fast so it’s okay to leave them out on the counter.
Sugar cookies can be stored in an airtight container:
- at room temperature for about 3 days.
- in the refrigerator for about a week.
- in the freezer for up to 3 months.
If you are stacking the cookies, place a layer of parchment paper between each layer to keep the sprinkles from falling off.
Other Christmas cookies you might like
- Christmas tree sugar cookies
- Candy cane sugar cookies
- Grinch heart sugar cookies
- Decorated angel sugar cookies
- Peppermint chocolate fudge balls
More Christmas cookie recipes –>
Snowflake Sugar Cookies
Ingredients
Cut out cookies
- 2½ cups all-purpose flour
- ¼ teaspoon baking powder
- ¼ teaspoon baking soda
- 1 large egg
- 1 teaspoon vanilla extract
- ¼ teaspoon almond extract
- ¾ teaspoon salt
- 1 cup granulated sugar
- 1 cup 2 sticks cold unsalted butter
- 1 package blue sprinkles and/or sanding sugar
Royal icing
- 4 cups (or 1 pound) icing sugar
- 3 Tablespoons meringue
- 1 teaspoon vanilla extract
- ½ cup WARM water
Equipment
- 2 small mixing bowls
- food processor
- rimless cookie sheet
- parchment paper
- rolling pin
- large snowflake cookie cutter
- small snowflake cookie cutter
- thin spatula
- wire cooling rack
- stand mixer with mixing bowl
- plastic wrap
- Piping bag
- Piping tip #4 (#3 or #5 will also work)
- Coupler (optional) – helps to keep icing from leaking
Instructions
Cut out cookies
- In a small bowl, mix together 2½ cups of flour, ¼ teaspoon baking soda and ¼ teaspoon baking powder. Set aside.
- In another bowl, beat an egg, 1 teaspoon vanilla extract, ¼ teaspoon almond extract and ¾ teaspoon salt. Set aside.
- Cut 1 cup (2 sticks) of cold butter into ½ inch chunks.
- In a food processor, blend the butter and 1 cup of granulated sugar until combined, about 30 seconds.
- Add in the egg mixture. Process until combined, about 10 seconds.
- Then add the flour mixture and process until all of the flour is combined, about 30 seconds.
- Divide the dough in half.
- Place a piece of parchment paper underneath and on top of the first ball of dough.
- With a rolling pin, roll the cookie dough out between the pieces of parchment paper. It should be about 1/8" thick.
- Place the rolled-out dough on a large platter or cookie sheet with the parchment paper left in place.
- Repeat with the other ball of dough.
- Refrigerate the two sheets of rolled out dough for 1½ hours, or freeze for 30 minutes.
- When the cookie dough is stiff, take the first sheet of cookie dough out of the refrigerator.
- Peel off the top layer of parchment paper.
- Place the larger snowflake cookie cutter on the cookie dough. Then center the smaller snowflake cookie cutter in the center of the larger one. Push down on both to cut the dough. Repeat to make additional cookies.
- Do the same thing with the second sheet of cookie dough.
- If the cookie dough has softened, refrigerate it for another 30 minutes or until the it is stiff. This will make it much easier to remove the cookies while keeping their shape.
- Use a thin spatula (or a cake knife) to separate the cookies from the bottom layer of parchment paper. Remove the excess dough from around the cookies.
- Remove the small snowflakes from the inside of the larger ones.
- Put another piece of parchment paper down on a cookie sheet.
- Then lay out both the large and small snowflakes about ½ inch apart on the baking sheet.
- Bake at 300℉ for 10 to 15 minutes, until the bottom of the cookies are slightly brown.
- Let cool for 5 minutes on the cookie sheet. Then move to a wire rack and let them cool completely.
- Repeat with the other sheet of cut-out cookies.
- Roll out the extra dough to create another batch of cookies.
How to make white royal icing
- Mix 4 cups icing sugar, 3 Tablespoons meringue powder, 1 teaspoon vanilla and ½ cup of WARM water in a stand mixer on low speed
- Once they are combined, increase to medium speed.
- Mix for 5 to 8 minutes until the icing forms soft peaks and it takes about 15 seconds to close if a knife is run through it.
- Put the white icing in a piping bag with a #3, #4 or #5 piping tip attached.
Decorating snowflake cut out cookies – Design 1
- Draw a line from the end of one snowflake point all the way across the cookie to the end of the opposite snowflake point. Repeat for all of the snowflake points
- Then draw 2 or 3 V-shaped lines across each of the snowflake points, with the middle of the V crossing the straight lines drawn previously.
- If you are decorating a snowflake with a cutout in the middle, draw an outline around the inner edge.
- (Optional) Sprinkle with sanding sugar while the icing is still wet.
Decorating snowflake cookies – Design 2
- Outline the edges of the cookie with royal icing.
- Then flood (fill in) the middle of the cookie.
- Use a knife or toothpick to spread the icing into any gaps.
- (Optional) While the icing is still wet, sprinkle sanding sugar or sprinkles over the top.
Store the cookies
- Let the cookies stand for a few hours allowing the icing to dry before storing in an airtight container for a few days or freezing for up to 3 months.
Notes
- Covering the cookie sheet with parchment paper prevents the cookies from spreading which helps to keep their shape.
- Only bake 1 sheet of cookies at a time since stacking them in the oven will cause uneven heating
- To keep the cookies looking good when storing, separate each layer with a piece of parchment paper.
Nutrition values are estimates only, using online calculators. Please verify using your own data.
Have comments or questions about our snowflake sugar cookies recipe? Tell us in the section below.
This post was originally published on December 14, 2021 but was updated with new content on March 19, 2024.